Archive for January, 2015

Disable Bluetooth on CentOS / RHEL (Redhat) / Fedora Linux servers – Disable hidd bluetooth devices

Thursday, January 29th, 2015

Disable_Bluetooth_on_CentOS_RHEL_Redhat_Fedora_Linux_servers_-_Disable_hidd_bluetooth_devices-logo

Bluetooth protocol on Linux is nice to have (supported) on Linux Desktop systems to allow easy communication wth PDAs, Tablets, Mobiles, Digital Cameras etc, However many newly purchased dedicated servers comes with Bluetooth support enabled which is a service rarely used, thus it is a good strong server security / sysadmin practice to remove the service supporting Blueetooth (Input Devices) on Linux hosts this is the hidd (daemon) service, besides that there are few Linux kernel modules to enable bluetooth support and removing it is also a very recommended practice while configuring new Production servers. 

Leaving Blueetooth enabled on Linux just takes up memory space and  potentially is a exposing server to possible security risk (might be hacked) remotely. 
Thus eearlier I've blogged on how bluetooth is disabled on Debian / Ubuntu Linux servers an optimization tuning (check) I do on every new server I have to configure, since administrating both RPM and Deb Linux distributions I usually also remove bluetooth hidd service support on every CentOS / RHEL / Fedora Linux – redhat  (where it is installed), here is how :


1. Disable Bluetooth in CentOS / RHEL Linux


a) First check whether hidd service is running on server:
 

[root@centos ~]# ps aux |grep -i hid
… 


b) Disable bluetooth services
 

[root@centos ~]# /etc/init.d/hidd stop
[root@centos ~]# chkconfig hidd off
[root@centos ~]# chkconfig bluetooth off
[root@centos ~]# /etc/init.d/bluetooth off


c) Disable any left Bluetooth kernel module (drivers), not to load on next server boot
 

[root@centos ~]# echo 'alias net-pf-31 off' >> /etc/modprobe.conf


If you don't need or intend to use in future server USBs it is also a good idea to disable USBs as well:
 

[root@centos ~]# lsmod|grep -i hid
usbhid                 33292  0
hid                    63257  1 usbhid
usbcore               123122  4 usb_storage,usbhid,ehci_hcd


[root@centos ~]# echo 'usbhid' >> /etc/modprobe.d/blacklist.conf
[root@centos ~]# echo 'hid' >> /etc/modprobe.d/blacklist.conf
[root@centos ~]# echo 'usbcore' >> /etc/modprobe.d/blacklist.conf


2. Disable Bluetooth on Fedora Linux

Execute following:
 

[hipo@fedora ~]# /usr/bin/sudo systemctl stop bluetooth.service
[hipo@fedora ~]# /usr/bin/sudo systemctl disable bluetooth.service

 
3. Disable Bluetooth on Gentoo / Slackware and other Linuces

An alternative way to disable bluetooth that should work across all Linux distributions / versions is:
 

[root@fedora ~]# su -c 'yum install rfkill'
[root@fedora ~]# su -c 'vi /etc/rc.d/rc.local'


Place inside, something like (be careful not to overwrite something, already execution on boot):
 

#!/bin/sh
rfkill block bluetooth
exit 0


4. Disable any other unnecessery loaded service on boot time

It is a good idea to also a good idea to check out your server running daemons, as thoroughfully as possible and remove any other daemons / kernel modules not being used by server.

To disable all unrequired services, It is useful to get a list of all enabled services, on RedHat based server issue:


[root@cento ~]#  chkconfig –list |grep "3:on" |awk '{print $1}'


 A common list of services you might want to disable if you're configuring (Linux, Apache, MySQL, PHP = LAMP) like server is:
 

chkconfig anacron off
chkconfig apmd off
chkconfig atd off
chkconfig autofs off
chkconfig cpuspeed off
chkconfig cups off
chkconfig cups-config-daemon off
chkconfig gpm off
chkconfig isdn off
chkconfig netfs off
chkconfig nfslock off
chkconfig openibd off
chkconfig pcmcia off
chkconfig portmap off
chkconfig rawdevices off
chkconfig readahead_early off
chkconfig rpcgssd off
chkconfig rpcidmapd off
chkconfig smartd off
chkconfig xfs off
chkconfig ip6tables off
chkconfig avahi-daemon off
chkconfig firstboot off
chkconfig yum-updatesd off
chkconfig mcstrans off
chkconfig pcscd off
chkconfig bluetooth off
chkconfig hidd off


In most cases you can just run script like this – centos-disable_non-required_essential_services_for_lamp_server.sh.
 

Another useful check the amount of services each of the running server daemons is using, here is how:
 

ps aux | awk '{print $4"t"$11}' | sort | uniq -c | awk '{print $2" "$1" "$3}' | sort -nr


Output of memory consumption check command is here

Clean slow Windows PC / Laptop from Spyware, Malware, Viruses, Worms and Trojans – Anti-Malware Program Arsenal

Monday, January 26th, 2015

clean-slow-Windows-computer-notebook-laptop-from-malware-spyware-viruses-worms-and-trojans

Malware Bytes is a great tool to clean a PC in a quick and efficient way from Malware /  Spyware that wormed while browsing infectious site on the internet.
But sometimes PCs that has to be fixed are so badly infected with Spyware, Malware and Viruses that even after running Malware Bytes on boot time, left Work or Viruses do automatically download from the Internet or have been polymorphically renamed to a newer one that escapes Malware Bytes badware database and heroistics
Such problematic PCs are usually unmaintained user PCs whose Anti-Virus procetion with Nod32 or Kaspersky licensing has long expired leaving the PC without any mean of protection / PCs with removed Firewall / AV Program (due to Virus or Malware Infection) or on Computers which were used actively to download Cracked Programs, Games – by small kids or PCs used for watching heavily Porn (by teenagers).

Here is a List of Top Iseful FreeWare anti-Malware softwares, you can use in combination with MalwareBytes to (Clean) / Fix a Windows PC that is in almost unsolvable state (and obviously needs re-install) but contains too much software either obsolete or hard (time wasting) to configure:

Below anti-malware goodies helps in “Resurrecting” even the worst infected PC, so I believe every Win Admin should know them well and in computer clubs and university Windows computer networks with Internet it is recommended to check computers at least once a year …

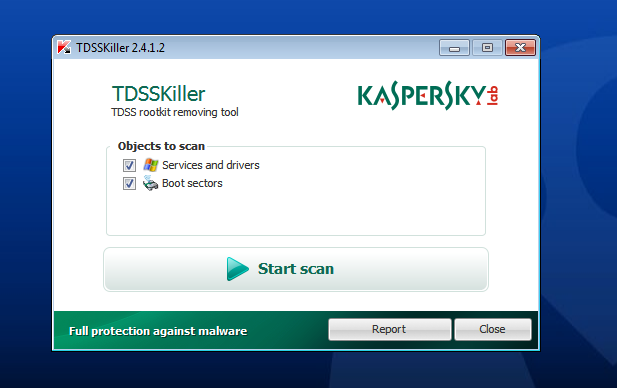
1. Remove Bootkits and Trojans with Kaspersky TDSSKiller

Bootkit is a rootkit which loads when Windows system boots.  To search and destroy bootkits – Download the latest official version of Kaspersky TDSSKiller.

remove-bootkits-and-trojans-with-kaspersky-tdsskiller-screenshot-anti-malware

KASPERSKY TDSSKILLER DOWNLOAD LINK Run Kaspersky (after changing parameters  – enable Detect TDLFS file system) and remove any found infections

2. Download and use latest official version of RKill to terminate any malicious processes running in background

rkill-terminate-any-malicious-spyware-malware-processes-running-in-background-rkill-logo

Please note that you will have to rename version of RKILL so that malicious software won’t block this utility from running. (link will automatically download RKILL renamed as iExplore.exe)
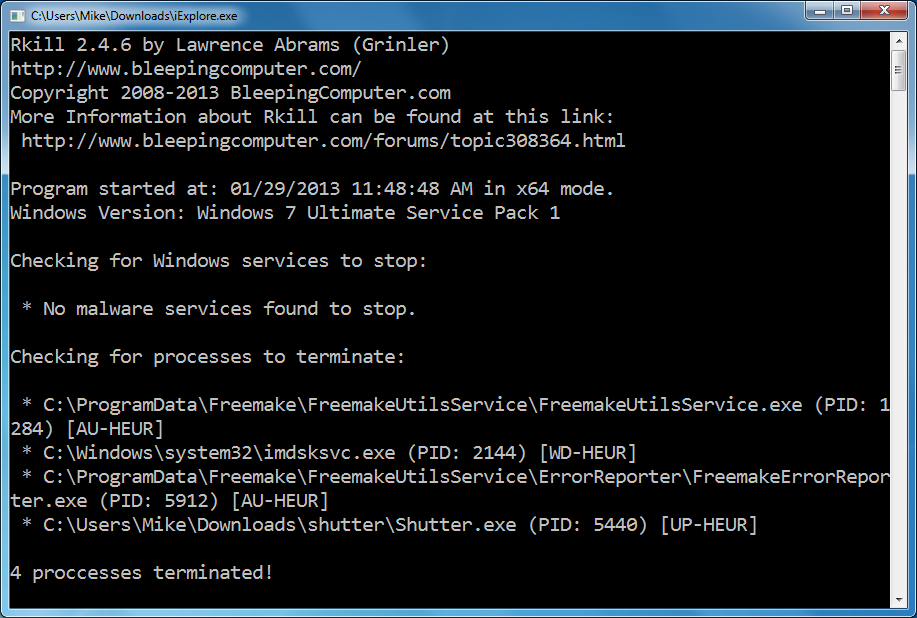
Double click on iExplore.exe to start RKill and stop any processes associated with Luhe.Sirefef.A.

rkill-terminate-trojan-spyware-processes-windows-xp-7-screenshot

RKill will now start working in the background, please be patient while the program looks for any malicious process and tries to end them.
When the Rkill utility has completed its task, it will generate a log.

Do not reboot your computer after running RKill as the malware programs will start again.

When the Rkill utility has completed its task, it will generate a log. Do not reboot computer after running RKill as the malware programs will start again.

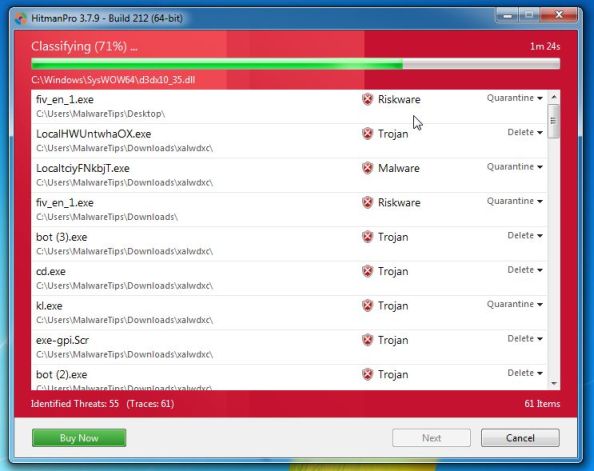
3. Clean (any remaining) malware from your computer with HitmanPro

clean-remaining-malware-from-computer-with-hitmanpro-scanning-screenshot

HITMANPRO DOWNLOAD LINK is here

My Mirror of HitmanPro 3.7 (32 bit) Windows version is here
My Mirror of HitmanPro 3.7 (64 bit) Windows version is here

Because HitmanPro is unfortunately proprietary software, when you run a scan on the computer “Activate free license” button to begin the free 30 days trial, and remove all the malicious files found on your computer.

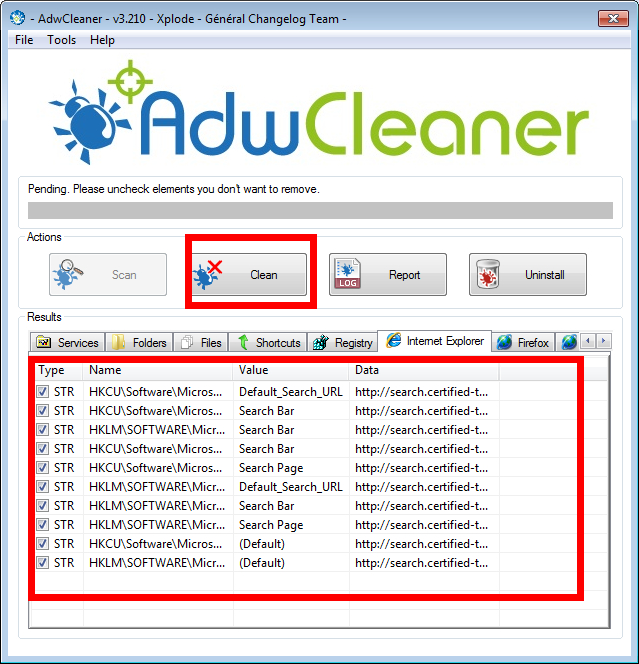
4. Remove Windows adware with AdwCleaner

The AdwCleaner utility will scan your computer and web browser for the malicious files, browser extensions and registry keys, that may have been installed on your computer without your knowledge.

adwcleaner-clean-remove-delete-adware-with-AdwCleaner-found-malware-screenshot

Here isAdwCleaner utility ADWCLEANER DOWNLOAD LINK 
My Download AdwCleaner 4.109 is here

Note that before starting AdwCleaner, close all open programs and internet browsers. After finishing scan AdwCleaner requires a reboot (always backup cause you never know what can happen).

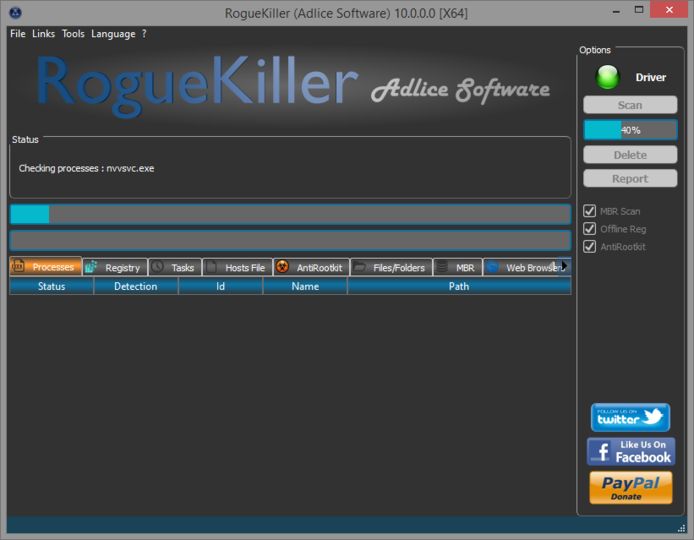
5. Remove any malicious registry keys added by malware with RogueKiller

remove-any-malicious-registry-keys-added-by-malware-with-RogueKiller

RogueKiller is a utility that will scan for the unwanted registry keys and any other malicious files on your computer. It is pretty much like the free software Little Registry Cleaner but it is specialised in removing common malware left junk keys.

download the latest official version of RogueKiller from the below links.

ROGUEKILLER x86 DOWNLOAD LINK (For 32-bit machines)
ROGUEKILLER x64 DOWNLOAD LINK (For 64-bit machines)

Download Mirror link of Roguekiller X86 is here
Download Mirror link of Roguekiller X64 is here

Wait for the Prescan to complete.This should take only a few seconds,  then click on the “Scan” button to perform a system scan. After scan complete delete any found hax0r malicious registries

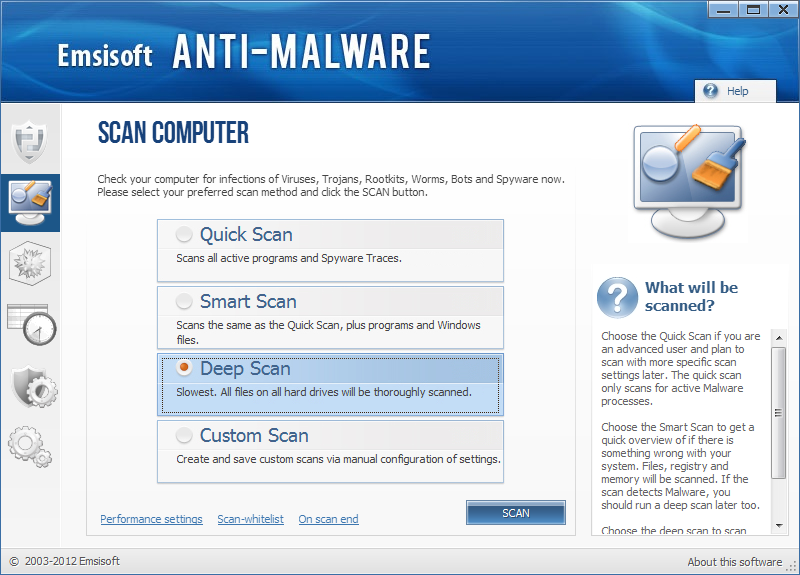
6. Purge any leftover infections on your computer with Emsisoft Anti-Malware

purge-any-left-over-infections-on-your-computer-with-EmsiSoft-anti-malware

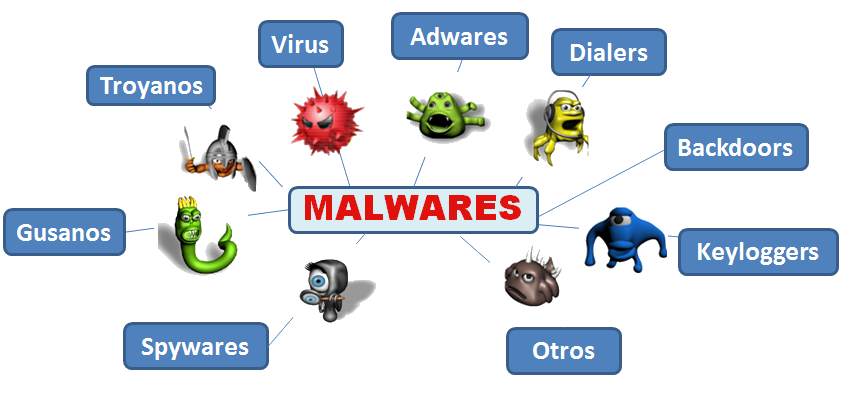
Emsisoft scan (potentially) infected PC for Viruses, Trojans, Spyware, Adware, Worms, Dialers, Keyloggers and other badware.

DOWNLOAD EMSISOFT EMERGENCY KIT HERE  – The link will open in new window tab. Note that EmsiSoftEmergencyKit is huge 168 Mbs!

My mirror of EmsiSoft Emergency kit is here

It is recommended to do the SMART Scan as it is more complete, though if you're in a hurry Quick Scan might also find something ugly. Once Scan completes Quarantine any found infected items.

It is best if all of the 7 Win cleaners are run, e.g.:

(TDSSKiller, RKill, HitmanPro, AdwCleaner, RogueKiller, Little Registry Cleaner  and EmsiSoft) in a consequential order as they're shown in article). Finally a run of Malware Bytes just to make sure nothing has remained is a good idea too.

Hopefully now you should be malware free. If you know other useful Anti-Spyware tools that helped you in case of PC Malware Slowness problems (constant Hard Disk read writes), please drop a comment and I will include them in this list). 
Once badware is removed from your PC or laptop the CPU should no longer show constantly busy with some strange process in taskmgr and notebook should be much more responsive (and if you have power management enabled) it will consume less energy reducing your electricity bills 🙂
 

Any feedback on experience with running above bunch of anti spy programs is also mostly welcome. 

Useful abbreviations for people working in Corporations like HP, IBM and Dell – Things New Comer should know on company onboarding time

Friday, January 23rd, 2015

useful-abbreviations-for-new-comers-things-to-know-on-onboarding-period-in-huge-corporations-as-HP-IBM-Apple
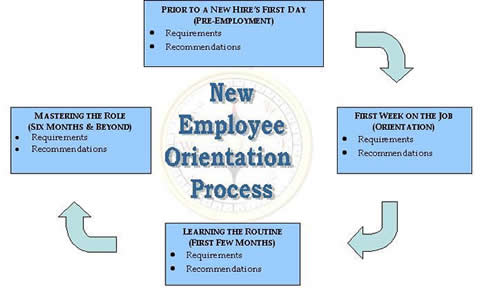
If you have worked in a small or middle sized company and you're offered work into some of the top 100 world corporations, prepare yourself for some shocking 3 to 6 months depending on the company. This period in which you will be introduced to the company's field of business and way of work is called in corporate terms OnBoarding period.  Even if everything looks to complicated and obscure, don't be quick to loose yourself or desperate as this is just a new beginning and as any new beginning it is hard. However once you're acquainted with basics it will be much easier for you.

After all most of the new things you will learn in Corporate Environment are just the good old ones you know already packaged under a different wrapper. You will be introduced to many portals, client names, have to watch a lot of  "brain-dead" trainings, which told you basics on Corporation and its client essentials, be offered ways to advance, have to request Accounts and Credentials to servers via some obscure procedures, which change all the time, so it is likely the procedures you have to follow to get the necessery network / server accesses will be a procedure different from the one your colleagues followed few years ago, thus probably you will have to do account requests for a first time.  In this on-boarding time you will deal with a lot of trainings teaching you to be ethical, respect your co-workers, learn basics of inter-cultural awareness and learn to get responsibility for your actions and some specific training regarding the job position (job description) you have.

onboarding-color-diagram-yellow-red-green-blue-onboarding-corporation-best-pracices-and-advises

You have to be patient and non-judgemental and ready to accept situation as it is and not be angry that so many people doesn't have idea on what is happening. Also it is a good start-up corporate advice to respect people's knowledge, don't thing that you're too knowledgable, as you will be amazed that there are a lot of people in huge companies which have better understanding and knowledge on tech than you. Also realize, the confusion that is taking place in Huge companies "The Right hand doesn't know what the left hand is doing", as our CCL Kalin used to say. The corporate world is a world where way of work is very different from tiny companies, you will have a chain of managers on top of you. The huge companies world is a world of big fish players ..
onboarding_to-big-company-howto-cycle_diagram

It is normal that in the first weeks / months you feel overwhelmed because of too much information and all looks too difficult, however just don't worry and go on. Now all is hard but in a few months everything comes to place and you realize in reality all is easy and it just seems hard in the beginning.

It is a good thing that you use the "Induction" / Onboarding period of first few months to find to make as many contacts as possible as this will be of a great help in your later job time. Get in contact with people from Database / Database and Storage / Load Balancers / Networking / Firewall Teams / Managers / Delivery Leads – the rule here is the more, the better.  If you want to grow in the company's scale making social contacts is even more important than being a hard-worker. If you have friends in management of company and you do your work well and try to be proactive, sooner or later your managers will notice this and will recommend you for some kind of manager position.

employee_onboarding_process-in-large-companies-visualized-pic

Here's few abbreviation meanings, you will have to learn if you will have to work some kind of system administration or support work for a Hewlett Packard.

Microsoft Products – For people coming from Linux / UNIX background, the induction (onboarding) period into a large corporation is even more complicated because if you have been accustomed to using Open Source OS and tools in large corporations you will probably have to do a lot of things with proprietary tools which are hard to run on Linux / *nix, therefore it is good practice if you intend to work for Biggest Organizations in the world to get used to either running a MS Windows 7 / 8 into a Virtualbox or VMWare or get used to using Windows as a Desktop environment. Once you enter the huge organization it is likely you're handed in with your working notebook, shipped with a Customized Windows install to work well with the corporation where you're onboarding. However companies like HP did a great job, because they offer Ubuntu / Debian / Scientific Linux distributions tailored with most tools you will need for normal daily work, so it is not necessery to use Windows (though I find it personally much easier) to use Windows as  desktop nowadays.
I really don't like running 20% of applications in Virtual Machines and doing occasional work-arounds to make things work. After all life is complex enough …


Microsoft Lync Communicator – This is the defacto standard program still used in corporation for internal VoIP / Video communication , One of coolest Lync feature is Sharing Screen. At any time you can share your screen (thing like you have installed teamviewer), give-control to remote party, you can share screen between multiple people and it is pretty much like a shared desktop conference, really useful! However sometimes when Internet is slow or network is failing occasionally MS Lync gives worse results than TeamViewer, so having TeamViewer just in case is useful too. Lync works making the VoIP connection by using some Exchange Mail server integration.

MS (Outlook) Calendar – Calendar is one of the top things you have to know to organize meetings with clients and colleagues to discuss various project aspects, server problems or just ask a question your Solution Designer regarding some server Environment designed by him .

MS Outlook – All mail communication is primary using Outlook Express, you can add Tasks, Contacts and set Calendar meetings with it. If you're like me and coming from UNIX world and get used too much to Mozilla Thunderbird, you will be in big shock until you get used to work with Outlook, not that it is difficult but it is quite different from Thunderbird. For efficient work with Outlook Mail you will have to learn creating Outlook Filters and Outlook Mail backups as often mailbox is just 1 or2G  and mailbox fills in for a year time.

Monitoring Software IBM Netcool or something a like – Servers and services will be monitored with some kind of tool whose basics you will have to learn, if you have worked with Monit / Nagios or Munin you will quickly grasp the basic concept

MS Office / MS Project – You need Word and Excel quite often and for sysadmins this is very irritating. All office and client documents will be exchanged in Word and Excel format, if you're a Project Manager you will need heavily use of Microsoft Project too which needs to be installed additionally as it does not ship by default with most MS Office / Windows installs.

MS OneNote – is a software like notepad supporting tabs and allowing to make notes which are stored to a SharePoint

SharePoint (SP) – in large companies they like placing things into Sharepoints so a lot of the documentation is found on some random sharepoints (this is like a Directory Listing Apache server) – very annoying as it is really chaotic – I don't like it.

CMO – Chief Marketing Officer

CMO – Current Mode of Operations

FMO – Future Mode of Operations

SMO – Separation Management Office / Separation Management Officer

WFH – Work From Home, mail header message aiming to report someone is going to work from his home during the day

CFO – Chief Financial Officer

CEO – Chief Execute Officer

PM – Project Manager

FCR – Firewall Change Request (Any new or old firewall rule nr. which has to be created / modified / deleted)

RTPA – Ready to Production

ORT – Operational Readiness Test (some basic tests to be made and documented), before a server is handed in to RTPA

HPSM – HP Service Manager (a ticket / change web desktop frontend)

Change – a ticket like ID and system which has to be used necessery to describe any server config / file / service modification

Ticket – A support ticket oped in case of some emergency with some server service happens

CI = Configuration Item
Instance – Any service that is running more than once on a server lets (say 2 MySQL and 2 Apache servers) running on same server on different port numbers will be 4 instances

LB = Load Balancer (Load Balancers include capabilities of Intelligent Switches are in essence routers which can balance load ovr number of hosts running different services in order to ensure traffic received to a service is balanced between members of a cluster most often they're Active and Standby. Different methods to load balance traffic exist round-robin etc., traffic to Apache / MySQL / PostgreSQL and virtually any service could be load balanced.

SD – Solution Design / Solution Designer (The person preparing the graphics and documentation for how a combination of servers environment will be operating)

MTR – Maximum Time to Repair (Maximum time to repair client service or env, lets say 2 hours / 5 / 10 hrs)

SLA = Service Level Agreement (Agreement document between Company Corporation and End customer about services / servers or any work to  be provided under what conditions and cost and time interval. In short SLA is a contract document between Corporation and customer.

Service Window – Mon – Fri 08:00 – 17:00 (The time in which server is on active support and will has to be repaired by a support team promptly if emergency occurs)

TOP Process – Turn to Production (The processes which PM follows, before project turns to production TTP).

Top Approver – The list of people involved in project which has to approve the Top process until set as completed.

DL / CCL – Delivery Lead / Collaboration Capability Lead / Client

Capability Lead – This is a job position one step behind a Team Manager. DL's goals are to help teams manage internal issues and deal with clients requests, next to doing some minor technical job. In short this position is like a Junior Manager (or a position which is held before), people emerge to Team Managers.

TDL – Technical Delivery Lead

Prod or just P env – Production environment (if many servers) or P server if it is single one

QA env – Quality Assurance (something like a testing environment or server)

UAT (User Acceptance Testing) / Test server, env – UAT is the last phase of software testing process.
During UAT, actual software users test the software to make sure it can handle required tasks in real-world scenarios, according to specifications.  UAT is also known as beta testing
Test server usually same configuration as Prod whose purpose is to test new releases before deployed to Prod environment

DNS Internal / External record – (Whether DNS is seen only in a client local network (from Internal DNS only) – its called Internal record, External record is when a hostname is resolved from all the Internet)

EMEA – Common Abbreviation for: Europe, Middle East Asia sometimes to mean Europe Middle East, Africa

DC – Data Center (location) in some address room / rack numbers etc.

SN – Serial Number (Serial number of server or hardware  component

DB – Server Database (DataGuard is Oracle Db special solution for synchronization of databases for higher Db protection)

Security Class – The levels of security of access to a server (Different countries and Unions legislation world-wide require different rules and regulations on server security).
Examples of Server security classes are: White, Grey, Black (servers). For example according to EU legislation Black servers
can only be administrated / managed by people originating from
same country as where server is physically located.

Digital Key / (Digital Certificate) / Active Identity – This is a Flash drive USB (storage) with installed digital certificate which is used to authenticate you to internel corporate network
 

PC COE – PC COE –  is a set of services and tools that has helped HP reduce its desktop computing costs by $200 million per year. HP also establishes a new organization within the HP OpenView division to market TCO solutions. From PC-COE you can install almost all proprietary software for free and use them for your daily work. The software comes with free Licensing for internal HP Use.

Junos Pulse / Remote Access to HP Network – Dynamic SSL VPN Connectivity at most companies  to access a corporate network you connect via some encrypted VPN client, some companies probably use OpenVPN.

Citrix Receiver – Citrix Receiver is the easy-to-install client software that provides access to your XenDesktop and XenApp installations. With this free download you can access applications, desktops and data easily and securely from any device, including smartphones, tablets, PCs and Macs


Above terminology is specific to HP however, most of the terminology and procedures during onboarding time (period) should be very similar or even the same for other of the Top 100 Largest Companies by Revenue such as:

IBM, Dell, E.ON, Apple, Samsung, Toyota, Daimler, Gazprom, RosNeft, Volkswagen Group, Honda, AT&T, General Motors, Allianz, LukOil, Carrefour, Siemens, BASF, Philips, Ford Motor Company, Koch Industries, Tesco, Royal Dutch Shell, BP, Chevron, Vitol,  SK Group, Verizon, General Electric, Wal-Mart Stores, Nestle etc.

Probably there are things I'm missing so, if there is something else you have learned understand during onboarding, please share it in comments!

That's it, Happy Onboarding !!! 🙂
Automatic restart Tomcat on Windows script via TaskScheduler daily – A command line to add / remove new Windows “Cron” like job

Thursday, January 22nd, 2015

automatic-restart-Tomcat-on-Windows-via-TaskShcheduler-daily-weekly-monthly-a-command-line-to-add-remove-new-windows-cron-job
I'm responsbile for a project environment made up of 3 components which is occasionally dying. Here is a short raw overview of environment

  • Apache Reverse Proxy (entry door to app server)
  • Tomcat Server with an Application enabling web access
  • A Java Standalone application using SQLite database

 The Tomcat and Java Standalone application is running on top of Windows 2008 RC2 Standard, the overall environment is becoming inacessible periodically and in order to solve that the customer decided to implement a daily Windows server reboot in my opinion this is very bad approach as it is much better to just set an auto reboot of each of components using few tiny batch scripts and Windows Taskmgr, however as the customer is king and decided to implement the reboot its their own thing. 
However even fter the daily server reboot was set once a week or so the application was becoming inaccessible and a Tomcat server restart was necessery as a fix.

Finally as a work-around to the issue, I've proposed the logical thing to automatically restart Tomcat once a day early in morning, here is how Tomcat auto Restart was implemented on the Win server:

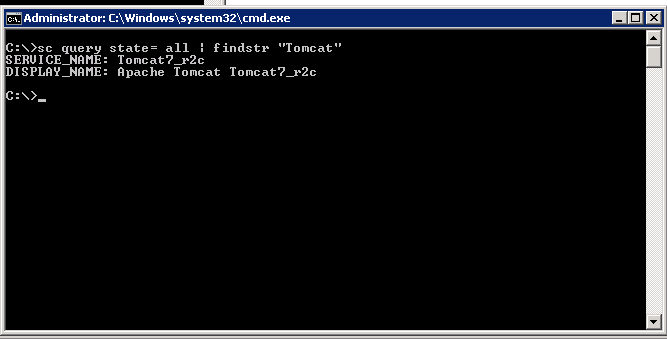
1. Check out the name of running Tomcat service

First thing is to use the sc command to find out the Tomcat application name:


how-to-show-tomcat-service-name-command-windows-screenshot

C:UsersGeorgi>sc query state= all| findstr "Tomcat"
SERVICE_NAME: Tomcat7_r2c
DISPLAY_NAME: Apache Tomcat Tomcat7_r2c

C:UsersGeorgi>


2. Create bat script to stop and start Tomcat service

Press keyboard Win-button + R, start notepad type inside:
 

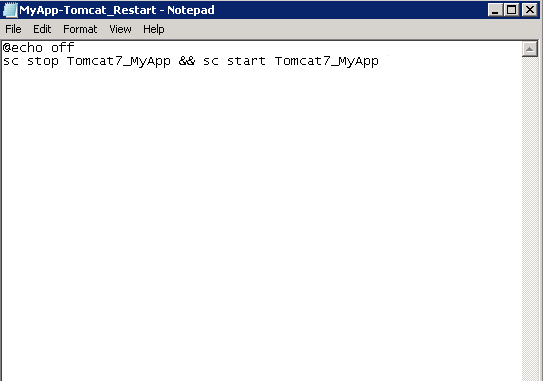
@echo off
sc stop Tomcat7_r2c && sc start Tomcat7_r2c

(MyApp-Tomact-Restart-bat-file-ms-windows-screenshot

Don't be confused from screenshot that I have Tomcat7_MyApp instead of Tomcat7_r2c, but I made screenshot in hurry for another app.
Save the file, somewhere (preferrably) in application folder/bin/  it is best to save it once with bat extension MyApp-Tomcat_Restart.bat and once as MyApp-Tomcat_Restart.xml (XML format file is later needed for import to Task Scheduler which understands .XMLs). The .bat file is good to have because it is useful to somtimes restart Tomcat manually by running it (in case of some sudden Tomcat Appserver occurs even though the auto-restart script).
 

3. Create new Task using command line (cmd.exe)


Task can be created also from command line using following syntax:
 

schtasks /Create [/S [/U [/P [  ]]]]
/XML <xmlfile> /TN <taskname>

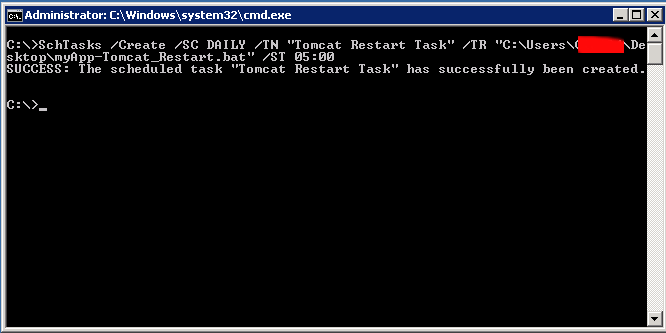
Simple way to create a new Windows task is shown in below command, it will set my Tomcat Restart script to run everyday in 05:00 early morning when no employees are using the system:

schTasks /Create /SC DAILY /TN "My Task" /TR "C:UsersGeorgiDesktopmyApp-Tomcat_Restart.bat" /ST 05:00
SUCCESS: The scheduled task "Tomcat Restart Task" has successfully been created.


import-new-windows-task-scheduler-task-from-command-line-windows-add-new-cronjob-command-screenshot


4. Create / Import new Windows "Cron" job 

Alternative way is to use Task Scheduler GUI frontend and create new (Basic Task) or  import just created script

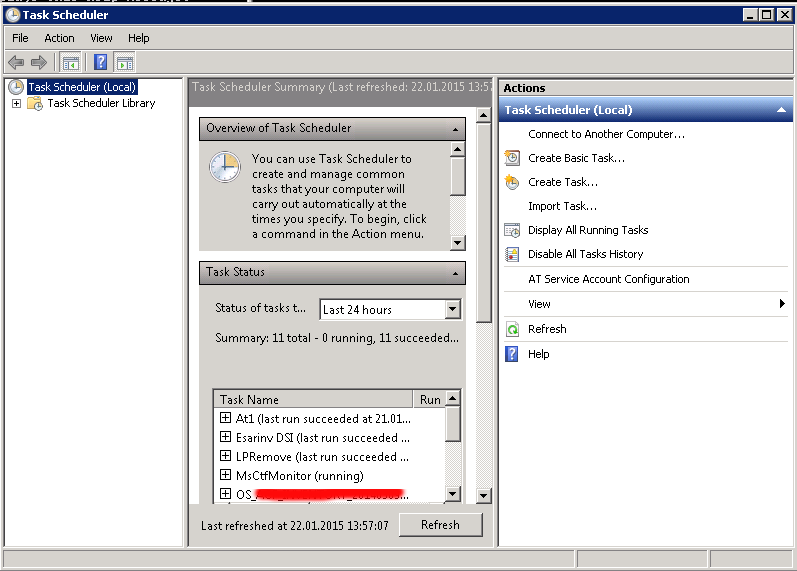
To run Windows Task Scheduler from comamnd line :
 

Taskschd.msc

taskschd_windows-run-from-command-line-screenshot

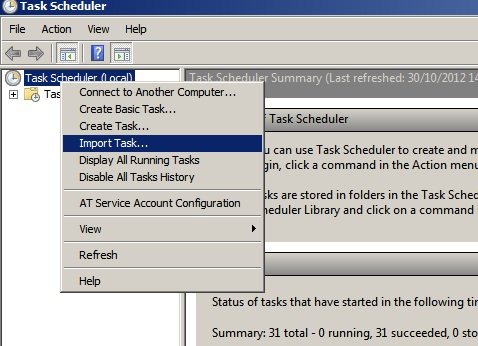
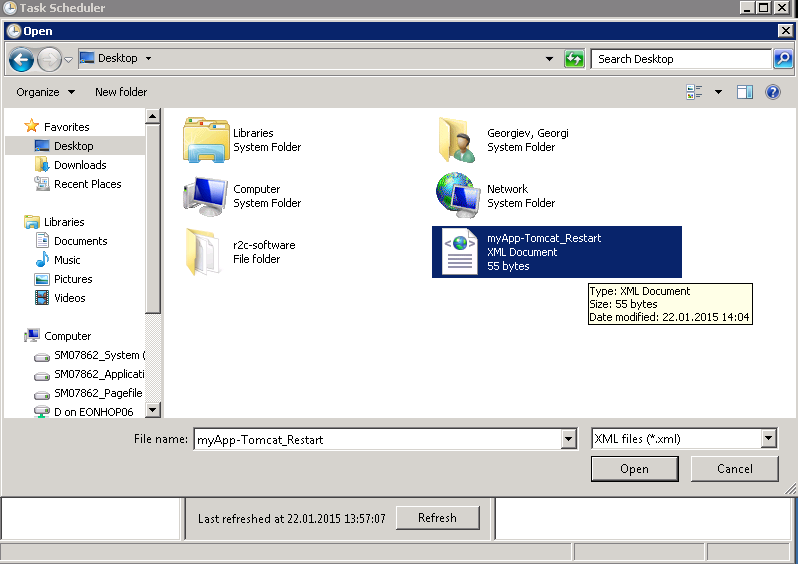
To import already existing .XML formatted file for Task scheduler, right click on the Task Scheduler (Local) and select Import task

task-scheduler-local-task-import-microsoft-2008-r2-windows-screenshot

Import the myApp-Tomcat_Restart.XML previously created file

task-scheduler-import-tomcat-restart-xml-file-windows-server-2008-r2-screenshot

Adjust settings to suit your needs, but what change atleast:

  •         the path to the myApp-Tomcat_Restart.bat file in Actions tab
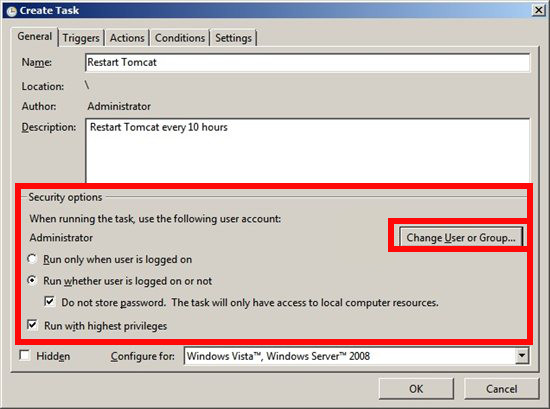
  •         the Local User account with which script will be running (administrator) in General tab

Task-Scheduler-windows-general-local-user-account-with-which-task-will-be-running

After making all changes you will be prompted for server Administrator account password 

5. check existing Win Cron job from command line

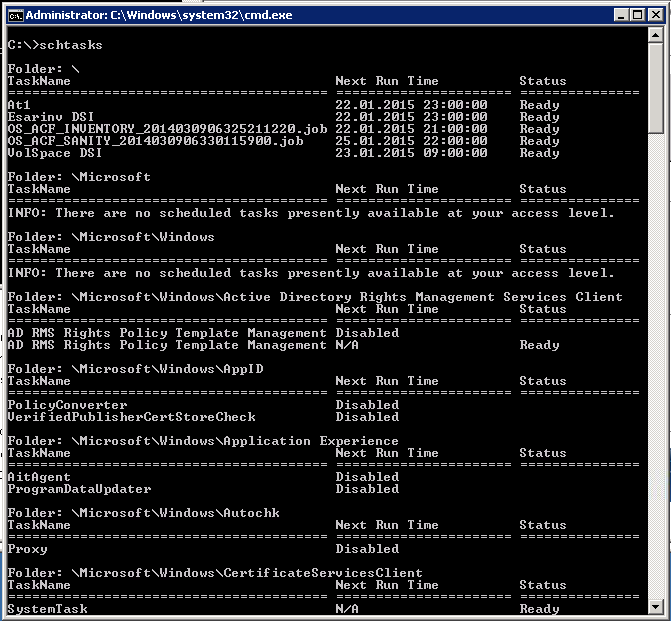
To see the configured (Scheduled Tasks) in command line mode with a command:

Schtasks.exe

schtasks-windows-equivalent-command-to-linux-unix-crontab-screenshot

The command is Windows equivalent to UNIX / Linux's crontab, e.g.:

crontab -u root -l


6. Delete existing Windows Task Job from Command line

If you happen to need to delete just created task or any other task from command line (Assuming that you know the previously created task name), use cmd:

C:>schtasks /Delete /TN "Tomcat Restart Task"
WARNING: Are you sure you want to remove the task "Tomcat Restart Task" (Y/N)? y

SUCCESS: The scheduled task "Tomcat Restart Task" was successfully deleted.


Task completed, Tomcat will auto-restart on Windows host at your scheduled time. Feedback is mostly welcome 🙂
Enjoy  


Linux: How to see / change supported network bandwidth of NIC interface and get various eth network statistics with ethtool

Monday, January 19th, 2015

linux-how-to-see-change-supported-network-bandwidth-of-NIC-interface-and-view-network-statistics
If you're a novice Linux sysadmin and inherited some dedicated servers without any documentation and hence on of the first things you have to do to start a new server documentation is to check the supported TCP/IP network speed of servers Network (ethernet) Interfaces. On Linux this is very easy task to verify the speed of LAN card supported Local / Internet traffic install ethtool (if not already preseont on the servers) – assuming you're dealing with Debian / Ubuntu Linux servers.

1. Install ethtool on Deb and RPM based distros

dedi-server1:~# apt-cache show ethtool|grep -i desc -A 3
Description: display or change Ethernet device settings
 ethtool can be used to query and change settings such as speed, auto-
 negotiation and checksum offload on many network devices, especially
 Ethernet devices.

dedi-server1:~# apt-get install –yes ethtool
..

ethtool should be installed by default on CentOS / Fedora / RHEL and  syntax is same like on Debs. If you happen to miss ethtool on any (SuSE) / RedHat / RPM based distro install it with yum

[root@centos:~] # yum -y install ethtool


2. Get ethernet configurations

To check the current eth0 / eth1 / ethX network (Speed / Duplex) and other network related configuration configuration:
 

dedi-server5:~# ethtool eth0

Settings for eth0:
        Supported ports: [ TP ]
        Supported link modes:   10baseT/Half 10baseT/Full
                                100baseT/Half 100baseT/Full
                                1000baseT/Full
        Supports auto-negotiation: Yes
        Advertised link modes:  10baseT/Half 10baseT/Full
                                100baseT/Half 100baseT/Full
                                1000baseT/Full

        Advertised pause frame use: No
        Advertised auto-negotiation: Yes
        Speed: 1000Mb/s
        Duplex: Full
        Port: Twisted Pair
        PHYAD: 1
        Transceiver: internal
        Auto-negotiation: on
        MDI-X: off
        Supports Wake-on: pumbag
        Wake-on: g
        Current message level: 0x00000001 (1)
        Link detected: yes

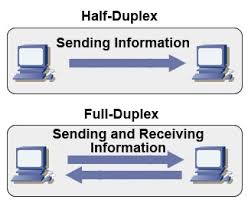
Having a NIC configured to act as Duplex is very important as Duplex communication enables LAN card to communicate both sides (Sent / Receive) packets simultaneously.

full-duplex-half-duplex-explained-picture

Probably most interesting parameters for most admins are the ones that are telling whether the NIC UpLink is 10megabyte / 100 megabyte or 1Gigabyte as well as supported Receive / Send ( Transfer ) speeds of LAN, a common useful ethtool admin use to just show current LAN ethernet interface speed:

server-admin1:~# ethtool eth0 |grep -i speed
        Speed: 1000Mb/s


To get info about NIC (kernel module / driver) used with ethtool:

dedi-server3:~# ethtool -i eth0 driver: e1000e
version: 1.2.20-k2
firmware-version: 1.8-0
bus-info: 0000:06:00.0

3. Make LAN Card blink to recognize eth is mapped to which Physical LAN

Besides that ethtool has many other useful use cases, for example if you have a server with 5 lan or more LAN cards, but you're not sure to which of all different EthX interfaces correspond, a very useful thing is to make eth0, eth1, eth2, eth3, etc. blink for 5 seconds in order to identify which static IP is binded physically to which NIC , here is how:

ethtool -p eth0 5


Then you can follow the procedure for any interface on the server and map them with a sticker 🙂

Ethtool is also useful for getting "deep" (thorough) statistics on Server LAN cards, this could be useful to identify sometimes hard to determine broadcast flood attacks:
 

4. Get network statistics with ethtool for interfaces
 

dedi-server5:~# ethtool -S eth0|grep -vw 0
NIC statistics:
     rx_packets: 6196644448
     tx_packets: 7197385158
     rx_bytes: 2038559235701
     tx_bytes: 8281206569250
     rx_broadcast: 357508947
     tx_broadcast: 172
     rx_multicast: 34731963
     tx_multicast: 20
     rx_errors: 115
     multicast: 34731963
     rx_length_errors: 115
     rx_no_buffer_count: 26391
     rx_missed_errors: 10059
     tx_timeout_count: 3
     tx_restart_queue: 2590
     rx_short_length_errors: 115
     tx_tcp_seg_good: 964136993
     rx_long_byte_count: 2038559235701
     rx_csum_offload_good: 5824813965
     rx_csum_offload_errors: 42186
     rx_smbus: 383640020

5. Turn on Auto Negotiation and change NIC set speed to 10 / 100 / 1000 Mb/s

Auto-negotiation is important as an ethernet procedure by which two communication devices (2 network cards) choose common transmission parameters such as speed, duplex mode, and flow control in order to achieve maximum transmission speed over the network. On 1000BASE-T basednetworks the standard is a mandatory. There is also backward compatability for older 10BASE-T Networks.

a) To raise up NIC to use 1000 Mb/s in case if the bandwidth was raised to 1Gb/s but NIC settings were not changed:

dedi-server1:~# ethtool -s eth0 speed 1000 duplex half autoneg off


b) In case if LAN speed has to be reduced for some weird reason to 10 / 100Mb/s


dedi-server1:~# ethtool -s eth0 speed 10 duplex half autoneg off

dedi-server1:~# ethtool -s eth0 speed 100 duplex half autoneg off

c) To enable disable NIC Autonegotiation:

dedi-server1:~# ethtool -s eth0 autoneg on


6. Change Speed / Duplex settings to load on boot

a) Set Network to Duplex on Fedora / CentOS etc.

Quickest way to do it is of course to use /etc/rc.local. If you want to do it following distribution logic on CentOS / RHEL Linux:

Add to /etc/sysconfig/network-scripts/ifcfg-eth0

vim /etc/sysconfig/network/-scripts/ifcfg-eth0

ETHTOOL_OPTS="speed 1000 duplex full autoneg off"

To load the new settings restart networking (be careful to have physical access to server if something goes wrong 🙂 )

service network restart

b) Change network speed / duplex setting on Debian / Ubuntu Linux

Add at the end of /etc/network/interfaces

vim /etc/network/interfaces

post-up ethtool -s eth0 speed 100 duplex full autoneg off

7. Tune NIC ring buffers

dedi-server1:~# ethtool -g eth0

Ring parameters for eth0:
Pre-set maximums:
RX:             4096
RX Mini:        0
RX Jumbo:       0
TX:             4096
Current hardware settings:
RX:             256
RX Mini:        0
RX Jumbo:       0
TX:             256

As you can see the default setting of RX (receive) buffer size is low 256 and on busy servers with high traffic loads, depending on the hardware NIC vendor this RX buffer size varies.
Through increasing the Rx/Tx ring buffer size , you can decrease the probability of discarding packets in the NIC during a scheduling delay.
A change in rx buffer ring requires NIC restart so (be careful not to loose connection to remote server), be sure to have iLO access to it.

Here is how to raise Rx ring buffer size 4 times from default value:

ethtool -G eth0 rx 4096 tx 4069

How to get a list and Backup (Save Enabled Plugins) / Restore Enabled (Active) plugins in WordPress site with SQL query

Wednesday, January 14th, 2015

get-list-and-backup-restore-enabled-active-plugins-only-in-wordpress-with-sql-mysql-query

Getting a snapshot of all active plugins and keeping it for future in case if you install some broken plugin and you have to renable all enabled plugins from scratch is precious thing in WordPress.

… It is really annoying when you decide to try to enable few new plugins and out of a sudden your WordPress site / blog starts hanging (when accessed in browser)…

To fix it you have to Disable All Plugins and Re-enable all that used to work. However if you don't keep a copy of the plugins which were previously working and you're like me and have 109 plugins installed of which only 50 are in (Active) state / used. It could take you a day or two until you come up with a similar list to the ones you previously used … Thanksfully there is some prevention you can take by dumping a list of all plugins that are currently active and in later time only enable those in the list.


# mysql -u root -p
Enter password:

mysql> USE blog_db;

Here is the output I get in the moment:
 

mysql> DESCRIBE wp_options;
+————–+———————+——+—–+———+—————-+
| Field        | Type                | Null | Key | Default | Extra          |
+————–+———————+——+—–+———+—————-+
| option_id    | bigint(20) unsigned | NO   | PRI | NULL    | auto_increment |
| option_name  | varchar(64)         | NO   | UNI |         |                |
| option_value | longtext            | NO   |     | NULL    |                |
| autoload     | varchar(20)         | NO   |     | yes     |                |
+————–+———————+——+—–+———+—————-+


mysql> SELECT * FROM wp_options WHERE option_name = 'active_plugins';

|        38 | active_plugins | a:50:{i:0;s:45:"add-to-any-subscribe/add-to-any-subscribe.php";i:1;s:19:"akismet/akismet.php";i:2;s:43:"all-in-one-seo-pack/all_in_one_seo_pack.php";i:3;s:66:"ambrosite-nextprevious-post-link-plus/ambrosite-post-link-plus.php";i:4;s:49:"automatic-tag-selector/automatic-tag-selector.php";i:5;s:27:"autoptimize/autoptimize.php";i:6;s:35:"bm-custom-login/bm-custom-login.php";i:7;s:45:"ckeditor-for-wordpress/ckeditor_wordpress.php";i:8;s:47:"comment-info-detector/comment-info-detector.php";i:9;s:27:"comments-statistics/dcs.php";i:10;s:31:"cyr2lat-slugs/cyr2lat-slugs.php";i:11;s:49:"delete-duplicate-posts/delete-duplicate-posts.php";i:12;s:45:"ewww-image-optimizer/ewww-image-optimizer.php";i:13;s:34:"feedburner-plugin/fdfeedburner.php";i:14;s:39:"feedburner-widget/widget-feedburner.php";i:15;s:63:"feedburner_feedsmith_plugin_2.3/FeedBurner_FeedSmith_Plugin.php";i:16;s:21:"feedlist/feedlist.php";i:17;s:39:"force-publish-schedule/forcepublish.php";i:18;s:50:"google-analytics-for-wordpress/googleanalytics.php";i:19;s:81:"google-sitemap-generator-ultimate-tag-warrior-tags-addon/UTWgoogleSitemaps2_1.php";i:20;s:36:"google-sitemap-generator/sitemap.php";i:21;s:24:"headspace2/headspace.php";i:22;s:29:"my-link-order/mylinkorder.php";i:23;s:27:"php-code-widget/execphp.php";i:24;s:43:"post-plugin-library/post-plugin-library.php";i:25;s:35:"post-to-twitter/post-to-twitter.php";i:26;s:28:"profile-pics/profile-pic.php";i:27;s:27:"redirection/redirection.php";i:28;s:42:"scripts-to-footerphp/scripts-to-footer.php";i:29;s:29:"sem-dofollow/sem-dofollow.php";i:30;s:33:"seo-automatic-links/seo-links.php";i:31;s:23:"seo-slugs/seo-slugs.php";i:32;s:41:"seo-super-comments/seo-super-comments.php";i:33;s:31:"similar-posts/similar-posts.php";i:34;s:21:"sociable/sociable.php";i:35;s:44:"strictly-autotags/strictlyautotags.class.php";i:36;s:16:"text-control.php";i:37;s:19:"tidy-up/tidy_up.php";i:38;s:37:"tinymce-advanced/tinymce-advanced.php";i:39;s:33:"tweet-old-post/tweet-old-post.php";i:40;s:33:"w3-total-cache/w3-total-cache.php";i:41;s:44:"widget-settings-importexport/widget-data.php";i:42;s:54:"wordpress-23-related-posts-plugin/wp_related_posts.php";i:43;s:23:"wp-minify/wp-minify.php";i:44;s:27:"wp-optimize/wp-optimize.php";i:45;s:33:"wp-post-to-pdf/wp-post-to-pdf.php";i:46;s:29:"wp-postviews/wp-postviews.php";i:47;s:55:"wp-simple-paypal-donation/wp-simple-paypal-donation.php";i:48;s:46:"wp-social-seo-booster/wpsocial-seo-booster.php";i:49;s:31:"wptouch-pro-3/wptouch-pro-3.php";} | yes      |

Copy and paste this CVS format data to a text file or a Word document for later reference ..

To restore back to normal only active WordPress plugins, first launch following SQL query to disable all enabled wordpress plugins:

UPDATE wp_options SET option_value = 'a:0:{}' WHERE option_name = 'active_plugins';

To restore above "backupped" list of active WP plugins you have to copy paste the saved content and paste it into above UPDATE query substituting option_value=' ' with the backupped string.

P.S. – This query should work on WordPress 3.x on older wordpress ver 2.x use instead:

UPDATE wp_options SET option_value = ' ' WHERE option_name = 'active_plugins';

Because pasting the backupped Active plugins list CSV is a messy and unreadable from command line it is recommended for clarity to use PHPMyAdmin frontend (whenever it is available) on server. This little hint is a real time-saver and saves a lot of headaches. Before proceeding to any Db UPDATE SQL queries always backup your Blog database, with time structure of WordPress data changes!, so in future releases this method might not be working, however if it helped you and works on your version please drop a comment with WordPress version on which this helped you.

Enjoy! 🙂
 

Turn your Windows PC / notebook to Wireless Router with My Wifi Router 3.0 and TP-Link TL-WN722N

Wednesday, January 7th, 2015

my-wifi-router-3.0-turn-regular-windows-notebook-to-wifi-router

I've been to home of my wife's parents and for this Christmas, they have received second hand Acer Aspire notebook as a Christmas gift. So far they were using internet using their Windows XP PC which is getting internet here in Belarus via UTP network cable using ByFly ZTE ADSL router modem. As ADSL modem lacked wifh WI-FI Antenna (support) and there was already the Acer notebook which had to access the internet preferrably via Wireless connection, the option was to get a WI-FI router and connect it to the ADSL modem but as this would cost (20 EUR at minimum) and there was alreay Wireless (Receiver) adapter TP-LINK TL-WN722N unused, I decided to try make the TP-LINK Receiver and Windows XP PC to act as a small Home Made Wireless  (software) router.

Until I succeeded I've tried multiple softwares which all failed to turn the Windows PC to Wi-Fi Hotspot.
Here is list of few of the softwares I tried that didn't worked for some reason:

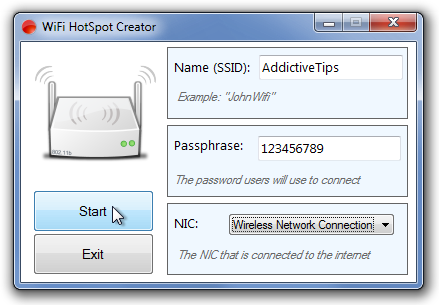
1. Wifi HotSpot Creator

WiFi-HotSpot-Creator-screenshot

Turn your PC into a Wi-Fi Router for Free!

Instantly share your internet connection with your friends and peers over Wi-Fi. Turns your PC into a Wi-Fi Router! And its Free! Wifi HotSpot Creator is said to be able to convert any Mac OS X and Windows PC to hotspot here is Wifi HotSpot Creator download website
Wifi HotSpot Creator is said to work with Windows Vista / XP / 7 / 8, however as I said it doesn't work for me on Windows XP.
 

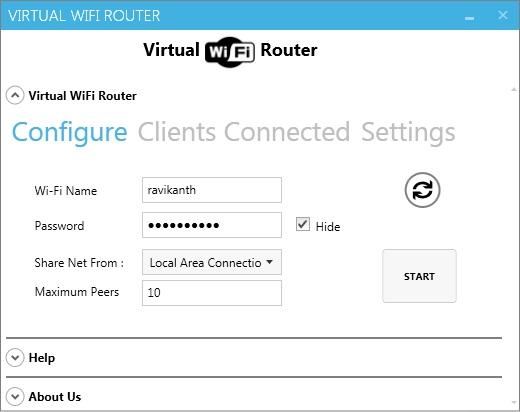
2. Virtual Wifi router

Here is

With Virtual WiFi Router you can create a WiFi hotspot for WiFi Reverse Tethering on Windows 7 and for wifi supported mobiles and other wifi enabled computer to create a network and to share internet. Virtual Wifi Router in a minute converts your PC into a WiFi hot spot for free.

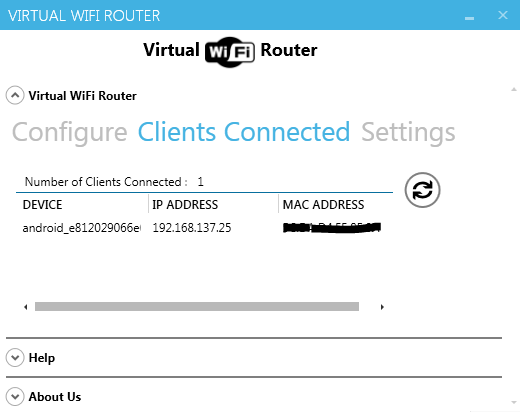
To make the program working it depends on .NET 4.5. Though the program looked like a superb it unfortunately was crashing on Windows XP. Below are few screenshots from program working on Windows 7.

virtual-wifi-router-screenshot

virtual-wifi-router-connected-device-screenshot-windows
3. My Wifi Router 3.0

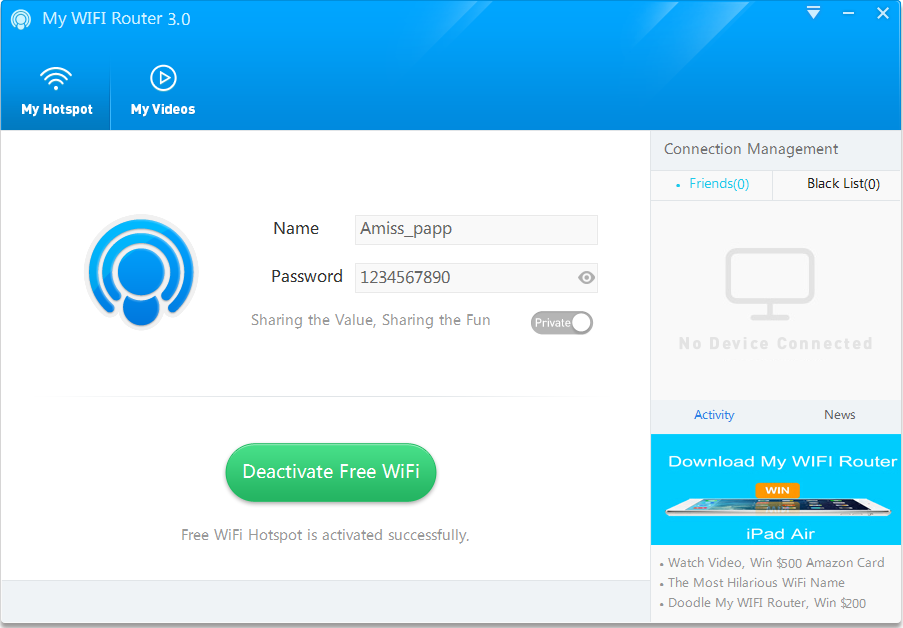
Finally I've come across My Wifi Router 3.0 which is just another program that makes necessery Windows configuration to TP-Link TL-WN722N Wireless receiver Adapter to turn it into a homemade Wi-Fi router.
my-wifi-router-on-windows-xp-desktop-pc-noteboko-creenshot

By default Amiss_papp Wifi is configured, this can be changed, however in my case when I tried changing it there were some issues, so finally I've had to re-install My Wifi Router to make it working again.
Once configured My Wifi Router there is the green button (Activate / Deactivate Free Wifi) as seen from screenshot.

As you can see My Wifi Router also allows to Share Videos over WiFi. Once I've tested the program and confirmed it as working, I had to configure it to automatically start on Windows PC boot.

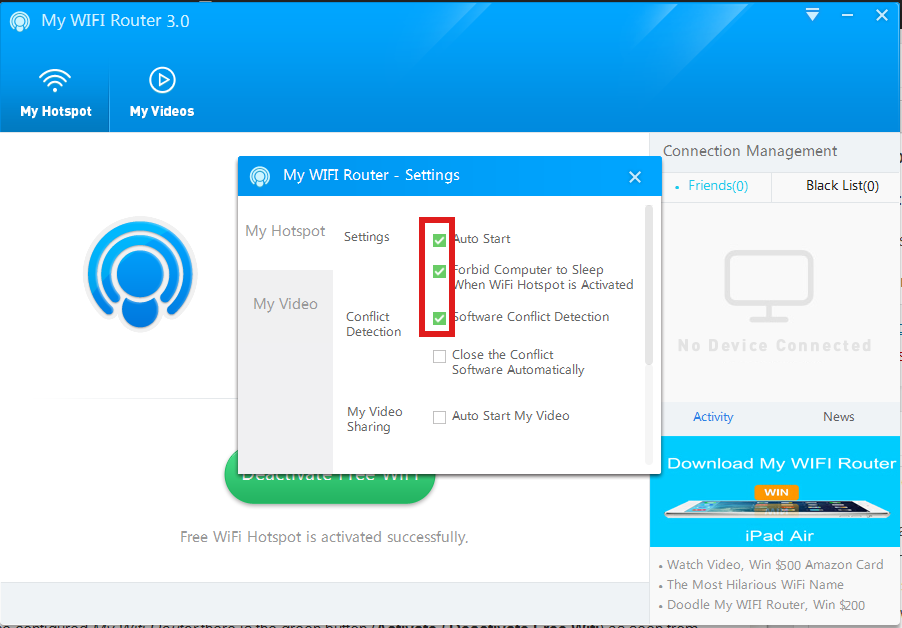
This is done from Settings (located on backward triangle button, next to minimize function).
I had to set check in to  Auto Start and Software Conflict Detection.

make-windows-pc-with-wireless-wifi-router-my-wifi-router-settings-screenshot

Once connected to the TP-Link TL-WN722N (USB) Wi-Fi (High Gain) Receiver adapter in Windows Tray a new indicator will popup that a device has been connected. I've tested My Wifi Router and it seem to be working fine with 3 remote connected Wi-Fi devices (1 Notebook and 2 Nokia Lumia mobile phones). The speed of internet was fast and if I didn't know the connection is done in a software way via such an improvised Windows XP Wi-Fi network router I would think it is just a regular Wi-Fi network router.

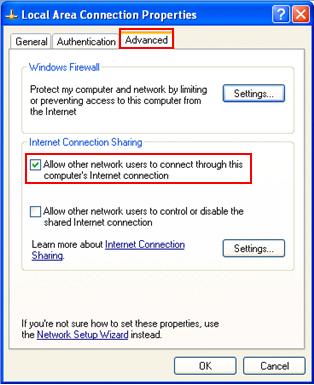
One more thing I had to do to make the internet working I had to share the the LAN Network (ethernet card) Interface's internet from
 

Control Panel -> Networking -> Local Area Connection (Properties) -> Advanced

https://www.pc-freak.net/images/windows-xp-internet-connection-sharing-how-to-networking-screenshot-make-network-address-translation-windows-xp.jpg

A downside of My Wifi Router is I couldn't find a way to save password while connection to the newly created WiFi router with it, so each time I had to login I had to manually type in the password (default my wifi router password is 123567890). Re-typing password on each login is annoying but if you have to do it once per day in the morning when you turn on your notebook it is not such a big deal.

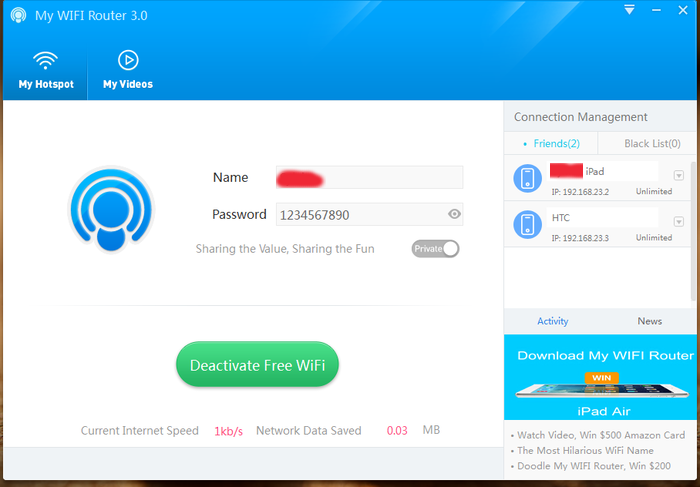
Once connected to My Wifi Router in Connection Management in Friends (tab) you will see a list with connected devices.

my-wifi-router-on-windows-xp-with-htc-and-ipad-iphone-connected
As visible from above screenshot default IPs which will be assigned to new connected clients to My Wifi Router will be in local network IP range 192.168.23.2 – 192.168.23.254.

Now all left is to Enjoy  your new Software Wi-Fi router 🙂

Windows XP / 7, Minimize any program to system tray free software – RBTray, Trayconizer and Windows HideIT

Monday, January 5th, 2015

rbtray-screenshot1-on-ms-windows-minimize-any-application-systray-winblows
As Linux admin, I'm already aware of AllTray *NIX application able to send any application to GNOME / KDE tray.
But what If you have a program on Windows XP / 7 / 8,  that doesn't have a minimize to tray functionality and you want to send it to tray?
I.e. what if you want to send programs like Notepad (that doesn't by default go to win systray) to Windows  tray in order to prevent them mess up with other Open Windows minimized windows?

After a quick research on the topic I found these 3 – RBtray, Trayconizer, HideIt, Below is a very quick review on each

.

1. Minimize any Windows program to tray with RBTray

rbtray_windows-7-screenshot-minimize-any-application-to-tray-minimize-notepad
If you want to stick to open source (GPL) software a tiny free software proggie that does the trick is RBTray current latest RBtray is 4.3 release is download mirror is here.

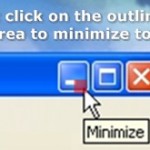
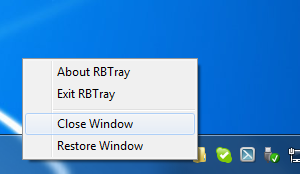
To use RBTray you don't need to do anything, once program is unarchived from archive, once launched there will be no system application that it is running, but you can go to any minimized program (not in tray) and by clicking with right mouse button on minimize button you will the app minimize to tray.

Here is how RBTray works (taken from archive README file):

Installing:
Extract the 32-bit or 64-bit binaries (depending on your OS) to a
 folder, e.g.
C:Program FilesRBTray.  Double click RBTray.exe to start it.  If you want it
to automatically start after you reboot, create a shortcut to RBTray.exe in
your Start menu's Startup group.

Using:
Right click on any program's minimize button to minimize it to the tray.  To
restore, single-click the program's icon in the tray.

Exiting:
Right click on any tray icon created by RBTray and click Exit RBTray in the
popup menu.  Or run RBTray.exe with the –exit parameter.


2. Miminize any app to system tray with Trayconizer

trayconizer_screenshot-microsoft-windows-minimize-notepad
Trayconizer is the other tray minizer tool you might want to check out, Windows tray minize application a download mirror of Trayconizer is here. As of time of writing this post (current) latest Trayconizer version is 1.1.1.

Trayconizer allows you to minimize virtually any application to the system tray rather than having it take up valuable space in your taskbar. The screen shot to the left shows Trayconizer minimizing Notepad to the system tray. Trayconizer is definitely the tool of choice of system administrators who need to keep minimized windows program to system tray each time on boot as it can be easily run from command line.

Using Trayconizer is simple. To start Trayconizer on Notepad, you would execute: C:PathToTrayconizer.exe C:WindowsNotepad.exe.

You can create a shortcut in your Startup group to execute Trayconizer on a program that you use frequently but want to keep tucked out of the way in the system tray when you're not using it. There is even an option for starting the application initially in the minimized state.

Trayconizer will automatically shut itself down when you close the program you are Trayconizing. Additionally, multiple Trayconized programs are handled by a single instance of Trayconizer to avoid wasting system resources.

Trayconizer requires no DLL's beyond the base Win32 API libraries and will not store any entries in your registry.

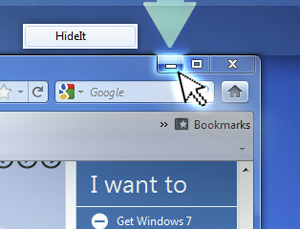
3. Minimize any program to Windows systray with Windows HideIT

windows-hideit-minimize-to-tray-screenshot-send-any-running-windows-program-to-systray

Another good tool useful in hiding (minimizing) Windows programs which are lacking the minimize option embedded built-in is Windows HideIT.

Hideit official download website is here, note that with Hideit, Its pretty confusing to find where to download in (so to download look in the right upper corner for a download button) HideIT Download Mirror is here.

Hideit should be able to minimize any Application to sysytem tray, while Rbtray fails ith some. Both RBtray and Windows
HIdeIT will popup with a blue down-arrow on Tray icon once launched and you can show / hide minimized applications from there.

All RbTray, Trayconizer and HideIt tray minimizers should work on virtually all NT 4.0 Windows XP / 2000 / Vista / 7 / 8 though I haven't tested on all of 'em yet. If you happen to find it working on  Win NT 4.0 / 8 etc., please drop a comment.