Archive for the ‘Remote System Administration’ Category

How to disown a process once it is running on Linux – old but useful trick

Thursday, December 20th, 2018

how-to-disown-a-shell-running-process-on-linux-trick

There is one very old but  gold useful UNIX / Linux trick, I remembered which will be interesting to share it's called  it is called disowning.


Lets say you run execution of a job an rsync job or a simple copy job of a very large file, but in the middle of the copy you remembered you need to do something else and thus want to switch back to shell (without opening a new ssh if on remote server) or a new console if on a local machine.
Then how can you background the copy process and move the process to the rest of long running process system list e.g. "disown" it from yourself so the process continues its job in the background just like of the rest of the backgrounded running processes on the system.

Here is the basic syntax of the disown command:
 

help disown
disown: disown [-h] [-ar] [jobspec …]
    By default, removes each JOBSPEC argument from the table of active jobs.
    If the -h option is given, the job is not removed from the table, but is
    marked so that SIGHUP is not sent to the job if the shell receives a
    SIGHUP.  The -a option, when JOBSPEC is not supplied, means to remove all
    jobs from the job table; the -r option means to remove only running jobs.


Here is a live example of what I meant by above lines and actual situation where disown comes super useful.

The 'disown' command/builtin (this is in bash), which will disassociate the process from the shell and not send the HUP signal to the process on exit.

root@linux:~# cp -rpf SomeReallyLargeFile1 SomeReallylargeFile2

[1]+  Stopped                 cp -i -r SomeReallyLargeFile SomeReallylargeFile2
root@linux:~#  bg %1
[1]+ cp -i -r SomeReallyLargeFile SomeReallylargeFile2 &
root@linux:~#  jobs
[1]+  Running                 cp -i -r testLargeFile largeFile2 &
root@linux:~# disown -h %1
root@linux:~# ps -ef |grep largeFile2
root      5790  5577  1 10:04 pts/3    00:00:00 cp -i -rpf SomeReallyLargeFile SomeReallylargeFile2
root      5824  5577  0 10:05 pts/3    00:00:00 grep largeFile2
root@linux:~#


Of course you can always use something like GNU screen (VT100/ ANSI Terminal screen manager) or tmux (terminal multiplexer) to detach the process but you will have to have run the screen  / tmux session in advance which you might haven't  yet as well as it is  required one of the 2 to be present on a servers and on many servers in complex client environments this might be missing and hard to install (such as server is behind a firewall DMZ-ed (Demilitirezed Zoned) network and no way to install extra packages), the disown command makes sense.

Another useful old tip, that new Linux users might not konw is the nohup command (which runs a command immune to hangups with output to a non-tty), nohup's main use is if you want to run process in background with (ampersand) from bash / zsh / tcsh etc. and keep the backgrounded process running even once you've exited the active shell, to do so run the proc background as follows:
 

$ nohup command-to-exec &


Hope this helps someone, Enjoy!


Automatic network restart and reboot Linux server script if ping timeout to gateway is not responding as a way to reduce connectivity downtimes

Monday, December 10th, 2018

automatic-server-network-restart-and-reboot-script-if-connection-to-server-gateway-inavailable-tux-penguing-ascii-art-bin-bash

Inability of server to come back online server automaticallyafter electricity / network outage

These days my home server  is experiencing a lot of issues due to Electricity Power Outages, a construction dig operations to fix / change waterpipe tubes near my home are in action and perhaps the power cables got ruptered by the digger machine.
The effect of all this was that my server networking accessability was affected and as I didn't have network I couldn't access it remotely anymore at a certain point the electricity was restored (and the UPS charge could keep the server up), however the server accessibility did not due restore until I asked a relative to restart it or under a more complicated cases where Tech aquanted guy has to help – Alexander (Alex) a close friend from school years check his old site here – alex.www.pc-freak.net helps a lot.to restart the machine physically either run a quick restoration commands on root TTY terminal or generally do check whether default router is reachable.

This kind of Pc-Freak.net downtime issues over the last month become too frequent (the machine was down about 5 times for 2 to 5 hours and this was too much (and weirdly enough it was not accessible from the internet even after electricity network was restored and the only solution to that was a physical server restart (from the Power Button).

To decrease the number of cases in which known relatives or friends has to  physically go to the server and restart it, each time after network or electricity outage I wrote a small script to check accessibility towards Default defined Network Gateway for my server with few ICMP packages sent with good old PING command
and trigger a network restart and system reboot
(in case if the network restart does fail) in a row.

1. Create reboot-if-nwork-is-downsh script under /usr/sbin or other dir

Here is the script itself:


#!/bin/sh
# Script checks with ping 5 ICMP pings 10 times to DEF GW and if so
# triggers networking restart /etc/inid.d/networking restart
# Then does another 5 x 10 PINGS and if ping command returns errors,
# Reboots machine
# This script is useful if you run home router with Linux and you have
# electricity outages and machine doesn't go up if not rebooted in that case

GATEWAY_HOST='192.168.0.1';

run_ping () {
for i in $(seq 1 10); do
    ping -c 5 $GATEWAY_HOST
done

}

reboot_f () {
if [ $? -eq 0 ]; then
        echo "$(date "+%Y-%m-%d %H:%M:%S") Ping to $GATEWAY_HOST OK" >> /var/log/reboot.log
    else
    /etc/init.d/networking restart
        echo "$(date "+%Y-%m-%d %H:%M:%S") Restarted Network Interfaces:" >> /tmp/rebooted.txt
    for i in $(seq 1 10); do ping -c 5 $GATEWAY_HOST; done
    if [ $? -eq 0 ] && [ $(cat /tmp/rebooted.txt) -lt ‘5’ ]; then
         echo "$(date "+%Y-%m-%d %H:%M:%S") Ping to $GATEWAY_HOST FAILED !!! REBOOTING." >> /var/log/reboot.log
        /sbin/reboot

    # increment 5 times until stop
    [[ -f /tmp/rebooted.txt ]] || echo 0 > /tmp/rebooted.txt
    n=$(< /tmp/rebooted.txt)
        echo $(( n + 1 )) > /tmp/rebooted.txt
    fi
    # if 5 times rebooted sleep 30 mins and reset counter
    if [ $(cat /tmprebooted.txt) -eq ‘5’ ]; then
    sleep 1800
        cat /dev/null > /tmp/rebooted.txt
    fi
fi

}
run_ping;
reboot_f;

You can download a copy of reboot-if-nwork-is-down.sh script here.

As you see in script successful runs  as well as its failures are logged on server in /var/log/reboot.log with respective timestamp.
Also a counter to 5 is kept in /tmp/rebooted.txt, incremented on each and every script run (rebooting) if, the 5 times increment is matched

a sleep is executed for 30 minutes and the counter is being restarted.
The counter check to 5 guarantees the server will not get restarted if access to Gateway is not continuing for a long time to prevent the system is not being restarted like crazy all time.
 

2. Create a cron job to run reboot-if-nwork-is-down.sh every 15 minutes or so 

I've set the script to re-run in a scheduled (root user) cron job every 15 minutes with following  job:

To add the script to the existing cron rules without rewriting my old cron jobs and without tempering to use cronta -u root -e (e.g. do the cron job add in a non-interactive mode with a single bash script one liner had to run following command:


{ crontab -l; echo "*/15 * * * * /usr/sbin/reboot-if-nwork-is-down.sh 2>&1 >/dev/null; } | crontab –


I know restarting a server to restore accessibility is a stupid practice but for home-use or small client servers with unguaranteed networks with a cheap Uninterruptable Power Supply (UPS) devices it is useful.

Summary

Time will show how efficient such a  "self-healing script practice is.
Even though I'm pretty sure that even in a Corporate businesses and large Public / Private Hybrid Clouds where access to remote mounted NFS / XFS / ZFS filesystems are failing a modifications of the script could save you a lot of nerves and troubles and unhappy customers / managers screaming at you on the phone 🙂


I'll be interested to hear from others who have a better  ideas to restore ( resurrect ) access to inessible Linux server after an outage.?
 

Prevent rsync cronjob to run multiple times via cronjob on Linux

Wednesday, November 21st, 2018

prevent-rsync-rsync-to-run-multiple-times-via-cronjob-on-linux

Today I had a report of a server whose Load Avarage keeps at the high level of 86, the machine runs on a bare metal rock solid hardware and even with such high Loads of the kernel it runs fine, but due to the I/O overhead the SANs red from a remote NetApp storage device started to be sluggish and hence it needed to be reviewed, thus I jumped in via the hop station (jump host) into the server.
 

1. Short investation on root cause for high server load


After a short investigation, I've found an rsync job set by someone on a cron job to be routinely run every 30 minutes, thus the old scheduled rsync, which seemed to run multiple times on the server (about 50 processes) of same rsync (file system synchronization was running) and as expected the storage was saddled with mutiple Input / Output requests.

The root cron job was like that:
 

server:~# crontab -u root -l |grep -i rsync
/usr/bin/rsync -ax /var/www/htdocs/directory_to_synchronize / /srv/www/synch_back/directory_to_synchrnize


A process list showed the following high number of running mirrored rsyncs:


server:~# ps axuwwf | grep -i rsync | wc -l
80


2. The Fix – Set Rsync to only via cron only in case if it is not already running in background


In order to fix it, I had to kill all current running rsync (here luckily only same single instance of rsync was running, but generally I was cautious to check no other rsync jobs are running – otherwise I would have mistakenly killed some other rsync job ongoing …)

Then I set the following new cron job one liner quick shell script that does the job to assign a pid file that is created before rsync and deleted after rsync completion.
 

if [ ! -e /tmp/repo_dba_sync.lock ]; then touch /tmp/repo_dba_sync.lock; /usr/bin/rsync -ax /var/www/htdocs/directory_to_synchronize / /srv/www/synch_back/directory_to_synchrnize ; trap 'rm -f /tmp/repo_dba_sync.lock; fi' EXIT  >/dev/null 2>&1


The cron job looked like so:


*/30 * * * * if [ ! -e /tmp/repo_dba_sync.lock ]; then touch /tmp/repo_dba_sync.lock; /usr/bin/rsync -ax /var/www/htdocs/directory_to_synchronize / /srv/www/synch_back/directory_to_synchrnize ; trap 'rm -f /tmp/repo_dba_sync.lock; fi'  EXIT >/dev/null 2>&1

Just in case if you're wondering
a trap should be used to verify that the lock file is removed when the script is exited for any reason.
This way the lock file will be removed even if the script exits before the end of the script.

An alternative and more simple ways to do it is via:
 

pgrep rsync > /dev/null || rsync -ax /var/www/htdocs/directory_to_synchronize / /srv/www/synch_back/directory_to_synchrnize


Or if you don't want to use bash's:
 

if []; then; fi


condition but still use a file lock the flock command can be used like so:
 

flock -n lock_file -c "rsync …"

Qmail redirect mail to another one and keep local Mailbox copy with .qmail file – Easy Set up email forwarding Qmail

Saturday, August 11th, 2018

Qmail redirect mail box to another one with .Qmail file dolphin artistic logo

QMail (Considered to be the most secure Mail server out there whose modified version is running on Google – Gmail.com and Mail Yahoo! and Yandex EMail (SMTP) servers, nowadays has been highly neglected and considered obsolete thus most people prefer to use postfix SMTP or EXIM but still if you happen to be running a number of qmail old rack Mail servers (running a bunch of Email addresses and Virtual Domains straight on the filesystem – very handy by the way for administration much better than when you have a Qmail Mail server configured to store its Mailboxes within MySQL / PostgreSQL or other Database server – because simple vpopmail configured to play nice with Qmail and store all user emails directly on Filesystem (though considered more insecure the email correspondence can be easily red, if the server is hacked it is much better managable for a small and mid-sized mailserver) or have inherited them from another sys admin and you wonder how to redirect a single Mailbox:

(under domain lets say domain's email  my-server1.com should forward to to SMTP domain my-server-whatever2.com (e.g. your-email-username@server-whatever1.com is supposed to forward to your-email-username2@server-whatever2.com).
To achieve it create new file called .qmail

Under the Qmail or VirtualDomain location for example:

/var/qmail/mailnames/myserver1.com/username/.qmail


e.g
 

root@qmail-server:~# vim /var/qmail/mailnames/myserver1.com/your-email-username/.qmail
&your-email-username@server-whatever1.com

your-email-username@example1.com
/home/vpopmail/domains/server-whatever2.com/your-email-username/Maildir/


!!! NOTE N.B. !!! the last slash / after Maildir (…Maildir/) is important to be there otherwise mail will not get delivered
That's all now send a test email, just to make sure redirection works properly, assuming the .qmail file is created by root, by default the file permissions will be with privileges root:root.

Note
 

That shouldn't be a problem at all. That's all now enjoy emails being dropped out to the second mail 🙂


Check Windows install date / Howto find install time and date / Check how old is Windows

Sunday, October 22nd, 2017

how-to-find-windows-install-date-change-windows-install-date-change-file-folder-creation-date-howto

Just like us people operating systems have age, they have stages of young, teenage, grow up and old 🙂

Finding out how old is Windows as Operating System is important task for Windows system administrator and Tech support and can help you decide whether the OS requires a fresh reinstall as Windows is known historically to start misbehaving with its aging and especially for Computer Technicians / Support that have Windows Support clients or for Computer Clubs support guys, it is a among the good practices to re-install Windows every few years (every 3 / 4 years for servers to 7 years for Win Servers) and for Desktop or Gamers PCs the lifecycle of OS often much less, a reinstall is required every 2, 2.5 years or so.

Of course Desktop PC Windows users are much more prone to the requirement for frequent reinstalls, because they tend to install a lot of shit cracked, software games and a lot of ugly stuff, that infests the PC and fills up registry with a lot of broken and useless content.

Finding out, the install date of Programs (Applications) in Windows


1. In registry: HKEY_LOCAL_MACHINESoftwareMicrosoftWindowsCurrentVersionUninstall

InstallDate
YYYYMMDD (eg 20090301 for here March 1, 2009)


2. Through Control Panel -> Programs and Features

From Column:

"Installed on"


Determine the install date of Windows
 

1. In command line you have to issue:
 

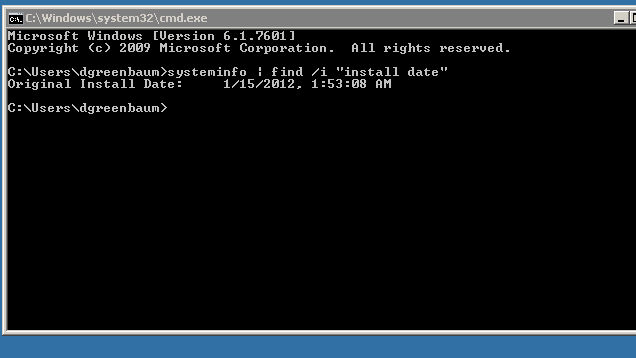
systeminfo|find /i "original"


systeminfo-find-original-windows-server-screenshot-get-windows-install-date-howto

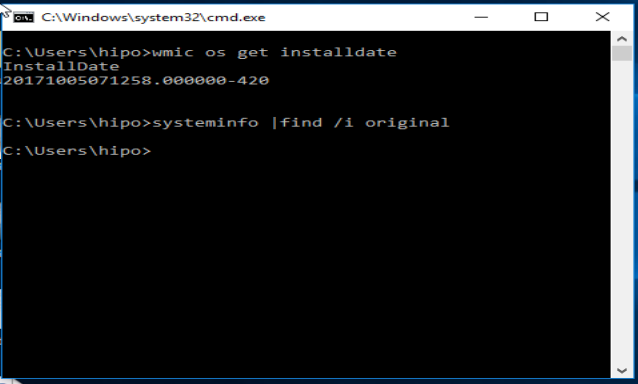
Note that this command will work on Windows Servers 2003, 2007, 2010 and Windows XP, 7, 8 but will show empty result on Windows 10


2. In cmd (command prompt):
 

WMIC OS GET installdate


systeminfo-find-original-windows-server-screenshot-get-windows-install-date-howto1


Reult you will get will be like:
20131019011658

Deciphered this Windows install date is on: 2013(year) 10(month) 19(date) 01(hour) 16(minutes) 58(seconds)
 

3. Another way to get the OS install date via Windows Registers:


HKLMSOFTWAREMicrosoftWindows NTCurrentVersionInstallDate


You will find  therea record number like 1414160971, to get the actual date you have to convert that to decimal
Конвертира се в decimal, и примерно излиза: 1414160971

To convert for those who have GNU / Linux or *BSD at hand the easiest way to convert it is to use below command that converts from unix timestampt to readable date command output:


echo 1414160971 | gawk '{print strftime("%c", $0)}'
24.10.2014 (fr) 17:29:31 EEST


For those that doesn't have GNU / Linux at hand you can use this online tool for conversion unix timestamp to readable output


How to edit creation date, and date of file or folder edit in Windows?

Как да се редактира дата на създаване, дата на редактиране на файл или папка под Windows:

Well why would you want to change the creation date of Windows install or creation date of file or folder edit in Windows?
Well just for the fun or because it can 🙂

Actually a lot of Windows white hats and mostly Script Kiddies (malicious crackers) do use this feature to falsify changed files in Windows lets say system files or any other Windows file, sometimes dumping the install date could be useful in computer data theft investigations or by crackers (please don't mix it with hackers, because term hacker is to be coined for a genius programmers and playful people).

It is possible to do a lot if not everything via Windows registry but perhaps the best way is to use a simple tool Attribute Changer, that is capable to change Windows file, folder and windows install creation date.
 

Check Windows Operating System install date, Full list of installed and uninstalled programs from command line / Check how old is your Windows installation?

Tuesday, March 29th, 2016

when-was-windows-installed-check-howto-from-command-line
Sometimes when you have some inherited Windows / Linux OS servers or Desktops, it is useful to be aware what is the Operating System install date. Usually the install date of the OS is closely to the date of purchase of the system this is especially true for Windows but not necessery true for Liunx based installs.

Knowing the install date is useful especially if you're not sure how outdated is a certain operating system. Knowing how long ago a current installation was performed could give you some hints on whether to create a re-install plans in order to keep system security up2date and could give you an idea whether the system is prone to some common errors of the time of installation or security flaws.


1. Check out how old is Windows install?

Finding out the age of WIndows installation can be performed across almost all NT 4.0 based Windowses and onwards, getting Winblows install date is obtained same way on both Windows XP / Vista/  7  and 8.

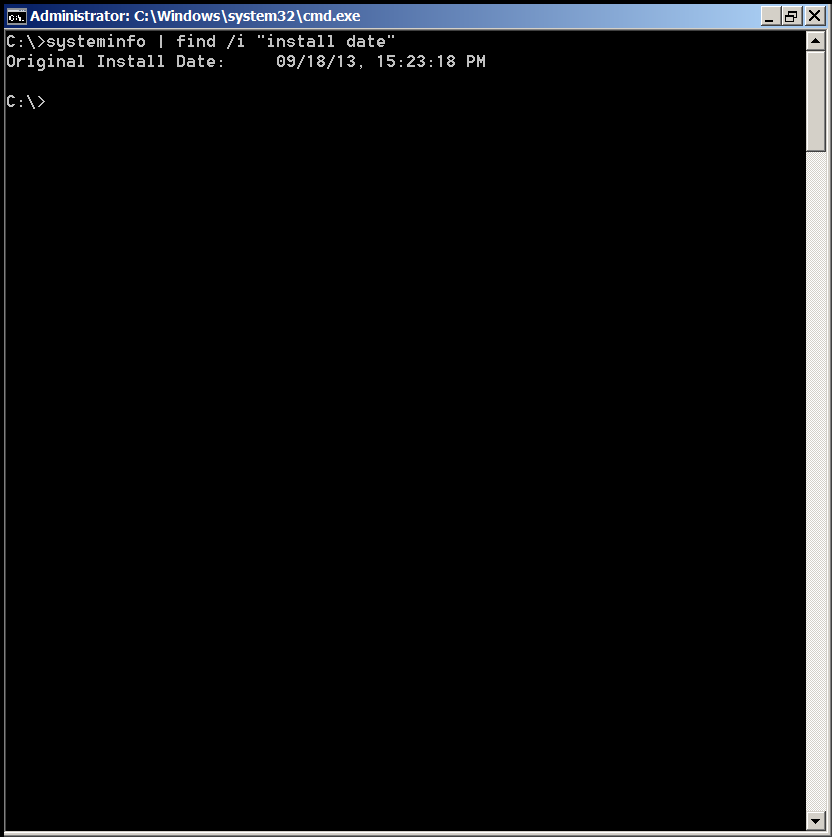
Besides many useful things such as detailed information about the configuration of your PC / notebook systeminfo could also provide you with install date, to do so just run from command line (cmd.exe).
 

C:\Users\hipo> systeminfo | find /i "install date"
Original Install Date:     09/18/13, 15:23:18 PM


check-windows-os-install-date-from-command-line-howto-screenshot

If you need to get the initial Windows system install date however it might be much better to use WMIC command to get the info:


C:\Users\hipo>WMIC OS GET installdate
InstallDate
20130918152318.000000+180


The only downside of using WMIC as you can see is it provides the Windows OS install date in a raw unparsed format, but for scripters that's great.

2. Check WIndows Installed and Uinstalled software and uptime from command line

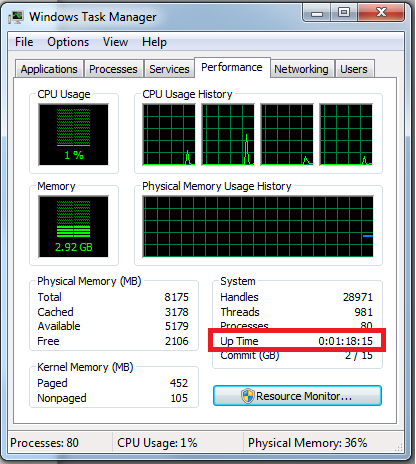
One common other thing next to Windows install date is what is the Windows uptime, the easiest way to get that is to run Task Manager in command line run taskmgr

windows-task-manager-how-to-check-windows-operating-system-uptime-easily

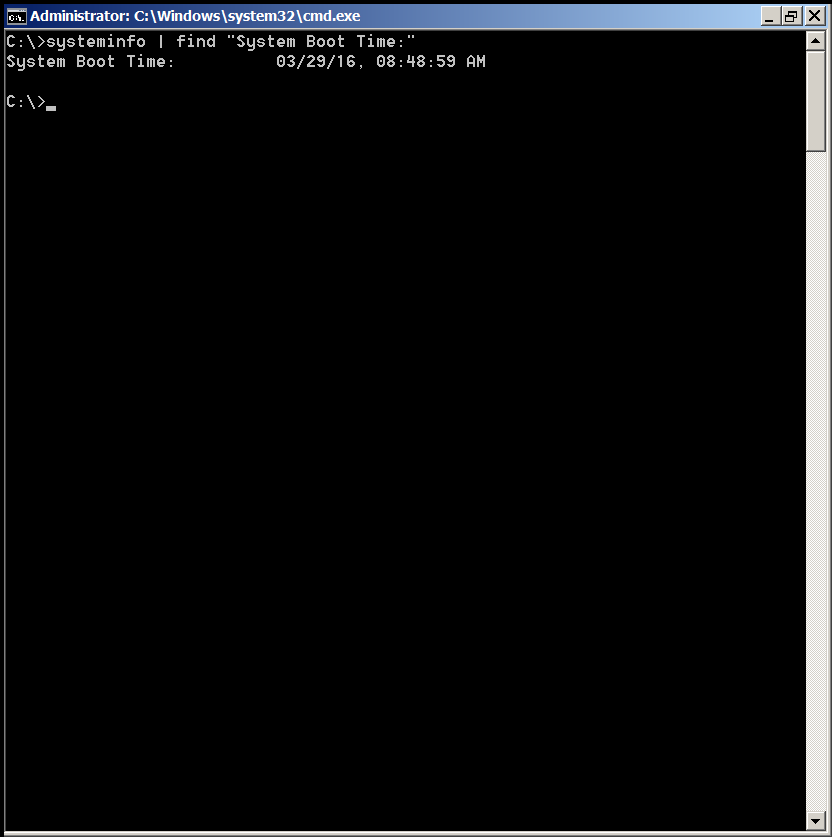
For those who want to get the uptime from windows command line for scripting purposes, this can be done again with systeminfo cmd, i.e.:


C:\> systeminfo | find "System Boot Time:"
System Boot Time:          03/29/16, 08:48:59 AM


windows-os-command-to-get-system-uptime-screenshot

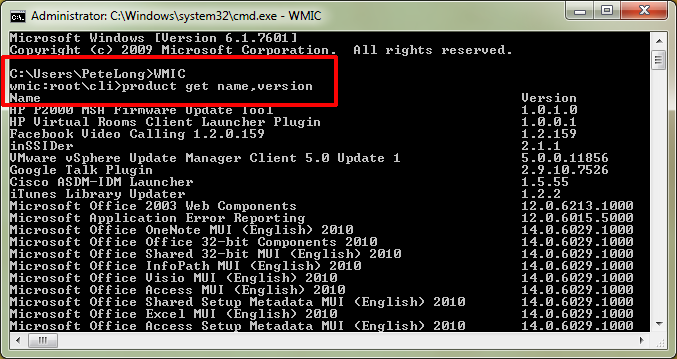
Other helpful Windows command liners you might want to find out about is getting all the Uninstalled and Installed programs from command line this again is done with WMIC


C:\> wmic /OUTPUT:my_software.txt product get name


get-a-full-list-of-installed-software-programs-on-windows-xp-vista-7-8-command-howto-screenshot

Alternative way to get a full list of installed software on Windows OS is to use Microsoft/SysInternals psinfo command:


C:\> psinfo -s > software.txt
C:\> psinfo -s -c > software.csv


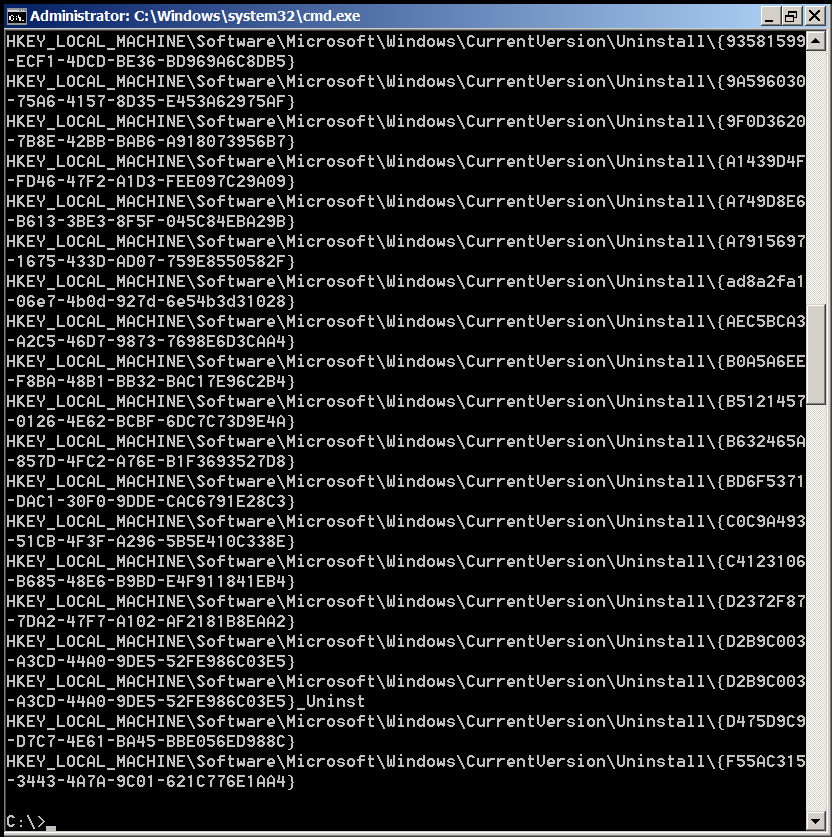
If you need to get a complete list of Uinstalled Software using command line (e.g. for batch scripting) purposes, you can query that from Windows registry, like so:


C:\>reg query HKEY_LOCAL_MACHINE\Software\Microsoft\Windows\CurrentVersion\Uninstall


Command Output will be something like on below shot:

windows-OS-show-get-full-list-of-uninstalled-programs-using-a-command-line-screenshot

Well that's all folks 🙂


Remove string line from file on Linux and BSD – Delete entire line with string from file

Tuesday, March 15th, 2016

linux-remove-lines-containing-string-with-sed

If you're already used too using grep -v "sometring" filename to print everything from a file without the certain grepped string output and you want to do the same to delete lines based on strings without having to output the grepped string to a file and then overwritting the original file:
 

grep -v 'whatever' filename > filename1
mv filename1 filename


A much better way to delete an whole line containing a string match from a file is to use sed
sed
should be the tool of choice especially if you're scripting because sed is especially made for such batch edittings.

Here is how to do delete an entire line based on a given string:


sed –in-place '/some string to search and delete/d' myfilename


It might be a good idea to also create backups just to make sure something doesn't get deleted incidently to do use:

sed –in-place=.bak '/some string to search and delete/d' myfilename

If you need to wipe out an exact string from all files within a folder you might use a for loop or perl (some good examples check my previous article here)

In short to use bash's for loop here is how to backup and remove all lines with a string match within all files within a Linux directory:


for f in *.txt; do sed –in-place '/some string/d'
"$f"; done
find -name '*.txt' -exec sed –in-place=.bak '/some
string/d' "{}" ';'


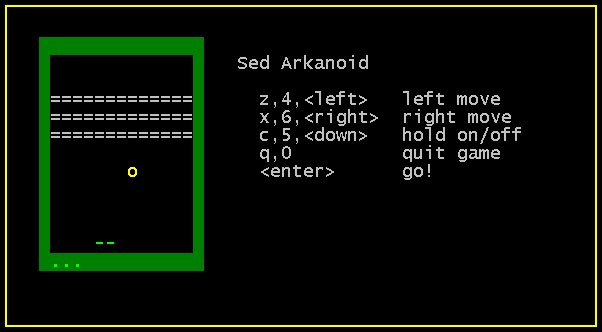
BTW SED is really rich editor and some people got so much into it that there is even a sed written text (console) version of arkanoid 🙂

sed-text-editor-written-arkanoid-game-linux-bsd

If you want to break the ice and get some fun in your boring sysadmin life get sed arkanoid code from here.
I have it installed under pc-freak.net free ASCII Games entertainment service, so if you want to give it a try just login and give a try.

Enjoy 🙂

Windows: command to show CPU info, PC Motherboard serial number and BIOS details

Wednesday, March 2nd, 2016

windows-command-to-show-motherboard-bios-and-cpu-serials-and-specific-info-with-wmic

Getting CPU information, RAM info and other various hardware specifics on Windows from the GUI interface is pretty trivial from Computer -> Properties
even more specifics could be obtained using third party Windows software such as CPU-Z

Perhaps there are plenty of many other ones to get and log info about hardware on PC or notebook system, but for Windwos sysadmins especially ones who are too much in love with command prompt way of behaving and ones who needs to automatizate server deployment processes with BATCH (.BAT)  scripts getting quickly info about hardware on freshly installed remote host Win server with no any additional hardware info tools, you'll be happy to know there are command line tools you can use to get extra hardware information on Windows PC / server:

The most popular tool available to present you with some basic hardware info is of course systeminfo


C:\> systeminfo

Host Name:                 REMHOST
OS Name:                   Microsoft Windows Server 2012 R2 Standard
OS Version:                6.3.9600 N/A Build 9600
OS Manufacturer:           Microsoft Corporation
OS Configuration:          Member Server
OS Build Type:             Multiprocessor Free
Registered Owner:          Registrar
Registered Organization:   Registrar
Product ID:                00XXX-X0000-00000-XX235
Original Install Date:     17/02/2016, 11:38:39
System Boot Time:          18/02/2016, 14:16:48
System Manufacturer:       VMware, Inc.
System Model:              VMware Virtual Platform
System Type:               x64-based PC
Processor(s):              1 Processor(s) Installed.
                           [01]: Intel64 Family 6 Model 45 Stepping 7 GenuineInt
el ~2600 Mhz
BIOS Version:              Phoenix Technologies LTD 6.00, 11/06/2014
Windows Directory:         C:\Windows
System Directory:          C:\Windows\system32
Boot Device:               \Device\HarddiskVolume1
System Locale:             de;German (Germany)
Input Locale:              de;German (Germany)
Time Zone:                 (UTC+01:00) Amsterdam, Berlin, Bern, Rome, Stockholm,
 Vienna
Total Physical Memory:     4,095 MB
Available Physical Memory: 2,395 MB
Virtual Memory: Max Size:  10,239 MB
Virtual Memory: Available: 8,681 MB
Virtual Memory: In Use:    1,558 MB
Page File Location(s):     C:\pagefile.sys
Domain:                    dom1.domain.com
Logon Server:              \\DOM
Hotfix(s):                 148 Hotfix(s) Installed.
                           [01]: KB2894852
                           [02]: KB2894856
                           [03]: KB2918614
                           [04]: KB2919355
…..


Now though systeminfo's hardware details and installed Windows KBXXXXX OS Hotfix patches are getting lists the command does not provide you with info about  system’s BIOS, thus to get this info you'll have to use also wmic (Windows Management Instrumentation Command).


So What Is WMIC?

WMIC extends WMI for operation from several command-line interfaces and through batch scripts. Before WMIC, you used WMI-based applications (such as SMS), the WMI Scripting API, or tools such as CIM Studio to manage WMI-enabled computers. Without a firm grasp on a programming language such as C++ or a scripting language such as VBScript and a basic understanding of the WMI namespace, do-it-yourself systems management with WMI was difficult. WMIC changes this situation by giving you a powerful, user-friendly interface to the WMI namespace.

WMIC is more intuitive than WMI, in large part because of aliases. Aliases take simple commands that you enter at the command line, then act upon the WMI namespace in a predefined way, such as constructing a complex WMI Query Language (WQL) command from a simple WMIC alias Get command. Thus, aliases act as friendly syntax intermediaries between you and the namespace. For example, when you run a simple WMIC command such as

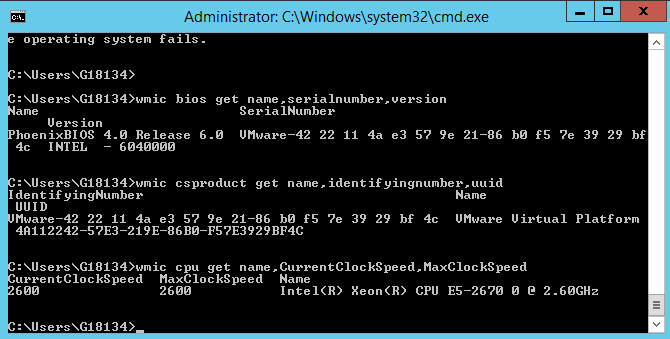
Here is how to wmic to get PC Motherboard serial numbers, CPU and BIOS details:


C:\> wmic bios get name,serialnumber,version


Above will print  name if your BIOS, current version and it’s serial number if there is any.

If you need to get more info about the specific Motherboard installed on host:


C:\> wmic csproduct get name,identifyingnumber,uuid


This command will show motherboard modification and it’s UUID

If you want to quickly get what is Windows running hardware CPU clock speed
 

C:\> wmic cpu get name,CurrentClockSpeed,MaxClockSpeed


Also if you have turbo boost CPUs above command will help you find what’s the Max Clock Speed your system is capable of for the current hardware configuration.

If you do have dynamic clock speed running, then add this line, will refresh and monitor the Clock speed every 1 second.
 

C:\> wmic cpu get name,CurrentClockSpeed,MaxClockSpeed /every:1

Actually wmic is a great tool

Mount remote Linux SSHFS Filesystem harddisk on Windows Explorer SWISH SSHFS file mounter and a short evaluation on what is available to copy files to SSHFS from Windows PC

Monday, February 22nd, 2016

swish-mount-and-copy-files-from-windows-to-linux-via-sshfs-mount

I'm forced to use Windows on my workbook and I found it really irritating, that I can't easily share files in a DropBox, Google Drive, MS OneDrive, Amazon Storage or other cloud-storage free remote service. etc.
I don't want to use DropBox like non self-hosted Data storage because I want to keep my data private and therefore the only and best option for me was to make possible share my Linux harddisk storage
dir remotely to the Windows notebook.

I didn't wanted to setup some complex environment such as Samba Share Server (which used to be often a common option to share file from Linux server to Windows), neither wanted to bother with  installing FTP service and bother with FTP clients, or configuring some other complex stuff such as WebDav – which BTW is an accepted and heavily used solution across corporate clients to access read / write files on a remote Linux servers.
Hence, I made a quick research what else besides could be used to easily share files and data from Windows PC / notebook to a home brew or professional hosting Linux server.

It turned out, there are few of softwares that gives a similar possibility for a home lan small network Linux / Windows hybrid network users such, here is few of the many:

  • SyncThingSyncthing is an open-source file synchronization client/server application, written in Go, implementing its own, equally free Block Exchange Protocol. The source code's content-management repository is hosted on GitHub


    syncthing-logo

  • OwnCloud – ownCloud provides universal access to your files via the web, your computer or your mobile devices


    owncloud-logo

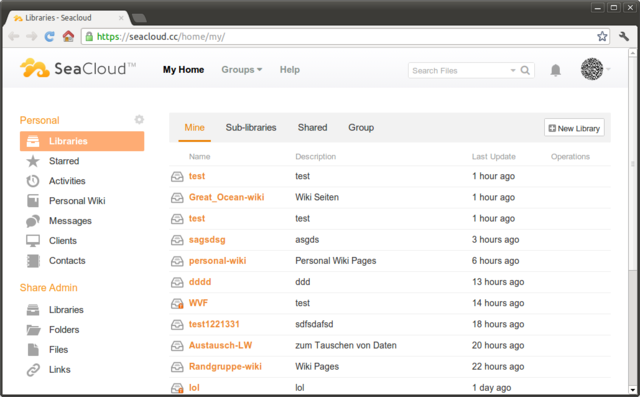
  • Seafile – Seafile is a file hosting software system. Files are stored on a central server and can be synchronized with personal computers and mobile devices via the Seafile client. Files can also be accessed via the server's web interface


seafile-client-in-browser

I've checked all of them and give a quick try of Syncthing which is really easy to start, just download the binary launch it and configure it under https://Localhost:8385 URL from a browser on the Linux server.
Syncthing seemed to be nice and easy to configure solution to be able to Sync files between Server A (Windows) and Server B(Linux) and guess many would enjoy it, if you want to give it a try you can follow this short install syncthing article.
However what I didsliked in both SyncThing and OwnCloud and Seafile and all of the other Sync file solutions was, they only supported synchronization via web and didn't seemed to have a Windows Explorer integration and did required
the server to run more services, posing another security hole in the system as such third party softwares are not easily to update and maintain.

Because of that finally after rethinking about some other ways to copy files to a locally mounted Sync directory from the Linux server, I've decided to give SSHFS a try. Mounting SSHFS between two Linux / UNIX hosts is
quite easy task with SSHFS tool

In Windows however the only way I know to transfer files to Linux via SSHFS was with WinSCP client and other SCP clients as well as the experimental:

As well as few others such as ExpandDrive, Netdrive, Dokan SSHFS (mirrored for download here)
I should say that I first decided to try copying few dozen of Gigabyte movies, text, books etc. using WinSCP direct connection, but after getting a couple of timeouts I was tired of WinSCP and decided to look for better way to copy to remote Linux SSHFS.
However the best solution I found after a bit of extensive turned to be:

SWISH – Easy SFTP for Windows

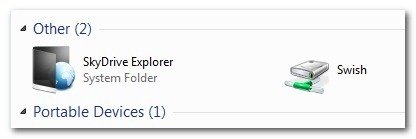
Swish is very straight forward to configure compared to all of them you download the .exe which as of time of writting is at version 0.8.0 install on the PC and right in My Computer you will get a New Device called Swish next to your local and remote drives C:/ D:/ , USBs etc.

swish-new-device-to-appear-in-my-computer-to-mount-sshfs

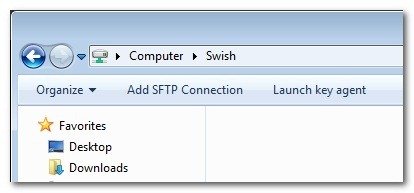
As you see in below screenshot two new non-standard buttons will Appear in Windows Explorer that lets you configure SWISH

windows-mount-sshfs-swish-add-sftp-connection-button-screenshot

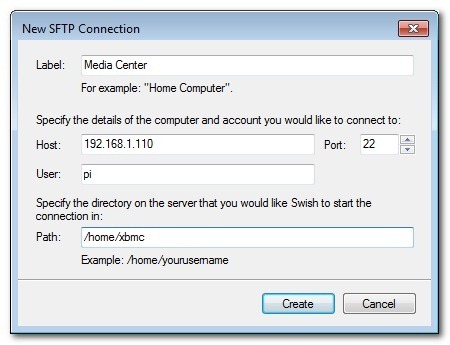
Next and final step before you have the SSHFS remote Linux filesystem visible on Windows Xp / 7 / 8 / 10 is to fill in remote Linux hostname address (or even better fill in IP to get rid of possible DNS issues), UserName (UserID) and Direcory to mount.

swish-new-fill-in-dialog-to-make-new-linux-sshfs-mount-directory-possible-on-windows

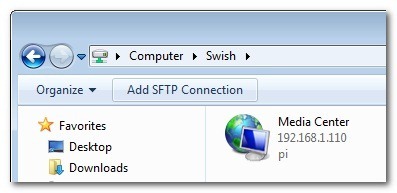
Then you will see the SSHFS moutned:

swish-sshfs-mounted-on-windows

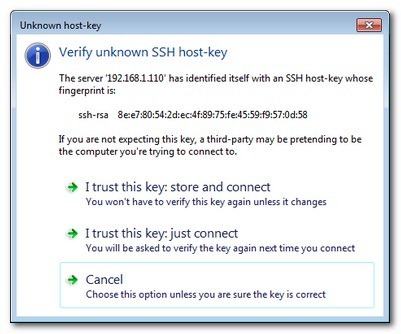
You will be asked to accept the SSH host-key as it used to be unknown so far

swish-mount-sshfs-partition-on-windows-from-remote-linux-accept-key

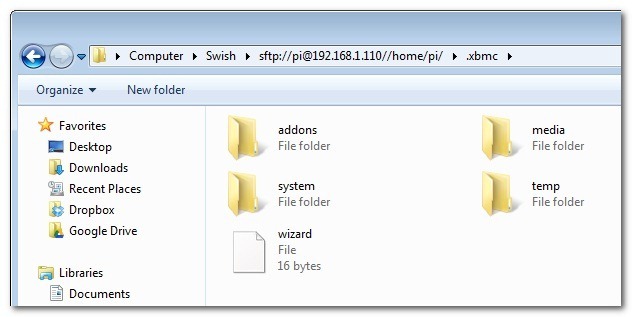
That's it now you will see straight into Windows Explorer the remote Linux SSHFS mounted:

remote-sshfs-linux-filesystem-mounted-in-windows-explorer-with-swish

Once setupped a Swish connection to copy files directly to it you can use the Send to Embedded Windows dialog, as in below screenshot

swish-send-to-files-windows-screenshot

The only 3 problem with SWISH are:

1. It doesn't support Save password, so on every Windows PC reboot when you want to connect to remote Linux SSHFS, you will have to retype remote login user pass.
Fron security stand point this is not such a bad thing, but it is a bit irritating to everytime type the password without an option to save permanently.
The good thing here is you can use Launch Key Agent
as visible in above screenshot and set in Putty Key Agent your remote host SSH key so the passwordless login will work without any authentication at
all however, this might open a security hole if your Win PC gets infected by virus, which might delete something on remote mounted SSHFS filesystem so I personally prefer to retype password on every boot.

2. it is a bit slow so if you're planning to Transfer large amounts of Data as hundreds of megabytes, expect a very slow transfer rate, even in a Local  10Mbit Network to transfer 20 – 30 GB of data, it took me about 2-3 hours or so.
SWISH is not actively supported and it doesn't have new release since 20th of June 2013, but for the general work I need it is just perfect, as I don't tent to be Synchronizing Dozens of Gigabytes all the time between my notebook PC and the Linux server.

3. If you don't use the established mounted connection for a while or your computer goes to sleep mode after recovering your connection to remote Linux HDD if opened in Windows File Explorer will probably be dead and you will have to re-enable it.

For Mac OS X users who want to mount / attach remote directory from a Linux partitions should look in fuguA Mac OS X SFTP, SCP and SSH Frontend

I'll be glad to hear from people on other good ways to achieve same results as with SWISH but have a better copy speed while using SSHFS.