Posts Tagged ‘com’

Djigan – Derzi mne za Ruku (Hold me for the hand) – Nice Russian modern disco pop song

Thursday, January 24th, 2013

In Vkotankte (Vk.com) – or the so called Russian Facebook there is a functionality to listen music while putting info on your wall or just chatting with friends. It's very, very handy functionality which facebook lacks. There while listening to some random Russian songs I come across a very, very nice modern disco pop song, I'm sure many others will like it. Too sad people part of western culture knows nothing of what is happening in Russia and this part of the world. There is plenty of nice Russian cultural things and modern songs to listen to.
 

Djigan – Hold me for the hand (Derzi mne za ruku) / Джиган – Держи меня за руку

Did you that every single day there are …

Saturday, April 7th, 2012

Do you know that every single day there are:

  • 150 Million Blogs being read
  • 60 Million New Facebook Status Updates
  • 140 Million New "Treets" …
  • 2 Million New Videos Posted to Youtube per day
  • 3.3 Billion! Product and Information Searches
  • 188 Billion! Emails Sent …


This statistics were sent to me just few weeks, ago by a friend. I have no clue where he got the statistics, but the numbers are really amazing. From a business perspective point of view this numbers are tremendously HIGH! Nowadays only about 2.5 billion people are actively using the internet daily.

This means more than half of the humanity is still about to join using the internet in the 10 or 15 years to come. Though the continuous use of internet has a very bad impact on us. It is a tremendously big business opportunity field. With this said definitely business innovative people and enterpreneurs should reconsider, there strategic plans for potential products and extend or include the internet in anything they do in order to maximize profits.

All this is just news for anyone who is involved somehow actively with the net (like me), so system admins, web designers, programmers, use your brains and start making money from the internet. If one doesn't start with monetarizing his high tech skills, its quite likely some bad tied suit guy took the lead and made his millions or billions  on our back 🙂

Tools to scan a Linux / Unix Web server for Malware and Rootkits / Lynis and ISPProtect – clean Joomla / WordPress and other CMS for malware and malicious scripts and trojan codes

Monday, March 14th, 2016

Linux-BSD-Unix-Rootkit-Malware-XSS-Injection-spammer-scripts-clean-howto-manual

If you have been hacked or have been suspicious that someone has broken up in some of the shared web hosting servers you happent o manage you already probably have tried the server with rkhuter, chroot and unhide tools which gives a general guidance where a server has been compromised

However with the evolution of hacking tools out there and the boom of Web security XSS / CSS / Database injections and PHP scripts vulnerability catching an intruder especially spammers has been becoming more and more hard to achieve.

Just lately a mail server of mine's load avarage increased about 10 times, and the CPU's and HDD I/O load jump over the sky.
I started evaluating the situation to find out what exactly went wrong with the machine, starting with a hardware analysis tools and a physical check up whether all was fine with the hardware Disks / Ram etc. just to find out the machine's hardware was working perfect.
I've also thoroughfully investigated on Logs of Apache, MySQL, TinyProxy and Tor server and bind DNS and DJBDns  which were happily living there for quite some time but didn't found anything strange.

Not on a last place I investigated TOP processes (with top command) and iostat  and realized the CPU high burst lays in exessive Input / Output of Hard Drive. Checking the Qmail Mail server logs and the queue with qmail-qstat was a real surprise for me as on the queue there were about 9800 emails hanging unsent, most of which were obviously a spam, so I realized someone was heavily spamming through the server and started more thoroughfully investigating ending up to a WordPress Blog temp folder (writtable by all system users) which was existing under a Joomla directory infrastructure, so I guess someone got hacked through the Joomla and uploaded the malicious php spammer script to the WordPress blog. I've instantly stopped and first chmod 000 to stop being execuded and after examing deleted view73.php, javascript92.php and index8239.php which were full of PHP values with binary encoded values and one was full of encoded strings which after being decoding were actually the recepient's spammed emails.
BTW, the view*.php javascript*.php and index*.php files were owned by www-data (the user with which Apache was owned), so obviously someone got hacked through some vulnerable joomla or wordpress script (as joomla there was quite obscure version 1.5 – where currently Joomla is at version branch 3.5), hence my guess is the spamming script was uploaded through Joomla XSS vulnerability).

As I was unsure wheteher the scripts were not also mirrored under other subdirectories of Joomla or WP Blog I had to scan further to check whether there are no other scripts infected with malware or trojan spammer codes, webshells, rootkits etc.
And after some investigation, I've actually caught the 3 scripts being mirrored under other webside folders with other numbering on filename view34.php javascript72.php, index8123.php  etc..

I've used 2 tools to scan and catch malware the trojan scripts and make sure no common rootkit is installed on the server.

1. Lynis (to check for rootkits)
2. ISPProtect (Proprietary but superb Website malware scanner with a free trial)

1. Lynis – Universal security auditing tool and rootkit scanner

Lynis is actually the well known rkhunter, I've used earlier to check servers BSD and Linux servers for rootkits.
To have up-to-date version of Lynis, I've installed it from source:
 

cd /tmp
wget https://cisofy.com/files/lynis-2.1.1.tar.gz
tar xvfz lynis-2.1.1.tar.gz
mv lynis /usr/local/
ln -s /usr/local/lynis/lynis /usr/local/bin/lynis


Then to scan the server for rootkits, first I had to update its malware definition database with:
 

lynis update info


Then to actually scan the system:
 

lynis audit system


Plenty of things will be scanned but you will be asked on a multiple times whether you would like to conduct different kind fo system services and log files, loadable kernel module rootkits and  common places to check for installed rootkits or server placed backdoors. That's pretty annoying as you will have to press Enter on a multiple times.

lynis-asking-to-scan-for-rootkits-backdoors-and-malware-your-linux-freebsd-netbsd-unix-server

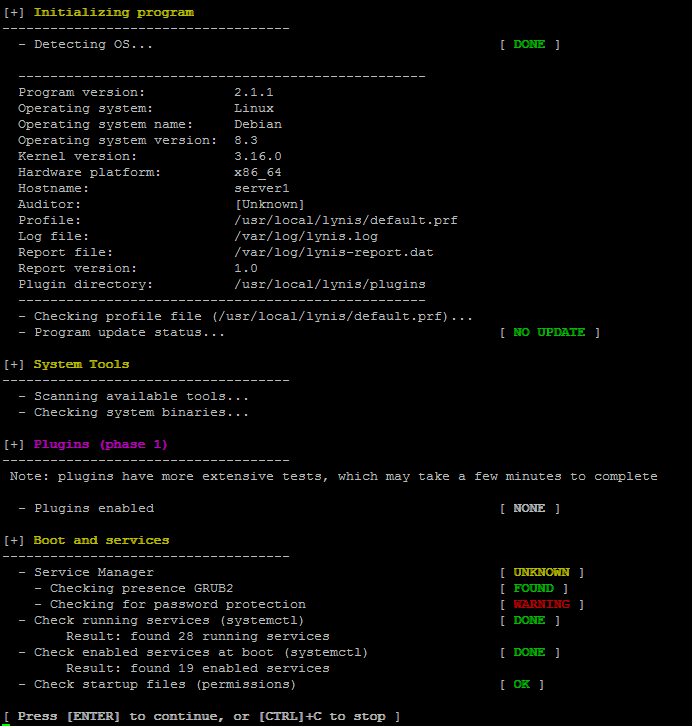
Once scan is over you will get a System Scan Summary like in below screenshot:

lynis-scanned-server-for-rootkit-summer-results-linux-check-for-backdoors-tool

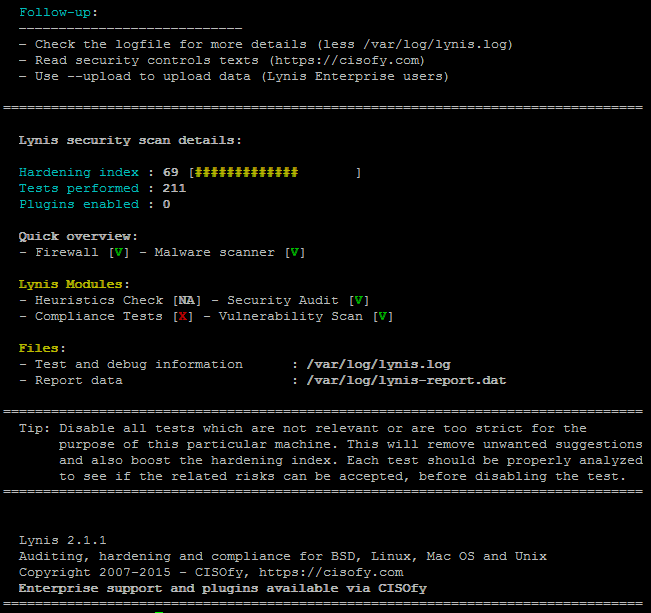
Lynis suggests also a very good things that might be tampered to make the system more secure, so using some of its output when I have time I'll work out on hardening all servers.

To prevent further incidents and keep an eye on servers I've deployed Lynis scan via cron job once a month on all servers, I've placed under a root cronjob on every first dae of month in following command:


server:~# crontab -u root -e
0 3 1 * * /usr/local/bin/lynis –quick 2>&1 | mail -s "lynis output of my server" admin-mail@my-domain.com)


2. ISPProtect – Website malware scanner

ISPProtect is a malware scanner for web servers, I've used it to scan all installed  CMS systems like WordPress, Joomla, Drupal etc.
ISPProtect is great for PHP / Pyhon / Perl and other CMS based frameworks.
ISPProtect contains 3 scanning engines: a signature based malware scanner, a heuristic malware scanner, and a scanner to show the installation directories of outdated CMS systems.
Unfortunately it is not free software, but I personally used the FREE TRIAL option  which can be used without registration to test it or clean an infected system.
I first webserver first locally for the infected site and then globally for all the other shared hosting websites.

As I wanted to check also rest of hosted websites, I've run ISPProtect over the all bunch of installed websites.
Pre-requirement of ISPProtect is to have a working PHP Cli and Clamav Anti-Virus installed on the server thus on RHEL (RPM) based servers make sure you have it installed if not:
 

server:~# yum -y install php

server:~# yum -y install clamav


Debian based Linux servers web hosting  admins that doesn't have php-cli installed should run:
 

server:~# apt-get install php5-cli

server:~# apt-get install clamav


Installing ISPProtect from source is with:

mkdir -p /usr/local/ispprotect
chown -R root:root /usr/local/ispprotect
chmod -R 750 /usr/local/ispprotect
cd /usr/local/ispprotect
wget http://www.ispprotect.com/download/ispp_scan.tar.gz
tar xzf ispp_scan.tar.gz
rm -f ispp_scan.tar.gz
ln -s /usr/local/ispprotect/ispp_scan /usr/local/bin/ispp_scan


To initiate scan with ISPProtect just invoke it:
 

server:~# /usr/local/bin/ispp_scan


ispprotect-scan-websites-for-malware-and-infected-with-backdoors-or-spamming-software-source-code-files

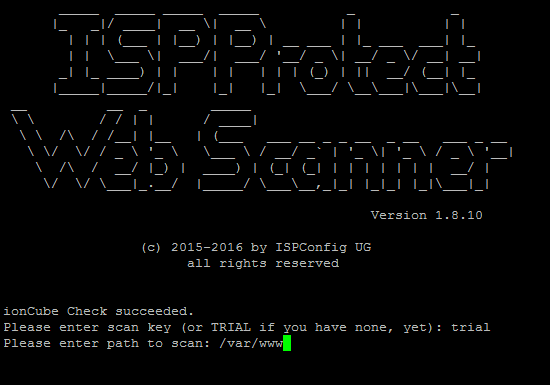
I've used it as a trial

Please enter scan key:  trial
Please enter path to scan: /var/www

You will be shown the scan progress, be patient because on a multiple shared hosting servers with few hundred of websites.
The tool will take really, really long so you might need to leave it for 1 hr or even more depending on how many source files / CSS / Javascript etc. needs to be scanned.

Once scan is completed scan and infections found logs will be stored under /usr/local/ispprotect, under separate files for different Website Engines and CMSes:

After the scan is completed, you will find the results also in the following files:
 

Malware => /usr/local/ispprotect/found_malware_20161401174626.txt
Wordpress => /usr/local/ispprotect/software_wordpress_20161401174626.txt
Joomla => /usr/local/ispprotect/software_joomla_20161401174626.txt
Drupal => /usr/local/ispprotect/software_drupal_20161401174626.txt
Mediawiki => /usr/local/ispprotect/software_mediawiki_20161401174626.txt
Contao => /usr/local/ispprotect/software_contao_20161401174626.txt
Magentocommerce => /usr/local/ispprotect/software_magentocommerce_20161401174626.txt
Woltlab Burning Board => /usr/local/ispprotect/software_woltlab_burning_board_20161401174626.txt
Cms Made Simple => /usr/local/ispprotect/software_cms_made_simple_20161401174626.txt
Phpmyadmin => /usr/local/ispprotect/software_phpmyadmin_20161401174626.txt
Typo3 => /usr/local/ispprotect/software_typo3_20161401174626.txt
Roundcube => /usr/local/ispprotect/software_roundcube_20161401174626.txt


ISPProtect is really good in results is definitely the best malicious scripts / trojan / trojan / webshell / backdoor / spammer (hacking) scripts tool available so if your company could afford it you better buy a license and settle a periodic cron job scan of all your servers, like lets say:


server:~# crontab -u root -e
0 3  1 * *   /usr/local/ispprotect/ispp_scan –update && /usr/local/ispprotect/ispp_scan –path=/var/www –email-results=admin-email@your-domain.com –non-interactive –scan-key=AAA-BBB-CCC-DDD


Unfortunately ispprotect is quite expensive so I guess most small and middle sized shared hosting companies will be unable to afford it.
But even for a one time run this tools worths the try and will save you an hours if not days of system investigations.
I'll be glad to hear from readers if aware of any available free software alternatives to ISPProtect. The only one I am aware is Linux Malware Detect (LMD).
I've used LMD in the past but as of time of writting this article it doesn't seems working any more so I guess the tool is currently unsupported / obsolete.


Use mac PC built-in camera to make / take pictures on Mac OS X macbookair notebook with Photo Booth

Friday, February 26th, 2016

take-picture-or-video-with-built-in-camera-on-MacOSX-PhotoboothLOGO

It seems we lost our Good high quality Digital Camera somewhere and I was in need urgently to make a good quality photo (my ZTE Phone) has a very bad camera, so I got the idea to use Macbookair's camera as it has better
resolution to picture my present a  Tank Tort 🙂 hand made by my wife as a present for the Day of the Defender of the Fatherland which is a major feast in Russia, Belarus and many of the ex-Soviet Union members communist countries.

Actually using build in camare in MacBookAir is a handy thing for people mising at the moment a good high quality digital camera as it is thin and light and build in MacBook cam can be used to make Videos and Pictures exactly the same way
as an ordinary Tablet Computer is used so commonly nowadays by many:

In other words I needed for the Mac OS X equivalent to Cheese's (Photo and Video) capturer program for Linux.

Luckily for people interested in using their Mac OS notebook as a amateur camera this is easy by using default shipped Mac Application called:

Photo Booth app

To Launch Photo Booth app it just look it up in Finder and double click it:

PhotoBooth-how-to-take-photos-on-macosx

Clicking the large red button underneath the preview area will take a picture after an optional countdown.

Tort Tank of Svetka

Besides being able to capture Video and Pictures from Mac's camera it could add also some nice effects to taken pictures and videos (supports a basic video editing) features and effects.

The effects you can choose are are: Sepia, Black and White, Glow, Comic Book, Normal, Colored Pencil, Thermal Camera, X-Ray, and Pop Art. There are also effects that change the person in the picture using these effects: Bulge, Dent, Twirl, Squeeze, Mirror, Light Tunnel, Fish Eye, and Stretch. Actually  photographic filters of Photo Booth are very similar to Adobe Photoshop.

make-picture-on-mac-photobooth-effects-screenshot
By default Photo Booth will create picture, howver

Photo Booth saves your photos as JPEG files in a folder named Photo Booth, located in your home folder.

Choose File > Reveal in Finder

to see your picture files.

A much better way to be able to easily see and access all taken Pictures and Videos with Photo Booth is to


open Terminal


and type:

——-


$ cd Pictures
$ ln -s Photo\ Booth\ Library/Pictures/ PhotoBoothPics


This will make Link to pictures be easily accessible from your Finder -> Pictures folder
 
Applying custom photo backgrounds

A very useful feature of Photo Booth is that the user can apply backdrops to provide an effect similar to a green screen. When a backdrop is selected, a message appears telling the user to step away from the camera. Once the background is analyzed, the user steps back in front of the camera and is shown in front of the chosen backdrop.

For people who prefer to take photos using a console program on Mac OS I guess you should take a look at ffpeg
Here is one more snapshot of the Tort Tank snapshot made with the Macbookair of Svetlana 🙂

Tort Tank


P.S. If you like the Tort Tank and you happen to live in Sofia Bulgaria, you can order it  by dropping me a comment with request 🙂

Enjoy ! 🙂

Mount remote Linux SSHFS Filesystem harddisk on Windows Explorer SWISH SSHFS file mounter and a short evaluation on what is available to copy files to SSHFS from Windows PC

Monday, February 22nd, 2016

swish-mount-and-copy-files-from-windows-to-linux-via-sshfs-mount

I'm forced to use Windows on my workbook and I found it really irritating, that I can't easily share files in a DropBox, Google Drive, MS OneDrive, Amazon Storage or other cloud-storage free remote service. etc.
I don't want to use DropBox like non self-hosted Data storage because I want to keep my data private and therefore the only and best option for me was to make possible share my Linux harddisk storage
dir remotely to the Windows notebook.

I didn't wanted to setup some complex environment such as Samba Share Server (which used to be often a common option to share file from Linux server to Windows), neither wanted to bother with  installing FTP service and bother with FTP clients, or configuring some other complex stuff such as WebDav – which BTW is an accepted and heavily used solution across corporate clients to access read / write files on a remote Linux servers.
Hence, I made a quick research what else besides could be used to easily share files and data from Windows PC / notebook to a home brew or professional hosting Linux server.

It turned out, there are few of softwares that gives a similar possibility for a home lan small network Linux / Windows hybrid network users such, here is few of the many:

  • SyncThingSyncthing is an open-source file synchronization client/server application, written in Go, implementing its own, equally free Block Exchange Protocol. The source code's content-management repository is hosted on GitHub


    syncthing-logo

  • OwnCloud – ownCloud provides universal access to your files via the web, your computer or your mobile devices


    owncloud-logo

  • Seafile – Seafile is a file hosting software system. Files are stored on a central server and can be synchronized with personal computers and mobile devices via the Seafile client. Files can also be accessed via the server's web interface


seafile-client-in-browser

I've checked all of them and give a quick try of Syncthing which is really easy to start, just download the binary launch it and configure it under https://Localhost:8385 URL from a browser on the Linux server.
Syncthing seemed to be nice and easy to configure solution to be able to Sync files between Server A (Windows) and Server B(Linux) and guess many would enjoy it, if you want to give it a try you can follow this short install syncthing article.
However what I didsliked in both SyncThing and OwnCloud and Seafile and all of the other Sync file solutions was, they only supported synchronization via web and didn't seemed to have a Windows Explorer integration and did required
the server to run more services, posing another security hole in the system as such third party softwares are not easily to update and maintain.

Because of that finally after rethinking about some other ways to copy files to a locally mounted Sync directory from the Linux server, I've decided to give SSHFS a try. Mounting SSHFS between two Linux / UNIX hosts is
quite easy task with SSHFS tool

In Windows however the only way I know to transfer files to Linux via SSHFS was with WinSCP client and other SCP clients as well as the experimental:

As well as few others such as ExpandDrive, Netdrive, Dokan SSHFS (mirrored for download here)
I should say that I first decided to try copying few dozen of Gigabyte movies, text, books etc. using WinSCP direct connection, but after getting a couple of timeouts I was tired of WinSCP and decided to look for better way to copy to remote Linux SSHFS.
However the best solution I found after a bit of extensive turned to be:

SWISH – Easy SFTP for Windows

Swish is very straight forward to configure compared to all of them you download the .exe which as of time of writting is at version 0.8.0 install on the PC and right in My Computer you will get a New Device called Swish next to your local and remote drives C:/ D:/ , USBs etc.

swish-new-device-to-appear-in-my-computer-to-mount-sshfs

As you see in below screenshot two new non-standard buttons will Appear in Windows Explorer that lets you configure SWISH

windows-mount-sshfs-swish-add-sftp-connection-button-screenshot

Next and final step before you have the SSHFS remote Linux filesystem visible on Windows Xp / 7 / 8 / 10 is to fill in remote Linux hostname address (or even better fill in IP to get rid of possible DNS issues), UserName (UserID) and Direcory to mount.

swish-new-fill-in-dialog-to-make-new-linux-sshfs-mount-directory-possible-on-windows

Then you will see the SSHFS moutned:

swish-sshfs-mounted-on-windows

You will be asked to accept the SSH host-key as it used to be unknown so far

swish-mount-sshfs-partition-on-windows-from-remote-linux-accept-key

That's it now you will see straight into Windows Explorer the remote Linux SSHFS mounted:

remote-sshfs-linux-filesystem-mounted-in-windows-explorer-with-swish

Once setupped a Swish connection to copy files directly to it you can use the Send to Embedded Windows dialog, as in below screenshot

swish-send-to-files-windows-screenshot

The only 3 problem with SWISH are:

1. It doesn't support Save password, so on every Windows PC reboot when you want to connect to remote Linux SSHFS, you will have to retype remote login user pass.
Fron security stand point this is not such a bad thing, but it is a bit irritating to everytime type the password without an option to save permanently.
The good thing here is you can use Launch Key Agent
as visible in above screenshot and set in Putty Key Agent your remote host SSH key so the passwordless login will work without any authentication at
all however, this might open a security hole if your Win PC gets infected by virus, which might delete something on remote mounted SSHFS filesystem so I personally prefer to retype password on every boot.

2. it is a bit slow so if you're planning to Transfer large amounts of Data as hundreds of megabytes, expect a very slow transfer rate, even in a Local  10Mbit Network to transfer 20 – 30 GB of data, it took me about 2-3 hours or so.
SWISH is not actively supported and it doesn't have new release since 20th of June 2013, but for the general work I need it is just perfect, as I don't tent to be Synchronizing Dozens of Gigabytes all the time between my notebook PC and the Linux server.

3. If you don't use the established mounted connection for a while or your computer goes to sleep mode after recovering your connection to remote Linux HDD if opened in Windows File Explorer will probably be dead and you will have to re-enable it.

For Mac OS X users who want to mount / attach remote directory from a Linux partitions should look in fuguA Mac OS X SFTP, SCP and SSH Frontend

I'll be glad to hear from people on other good ways to achieve same results as with SWISH but have a better copy speed while using SSHFS.

Change Skype for Business UI to Lync – Skype for Business Lync Theme / Remove Skype for Business coloroful UI and Switch to Lync simple interface

Wednesday, February 17th, 2016

Revert-skype-for-business-Lync-User-Interface-change-skype-for-business-theme-skin

If you are working in a large corporation such as (HP or HPE – Hewlett Packard Enterprise (HPE is the new splitted company brand name for the Software and Servers division of ex-HP) / IBM / Dell or any other company with the size of top fortune companies and you Computer Domain admistrator has forced your work PC to already use Skype for Business instead of the good tested Lync Client along with the goodies and PROS of having the newer Skype for Business (S4B) as usual for old fashened users like me and the avarage employee the New S4B interface will turn into nightmare with all this circled names and more buttons and the annoying Skype Blue Theme.

For anyone who has even basic idea of design and aesthetics, I believe the default Theme of Skype For Business  will be evaluated as a serious "interface downgrade" compared to the simple looking Interface and White Skin of Lync Client.

With this said it will be logical for the end user like me to desire to customize a bit default S4B Skin to make it more elegant looking like Lync 2013 client but guess what there is a Surprise if you google around, Skype For Business just like the regular Skype client doesn't have integrated support for Skins / Themes.
To make the horror complete, many big corporations are choosing to migrate their Email infrastructure from the classical and well tested Windows Domain with Exchange Server to  Microsoft Office 365 (Cloud services),
which makes the dependency on M$ products even bigger and in the long run control and spying on people's email and information (people's data security even worsers) as you know how hackable Windows prooved to be over the years.


Well for those who remember the good old times of IRC (Internet Relay Chat) and ICQ (I seek you) 🙂 and even Jabber when chatting emerged and boomed into popularity all the chat clients nomatter whether it was a free software under GPL / BSD license or it was a Proprietary licensed software, there was always alternative on the Interface Outlook of the Chat clients and on practically all popular Chat / Audio / Video communication Standards / Protocols, there used to be some option for the users to use either a different client or to customize the outook of the program.

Well now the big surprise with Skype Protocol which was purchased by Microsoft some years ago back is this terrible already M$ program doesn't have any option for changing the Theme and even basic customization besides the ones provided by default by Microsoft. For my surprise such a trivial and everybody used program like Skype with perhaps already 1.5 or 2 Billion or even more users doesn't have even basic support for customization !!!
To make the Skype program use horror story even worser Microsoft does upgrade the Skype client agressively and for the last 3 or 4 years Skype is owned by Microsoft the interface gets changing slightly or even completely with every next release.

Now with latest Skype versions since a 1.5 year or so the agressiveness of the program even increased further as it wants you to automatically upgrade, every time you run Skype.
With this in mind and the fact, I have to spend about 8 to 10 years on the PC with Skype for Business switched on on my notebook with no option to use Lync for communication because of the Domain Exchange forcing the changes to all of the users within our EMEA.

So after some serious digging on the Internet, the only work around to change the Skype For Business Theme available by a couple of sources is to Revert Back the Skype User Interface to Lync 2013 Client by changing a value to the Windows registry and get back the good old elegant Lync interface instead of S4B.

The Windows registry value that needs to be changed is:

[HKEY_CURRENT_USER\Software\Microsoft\Office\Lync]


The default value there is:
 

Windows Registry Editor Version 5.00
[HKEY_CURRENT_USER\Software\Microsoft\Office\Lync]
"CanSharePptInCollab"=dword:00000001
"CanAppShareInCollab"=dword:00000001
"CanShareOneNoteInCollab"=dword:00000001
"EnableSkypeUI"=hex:01,00,00,00


The value has to be changed to:

Windows Registry Editor Version 5.00
[HKEY_CURRENT_USER\Software\Microsoft\Office\Lync]
"CanSharePptInCollab"=dword:00000001
"CanAppShareInCollab"=dword:00000001
"CanShareOneNoteInCollab"=dword:00000001
"EnableSkypeUI"=hex:00,00,00,00


restart_lync_screenshot-ms-windows

The value "EnableSkypeUI"=hex:01,00,00,00 – instructs so Skype for Business UI is used:
"EnableSkypeUI"=hex:00,00,00,00 – instructs S4B to revert back to Old Lync interface

For a little bit more on the value check out also articles – Alternate Between The Microsoft Lync and Skype for Business
and Managing the Skype Client UI in Skype for Business.

To modify about registry setting you will either have to manually run regedit from Start -> Run ->  cmd.exe or use Windows button + R and type inside run box:
 

regedit


Or even better just use and Run (Click over twice) on this skype.reg (download) sciprt which will modify registry

Because the Domain administrator has forced a policy to automatically offer Change of Lync Interface to Skype for Business on every notebook boot to disable EnableSkypeUI registry value and make Skype appear in the good old Lync UI, I've created also a tiny Batch script lync_ui.bat with following content:
 

cd \
cd \Users\georgi\scripts
 regedit /s skype.reg
exit


You can download lync_ui.bat from here

Note that both skype.reg and lync_ui.bat should be existing in my case in C:\Users\georgi\scipts , change this path to whatever your username is and create scripts folder in your User Home dir.
If unsure about the home directory name you can check it from command prompt with:
 

C:\Users\georgi> echo %HOMEPATH%
\Users\georgi


To make the lync_ui.bat (script invoking skype.reg)  be executed on every PC boot, you need to add it to:

Start -> All Programs -> StartUp

https://www.pc-freak.net/images/how-to-add-script-to-windows-startup-screenshto-microsoft-windows-7

Well this is it now you will have back the Lync UI, Enjoy! 🙂


Fix MySQL ibdata file size – ibdata1 file growing too large, preventing ibdata1 from eating all your server disk space

Thursday, April 2nd, 2015

fix-solve-mysql-ibdata-file-size-ibdata1-file-growing-too-large-and-preventing-ibdata1-from-eating-all-your-disk-space-innodb-vs-myisam

If you're a webhosting company hosting dozens of various websites that use MySQL with InnoDB  engine as a backend you've probably already experienced the annoying problem of MySQL's ibdata1 growing too large / eating all server's disk space and triggering disk space low alerts. The ibdata1 file, taking up hundreds of gigabytes is likely to be encountered on virtually all Linux distributions which run default MySQL server <= MySQL 5.6 (with default distro shipped my.cnf). The excremental ibdata1 raise appears usually due to a application software bug on how it queries the database. In theory there are no limitation for ibdata1 except maximum file size limitation set for the filesystem (and there is no limitation option set in my.cnf) meaning it is quite possible that under certain conditions ibdata1 grow over time can happily fill up your server LVM (Storage) drive partitions.

Unfortunately there is no way to shrink the ibdata1 file and only known work around (I found) is to set innodb_file_per_table option in my.cnf to force the MySQL server create separate *.ibd files under datadir (my.cnf variable) for each freshly created InnoDB table.
 

1. Checking size of ibdata1 file

On Debian / Ubuntu and other deb based Linux servers datadir is /var/lib/mysql/ibdata1

server:~# du -hsc /var/lib/mysql/ibdata1
45G     /var/lib/mysql/ibdata1
45G     total


2. Checking info about Databases and Innodb storage Engine

server:~# mysql -u root -p
password:

mysql> SHOW DATABASES;
+——————–+
| Database           |
+——————–+
| information_schema |
| bible              |
| blog               |
| blog-sezoni        |
| blogmonastery      |
| daniel             |
| ezmlm              |
| flash-games        |


Next step is to get some understanding about how many existing InnoDB tables are present within Database server:


mysql> SELECT COUNT(1) EngineCount,engine FROM information_schema.tables WHERE table_schema NOT IN ('information_schema','performance_schema','mysql') GROUP BY engine;
+————-+——–+
| EngineCount | engine |
+————-+——–+
|         131 | InnoDB |
|           5 | MEMORY |
|         584 | MyISAM |
+————-+——–+
3 rows in set (0.02 sec)

To get some more statistics related to InnoDb variables set on the SQL server:
 

mysqladmin -u root -p'Your-Server-Password' var | grep innodb


Here is also how to find which tables use InnoDb Engine

mysql> SELECT table_schema, table_name
    -> FROM INFORMATION_SCHEMA.TABLES
    -> WHERE engine = 'innodb';

+————–+————————–+
| table_schema | table_name               |
+————–+————————–+
| blog         | wp_blc_filters           |
| blog         | wp_blc_instances         |
| blog         | wp_blc_links             |
| blog         | wp_blc_synch             |
| blog         | wp_likes                 |
| blog         | wp_wpx_logs              |
| blog-sezoni  | wp_likes                 |
| icanga_web   | cronk                    |
| icanga_web   | cronk_category           |
| icanga_web   | cronk_category_cronk     |
| icanga_web   | cronk_principal_category |
| icanga_web   | cronk_principal_cronk    |


3. Check and Stop any Web / Mail / DNS service using MySQL

server:~# ps -efl |grep -E 'apache|nginx|dovecot|bind|radius|postfix'

Below cmd should return empty output, (e.g. Apache / Nginx / Postfix / Radius / Dovecot / DNS etc. services are properly stopped on server).

4. Create Backup dump all MySQL tables with mysqldump

Next step is to create full backup dump of all current MySQL databases (with mysqladmin):

server:~# mysqldump –opt –allow-keywords –add-drop-table –all-databases –events -u root -p > dump.sql
server:~# du -hsc /root/dump.sql
940M    dump.sql
940M    total


If you have free space on an external backup server or remotely mounted attached (NFS or SAN Storage) it is a good idea to make a full binary copy of MySQL data (just in case something wents wrong with above binary dump), copy respective directory depending on the Linux distro and install location of SQL binary files set (in my.cnf).
To check where are MySQL binary stored database data (check in my.cnf):

server:~# grep -i datadir /etc/mysql/my.cnf
datadir         = /var/lib/mysql

If server is CentOS / RHEL Fedora RPM based substitute in above grep cmd line /etc/mysql/my.cnf with /etc/my.cnf

if you're on Debian / Ubuntu:

server:~# /etc/init.d/mysql stop
server:~# cp -rpfv /var/lib/mysql /root/mysql-data-backup

Once above copy completes, DROP all all databases except, mysql, information_schema (which store MySQL existing user / passwords and Access Grants and Host Permissions)

5. Drop All databases except mysql and information_schema

server:~# mysql -u root -p
password:


mysql> SHOW DATABASES;

DROP DATABASE blog;
DROP DATABASE sessions;
DROP DATABASE wordpress;
DROP DATABASE micropcfreak;
DROP DATABASE statusnet;

          etc. etc.

ACHTUNG !!! DON'T execute!DROP database mysql; DROP database information_schema; !!! – cause this might damage your User permissions to databases

6. Stop MySQL server and add innodb_file_per_table and few more settings to prevent ibdata1 to grow infinitely in future

server:~# /etc/init.d/mysql stop

server:~# vim /etc/mysql/my.cnf
[mysqld]
innodb_file_per_table
innodb_flush_method=O_DIRECT
innodb_log_file_size=1G
innodb_buffer_pool_size=4G

Delete files taking up too much space – ibdata1 ib_logfile0 and ib_logfile1

server:~# cd /var/lib/mysql/
server:~#  rm -f ibdata1 ib_logfile0 ib_logfile1
server:~# /etc/init.d/mysql start
server:~# /etc/init.d/mysql stop
server:~# /etc/init.d/mysql start
server:~# ps ax |grep -i mysql


You should get no running MySQL instance (processes), so above ps command should return blank.
 

7. Re-Import previously dumped SQL databases with mysql cli client

server:~# cd /root/
server:~# mysql -u root -p < dump.sql

Hopefully import should went fine, and if no errors experienced new data should be in.

Altearnatively if your database is too big and you want to import it in less time to mitigate SQL downtime, instead import the database with:

server:~# mysql -u root -p
password:
mysql>  SET FOREIGN_KEY_CHECKS=0;
mysql> SOURCE /root/dump.sql;
mysql> SET FOREIGN_KEY_CHECKS=1;


If something goes wrong with the import for some reason, you can always copy over sql binary files from /root/mysql-data-backup/ to /var/lib/mysql/
 

8. Connect to mysql and check whether databases are listable and re-check ibdata file size

Once imported login with mysql cli and check whther databases are there with:

server:~# mysql -u root -p
SHOW DATABASES;

Next lets see what is currently the size of ibdata1, ib_logfile0 and ib_logfile1
 

server:~# du -hsc /var/lib/mysql/{ibdata1,ib_logfile0,ib_logfile1}
19M     /var/lib/mysql/ibdata1
1,1G    /var/lib/mysql/ib_logfile0
1,1G    /var/lib/mysql/ib_logfile1
2,1G    total

Now ibdata1 will grow, but only contain table metadata. Each InnoDB table will exist outside of ibdata1.
To better understand what I mean, lets say you have InnoDB table named blogdb.mytable.
If you go into /var/lib/mysql/blogdb, you will see two files
representing the table:

  •     mytable.frm (Storage Engine Header)
  •     mytable.ibd (Home of Table Data and Table Indexes for blogdb.mytable)

Now construction will be like that for each of MySQL stored databases instead of everything to go to ibdata1.
MySQL 5.6+ admins could relax as innodb_file_per_table is enabled by default in newer SQL releases.


Now to make sure your websites are working take few of the hosted websites URLs that use any of the imported databases and just browse.
In my case ibdata1 was 45GB after clearing it up I managed to save 43 GB of disk space!!!

Enjoy the disk saving! 🙂

Don’t revoke GoDaddy SSL certificate. (Expired) Revoked SSL is impossible to revert

Thursday, April 12th, 2012

godaddy_logo
One of our company SSL (https) Certificates recently expired so I needed to renew the SSL certificate.

I was in a hurry doing plenty of other stuffs so it seemed logical for me to Revoke the Certificate. I thought revoking the certificate will simply cancel it and afterwards, in Godaddy's SSL (Manager Certificates) interface the Revoked – Cancelled certificate will re-appear in the menu, ready to be generated in the same way as earlier I initially generated the Godaddy's bought SSL certificate

Hence I proceeded and used Revoke button:

Godaddy SSL certificate manager browser certificate Screenshot

Well guess what my calculations, were wrong.
 Revoking, just cancel it. The  revoked domain SSL certificate did not show up again in Godaddy's Cert Manager and I have no way from their interface to revert the changes.

To deal with the situation, I contacted Godaddy Support immediately with the following inquiry:
 

Other : Revoked SSL Certificate
Issue :
Hello we have revoked the SSL certificate for our domain our.domain-name.com.
 Can we revert back the certificate as it was.
If not how to generate a new key for our domain https://our.domain-name.com
Thanks in Advance.
Kindest Regards

"My-Company-name" Tech Support

In 5 hours time I received the following tech support answer:
 

Dear Tech Support,

Thank you for contacting Online Support. It is not possible to reinstate a canceled certificate. You will need to purchase a new certificate. I have requested that a refund be applied to your account. Once the credit appears in your account, please allow 5-7 business days to see the funds applied to the associated payment method. Thank you for your patience and understanding in this matter.

Please let us know if we can help you in any other way.

Sincerely,

Christian P.
Online Support Team
Customer Inquiry
Name : Cadia Tech Support
Domain Name : our.domain-name.com
ShopperID : xxxxxxxxx
Phone : xxxxxxxx
Shopper Validated : Yes
Browser : Mozilla/5.0 (Windows; U; Windows NT 6.1; en-US; rv:1.9.2.3) Gecko/20100401 Firefox/3.6.3

Apparently Godaddy, can work out a bit on their tech support answering time 5 hours for a simple reply is quite long.

Now taking in consideration, above reply from Godady, my only options are to either wait for 5 to 7 (business days) or buy a new credit for SSL certificate.

Buying a new credit will probably not happen as our company is experiencing some financial troubles because of the crisis. So I guess we will have to wait for this 7 days at worst. So again if you wonder to REVOKE or not an SSL certificate. Think again …

Just a small note to make here, that Godaddy has a very straight forward way to just renew an expered certificate, which I succesfully later have done for 4 domains. Well, if only I knew earlier what REVOKE SSL cert really does I wouldn't have ended in this mess …

How to renew self signed QMAIL toaster and QMAIL rocks expired SSL pem certificate

Friday, September 2nd, 2011

qmail_toaster_logo-fix-qmail-rocks-expired-ssl-pem-certificate

One of the QMAIL server installs, I have installed very long time ago. I've been notified by clients, that the certificate of the mail server has expired and therefore I had to quickly renew the certificate.

This qmail installation, SSL certificates were located in /var/qmail/control under the names servercert.key and cervercert.pem

Renewing the certificates with a new self signed ones is pretty straight forward, to renew them I had to issue the following commands:

1. Generate servercert encoded key with 1024 bit encoding

debian:~# cd /var/qmail/control
debian:/var/qmail/control# openssl genrsa -des3 -out servercert.key.enc 1024
Generating RSA private key, 1024 bit long modulus
...........++++++
.........++++++
e is 65537 (0x10001)
Enter pass phrase for servercert.key.enc:
Verifying - Enter pass phrase for servercert.key.enc:

In the Enter pass phrase for servercert.key.enc I typed twice my encoded key password, any password is good, here though using a stronger one is better.

2. Generate the servercert.key file

debian:/var/qmail/control# openssl rsa -in servercert.key.enc -out servercert.key
Enter pass phrase for servercert.key.enc:
writing RSA key

3. Generate the certificate request

debian:/var/qmail/control# openssl req -new -key servercert.key -out servercert.csr
debian:/var/qmail/control# openssl rsa -in servercert.key.enc -out servercert.key
Enter pass phrase for servercert.key.enc:writing RSA key
root@soccerfame:/var/qmail/control# openssl req -new -key servercert.key -out servercert.csr
You are about to be asked to enter information that will be incorporated
into your certificate request.
What you are about to enter is what is called a Distinguished Name or a DN.
There are quite a few fields but you can leave some blank
For some fields there will be a default value,
If you enter '.', the field will be left blank.
-----
Country Name (2 letter code) [AU]:UK
State or Province Name (full name) [Some-State]:London
Locality Name (eg, city) []:London
Organization Name (eg, company) [Internet Widgits Pty Ltd]:My Company
Organizational Unit Name (eg, section) []:My Org
Common Name (eg, YOUR name) []:
Email Address []:admin@adminmail.com

Please enter the following 'extra' attributes
to be sent with your certificate request
A challenge password []:
An optional company name []:

In the above prompts its necessery to fill in the company name and location, as each of the prompts clearly states.

4. Sign the just generated certificate request

debian:/var/qmail/control# openssl x509 -req -days 9999 -in servercert.csr -signkey servercert.key -out servercert.crt

Notice the option -days 9999 this option instructs the newly generated self signed certificate to be valid for 9999 days which is quite a long time, the reason why the previous generated self signed certificate expired was that it was built for only 365 days

5. Fix the newly generated servercert.pem permissions debian:~# cd /var/qmail/control
debian:/var/qmail/control# chmod 640 servercert.pem
debian:/var/qmail/control# chown vpopmail:vchkpw servercert.pem
debian:/var/qmail/control# cp -f servercert.pem clientcert.pem
debian:/var/qmail/control# chown root:qmail clientcert.pem
debian:/var/qmail/control# chmod 640 clientcert.pem

Finally to load the new certificate, restart of qmail is required:

6. Restart qmail server

debian:/var/qmail/control# qmailctl restart
Restarting qmail:
* Stopping qmail-smtpd.
* Sending qmail-send SIGTERM and restarting.
* Restarting qmail-smtpd.

Test the newly installed certificate

To test the newly installed SSL certificate use the following commands:

debian:~# openssl s_client -crlf -connect localhost:465 -quiet
depth=0 /C=UK/ST=London/L=London/O=My Org/OU=My Company/emailAddress=admin@adminmail.com
verify error:num=18:self signed certificate
verify return:1
...
debian:~# openssl s_client -starttls smtp -crlf -connect localhost:25 -quiet
depth=0 /C=UK/ST=London/L=London/O=My Org/OU=My Company/emailAddress=admin@adminmail.com
verify error:num=18:self signed certificate
verify return:1
250 AUTH LOGIN PLAIN CRAM-MD5
...

If an error is returned like 32943:error:140770FC:SSL routines:SSL23_GET_SERVER_HELLO:unknown protocol:s23_clnt.c:607: this means that SSL variable in the qmail-smtpdssl/run script is set to 0.

To solve this error, change SSL=0 to SSL=1 in /var/qmail/supervise/qmail-smtpdssl/run and do qmailctl restart

The error verify return:1 displayed is perfectly fine and it's more of a warning than an error as it just reports the certificate is self signed.