Posts Tagged ‘Convert’

How to RIP audio CD and convert to MP3 format on Linux

Thursday, April 11th, 2024

I've been given a very tedious task to Copy music from Audio CD Drive to MP3 / MP4 file format and then copy the content to external Flash drive.
Doing so is pretty trivial, you just need to have a CD / DVD rom on your computer something that becomes rare nowadays and then you need to have installed a bunch of software, if you don't already have it as i've pointed in my previous article Howto craete Music Audio CD from MP3 files, create playable WAV format audio CD Albums from MP3s.

Creating a Audio CD from an MP3 collection is exactly the opposite to what is aim't now (to copy the content of a CD to a computer and prepare it for A Car MP3 player).

1. RIPing audio CDs to WAV and Conver to MP3 from terminal
 

On Linux there is  many ways to do it and many tools that can do it for your both graphical and command line.
But as I prefer command line to do stuff, in this article I'll mention the quickest and most elementary one which is done in 2 steps.

1. Use a tool to dump the CD Audio music to Tracks in WAV format
2. Convert the WAV to MP3 format

We'll need cdparanoia tool installed as well as ffmpeg.

If you don't have them installed do:

# apt-get install –yes cdparanoia dvd+rw-tools cdw cdrdao audiotools cdlabelgen dvd+rw-tools wodim ffmpeg lame normalize-audio libavcodec58

Next create the directory where you want to dump the .wav files.

# mkdir /home/hipo/audiorip/cd1
# cd /home/hipo/audiorip/cd1

Next assumng the Audio CD is plugged in the CD reader, dump its full content into track*.WAV files with cmd:

# paranoia -B

This will produce you the dumped songs into .wav files.

hipo@noah:~/audiorip/cd1$ ls -al *.wav
-rw-r–r– 1 root root  10278284 мар 25 22:49 track01.cdda.wav
-rw-r–r– 1 root root  21666668 мар 25 22:50 track02.cdda.wav
-rw-r–r– 1 root root  88334108 мар 25 22:53 track03.cdda.wav
-rw-r–r– 1 root root  53453948 мар 25 22:55 track04.cdda.wav
-rw-r–r– 1 root root 100846748 мар 25 22:58 track05.cdda.wav
-rw-r–r– 1 root root  41058908 мар 25 22:59 track06.cdda.wav
-rw-r–r– 1 root root 105952940 мар 25 23:02 track07.cdda.wav
-rw-r–r– 1 root root  50074124 мар 25 23:03 track08.cdda.wav
-rw-r–r– 1 root root  92555948 мар 25 23:06 track09.cdda.wav
-rw-r–r– 1 root root  61939964 мар 25 23:07 track10.cdda.wav
-rw-r–r– 1 root root   8521340 мар 25 23:07 track11.cdda.wav

Then you can use a simple for loop with ffmpeg command to conver the .wav files to .mp3s.

hipo@noah:~/audiorip/cd1$  for i in $( ls -1 *); do ffmpeg -i $i $i.wav.mp3; done
 

ffmpeg version 1.2.12 Copyright (c) 2000-2015 the FFmpeg developers
  built on Feb 12 2015 18:03:16 with gcc 4.7 (Debian 4.7.2-5)
  configuration: –prefix=/usr –extra-cflags='-g -O2 -fstack-protector –param=ssp-buffer-size=4 -Wformat -Werror=format-security ' –extra-ldflags='-Wl,-z,relro' –cc='ccache cc' –enable-shared –enable-libmp3lame –enable-gpl –enable-nonfree –enable-libvorbis –enable-pthreads –enable-libfaac –enable-libxvid –enable-postproc –enable-x11grab –enable-libgsm –enable-libtheora –enable-libopencore-amrnb –enable-libopencore-amrwb –enable-libx264 –enable-libspeex –enable-nonfree –disable-stripping –enable-libvpx –enable-libschroedinger –disable-encoder=libschroedinger –enable-version3 –enable-libopenjpeg –enable-librtmp –enable-avfilter –enable-libfreetype –enable-libvo-aacenc –disable-decoder=amrnb –enable-libvo-amrwbenc –enable-libaacplus –libdir=/usr/lib/x86_64-linux-gnu –disable-vda –enable-libbluray –enable-libcdio –enable-gnutls –enable-frei0r –enable-openssl –enable-libass –enable-libopus –enable-fontconfig –enable-libpulse –disable-mips32r2 –disable-mipsdspr1 –dis  libavutil      52. 18.100 / 52. 18.100
  libavcodec     54. 92.100 / 54. 92.100
  libavformat    54. 63.104 / 54. 63.104
  libavdevice    54.  3.103 / 54.  3.103
  libavfilter     3. 42.103 /  3. 42.103
  libswscale      2.  2.100 /  2.  2.100
  libswresample   0. 17.102 /  0. 17.102
  libpostproc    52.  2.100 / 52.  2.100
[wav @ 0x66c900] max_analyze_duration 5000000 reached at 5015510 microseconds
Guessed Channel Layout for  Input Stream #0.0 : stereo
Input #0, wav, from 'track01.cdda.wav':
  Duration: 00:00:23.19, bitrate: 1411 kb/s
    Stream #0:0: Audio: pcm_s16le ([1][0][0][0] / 0x0001), 44100 Hz, stereo, s16, 1411 kb/s
Output #0, mp3, to 'track01.cdda.wav.wav.mp3':
  Metadata:
    TSSE            : Lavf54.63.104
    Stream #0:0: Audio: mp3, 44100 Hz, stereo, s16p
Stream mapping:
  Stream #0:0 -> #0:0 (pcm_s16le -> libmp3lame)
Press [q] to stop, [?] for help
size=     363kB time=00:00:23.19 bitrate= 128.2kbits/s    
video:0kB audio:363kB subtitle:0 global headers:0kB muxing overhead 0.058402%
ffmpeg version 1.2.12 Copyright (c) 2000-2015 the FFmpeg developers
  built on Feb 12 2015 18:03:16 with gcc 4.7 (Debian 4.7.2-5)
  configuration: –prefix=/usr –extra-cflags='-g -O2 -fstack-protector –param=ssp-buffer-size=4 -Wformat -Werror=format-security ' –extra-ldflags='-Wl,-z,relro' –cc='ccache cc' –enable-shared –enable-libmp3lame –enable-gpl –enable-nonfree –enable-libvorbis –enable-pthreads –enable-libfaac –enable-libxvid –enable-postproc –enable-x11grab –enable-libgsm –enable-libtheora –enable-libopencore-amrnb –enable-libopencore-amrwb –enable-libx264 –enable-libspeex –enable-nonfree –disable-stripping –enable-libvpx –enable-libschroedinger –disable-encoder=libschroedinger –enable-version3 –enable-libopenjpeg –enable-librtmp –enable-avfilter –enable-libfreetype –enable-libvo-aacenc –disable-decoder=amrnb –enable-libvo-amrwbenc –enable-libaacplus –libdir=/usr/lib/x86_64-linux-gnu –disable-vda –enable-libbluray –enable-libcdio –enable-gnutls –enable-frei0r –enable-openssl –enable-libass –enable-libopus –enable-fontconfig –enable-libpulse –disable-mips32r2 –disable-mipsdspr1 –dis  libavutil      52. 18.100 / 52. 18.100
  libavcodec     54. 92.100 / 54. 92.100
  libavformat    54. 63.104 / 54. 63.104
  libavdevice    54.  3.103 / 54.  3.103
  libavfilter     3. 42.103 /  3. 42.103
  libswscale      2.  2.100 /  2.  2.100
  libswresample   0. 17.102 /  0. 17.102
  libpostproc    52.  2.100 / 52.  2.100
[mp3 @ 0x66c900] max_analyze_duration 5000000 reached at 5015510 microseconds
Input #0, mp3, from 'track01.cdda.wav.mp3':
  Metadata:
    encoder         : Lavf54.63.104
  Duration: 00:00:23.22, start: 0.000000, bitrate: 128 kb/s
    Stream #0:0: Audio: mp3, 44100 Hz, stereo, s16p, 128 kb/s
File 'track01.cdda.wav.mp3.wav.mp3' already exists. Overwrite ? [y/N] y
Output #0, mp3, to 'track01.cdda.wav.mp3.wav.mp3':
  Metadata:
    TSSE            : Lavf54.63.104
    Stream #0:0: Audio: mp3, 44100 Hz, stereo, s16p
Stream mapping:
  Stream #0:0 -> #0:0 (mp3 -> libmp3lame)
Press [q] to stop, [?] for help
Trying to remove 1152 samples, but the queue is emptys    
size=     363kB time=00:00:23.24 bitrate= 128.1kbits/s    
video:0kB audio:363kB subtitle:0 global headers:0kB muxing overhead 0.058336%
ffmpeg version 1.2.12 Copyright (c) 2000-2015 the FFmpeg developers
  built on Feb 12 2015 18:03:16 with gcc 4.7 (Debian 4.7.2-5)
  configuration: –prefix=/usr –extra-cflags='-g -O2 -fstack-protector –param=ssp-buffer-size=4 -Wformat -Werror=format-security ' –extra-ldflags='-Wl,-z,relro' –cc='ccache cc' –enable-shared –enable-libmp3lame –enable-gpl –enable-nonfree –enable-libvorbis –enable-pthreads –enable-libfaac –enable-libxvid –enable-postproc –enable-x11grab –enable-libgsm –enable-libtheora –enable-libopencore-amrnb –enable-libopencore-amrwb –enable-libx264 –enable-libspeex –enable-nonfree –disable-stripping –enable-libvpx –enable-libschroedinger –disable-encoder=libschroedinger –enable-version3 –enable-libopenjpeg –enable-librtmp –enable-avfilter –enable-libfreetype –enable-libvo-aacenc –disable-decoder=amrnb –enable-libvo-amrwbenc –enable-libaacplus –libdir=/usr/lib/x86_64-linux-gnu –disable-vda –enable-libbluray –enable-libcdio –enable-gnutls –enable-frei0r –enable-openssl –enable-libass –enable-libopus –enable-fontconfig –enable-libpulse –disable-mips32r2 –disable-mipsdspr1 –dis  libavutil      52. 18.100 / 52. 18.100
  libavcodec     54. 92.100 / 54. 92.100
  libavformat    54. 63.104 / 54. 63.104
  libavdevice    54.  3.103 / 54.  3.103
  libavfilter     3. 42.103 /  3. 42.103
  libswscale      2.  2.100 /  2.  2.100
  libswresample   0. 17.102 /  0. 17.102
  libpostproc    52.  2.100 / 52.  2.100
[mp3 @ 0x66c900] max_analyze_duration 5000000 reached at 5015510 microseconds
Input #0, mp3, from 'track01.cdda.wav.mp3.wav.mp3':
  Metadata:
    encoder         : Lavf54.63.104
  Duration: 00:00:23.25, start: 0.000000, bitrate: 128 kb/s
    Stream #0:0: Audio: mp3, 44100 Hz, stereo, s16p, 128 kb/s
Output #0, mp3, to 'track01.cdda.wav.mp3.wav.mp3.wav.mp3':
  Metadata:
    TSSE            : Lavf54.63.104
    Stream #0:0: Audio: mp3, 44100 Hz, stereo, s16p
Stream mapping:
  Stream #0:0 -> #0:0 (mp3 -> libmp3lame)
Press [q] to stop, [?] for help
Trying to remove 1152 samples, but the queue is emptys    
size=     364kB time=00:00:23.27 bitrate= 128.1kbits/s    
video:0kB audio:364kB subtitle:0 global headers:0kB muxing overhead 0.058271%
ffmpeg version 1.2.12 Copyright (c) 2000-2015 the FFmpeg developers
  built on Feb 12 2015 18:03:16 with gcc 4.7 (Debian 4.7.2-5)
  configuration: –prefix=/usr –extra-cflags='-g -O2 -fstack-protector –param=ssp-buffer-size=4 -Wformat -Werror=format-security ' –extra-ldflags='-Wl,-z,relro' –cc='ccache cc' –enable-shared –enable-libmp3lame –enable-gpl –enable-nonfree –enable-libvorbis –enable-pthreads –enable-libfaac –enable-libxvid –enable-postproc –enable-x11grab –enable-libgsm –enable-libtheora –enable-libopencore-amrnb –enable-libopencore-amrwb –enable-libx264 –enable-libspeex –enable-nonfree –disable-stripping –enable-libvpx –enable-libschroedinger –disable-encoder=libschroedinger –enable-version3 –enable-libopenjpeg –enable-librtmp –enable-avfilter –enable-libfreetype –enable-libvo-aacenc –disable-decoder=amrnb –enable-libvo-amrwbenc –enable-libaacplus –libdir=/usr/lib/x86_64-linux-gnu –disable-vda –enable-libbluray –enable-libcdio –enable-gnutls –enable-frei0r –enable-openssl –enable-libass –enable-libopus –enable-fontconfig –enable-libpulse –disable-mips32r2 –disable-mipsdspr1 –dis  libavutil      52. 18.100 / 52. 18.100
  libavcodec     54. 92.100 / 54. 92.100
  libavformat    54. 63.104 / 54. 63.104
  libavdevice    54.  3.103 / 54.  3.103
  libavfilter     3. 42.103 /  3. 42.103
  libswscale      2.  2.100 /  2.  2.100
  libswresample   0. 17.102 /  0. 17.102
  libpostproc    52.  2.100 / 52.  2.100
[wav @ 0x66c900] max_analyze_duration 5000000 reached at 5015510 microseconds
Guessed Channel Layout for  Input Stream #0.0 : stereo
Input #0, wav, from 'track02.cdda.wav':
  Duration: 00:02:21.28, bitrate: 1411 kb/s
    Stream #0:0: Audio: pcm_s16le ([1][0][0][0] / 0x0001), 44100 Hz, stereo, s16, 1411 kb/s
Output #0, mp3, to 'track02.cdda.wav.wav.mp3':
  Metadata:
    TSSE            : Lavf54.63.104
    Stream #0:0: Audio: mp3, 44100 Hz, stereo, s16p
Stream mapping:
  Stream #0:0 -> #0:0 (pcm_s16le -> libmp3lame)
Press [q] to stop, [?] for help


Finally remove the old unneded .wav files and enjoy the mp3s with vlc / mplayer / mpg123 or whatever player you like.

hipo@noah:~/audiorip/cd1$  rm -f *.wav


Now mount the flash drive and copy th files into it.

# mkdir /media/usb-drive
# mount /dev/sdc1 /media/usb-drive/
# mkdir -p /media/usb-drive/cd1
# fdisk -l |grep -i sdc1

/dev/sdc1 on /media/usb-drive type vfat (rw,relatime,fmask=0022,dmask=0022,codepage=437,iocharset=utf8,shortname=mixed,errors=remount-ro

# cp -rpf ~/audiorip/cd1*.mp3 /mnt/usb-drive/cd1
# umount /dev/sdc1


2. RIPping audio CD on Linux with rip-audio-cds-linux.sh  script
 

#!/bin/bash
# A simple shell script to rip audio cd and create mp3 using lame
# and cdparanoia utilities.
# —————————————————————————-
# Written by Vivek Gite <http://www.cyberciti.biz/>
# (c) 2006 nixCraft under GNU GPL v2.0+
# —————————————————————————-
read -p "Starting in 5 seconds ( to abort press CTRL + C ) " -t 5
cdparanoia -B
for i in *.wav
do
    lame –vbr-new -b 360 "$i" "${i%%.cdda.wav}.mp3"
    rm -f "$i"
done


If you need to automate the task of dumping the audio CDs to WAV and convert them to MP3s you can do it via a small shell script like the one provided by cyberciti.biz that uses paranoia and lame commands in a shell script loop. Script rip-audio-cds-linux.sh is here

3. Dump Audio CD to MP3 with Graphical program ( ripperx ) 

By default most modern Linux distributions including the Debian GNU / Linux based ones has the ripperx in the default repositories, as well as the tool is downloadable and compilable from source from sourceforge.net 
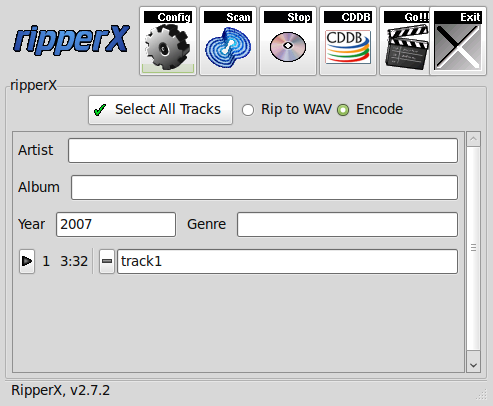
ripping-audio-cds-linux-graphical-program-ripperx-tool

# apt-cache show ripperx|grep -i descript -A3 -B3
Architecture: amd64
Depends: cdparanoia, vorbis-tools (>= 1.0beta3), libatk1.0-0 (>= 1.12.4), libc6 (>= 2.14), libcairo2 (>= 1.2.4), libfontconfig1 (>= 2.12.6), libfreetype6 (>= 2.2.1), libgcc1 (>= 1:3.0), libgdk-pixbuf2.0-0 (>= 2.22.0), libglib2.0-0 (>= 2.16.0), libgtk2.0-0 (>= 2.8.0), libpango-1.0-0 (>= 1.14.0), libpangocairo-1.0-0 (>= 1.14.0), libpangoft2-1.0-0 (>= 1.14.0), libstdc++6 (>= 5.2), libtag1v5 (>= 1.9.1-2.2~)
Suggests: sox, cdtool, mpg321, flac, toolame
Description-en: GTK-based audio CD ripper/encoder
 ripperX is a graphical interface for ripping CD audio tracks (using
 cdparanoia) and then encoding them into the Ogg, FLAC, or MP2/3
 formats using the vorbis tools, FLAC, toolame or other available
 MP3 encoders.
 .
 It includes support for CDDB lookups and ID3v2 tags.
Description-md5: cdeabf4ef72c33d57aecc4b4e2fd5952
Homepage: http://sourceforge.net/projects/ripperx/
Tag: hardware::storage, hardware::storage:cd, interface::graphical,
 interface::x11, role::program, scope::application, uitoolkit::gtk,

# apt install –yes ripperx
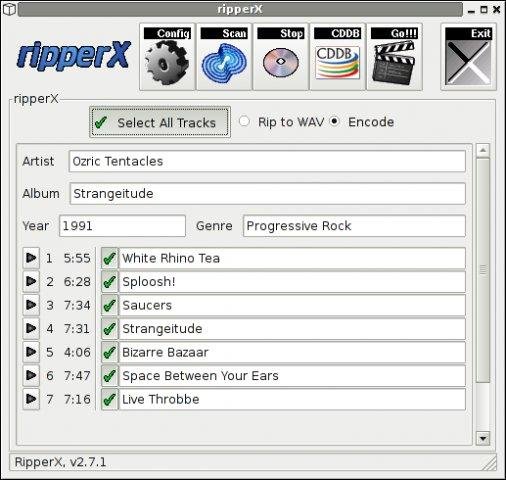

https://www.pc-freak.net/images/ripperx-linux-gui-rip-audio-cds-tool

That's all folks.
Enjoy !

Howto convert KVM QCOW2 format Virtual Machine to Vmdk to migrate to VMware ESXi

Thursday, November 17th, 2022

qcow2-to-vmdkvk-convert-to-complete-linux-kvm-to-vmware-esxi-migration

Why you would want to convert qcow2 to vmdk?

When managing the heterogeneous virtual environment or changing the virtualization solutions that become so common nowadays, you might need to migrate qcow2 from a Linux based KVM virtualization solution to VMWare's proprietary  vmdk – the file format in which a VMWare does keep stored it's VMs, especially if you have a small business or work in a small start-up company where you cannot afford to buy something professional as VMware vCenter Converter Standalone or Microsoft virtual machine converter (MVMC)- usually used to to migrate VMware hosts to Hyper-V hosts, but also capable to migrate .qcow2 to .vmdk. The reason is that your old datacenter based on Linux OS custom KVM virtual machines might be moved to VMWare ESX to guarantee better and more systemized management (which though is very questionable, since most of my experiences with VMWare was that though the software was a great one, the people who manage it was not very much specialists in managing it).

Another common reason is that running a separate Linux virtual machine, costs you more than a well organized VMWare farm because you need more qualified Linux specialists to manage the KVMs thus KVM to VMWare management as in most big corporations nowadays’s main target is to cut the costs.
Even with successful migrations like that, though you might often expect a drop in the quality of the service when your VM ends in the VMWare farm.

Nomatter what’s the reason to migrate qcow2 to VMDK So lets proceed with how the .QCOW2 to .VMDK can be easily done.


1. Get information about the VM you would like to migrate to VMDK

In QEMU-KVM environment, the popular image format is qcow2, which outperforms the first generation of qcow format and raw format. You can find the files of virtual disks by checking the information of virtual machine by virsh command:

[root@hypervisor-machine ~]# virsh dominfo virtual-machine-name

INFO
ID: {e59ae416-9314-4e4b-af07-21c31d91b3fb}
EnvID: 1704649750
Name: CentOS7minimal
Description:
Type: VM
State: stopped
OS: centos7
Template: no
Uptime: 00:00:00 (since 2019-04-25 13:04:11)
Home: /vz/vmprivate/e39ae416-9314-4e4b-af05-21c31d91b3fb/
Owner: root@.
GuestTools: state=not_installed
GuestTools autoupdate: on
Autostart: off
Autostop: shutdown
Autocompact: off
Boot order: hdd0 cdrom0
EFI boot: off
Allow select boot device: off
External boot device:
On guest crash: restart
Remote display: mode=manual port=6903 address=0.0.0.0
Remote display state: stopped
Hardware:
  cpu sockets=1 cpus=2 cores=2 VT-x accl=high mode=64 ioprio=4 iolimit='0'
  memory 2048Mb
  video 32Mb 3d acceleration=off vertical sync=yes
  memory_guarantee auto
  hdd0 (+) scsi:0 image='/vz/vmprivate/e59ae415-9314-4e4b-af05-21c31d91b3fb/harddisk.hdd' type='expanded' 5120Mb subtype=virtio-scsi
  cdrom0 (+) scsi:1 image='/home/CentOS-7-x86_64-Minimal-1611.iso' state=disconnected subtype=virtio-scsi
  usb (+)
  net0 (+) dev='vme42bef5f3' network='Bridged' mac=001C42BEF5F3 card=virtio ips='10.50.50.27/255.255.255.192 ' gw='10.50.50.1'
SmartMount: (-)
Disabled Windows logo: on
Nested virtualization: off
Offline management: (-)
Hostname: kvmhost.fqdn.com


2. Convert the harddrive to VMDK

[root@hypervisor-machine e59ae415-9314-4e4b-af05-21c31d91b3fb]# ls -lsah

1.3G -rw-r—– 1 root root 1.3G Apr 25 14:43 harddisk.hdd

a. Converstion with qemu:

You can use qemu-img tool that is installable via cmds:

yum install quemu-img / apt install qemu-img / zipper install qemu-img (depending on the distribution RedHat / Debian / SuSE Linux)

-f: format of the source image

-O: format of the target image

[root@hypervisor-machine ~]# qemu-img convert -f qcow2 -O vmdk \-o adapter_type=lsilogic,subformat=streamOptimized,compat6 harddisk.hdd harddisklsilogic.vmdk


[root@ hypervisor-machine e59ae415-9314-4e4b-af05-21c31d91b3fb]# ls -lsah

1.3G -rw-r—– 1 root root 1.3G Apr 25 14:43 harddisk.hdd

536M -rw-r–r– 1 root root 536M Apr 26 14:52 harddisklsilogic.vmdk

3. Upload the new harddrive to the ESXi Hypervisor and adapt it to ESX

This vmdk might not be able to used on ESXi, but you can use it on VMware Workstation. To let it work on ESXi, you need to use vmkfstools to convert it again.


a. Adapt the filesystem to ESXi

[root@hypervisor-machine ~]# vmkfstools -i harddisklsilogic.vmdk  -d thin harddisk.vmdk


4. Create a VM and add the converted harddrive to the machine. 

Futher

Recreate the initramfs

But of course this won’t work directly as it often happens with Linux 🙂 !!. 
We need to make adjustments to the virtual machine as well with few manual interventions:

1. Start the machine from the VMWare interface

2. Grub CentOS Linux rescue will appear from the prompt

3. Run command

dracut –regenerate-all –force


to Recreate the initramfs.
 

Note that You might also have to edit your network configuration since your network device usually get’s a different name.
 

Finally reboot the host:

[root@hypervisor-machine ~]# reboot


And voila you’re ready to play the VM inside the ESX after some testing, you might switch off the KVM Hypervisor hosted VM and reroute the network to point to the ESX Cluster.


Squid Proxy log timestamp human readable / Convert and beautify Proxy unixtime logs in human-readable form howto

Thursday, February 21st, 2019

ccze-squid-access-log-colorized-with-log-analizer-linux-tool

If you have installed Squid Cache Proxy recently and you need to watch who is accessing the proxy and what Internet (website is viewed) under /var/log/squid/access.log /var/log/store.log /var/log/access.log etc., you will be unpleasently surprised the log's records are logged in a weird human unreadable format called UTC as Squid Proxy server does not store the date / year / hour time information in a human readable format.

Squid uses the format:
<UNIX timestamp>.<Centiseconds> and you have to be a robot of a kind or a math genious to read it 🙂

To display Squid Proxy log in a human readable, luckily you can use below one-liner  regular expression.
 

cat access.log | perl -p -e 's/^([0-9]*)/”[“.localtime($1).”]"/e'


If you have to review squid logs multiple times and on a regular basis you can either set some kind of cmd alias in $HOME/.bashrc such as:

alias readproxylog='cat access.log | perl -p -e 's/^([0-9]*)/”[“.localtime($1).”]"/e'

Or for those who prefer beauty install and use a log beatifier / colorizer such as ccze
 

root@pcfreak:/home/hipo# apt-cache show ccze|grep -i desc -A 3
Description-en: robust, modular log coloriser
 CCZE is a robust and modular log coloriser, with plugins for apm,
 exim, fetchmail, httpd, postfix, procmail, squid, syslog, ulogd,
 vsftpd, xferlog and more.

Description-md5: 55cd93dbcf614712a4d89cb3489414f6
Homepage: https://github.com/madhouse/ccze
Tag: devel::prettyprint, implemented-in::c, interface::commandline,
 role::program, scope::utility, use::checking, use::filtering,

root@pcfreak:/home/hipo# apt-get install –yes ccze


tail -f /var/log/squid/access.loc | ccze -CA


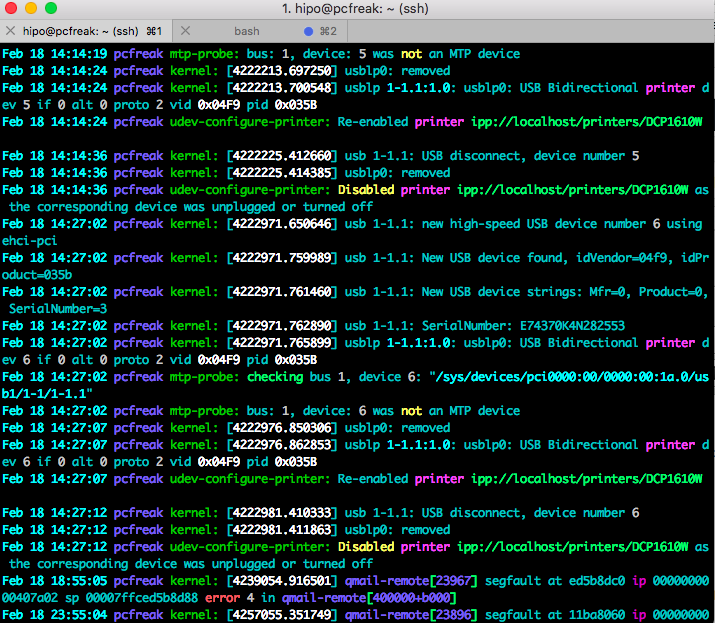
ccze is really nice to view /var/log/syslog errors and make your daily sysadmin life a bit more colorful


tail -f -n 200 /var/log/messages | ccze


tail-ccze-syslog-screenshot viewing in Colors your Linux logs

For a frequent tail + ccze usage with ccze you can add to ~/.bashrc following shell small function
 

tailc () { tail $@ | ccze -A }


Below is a list of supported syntax highlighting colorizer:

$ ccze -l
Available plugins:

Name      | Type    | Description
————————————————————
apm       | Partial | Coloriser for APM sub-logs.
distcc    | Full    | Coloriser for distcc(1) logs.
dpkg      | Full    | Coloriser for dpkg logs.
exim      | Full    | Coloriser for exim logs.
fetchmail | Partial | Coloriser for fetchmail(1) sub-logs.
ftpstats  | Full    | Coloriser for ftpstats (pure-ftpd) logs.
httpd     | Full    | Coloriser for generic HTTPD access and error logs.
icecast   | Full    | Coloriser for Icecast(8) logs.
oops      | Full    | Coloriser for oops proxy logs.
php       | Full    | Coloriser for PHP logs.
postfix   | Partial | Coloriser for postfix(1) sub-logs.
procmail  | Full    | Coloriser for procmail(1) logs.
proftpd   | Full    | Coloriser for proftpd access and auth logs.
squid     | Full    | Coloriser for squid access, store and cache logs.
sulog     | Full    | Coloriser for su(1) logs.
super     | Full    | Coloriser for super(1) logs.
syslog    | Full    | Generic syslog(8) log coloriser.
ulogd     | Partial | Coloriser for ulogd sub-logs.
vsftpd    | Full    | Coloriser for vsftpd(8) logs.
xferlog   | Full    | Generic xferlog coloriser.

At many cases for sysadmins like me that prefer clarity over obscurity, even a better solution is to just change in /etc/squid/squid.conf
the logging to turn it in human-readable form
, to do so add to config somewhere:


Logformat squid %tl.%03tu %6tr %>a %Ss/%03Hs %


You will get log output in format like:


18/Feb/2019:18:38:47 +0200.538 4787 y.y.y.y TCP_MISS/200 41841 GET https://google.com – DIRECT/x.x.x.x text/html


SQUID's format recognized parameters in above example are as follows:


%    a literal % character
>a    Client source IP address
>A    Client FQDN
>p    Client source port
la    Local IP address (http_port)
lp    Local port number (http_port)
sn    Unique sequence number per log line entry
ts    Seconds since epoch
tu    subsecond time (milliseconds)
tl    Local time. Optional strftime format argument
default %d/%b/%Y:%H:%M:%S %z
tg    GMT time. Optional strftime format argument
default %d/%b/%Y:%H:%M:%S %z
tr    Response time (milliseconds)
dt    Total time spent making DNS lookups (milliseconds)


Converting .crt .cer .der to PEM, converting .PEM to .DER and convert .PFX PKCS#12 (.P12) to .PEM file using OpenSSL

Friday, September 1st, 2017

openssl_check_verify_crt_csr_key_certificate_consistency-with-openssl-command-openssl-logo

These commands allow you to convert certificates and keys to different formats to make them compatible with specific types of servers or software. For example, you can convert a normal PEM file that would work with Apache to a PFX (PKCS#12) file and use it with Tomcat or IIS.

  • Convert a DER file (.crt .cer .der) to PEM


    openssl x509 -inform der -in certificate.cer -out certificate.pem
    
  • Convert a PEM file to DER


    openssl x509 -outform der -in certificate.pem -out certificate.der
    
  • Convert a PKCS#12 file (.pfx .p12) containing a private key and certificates to PEM


    openssl pkcs12 -in keyStore.pfx -out keyStore.pem -nodes


    You can add -nocerts to only output the private key or add -nokeys to only output the certificates.

  • Convert a PEM certificate file and a private key to PKCS#12 (.pfx .p12)


    openssl pkcs12 -export -out certificate.pfx -inkey privateKey.key \
    -in certificate.crt -certfile CACert.crt

How to add (.srt , .sub) subtitles to .flv flash movie video on Linux

Friday, April 15th, 2011

how-to-add-srt-subtitles-to-flv-flash-movie-video-on-linux
If you're on Linux the questions like, how can I convert between video and audio formats, how to do photo editing etc. etc. have always been a taugh question as with it's diversity Linux often allows too many ways to do the same things.

In the spirit of questioning I have been recently curious, how can a subtitles be added to a flash video (.flv) video?

After some research online I've come up with the below suggested solution which uses mplayer to do the flash inclusion of the subtitles file.

mplayer your_flash_movie.flv -fs -subfont-text-scale 3

While including the subtitles to the .flv file, it's best to close up all the active browsers and if running something else on the desktop close it up.
Note that above's mplayer example for (.srt and .sub) subtitle files example is only appropriate for a .flv movie files which already has a third party published subtitle files.

What is interesting is that often if you want to make custom subtitles to let's say a video downloaded from Youtube on Linux the mplayer way pointed above will be useless. Why?

Well the Linux programs that allows a user to add custom subtitles to a movie does not support the flv (flash video) file format.

My idea on how to create custom subtitles and embed them into a flv movie file is very simple and it goes like this:

1. Convert the .flv file format to let's say .avi or .mpeg
2. Use gnome-subitles or subtitleeditor to create the subtitles for the .avi or .mpeg file
3. Convert back the .avi/.mpeg file with included subtitles to .flv (flash video format)

This methodology is really long and time consuming, but pitily as far as my understanding goes it's the only way to do that on your Linux until now.

To make the conversations between .flv and .avi format you will need to use the ffmpeg – (FFMpeg command line tool video converter), here is how:

– Convert .flv to .avi

debian:~# /usr/bin/ffmpeg -i input_flvfilename.flv output_avifilename.avi

– Convert .avi file to .flv

debian:~# /usr/bin/ffmpeg -y -i /path/to/your/avi/input_avifilename.avi -acodec mp3 -ar 22050 -f flv
/path/to/your/flv/output_flvfilename.flv

The required overall tools which you will have to have installed on your Debian or Ubuntu Linux are:

1. ffmpeg
2. gnome-subtitles
3. subtitleeditor
4. mplayer

You will also have to spend some time to get to know gnome-subtitles or subtitleeditor, but it won't be that long until you get the idea on how to use them.

Convert png files to ico on Linux – Create “icon” files from pictures

Tuesday, November 2nd, 2010

You will need png2ico

First you will have to download the png2ico source

Now you will have to download compile and install the program by issuing:

debian:~# wget http://www.winterdrache.de/freeware/png2ico/data/png2ico-src-2002-12-08.tar.gz
debian:~# tar -zxvf png2ico-src-2002-12-08.tar.gz...
debian:~# cd png2ico/
debian:/root/png2ico# make
debian:/root/png2ico# cp -rpf png2ico /usr/local/bin/

Convertion is pretty easy and it comes to executing simply:

debian:/home/hipo$ png2ico favicon.ico png_picture_to_convert.png

Note that your png_picture_to_convert.png has to be in a graphic dimensions of 16×16
That’s all now you should have your favicon.ico on your Linux created.

Convert WAV to MP3 in command line with LAME on Linux

Friday, April 8th, 2011

I needed to convert a bunch of files from WAV to MP3 format on my Linux desktop.

I’ve placed all my wav files to the directory /home/hipo/wav

And then I issued the small one liner script to convert the .wav files to .mp3 using the niftly lame linux mp3 convertor.

Here is how I did it:

linux-desktop:~$ cd wav
linux-desktop:/home/hipo/wav$ for i in *.wav; do
new_name=$(echo $i |sed -e 's#wav#mp3#g');
lame -V0 -h -b 160 --vbr-new "$i" "$new_name";
done

After executing the little script you might go and have a coffee, if you have thousands of files, each file convertion takes about 10-15 seconds of time (speed depends on your CPU).

Here is some output from a lame convertion to mp3 taking place:

Encoding as 8 kHz single-ch MPEG-2.5 Layer III VBR(q=0)
Frame | CPU time/estim | REAL time/estim | play/CPU | ETA
27237/27237 (100%)| 0:12/ 0:12| 0:12/ 0:12| 155.89x| 0:00
64 [27237] ***************************************************************
----------------------------------------------
kbps mono % long switch short %
64.0 100.0 84.1 8.9 7.0
If you want to save my convertion quickly for a later, download my Convert WAV to mp3 from a directory with lame shell script here

Actually there are plenty of other ways to convert wav to mp3 on Linux through mplayer, ffmpeg even with mpg123.

There are also some GUI programs that could do the convertion like winff , however for some weird reason after installing WinFF on my debian it was not able to complete convertion to mp3?!
But it doesn’t matter, the good news is I did what I wanted to via the simple lame program and the above script, hope it helps somebody out there.

Convert PDF .pdf to Plain Text .txt files on GNU / Linux and FreeBSD / pdftotext

Friday, November 16th, 2012

Convert PDF .pdf to .txt Plain Text on GNU / Linux Redhat, Debian, CentOS, Fedora and FreeBSD with pdftotext poppler-utils

If you need to convert Adobe PDF to Plain Text on Linux or FreeBSD, you will have to take a look at a poppler-utils – (PDF Utilities).

For those who wonder why you need at all a .PDF in .TXT, I can think of at least 4 good reasons. 
 

PDF to text convertion on Linux and other UNIX-es is possible through a set of tools called poppler-utils

poppler-utils is installable on most Linux distributions on Debian Ubuntu based Linux-es it is installable with the usual:

noah:~# apt-get install --yes poppler-utils
....

On Fedora it is available and installable from default repositories with yum

[root@fedora~]# yum -y install poppler-utils 

On Mandriva Linux:
[root@mandriva~] # urpmi poppler
....

On FreeBSD (and possibly other BSDs) you can install via ports or install it from binary with:

freebsd# pkg_add -vr poppler-utils
....

Here is a list of poppler-utils contents from the .deb Debian package, on other distros and BSD the /bin content tools are same.
noah:~ # dpkg -L poppler-utils|grep -i /usr/bin/
/usr/bin/pdftohtml
/usr/bin/pdfinfo
/usr/bin/pdfimages
/usr/bin/pdftops
/usr/bin/pdftoabw
/usr/bin/pdftoppm
/usr/bin/pdffonts
/usr/bin/pdftotext

1. Converting  .pdf to .txt 

Converting whole PDF document to TXT is done with:

$ pdftotext PeopleWare-Productive_Projects.pdf PeopleWare-Productive_Projects.txt
 
2. Extracting from PDF to Text file only selected pages

 Dumping to .TXT only specific pages from a PDF file: is done through -f and -l arguments (First and Last) pages number.

$ pdftotext -f 3 -l 10 PeopleWare-Productive_Projects.pdf PeopleWare-Productive_Projects.txt

3. Converting PDF to TXT  protected with password

  $ pdftotext -opw 'Password' Password-protected-file.pdf Unprotected-file-dump.txt

the -opw arguments stand for 'Owner Password'. As suggested by man page -opw will bypass all PDF security restrictions. In PDFs there are file permission password protection as well as user password. 

To remove permissions password protection of file

$ pdftotext -upw 'Password' Password-protected-file.pdf Unprotected-file-dump.txt

 
4. Converting .pdf to .txt and setting type of end of file

Depending on the type of Operating System the TEXT file will be red further, you can set the type of end of lines (for those who don't know it here is the 3 major OSes UNIX, Windows, and MAC end of line codes:

DOS & Windows: \r\n 0D0A (hex), 13,10 (decimal)
Unix & Mac OS X: \n, 0A, 10
Macintosh (OS 9): \r, 0D, 13

$ pdftotext -eol unix PeopleWare-Productive_Projects.pdf
PeopleWare-Productive_Projects.txt

The -eol accepts (mac, unix or dos) as options

A bit off topic but very useful thing is to then listen to converted .txt files using festival.

5. Reading .PDF in Linux Text Console and Terminals

$ pdftotext PDF_file_to_Read.pdf -

Btw it is interesting to mention Midnight Commander ( mcview ), component which supports opening .pdf files in console uses pdftotext for extracting PDFs and visualizing in plain text in exactly same way

Well that's it happy convertion.

Convert .doc to .pdf on Linux and BSD using console / Convertion of PDF to DOC inside scripts

Tuesday, November 13th, 2012

how to Convert .doc to .PDF using console / terminal on Linux and FreeBSD

On Linux, there are plenty of ways nowadays to convert Microsoft Word or OpenOffice .DOC documents to Adobe's PDF (Postscript). However most of the ways require a graphical environment. As I'm interested in how convertion is done mainly from console to suit shell scripts and php which has to routinely convert a bunch of .DOC files to .PDF. I've checked today how PDF to DOC is possible on Debian, Ubuntu, Arch Linux  and FreeBSD..

There are few tools one can use from console, that doesn't requiere you to have running Xorg on the convertion host. The quality of the produced converted document, may vary and with some Microsoft Office doc files, there might be some garbage. But generally for simplistic and well written "macros" free documents the quality of PDF is satisfactory with few of the tools.

Here I will list the few tools, one can use for convertion:

  • abiword – you probably know abiword GUI program which is a good substitute for people who doesn't want the huge openoffice on the host. interestingly abiword supports converts with no need for GUI
     
  • wvPDF (you have to have install wv package and usually this converter works well only with very old .DOC (MS Office 97) – I was not impressed with those convert results
     
  • oowriter / swriter (whether LibreOffice installed) or writer (on LibreOffice), on some Ubuntus and derivatives the equivalent cmd is lowriter
     
  • unoconv – this tool produces really good DOC to  PDF converts, it is a python script using openoffice / libreoffice as backend convertion engine so produced PDFs will be identical like the ones produced with oowriter, the pros of the tool is its syntax is very user friendly and along with PDF to DOC it supports easy syntax converting to  bunch of other file formats. Actually unoconv supports same convertions which supported by OpenOffice.org, the advantage is however you can use it within console and even schedule convertion to be processed by a remote host.


1. Convertion of DOC to PDF with abiword

abiword --to=pdf doc_file_to_convert.doc

2. Convert DOC to PDF with wvPDF

apt-get install --yes wv texlive-base texlive-latex-base ghostscript

wvPDF doc-file-to-convert-to-pdf.doc converted-to-pdf.pdf

wvPDF doc-file-to-convert-to-pdf.doc convert-to-pdf.pdf

Current directory: /home/hipo/Desktop
"doc-file-to-convert-to-pdf.eps" exists - skipping...
Some problem running latex.
Check for Errors in steinway.log
Continuing... 


The produced .pdf was not useful most of the text inside was completely missing as well as some weird probably PostScript convertion characters were in the .PDF. Seeing its output I would as of time of writing wvPDF Debian's verion 1.2.4 is crap.


3. Convert DOC to PDF with oowriter / swriter / lowrite

a) convert with oowriter and swriter

I saw posts online claiming DOC to PDF convertion is possible directly with oowriter or swriters with commands:

oowriter -convert-to pdf:writer_pdf_Export input-doc-file-to-convert.doc

or

swriter -convert-to pdf:writer_pdf_Export steinway.doc - as named on some Linux-es
 

As long as I tested it on my Debian Squeeze, neither of the two works
.I saw some suggestions that PDF can be generated by installing and using cups-pdf debian package:

apt-get install cups-pdf oowriter -pt pdf your_word_file.doc b) convert DOC to PDF with lowriter I've seen in Ubuntu documentation and in Ubuntu forums, users saying they had some good results using lowriter, which is a sort of front-end program to ImageMagick's convert. I never tested that but I doubt of any satisfactory results, as I tried converting to PDF earlier using convert and often converts failed. Anyways you try it with:

lowriter --convert-to pdf *.doc


4. Converting PDF to DOC  with unoconv

As of time of writing it seems unoconv is best Linux console tool for converting .doc to .pdf

It produces good readable text, as well as pictures and elements looks exactly as in OpenOffice.

To install it I run:

# apt-get install --yes unoconv
....

To use it:

$ unoconv -fpdf any-file-to-convert.doc

If you don't get errors or it doesn't crash a .doc file with same name any-file-to-convert.doc is created.

What unoconv, does is precisely the same as if using OpenOffice GUI's  to convert to PDF:


  • Open -> Open Office (3.2 in my case)
  • Open Document to export
  • File->Export as PDF
  • Click: Export
  • Choose file namefor output PDF


An interesting feature of unoconv is its possibility to run and convert as a port listening server. I never used this but noticed it mentioned in manual EXAMPLE section:


EXAMPLES
       You can use unoconv in standalone mode, this means that in absence of an OpenOffice listener, it will starts its own:

       unoconv -f pdf some-document.odt
       One can use unoconv as a listener (by default localhost:2002) to let other unoconv instances connect to it:

       unoconv --listener &
       unoconv -f pdf some-document.odt
       unoconv -f doc other-document.odt
       unoconv -f jpg some-image.png
       unoconv -f xsl some-spreadsheet.csv
       kill -15 %-
       This also works on a remote host:

       unoconv --listener --server 1.2.3.4 --port 4567
       and then connect another system to convert documents:

       unoconv --server 1.2.3.4 --port 4567

unoconv does not recognize wildcards like ' * ' , so in order to convert multiple DOC to PDF files one has to use the usual shell loop:

for i in *.doc; do unoconv -fpdf $i; done

From all my tests, I think unoconv is preferred tool for Linux and BSD users (good time to mention unoconv is available on FreeBSD too. BSD users can install it via port  /usr/ports/textproc/unoconv)

How to convert Adobe PDF file format to Microsoft Word DOC on MS Windows 2000 / XP / Vista / 7

Tuesday, July 24th, 2012

How to convert PDF to DOC on Microsoft Windows XP, MS Windows 7, Win Vista convert PDF to MS DOC 2003, ABBYY Covert Page
I had to convert Adobe PDF file to Microsoft Word ( .doc) file on Microsoft Windows OS for a friend. There is plenty of software available to convert PDF to DOC on Windows, as well as few web-site services claiming to convert correcly PDF to DOC. Converting PDF to DOC is easy and can be done with Open Office, however the reverse process is a real pain in the ass. I tried a dozen of free web serviecs to convert an ancient Latin writting PDF to DOC but none of them couldn’t properly convert it. Failing with the web services as a tool to convert, I’ve turned to seeking a tool that will do the trick. After trying few PDF to DOC converters which failed to produce a properly structed edittable DOC from the PDF file, I’ve come across ABBYY PDF Transformer 2.0. Abbyy PDF Transformer finally did it …

I’ve tried hard to look for a free software good PDF to DOC converter alternative for Windows but it seems as of time of writing this post there is no GPLed free software that does properly convert PDFs to MS WORD DOC ….

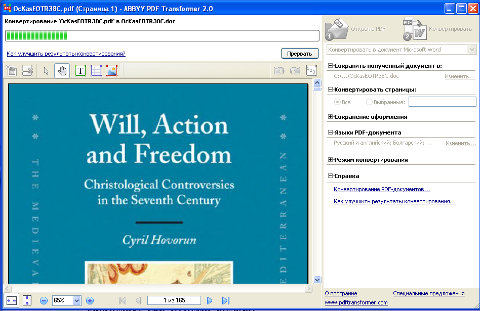
Using Abbyy PDF Transformer 2.0 is a piece of cake all I had to do is select the PDF file (pressing Open PDF) and then click on Convert (in right bottom corner). Below is a shot of Abby PDF transformer in action.

How to convert PDF to DOC on Microsoft Windows XP, MS Windows 7, Win Vista convert PDF to MS DOC 2003, abby pdf converter in action