Posts Tagged ‘copying’
Tuesday, December 3rd, 2019

Sometimes on servers that follow high security standards in companies following PCI Security (Payment Card Data Security) standards it is necessery to have a very weird configurations on servers,to be able to do trivial things such as syncing files between servers with root privileges in a weird manners.This is the case for example if due to security policies you have disabled root user logins via ssh server and you still need to synchronize files in directories such as lets say /etc , /usr/local/etc/ /var/ with root:root user and group belongings.
Disabling root user logins in sshd is controlled by a variable in /etc/ssh/sshd_config that on most default Linux OS
installations is switched on, e.g.
grep -i permitrootlogin /etc/ssh/sshd_config
PermitRootLogin yes
Many corporations use Vulnerability Scanners such as Qualys are always having in their list of remote server scan for SSH Port 22 to turn have the PermitRootLogin stopped with:
PermitRootLogin no
In this article, I'll explain a scenario where we have synchronization between 2 or more servers Server A / Server B, whatever number of servers that have already turned off this value, but still need to
synchronize traditionally owned and allowed to write directories only by root superuser, here is 4 easy steps to acheive it.
1. Add rsyncuser to Source Server (Server A) and Destination (Server B)
a. Execute on Src Host:
groupadd rsyncuser
useradd -g 1000 -c 'Rsync user to sync files as root src_host' -d /home/rsyncuser -m rsyncuser
b. Execute on Dst Host:
groupadd rsyncuser
useradd -g 1000 -c 'Rsync user to sync files dst_host' -d /home/rsyncuser -m rsyncuser
2. Generate RSA SSH Key pair to be used for passwordless authentication
a. On Src Host
su – rsyncuser
ssh-keygen -t rsa -b 4096
b. Check .ssh/ generated key pairs and make sure the directory content look like.
[rsyncuser@src-host .ssh]$ cd ~/.ssh/; ls -1
id_rsa
id_rsa.pub
known_hosts
3. Copy id_rsa.pub to Destination host server under authorized_keys
scp ~/.ssh/id_rsa.pub rsyncuser@dst-host:~/.ssh/authorized_keys
Next fix permissions of authorized_keys file for rsyncuser as anyone who have access to that file (that exists as a user account) on the system
could steal the key and use it to run rsync commands and overwrite remotely files, like overwrite /etc/passwd /etc/shadow files with his custom crafted credentials
and hence hack you 🙂
Hence, On Destionation Host Server B fix permissions with:
su – rsyncuser; chmod 0600 ~/.ssh/authorized_keys
[rsyncuser@dst-host ~]$
An alternative way for the lazy sysadmins is to use the ssh-copy-id command
$ ssh-copy-id rsyncuser@192.168.0.180
/usr/bin/ssh-copy-id: INFO: Source of key(s) to be installed: "/root/.ssh/id_rsa.pub"
/usr/bin/ssh-copy-id: INFO: attempting to log in with the new key(s), to filter out any that are already installed
/usr/bin/ssh-copy-id: INFO: 1 key(s) remain to be installed — if you are prompted now it is to install the new keys
root@192.168.0.180's password:
For improved security here to restrict rsyncuser to be able to run only specific command such as very specific script instead of being able to run any command it is good to use little known command= option
once creating the authorized_keys
4. Test ssh passwordless authentication works correctly
For that Run as a normal ssh from rsyncuser
On Src Host
[rsyncuser@src-host ~]$ ssh rsyncuser@dst-host
Perhaps here is time that for those who, think enabling a passwordless authentication is not enough secure and prefer to authorize rsyncuser via a password red from a secured file take a look in my prior article how to login to remote server with password provided from command line as a script argument / Running same commands on many servers
5. Enable rsync in sudoers to be able to execute as root superuser (copy files as root)
For this step you will need to have sudo package installed on the Linux server.
Then, Execute once logged in as root on Destionation Server (Server B)
[root@dst-host ~]# grep 'rsyncuser ALL' /etc/sudoers|wc -l || echo ‘rsyncuser ALL=NOPASSWD:/usr/bin/rsync’ >> /etc/sudoers
Note that using rsync with a ALL=NOPASSWD in /etc/sudoers could pose a high security risk for the system as anyone authorized to run as rsyncuser is able to overwrite and
respectivle nullify important files on Destionation Host Server B and hence easily mess the system, even shell script bugs could produce a mess, thus perhaps a better solution to the problem
to copy files with root privileges with the root account disabled is to rsync as normal user somewhere on Dst_host and use some kind of additional script running on Dst_host via lets say cron job and
will copy gently files on selective basis.
Perhaps, even a better solution would be if instead of granting ALL=NOPASSWD:/usr/bin/rsync in /etc/sudoers is to do ALL=NOPASSWD:/usr/local/bin/some_copy_script.sh
that will get triggered, once the files are copied with a regular rsyncuser acct.
6. Test rsync passwordless authentication copy with superuser works
Do some simple copy, lets say copy files on Encrypted tunnel configurations located under some directory in /etc/stunnel on Server A to /etc/stunnel on Server B
The general command to test is like so:
rsync -aPz -e 'ssh' '–rsync-path=sudo rsync' /var/log rsyncuser@$dst_host:/root/tmp/
This will copy /var/log files to /root/tmp, you will get a success messages for the copy and the files will be at destination folder if succesful.
On Src_Host run:
[rsyncuser@src-host ~]$ dst=FQDN-DST-HOST; user=rsyncuser; src_dir=/etc/stunnel; dst_dir=/root/tmp; rsync -aP -e 'ssh' '–rsync-path=sudo rsync' $src_dir $rsyncuser@$dst:$dst_dir;
7. Copying files with root credentials via script
The simlest file to use to copy a bunch of predefined files is best to be handled by some shell script, the most simple version of it, could look something like this.
#!/bin/bash
# On server1 use something like this
# On server2 dst server
# add in /etc/sudoers
# rsyncuser ALL=NOPASSWD:/usr/bin/rsync
user='rsyncuser';
dst_dir="/root/tmp";
dst_host='$dst_host';
src[1]="/etc/hosts.deny";
src[2]="/etc/sysctl.conf";
src[3]="/etc/samhainrc";
src[4]="/etc/pki/tls/";
src[5]="/usr/local/bin/";
for i in $(echo ${src[@]}); do
rsync -aPvz –delete –dry-run -e 'ssh' '–rsync-path=sudo rsync' "$i" $rsyncuser@$dst_host:$dst_dir"$i";
done
In above script as you can see, we define a bunch of files that will be copied in bash array and then run a loop to take each of them and copy to testination dir.
A very sample version of the script rsync_with_superuser-while-root_account_prohibited.sh
Conclusion
Lets do short overview on what we have done here. First Created rsyncuser on SRC Server A and DST Server B, set up the key pair on both copied the keys to make passwordless login possible,
set-up rsync to be able to write as root on Dst_Host / testing all the setup and pinpointing a small script that can be used as a backbone to develop something more complex
to sync backups or keep system configurations identicatial – for example if you have doubts that some user might by mistake change a config etc.
In short it was pointed the security downsides of using rsync NOPASSWD via /etc/sudoers and few ideas given that could be used to work on if you target even higher
PCI standards.
Tags: bin, command, copy files, copying, Dst Host, enable, execute, logins, make, password, passwordless, possible, root, root privileges, rsync, running, security policies, servers, shell script, Short, Src Host, ssh server, superuser, system, test, var, without
Posted in Linux, Networking, System Administration | 1 Comment »
Friday, June 20th, 2014 
I recently migrated MySQL database server from host A to host B (remotesystemadministration.com), because I wanted to have the mysql database server on a separate machine (have separation of server running services and have a dedicated mysql server).
MySQL server host (running on localhost previously was set from my mysql config – my.cnf to listen and serve connections on localhost with
bind-address = 127.0.0.1
). MySQL is used by a Tomcat running Java application on localhost and my task was to set the Tomcat to use the MySQL database remotely to MySQL host B (new remote hostname where MySQL is moved is remotesystemadminsitration.com and is running on IP 83.228.93.76).
Migration from MySQL Db server 1 (host A) to MySQL Db server 2 (host B) is done by binary copying the mysql database directory which in this case is (as it is a Debian server installed MySQL), the standard directory where mysql stores its database data is /var/lib/mysql ( datadir = /var/lib/mysql in /etc/mysql/my.cnf)
Binary copying of data from MySQL db (host A) to MySQL Db (host B) is done with rsync
After migrating and trying to login on migrated mysql database on remotesystemadministration.net with mysql cli client:
remotesysadmin:~$ mysql -u root -p
I got following error:
ERROR 1045 (28000): Access denied for user 'root'@'remotesystemadministration.com' (using password: YES)
To fix the issue I had to login remotely from old migration server mysql (host A) cli:
mysql:~$ mysql -u root -p -h remotesystemadministration.com
and run SQL commands:
GRANT ALL PRIVILEGES ON *.* TO 'root'@'remotesystemadministration.com' WITH GRANT OPTION;

GRANT USAGE ON *.* TO 'root'@'remotesystemadministration.com' IDENTIFIED BY 'secret-mysql-pass';

FLUSH PRIVILEGES;
Query OK, 0 rows affected (0.03 sec)
Query OK, 0 rows affected (0.00 sec)
Query OK, 0 rows affected (0.00 sec)
Another way to solve the problem is to add the root user to be able to connect from any host (Enable MySQL root access from all host), to do so issue:
GRANT ALL PRIVILEGES ON *.* TO 'root'@'%' IDENTIFIED BY 'password';

FLUSH PRIVILEGES;
Note: In newer version of MySQL, flush privileges could be omitted.
Another approach if you want to substitute access from localhost for all users and enable all users to be able to authenticate to mysql remotely is to execute SQL Query:
UPDATE USER SET host='%' WHERE host='localhost';
Allowing all users to be able to connect from anywhere on the internet is a very bad security practice anyways, if you already have a tight firewall setup and you can only access the server via specific remote IP addresses allowing MySQL access from all hosts / ips should be ok.
Tags: com, config, copying, ERROR, issue, Java, lib, localhost, migration, mysql database, mysql database server, net, remotesystemadministration, root, running, task, var
Posted in MySQL, Programming, System Administration | No Comments »
Monday, December 2nd, 2013 
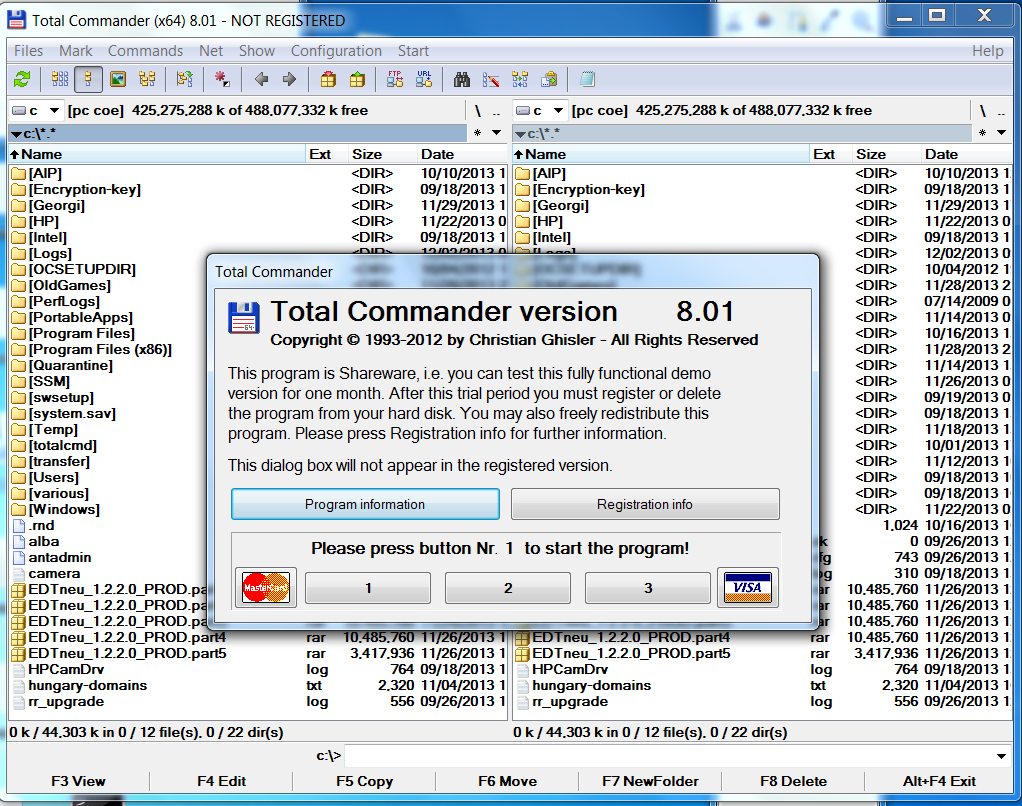
Whether coming from Linux background and you're forced to work with MS Windows or even if you're born as a Windows user and you hold a strong dislike for Windows File Explorer. You will certainly appreacite some Windows Explorer alternative like Total Commander.
1. Total Commander – Windows Advanced File Manager
Total Commander was widely spread and still is mostly used by advanced Windows users since the distant 1996 when it came to exist.
Total Commander is highly spread among programmers and computer professionals. It is well known in Russia and the ex-Soviet Union block countries Total Commander is strongly preferred over Windows Explorer by anyone who ever had to work in Old command line MS-DOS, Unix consoles / Midnight Commander etc. Total Commander has just one downside it is not free as in freedom but shareware, so you either have to find a crack for it or everytime you run it press a number before you can proceed with it, this however is not such a big issue as usually you work with computer whole day and even if you should press a number once to continue run as Shareware, you have to do it just once or twice a day.
So why use Total Commander or Free Commander preferred choice over Windows Explorer and why it is better for one to use it:
1. Security
Big part of viruses have hidden attribute. Of course we can’t see it’s presence in Windows Explorer, this is so common with USB Drive Viruses. While MS Explorer has limited capability in showing system file, Total Commander is different, once it is specified to show hidden files, all kind of hidden files are to be shown.
2. Support for multiple upload protocols like FTP and SFTP
Through Total Commander plugins you can enjoy simplified way to do every operation from one interface. Once plugin for SFTP / Webdav … plugins you will not have to install separate clients like WinSCP / CarotWebDav etc.
3. Play multimedia mp3 / Zip / Unzip, watch pictures
You can play your mp3s with no need for WinAmp, Unzip or IrfanView. As this is done internally in Total Commander through plugins. So using Total Commander saves you from multiple applications also gives you unified interface something which saves time and annoyance of separate applications pop-up windows.
4. Better file copying internal program
Total Commander's copier is much better than Windows Explorer default one. Lets say you have a power outage during copying a large file. What Windows Explorer will offer is overwrite the file loosing you time, whether Total Commander will continue copying from file byte size it stopped due to outage. Another advantage is it will be able to copy damaged files much better than Windows default copier program. TT's internal copy is not so quick as TerraCopy but faster than Windows Explorer default one..
5. More powerful search than Explorer's
TT has capabilities to search inside archives, set search encoding type. Search only by directories or files, set a range of dates from which files has to be found, search only hidden directories, search by directory file attribute, file size, look for duplicate files etc. etc.

Here is a complete list of Basic features embedded in Total Commander latest version which of time of writting is 8.01;
- Two file windows side by side
- Multiple language and Unicode support
- Enhanced search function
- Compare files (now with editor) / synchronize directories
- Quick View panel with bitmap display
- ZIP, ARJ, LZH, RAR, UC2, TAR, GZ, CAB, ACE archive handling + plugins
- Built-in FTP client with FXP (server to server) and HTTP proxy support
- Parallel port link, multi-rename tool
- Tabbed interface, regular expressions, history+favorites buttons
- Thumbnails view, custom columns, enhanced search
- Compare editor, cursor in lister, separate trees, logging, enhanced overwrite dialog etc.
- Unicode names almost everywhere, long names (>259 characters), password manager for ftp and plugins, synchronize empty dirs, 64 bit context menu, quick file filter (Ctrl+S)
- USB port connection via special, many improvements to ftp, synchronizing and other functions
Total Commander has a portable version for those who travel a lot and like to use it on multiple computers from a USB Stick.
2. Free Commander – A Total Commander Free for personal use Alternative

Free Commander is not open source but it is free to use for non-commercial use and not Shareware, so it is perfect alternative for those who like Total Commander but dislike fact you have to press a number on each TT start up and you have to see in Total Commander Title (NOT REGISTERED)
List of basic supported functions by Free Commander are;
- Dual-panel technology – horizontal and vertical
- Tabbed interface
- Optional tree view for each panel
- Built in file viewer to view files in hex, binary, text or image format
- File viewer inside archives too
- Built in archive handling: ZIP (read, write), CAB (read, write), RAR (read)
- Nested archive handling
- Built in FTP client
- Easy access to system folders, control panel, desktop and start menu
- Copy, move, delete, rename files and folders
- Multi rename tool
- Wipe files
- Create and verify MD5 checksums
- File splitting
- File properties and context menu
- Calculation of folder size
- Folder comparison / synchronization
- Modification of file date and attributes
- Folder / program favorites
- File searching (inside archive too)
- File filters for display
- User defined columns for detailed view
- DOS command line
- Multiple language support
Just like Total Command, Free Commander has a portable version for those who want run it on Windows machines with no admin permissions to install.
Tags: choice, copying, explorer, file, Free Commander, Ftp, Linux, multiple, program, programmers, protocols, Shareware, Total Commander, TT, Unicode, upload, view, Windows, windows explorer, Windows File Explorer, work
Posted in System Administration, Various, Windows | 3 Comments »
Friday, April 13th, 2012 1. Dump all installed server packages from Debian Linux server1
First it is necessery to dump a list of all installed packages on the server from which the intalled deb packages 'selection' will be replicated.
debian-server1:~# dpkg --get-selections \* > packages.txt
The format of the produced packages.txt file will have only two columns, in column1 there will be the package (name) installed and in column 2, the status of the package e.g.: install or deinstall
Note that you can only use the –get-selections as root superuser, trying to run it with non-privileged user I got:
hipo@server1:~$ dpkg --set-selections > packages.txt

dpkg: operation requires read/write access to dpkg status area
2. Copy packages.txt file containing the installed deb packages from server1 to server2
There is many way to copy the packages.txt package description file, one can use ftp, sftp, scp, rsync … lftp or even copy it via wget if placed in some Apache directory on server1.
A quick and convenient way to copy the file from Debian server1 to server2 is with scp as it can also be used easily for an automated script to do the packages.txt file copying (if for instance you have to implement package cloning on multiple Debian Linux servers).
 root@debian-server1:~# scp ./packages.txt hipo@server-hostname2:~/packages.txt

The authenticity of host '83.170.97.153 (83.170.97.153)' can't be established. RSA key fingerprint is 38:da:2a:79:ad:38:5b:64:9e:8b:b4:81:09:cd:94:d4. Are you sure you want to continue connecting (yes/no)? yes Warning: Permanently added '83.170.97.153' (RSA) to the list of known hosts. hipo@83.170.97.153's password:

packages.txt
As this is the first time I make connection to server2 from server1, I'm prompted to accept the host RSA unique fingerprint.
3. Install the copied selection from server1 on server2 with apt-get or dselect
debian-server2:/home/hipo# apt-get update

...

debian-server2:/home/hipo# apt-get upgrade

Reading package lists... Done

Building dependency tree

Reading state information... Done

debian-server2:/home/hipo# dpkg --set-selections < packages.txt

debian-server2:/home/hipo# apt-get -u dselect-upgrade --yes
The first apt-get update command assures the server will have the latest version of the packages currently installed, this will save you from running an outdated versions of the installed packages on debian-server2
Bear in mind that using apt-get sometimes, might create dependency issues. This is depending on the exact package names, being replicated in between the servers
Therefore it is better to use another approach with bash for loop to "replicate" installed packages between two servers, like so:
debian-server2:/home/hipo# for i in $(cat packages.txt |awk '{ print $1 }'); do aptitude install $i; done
If you want to automate the questioning about aptitude operations pass on the -y
debian-server2:/home/hipo# for i in $(cat packages.txt |awk '{ print $1 }'); do aptitude -y install $i; done
Be cautious if the -y is passed as sometimes some packages might be removed from the server to resolve dependency issues, if you need this packages you will have to again install them manually.
4. Mirroring package selection from server1 to server2 using one liner
A quick one liner, that does replicate a set of preselected packages from server1 to server2 is also possible with either a combination of apt, ssh, awk and dpkg or with ssh + dpkg + dselect :
a) One-liner code with apt-get unifying the installed packages between 2 or more servers
debian-server2:~# apt-get --yes install `ssh root@debian-server1 "dpkg -l | grep -E ^ii" | awk '{print $2}'`

...
If it is necessery to install on more than just debian-server2, copy paste the above code to all servers you want to have identical installed packages as with debian-server1 or use a shor for loop to run the commands for each and every host of multiple servers group.
In some cases it might be better to use dselect instead as in some situations using apt-get might not correctly solve the package dependencies, if encountering problems with dependencies better run:
debian-server2:/home/hipo# ssh root@debian-server1 'dpkg --get-selections' | dpkg --set-selections && dselect install
As you can see using this second dselect installed "package" mirroring is also way easier to read and understand than the prior "cryptic" method with apt-get, hence I personally think using dselect method is a better.
Well that's basically it. If you need to synchronize also configurations, either an rsync/scp shell script, should be used with all defined server1 config files or in case if a cloning of packages between identical server machines is necessery dd or some other tool like Norton Ghost could be used.
Hope this helps, someone.
Tags: apache, aptitude, authenticity, b4, clone, cloning, copying, deb packages, debian linux, deinstall, dependency, description, dpkg, dump, file, fingerprint, hosts, instance, lftp, Linux, linux servers, Mirroring, necessery, operation, package, package description, Permanently, privileged user, quot, root, rsync, scp, server packages, server1, server2, sftp, ssh, wget
Posted in Linux, System Administration | No Comments »
Saturday, March 3rd, 2012 I've recently had to make a copy of one /usr/local/nginx directory under /usr/local/nginx-bak, in order to have a working copy of nginx, just in case if during my nginx update to new version from source mess ups.
I did not check the size of /usr/local/nginx , so just run the usual:
nginx:~#  cp -rpf /usr/local/nginx /usr/local/nginx-bak

...
Execution took more than 20 seconds, so I check the size and figured out /usr/local/nginx/logs has grown to 120 gigabytes.
I didn't wanted to extra load the production server with copying thousands of gigabytes so I asked myself if this is possible with normal Linux copy (cp) command?. I checked cp manual e.g. man cp, but there is no argument like –exclude or something.
Even though the cp command exclude feature is not implemented by default there are a couple of ways to copy a directory with exclusion of subdirectories of files on G / Linux.
Here are the 3 major ones:
1. Copy directory recursively and exclude sub-directories or files with GNU tar
Maybe the quickest way to copy and exclude directories is through a littke 'hack' with GNU tar
nginx:~# mkdir /usr/local/nginx-new;

nginx:~# cd /usr/local/nginx#

nginx:/usr/local/nginx# tar cvf - \. --exclude=/usr/local/nginx/logs/* \

| (cd /usr/local/nginx-new; tar -xvf - )
Copying that way however is slow, in my case it fits me perfectly but for copying large chunks of data it is better not to use pipe and instead use regular tar operation + mv
# cd /source_directory

# tar cvf test.tar --exclude=dir_to_exclude/*\--exclude=dir_to_exclude1/* . \

# mv test.tar /destination_directory

# cd /destination# tar xvf test.tar
2. Copy folder recursively excluding some directories with rsync
P>eople who has experience with rsync , already know how invaluable this tool is. Rsync can completely be used as for substitute=de.a# rsync -av –exclude='path1/to/exclude' –exclude='path2/to/exclude' source destination
This example, can also be used as a solution to my copy nginx and exclude logs directory casus like so:
nginx:~# rsync -av --exclude='/usr/local/nginx/logs/' /usr/local/nginx/ /usr/local/nginx-new
As you can see for yourself, this is a way more readable for the tar, however it will not work on servers, where rsync is not installed and it is unusable if you have to do operations as a regular users on such for that case surely the GNU tar hack is more 'portable' across systems.
rsync has also Windows version and therefore, the same methodology should be working on MS Windows and good for batch scripting.
I've not tested it myself, yet as I've never used rsync on Windows, if someone has tried and it works pls drop me a short msg in comments.
3. Copy directory and exclude sub directories and files with find
Find in collaboration with cp can also be used to exclude certain directories while copying. Actually this method is better than the GNU tar hack and surely more efficient. For machines, where rsync is not installed it is just a perfect way to copy files from location to location, while excluding some directories, here is an example use of find and cp, for the above nginx case:
nginx:~# cd /usr/local/nginx

nginx:~# mkdir /usr/local/nginx

nginx:/usr/local/nginx# find . -type d \( ! -name logs \) -print -exec cp -rpf '{}' /usr/local/nginx-bak \;
This will find all directories inside /usr/local/nginx with find command print them on the screen, then execute recursive copy over each found directory and copy to /usr/local/nginx-bak
This example will work fine in the nginx case because /usr/local/nginx does not contain any files but only sub-directories. In other occwhere the directory does contain some files besides sub-directories the files had to also be copied e.g.:
# for i in $(ls -l | egrep -v '^d'); do\

cp -rpf $i /destination/directory
This will copy the files from source directory (for instance /usr/local/nginx/my_file.txt, /usr/local/nginx/my_file1.txt etc.), which doesn't belong to a subdirectory.
The cmd expression:
# ls -l | egrep -v '^d'
Lists only the files while excluding all the directories and in a for loop each of the files is copied to /destination/directory
If someone has better ideas, please share with me 🙂
Tags: argument, Auto, copy, copy cp, copy directory, copy folder, copying, destination directory, directory cd, Draft, eople, exclusion, feature, file, g man, gigabytes, gnu linux, gnu tar, linux linux, littke, location, man cp, mess, mess ups, msg, operation, p eople, production, production server, recursively, rpf, rsync, someone, something, source directory, subdirectories, substitute, tar cvf, tar xvf, test, tool, ups, xvf
Posted in Linux, Linux and FreeBSD Desktop, System Administration | 2 Comments »
Monday, January 9th, 2012 I've recently had to set up a backup system to synchronize backup archive files between two remote servers and as I do usually with this situation I just set up a crontab job to periodically execute rsync to copy data from source server to the destination server . Copying SRC to DEST is the default behaviour rsync uses, however in this case I had to copy from the destination server to the source server host (in other words sync files the reversely.
The usual way to copy with rsync via SSH (from SRC to DEST) is using a cmd line like:
debian:~$ /usr/bin/rsync -avz -e ssh backup-user@xxx.xxx.xxx.xxx:/home/backup-user/my-directory .
Where the xxx.xxx.xxx.xxx is my remote server IP with which files are synched.
According to rsync manual, the proposed docs SYNOPSIS is in the format;
Local: rsync [OPTION…] SRC… [DEST
Obviusly the default way to use rsync is to copy source to destination which I used until now, but in this case I had to the other way around and copy files from a destination host to the source server. It was logical that swapping the SRC and DEST would complete my required task. Anyways I consulted with some rsync gurus in irc.freenode.net , just to make sure it is proper to just swap the SRC, DEST arguments.
I was told this is possible, so I swapped args;
debian:~$ /usr/bin/rsync -avz -e ssh . backup-user@xxx.xxx.xxx.xxx:/home/backup-user/my-directory

...
Surprisingly this worked 😉 Anyways I was adviced by by a good guy nick named scheel , that putting -e ssh to command line is generally unnecessery except if there is no some uncommon used SSH port over which the data is transferred. An example case in which -e 'ssh is necessery would be if transferring via lets say SSH port 1234;
rsync -avz -e 'ssh -p1234' /source user@host:/dest
In all other cases omitting '-e ssh' is better as '-e ssh' is rsync default. Therefore my final swapped line I put in cron to copy from a destinatio to source host with rsync looked like so:
05 03 2 * * /usr/bin/ionice -c 3 /usr/bin/rsync -avz my-directory backup-user@xxx.xxx.xxx.xxx:/home/backup-user/ >/dev/null 2>&1
Tags: archive files, Auto, avz, backup system, case, cmd, cmd line, copy, copying, cron, default, default behaviour, destIn, destinatio, destination, destination host, destination server, docs, Draft, example, example case, few words, format, gurus, host, job, nbsp, necessery, nick, option, port 1234, remote server, rsync, scheel, server host, server ip, source host, source server, ssh port, sync files, system, usr bin
Posted in FreeBSD, Linux, System Administration | No Comments »
Monday, November 28th, 2011 
Have you looked for a universal physical check up tool to check up any filesystem type existing on your hard drive partitions?
I did! and was more than happy to just recently find out that the small UNIX program dd is capable to check any file system which is red by the Linux or *BSD kernel.
I’ll give an example, I have few partitions on my laptop computer with linux ext3 filesystem and NTFS partition.
My partitions looks like so:
noah:/home/hipo# fdisk -l

Disk /dev/sda: 160.0 GB, 160041885696 bytes

255 heads, 63 sectors/track, 19457 cylinders

Units = cylinders of 16065 * 512 = 8225280 bytes

Sector size (logical/physical): 512 bytes / 512 bytes

I/O size (minimum/optimal): 512 bytes / 512 bytes

Disk identifier: 0x2d92834c

Device Boot Start End Blocks Id System

/dev/sda1 1 721 5786624 27 Unknown

Partition 1 does not end on cylinder boundary.

/dev/sda2 * 721 9839 73237024 7 HPFS/NTFS

/dev/sda3 9839 19457 77263200 5 Extended

/dev/sda5 9839 12474 21167968+ 83 Linux

/dev/sda6 12474 16407 31593208+ 83 Linux

/dev/sda7 16407 16650 1950448+ 82 Linux swap / Solaris

/dev/sda8 16650 19457 22551448+ 83 Linux
For all those unfamiliar with dd – dd – convert and copy a file this tiny program is capable of copying data from (if) input file to an output file as in UNIX , the basic philosophy is that everything is a file partitions themselves are also files.
The most common use of dd is to make image copies of a partition with any type of filesystem on it and move it to another system
Looking from a Windows user perspective dd is the command line Norton Ghost equivalent for Linux and BSD systems.
The classic way dd is used to copy let’s say my /dev/sda1 partition to another hard drive /dev/hdc1 is by cmds:
noah:/home/hipo# dd if=/dev/sda1 of=/dev/hdc1 bs=16065b
Even though the basic use of dd is to copy files, its flexibility allows a “trick” through which dd can be used to check any partition readable by the operating system kernel for bad blocks
In order to check any of the partitions listed, let’s say the one listed with filesystem HPFS/NTFS on /dev/sda2 using dd
noah:/home/hipo# dd if=/dev/sda2 of=/dev/null bs=1M
As you can see the of (output file) for dd is set to /dev/null in order to prevent dd to write out any output red by /dev/sda2 partition. bs=1M instructs dd to read from /dev/sda2 by chunks of 1 Megabyte in order to accelerate the speed of checking the whole drive.
Decreasing the bs=1M to less will take more time but will make the bad block checking be more precise.
Anyhow in most cases bs of 1 Megabyte will be a good value.
After some minutes (depending on the partition size), dd if, of operations outputs a statistics informing on how dd operations went.
Hence ff some of the blocks on the partition failed to be red by dd this will be shown in the final stats on its operation completion.
The drive, I’m checking does not have any bad blocks and dd statistics for my checked partition does not show any hard drive bad block problems:
71520+1 records in

71520+1 records out

74994712576 bytes (75 GB) copied, 1964.75 s, 38.2 MB/s
The statistics is quite self explanatory my partition of s size 75 GB was scanned for 1964 seconds roughly 32 minutes 46 seconds. The number of records red and written are 71520+1 e.g. (records in / records out). This means that all the records were properly red and wrote to /dev/null and therefore no BAD blocks on my NTFS partition 😉
Tags: bad blocks, Blocks, boundary, bsd systems, bytesDisk, copying, cylinder boundary, dd, device boot, Disk, drive, drive partitions, end, everything, ext, fdisk, file, filesystem type, freebsd, gnu linux, hipo, image copies, input file, kernel, laptop, laptop computer, lDisk, linux dev, noah, norton ghost, NTFS, optimal, partition, perspective, quot, sda, sector, sector size, Solaris, tiny program, tool, type, unix program, windows user
Posted in Computer Security, FreeBSD, Linux, System Administration, Various | No Comments »
Monday, November 21st, 2011 
Many of us have already taken advantage of the powerful Rsync proggie, however I'm quite sure there are still people who never used rsync to transfer files between servers.. That's why I came with this small post to possibly introduce rsync to my blog readers.
Why Rsync and not Scp or SFTP? Well Rsync is designed from the start for large files transfer and optimized to do the file copying job really efficient. Some tests with scp against rsync will clearly show rsync's superiority.
Rsync is also handy to contiue copying of half copied files or backups and thus in many cases saves bandwidth and machine hdd i/o operations.
The most simple way to use rsync is:
server:~# rsync -avz -e ssh remoteuser@remotehost:/remote/directory /local/directory/
Where remoteuser@remotehost — is the the username and hostname of remote server to copy files to.
/remote/directory — is the directory where the rsync copied files should be stored
/local/directory — is the local directory from which files will be copied to remote directory
If not a preliminary passwordless ssh key (RSA / DSA) authentication is configured on remote server, the above command will prompt for a password otherwise the rsync will start doing the transfer.
If one needs to have a RSA or DSA (public / private key) passwordless SSH key authentication , a RSA key first should be generated and copied over to the remote server, like so:
server:~# ssh-keygen -t dsa

...

server:~# ssh-copy-id -i ~/.ssh/id_dsa.pub root@remotehost

...
That's all folks, enjoy rsyncing 😉
Tags: authentication, backups, bandwidth, blog, bsd unix, command, copying, directoryIf, DSA, file, half, hostname, job, Linux, local directory, password, passwordless ssh, private key, proggie, remote server, remotehost, remoteuser, root, rsa key, rsync, scp, sftp, ssh, ssh copy, superiority, transfer, unix, unix servers, username, way
Posted in Everyday Life, Linux, System Administration, Various, Web and CMS | No Comments »


