Posts Tagged ‘dpkg’

How to Recover deleted /var/lib/dpkg directory on Debian / Ubuntu Linux server

Wednesday, October 6th, 2021

how-to-recover-accidently-deleted-var-lib-dpkg-directory-on-debian-gnu-linux

Sometimes you might do something stupid, in the hurry like running the wrong rm  command and ending up deleting /var/lib/dpkg on your Debian / Ubuntu system.

by either wrongly issuing the rm to a directory or mistyping rm -r /var/lib/dpkg.
I know this is pretty dumb but sometimes we're all dumb, if you do so and you try to do the regular

root@debian:/ # apt update && apt upgrade

or try to install some random package onwards you will end up with error message:

E: Could not open lock file /var/lib/dpkg/lock – open (2: No such file or directory)

Ending up with this error, does totally blocks your further system administration activities with both apt / aptitude / apt-get as well as with dpkg package management tool.


1. The /var/backups recovery directory

Thankfully, by Gods mercy some of Debian Linux system architects has foreseen such issues might occur and have integrated into it the automatic periodic creation of some important files into directory /var/backups/

Hence the next step is to check what kind of backups are available, there:

root@debian:/ # ls -al /var/backups/
total 19892
drwxr-xr-x  7 root root      4096 Sep 24 06:25 ./
drwxr-xr-x 22 root root      4096 Dec 21  2020 ../
-rw-r–r–  1 root root    245760 Aug 20 06:25 alternatives.tar.0
-rw-r–r–  1 root root     15910 Aug 14 06:25 alternatives.tar.1.gz
-rw-r–r–  1 root root     15914 May 29 06:25 alternatives.tar.2.gz
-rw-r–r–  1 root root     15783 Jan 29  2021 alternatives.tar.3.gz
-rw-r–r–  1 root root     15825 Nov 20  2020 alternatives.tar.4.gz
-rw-r–r–  1 root root     15778 Jul 16  2020 alternatives.tar.5.gz
-rw-r–r–  1 root root     15799 Jul  4  2020 alternatives.tar.6.gz
-rw-r–r–  1 root root     80417 Aug 19 14:48 apt.extended_states.0
-rw-r–r–  1 root root      8693 Apr 27 22:40 apt.extended_states.1.gz
-rw-r–r–  1 root root      8658 Apr 17 19:45 apt.extended_states.2.gz
-rw-r–r–  1 root root      8601 Apr 15 00:52 apt.extended_states.3.gz
-rw-r–r–  1 root root      8599 Apr  9 00:26 apt.extended_states.4.gz
-rw-r–r–  1 root root      8542 Mar 18  2021 apt.extended_states.5.gz
-rw-r–r–  1 root root      8549 Mar 18  2021 apt.extended_states.6.gz
-rw-r–r–  1 root root   9030483 Jul  4  2020 aptitude.pkgstates.0
-rw-r–r–  1 root root    628958 May  7  2019 aptitude.pkgstates.1.gz
-rw-r–r–  1 root root    534758 Oct 21  2017 aptitude.pkgstates.2.gz
-rw-r–r–  1 root root    503877 Oct 19  2017 aptitude.pkgstates.3.gz
-rw-r–r–  1 root root    423277 Oct 15  2017 aptitude.pkgstates.4.gz
-rw-r–r–  1 root root    420899 Oct 14  2017 aptitude.pkgstates.5.gz
-rw-r–r–  1 root root    229508 May  5  2015 aptitude.pkgstates.6.gz
-rw-r–r–  1 root root        11 Oct 14  2017 dpkg.arch.0
-rw-r–r–  1 root root        43 Oct 14  2017 dpkg.arch.1.gz
-rw-r–r–  1 root root        43 Oct 14  2017 dpkg.arch.2.gz
-rw-r–r–  1 root root        43 Oct 14  2017 dpkg.arch.3.gz
-rw-r–r–  1 root root        43 Oct 14  2017 dpkg.arch.4.gz
-rw-r–r–  1 root root        43 Oct 14  2017 dpkg.arch.5.gz
-rw-r–r–  1 root root        43 Oct 14  2017 dpkg.arch.6.gz
-rw-r–r–  1 root root      1319 Apr 27 22:28 dpkg.diversions.0
-rw-r–r–  1 root root       387 Apr 27 22:28 dpkg.diversions.1.gz
-rw-r–r–  1 root root       387 Apr 27 22:28 dpkg.diversions.2.gz
-rw-r–r–  1 root root       387 Apr 27 22:28 dpkg.diversions.3.gz
-rw-r–r–  1 root root       387 Apr 27 22:28 dpkg.diversions.4.gz
-rw-r–r–  1 root root       387 Apr 27 22:28 dpkg.diversions.5.gz
-rw-r–r–  1 root root       387 Apr 27 22:28 dpkg.diversions.6.gz
-rw-r–r–  1 root root       375 Aug 23  2018 dpkg.statoverride.0
-rw-r–r–  1 root root       247 Aug 23  2018 dpkg.statoverride.1.gz
-rw-r–r–  1 root root       247 Aug 23  2018 dpkg.statoverride.2.gz
-rw-r–r–  1 root root       247 Aug 23  2018 dpkg.statoverride.3.gz
-rw-r–r–  1 root root       247 Aug 23  2018 dpkg.statoverride.4.gz
-rw-r–r–  1 root root       247 Aug 23  2018 dpkg.statoverride.5.gz
-rw-r–r–  1 root root       247 Aug 23  2018 dpkg.statoverride.6.gz
-rw-r–r–  1 root root   3363749 Sep 23 14:32 dpkg.status.0
-rw-r–r–  1 root root    763524 Aug 19 14:48 dpkg.status.1.gz
-rw-r–r–  1 root root    760198 Aug 17 19:41 dpkg.status.2.gz
-rw-r–r–  1 root root    760176 Aug 13 12:48 dpkg.status.3.gz
-rw-r–r–  1 root root    760105 Jul 16 15:25 dpkg.status.4.gz
-rw-r–r–  1 root root    759807 Jun 28 15:18 dpkg.status.5.gz
-rw-r–r–  1 root root    759554 May 28 16:22 dpkg.status.6.gz

drwx——  2 root root      4096 Oct 15  2017 ejabberd-2017-10-15T00:22:30.p1e5J8/
drwx——  2 root root      4096 Oct 15  2017 ejabberd-2017-10-15T00:24:02.dAUgDs/
drwx——  2 root root      4096 Oct 15  2017 ejabberd-2017-10-15T12:29:51.FX27WJ/
drwx——  2 root root      4096 Oct 15  2017 ejabberd-2017-10-15T21:18:26.bPQWlW/
drwx——  2 root root      4096 Jul 16  2019 ejabberd-2019-07-16T00:49:52.Gy3sus/
-rw——-  1 root root      2512 Oct 20  2020 group.bak
-rw——-  1 root shadow    1415 Oct 20  2020 gshadow.bak
-rw——-  1 root root      7395 May 11 22:56 passwd.bak
-rw——-  1 root shadow    7476 May 11 22:56 shadow.bak

Considering the situation the important files for us that could, help us restore our previous list of packages, we had installed on the Debian are files under /var/backups/dpkg.status*

Luckily debian based systems keeps backups of its important files that can be used later on for system recovery activities.
Below is a common structure of /var/lib/dpkg on a deb based system.

hipo@debian:/home/hipo$ ls -l /var/lib/dpkg/
total 11504
drwxr-xr-x 2 root root    4096 Aug 19 14:33 alternatives/
-rw-r–r– 1 root root      11 Oct 14  2017 arch
-rw-r–r– 1 root root 2199402 Oct 19  2017 available
-rw-r–r– 1 root root 2197483 Oct 19  2017 available-old
-rw-r–r– 1 root root       8 Sep  6  2012 cmethopt
-rw-r–r– 1 root root    1319 Apr 27 22:28 diversions
-rw-r–r– 1 root root    1266 Nov 18  2020 diversions-old
drwxr-xr-x 2 root root  606208 Sep 23 14:32 info/
-rw-r—– 1 root root       0 Sep 23 14:32 lock
-rw-r—– 1 root root       0 Mar 18  2021 lock-frontend
drwxr-xr-x 2 root root    4096 Sep 17  2012 parts/
-rw-r–r– 1 root root     375 Aug 23  2018 statoverride
-rw-r–r– 1 root root     337 Aug 13  2018 statoverride-old
-rw-r–r– 1 root root 3363749 Sep 23 14:32 status
-rw-r–r– 1 root root 3363788 Sep 23 14:32 status-old
drwxr-xr-x 2 root root    4096 Aug 19 14:48 triggers/
drwxr-xr-x 2 root root    4096 Sep 23 14:32 updates/


2. Recreate basic /var/lib/dpkg directory and files structures

As you can see, there are 5 directories and the status file and some other files. 
Hence the first step is to restore the lost directory structure.

hipo@debian: ~$ sudo mkdir -p /var/lib/dpkg/{alternatives,info,parts,triggers,updates}


3. Recover /var/lib/dpkg/status file

Further on recover the dpkg status file from backup

hipo@debian: ~$  sudo cp /var/backups/dpkg.status.0 /var/lib/dpkg/status


4. Check dpkg package installation works again and reinstall base-files

Next check if dpkg – debian package manager is now working, by simply trying to download dpkg*.deb reinstalling it.

root@debian:/root # apt-get download dpkg
# sudo dpkg -i dpkg*.deb

If you get no errors next step is to reinstall base-files which is important package on which dpkg depends.

root@debian:/root # apt-get download base-files

root@debian:/root # sudo dpkg -i base-files*.deb


5. Update deb system package list and db consistency

Onwards try to update system package list and check dpkg / apt database consistency.

root@debian:/root # dpkg –audit

root@debian:/root # sudo apt-get update

root@debian:/root # sudo apt-get check


The result should be more of the files in /var/lib/dpkg should appear, thus list the directory again and compare to the earlier given list of it, they should be similar.

root@debian:/root # ls -l /var/lib/dpkg

6. Reinstall completely from source code dpkg, if nothing else works
 

If some files are missing they should get created with a normal daily sysadmin package management tasks so no worries.

In case if after attempting to upgrade the system or install a package with apt, you get some nasty error like:
 

'/usr/local/var/lib/dpkg/status' for reading: No such file or directory


Then the next and final thing to try as a recovery is to download compile from a new and reinstall dpkg from source code!


root@debian:/ # wget https://launchpad.net/ubuntu/+archive/primary/+files/dpkg_1.16.1.2ubuntu7.2.tar.bz2
root@debian:/ # tar -xvf dpkg_1.16*

root@debian:/ # cd dpkg-1.16*

root@debian:/ # ./configure

root@debian:/ # make

root@debian:/ # make install


Hopefully you'll have gcc and development tools provided by build-essential .deb package otherwise you have to download and compile this ones as well 🙂
If this doesn't bring you back the installed packages you had priorly (hopefully not), then waste no more time and do a backup of the main things on the server, and reinstall it completely.

The moral out of this incident is always to implement always to your system a good back up system and regularly create backups of /var/lib/dpkg , /etc/ , /usr/local* and other important files on a remote backup server, to be able to easily recover if you do by mistake something whacky.
 

Hope that helped anyone. Cheers 🙂

Reinstall all Debian packages with a copy of apt deb package list from another working Debian Linux installation

Wednesday, July 29th, 2020

Reinstall-all-Debian-packages-with-copy-of-apt-packages-list-from-another-working-Debian-Linux-installation

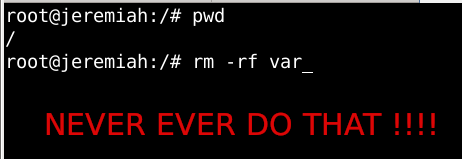
Few days ago, in the hurry in the small hours of the night, I've done something extremely stupid. Wanting to move out a .tar.gz binary copy of qmail installation to /var/lib/qmail with all the dependent qmail items instead of extracting to admin user /root directory (/root), I've extracted it to the main Operating system root / directrory.
Not noticing this, I've quickly executed rm -rf var with the idea to delete all directory tree under /root/var just 3 seconds later, I've realized I'm issuing the rm -rf var with the wrong location WITH a root user !!!! Being scared on what I've done, I've quickly pressed CTRL+C to immedately cancel the deletion operation of my /var.

wrong-system-var-rm-linux-dont-do-that-ever-or-your-system-will-end-up-irreversably-damaged

But as you can guess, since the machine has an Slid State Drive drive and SSD memory drive are much more faster in I/O operations than the classical ATA / SATA disks. I was not quick enough to cancel the operation and I've noticed already some part of my /var have been R.I.P-pped in the heaven of directories.

This was ofcourse upsetting so for a while I rethinked the situation to get some ideas on what I can do to recover my system ASAP!!! and I had the idea of course to try to reinstall All my installed .deb debian packages to restore system closest to the normal, before my stupid mistake.

Guess my unpleasent suprise when I have realized dpkg and respectively apt-get apt and aptitude package management tools cannot anymore handle packages as Debian Linux's package dependency database has been damaged due to missing dpkg directory 


/var/lib/dpkg 


Oh man that was unpleasent, especially since I've installed plenty of stuff that is custom on my Mate based desktop and, generally reinstalling it updating the sytem to the latest Debian security updates etc. will be time consuming and painful process I wanted to omit.

So of course the logical thing to do here was to try to somehow recover somehow a database copy of /var/lib/dpkg  if that was possible, that of course led me to the idea to lookup for a way to recover my /var/lib/dpkg from backup but since I did not maintained any backup copy of my OS anywhere that was not really possible, so anyways I wondered whether dpkg does not keep some kind of database backups somewhere in case if something goes wrong with its database.
This led me to this nice Ubuntu thred which has pointed me to the part of my root rm -rf dpkg db disaster recovery solution.
Luckily .deb package management creators has thought about situation similar to mine and to give the user a restore point for /var/lib/dpkg damaged database

/var/lib/dpkg is periodically backed up in /var/backups

A typical /var/lib/dpkg on Ubuntu and Debian Linux looks like so:
 

hipo@jeremiah:/var/backups$ ls -l /var/lib/dpkg
total 12572
drwxr-xr-x 2 root root    4096 Jul 26 03:22 alternatives
-rw-r–r– 1 root root      11 Oct 14  2017 arch
-rw-r–r– 1 root root 2199402 Jul 25 20:04 available
-rw-r–r– 1 root root 2199402 Oct 19  2017 available-old
-rw-r–r– 1 root root       8 Sep  6  2012 cmethopt
-rw-r–r– 1 root root    1337 Jul 26 01:39 diversions
-rw-r–r– 1 root root    1223 Jul 26 01:39 diversions-old
drwxr-xr-x 2 root root  679936 Jul 28 14:17 info
-rw-r—– 1 root root       0 Jul 28 14:17 lock
-rw-r—– 1 root root       0 Jul 26 03:00 lock-frontend
drwxr-xr-x 2 root root    4096 Sep 17  2012 parts
-rw-r–r– 1 root root    1011 Jul 25 23:59 statoverride
-rw-r–r– 1 root root     965 Jul 25 23:59 statoverride-old
-rw-r–r– 1 root root 3873710 Jul 28 14:17 status
-rw-r–r– 1 root root 3873712 Jul 28 14:17 status-old
drwxr-xr-x 2 root root    4096 Jul 26 03:22 triggers
drwxr-xr-x 2 root root    4096 Jul 28 14:17 updates

Before proceeding with this radical stuff to move out /var/lib/dpkg/info from another machine to /var mistakenyl removed oned. I have tried to recover with the well known:

  • extundelete
  • foremost
  • recover
  • ext4magic
  • ext3grep
  • gddrescue
  • ddrescue
  • myrescue
  • testdisk
  • photorec

Linux file deletion recovery tools from a USB stick loaded with a Number of LiveCD distributions, i.e. tested recovery with:

  • Debian LiveCD
  • Ubuntu LiveCD
  • KNOPPIX
  • SystemRescueCD
  • Trinity Rescue Kit
  • Ultimate Boot CD


but unfortunately none of them couldn't recover the deleted files … 

The reason why the standard file recovery tools could not recover ?

My assumptions is after I've done by rm -rf var; from sysroot,  issued the sync (- if you haven't used it check out man sync) command – that synchronizes cached writes to persistent storage and did a restart from the poweroff PC button, this should have worked, as I've recovered like that in the past) in a normal Sys V System with a normal old fashioned blocks filesystem as EXT2 . or any other of the filesystems without a journal, however as the machine run a EXT4 filesystem with a journald and journald, this did not work perhaps because something was not updated properly in /lib/systemd/systemd-journal, that led to the situation all recently deleted files were totally unrecoverable.

1. First step was to restore the directory skele of /var/lib/dpkg

# mkdir -p /var/lib/dpkg/{alternatives,info,parts,triggers,updates}


2. Recover missing /var/lib/dpkg/status  file

The main file that gives information to dpkg of the existing packages and their statuses on a Debian based systems is /var/lib/dpkg/status

# cp /var/backups/dpkg.status.0 /var/lib/dpkg/status


3. Reinstall dpkg package manager to make package management working again

Say a warm prayer to the Merciful God ! and do:

# apt-get download dpkg
# dpkg -i dpkg*.deb


4. Reinstall base-files .deb package which provides basis of a Debian system

Hopefully everything will be okay and your dpkg / apt pair will be in normal working state, next step is to:

# apt-get download base-files
# dpkg -i base-files*.deb


5. Do a package sanity and consistency check and try to update OS package list

Check whether packages have been installed only partially on your system or that have missing, wrong or obsolete control  data  or  files.  dpkg  should suggest what to do with them to get them fixed.

# dpkg –audit

Then resynchronize (fetch) the package index files from their sources described in /etc/apt/sources.list

# apt-get update


Do apt db constistency check:

#  apt-get check


check is a diagnostic tool; it updates the package cache and checks for broken dependencies.
 

Take a deep breath ! …

Do :

ls -l /var/lib/dpkg
and compare with the above list. If some -old file is not present don't worry it will be there tomorrow.

Next time don't forget to do a regular backup with simple rsync backup script or something like Bacula / Amanda / Time Vault or Clonezilla.
 

6. Copy dpkg database from another Linux system that has a working dpkg / apt Database

Well this was however not the end of the story … There were still many things missing from my /var/ and luckily I had another Debian 10 Buster install on another properly working machine with a similar set of .deb packages installed. Therefore to make most of my programs still working again I have copied over /var from the other similar set of package installed machine to my messed up machine with the missing deleted /var.

To do so …
On Functioning Debian 10 Machine (Working Host in a local network with IP 192.168.0.50), I've archived content of /var:

linux:~# tar -czvf var_backup_debian10.tar.gz /var

Then sftped from Working Host towards the /var deleted broken one in my case this machine's hostname is jericho and luckily still had SSHD and SFTP running processes loaded in memory:

jericho:~# sftp root@192.168.0.50
sftp> get var_backup_debian10.tar.gz

Now Before extracting the archive it is a good idea to make backup of old /var remains somewhere for example somewhere in /root 
just in case if we need to have a copy of the dpkg backup dir /var/backups

jericho:~# cp -rpfv /var /root/var_backup_damaged

 
jericho:~# tar -zxvf /root/var_backup_debian10.tar.gz 
jericho:/# mv /root/var/ /

Then to make my /var/lib/dpkg contain the list of packages from my my broken Linux install I have ovewritten /var/lib/dpkg with the files earlier backupped before  .tar.gz was extracted.

jericho:~# cp -rpfv /var /root/var_backup_damaged/lib/dpkg/ /var/lib/


7. Reinstall All Debian  Packages completely scripts


I then tried to reinstall each and every package first using aptitude with aptitude this is done with

# aptitude reinstall '~i'

However as this failed, tried using a simple shell loop like below:

for i in $(dpkg -l |awk '{ print $2 }'); do echo apt-get install –reinstall –yes $i; done

Alternatively, all .deb package reninstall is also possible with dpkg –get-selections and with awk with below cmds:

dpkg –get-selections | grep -v deinstall | awk '{print $1}' > list.log;
awk '$1=$1' ORS=' ' list.log > newlist.log
;
apt-get install –reinstall $(cat newlist.log)

It can also be run as one liner for simplicity:

dpkg –get-selections | grep -v deinstall | awk '{print $1}' > list.log; awk '$1=$1' ORS=' ' list.log > newlist.log; apt-get install –reinstall $(cat newlist.log)

This produced a lot of warning messages, reporting "package has no files currently installed" (virtually for all installed packages), indicating a severe packages problem below is sample output produced after each and every package reinstall … :

dpkg: warning: files list file for package 'iproute' missing; assuming package has no files currently installed
dpkg: warning: files list file for package 'brscan-skey' missing; assuming package has no files currently installed
dpkg: warning: files list file for package 'libapache2-mod-php7.4' missing; assuming package has no files currently installed
dpkg: warning: files list file for package 'libexpat1:amd64' missing; assuming package has no files currently installed
dpkg: warning: files list file for package 'libexpat1:i386' missing; assuming package has no files currently installed
dpkg: warning: files list file for package 'php5.6-readline' missing; assuming package has no files currently installed
dpkg: warning: files list file for package 'linux-headers-4.19.0-5-amd64' missing; assuming package has no files currently installed
dpkg: warning: files list file for package 'libgraphite2-3:amd64' missing; assuming package has no files currently installed
dpkg: warning: files list file for package 'libgraphite2-3:i386' missing; assuming package has no files currently installed
dpkg: warning: files list file for package 'libbonoboui2-0:amd64' missing; assuming package has no files currently installed
dpkg: warning: files list file for package 'libxcb-dri3-0:amd64' missing; assuming package has no files currently installed
dpkg: warning: files list file for package 'libxcb-dri3-0:i386' missing; assuming package has no files currently installed
dpkg: warning: files list file for package 'liblcms2-2:amd64' missing; assuming package has no files currently installed
dpkg: warning: files list file for package 'liblcms2-2:i386' missing; assuming package has no files currently installed
dpkg: warning: files list file for package 'libpixman-1-0:amd64' missing; assuming package has no files currently installed
dpkg: warning: files list file for package 'libpixman-1-0:i386' missing; assuming package has no files currently installed
dpkg: warning: files list file for package 'gksu' missing; assuming package has no files currently installed
dpkg: warning: files list file for package 'liblogging-stdlog0:amd64' missing; assuming package has no files currently installed
dpkg: warning: files list file for package 'mesa-vdpau-drivers:amd64' missing; assuming package has no files currently installed
dpkg: warning: files list file for package 'mesa-vdpau-drivers:i386' missing; assuming package has no files currently installed
dpkg: warning: files list file for package 'libzvbi0:amd64' missing; assuming package has no files currently installed
dpkg: warning: files list file for package 'libzvbi0:i386' missing; assuming package has no files currently installed
dpkg: warning: files list file for package 'libcdparanoia0:amd64' missing; assuming package has no files currently installed
dpkg: warning: files list file for package 'libcdparanoia0:i386' missing; assuming package has no files currently installed
dpkg: warning: files list file for package 'python-gconf' missing; assuming package has no files currently installed
dpkg: warning: files list file for package 'php5.6-cli' missing; assuming package has no files currently installed
dpkg: warning: files list file for package 'libpaper1:amd64' missing; assuming package has no files currently installed
dpkg: warning: files list file for package 'mixer.app' missing; assuming package has no files currently installed

After some attempts I found a way to be able to work around the warning message, for each package by simply reinstalling the package reporting the issue with

apt –reinstall $package_name


Though reinstallation started well and many packages got reinstalled, unfortunately some packages such as apache2-mod-php5.6 and other php related ones  started failing during reinstall ending up in unfixable states right after installation of binaries from packages was successfully placed in its expected locations on disk. The failures occured during the package setup stage ( dpkg –configure $packagename) …

The logical thing to do is a recovery attempt with something like the usual well known by any Debian admin:

apt-get install –fix-missing

As well as Manual requesting to reconfigure (issue re-setup) of all installed packages also did not produced a positive result

dpkg –configure -a

But many packages were still failing due to dpkg inability to execute some post installation scripts from respective .deb files.
To work around that and continue installing the rest of packages I had to manually delete all files related to the failing package located under directory 

/var/lib/dpkg/info#

For example to omit the post installation failure of libapache2-mod-php5.6 and have a succesful install of the package next time I tried reinstall, I had to delete all /var/lib/dpkg/info/libapache2-mod-php5.6.postrm, /var/lib/dpkg/info/libapache2-mod-php5.6.postinst scripts and even sometimes everything like libapache2-mod-php5.6* that were present in /var/lib/dpkg/info dir.

The problem with this solution, however was the package reporting to install properly, but the post install script hooks were still not in placed and important things as setting permissions of binaries after install or applying some configuration changes right after install was missing leading to programs failing to  fully behave properly or even breaking up even though showing as finely installed …

The final solution to this problem was radical.
I've used /var/lib/dpkg database (directory) from ther other working Linux machine with dpkg DB OK found in var_backup_debian10.tar.gz (linux:~# host with a working dpkg database) and then based on the dpkg package list correct database responding on jericho:~# to reinstall each and every package on the system using Debian System Reinstaller script taken from the internet.
Debian System Reinstaller works but to reinstall many packages, I've been prompted again and again whether to overwrite configuration or keep the present one of packages.
To Omit the annoying [Y / N ] text prompts I had made a slight modification to the script so it finally looked like this:
 

#!/bin/bash
# Debian System Reinstaller
# Copyright (C) 2015 Albert Huang
# Copyright (C) 2018 Andreas Fendt

# This program is free software: you can redistribute it and/or modify
# it under the terms of the GNU General Public License as published by
# the Free Software Foundation, either version 3 of the License, or
# (at your option) any later version.

# This program is distributed in the hope that it will be useful,
# but WITHOUT ANY WARRANTY; without even the implied warranty of
# MERCHANTABILITY or FITNESS FOR A PARTICULAR PURPOSE.  See the
# GNU General Public License for more details.

# You should have received a copy of the GNU General Public License
# along with this program.  If not, see <http://www.gnu.org/licenses/>.

# —
# This script assumes you are using a Debian based system
# (Debian, Mint, Ubuntu, #!), and have sudo installed. If you don't
# have sudo installed, replace "sudo" with "su -c" instead.

pkgs=`dpkg –get-selections | grep -w 'install$' | cut -f 1 |  egrep -v '(dpkg|apt)'`

for pkg in $pkgs; do
    echo -e "\033[1m   * Reinstalling:\033[0m $pkg"    

    apt-get –reinstall -o Dpkg::Options::="–force-confdef" -o Dpkg::Options::="–force-confold" -y install $pkg || {
        echo "ERROR: Reinstallation failed. See reinstall.log for details."
        exit 1
    }
done


 debian-all-packages-reinstall.sh working modified version of Albert Huang and Andreas Fendt script  can be also downloaded here.

Note ! Omitting the text confirmation prompts to install newest config or keep maintainer configuration is handled by the argument:


-o Dpkg::Options::="–force-confold


I however still got few NCurses Console selection prompts during the reinstall of about 3200+ .deb packages, so even with this mod the reinstall was not completely automatic.

Note !  During the reinstall few of the packages from the list failed due to being some old unsupported packages this was ejabberd, ircd-hybrid and a 2 / 3 more.
This failure was easily solved by completely purging those packages with the usual

# dpkg –purge $packagename

and reruninng  debian-all-packages-reinstall.sh on each of the failing packages.

Note ! The failing packages were just old ones left over from Debian 8 and Debian 9 before the apt-get dist-upgrade towards 10 Duster.
Eventually I got a success by God's grance, after few hours of pains and trials, ending up in a working state package database and a complete set of freshly reinstalled packages.

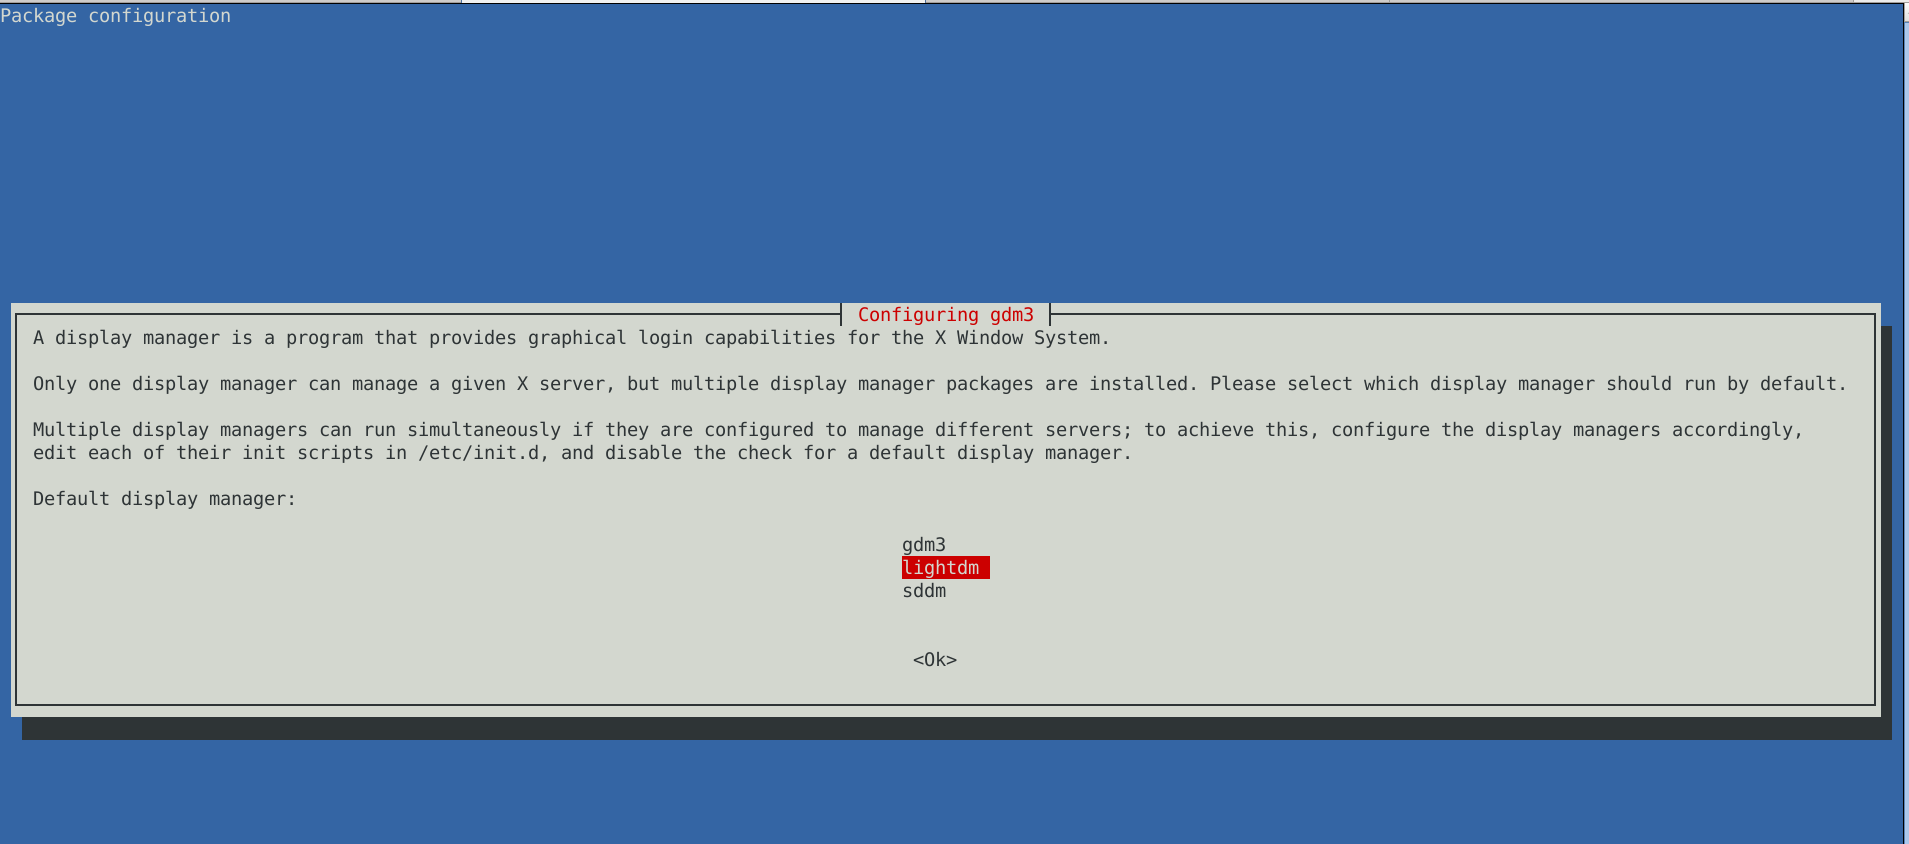
The only thing I had to do finally is 2 hours of tampering why GNOME did not automatically booted after the system reboot due to failing gdm
until I fixed that I've temprary used ligthdm (x-display-manager), to do I've

dpkg –reconfigure gdm3

lightdm-x-display-manager-screenshot-gdm3-reconfige

 to work around this I had to also reinstall few libraries, reinstall the xorg-server, reinstall gdm and reinstall the meta package for GNOME, using below set of commands:
 

apt-get install –reinstall libglw1-mesa libglx-mesa0
apt-get install –reinstall libglu1-mesa-dev
apt install –reinstallgsettings-desktop-schemas
apt-get install –reinstall xserver-xorg-video-intel
apt-get install –reinstall xserver-xorg
apt-get install –reinstall xserver-xorg-core
apt-get install –reinstall task-desktop
apt-get install –reinstall task-gnome-desktop


As some packages did not ended re-instaled on system because on the original host from where /var/lib/dpkg db was copied did not have it I had to eventually manually trigger reinstall for those too:


apt-get install –reinstall –yes vlc
apt-get install –reinstall –yes thunderbird
apt-get install –reinstall –yes audacity
apt-get install –reinstall –yes gajim
apt-get install –reinstall –yes slack remmina
apt-get install –yes k3b
pt-get install –yes gbgoffice
pt-get install –reinstall –yes skypeforlinux
apt-get install –reinstall –yes vlc
apt-get install –reinstall –yes libcurl3-gnutls libcurl3-nss
apt-get install –yes virtualbox-5.2
apt-get install –reinstall –yes vlc
apt-get install –reinstall –yes alsa-tools-gui
apt-get install –reinstall –yes gftp
apt install ./teamviewer_15.3.2682_amd64.deb –yes


Note that some of above packages requires a properly configured third party repositories, other people might have other packages that are missing from the dpkg list and needs to be reinstalled so just decide according to your own case of left aside working system present binaries that doesn't belong to any dpkg installed package.

After a bit of struggle everything is back to normal Thanks God! 🙂 !


Upgrade Debian Linux 9 to 10 Stretch to Buster and Disable graphical service load boot on Debian 10 Linux / Debian Buster is out

Tuesday, July 9th, 2019

howto-upgrade-debian-linux-debian-stretch-to-buster-debian-10-buster

I've just took a time to upgrade my Debian 9 Stretch Linux to Debian Buster on my old school Laptop (that turned 11 years old) Lenovo Thinkpad R61 . The upgrade went more or less without severe issues except few things.

The overall procedure followed is described n a few websites out there already and comes up to;


0. Set the proper repository location in /etc/apt/sources.list


Before update the sources.list used are:
 

deb [arch=amd64,i386] http://ftp.bg.debian.org/debian/ buster main contrib non-free
deb-src [arch=amd64,i386] http://ftp.bg.debian.org/debian/ buster main contrib non-free


deb [arch=amd64,i386] http://security.debian.org/ buster/updates main contrib non-free
deb-src [arch=amd64,i386] http://security.debian.org/ buster/updates main contrib non-free

deb [arch=amd64,i386] http://ftp.bg.debian.org/debian/ buster-updates main contrib non-free
deb-src [arch=amd64,i386] http://ftp.bg.debian.org/debian/ buster-updates main contrib non-free

deb http://ftp.debian.org/debian buster-backports main


For people that had stretch defined in /etc/apt/sources.list you should change them to buster or stable, easiest and quickest way to omit editting with vim / nano etc. is run as root or via sudo:
 

sed -i 's/stretch/buster/g' /etc/apt/sources.list
sed -i 's/stretch/buster/g' /etc/apt/sources.list.d/*.list

The minimum of config in sources.list after the modification should be
 

deb http://deb.debian.org/debian buster main
deb http://deb.debian.org/debian buster-updates main
deb http://security.debian.org/debian-security buster/updates main

Or if you want to always be with latest stable packages (which is my practice for notebooks):

deb http://deb.debian.org/debian stable main
deb http://deb.debian.org/debian stable-updates main
deb http://security.debian.org/debian-security stable/updates main


1. Getting list of hold packages if such exist and unholding them, e.g.


apt-mark showhold


Same could also be done via dpkg

dpkg –get-selections | grep hold


To unhold a package if such is found:

echo "package_name install"|sudo dpkg –set-selections

For those who don't know what hold package is this is usually package you want to keep at certain version all the time even though after running apt-get upgrade to get the latest package versions.
 

2. Use df -h and assure you have at least 5 – 10 GB free space on root directory / before proceed

df -h /

3. Update packages list to set new set repos as default

apt update


4. apt upgrade
 

apt upgrade

Here some 10 – 15 times you have to confirm what you want to do with configuration that has changed if you're unsure about the config (and it is not critical service) you're aware as such as Apache / MySQL / SMTP etc. it is best to install the latest maintainer version.

Hopefully here you will not get fatal errors that will interrupt it.

P.S. It is best to run apt-update either in VTTY (Virtual console session) with screen or tmux or via a physical tty (if this is not a remote server) as during the updates your GUI access to the gnome-terminal or konsole / xterm whatever console used might get cut. Thus it is best to do it with command:
 

screen apt upgrade


5. Run dist-upgrade to finalize the upgrade from Stertch to Buster


Once all is completed of the new installed packages, you will need to finally do, once again it is best to run via screen, if you don't have installed screen install it:


if [ $(which screen) ]; then echo 'Installed'; else apt-get install –yes screen ; fi

screen apt dist-upgrade


Here once again you should set whether old configuration to some e services has to stay or the new Debian maintainer package shipped one will overwrite the old and locally modified (due to some reason), here do wisely whatever you will otherwise some configured services might not boot as expected on next boot.


6. What if you get packages failed on update


If you get a certain package failed to configure after installed due to some reason, if it is a systemd service use:


journalctl -xe |head -n 50


or fully observer output of journalctl -xe and decide on yourself.

In most cases

dpkg-reconfigure failed-package-name


should do the trick or at least give you more hints on how to solve it.


Also if a package seems to be in inconsistent or broken state after upgrade  and simple dpkg-reconfigure doesn't help, a good command
that can help you is


dpkg-reconfigure -f package_name


or you can try to workaround a failed package setup with:
 

dpkg –configure -a

 
If dpkg-reconfigure doesn't help either as I experienced in prior of Debian from Debian 6 -> 7 an Debian 7 ->8 updates on some Computers, then a very useful thing to try is:
 

apt-get update –fix-missing 

apt-get install -f


At certain cases the only work around to be able to complete the package upgrade is to to remove the package with apt remove but due to config errors even that is not possible to work around this as final resort run:
 

dpkg –remove –force-remove-reinstreq


7. Clean up ununeeded packages


Some packages are left over due to package dependencies from Stretch and not needed in buster anymore to remove them.
 

apt autoremove


8. Reboot system once all upgrade is over


/sbin/reboot


9. Verify your just upgraded Debian is in a good state


root@noah:~# uname -a;
Linux noah 4.19.0-5-rt-amd64 #1 SMP PREEMPT RT Debian 4.19.37-5 (2019-06-19) x86_64 GNU/Linux


root@noah:~# cat /etc/issue.net
Debian GNU/Linux 10


root@noah:~# lsb_release -a
No LSB modules are available.
Distributor ID:    Debian
Description:    Debian GNU/Linux 10 (buster)
Release:    10
Codename:    buster


root@noah:~# hostnamectl
   Static hostname: noah
         Icon name: computer-laptop
           Chassis: laptop
        Machine ID: 4759d9c2f20265938692146351a07929
           Boot ID: 256eb64ffa5e413b8f959f7ef43d919f
  Operating System: Debian GNU/Linux 10 (buster)
            Kernel: Linux 4.19.0-5-rt-amd64
      Architecture: x86-64


10. Remove annoying picture short animation with debian logo looping


plymouth-debian-graphical-boot-services

By default Debian 10 boots up with annoying screen hiding all the status of loaded services state .e.g. you cannot see the services that shows in [ FAILED ] state and  which do show as [ OK ] to revert back the old behavior I'm used to for historical reasons and as it shows a lot of good Boot time debugging info, in previous Debian distributions this was possible  by setting the right configuration options in /etc/default/grub

which so far in my config was like so

GRUB_CMDLINE_LINUX_DEFAULT="quiet splash scsi_mod.use_blk_mq=y dm_mod.use_blk_mq=y zswap.enabled=1 text"


Note that zswap.enabled=1 passed option is because my notebook is pretty old machine from 2008 with 4GB of memory and zswap does accelerate performance when working with swap – especially helpful on Older PCs for more you can read more about zswap on ArchLinux wiki
After modifying this configuration to load the new config into grub the cmd is:
 

/usr/sbin/update-grub

 
As this was not working and tried number of reboots finally I found that annoying animated gif like picture shown up is caused by plymouth below is excerpts from Plymouth's manual page:


       "The plymouth sends commands to a running plymouthd. This is used during the boot process to control the display of the graphical boot splash."

Plymouth has a set of themes one can set:


# plymouth-set-default-theme -l
futureprototype
details
futureprototype
joy
lines
moonlight
softwaves
spacefun
text
tribar


I tried to change that theme to make the boot process as text boot as I'm used to historically with cmd:
 

update-alternatives –config text.plymouth

 
As after reboot I hoped the PC will start booting in text but this does not happened so the final fix to turn back to textmode service boot was to completely remove plymouth
 

apt-get remove –yes plymouth

Installing the phpbb forum on Debian (Squeeze/Sid) Linux

Saturday, September 11th, 2010

howto-easily-install-phpbb-on-debian-gnu-linux

I've just installed the phpbb forum on a Debian Linux because we needed a goodquick to install communication media in order to improve our internal communication in a student project in Strategic HR we're developing right now in Arnhem Business School.

Here are the exact steps I followed to have a properly it properly instlled:

1. Install the phpbb3 debian package
This was pretty straight forward:

debian:~# apt-get install phpbb3

At this point of installation I've faced a dpkg-reconfigure phpbb deb package configuration issue:
I was prompted to pass in the credentials for my MySQL password right after I've selected the MySQL as my preferred database back engine.
I've feeded my MySQL root password as well as my preferred forum database name, however the database installation failed because, somehow the configuration procedure tried to connect to my MySQL database with the htcheck user.
I guess this has to be a bug in the package itself or something from my previous installation misconfigured the way the debian database backend configuration was operating.
My assumption is that my previously installed htcheck package or something beforehand I've done right after the htcheck and htcheck-php packages installation.

after the package configuration failed still the package had a status of properly installed when I reviewed it with dpkg
I've thought about trying to manually reconfigure it using the dpkg-reconfigure debian command and I gave it a try like that:

debian:~# dpkg-reconfigure phpbb3

This time along with the other fields I've to fill in the ncurses interface I was prompted for a username before the password prompted appeared.
Logically I tried to fill in the root as it's my global privileges MySQL allowed user.
However that didn't helped at all and again the configuration tried to send the credentials with user htcheck to my MySQL database server.
To deal with the situation I had to approach it in the good old manual way.

2. Manually prepare / create the required phpbb forum database

To completet that connected to the MySQL server with the mysql client and created the proper database like so:

debian:~# mysql -u root -p
mysql>
CREATE database phpbb3forum;

3. Use phpmyadmin or the mysql client command line to create a new user for the phpbb forum

Here since adding up the user using the phpmyadmin was a way easier to do I decided to go that route, anyways using the mysql cli is also an option.

From phpmyadmin It's pretty easy to add a new user and grant privileges to a certain database, to do so navigate to the following database:

Privileges -> -> Add a new user ->

Now type your User name: , Host , Password , Re-type password , also for a Host: you have to choose Local from the drop down menu.

Leave the Database for user field empty as we have already previously created our desired database in step 2 of this article

Now press the "Go" button and the user will get created.

Further after choose the Privileges menu right on the bottom of the page once again, select through the checkbox the username you have just created let's say the previously created user is phpbb3

Go to Action (There is a picture with a man and a pencil on the right side of this button

Scroll down to the page part saying Database-specific privileges and in the field Add privileges on the following database: fill in your previosly created database name in our case it's phpbb3forum

and then press the "Go" button once again.
A page will appear where you will have to select the exact privileges you would like to grant on the specific selected database.
For some simplicity just check all the checkbox to grant as many privilegs to your database as you could.
Then again you will have to press the "Go" button and there you go you should have already configured an username and database ready to go with your new phpbb forum.

4. Create a virtualhost if you would like to have the forum as a subdomain or into a separate domain

If you decide to have the forum on a separate sub-domain or domain as I did you will have to add some kind of Virtualhost into either your Apache configuration /etc/apache2/apache2.conf or into where officially the virutualhosts are laid in Debian Linux in /etc/apache2/sites-available
I've personally created a new file like for instance /etc/apache2/sites-available/mysubdomain.mydomain.com

Here is an example content of the new Virtualhost:

<VirtualHost *>
ServerAdmin admin-email@domain.com
ServerName mysubdomain.domain.com

# Indexes + Directory Root.
DirectoryIndex index.php index.php5 index.htm index.html index.pl index.cgi index.phtml index.jsp index.py index.asp

DocumentRoot /usr/share/phpbb3/www/

# Logfiles
ErrorLog /var/log/apache2/yourdomain/error.log
CustomLog /var/log/apache2/yourdomain/access.log combined
# CustomLog /dev/null combined
<Directory /usr/share/phpbb3/www/>
Options FollowSymLinks MultiViews -Includes ExecCGI
AllowOverride All
Order allow,deny
allow from all </Directory>
</VirtualHost>

In above Virtualhost just change the values for ServerAdmin , ServerName , DocumentRoot , ErrorLog , CustomLog and Directory declaration to adjust it to your situation.

5. Restart the Apache webserver for the new Virtualhost to take affect

debian:~# /etc/init.d/apache2 restart

Now accessing your http://mysubdomain.domain.com should display the installed phpbb3 forum
The default username and password for your forum you can use straight are:

username: admin
password: admin

So far so good you by now have the PHPBB3 forum properly installed and running, however if you try to Register a new user in the forum you will notice that it's impossible because of a terrible ugly message reading:

Sorry but this board is currently unavailable.

I've spend few minutes online to scrape through the forums before I can understand what I have to stop that annoying message from appearing and allow new users to register in the phpbb forum

The solution came natural and was a setting that had to be changed with the forum admin account, thus login as admin and look at the bottom of the page, below the text reading Powered by phpBB © 2000, 2002, 2005, 2007 phpBB Group you will notice a link with Administration Control Panel
just press there a whole bunch of menus will appear on the screen allowing you to do numerous things, however what you will have to do is go to
Board Settings -> Disable Board

and change the radio button there to say No

That's all now your forum will be ready to go and your users can freely register and if the server where the forum is installed has an already running mail server, they will receive an emails with a registration data concerning their new registrations in your new phpbb forum.
Cheers and Enjoy your new shiny phpbb Forum 🙂

How to downgrade package with apt-get on Debian / Ubuntu / Mint Linux

Thursday, October 19th, 2017

how-to-downgrade-debian-package-to-an-older-version-debian_package-box


How can I downgrade a debian package to an older version with apt-get?

Downgrading a package in Debian is not frequently required but sometimes it is a must lets say a package you just upgraded fails to communicate properly to an application, in my case that's Ejabberd server which was working pretty well with Yaxim, Bruno or Xabber Mobile android application clients, unfortunately right after periodic apt-get upgrades I do with apt due to security upgrade of deb package ejabberd=2.1.10-4+deb7u1 to ejabberd=2.1.10-4+deb7u2 it messed up and even though it worked fine with Desktop clients such as Gajim and Pidgin, there was no Android application on my Phone with Android 4.4 which was able to communicate properly with the TLS encrypted Jabber server so my only option was to downgrade back to ejabberd=2.1.10-4+deb7u1.

I looked through duckduckgo.com a short URL is (ddg.gg) but I couldn't find the old deb file to downgrade so I was in a situation …

 Then I duckduck goed (I've recently stopped using Google as Google is collecting too much data and sharing with NSA) and I found following instructions on downgrade

——— 

If you have the version number, or the target release, apt-get supports choosing a particular version or target release. More details can be found on manual page of apt-get. It can also be accessed from terminal by typing man apt-get

sudo apt-get install <package-name>=<package-version-number> OR

sudo apt-get -t=<target release> install <package-name>

is the command to be run. This can be used to down-grade a package to a specific version.

It has been helpfully pointed out in the comments that

    apt-cache showpkg <package-name> – lists all available versions. (h/t Sparhawk)
    apt-mark hold <package-name> "holds" – the package at the current version, preventing automatic upgrades. (h/t Luís de Sousa )


In other words All I had to do is as root superuser is:
 

apt-get install «pkg»=«version»

OR

aptitude install «pkg»=«version»

Where «pkg» is the name of the package, and «version» is the version number.


So I just issued following cmd:

root@pcfreak:~# apt-get install ejabberd=2.1.10-4+deb7u1
Четене на списъците с пакети… Готово
Изграждане на дървото със зависимости       
Четене на информацията за състоянието… Готово
Предложени пакети:
  libunix-syslog-perl
Следните НОВИ пакети ще бъдат инсталирани:
  ejabberd
0 актуализирани, 1 нови инсталирани, 0 за премахване и 3 без промяна.
Необходимо е да се изтеглят 1795 kB архиви.
След тази операция ще бъде използвано 3699 kB допълнително дисково пространство.
Изт:1 http://ftp.uk.debian.org/debian/ wheezy/main ejabberd amd64 2.1.10-4+deb7u1 [1795 kB]


P.S. Sorry for the cyrillic for those who can't read it but it is standard messages that Debian does in package install time.

Analogously you can do it for any other newer package that upgraded, later on to prevent further security updates of the package you will have to put the package on hold, that's as easy as running:
 

root@pcfreak:~# aptitude hold ejabberd
No packages will be installed, upgraded, or removed.
0 packages upgraded, 0 newly installed, 0 to remove and 4 not upgraded.
Need to get 0 B of archives. After unpacking 0 B will be used.


How to extract a deb package on Debian, Ubuntu, Mint Linux and other non debian based distributions

Friday, October 13th, 2017

how-to-extract-deb-packages-with-dpkg-and-ar-application-x-deb

How to extract a deb package? 


Have you ever had a debian .deb package which contains image files you need, but the dependencies doesn't allow you to install it on your Debian / Ubuntu / Mint Linux release?
I had just recently downloaded the ultimate-edition-themes latest release v 0.0.7 a large pack of GNOME Themes and wanted to install it on my Debian Stretch Linux but I faced problems because of dependencies when trying to install with dpkg.

That is why I took another appoarch and decided to only extract the necessery themes from the archive only with dpkg.

Here is how I have extracted ultimate-edition-themes-.0.0.7_all.deb ;


dpkg -x ultimate-edition-themes-.0.0.7_all.deb /tmp/ultimate-edition-themes


So how dpkg extracts the .deb file?


Debian .deb packages are a regular more in Wikipedia – Unix archive files (ar) .

The structure of a deb file consists of another 3 files (2 tar.gzs and one binary) as follows:


debian-binary: regular text file, contains the version of the deb package format
control.tar.gz: compressed file, contains file md5sums and control directory for the deb package
data.tar.gz: compressed file, contains all the files which will be installed


Basicly if you're on a Linux distribution that lacks dpkg you can easily extract .deb binary using GNU AR  command (used to create, modify extract Unix ar files and is the GNU / Linux equivallent of the UNIX ar command).

To extract on Fedora or RPM based Linux distributions as well as BSDs with AR:

First print file conetnt with:

ar p  ultimate-edition-themes-.0.0.7_all.deb

Then extract it with:

ar x ultimate-edition-themes-.0.0.7_all.deb


Later just extract with tar (untar), the 2 other archived files contained in the .deb (ar) archive:


tar -zxvvf control.tar.gz; tar -zxxvf data.tar.gz


Get everything you need from there in my case that's the usr/share/themes folder, then enjoy life 🙂


How to get rid of “PHP Warning: PHP Startup: Unable to load dynamic library ‘/usr/lib/php5/20090626/suhosin.so'” on Debian GNU / Linux

Tuesday, October 25th, 2011

PHP-warning-how-to-fix-warnings-and-errors-php-logo

After a recent new Debian Squeeze Apache+PHP server install and moving a website from another server host running on CentOS 5.7 Linux server, some of the PHP scripts running via crontab started displaying the following annoying PHP Warnings :

debian:~# php /home/website/www/cron/update.php

PHP Warning: PHP Startup: Unable to load dynamic library '/usr/lib/php5/20090626/suhosin.so' – /usr/lib/php5/20090626/suhosin.so: cannot open shared object file: No such file or directory in Unknown on line 0

Obviously the error revealed that PHP cli is not happy that, I've previously removes the suhosin php5-suhosin module from the system.
I wouldn't have removed php5-suhosin if sometimes it doesn't produced some odd experiences with the Apache webserver.
To fix the PHP Warning, I used first grep to see, where exactly the suhosin module gets included in debian's php.ini config files. debian:~# cd /etc/php5
debian:/etc/php5# grep -rli suhosin *
apache2/conf.d/suhosin.ini
cgi/conf.d/suhosin.ini
cli/conf.d/suhosin.ini
conf.d/suhosin.ini

Yeah that's right Debian has three php.ini php config files. One for the php cli/usr/bin/php, another for the Apache webserver loaded php library/usr/lib/apache2/modules/libphp5.so and one for Apache's cgi module/usr/lib/apache2/modules/mod_fcgid.so .

I was too lazy to edit all the above found declarations trying to include the suhosin module in PHP, hence I remembered that probably all this obsolete suhosin module declaration are still present because probably the php5-suhosin package is still not purged from the system.

A quick check with dpkg , further strenthened my assumption as the php5-suhosin module was still hanging around as an (rc – remove candidate);

debian:~# dpkg -l |grep -i suhosin
rc php5-suhosin 0.9.32.1-1 advanced protection module for php5

Hence to remove the obsolete package config and directories completely out of the system and hence solve the PHP Warning I used dpkg –purge, like so:

debian:~# dpkg --purge php5-suhosin
(Reading database ... 76048 files and directories currently installed.)
Removing php5-suhosin ...
Purging configuration files for php5-suhosin ...
Processing triggers for libapache2-mod-php5 ...
Reloading web server config: apache2.

Further on to make sure the PHP Warning is solved I did the cron php script another go and it produced no longer errors:

debian:~# php /home/website/www/cron/update.php
debian:~#

Removing exim and installing qmail / Generate and install pseudo mta dummy package on Debian / Ubuntu etc. .deb based Linux

Thursday, March 10th, 2016

debian-dummy-mta-package-install-howto-tux-mail-nice-mascot
If you happen to be installing Qmail Mail server on a Debian or Ubuntu (.deb) based Linux, you will notice by default there will be some kind of MTA (Mail Transport Agent) already installed mail-transfer-agent package will be installed and because of Debian .deb package depedency to have an MTA always installed on the system you will be unable to remove Exim MTA without installing some other MTA (Postix / Qmail) etc.

This will be a problem for those like me who prefer to compile and install Qmail from source, thus to get around this it is necessery to create a dummy package that will trick the deb packaging depencies that actually mta-local MTA package is present on the server.

The way to go here is to use equivs (Circumvent debian package dependencies):
 

debian:~# apt-cache show equivs|grep -i desc -A 10

Description: Circumvent Debian package dependencies
 This package provides a tool to create trivial Debian packages.
 Typically these packages contain only dependency information, but they
 can also include normal installed files like other packages do.
 .
 One use for this is to create a metapackage: a package whose sole
 purpose is to declare dependencies and conflicts on other packages so
 that these will be automatically installed, upgraded, or removed.
 .
 Another use is to circumvent dependency checking: by letting dpkg
 think a particular package name and version is installed when it

Btw creating a .deb dummy package will be necessery in many other cases when you have to install from some third party debian repositories or some old and alrady unmaintaned deb-src packages for the sake of making some archaic software to resurrect somewhere, so sooner or later even if you're not into Mail servers you will certainly need equivs.

Then install equivs and go on proceeding creating the dummy mail-transport-agent package
 

debian:~# cd /tmp debian:~# cp -rpf /usr/share/doc/equivs/examples/mail-transport-agent.ctl . debian:~# equivs-build mail-transport-agent.ctl


Above command will build and package /tmp/mta-local_1.0_all.deb dummy package.
So continue and install it with dpkg as you use to install debian packages


debian:~# dpkg -i /tmp/mta-local_1.0_all.deb


From then on you can continue your standard LWQ – Life with Qmail or any other source based qmail installation with:


./config-fast mail.yourmaildomain.net


So that's it now .deb packaging system consistency will be complete so standard security package updates with apt-get and aptitude updates or dpkg -i third party custom software insatlls will not be breaking up any more.

Hope that helped someone 🙂


How to enable VirtualBox Windows XP FullScreen with VboxGuestAdditions.iso on Ubuntu 11.10 Linux

Tuesday, January 17th, 2012

Enable_VirtualBox_Windows_XP-fullscreen-with-vboxguest-additions-iso
Right after installing Windows XP inside VirtualBox, I've found out everything works fine except the screen. Even though pressing (Right CTRL + F) was changing the Windows XP running window to FullScreen the XP screen was taking only a part of the whole screen area, where almost half of the screen was visible as simply staying blank.

A bit of research and I found the issue is caused by missing VirtualBoxGuestAdditions .

VBoxAdditions is a package which should be installed inside the VirtualBox by navigating to Devices -> Install Guest Additions

Virtualbox offers a download of a VboxGuestAdditions_4.1.2_Ubuntu.iso from url;
http://dlc.sun.edgesuite.net/virtualbox/4.1.2_Ubuntu/VBoxGuestAdditions_4.1.2_Ubuntu.iso, anyways this download fails since the URL is currently unavailable.

To fix this two ways are possible:

1. Download VBoxGuestAdditions.iso from here and put it in directory /usr/share/virtualbox , e.g.:

root@ubuntu:~# cd /usr/share/virtualbox
root@ubuntu:/usr/share/virtualbox# wget https://www.pc-freak.net/files/VBoxGuestAdditions.iso
...

2. Download and install virtualbox-guest-additions-iso_4.1.2-1_all.deb

root@ubuntu:~# wget https://www.pc-freak.net/files/virtualbox-guest-additions-iso_4.1.2-1_all.deb
...
root@ubuntu:~# dpkg -i virtualbox-guest-additions-iso_4.1.2-1_all.deb
...

Next to enable and install guest additions once again use menus:

Devices -> Install Guest Additions

VirtualBox Install Guest Additions Ubuntu Screenshot

The screen to appear next will be similar to:

VBox guest Additions windows Ubuntu

Further on follow the few dialogs to complete the installations and integration of Guest Additions and restart the Virtual machine and hooray the Windows will appear in Full screen in VirtualBox ! 😉

How to get rid of Debian and Ubuntu GNU / Linux obsolete configuration files and system directories

Wednesday, October 19th, 2011

debian_ubuntu-linux-get-rid-of-obsolete-files
I've been using Debian GNU / Linux on my Thinkpad laptop for almost 3 years and half. Initially the Debian version which I had installed was a stable Debian Lenny. As I was mostly dissatisfied of the old versions of the programs, I migrated to testing / unstable
Testing / unstables shipped program versions were a bit better but still back in the day I wanted to get advantage of the latest program versions so for a while I switched to unstable .
Later I regretted for this bad idea, after the migration to Unstable, it was too buggy to run on a notebook one uses for everyday work.
Then to revert back to a bit stable I downgraded to testing unstable again.
When Debian launched Debian Squeeze I set in my /etc/apt/sources.list file software repositories to be the one for the stable Debian Squeeze.

As you can see, I've done quite a lot of "experiments" and "excersises". Many packages were installed, then removed, some became obsolete with time others I just temporary installed out of curiosity. Anyways as a result I ended up with many packages uninstalled / removed , which still kept some of their directory structres and configurations on the machine.

Today, I decided to check how many of these obsolete packages are still present in dpkg database and I was shocked to find out 412 debs were still in my package database! To check the number I used cmd:

root@noah:~# dpkg -l | grep -i '^rcs.*$'|wc -l

Considering the tremendous number of packs waiting to be purged, I decided to get rid of this old and already unnecessery files for the sake of clarity, besides that removing the old already uninstalled packages removes old configuration files, readmes, directories and frees some little space and therefore frees some inodes 😉

Before proceeding to remove them, I carefully reviewed and all the package names which I was about to completely purge in order to make sure there is no package with a configuration files I might need in future:

root@noah:~# dpkg -l |grep -i '^rcs.*$'
...
After reviewing all the deb packages possessing the rc – (remove candidate) flag, I used the following bash one liners to remove the obsolete deb packages:

root@noah:~# for i in $(dpkg -l |grep -i '^rcs.*$'|awk '{ print $2 }'); do echo dpkg --purge $i done...
root@noah:~# for i in $(dpkg -l |grep -i '^rcs.*$'|awk '{ print $2 }'); do dpkg --purge $i done

First line will just print out what will be purged with dpkg , so after I checked it out I used the second one to purge all the RC packs.