Posts Tagged ‘exact command’

Quick shortcut to lock your Linux computer desktop (Few words on Linux screensavers)

Thursday, November 20th, 2014

quick-way-to-lock-desktop-linux-howto-key
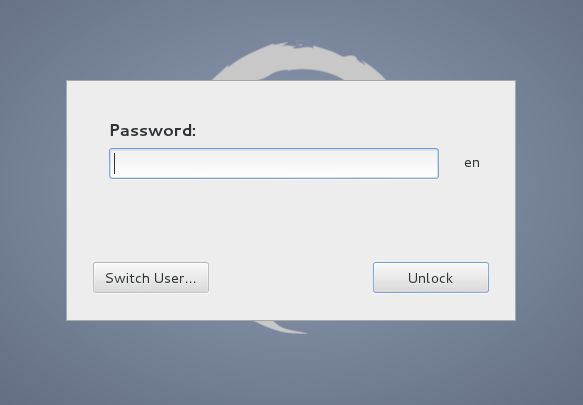
Locking the PC while going for a coffee break, Lunch or toilet is longly used to secure physically your PC display from spying eyes or prevent you from  someone to install a spying software or leak private data from PC HDD to an USB drive.
People who are coming from the wonderful MS Windows OS   are certainly used to quick shortcut key combination to lock PC screen with:
 

Windows key + L


So how to do Lock Screen on Linux?

On Linux locking your Screen the Quick Shortcut is:
 

CTRL + ALT + L.


Locking the screen is done (depending on the Linux distribution) by using by either using historically famous XScreenSaver if non-gnome / KDE graphical environemnt is used or if in Linux Gnome GUI with  gnome-screensaver and on KDE desktop manager with kscreenlocker.


Exact command executed on CTRL + ALT + L keypress on GNOME is:
 

gnome-screensaver-command -l


On KDE to manually lock screen command is:

kscreenlocker

Nomatter whether with GNOME or KDE its worthy mention that xscreensaver is more Screensaver rich than kscreenlocker and gnome-screensaver as it includes about 200 different Screensavers making screen nice to watch when you come back from a lunch.

For people with Windows key keyboard who are too used to using Windows XP / 7 lockreen WIN + L key shortcut to make Windows (key) + L keys combination work on Linux with GNOME desktop:
 

System -> Preferences -> Keyboard Shortcuts

Make Win + L keys combination work on Linux with KDE desktop
 

  1.  "System Settings" (KDE menu).
  2. Choose "Keyboard & mouse" (on "General" tab).
  3. Choose "Global Keyboard Shortcuts" on the left.
  4. Choose "Run Command Interface" from "KDE component" dropdown list.
  5. Choose "Lock session".
  6. Select "Custom".
  7. Click on "None" (button changes to "Input…").
  8. Compose your desired sequence by pressing appropriate buttons on your keyboard.
  9. Click "Apply".


For other desktop environments like Window Maker you can use xmodmap command to bind Win + L keys

How to mount ISO image files in Graphical Environment (GUI) on Ubuntu and Debian GNU/Linux

Saturday, January 14th, 2012

Mounting ISO files in Linux is easy with mount cmd, however remembering the exact command one has to issue is a hard task because mounting ISO files is not a common task.

Mounting ISO files directly by clicking on the ISO file is very nice, especially for lazy people uninitiated with the command line 😉

Besides that I'm sure many Windows users are curious if there is an equivallent program to DaemonTools for Linux / BSD*?

The answer to this question is YES!
There are two major programs which can be used as a DaemonTools substitute on Linux:

These are FuriousISOMount and AcetoneISO
AcetoneISO is more known and I've used it some long time ago and if I'm correct it used to be one of the first ISO Mount GUI programs for Linux. There is a project called GMount-ISO / (GMountISO) which of the time of writting this article seems to be dead (at least I couldn't find the source code).

Luckily FuriousISOMount and AcetoneISO are pretty easy to install and either one of the two is nowdays existing in most Linux distributions.
Probably the programs can also be easily run on BSD platform also quite easily using bsd linux emulation.
If someone has tried something to mount GUIs in Free/Net/OpenBSD, I'll be interesting to hear how?

1. Mount ISO files GUI in GNOME with Furius ISO Mount

FuriousISOMount is a simple Gtk+ interface to mount -t iso9660 -o loop command.

To start using the program on Debian / Ubuntu install with apt;

debian:~# apt-get install furiusisomount
The following extra packages will be installed:
fuseiso fuseiso9660 libumlib0
The following NEW packages will be installed:
furiusisomount fuseiso fuseiso9660 libumlib0

To access the program in GNOME after install use;

Applications -> Accessories -> Furious ISO Mount

Screenshot ISO Mount Tool Debian GNU/Linux Screenshot
 

When mounting it is important to choose Loop option to mount the iso instead of Fuse

After the program is installed to associate the (.iso) ISO files, to permanently be opened with furiusisomount roll over the .iso file and choose Open With -> Other Application -> (Use a custom command) -> furiusisomount

GNOME Open with menu Debian GNU / Linux

2. Mount ISO Files in KDE Graphical Environment with AcetoneISO

AcetoneISO is build on top of KDE's QT library and isway more feature rich than furiousisomount.
Installing AcetoneISO Ubuntu and Debian is done with:

debian:~# apt-get install acetoneiso
The following NEW packages will be installed:
acetoneiso gnupg-agent gnupg2 libksba8 pinentry-gtk2 pinentry-qt4
0 upgraded, 6 newly installed, 0 to remove and 35 not upgraded.
Need to get 3,963 kB of archives.
After this operation, 8,974 kB of additional disk space will be used.
...

Screenshot Furius ISO Mount Tool Debian GNU/Linux ScreenShot

AcetoneISO supports:
 

  • conversion between different ISO formats
  • burn images to disc
  • split ISO image volumes
  • encrypt images
  • extract password protected files

Complete list of the rich functionality AcetoneISO offers is to be found on http://www.acetoneteam.org/viewpage.php?page_id=6
To start the program via the GNOME menus use;

Applications -> Accessories -> Sound & Video -> AcetoneISO

I personally don't like AcetoneISO as I'm not a KDE user and I see the functionality this program offers as to rich and mostly unnecessery for the simple purpose of mounting an ISO.

3. Mount ISO image files using the mount command

If you're a console guy and still prefer mounting ISO with the mount command instead of using fancy gui stuff use:

# mount -t iso9660 -o loop /home/binary/someiso.iso /home/username/Iso_Directory_Name