Posts Tagged ‘ffmpeg’
Thursday, April 11th, 2024 
I've been given a very tedious task to Copy music from Audio CD Drive to MP3 / MP4 file format and then copy the content to external Flash drive.
Doing so is pretty trivial, you just need to have a CD / DVD rom on your computer something that becomes rare nowadays and then you need to have installed a bunch of software, if you don't already have it as i've pointed in my previous article Howto craete Music Audio CD from MP3 files, create playable WAV format audio CD Albums from MP3s.
Creating a Audio CD from an MP3 collection is exactly the opposite to what is aim't now (to copy the content of a CD to a computer and prepare it for A Car MP3 player).
1. RIPing audio CDs to WAV and Conver to MP3 from terminal
On Linux there is many ways to do it and many tools that can do it for your both graphical and command line.
But as I prefer command line to do stuff, in this article I'll mention the quickest and most elementary one which is done in 2 steps.
1. Use a tool to dump the CD Audio music to Tracks in WAV format
2. Convert the WAV to MP3 format
We'll need cdparanoia tool installed as well as ffmpeg.
If you don't have them installed do:
# apt-get install –yes cdparanoia dvd+rw-tools cdw cdrdao audiotools cdlabelgen dvd+rw-tools wodim ffmpeg lame normalize-audio libavcodec58
Next create the directory where you want to dump the .wav files.
# mkdir /home/hipo/audiorip/cd1
# cd /home/hipo/audiorip/cd1
Next assumng the Audio CD is plugged in the CD reader, dump its full content into track*.WAV files with cmd:
# paranoia -B
This will produce you the dumped songs into .wav files.
hipo@noah:~/audiorip/cd1$ ls -al *.wav
-rw-r–r– 1 root root 10278284 мар 25 22:49 track01.cdda.wav
-rw-r–r– 1 root root 21666668 мар 25 22:50 track02.cdda.wav
-rw-r–r– 1 root root 88334108 мар 25 22:53 track03.cdda.wav
-rw-r–r– 1 root root 53453948 мар 25 22:55 track04.cdda.wav
-rw-r–r– 1 root root 100846748 мар 25 22:58 track05.cdda.wav
-rw-r–r– 1 root root 41058908 мар 25 22:59 track06.cdda.wav
-rw-r–r– 1 root root 105952940 мар 25 23:02 track07.cdda.wav
-rw-r–r– 1 root root 50074124 мар 25 23:03 track08.cdda.wav
-rw-r–r– 1 root root 92555948 мар 25 23:06 track09.cdda.wav
-rw-r–r– 1 root root 61939964 мар 25 23:07 track10.cdda.wav
-rw-r–r– 1 root root 8521340 мар 25 23:07 track11.cdda.wav
Then you can use a simple for loop with ffmpeg command to conver the .wav files to .mp3s.
hipo@noah:~/audiorip/cd1$ for i in $( ls -1 *); do ffmpeg -i $i $i.wav.mp3; done
ffmpeg version 1.2.12 Copyright (c) 2000-2015 the FFmpeg developers
built on Feb 12 2015 18:03:16 with gcc 4.7 (Debian 4.7.2-5)
configuration: –prefix=/usr –extra-cflags='-g -O2 -fstack-protector –param=ssp-buffer-size=4 -Wformat -Werror=format-security ' –extra-ldflags='-Wl,-z,relro' –cc='ccache cc' –enable-shared –enable-libmp3lame –enable-gpl –enable-nonfree –enable-libvorbis –enable-pthreads –enable-libfaac –enable-libxvid –enable-postproc –enable-x11grab –enable-libgsm –enable-libtheora –enable-libopencore-amrnb –enable-libopencore-amrwb –enable-libx264 –enable-libspeex –enable-nonfree –disable-stripping –enable-libvpx –enable-libschroedinger –disable-encoder=libschroedinger –enable-version3 –enable-libopenjpeg –enable-librtmp –enable-avfilter –enable-libfreetype –enable-libvo-aacenc –disable-decoder=amrnb –enable-libvo-amrwbenc –enable-libaacplus –libdir=/usr/lib/x86_64-linux-gnu –disable-vda –enable-libbluray –enable-libcdio –enable-gnutls –enable-frei0r –enable-openssl –enable-libass –enable-libopus –enable-fontconfig –enable-libpulse –disable-mips32r2 –disable-mipsdspr1 –dis libavutil 52. 18.100 / 52. 18.100
libavcodec 54. 92.100 / 54. 92.100
libavformat 54. 63.104 / 54. 63.104
libavdevice 54. 3.103 / 54. 3.103
libavfilter 3. 42.103 / 3. 42.103
libswscale 2. 2.100 / 2. 2.100
libswresample 0. 17.102 / 0. 17.102
libpostproc 52. 2.100 / 52. 2.100
[wav @ 0x66c900] max_analyze_duration 5000000 reached at 5015510 microseconds
Guessed Channel Layout for Input Stream #0.0 : stereo
Input #0, wav, from 'track01.cdda.wav':
Duration: 00:00:23.19, bitrate: 1411 kb/s
Stream #0:0: Audio: pcm_s16le ([1][0][0][0] / 0x0001), 44100 Hz, stereo, s16, 1411 kb/s
Output #0, mp3, to 'track01.cdda.wav.wav.mp3':
Metadata:
TSSE : Lavf54.63.104
Stream #0:0: Audio: mp3, 44100 Hz, stereo, s16p
Stream mapping:
Stream #0:0 -> #0:0 (pcm_s16le -> libmp3lame)
Press [q] to stop, [?] for help
size= 363kB time=00:00:23.19 bitrate= 128.2kbits/s
video:0kB audio:363kB subtitle:0 global headers:0kB muxing overhead 0.058402%
ffmpeg version 1.2.12 Copyright (c) 2000-2015 the FFmpeg developers
built on Feb 12 2015 18:03:16 with gcc 4.7 (Debian 4.7.2-5)
configuration: –prefix=/usr –extra-cflags='-g -O2 -fstack-protector –param=ssp-buffer-size=4 -Wformat -Werror=format-security ' –extra-ldflags='-Wl,-z,relro' –cc='ccache cc' –enable-shared –enable-libmp3lame –enable-gpl –enable-nonfree –enable-libvorbis –enable-pthreads –enable-libfaac –enable-libxvid –enable-postproc –enable-x11grab –enable-libgsm –enable-libtheora –enable-libopencore-amrnb –enable-libopencore-amrwb –enable-libx264 –enable-libspeex –enable-nonfree –disable-stripping –enable-libvpx –enable-libschroedinger –disable-encoder=libschroedinger –enable-version3 –enable-libopenjpeg –enable-librtmp –enable-avfilter –enable-libfreetype –enable-libvo-aacenc –disable-decoder=amrnb –enable-libvo-amrwbenc –enable-libaacplus –libdir=/usr/lib/x86_64-linux-gnu –disable-vda –enable-libbluray –enable-libcdio –enable-gnutls –enable-frei0r –enable-openssl –enable-libass –enable-libopus –enable-fontconfig –enable-libpulse –disable-mips32r2 –disable-mipsdspr1 –dis libavutil 52. 18.100 / 52. 18.100
libavcodec 54. 92.100 / 54. 92.100
libavformat 54. 63.104 / 54. 63.104
libavdevice 54. 3.103 / 54. 3.103
libavfilter 3. 42.103 / 3. 42.103
libswscale 2. 2.100 / 2. 2.100
libswresample 0. 17.102 / 0. 17.102
libpostproc 52. 2.100 / 52. 2.100
[mp3 @ 0x66c900] max_analyze_duration 5000000 reached at 5015510 microseconds
Input #0, mp3, from 'track01.cdda.wav.mp3':
Metadata:
encoder : Lavf54.63.104
Duration: 00:00:23.22, start: 0.000000, bitrate: 128 kb/s
Stream #0:0: Audio: mp3, 44100 Hz, stereo, s16p, 128 kb/s
File 'track01.cdda.wav.mp3.wav.mp3' already exists. Overwrite ? [y/N] y
Output #0, mp3, to 'track01.cdda.wav.mp3.wav.mp3':
Metadata:
TSSE : Lavf54.63.104
Stream #0:0: Audio: mp3, 44100 Hz, stereo, s16p
Stream mapping:
Stream #0:0 -> #0:0 (mp3 -> libmp3lame)
Press [q] to stop, [?] for help
Trying to remove 1152 samples, but the queue is emptys
size= 363kB time=00:00:23.24 bitrate= 128.1kbits/s
video:0kB audio:363kB subtitle:0 global headers:0kB muxing overhead 0.058336%
ffmpeg version 1.2.12 Copyright (c) 2000-2015 the FFmpeg developers
built on Feb 12 2015 18:03:16 with gcc 4.7 (Debian 4.7.2-5)
configuration: –prefix=/usr –extra-cflags='-g -O2 -fstack-protector –param=ssp-buffer-size=4 -Wformat -Werror=format-security ' –extra-ldflags='-Wl,-z,relro' –cc='ccache cc' –enable-shared –enable-libmp3lame –enable-gpl –enable-nonfree –enable-libvorbis –enable-pthreads –enable-libfaac –enable-libxvid –enable-postproc –enable-x11grab –enable-libgsm –enable-libtheora –enable-libopencore-amrnb –enable-libopencore-amrwb –enable-libx264 –enable-libspeex –enable-nonfree –disable-stripping –enable-libvpx –enable-libschroedinger –disable-encoder=libschroedinger –enable-version3 –enable-libopenjpeg –enable-librtmp –enable-avfilter –enable-libfreetype –enable-libvo-aacenc –disable-decoder=amrnb –enable-libvo-amrwbenc –enable-libaacplus –libdir=/usr/lib/x86_64-linux-gnu –disable-vda –enable-libbluray –enable-libcdio –enable-gnutls –enable-frei0r –enable-openssl –enable-libass –enable-libopus –enable-fontconfig –enable-libpulse –disable-mips32r2 –disable-mipsdspr1 –dis libavutil 52. 18.100 / 52. 18.100
libavcodec 54. 92.100 / 54. 92.100
libavformat 54. 63.104 / 54. 63.104
libavdevice 54. 3.103 / 54. 3.103
libavfilter 3. 42.103 / 3. 42.103
libswscale 2. 2.100 / 2. 2.100
libswresample 0. 17.102 / 0. 17.102
libpostproc 52. 2.100 / 52. 2.100
[mp3 @ 0x66c900] max_analyze_duration 5000000 reached at 5015510 microseconds
Input #0, mp3, from 'track01.cdda.wav.mp3.wav.mp3':
Metadata:
encoder : Lavf54.63.104
Duration: 00:00:23.25, start: 0.000000, bitrate: 128 kb/s
Stream #0:0: Audio: mp3, 44100 Hz, stereo, s16p, 128 kb/s
Output #0, mp3, to 'track01.cdda.wav.mp3.wav.mp3.wav.mp3':
Metadata:
TSSE : Lavf54.63.104
Stream #0:0: Audio: mp3, 44100 Hz, stereo, s16p
Stream mapping:
Stream #0:0 -> #0:0 (mp3 -> libmp3lame)
Press [q] to stop, [?] for help
Trying to remove 1152 samples, but the queue is emptys
size= 364kB time=00:00:23.27 bitrate= 128.1kbits/s
video:0kB audio:364kB subtitle:0 global headers:0kB muxing overhead 0.058271%
ffmpeg version 1.2.12 Copyright (c) 2000-2015 the FFmpeg developers
built on Feb 12 2015 18:03:16 with gcc 4.7 (Debian 4.7.2-5)
configuration: –prefix=/usr –extra-cflags='-g -O2 -fstack-protector –param=ssp-buffer-size=4 -Wformat -Werror=format-security ' –extra-ldflags='-Wl,-z,relro' –cc='ccache cc' –enable-shared –enable-libmp3lame –enable-gpl –enable-nonfree –enable-libvorbis –enable-pthreads –enable-libfaac –enable-libxvid –enable-postproc –enable-x11grab –enable-libgsm –enable-libtheora –enable-libopencore-amrnb –enable-libopencore-amrwb –enable-libx264 –enable-libspeex –enable-nonfree –disable-stripping –enable-libvpx –enable-libschroedinger –disable-encoder=libschroedinger –enable-version3 –enable-libopenjpeg –enable-librtmp –enable-avfilter –enable-libfreetype –enable-libvo-aacenc –disable-decoder=amrnb –enable-libvo-amrwbenc –enable-libaacplus –libdir=/usr/lib/x86_64-linux-gnu –disable-vda –enable-libbluray –enable-libcdio –enable-gnutls –enable-frei0r –enable-openssl –enable-libass –enable-libopus –enable-fontconfig –enable-libpulse –disable-mips32r2 –disable-mipsdspr1 –dis libavutil 52. 18.100 / 52. 18.100
libavcodec 54. 92.100 / 54. 92.100
libavformat 54. 63.104 / 54. 63.104
libavdevice 54. 3.103 / 54. 3.103
libavfilter 3. 42.103 / 3. 42.103
libswscale 2. 2.100 / 2. 2.100
libswresample 0. 17.102 / 0. 17.102
libpostproc 52. 2.100 / 52. 2.100
[wav @ 0x66c900] max_analyze_duration 5000000 reached at 5015510 microseconds
Guessed Channel Layout for Input Stream #0.0 : stereo
Input #0, wav, from 'track02.cdda.wav':
Duration: 00:02:21.28, bitrate: 1411 kb/s
Stream #0:0: Audio: pcm_s16le ([1][0][0][0] / 0x0001), 44100 Hz, stereo, s16, 1411 kb/s
Output #0, mp3, to 'track02.cdda.wav.wav.mp3':
Metadata:
TSSE : Lavf54.63.104
Stream #0:0: Audio: mp3, 44100 Hz, stereo, s16p
Stream mapping:
Stream #0:0 -> #0:0 (pcm_s16le -> libmp3lame)
Press [q] to stop, [?] for help
…
Finally remove the old unneded .wav files and enjoy the mp3s with vlc / mplayer / mpg123 or whatever player you like.
hipo@noah:~/audiorip/cd1$ rm -f *.wav
Now mount the flash drive and copy th files into it.
# mkdir /media/usb-drive
# mount /dev/sdc1 /media/usb-drive/
# mkdir -p /media/usb-drive/cd1
# fdisk -l |grep -i sdc1
/dev/sdc1 on /media/usb-drive type vfat (rw,relatime,fmask=0022,dmask=0022,codepage=437,iocharset=utf8,shortname=mixed,errors=remount-ro
# cp -rpf ~/audiorip/cd1*.mp3 /mnt/usb-drive/cd1
# umount /dev/sdc1
2. RIPping audio CD on Linux with rip-audio-cds-linux.sh script
#!/bin/bash
# A simple shell script to rip audio cd and create mp3 using lame
# and cdparanoia utilities.
# —————————————————————————-
# Written by Vivek Gite <http://www.cyberciti.biz/>
# (c) 2006 nixCraft under GNU GPL v2.0+
# —————————————————————————-
read -p "Starting in 5 seconds ( to abort press CTRL + C ) " -t 5
cdparanoia -B
for i in *.wav
do
lame –vbr-new -b 360 "$i" "${i%%.cdda.wav}.mp3"
rm -f "$i"
done
If you need to automate the task of dumping the audio CDs to WAV and convert them to MP3s you can do it via a small shell script like the one provided by cyberciti.biz that uses paranoia and lame commands in a shell script loop. Script rip-audio-cds-linux.sh is here
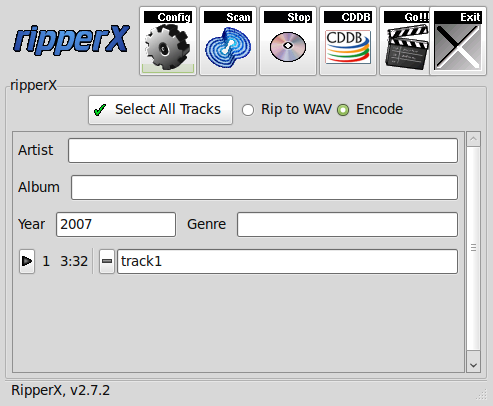
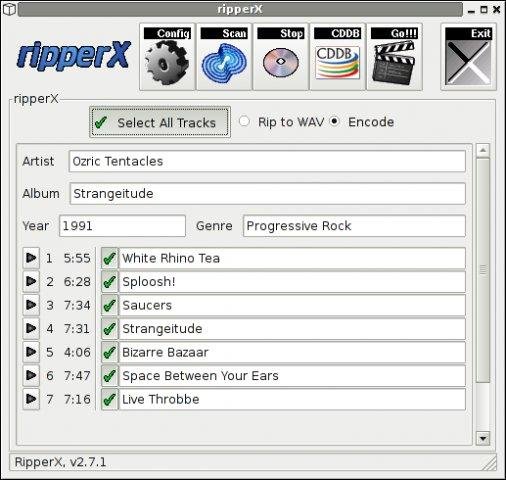
3. Dump Audio CD to MP3 with Graphical program ( ripperx )
By default most modern Linux distributions including the Debian GNU / Linux based ones has the ripperx in the default repositories, as well as the tool is downloadable and compilable from source from sourceforge.net
# apt-cache show ripperx|grep -i descript -A3 -B3
Architecture: amd64
Depends: cdparanoia, vorbis-tools (>= 1.0beta3), libatk1.0-0 (>= 1.12.4), libc6 (>= 2.14), libcairo2 (>= 1.2.4), libfontconfig1 (>= 2.12.6), libfreetype6 (>= 2.2.1), libgcc1 (>= 1:3.0), libgdk-pixbuf2.0-0 (>= 2.22.0), libglib2.0-0 (>= 2.16.0), libgtk2.0-0 (>= 2.8.0), libpango-1.0-0 (>= 1.14.0), libpangocairo-1.0-0 (>= 1.14.0), libpangoft2-1.0-0 (>= 1.14.0), libstdc++6 (>= 5.2), libtag1v5 (>= 1.9.1-2.2~)
Suggests: sox, cdtool, mpg321, flac, toolame
Description-en: GTK-based audio CD ripper/encoder
ripperX is a graphical interface for ripping CD audio tracks (using
cdparanoia) and then encoding them into the Ogg, FLAC, or MP2/3
formats using the vorbis tools, FLAC, toolame or other available
MP3 encoders.
.
It includes support for CDDB lookups and ID3v2 tags.
Description-md5: cdeabf4ef72c33d57aecc4b4e2fd5952
Homepage: http://sourceforge.net/projects/ripperx/
Tag: hardware::storage, hardware::storage:cd, interface::graphical,
interface::x11, role::program, scope::application, uitoolkit::gtk,
# apt install –yes ripperx
That's all folks.
Enjoy !
Tags: Audio, audio cd, ccache, cdda, cmd, Convert, ffmpeg, gcc, graphical interface, help, hipo, linux?, need, Press, RIP, root root, shell script
Posted in Educational, File Convert Tools, Linux, Linux and FreeBSD Desktop, Linux Audio & Video | No Comments »
Monday, January 23rd, 2012 
1. Add Medibuntu package repository
root@ubuntu:~# wget --output-document=/etc/apt/sources.list.d/medibuntu.list \

http://www.medibuntu.org/sources.list.d/$(lsb_release -cs).list \

&& apt-get --quiet update \

&& apt-get --yes --quiet --allow-unauthenticated install medibuntu-keyring \

&& apt-get --quiet update
2. Enable Ubuntu to play Restricted DVD
root@ubuntu:~# apt-get install --yes libdvdread4

...

root@ubuntu:~# /usr/share/doc/libdvdread4/install-css.sh
After that VLC will be ready to play DVDs for some programs which was compiled without DVD, source rebuilt is required.
If DVDs hang you might need to set a Region Code with regionset:
# regionset
3. Install non-free codecs
root@ubuntu:~# apt-get install non-free-codecs
4. Install Chromium ffmpeg nonfree codecs
root@ubuntu:~# apt-get install chromium

root@ubuntu:~# apt-get install chromium-codecs-ffmpeg-nonfree
5. Install w32codecs / w64codecs
Depending on the Ubuntu Linux installation architecture 32/64 bit install w32codecs or w64codecs
For 32 bit (x86) Ubuntu install w32codecs:
root@ubuntu:~# apt-get install w32codecs
For 64 bit arch Ubuntu:
root@ubuntu:~# apt-get install w64codecs
6. Install ubuntu-restricted-extras meta package
root@ubuntu:~# apt-get install ubuntu-restricted-extras
7. Install cheese for webcam picture/video snapshotting
root@ubuntu:~# apt-get install cheese
8. Install GIMP, Inkscape, xsane,sane, shotwell etc.
root@ubuntu:~# apt-get --yes install sane xsane gimp inkscape gimp-data-extras gimp-plugin-registry \

blender gcolor2 showtwell bluefish kompozer
9. Install multimedia Sound & Video utilities
Install Subtitle editor, video editiking , sound editing, mp3 player, iso mounters, DVD/CD Burners
root@ubuntu:~# apt-get install rhythmbox banshee smplayer mplayer \

realplayer audacity brasero jokosher istanbuk gtk-recordMyDesktop \acetoneisohexedit furiusisomount winff fala audacious dvdstyler lives hydrogen

subtitleeditor gnome-subtitles electricsheep k3b
10. Install CD / DVD RIP tools
root@ubuntu:~# apt-get install acidrip sound-juicer ogmrip thoggen
11. Install chat messanger programs, Browsers, mail pop3 clients, torrent, emulators, ftp clients etc.
apt-get install seamonkey thunderbird transmission transmission-gtk gbgoffice kbedic \

pidgin openoffice.org gxine mozilla-plugin-vlc wine dosbox samba filezilla amsn ntp \epiphany-browser ntpdate desktop-webmail alltray chmsee gftp xchat-gnome ghex \gnome-genius bleachbit arista
12. Install Non-Free Flash Player
Unfortunately Gnash is not yet production ready and crashes in many websites …
root@ubuntu:~# apt-get install flashplugin-nonfree flashplugin-nonfree-extrasound swfdec-gnome
13. Install Archive / Unarchive management programs
root@ubuntu:~# apt-get install unace unrar zip unzip p7zip-full p7zip-rar sharutils rar uudeview \

mpack lha arj cabextract file-roller
15. Install VirtualBox and QEmu
root@ubuntu:~# apt-get install qemu-launcher qemu-kvm-extras virtualbox virtualbox-ose \

virtualbox-ose-guest-dkms virtualbox-ose-guest-dkms
This should be enough to use Ubuntu normally for multimedia Desktop just as MS Windows for most of the daily activities.
Am I missing some important program?
Tags: amp, architecture, audacity, Auto, banshee, bit, blender, bluefish, cd burners, Chromium, Draft, editing, editing mp3, ffmpeg, free codecs, gcolor, inkscape, Install, installation, ISO, libdvdread, Linux, linux multimedia, list, lsb, Medibuntu, meta package, org, output document, package, player, plugin registry, regionset, repository, root, sane, shafter, shotwell, showtwell, smplayer, Sound, sound editing, Sound Video, subtitle editor, sudo, Ubuntu, ubuntu linux, Ubuntu Linux Multimedia, video, video utilities, VirtualBox, VLC, wget, WinFF, x86
Posted in Linux, Linux and FreeBSD Desktop, Linux Audio & Video, System Administration | 4 Comments »
Friday, April 15th, 2011 
If you're on Linux the questions like, how can I convert between video and audio formats, how to do photo editing etc. etc. have always been a taugh question as with it's diversity Linux often allows too many ways to do the same things.
In the spirit of questioning I have been recently curious, how can a subtitles be added to a flash video (.flv) video?
After some research online I've come up with the below suggested solution which uses mplayer to do the flash inclusion of the subtitles file.
mplayer your_flash_movie.flv -fs -subfont-text-scale 3
While including the subtitles to the .flv file, it's best to close up all the active browsers and if running something else on the desktop close it up.
Note that above's mplayer example for (.srt and .sub) subtitle files example is only appropriate for a .flv movie files which already has a third party published subtitle files.
What is interesting is that often if you want to make custom subtitles to let's say a video downloaded from Youtube on Linux the mplayer way pointed above will be useless. Why?
Well the Linux programs that allows a user to add custom subtitles to a movie does not support the flv (flash video) file format.
My idea on how to create custom subtitles and embed them into a flv movie file is very simple and it goes like this:
1. Convert the .flv file format to let's say .avi or .mpeg
2. Use gnome-subitles or subtitleeditor to create the subtitles for the .avi or .mpeg file
3. Convert back the .avi/.mpeg file with included subtitles to .flv (flash video format)
This methodology is really long and time consuming, but pitily as far as my understanding goes it's the only way to do that on your Linux until now.
To make the conversations between .flv and .avi format you will need to use the ffmpeg – (FFMpeg command line tool video converter), here is how:
– Convert .flv to .avi
debian:~# /usr/bin/ffmpeg -i input_flvfilename.flv output_avifilename.avi
– Convert .avi file to .flv
debian:~# /usr/bin/ffmpeg -y -i /path/to/your/avi/input_avifilename.avi -acodec mp3 -ar 22050 -f flv

/path/to/your/flv/output_flvfilename.flv
The required overall tools which you will have to have installed on your Debian or Ubuntu Linux are:
1. ffmpeg
2. gnome-subtitles
3. subtitleeditor
4. mplayer
You will also have to spend some time to get to know gnome-subtitles or subtitleeditor, but it won't be that long until you get the idea on how to use them.
Tags: and, avi, avi file, avi format, avi mpeg, close, command line tool, consuming, conversations, Convert, custom, Desktop, editing, editor, ffmpeg, file, Flash, flv file format, format, Gnome, How to, inclusion, Linux, linux programs, methodology, movie file, movie files, mpeg, mpeg file, mplayer, party, photo editing, something, subtitle editor, subtitle files, subtitles, taugh, time, time consuming, tool, Ubuntu, use, video, video converter, video file, youtube
Posted in Linux, Linux and FreeBSD Desktop, Linux Audio & Video | 1 Comment »
Wednesday, June 12th, 2013 
Here in my job, there is one internet (TV) around which can only read video formats in Mp4. Henceforth I needed a way to convert a number of JPEG / PNG format Picture files to Mp4. In my situation I needed to make video out of pictures and script it as this was required to be later pushed via FTP protocol to the Internet TV. Ater doing some research I figured out this is possible to build video out of pictures by using together ImageMagick and avconv.
First thing is to send pictures in certain resolution. There is a tool from imagemagick package called mogrify (which can do that). To convert a number of different dimension pictures to lets say 1024×768, used:
noah:~# mogrify -resize 1024×768 *.png
In earlier Linux distributions to create a movie from pictures ffmpeg was used like so:
# ffmpeg -qscale 5 -r 20 -b 9600 -i SDC%04d.png movie.mp4
However in newer version of ffmpeg support for this is removed, and to make video from images, there is other tool avconv. On most Linux distributions avconv is part of libav-tools package.
To install on avconv Debian and Ubuntu;
noah:~# apt-get install –yes libav-tools
…
Once installed to create single mp4 video from JPEG or PNG pictures:
noah:~# avconv -i SDC106001.JPG SDC10595.JPG SDC13611.JPG SDC13612.JPG SDC13614.JPG movie-from-pictures.mp4
I found there is also a nice GUI,software Open Movie Editor, which can create video out of number of pictuers stored in a directory.
Open Movie Editor is available in most Linux distributions (unfortunately as of time of writting on Debian Wheeze there is no install candidate of openmovieeditor), there is however substitute package doing the same job called openshot);
On latest Debian stable to install Openshot:
noah:~# apt-get install –yes openshot
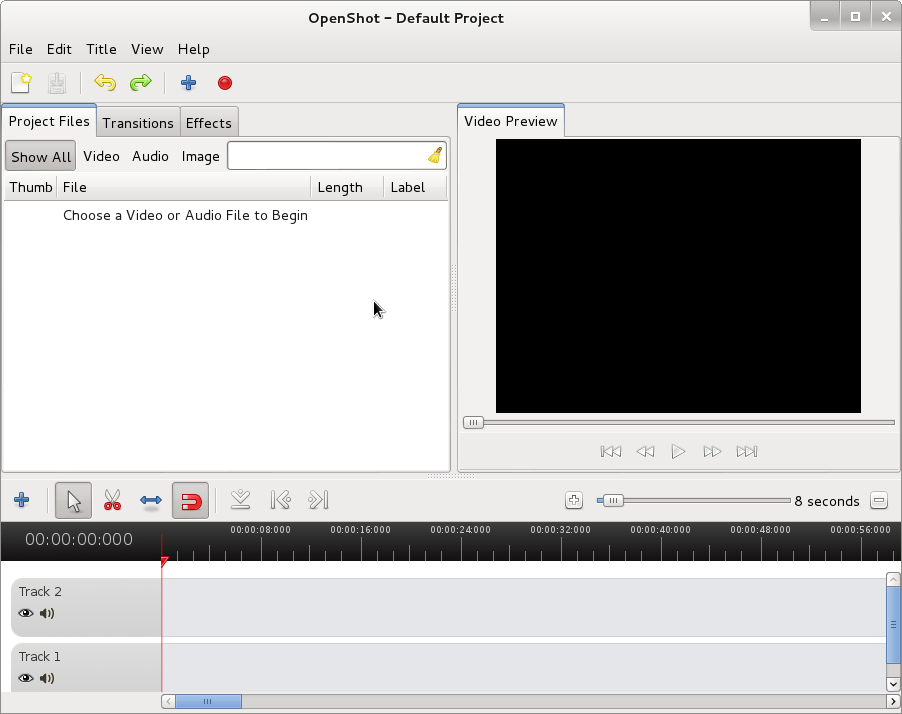
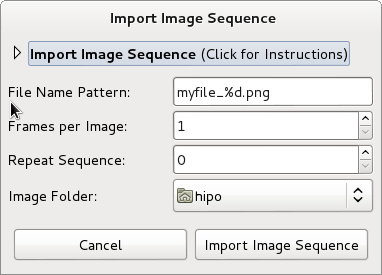
Openshot has an option (Import Image Sequence) from File -> Import Image Sequence. Using this option you can select a directory with fles with common prefix name lets say IMG*.png and create Video based on the photos inside.
On Ubuntu Linux or other distro where openmovieeditor is avialable install it with:
ubuntu:~# apt-get install –yes openmovieeditor
…
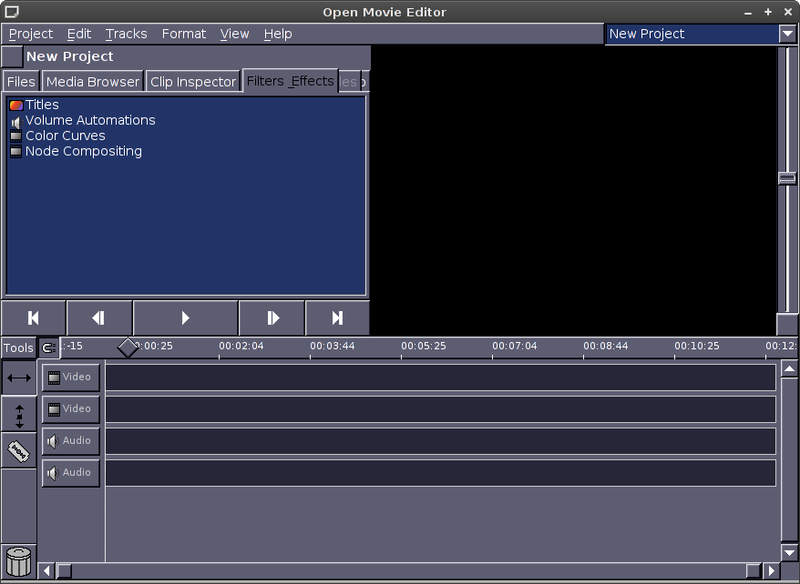
To create a video out of pictures click on Media Browser tab. Choose the Folder with pictures from which video will be generated and drag them to the Video bar
(window).
To save produced video navigate to menus:
Project -> Render
and select format to save it as. One good codec to save output is Quicktime's. To convert later Quicktime MOV Video to MP4 video,
there is the Pytube Media Converter script.
Well that's all enjoy your new videos from pictures 🙂
Tags: ffmpeg, images, internet tv, jpeg images, Linux, mogrify, most linux distributions, pictuers, png format, Protocol, ubuntu linux, video formats, wheeze, writting
Posted in Everyday Life, Linux, Linux and FreeBSD Desktop, Various | No Comments »
Friday, April 8th, 2011 I needed to convert a bunch of files from WAV to MP3 format on my Linux desktop.
I’ve placed all my wav files to the directory /home/hipo/wav
And then I issued the small one liner script to convert the .wav files to .mp3 using the niftly lame linux mp3 convertor.
Here is how I did it:
linux-desktop:~$ cd wav

linux-desktop:/home/hipo/wav$ for i in *.wav; do

new_name=$(echo $i |sed -e 's#wav#mp3#g');

lame -V0 -h -b 160 --vbr-new "$i" "$new_name";

done
After executing the little script you might go and have a coffee, if you have thousands of files, each file convertion takes about 10-15 seconds of time (speed depends on your CPU).
Here is some output from a lame convertion to mp3 taking place:
Encoding as 8 kHz single-ch MPEG-2.5 Layer III VBR(q=0)

Frame | CPU time/estim | REAL time/estim | play/CPU | ETA

27237/27237 (100%)| 0:12/ 0:12| 0:12/ 0:12| 155.89x| 0:00

64 [27237] ***************************************************************

----------------------------------------------

kbps mono % long switch short %

64.0 100.0 84.1 8.9 7.0
If you want to save my convertion quickly for a later, download my Convert WAV to mp3 from a directory with lame shell script here
Actually there are plenty of other ways to convert wav to mp3 on Linux through mplayer, ffmpeg even with mpg123.
There are also some GUI programs that could do the convertion like winff , however for some weird reason after installing WinFF on my debian it was not able to complete convertion to mp3?!
But it doesn’t matter, the good news is I did what I wanted to via the simple lame program and the above script, hope it helps somebody out there.
Tags: coffee, Convert, convertion, convertor, cpu time, Desktop, desktop cd, download, estim, eta, ffmpeg, file, format, Frame, gui programs, hipo, linux desktop, linux mp3, mpg, mpg123, place, real time, reason, script, Shell, shell script, time, time speed, v0, VBR, WAV, wav files, wav mp3, weird reason, WinFF
Posted in Linux and FreeBSD Desktop, Linux Audio & Video | 8 Comments »
Tuesday, December 25th, 2012 The good old ffmpeg, along with being able to capture sound and video from your Linux Desktop or a certain Window and Skype whatever WebCamera input is also able to record sound from both camera or embedded laptop microphone. Here is how:
# ffmpeg -f alsa -ac 2 -i pulse -acodec pcm_s16le -vcodec libx264 -vpre lossless_ultrafast -threads 0 -y myVOICE.wav
This as you can see from arguments, uses GNOME's pulseaudio (audio service) and ALSA. Sound is first streamed through alsa and then the sound inflow is passed to be processed and multipled in a separate sound channel by pulseaudio. This method though said to be working fine on Ubuntu Linux is not working well on some other Linux distributions like Debian if one is using ALSA configured to use a software sound multiplexor via the so called – alsa dsnoop interface (previously I write how to use it in order to make Skype and other programs use SoundBlaster proper – article is here)
Below is the output warning I got whether trying ffmpeg with -f alsa and -i pulse arguments:
hipo@noah:~/Desktop$ ffmpeg -f alsa -ac 2 -i pulse   -acodec pcm_s16le -vcodec libx264 -vpre lossless_ultrafast -threads 0  -y  myVOICE.wav

FFmpeg version SVN-r25838, Copyright (c) 2000-2010 the FFmpeg developers

  built on Sep 20 2011 17:00:01 with gcc 4.4.5

  configuration: --enable-libdc1394 --prefix=/usr --extra-cflags='-Wall -g ' --cc='ccache cc' --enable-shared --enable-libmp3lame --enable-gpl --enable-libvorbis --enable-pthreads --enable-libfaac --enable-libxvid --enable-postproc --enable-x11grab --enable-libgsm --enable-libtheora --enable-libopencore-amrnb --enable-libopencore-amrwb --enable-libx264 --enable-libspeex --enable-nonfree --disable-stripping --enable-avfilter --enable-libdirac --disable-decoder=libdirac --enable-libschroedinger --disable-encoder=libschroedinger --enable-version3 --enable-libopenjpeg --enable-libvpx --enable-librtmp --extra-libs=-lgcrypt --disable-altivec --disable-armv5te --disable-armv6 --disable-vis

  libavutil     50.33. 0 / 50.43. 0

  libavcore      0.14. 0 /  0.14. 0

  libavcodec    52.97. 2 / 52.97. 2

  libavformat   52.87. 1 / 52.87. 1

  libavdevice   52. 2. 2 / 52. 2. 2

  libavfilter    1.65. 0 /  1.65. 0

  libswscale     0.12. 0 /  0.14. 1

  libpostproc   51. 2. 0 / 51. 2. 0

[alsa @ 0x633160] capture with some ALSA plugins, especially dsnoop, may hang.
where concrete programs, are run which take use of OSS (Open Sound System) – an already obsolete sound architecture. By the way on current Debian / Fedora etc. Linux-es OSS is managed and played only, whether few kernel modules are already pre-loaded, below are the ones as pasted from my Debian Squeeze:
# lsmod | grep -i oss
snd_pcm_oss 32591 0
snd_mixer_oss 12606 1 snd_pcm_oss
snd_pcm 60487 3 snd_hda_intel,snd_hda_codec,snd_pcm_oss
snd 46526 15 snd_hda_codec_analog,snd_hda_intel,snd_hda_codec,snd_hwdep,snd_pcm_oss,snd_mixer_oss,snd_pcm,snd_rawmidi,snd_seq,snd_timer,snd_seq_device
The oss processed sound recording from ffmpeg is not working, well on my Linux, cause I have my custom (non-Debian) native binary Firefox downloaded and installed from Firefox's website.The browser is compiled to open automatically /dev/dsp which in practice uses the above-mentioned OSS listed modules, which on their behalf when used break out the sound processed by alsa and respectively pulseaudio (those who use Linux for longer time should remember in the times of OSS only one certain sound stream was possible to be processed / played on Linux historically before ALSA come to scene to be "defacto" standard kernel sound processor. Well ofcourse firefox developers who compiled the Firefox for Linux probably was using Slackware or some other Linux distro which probably used to play sound still via OSS or maybe they compiled it so thinking OSS because of its historical importance is still supported by more Linux distributions than alsa is. I like the custom compiled Firefox to run on my Debian instead of default Debian Squeeze (IceWeasel) cause firefox.org ,Firefox version is much newer and supports better latest HTML5 as well as it includes ability to download and apply automatic updates to the latest version provided by Firefox team. However I fou
Thus for Linux users like me using latest firefox binary from firefox.org (in parallel) with opened Firefox browser to record sound from Webcam or Embedded notebook mic the obsolete OSS has to be used, here is how:
# ffmpeg -f oss -ac 2 -i /dev/dsp -acodec pcm_s16le -vcodec libx264 -vpre lossless_ultrafast -threads 0 -y my-recorder-VOICE.wav
Enjoy ;)
Tags: alsa, analog, cflags, fedora, ffmpeg, laptop, Linux, linux desktop, linux distributions, microphone input, multiplexor, squeeze, threads, ultrafast, vcodec
Posted in Linux and FreeBSD Desktop, Linux Audio & Video | 3 Comments »
Tuesday, December 18th, 2012
Two articles, before I've blogged on how one can take pictures from console / terminal with ffmpeg. It was interesting fact, I've stumbled on ffmpeg is able of capturing video executed from terminal or plain console TTY.
The command to do so is:
 # ffmpeg -f video4linux2 -r 25 -s 640x480 -i /dev/video0 webcam-movie.avi

FFmpeg version SVN-r25838, Copyright (c) 2000-2010 the FFmpeg developers

  built on Sep 20 2011 17:00:01 with gcc 4.4.5

  configuration: --enable-libdc1394 --prefix=/usr --extra-cflags='-Wall -g ' --cc='ccache cc' --enable-shared --enable-libmp3lame --enable-gpl --enable-libvorbis --enable-pthreads --enable-libfaac --enable-libxvid --enable-postproc --enable-x11grab --enable-libgsm --enable-libtheora --enable-libopencore-amrnb --enable-libopencore-amrwb --enable-libx264 --enable-libspeex --enable-nonfree --disable-stripping --enable-avfilter --enable-libdirac --disable-decoder=libdirac --enable-libschroedinger --disable-encoder=libschroedinger --enable-version3 --enable-libopenjpeg --enable-libvpx --enable-librtmp --extra-libs=-lgcrypt --disable-altivec --disable-armv5te --disable-armv6 --disable-vis

  libavutil     50.33. 0 / 50.43. 0

  libavcore      0.14. 0 /  0.14. 0

  libavcodec    52.97. 2 / 52.97. 2

  libavformat   52.87. 1 / 52.87. 1

  libavdevice   52. 2. 2 / 52. 2. 2

  libavfilter    1.65. 0 /  1.65. 0

  libswscale     0.12. 0 /  0.14. 1

  libpostproc   51. 2. 0 / 51. 2. 0
Like you can see in accordance with WebCamera maximum supported resolution, one can change 640×480 to higher in case if attached expensive HD webcam.
Note that the webcamera should not be in use when issuing the command, otherwise because /dev is used you will get:
[video4linux2 @ 0x633160] Cannot find a proper format for codec_id 0, pix_fmt -1. /dev/video0: Input/output error
It is another interesting, topic I thought if if i t is possible to somehow caputre the Video streamed currently, whether for example in Skype there is a Skype conference established, but unfortunately it is not possible to do it with ffmpeg, cause /dev/video0 is in use while Skype Video stream flows.
There is another way to record Skype and other Programs recording from the WebCam (i.e. Cheese) by using a small command line tool recordmydesktop.
To use recordmydesktop to save (record) Skype Video Conference just run it in advance and afterwardsmake your Skype call. To capture input from the WebCam while it is in use there are two other GUI instruments capturing the Active Desktop – e.g. Istanbul and vnc2swf. If you never used any of those and you want to read short review on them check out my older article – Best Software Available Today for GNU / Linux Desktop capturing on Debian
The The little problem with recording the desktop is that if you want to record the Skype conference and straight use the software you will catch also the rest of the Desktop, however it is possible to set recordmydesktop to record content from a Windows with specific ID, so recording only skype Video should be possible too.
I was intrigued by the question if after all Video Capturing is possible while Video is Streamed from WebCam with ffmpeg, so did a quick research for the command line freaks, here is how:
ffmpeg -f x11grab -s `xdpyinfo | grep -i dimensions: | sed 's/[^0-9]*pixels.*(.*).*//' | sed 's/[^0-9x]*//'` -r 25 -i :0.0 -sameq recorder-video-from-cam.avi
The only problem with this command line is the video captured from webcamera will be without sound. To take the Video and Sound input with ffmpeg use:
ffmpeg -f alsa -ac 2 -i pulse -f x11grab -r 30 -s 1024x768 -i :0.0 -acodec pcm_s16le -vcodec libx264 -vpre lossless_ultrafast -threads 0 mydesktop.mov
On Debian and Ubuntu Linux, there is also GUI recordmydesktop the package name to install is gtk-recordmydesktop. GTK-RecordMyDesktop, works pretty well, so probably for people looking for convenience and ex-Windows GUI oriented Linux
users it is best choice.
To use it on Debian:
# apt-get --yes install gtk-recordmydesktop
and launch it with cmd:
# gtk-recordmydesktop
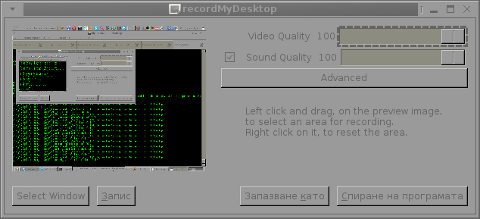
As you can see in above, screenshot GTK-Screenshot can select a Certain Window on Desktop to record, so with it it is a piece of cake to:
1. start the Skype Video conference
2. Launch gtk-recordmydesktop
3. Press Select Window and Select Skype Video Stream
I'm curious if the pointed Skype + gtk-recordmydesktop, method to capture Skype Active videos will be working on FreeBSD. Unfortunately I don't have FreeBSD Desktop with attached WebCam to give it a, try I will be very thankful, if someone using FreeBSD / NetBSD happen to read this article and take few minutes to test if it works and drop a comment below.
That's all, Enjoy, your captured video with sound 😉
Tags: blogged, cflags, developers, ffmpeg, interesting fact, libs, Linux, prefix, webcamera
Posted in Linux, System Administration | No Comments »
Friday, July 27th, 2012 I’ve used K3B just recently to RIP an Audio CD with music to MP3. K3b has done a great job ripping the tracks, the only problem was By default k3b RIPs songs in OGG Vorbis (.ogg) and not mp3. I personally prefer OGG Vorbis as it is a free freedom respecting audio format, however the problem was the .ogg-s cannot be read on many of the audio players and it could be a problem reading the RIPped oggs on Windows. I’ve done the RIP not for myself but for a Belarusian gfriend of mine and she is completely computer illiterate and if I pass her the songs in .OGG, there is no chance she succed in listening the oggs. I’ve seen later k3b has an option to choose to convert directly to MP3 Using linux mp3 lame library this however is time consuming and I have to wait another 10 minutes or so for the songs to be ripped to shorten the time I decided to directly convert the existing .ogg files to .mp3 on my (Debian Linux). There are probably many ways to convert .ogg to mp3 on linux and likely many GUI frontends (like SoundConverter) to use in graphic env.
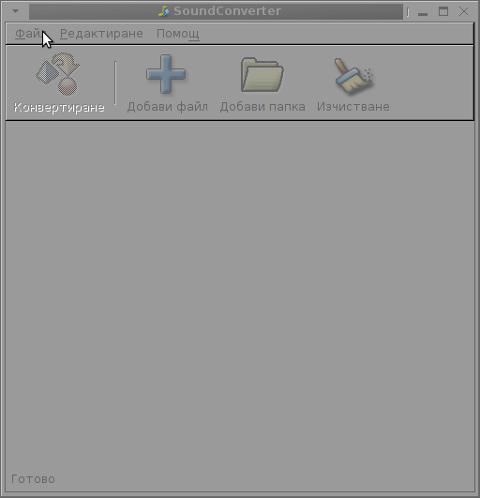
I however am a console freak so I preferred doing it from terminal. I’ve done quick research on the net and figured out the good old ffmpeg is capable of converting .oggs to .mp3s. To convert all mp3s just ripped in the separate directory I had to run ffmpeg in a tiny bash loop.
A short bash shell script 1 liner combined with ffmpeg does it, e.g.;
for f in *.ogg; do ffmpeg -i "$f" "`basename "$f" .ogg`.mp3"; done.....
The loop example is in bash so in order to make the code work on FreeBSD it is necessery it is run in a bash shell and not in BSDs so common csh or tcsh.
Well, that’s all oggs are in mp3; Hip-hip Hooray 😉
Tags: audio cd, Auto, basename, bash shell script, BSDs, chance, code, consuming, csh, debian linux, Draft, ffmpeg, format, freak, freebsd, freedom, frontends, GNU, gnu linux, job, k3b, Linux, necessery, Ogg, ogg files, oggs, option, RIPs, script, Shell, soundconverter, terminal, time, time consuming, vorbis ogg, work
Posted in Everyday Life, FreeBSD, Linux and FreeBSD Desktop, Linux Audio & Video | No Comments »
Thursday, September 29th, 2011 ffmpeg is the de-facto standard for Video conversion on Linux and BSD platforms. I was more than happy to find out that ffmpeg is capable of converting an .ogv file format to .flv (Flash compressed Video).
Ogg Vorbis Video to Flash’s conversion on Linux is a real piece of cake with ffmpeg .
Here is how to convert .ogv to .flv:
debian:~# ffmpeg -i ogg_vorbis_video_to_convert_.ogv converted_ogg_vorbis_video_to_flash_video.flv

...
Conversion of a 14MB ogg vorbis video to flv took 28 seconds, the newly produced converted_ogg_vorbis_video_to_flash_video.flv has been reduced to a size of 9MB. This is on a system with 2 GB of memory and dual core 1.8 Ghz intel CPU.
Tags: BSD, bsd platforms, cake, conversion, core, CPU, de facto standard, Debian, dual core, ffmpeg, file, file format, Flash, flv, format, freebsd, ghz intel, intel, intel cpu, Linux, memory, Ogg, ogv, piece of cake, platform, size, standard, system, video conversion, Vorbis
Posted in FreeBSD, Games Linux, Linux Audio & Video | No Comments »
Friday, April 15th, 2011 In my quest to know Linux better and use it capabilities to fulfill a multimedia tasks I came across the question:
How can I extract audio sound and music from Flash Videos .flv file format?
After a bit of investigation online I’ve found out in order to achieve this task the quickest way is via the handy ffmpeg conversion tool .
It’s rather easy actually, all necessery to do the conversion is to have the ffmpeg installed.
FFMpeg is part of Debian and Ubuntu repositories, so if you haven’t installed it yet, go straigh and install it with:
debian:~# apt-get install ffmpeg

...
Many modern day Linux distributions already have the ffmpeg pre-installed by default, ffmpeg even have a Windows version so this little tutorial should be directly applied on a Windows host with installed ffmpeg.
Convertion of a .flv file to .mp3 file for example is a real piece of cake to so do issue the command:
debian:~# ffmpeg -i input_file.flv -ab 128 -ar 44100 output_file.mp3
The few mmpeg options meaning is as follows:
-i (specifies input file)
-ab (Set the audio bitrate in bit/s 64k by default)
-ar (Set the audio sampling frequency (default = 44100 Hz).)
For more options checkout the ffmpeg help.
I found ffmpeg to be a bit slower than I expected. A 17 minutes .flv video file is converted to .mp3 for 38 seconds time.
Here is the textual output I got on my Debian Linux while extracting the flash video’s sound and converting it to mp3:
debian:~# time ffmpeg -i g7tvI6JCXD0.flv -ab 128 -ar 44100 output.mp3
FFmpeg version SVN-r25838, Copyright (c) 2000-2010 the FFmpeg developers
built on Jan 21 2011 08:21:58 with gcc 4.4.5
configuration: –enable-libdc1394 –prefix=/usr –extra-cflags=’-Wall -g ‘ –cc=’ccache cc’ –enable-shared –enable-libmp3lame –enable-gpl –enable-libvorbis –enable-pthreads –enable-libfaac –enable-libxvid –enable-postproc –enable-x11grab –enable-libgsm –enable-libtheora –enable-libopencore-amrnb –enable-libopencore-amrwb –enable-libx264 –enable-libspeex –enable-nonfree –disable-stripping –enable-avfilter –enable-libdirac –disable-decoder=libdirac –enable-libschroedinger –disable-encoder=libschroedinger –enable-version3 –enable-libopenjpeg –enable-libvpx –enable-librtmp –extra-libs=-lgcrypt –disable-altivec –disable-armv5te –disable-armv6 –disable-vis
libavutil 50.33. 0 / 50.39. 0
libavcore 0.14. 0 / 0.14. 0
libavcodec 52.97. 2 / 52.97. 2
libavformat 52.87. 1 / 52.87. 1
libavdevice 52. 2. 2 / 52. 2. 2
libavfilter 1.65. 0 / 1.65. 0
libswscale 0.12. 0 / 0.12. 0
libpostproc 51. 2. 0 / 51. 2. 0
[flv @ 0x1336760] Estimating duration from bitrate, this may be inaccurate
Seems stream 0 codec frame rate differs from container frame rate: 2000.00 (2000/1) -> 29.92 (359/12)
Input #0, flv, from ‘g7tvI6JCXD0.flv’:
Metadata:
duration : 1060
starttime : 0
totalduration : 1060
width : 480
height : 360
videodatarate : 76
audiodatarate : 94
totaldatarate : 179
framerate : 30
bytelength : 23723246
canseekontime : true
sourcedata : B5F9E82C6HH1302704673918653
purl :
pmsg :
Duration: 00:17:40.35, start: 0.000000, bitrate: 174 kb/s
Stream #0.0: Video: h264, yuv420p, 480×360 [PAR 1:1 DAR 4:3], 77 kb/s, 29.92 tbr, 1k tbn, 2k tbc
Stream #0.1: Audio: aac, 44100 Hz, stereo, s16, 96 kb/s
WARNING: The bitrate parameter is set too low. It takes bits/s as argument, not kbits/s
Output #0, mp3, to ‘output.mp3’:
Metadata:
duration : 1060
starttime : 0
totalduration : 1060
width : 480
height : 360
videodatarate : 76
audiodatarate : 94
totaldatarate : 179
framerate : 30
bytelength : 23723246
canseekontime : true
sourcedata : B5F9E82C6HH1302704673918653
purl :
pmsg :
TSSE : Lavf52.87.1
Stream #0.0: Audio: libmp3lame, 44100 Hz, stereo, s16, 0 kb/s
Stream mapping:
Stream #0.1 -> #0.0
Press [q] to stop encoding
size= 16576kB time=1060.81 bitrate= 128.0kbits/s
video:0kB audio:16575kB global headers:0kB muxing overhead 0.002404%
real 0m38.489s
user 0m37.126s
sys 0m0.764s
When talking about conversions, another very useful application of ffmpeg is in case if you want to:
Extract Audio from online streams
Let’s say you have a favourite radio, you often listen and there are a podcast you want to capture for later listening, or just catch a few nice songs, using ffmpeg it’s a piece of cake by using the command like:
debian:~# ffmpeg -i http:///xxx.xxx.xxx.xxx/some -ab 128 -ar 44100 captured-radio-sound.mp3
The possible ways of use of ffmpeg is truly versatily, you can use it for instance if you have to convert some kind of audio or video format to another one I have given a very simple example of converting a .flv file to .avi and vice versa in my previous post
Tags: audio bitrate, audio sampling, BSD, cake, ccache, cflags, conversion tool, convertion, debian linux, ffmpeg, file, format, gcc, height, input file, investigation, jan 21, JCXD, Linux, multimedia tasks, music, necessery, piece, piece of cake, sampling frequency, Set, Sound, sound and music, starttime, textual output, time, tool, Ubuntu, ubuntu repositories, video, video file, Videos, width, windows version
Posted in Linux, Linux and FreeBSD Desktop, Linux Audio & Video | 1 Comment »


