Posts Tagged ‘fullscreen’
Monday, January 10th, 2022 
My experience with enabling virtualbox additions guest tools on many of the separate Linux distributions throughout time is pretty bad as it always is a pain in the ass to enable fully functional full screen and copy paste for Virtualbox…
For those who installed it for a first time vbox guest addition tools for Virtualbox are additional software components added so the Emulated Operating system
could allow better screen resolution and better mouse integration support.
So far I've installed virtualbox additions tools to CentOS 7 and Debian Linux various releases and faced complications there as well.
Few days ago my colleague Georgi Stoyanov have installed CentOS 8.3 with current version of VirtualBox 6.1 (vesrsion from beginning of 2022) and he has also shared had issues with enabling the CentOS 8.3 Linux to work with guestadditions but eventually found a resolution.
Thus he has shared with me the solution and I share it with you, so hopefully someone else could enable Guesttools on his CentOS 8.3 with less digging online.
The error received is:
# ./VBoxLinuxAdditions.run
Trying to install Guest Additions in RHEL 8.3.
VirtualBox Guest Additions: Starting.
VirtualBox Guest Additions: Building the VirtualBox Guest Additions kernel
modules. This may take a while.
VirtualBox Guest Additions: To build modules for other installed kernels, run
VirtualBox Guest Additions: /sbin/rcvboxadd quicksetup
VirtualBox Guest Additions: or
VirtualBox Guest Additions: /sbin/rcvboxadd quicksetup all
VirtualBox Guest Additions: Building the modules for kernel
4.18.0-193.el8.x86_64.
VirtualBox Guest Additions: Look at /var/log/vboxadd-setup.log to find out what
went wrong
ValueError: File context for /opt/VBoxGuestAdditions-6.0.20/other/mount.vboxsf already defined
VirtualBox Guest Additions: Running kernel modules will not be replaced until
the system is restarted
Press Return to close this window…
No idea what to do next. Been trying for sometime.
To enable guestaddtions in CentOS 8.3, e.g. get arount the error you have to:
1. Install all necessery dependncies RPMs required by GuestAddition tools
# dnf install tar bzip2 kernel-devel-$(uname -r) kernel-headers perl gcc make elfutils-libelf-devel
# dnf -y install gcc automake make kernel-headers dkms bzip2 libxcrypt-compat kernel-devel perl
2. Run below semanage and restorecon commands
# semanage fcontext -d /opt/VBoxGuestAdditions-/other/mount.vboxsf
# restorecon /opt/VBoxGuestAdditions-/other/mount.vboxsf
3. Insert Virtualbox guest additions ISO and Run it
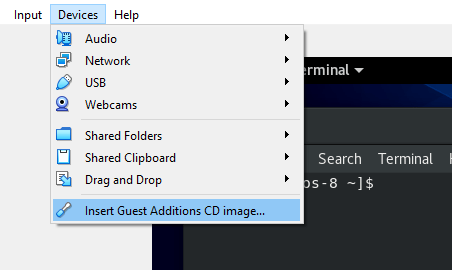
Devices -> Insert Guest Additions CD Image
Click Run button to exec Vbox_GAs_6.0.18 script or run it manually
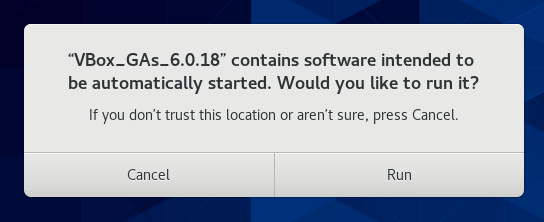
or mount it manually with mount command and execute the VBoxLinuxAdditions.run to do so:
$ cd /run/media/`whoami`/VB*
$ su
# ./VBoxLinuxAdditions.run
Installing additional modules …
VirtualBox Guest Additions: Building the VirtualBox Guest Additions kernel modules. This may take a while.
VirtualBox Guest Additions: Running kernel modules will not be replaced until the system is restarted
VirtualBox Guest Additions: Starting.
4. Reboot the VM
# reboot
5. Check and Confirm Virtualbox guest additions are properly installed and running
# lsmod | grep vbox
…
6. Enable Copy / Paste from to Virttual Machine e.g. Shared Clipboard / Shared Folder etc.
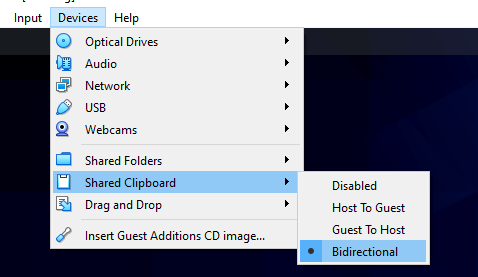
The three options most useful besides the support for FullScreen OS emulation by Virtualbox to enable right after
guesttools is on are:
1. Devices -> Shared Clipboard -> Bidirectional
2. Devices -> Drag and Drop -> Bidirectional
3. Devices -> Shared Folders -> Shared Folder Settings
Tags: additions, CentOS, copy paste, enable, fullscreen, installed, Installing, log, mount, org, Reboot, Redhat, resolution, sudo, support, vm
Posted in Linux, Various, Virtual Machines | No Comments »
Tuesday, January 17th, 2012 
Right after installing Windows XP inside VirtualBox, I've found out everything works fine except the screen. Even though pressing (Right CTRL + F) was changing the Windows XP running window to FullScreen the XP screen was taking only a part of the whole screen area, where almost half of the screen was visible as simply staying blank.
A bit of research and I found the issue is caused by missing VirtualBoxGuestAdditions .
VBoxAdditions is a package which should be installed inside the VirtualBox by navigating to Devices -> Install Guest Additions
Virtualbox offers a download of a VboxGuestAdditions_4.1.2_Ubuntu.iso from url;
http://dlc.sun.edgesuite.net/virtualbox/4.1.2_Ubuntu/VBoxGuestAdditions_4.1.2_Ubuntu.iso, anyways this download fails since the URL is currently unavailable.
To fix this two ways are possible:
1. Download VBoxGuestAdditions.iso from here and put it in directory /usr/share/virtualbox , e.g.:
root@ubuntu:~# cd /usr/share/virtualbox

root@ubuntu:/usr/share/virtualbox# wget https://www.pc-freak.net/files/VBoxGuestAdditions.iso

...
2. Download and install virtualbox-guest-additions-iso_4.1.2-1_all.deb
root@ubuntu:~# wget https://www.pc-freak.net/files/virtualbox-guest-additions-iso_4.1.2-1_all.deb

...

root@ubuntu:~# dpkg -i virtualbox-guest-additions-iso_4.1.2-1_all.deb

...
Next to enable and install guest additions once again use menus:
Devices -> Install Guest Additions
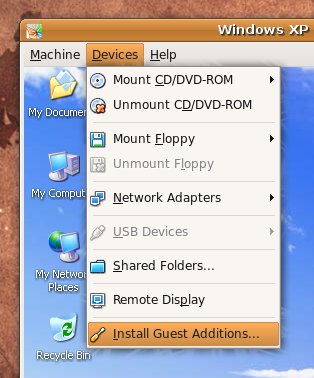
The screen to appear next will be similar to:
Further on follow the few dialogs to complete the installations and integration of Guest Additions and restart the Virtual machine and hooray the Windows will appear in Full screen in VirtualBox ! 😉
Tags: additions, area, deb, dialogs, dlc, download, dpkg, edgesuite, everything, freak, FULL, fullscreen, half, hooray, How to, Install, installing windows, integration, iso 2, issue, Linux, menus, net, package, root, screen, share, sun, two ways, Ubuntu, usr, Virtual, virtual machine, VirtualBox, VirtualBoxGuestAdditions, wget, windows xp
Posted in Linux, Linux and FreeBSD Desktop, System Administration, Virtual Machines | 1 Comment »
Wednesday, May 28th, 2014 
If you need to use Virtual Machine to run some testing on heterogenous Operating Systems and you have chosen VMWare as a Virtual Machine. You will soon notice some of Virtual Machines functionality like copy between host operating system and Virtual Machine, true fullscreen mode and most importantly Copy paste between your host operating system and VMWare is not working. I'm not too much into Virtualization these days so for me it was truely shocking that a proprietary software like VMWare, claimed to be the best and most efficient Virtual Machine nowadays is not supporting copy / paste, fullscreen and copy between host and guest OS. For those arguing why I'm using VMWare at all as it is proprietary and there is already free software Virtual Machines like QEMU and Oracle's VirtualBox its simply because now I have the chance to install and use VMWare 9 Enterprise on my work place at HP with a free Corporate license – in other words I'm using VMWare just for the sake of educating myself and would always recommend VirtualBox for those looking for good substitute free alternative to VMWare.
Before trying out VMWare, I tried Virtualbox to emulate Linux on my HP work PC running Windows with VirtualBox I was having issues with keyboard not working (because of lack of support of USB, no full screen support and lack of copy / paste between OS-es), I've just recently understood this is not because Virtualbox is bad Virtualization solution but because I forgot to install VirtualBox Oracle VM VirtualBox Extension Pack which allows support for USB, enables copy paste and full screen support. The equivalent to Virtualbox Oracle VM VirtualBox in VMWare world is called VMWare-Tools and once the guest operating system is installed inside VMWare VM, its necessary to install vmware-tools to enable better screen resolution and copy paste.
In Windows Virtual Machine installation of vmware-tools is pretty straight forward you go through VMWare's menus
VM -> Install Vmware-tools
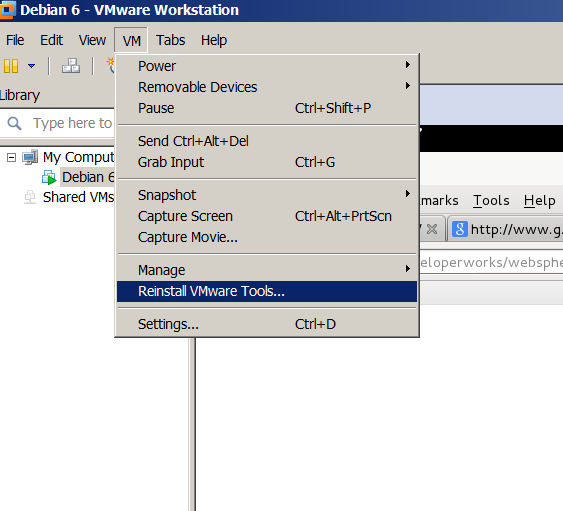
follow the instructions and you're done, however as always installing VMWare-tools on Linux is little bit more complicated you need to run few commands from Linux installed inside the Virtual Machine to install vmware-tools. Here is how vmware-tools is installed on Debian / Ubuntu / Linux Mint and rest of Debian based operating systems:
1. Install Build essentials and gcc You need to have this installed some developer tools as well as GCC compiler in order for the vmware-tools to compile a special Linux kernel module which enables extra support (integration) between the VMWare VM and the installed inside VM Linux distro
apt-get install --yes build-essential gcc

...
2. Install appropriate Linux headers corresponding to current Linux OS installed kernel
apt-get install --yes linux-headers-$(uname -r)

....
3. Mount CD (Virtual) Content to obtain the vmware-tools version for your Linux
Be sure to have first checked from VMWare menus on menus VM -> Intall Vmware Tools
This step is a little bit strange but just do it without too much questioning …
mount /dev/cdrom /mnt/

umount /media/cdrom0/

mount /media/cdrom

mount /dev/sr0 /mnt/cdrom/

mount /dev/sr0 /mnt/
Note that /dev/sr0, might already be mounted and sometimes it might be necessary to unmount it first (don't remember exactly if I unmounted it or not)
4. Copy and Untar VMwareTools-9.2.0-799703.tar.gz
cp -rpf /media/cdrom/VMwareTools-9.2.0-799703.tar.gz /tmp/

cd /tmp/

tar -zxvvf VMwareTools-9.2.0-799703.tar.gz

...
5. Run vmware-tools installer
cd vmware-tools-distrib/

./vmware-install.pl
You will be asked multiple questions you can safely press enter to answer with default settings to all settings, hopefully if all runs okay this will make VMWare Tools installed
Creating a new VMware Tools installer database using the tar4 format.
Installing VMware Tools.
In which directory do you want to install the binary files?
[/usr/bin]
What is the directory that contains the init directories (rc0.d/ to rc6.d/)?
[/etc]
What is the directory that contains the init scripts?
[/etc/init.d]
In which directory do you want to install the daemon files?
[/usr/sbin]
In which directory do you want to install the library files?
[/usr/lib/vmware-tools]
The path "/usr/lib/vmware-tools" does not exist currently. This program is
going to create it, including needed parent directories. Is this what you want?
[yes]
In which directory do you want to install the documentation files?
[/usr/share/doc/vmware-tools]
The path "/usr/share/doc/vmware-tools" does not exist currently. This program
is going to create it, including needed parent directories. Is this what you
want? [yes]
The installation of VMware Tools 9.2.0 build-799703 for Linux completed
successfully. You can decide to remove this software from your system at any
time by invoking the following command: "/usr/bin/vmware-uninstall-tools.pl".
Before running VMware Tools for the first time, you need to configure it by
invoking the following command: "/usr/bin/vmware-config-tools.pl". Do you want
this program to invoke the command for you now? [yes]
Initializing…
Making sure services for VMware Tools are stopped.
Stopping VMware Tools services in the virtual machine:
Guest operating system daemon: done
Unmounting HGFS shares: done
Guest filesystem driver: done
[EXPERIMENTAL] The VMware FileSystem Sync Driver (vmsync) is a new feature that creates backups of virtual machines. Please refer to the VMware Knowledge Base for more details on this capability. Do you wish to enable this feature?
[no]
Before you can compile modules, you need to have the following installed…
make
gcc
kernel headers of the running kernel
Searching for GCC…
Detected GCC binary at "/usr/bin/gcc-4.6".
The path "/usr/bin/gcc-4.6" appears to be a valid path to the gcc binary.
Would you like to change it? [no]
Searching for a valid kernel header path…
Detected the kernel headers at "/lib/modules/3.2.0-4-amd64/build/include".
The path "/lib/modules/3.2.0-4-amd64/build/include" appears to be a valid path
to the 3.2.0-4-amd64 kernel headers.
Would you like to change it? [no]
The vmblock enables dragging or copying files between host and guest in a
Fusion or Workstation virtual environment. Do you wish to enable this feature?
[no] yes
make: Leaving directory `/tmp/vmware-root/modules/vmblock-only'
No X install found.
Creating a new initrd boot image for the kernel.
update-initramfs: Generating /boot/initrd.img-3.2.0-4-amd64
Checking acpi hot plug done
Starting VMware Tools services in the virtual machine:
Switching to guest configuration: done
VM communication interface: done
VM communication interface socket family: done
File system sync driver: done
Guest operating system daemon: done
The configuration of VMware Tools 8.6.10 build-913593 for Linux for this
running kernel completed successfully.
You must restart your X session before any mouse or graphics changes take
effect.
You can now run VMware Tools by invoking "/usr/bin/vmware-toolbox-cmd" from the
command line or by invoking "/usr/bin/vmware-toolbox" from the command line
during an X server session.
To enable advanced X features (e.g., guest resolution fit, drag and drop, and
file and text copy/paste), you will need to do one (or more) of the following:
1. Manually start /usr/bin/vmware-user
2. Log out and log back into your desktop session; and,
3. Restart your X session.
Enjoy,
–the VMware team
Found VMware Tools CDROM mounted at /mnt. Ejecting device /dev/sr0 …
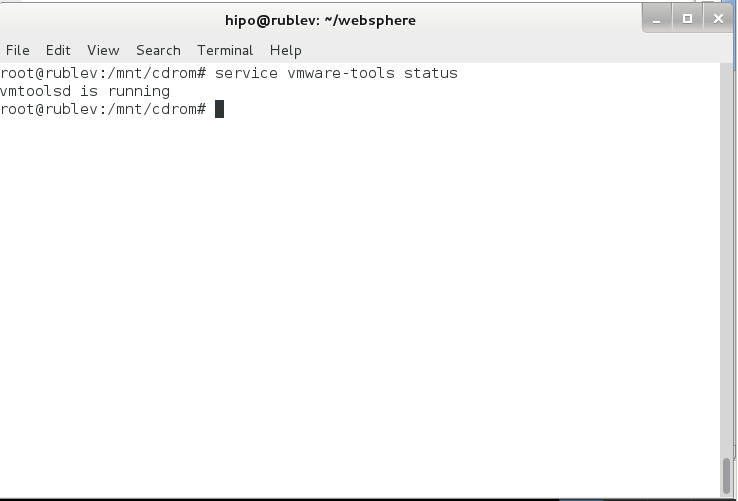
.To make sure vmware-tools compiled modules are loaded into Linux kernel inside VM, restart the Virtual Machine. Once Linux boots again and you login to gnome-terminal to check what is vmware-tools status (e.g. if properly loaded) run:
service vmware-tools status

vmtoolsd is running
This method of installing works on Debian 7 (Wheezy) but same steps should work on any Ubuntu and rest of Debian derivatives. For Redhat (RPM) based Linux distributions to install vmware-tools after mounting cdrom drive following above instructions you will have an rpm package instead of .tar.gz archive so all you have to do is install the rpm, e.g. launch smth. like:
rpm -Uhv /mnt/cdrom/VMwareTools-9.2.0-799703.i386.rpm
Cheers 😉
Tags: checking, copy paste, Debian, Debian Ubuntu Linux Mint, directory, fullscreen, host, kernel, mount dev, need, operating systems, proprietary software, running, testing, usr bin, virtual machines, working
Posted in Everyday Life, Various, Windows | No Comments »
Tuesday, January 8th, 2013 Most programs, like Firefox, Opera, Chrome, Adobe Acrobat Reader, Evince etc. etc. have as a default set F11 to bring the program to full screen. It seems logical that the Linux substitute for Microsoft Office – Open Office should also go full screen while the user press F11, but weirdly it doesn't.
Pressing F11 in Open Office on my current Debian Squeeze (6.0.5) Stable Linux with OpenOffice.org 3 brings to screen Styles and Formatting customization dialog.
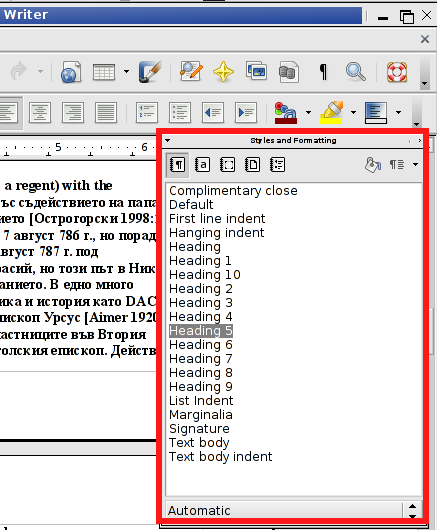
I'm not sure why openoffice is behaving like this, but one of my guess is cause OpenOffice was multiple times upgraded whenever I upgraded my Debian to latest stable with apt-get update && apt-get upgrade thus most likely still some keyboard bindings from older OO versions are affecting it. There are two ways to make OpenOffice display in Full-Screen.
1. Using OO menus
Use View -> Full Screen (F11)
As I said it is possible, the F11 key assignment is still reacting to old config assignment as in dialog for full screen the Shortcut key said to bring OO full-screen is F11.
2. Making OpenOffice FullScreen through keyboard
Keyboard config to bring OpenOffice to Full-Screen mode is a simultaneous key-press of:
CTRL + SHIFT + J
Pressing Ctrl + Shift + J again brings OO to its standard window.

Though I'm not sure I assume in newer OpenOffice versions now distributed under the LibreOffice name (cause of some Patents and Licensing issues), CTRL + SHIFT + J should bring up LibreOffice in Full-Screen too. I don't have at hand installed version of LibreOffice, so if someone can confirm for sure of Ctrl + Shift + J makes LibreOffice go FullScreen? Please drop comment.
Cheers 😉
Tags: adobe acrobat reader, Firefox, formatting, fullscreen, guess, keyboard bindings, menus, microsoft office, multiple times, open office, OpenOffice, patents, screen mode, shortcut key, two ways
Posted in Everyday Life, Linux and FreeBSD Desktop | 1 Comment »
Wednesday, January 17th, 2007 Aloha. Still here. Two days ago I ran Heroes 3 under my FreeBSD box successfully, there was a terrible bug in fullscreen mode which needed fix I’ve used the loki’s site patch to patch the heroes 3 start binary with xdelta. The loki installer was a terrible pain in the ass I used my l337test sk!llZ :} to be able to patch the binary by hand. About the last post yes I was desperate still not good still living. Today I was on exam again a failure probably, nothing new.
As I often used to say in the fast if something starts bad then it overs bad too. See my life show this very well. I’m suffering terrible and still waiting for something to set me free to happen. What would be the turning point? Will there be turning point at all? No idea. If God is such good and powerful as he said in the bible and his promises are true then he will deliver me and set me free on a good ground. Still hoping … Prodigy — Speedway, else the earth is probably his favourite experiment.
Tags: bible, earth, experiment, failure, favourite, freebsd, fullscreen, god, ground, hand, heroes, idea, life, llZ, loki, Mode, pain, pain in the ass, post, Prodigy, promises, show, site, something, speedway, test, turning, turning point, xdelta
Posted in Everyday Life | No Comments »
Monday, February 5th, 2007 Yesterday I was on a birthday of a one girl Krisi she is 18 already. It was a standard teen party. Awful place, I drunk 3 beers and smoked a lot of cigaretes in general we discussed with some ppl Does the Lord exist things. Is evolution real is it possible at all things like this. There was one boy who was keen on Free Software GPL etc. I realized I’m a real psycho after I started to convince him Windows and M$ products are much better than free software :]. After 3 hours speaking like a 15 years m$ user. When walking back for home. I asked my self what the heck? What I did I’m real psycho ;]. Zuio and I broke 1 flowerpot when doing POGO on a Hipodil song. I eat some strange salad with hands ( I pretended to be a Bangla person ) :]. Nomen drunk a lot and got angry at a guy and proposed to start a fight:]. In 5:30 a.m. we were already at home. Our mood got fucked up a little when going back to home. In the morning Papi wake me up and suggested to go to a coffee, I aggreed as usual but I did misunderstood about the place where we decided to see, and waited on other place after that I realized I did a mistake and he meant we have to see each other in the Winter Theather not the Summer One (silly me). After that normal day I eat. I did some server descriptions, played mame in Nomen (I went his home). I was able to start gxmame to work in fullscreen in the end (my integrated video card is doing alot of problems about the games) but I found out the xmame -ef 1 option. That one rules.END—–
Tags: awful place, Bangla, beers, card, cigaretes, coffee, end, evolution, fight, flowerpot, Free, free software, fullscreen, games, Krisi, Lord, mame, mistake, mood, option, party, person, place, POGO, ppl, psycho, salad, software, teen party, video, video card, what the heck, xmame
Posted in Everyday Life | No Comments »
Saturday, January 7th, 2012 I always love so much to go back to the times, when games were games and people had still valued words like moral and respect.
In that great days of old school computing, we used to play the awesome old schools Tyrian and the Nintendo 1941 game (hopefully some still remember).
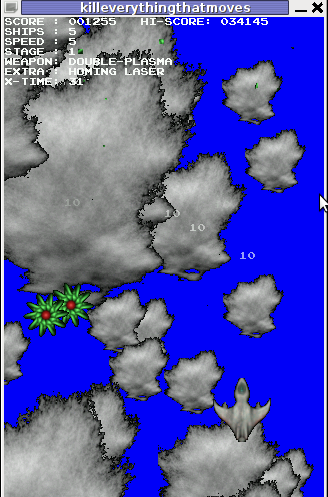
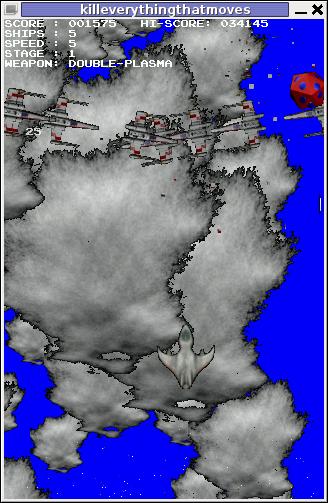
For all who don't Tyrian is one of the best Spaceship Arcades of all times!, and especially for DOS operating system the best I've personally seen.
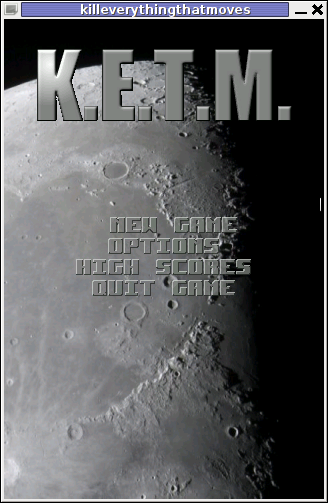
Recently I was checking the arcade games available for install on my Debian GNU / Linux and happily come across a game called KETM.
KETM acronym stands for the memorizable KILL EVERYTHING THAT MOVES and is free software distributed game under GPL.
The original creation idea was probably to resemble the so famous in the '90s spaceshooter games.
KETM is pretty addictive just like tyrian and has santimental meaning for me since it brings me memories for my arcade gaming years 😉
The game is easy to play and has a feeling of "diversity" especially in type of weapons your ship can obtain and use against enemies.
The powerups you get is quite plenty compared to the enemy ship types you should destroy 😉 In overall the game is quite easy to play, this however is also a good thing, as you can play more smoothly without dying every few secs like it is in so many arcade games…
The game has only 4 game levels and on each level end there is a big spaceship "the boss" which is the last in line to destroy in the tradition of the 2d arcade games.
Kill Everything That Moves is available for Debian and Ubuntu as a deb installable with apt. To install the game on Debian and Ubuntu
debian:~# apt-get install ketm

...
ketm's official latest available source and binary of time of writting this article is at version 0.6 and as far as I checked it unfortunately seems like the game development is stucked and the code seems a unmaintained.
I'm sure ketm has a lot of potential en hope somebody will adopt the code and will push further its development.
The game runs by default in the annoying windowed mode, I don't like this so I always run it fullscreen:
debian:~# ketm -f
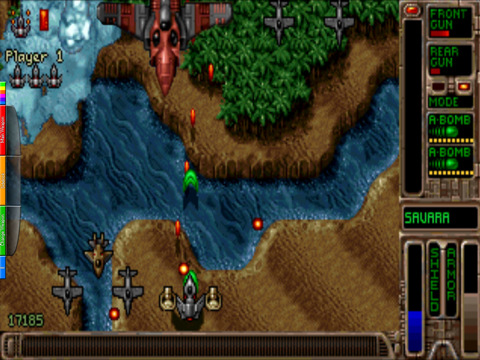
KETM also reminds a bit on GEKI 2 / 3, which I have previously blogged about but I found KETM to be more enjoyable than gekis.
I've seen KETM has RPM ports as well so installing the game on fedora will be probably as easy as downloading the respective RPMs fulfilling the RPM package requirements and installing with rpm -i. I would be glad to hear from people who had succesfully run the game on Fedora and other RPM based Linux distributions?
The only thing that prevents the game to feel a bit more awesome (in my view) is the missing sound & music … Even though in the game settings inside the main menu there is an option for Sound On / Off the game runs by default without any sound or music (at least on my Debian).
I hope you will have some fun with KETM just I like I did! 😉
Also if you haven't played Tyrian yet, then I strongly advice you download Tyrian from here and try it out with dosbox – (a dos gnu linux / bsd game emulator)
Interesting fact to mention here, while looking for the native tyrian game info , I found tyrian has an open source version under development called – OpenTyrian . I'll check the game and write on it when I have time.
Tags: acronym, arcade gaming, arcades, Auto, bit, code, computing, deb, debian gnu, diversity, dos operating system, Draft, enemies, enemy ship, everything, fullscreen, game development, game levels, Geki, GNU, gnu linux, kill, last, level, Linux, linux game, Nintendo, official, old school, quot, rpm, secs, ship types, software, Sound, spaceship, spaceshooter, time, type, Ubuntu
Posted in Entertainment, Games Linux, Linux | No Comments »
Monday, January 2nd, 2012 Some might remember Psychosis Lemmings that we used to enjoy back in the glorious days of DOS 😉 I remember Lemmings used to be among the played game in one line with other top arcades like Dangerous Dave, Commander Keen, Xenon etc.
The game used to be quite unique for the time and it was quite cool that it worked on quite old machines lime my old 8086 XT with 640kb of memory. It even supported two player mode! 😉
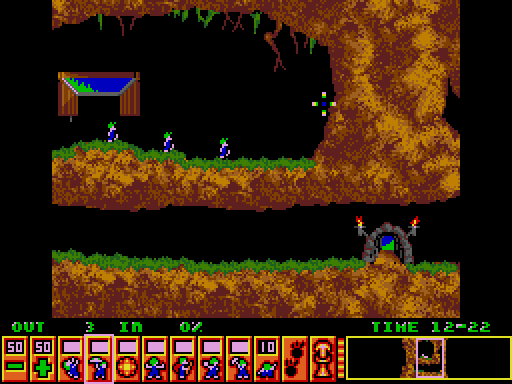
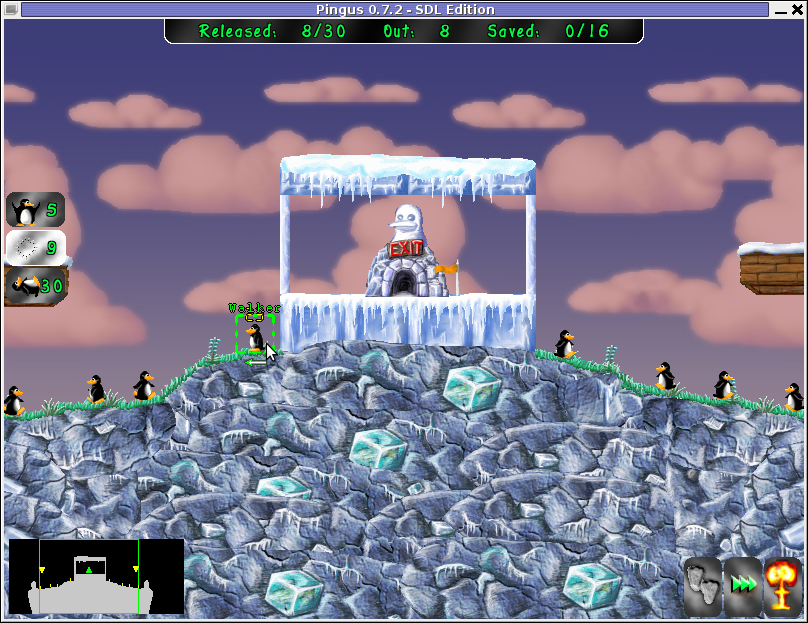
I was happy to find out actually Lemmings remake is available in the Free Software OS realm . These Lemmings clone game is called Pingus
Instead of governing a group of lemmings which had to move to an exit door by making a save path using various tools and combination of team member character skills, the main heroes in Pingus are cute little penguins 😉
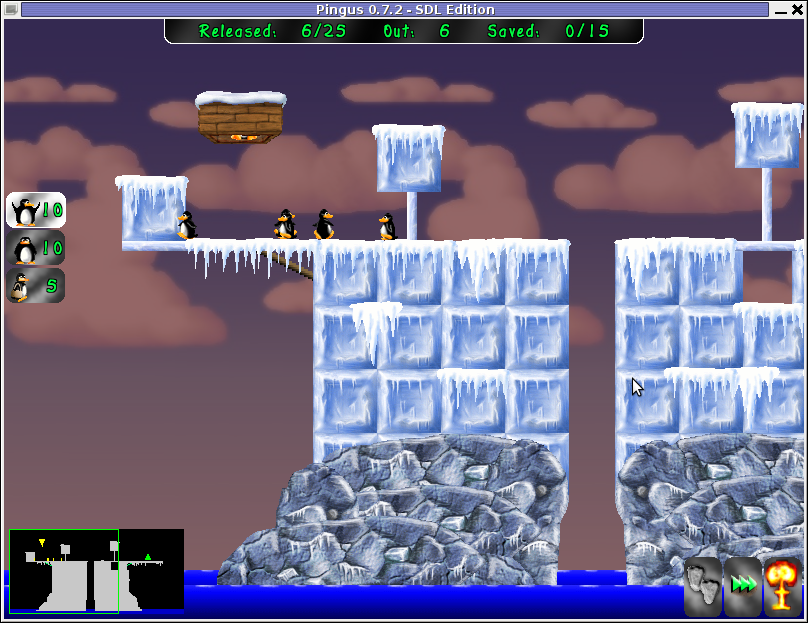
Pingus is built on TOP of SDL libraries and has a combination of awesome graphics and enjoyable music soundtrack and as a game play is a way better than its original predecessor.
If i have to to rank this game I would put it among the best 20 free software games ever produced for Linux / BSD.
pingus is available for almost all kind of Linux distritubions as well as is included in the FreeBSD port tree:
On Debian its available as a package ready to be installed with aptitude or apt by issuing:
debian:~# aptitude install pingus
For FreeBSD pingus is installed via ports tree, by running cmds:
freebsd# cd /usr/ports/games/pingus

freebsd# make install && make install clean
By default pingus will run in a Windowed mode, to run the game in fullscreen you will have to run it with the -f switch via terminal, or by pressing ALT+F2 in GNOME and typing:
$ pingus -f
The game is quite hard to complete in that resembling the lemmings. It has an embedded Mapeditor , by which new levels can be easily constructed and sent to the game developers (in that way helping the game development).
Pingus is also multi-platform, licensed under GPL2 and is also ported for Mac OSX and MS Windows, allowing others non free software users enjoy.
Pingus Windows and MacOS X binary as well as source can be downloaded here
Playing Pingus has few benefits, one is it can be nice to kill some boredom (for sysadmins) or / and bring some good past gaming memories. It's also good for developing some elder people strategic thinking as well as very suitable for little children to help develop their intellectual (thinking) in solving complex consequential tasks. Pingus could also be beneficial for teens to develop organizational and math skills.
Tags: Alt, aptitude, arcade game, arcades, BSD, character skills, dangerous dave, door, enjoyable music, exit, Free, free lemmings, free software games, freebsd port, fullscreen, game developers, game development, game play, glorious days, Gnome, gnu linux, Linux, little penguins, mapeditor, music soundtrack, non, package, pingus, player, player mode, realm, SDL, sdl libraries, software, team, terminal, time, tree, windowed mode, xenon
Posted in Entertainment, Games Linux, Linux and FreeBSD Desktop | 2 Comments »
Wednesday, December 21st, 2011 Do you remember that oldschool Arcade VolleyBall game which was so popular on 16 bit (8086 XT) computers.
I remember this game from the years I was 12 years old, back in the days where we the gamers distributed all the DOS games on 360 KB 5.25" diskettes
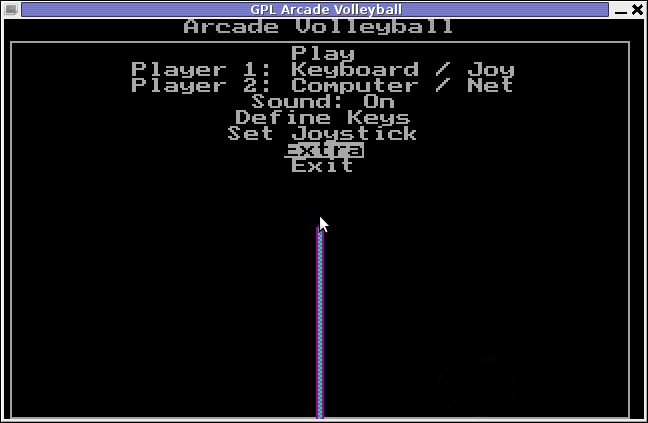
I was looking over the games available to install on my Debian GNU / Linux today just to be happily suprised to find GPL Arcade Volleyball an identical game remake of the old Arcade Volleyball 8086 classic freeware game.
I remember we spend many hours with friends playing on the old Manifactured in Bulgaria Pravetz 16! computers
During communism and post communism Pravetz was the only computer brand we could buy from the market, as there was limitations on the exported and imported tech equipment within the USSR union.
Pravetz computers are a literal remake of 16 bit IBM 8086 computers and the computer design and integrals was stolen from IBM 16 bit 8086 / 8088 PC architecture
Arcade Volleyball has set a mark on my generation and I believe many people will remember the times this game was a hit with a bit of Nostalgia 😉
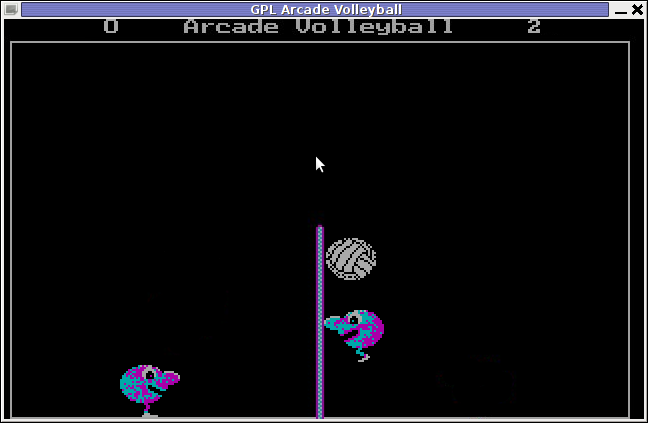
Besides being an identical remake of PC Arcade Volleyball , GPL Arcade Volleyball is even expanded as it includes extra features which the original game lacked. Game includes:
- Network Volleyball client / server Game (up to 4 players)
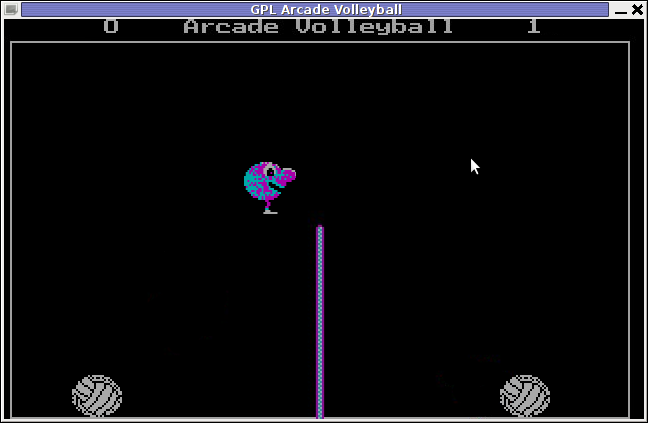
- 6 Game Themes which completely change the game look & feel to be modernistic
Here are few GAV screenshots of the different existing game Themes:
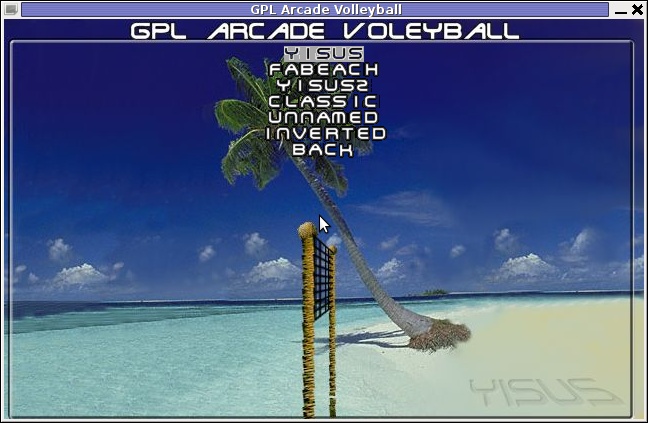
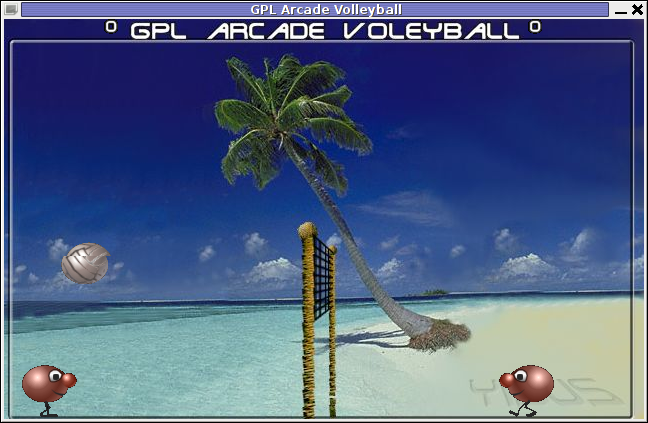
Yisus GAV Theme gameplay screenshot
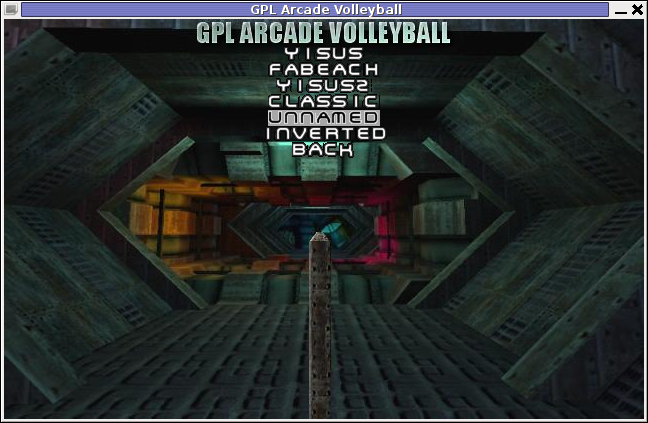
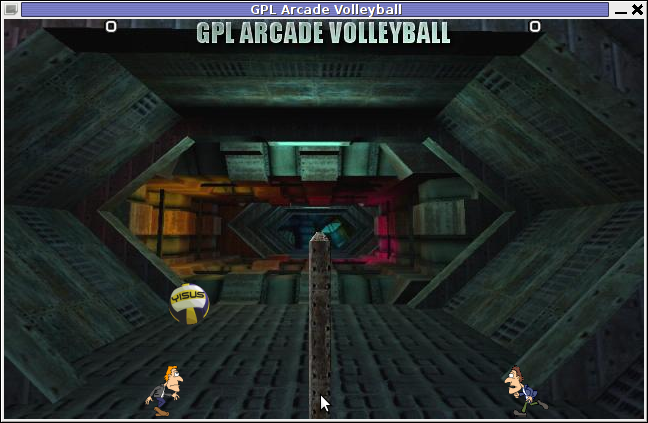
GAV – Unnamed Theme Gameplay
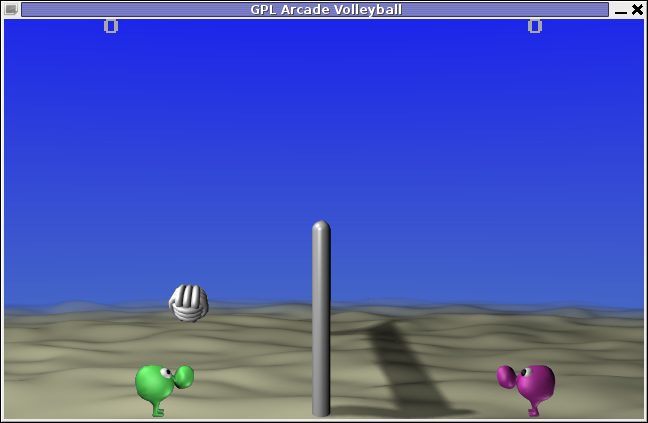
GAV – FaBeach Theme Gameplay
GAV supports both Window and fullscreen modes. To enable Fullscreen mode, while inside the game use:
Extra -> Fullscreen (Yes)
Saving preferences is also something which I if I recall correctly the original game lacked. This is done by navigating to:
Extra -> Save Preferences
GAV is said to support Joystick in resemblance to the original DOS game, though I've never tested it with a joy.
One of the greatest GAV game (hacks) is the Inverted Theme. Selecting it inverts the order in the game, where the game player becomes the volleyball ball and the ball becomes the player 😉
GAV does not yet not have a Free / Open / Net BSD port as far as I currently see, anyways since the game is Free Software probably soon a port will be available for BSDs as well.
The default GAV game controls are a bit untraditional. By default the one player game starts you play Volleyball game player positioned on the left.
For left player the default control keys are:
- z – move player left
- c – move player right
- left shift – jump
Right player controls are:
- Left – left (arrow key)
- right – right (arrow key)
- jump – up cursor key
GAV supports also a shortcut key for switching between windowed and full screen game mode by pressing F10
Installing the game on Debian and Ubuntu Linuces is done with:
linux:~# apt-get --yes install gav
Unfortunately gav does not have a definition to be added to GNOME or KDE Applications menus, thus to start the game after installed one has to do it manually by typing either in gnome RUN (Alt+F2) or on command line:
linux:~$ gav
Happy playing 😉
Tags: amp, architecture, arrow, bulgaria, change, client, client server, communism, computer brand, computer design, debian gnu, dos game, dos games, equipment, EXTRA, Free, freeware, freeware game, fullscreen, game themes, Gameplay, generation, Gnome, integrals, joystick, Manifactured, mark, modes, move, nbsp, nev, nostalgia, pc arcade, pc architecture, player, Pravetz, quot, resemblance, right, screenshot, server game, something, ussr, volleyball game, window, Yisus
Posted in Entertainment, Games Linux, Linux Audio & Video | No Comments »
Thursday, December 15th, 2011 
I’m writting some game reviews and movie reviews, every now and then and therefore being able to capture a fullscreen running program like let’s say mplayer or vlc or some full screen running game is something I really need.
The usual PrtScr button which normally works to prepare screenshots in GNOME or KDE, however is not working if the root window handler is being passed to a different program than the Window Manager and pressing it while inside of many older programs or applicationsdoes not produce a print screen of the current screen.
Anyways I found a hack to this using the good old ImageMagick – import command line screenshotting program.
To take a screenshot of a certain program run from gnome-terminal or konsole using import cmd its possible to use a quick one liner which will take a snapshot of the root Window the started program will use.
Let’s say you want to make a screenshot of the entry screen of the FreeDOOM (DooM 3d shooter classical game arcade free Software Alternative).
Launch gnome-terminal or konsole , xterm , depending on the GUI environment you use and issue the commands:
debian:~$ ( sleep 15; import -window root my_desired_screenshot_name.png ) &

debian:~$ freedoom
The first command will launch import after a sleep of 15 secs and therefore will screenshot the active window which will be at focus after 15 seconds, where the & sign will background it and the second one will launch FreeDooM . You will have to wait for a certain secs and switch to the exact screen you will want to screenshot.
If you want to screenshot some game scene that will appear in 20 minutes change above sleep 15 cmd to be to something like sleep 180
That method can be used for screenshotting any other program running on fullscreen, the method is a bit inflexible as you will have to adjust a timing but it works fine 😉
Tags: bit, Button, classical game, cmd, Desktop, desktop environment, exact screen, first command, FreeDooM, fullscreen, game arcade, game reviews, game scene, Gnome, GNU, gnu linux, gui environment, how to take a screenshot, ImageMagick, import, import command, import window, launch, Linux, mplayer, PrtScr, root, root window, running game, screen, screenshot, shooter, sign, sleep, software, something, timing, VLC, xterm
Posted in FreeBSD, Linux, Linux and FreeBSD Desktop, Various | No Comments »


