Posts Tagged ‘hardware’

Deny DHCP Address by MAC on Linux

Thursday, October 8th, 2020

Deny DHCP addresses by MAC ignore MAC to not be DHCPD leased on GNU / Linux howto

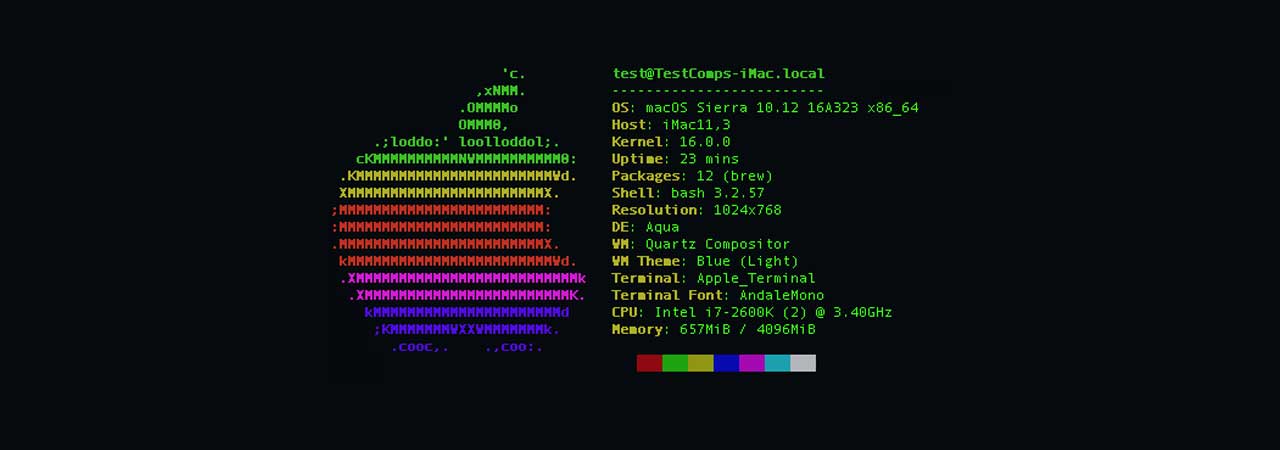
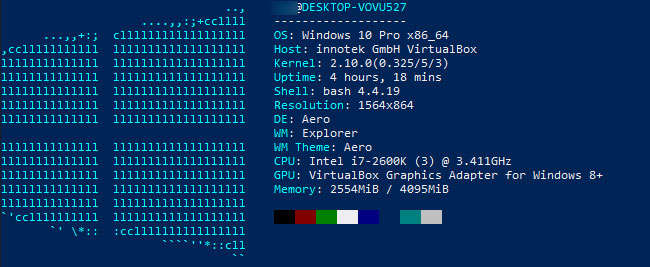
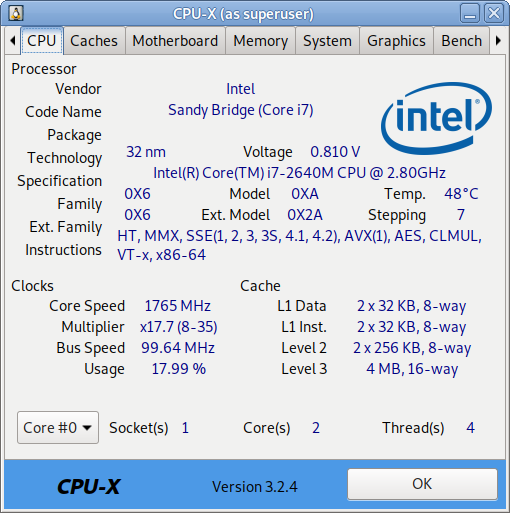
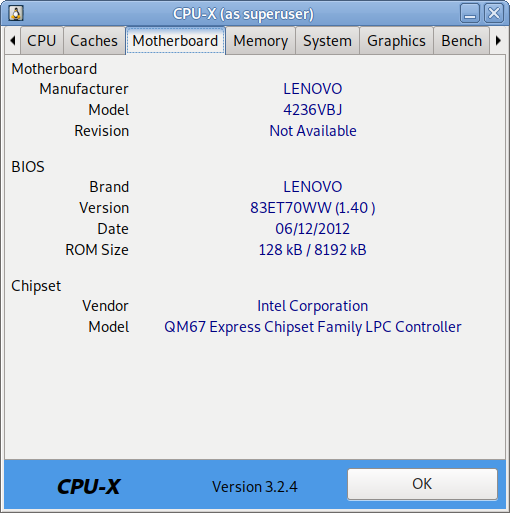
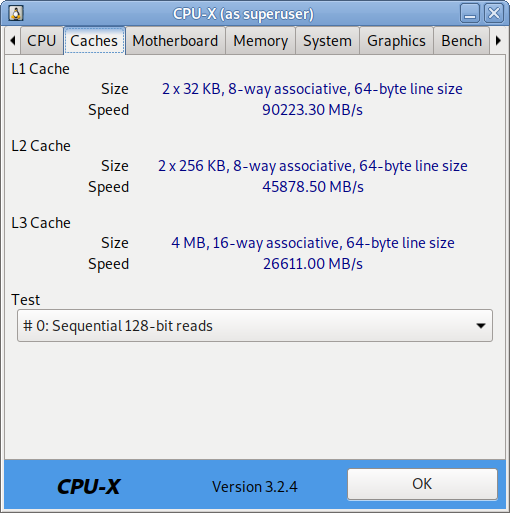
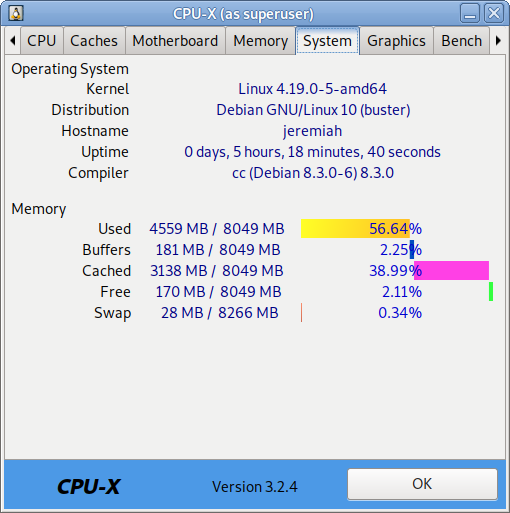
I have not blogged for a long time due to being on a few weeks vacation and being in home with a small cute baby. However as a hardcore and a bit of dumb System administrator, I have spend some of my vacation and   worked on bringing up the the www.pc-freak.net and the other Websites hosted as a high availvailability ones living on a 2 Webservers running on a Master to Master MySQL Replication backend database, this is oll hosted on  servers, set to run as a round robin DNS hosts on 2 servers one old Lenove ThinkCentre Edge71 as well as a brand new real Lenovo server Lenovo ThinkServer SD350 with 24 CPUs and a 32 GB of RAM
To assure Internet Connectivity is having a good degree of connectivity and ensure websites hosted on both machines is not going to die if one of the 2 pair configured Fiber Optics Internet Providers Bergon.NET has some Issues, I've rented another Internet Provider Line is set bought from the VIVACOM Mobile Fiber Internet provider – that is a 1 Gigabit Fiber Optics Line.
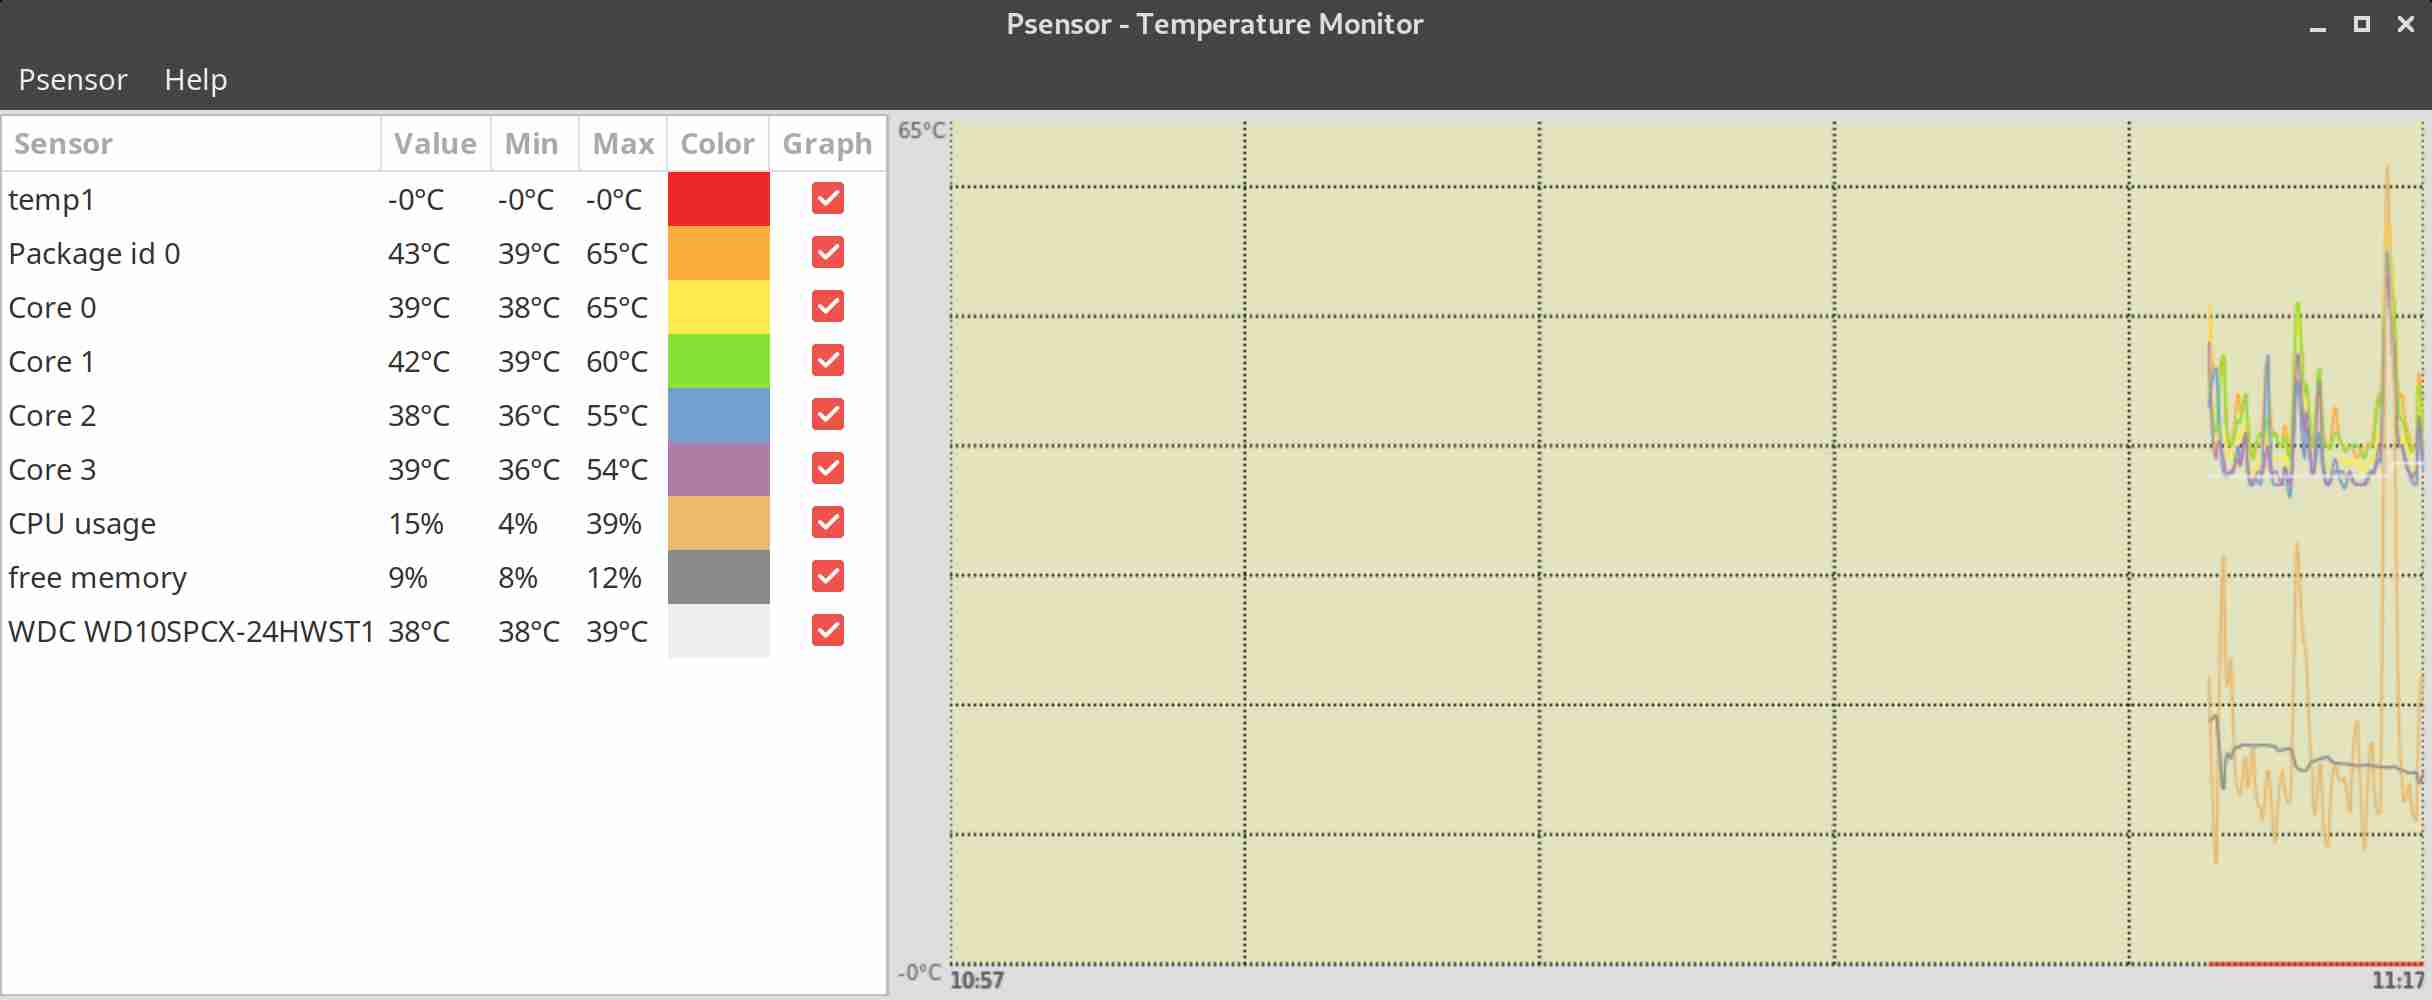
Next to that to guarantee there is no Database, Webserver, MailServer, Memcached and other running services did not hit downtimes due to Electricity power outage, two Powerful Uninterruptable Power Supplies (UPS)  FPS Fortron devices are connected to the servers each of which that could keep the machine and the connected switches and Servers for up to 1 Hour.

The machines are configured to use dhcpd to distributed IP addresses and the Main Node is set to distribute IPs, however as there is a local LAN network with more of a personal Work PCs, Wireless Devices and Testing Computers and few Virtual machines in the Network and the IPs are being distributed in a consequential manner via a ISC DHCP server.

As always to make everything work properly hence, I had again some a bit weird non-standard requirement to make some of the computers within the Network with Static IP addresses and the others to have their IPs received via the DHCP (Dynamic Host Configuration Protocol) and add some filter for some of the Machine MAC Addresses which are configured to have a static IP addresses to prevent the DHCP (daemon) server to automatically reassign IPs to this machines.

After a bit of googling and pondering I've done it and some of the machines, therefore to save others the efforts to look around How to set Certain Computers / Servers Network Card MAC (Interfaces) MAC Addresses  configured on the LAN network to use Static IPs and instruct the DHCP server to ingnore any broadcast IP addresses leases – if they're to be destined to a set of IGNORED MAcs, I came up with this small article.

Here is the DHCP server /etc/dhcpd/dhcpd.conf from my Debian GNU / Linux (Buster) 10.4


option domain-name "pcfreak.lan";
option domain-name-servers 8.8.8.8, 8.8.4.4, 208.67.222.222, 208.67.220.220;
max-lease-time 891200;
authoritative;
class "black-hole" {
    match substring (hardware, 1, 6);
    ignore booting;
}
subclass "black-hole" 18:45:91:c3:d9:00;
subclass "black-hole" 70:e2:81:13:44:11;
subclass "black-hole" 70:e2:81:13:44:12;
subclass "black-hole" 00:16:3f:53:5d:11;
subclass "black-hole" 18:45:9b:c6:d9:00;
subclass "black-hole" 16:45:93:c3:d9:09;
subclass "black-hole" 16:45:94:c3:d9:0d;/etc/dhcpd/dhcpd.conf
subclass "black-hole" 60:67:21:3c:20:ec;
subclass "black-hole" 60:67:20:5c:20:ed;
subclass "black-hole" 00:16:3e:0f:48:04;
subclass "black-hole" 00:16:3e:3a:f4:fc;
subclass "black-hole" 50:d4:f5:13:e8:ba;
subclass "black-hole" 50:d4:f5:13:e8:bb;
subnet 192.168.0.0 netmask 255.255.255.0 {
        option routers                  192.168.0.1;
        option subnet-mask              255.255.255.0;
}
host think-server {
        hardware ethernet 70:e2:85:13:44:12;
        fixed-address 192.168.0.200;
}
default-lease-time 691200;
max-lease-time 891200;
log-facility local7;

To spend you copy paste efforts a file with Deny DHCP Address by Mac Linux configuration is here
/home/hipo/info
Of course I have dumped the MAC Addresses to omit a data leaking but I guess the idea behind the MAC ADDR ignore is quite clear

The main configuration doing the trick to ignore a certain MAC ALenovo ThinkServer SD350ddresses that are reachable on the Connected hardware switch on the device is like so:

class "black-hole" {
    match substring (hardware, 1, 6);
    ignore booting;
}
subclass "black-hole" 18:45:91:c3:d9:00;


The Deny DHCP Address by MAC is described on isc.org distribution lists here but it seems the documentation on the topic on how to Deny / IGNORE DHCP Addresses by MAC Address on Linux has been quite obscure and limited online.

As you can see in above config the time via which an IP is freed up and a new IP lease is done from the server is severely maximized as often DHCP servers do use a max-lease-time like 1 hour (3600) seconds:, the reason for increasing the lease time to be to like 10 days time is that the IPs in my network change very rarely so it is a waste of CPU cycles to do a frequent lease.

default-lease-time 691200;
max-lease-time 891200;


As you see to Guarantee resolving works always as expected I have configured – Google Public DNS and OpenDNS IPs

option domain-name-servers 8.8.8.8, 8.8.4.4, 208.67.222.222, 208.67.220.220;


One hint to make is, after setting up all my desired config in the standard config location /etc/dhcp/dhcpd.conf it is always good idea to test configuration before reloading the running dhcpd process.


root@pcfreak: ~# /usr/sbin/dhcpd -t
Internet Systems Consortium DHCP Server 4.4.1
Copyright 2004-2018 Internet Systems Consortium.
All rights reserved.
For info, please visit https://www.isc.org/software/dhcp/
Config file: /etc/dhcp/dhcpd.conf
Database file: /va/home/hipo/infor/lib/dhcp/dhcpd.leases
PID file: /var/run/dhcpd.pid
 

That's all folks with this sample config the IPs under subclass "black-hole", which are a local LAN Static IP Addresses will never be offered leasess anymore from the ISC DHCP.
Hope this stuff helps someone, enjoy and in case if you need a colocation of a server or a website hosting for a really cheap price on this new set High Availlability up described machines open an inquiry on https://web.www.pc-freak.net.


Monitoring Linux hardware Hard Drives / Temperature and Disk with lm_sensors / smartd / hddtemp and Zabbix Userparameter lm_sensors report script

Thursday, April 30th, 2020

monitoring-linux-hardware-with-software-temperature-disk-cpu-health-zabbix-userparameter-script

I'm part of a  SysAdmin Team that is partially doing some minor Zabbix imrovements on a custom corporate installed Zabbix in an ongoing project to substitute the previous HP OpenView monitoring for a bunch of Legacy Linux hosts.
As one of the necessery checks to have is regarding system Hardware, the task was to invent some simplistic way to monitor hardware with the Zabbix Monitoring tool.  Monitoring Bare Metal servers hardware of HP / Dell / Fujituse etc. servers  in Linux usually is done with a third party software provided by the Hardware vendor. But as this requires an additional services to run and sometimes is not desired. It was interesting to find out some alternative Linux native ways to do the System hardware monitoring.
Monitoring statistics from the system hardware components can be obtained directly from the server components with ipmi / ipmitool (for more info on it check my previous article Reset and Manage intelligent  Platform Management remote board article).
With ipmi
 hardware health info could be received straight from the ILO / IDRAC / HPMI of the server. However as often the Admin-Lan of the server is in a seperate DMZ secured network and available via only a certain set of routed IPs, ipmitool can't be used.

So what are the other options to use to implement Linux Server Hardware Monitoring?

The tools to use are perhaps many but I know of two which gives you most of the information you ever need to have a prelimitary hardware damage warning system before the crash, these are:
 

1. smartmontools (smartd)

Smartd is part of smartmontools package which contains two utility programs (smartctl and smartd) to control and monitor storage systems using the Self-Monitoring, Analysis and Reporting Technology system (SMART) built into most modern ATA/SATA, SCSI/SAS and NVMe disks

Disk monitoring is handled by a special service the package provides called smartd that does query the Hard Drives periodically aiming to find a warning signs of hardware failures.
The downside of smartd use is that it implies a little bit of extra load on Hard Drive read / writes and if misconfigured could reduce the the Hard disk life time.


linux:~#  /usr/sbin/smartctl -a /dev/sdb2
smartctl 6.6 2017-11-05 r4594 [x86_64-linux-4.19.0-5-amd64] (local build)
Copyright (C) 2002-17, Bruce Allen, Christian Franke, www.smartmontools.org

=== START OF INFORMATION SECTION ===
Device Model:     KINGSTON SA400S37240G
Serial Number:    50026B768340AA31
LU WWN Device Id: 5 0026b7 68340aa31
Firmware Version: S1Z40102
User Capacity:    240,057,409,536 bytes [240 GB]
Sector Size:      512 bytes logical/physical
Rotation Rate:    Solid State Device
Device is:        Not in smartctl database [for details use: -P showall]
ATA Version is:   ACS-3 T13/2161-D revision 4
SATA Version is:  SATA 3.2, 6.0 Gb/s (current: 3.0 Gb/s)
Local Time is:    Thu Apr 30 14:05:01 2020 EEST
SMART support is: Available – device has SMART capability.
SMART support is: Enabled

=== START OF READ SMART DATA SECTION ===
SMART overall-health self-assessment test result: PASSED

General SMART Values:
Offline data collection status:  (0x00) Offline data collection activity
                                        was never started.
                                        Auto Offline Data Collection: Disabled.
Self-test execution status:      (   0) The previous self-test routine completed
                                        without error or no self-test has ever
                                        been run.
Total time to complete Offline
data collection:                (  120) seconds.
Offline data collection
capabilities:                    (0x11) SMART execute Offline immediate.
                                        No Auto Offline data collection support.
                                        Suspend Offline collection upon new
                                        command.
                                        No Offline surface scan supported.
                                        Self-test supported.
                                        No Conveyance Self-test supported.
                                        No Selective Self-test supported.
SMART capabilities:            (0x0002) Does not save SMART data before
                                        entering power-saving mode.
                                        Supports SMART auto save timer.
Error logging capability:        (0x01) Error logging supported.
                                        General Purpose Logging supported.
Short self-test routine
recommended polling time:        (   2) minutes.
Extended self-test routine
recommended polling time:        (  10) minutes.

SMART Attributes Data Structure revision number: 1
Vendor Specific SMART Attributes with Thresholds:
ID# ATTRIBUTE_NAME          FLAG     VALUE WORST THRESH TYPE      UPDATED  WHEN_FAILED RAW_VALUE
  1 Raw_Read_Error_Rate     0x0032   100   100   000    Old_age   Always       –       100
  9 Power_On_Hours          0x0032   100   100   000    Old_age   Always       –       2820
 12 Power_Cycle_Count       0x0032   100   100   000    Old_age   Always       –       21
148 Unknown_Attribute       0x0000   100   100   000    Old_age   Offline      –       0
149 Unknown_Attribute       0x0000   100   100   000    Old_age   Offline      –       0
167 Unknown_Attribute       0x0000   100   100   000    Old_age   Offline      –       0
168 Unknown_Attribute       0x0012   100   100   000    Old_age   Always       –       0
169 Unknown_Attribute       0x0000   100   100   000    Old_age   Offline      –       0
170 Unknown_Attribute       0x0000   100   100   010    Old_age   Offline      –       0
172 Unknown_Attribute       0x0032   100   100   000    Old_age   Always       –       0
173 Unknown_Attribute       0x0000   100   100   000    Old_age   Offline      –       0
181 Program_Fail_Cnt_Total  0x0032   100   100   000    Old_age   Always       –       0
182 Erase_Fail_Count_Total  0x0000   100   100   000    Old_age   Offline      –       0
187 Reported_Uncorrect      0x0032   100   100   000    Old_age   Always       –       0
192 Power-Off_Retract_Count 0x0012   100   100   000    Old_age   Always       –       16
194 Temperature_Celsius     0x0022   034   052   000    Old_age   Always       –       34 (Min/Max 19/52)
196 Reallocated_Event_Count 0x0032   100   100   000    Old_age   Always       –       0
199 UDMA_CRC_Error_Count    0x0032   100   100   000    Old_age   Always       –       0
218 Unknown_Attribute       0x0032   100   100   000    Old_age   Always       –       0
231 Temperature_Celsius     0x0000   097   097   000    Old_age   Offline      –       97
233 Media_Wearout_Indicator 0x0032   100   100   000    Old_age   Always       –       2104
241 Total_LBAs_Written      0x0032   100   100   000    Old_age   Always       –       1857
242 Total_LBAs_Read         0x0032   100   100   000    Old_age   Always       –       1141
244 Unknown_Attribute       0x0000   100   100   000    Old_age   Offline      –       32
245 Unknown_Attribute       0x0000   100   100   000    Old_age   Offline      –       107
246 Unknown_Attribute       0x0000   100   100   000    Old_age   Offline      –       15940

SMART Error Log Version: 1
No Errors Logged

SMART Self-test log structure revision number 1
No self-tests have been logged.  [To run self-tests, use: smartctl -t]

Selective Self-tests/Logging not supported


2. hddtemp


Usually if smartd is used it is useful to also use hddtemp which relies on smartd data.
 The hddtemp program monitors and reports the temperature of PATA, SATA
 or SCSI hard drives by reading Self-Monitoring Analysis and Reporting
 Technology (S.M.A.R.T.)
information on drives that support this feature.
 

linux:~# /usr/sbin/hddtemp /dev/sda1
/dev/sda1: Hitachi HDS721050CLA360: 31°C
linux:~# /usr/sbin/hddtemp /dev/sdc6
/dev/sdc6: KINGSTON SV300S37A120G: 25°C
linux:~# /usr/sbin/hddtemp /dev/sdb2
/dev/sdb2: KINGSTON SA400S37240G: 34°C
linux:~# /usr/sbin/hddtemp /dev/sdd1
/dev/sdd1: WD Elements 10B8: S.M.A.R.T. not available


3. lm-sensors / i2c-tools 

 Lm-sensors is a hardware health monitoring package for Linux. It allows you
 to access information from temperature, voltage, and fan speed sensors.
i2c-tools
was historically bundled in the same package as lm_sensors but has been seperated cause not all hardware monitoring chips are I2C devices, and not all I2C devices are hardware monitoring chips.

The most basic use of lm-sensors is with the sensors command


linux:~# sensors
i350bb-pci-0600
Adapter: PCI adapter
loc1:         +55.0 C  (high = +120.0 C, crit = +110.0 C)


coretemp-isa-0000
Adapter: ISA adapter
Physical id 0:  +28.0 C  (high = +78.0 C, crit = +88.0 C)
Core 0:         +26.0 C  (high = +78.0 C, crit = +88.0 C)
Core 1:         +28.0 C  (high = +78.0 C, crit = +88.0 C)
Core 2:         +28.0 C  (high = +78.0 C, crit = +88.0 C)
Core 3:         +28.0 C  (high = +78.0 C, crit = +88.0 C)


On CentOS Linux useful tool is also  lm_sensors-sensord.x86_64 – A Daemon that periodically logs sensor readings to syslog or a round-robin database, and warns of sensor alarms.

In Debian Linux there is also the psensors-server (an HTTP server providing JSON Web service which can be used by GTK+ Application to remotely monitor sensors) useful for developers
psesors-server

psensor-linux-graphical-tool-to-check-cpu-hard-disk-temperature-unix

If you have a Xserver installed on the Server accessed with Xclient or via VNC though quite rare,
You can use xsensors or Psensora GTK+ (Widget Toolkit for creating Graphical User Interface) application software.

With this 3 tools it is pretty easy to script one liners and use the Zabbix UserParameters functionality to send hardware report data to a Company's Zabbix Sserver, though Zabbix has already some templates to do so in my case, I couldn't import this templates cause I don't have Zabbix Super-Admin credentials, thus to work around that a sample work around is use script to monitor for higher and critical considered temperature.
Here is a tiny sample script I came up in 1 min time it can be used to used as 1 liner UserParameter and built upon something more complex.

SENSORS_HIGH=`sensors | awk '{ print $6 }'| grep '^+' | uniq`;
SENSORS_CRIT=`sensors | awk '{ print $9 }'| grep '^+' | uniq`; ;SENSORS_STAT=`sensors|grep -E 'Core\s' | awk '{ print $1" "$2" "$3 }' | grep "$SENSORS_HIGH|$SENSORS_CRIT"`;
if [ ! -z $SENSORS_STAT ]; then
echo 'Temperature HIGH';
else 
echo 'Sensors OK';
fi 

Of course there is much more sophisticated stuff to use for monitoring out there


Below script can be easily adapted and use on other Monitoring Platforms such as Nagios / Munin / Cacti / Icinga and there are plenty of paid solutions, but for anyone that wants to develop something from scratch just like me I hope this
article will be a good short introduction.
If you know some other Linux hardware monitoring tools, please share.

Getting Console and Graphical hardware system information on Linux with cpuinfo, neofetch, CPU-X (CPU-Z Unix alternative), I-nex and inxi

Tuesday, September 17th, 2019

getting-console-information-and-graphical-hardware-system-information-Linux-cpuinfo-neofetch-cpu-x-i-nex-1

Earlier I've wrote extensive article on how to get hardware information on Linux using tools such as dmidecode, hardinfo, lshw, hwinfo, x86info and biosdecode but there are few other hardware reporting tools for Linux worthy to mention that has been there for historical reasons such as cpuinfo as we as some new shiny ones such as neofetch (a terminal / console hardware report tool as well the CPU-X and I-Nex  which is Linux equivalent to the all known almost standard for Windows hardware detection CPU-Z worthy to say few words about.
 

1. cpuinfo


Perhaps the most basic tool to give you a brief information about your Processor type (model) number of Cores and Logical Processors is cpuinfo

I remember cpuinfo has been there since the very beginning on almost all Linux distributions's repository, nowadays its popularity of the days when the kings on the Linux OS server scenes were Slackware, Caldera OpenLinux and Redhat 6.0 Linux and Debian 3.0  declined but still for scripting purposes it is handy small proggie.

To install and run it in Debian  / Ubuntu / Mint Linux etc.:


aptitude install -y cpuinfo

/usr/bin/cpu-info


Linux-get-processor-system-info-in-console-cpu-info


2. neofetch


The next one worthy to install and check is neofetch (a cross-platform and easy-to-use system information
 command line script that collects your Linux system information and display it on the terminal next to an image, it could be your distributions logo or any ascii art of your choice.)

The cool thing about neofetch is besides being able to identify the System server / desktop hardware parameters, it gives some basic info about number of packages installed on the system, memory free and in use, used kernel and exact type of System (be it Dell PowerEdge Model XX, IBM eSeries Model / HP Proliant Model etc.

neofetch-OS-hardware-information-Linux-ascii-system-info-desktop-notebook

neofetch info generated on my home used Lenovo Thikpad T420

neofetch-OS-hardware-information-Linux-ascii-system-info-pcfreak-home-server
neofetch info from www.pc-freak.net running current machine

neofetch even supports Mac OS X and Windows OS ! 🙂

To install neofetch on Mac OS X:
 

/usr/bin/ruby -e "$(curl -fsSL https://raw.githubusercontent.com/Homebrew/install/master/install)"


or via Mac ported packages using brew

brew install neofetch


neofetch-screenshot-from-Mac-OS-X

neofetch is even installable on Windows OS that has the scoop command line installer tool installer manager with below PowerShell code in cmd.exe (Command line):

powershell Set-ExecutionPolicy RemoteSigned -scope CurrentUser
iex (new-object net.webclient).downloadstring('https://get.scoop.sh')
scoop install git
scoop install neofetch

neofetch-microsoft-windows-hardware-command-line-report-tool-screenshot


By the way Scoop was quite a finding for me and it is pretty handy to install plenty of useful command line Linux / UNIX tools, such as curl, wget, git etc. in the same easy straight forward way as a standard yum or apt-get on Windows (without explicitly installing things as GnuWin and CygWin).
 

3. CPU-X graphical user interface hardware report Linux GUI alternative to Windows CPU-Z


The packages for CPU-X are a bit outdated and even though there are rpm packages for Fedora, OpenSuSE and .deb package for Debian for Debian, Ubuntu and ArchLinux (pacman), there is no up to date version for Debian 10 and the package builds distributed for different Linux distros are a bit outdated.

Thus to install CPU-X on any Linux distribution it is perhaps best to use the portable version (static binary) of CPU-X.
It is currently available on https://github.com/X0rg/CPU-X/releases

To install latest portable version of CPU-X

wget https://github.com/X0rg/CPU-X/releases/download/v3.2.4/CPU-X_v3.2.4_portable.tar.gz

mkdir CPU-X
cd CPU-X

tar -zxvvf CPU-X_v3.2.4_portable.tar.gz
-rwxr-xr-x yohan/users 4563032 2019-01-13 22:15 CPU-X_v3.2.4_portable.bsd64
-rwxr-xr-x yohan/users 5484968 2019-01-13 22:15 CPU-X_v3.2.4_portable.linux64


cp -rpf CPU-X_v3.2.4_portable.linux64 /usr/local/bin/
ln -sf /usr/local/bin/CPU-X_v3.2.4_portable.linux64 /usr/local/bin/cpu-x


Next run as superuser (root)
 

hipo@jeremiah:~$ su -c 'cpu-x'


As seen from below screenshots cpu-x reports a lot of concrete specific hardware data on:

  • Processor
  • Motherboard
  • Memory
  • System
  • Graphic card
  • Performance

cpu-x-cpu-cpu-z-alternative-linux-screenshot-CPU-info

cpu-x-cpu-cpu-z-alternative-linux-screenshot-caches-info

cpu-x-cpu-cpu-z-alternative-linux-screenshot-Motherboard-info

cpu-x-cpu-cpu-z-alternative-linux-screenshot-memory-info

cpu-x-cpu-cpu-z-alternative-linux-screenshot-system-info

cpu-x-cpu-cpu-z-alternative-linux-screenshot-graphics-info

CPU-X can be installed also on FreeBSD very easily by just installing from BSD port tree sysutils/cpu-x/
It is also said to work on other *BSDs, NetBSD, OpenBSD Unixes but I guess this will require a manual compilation based on FreeBSD's port Makefile.

4. I-Nex another GUI alternative to CPU-Z for UNIX / Linux

I-Nex is even more useful for general hardware reporting as it reports many hardware specifications not reported by CPU-X such as Battery type and Model Name  (if the hardware report is on a laptop), info on USB devices slots or plugged USB devices brand and specifications, the available Network devices on the system (MAC Addresses) of each of it, Installed and used drivers on Hard Disk (ATA / SATA / SCSI / SSD), HW Sector size, Logical Block size, HDD Sectors count and other specific Hard Drive data as well as information on available Audio (Sound Blaster) devices (HDA-Intel), used Codecs, loaded kernel ALSA driver, Video card used and most importantly indicators on Processor reported CPU (temperature).


To install I-nex

Go to https://launchpad.net/i-nex or any of the mirror links where it resides and install the respective package, in my case, I was doing the installation on Debian Linux, so fetched current latest amd64 package which as of moment of writting this article is i-nex_7.6.0-0-bzr977-20161012-ubuntu16.10.1_amd64.deb , next installed it with dpkg
 

dpkg -i i-nex_7.6.0-0-bzr977-20161012-ubuntu16.10.1_amd64.deb


As the package was depending on some other .deb packages, which failed to install to install the missing ones I had to further run
 

apt –fix-broken install

i-nex-cpu-info-linux-hardware-info-program


hre

I-Nex thermal indicators about CPU temperature on a Linux Desktop notebook

i-nex-gpu-info-linux-hardware-info-program

i-nex-mobo-info-linux-hardware-info-program

i-nex-audio-info-linux-hardware-info-program

i-nex-drivers-info-linux-hardware-info-program

i-nex-system-info-linux-hardware-info-program

i-nex-battery-info-linux-hardware-info-program


There are other Hardware identification report tools such as CUDA-Z that are useful to check if you have Nvidia Video Card hardware Installed on the PC to check the status of CUDA enabled GPUs, useful if working with nVidia Geforce, Quadro, Tesla cards and ION chipsets.

If you use it however be aware that CUDA-Z is not compatible with 3rd-party linux drivers for NVidia so make sure you have the current official Nvidia version.


5. Inxi full featured system information script


Inxi is a 10000 lines mega bash script that fetches hardware details from multiple different sources in /proc /sys and from commands on the system, and generates a beautiful looking console report that non technical users can read easily.

inxi-10-k-mega-bash-shell-script-reporting-on-installed-system-computer-hardware


inxi -Fx


inxi-report-on-installed-hardware-on-my-lenovo-thinkpad-home-laptop

Each of the pointed above tools has different method of collection of Hardware information from various resources e.g. – kernel loaded modules, dmesg, files like /proc/meminfo /proc/version /proc/scsi/scsi /proc/partitions.
Hence some of the tools are likely to report more info than otheres, so in case if some information you need regarding the system plugged in hardware is missing you can perhaps obtain it from another program. Most Linux distribution desktop provided GNOME package are including Hardinfo gui tool, but in many cases above mentioned tools are likely to add even more on info on what is inside your PC Box.
If you're aware of others tools that are useful not mentioned here please share it.

How to check Linux OS install date / How long ago was Linux installed

Sunday, October 22nd, 2017

If you're sysadmin who inherited a few hundreds of Linux machines from a previous admin and you're in process of investigating how things were configured by the previous administrator one of the crucial things to find out might be

How Long ago was Linux installed?

Here is how to check the Linux OS install date.

The universal way nomatter the Linux distribution is to use fullowing command:


root@pcfreak:~# tune2fs -l /dev/sda1 | grep 'Filesystem created:'
Filesystem created:       Thu Sep  6 21:44:22 2012


Above command assumes the Linux's root partition / is installed on /dev/sda1 however if your case is different, e.g. the primary root partition is installed on /dev/sda2 or /dev/sdb1 / dev/sdb2 etc. just place the right first partition into the command.

If primary install root partition is /dev/sdb1 for example:
 

root@pcfreak:~# tune2fs -l /dev/sdb1 | grep 'Filesystem created:'


To find out what is the root partition of the Linux server installed use fdisk command:


root@pcfreak:~# fdisk -l


Disk /dev/sda: 465,8 GiB, 500107862016 bytes, 976773168 sectors
Units: sectors of 1 * 512 = 512 bytes
Sector size (logical/physical): 512 bytes / 512 bytes
I/O size (minimum/optimal): 512 bytes / 512 bytes
Disklabel type: dos
Disk identifier: 0x00051eda

Device     Boot     Start       End   Sectors   Size Id Type
/dev/sda1  *         2048 965193727 965191680 460,2G 83 Linux
/dev/sda2       965195774 976771071  11575298   5,5G  5 Extended
/dev/sda5       965195776 976771071  11575296   5,5G 82 Linux swap / Solaris

Disk /dev/sdb: 111,8 GiB, 120034123776 bytes, 234441648 sectors
Units: sectors of 1 * 512 = 512 bytes
Sector size (logical/physical): 512 bytes / 512 bytes
I/O size (minimum/optimal): 512 bytes / 512 bytes
Disklabel type: dos
Disk identifier: 0x00000000


Other ways to check the Linux OS install date on Debian / Ubuntu / Mint etc. deb. based GNU / Linux


Deban based Linux distributions do create an initial /var/log/installer directory containing various install information such as hardware-summary, partition, initial installed deb packages, exact version of Linux distribution, and the way it was installed either it was installed from an ISO image, or it was network install etc.


root@pcfreak:~# ls -al /var/log/installer/
total 1228
drwxr-xr-x  3 root root   4096 sep  6  2012 ./
drwxr-xr-x 72 root root  12288 окт 22 06:26 ../
drwxr-xr-x  2 root root   4096 sep  6  2012 cdebconf/
-rw-r–r–  1 root root  17691 sep  6  2012 hardware-summary
-rw-r–r–  1 root root    163 sep  6  2012 lsb-release
-rw——-  1 root root 779983 sep  6  2012 partman
-rw-r–r–  1 root root  51640 sep  6  2012 status
-rw——-  1 root root 363674 sep  6  2012 syslog


If those directory is missing was wiped out by the previous administrator, to clear up traces of his previous work before he left job another possible way to find out exact install date is to check timestamp of /lost+found directory;
 

root@pcfreak:~# ls -ld /lost+found/
drwx—— 2 root root 16384 sep  6  2012 /lost+found//


Check OS Linux install date on (Fedora, CentOS, Scientific Linux, Oracle and other Redhat RPM based Distros)


[root@centos: ~]# rpm -qi basesystem
Name        : basesystem
Version     : 10.0
Release     : 7.el7
Architecture: noarch
Install Date: Mon 02 May 2016 19:20:58 BST
Group       : System Environment/Base
Size        : 0
License     : Public Domain
Signature   : RSA/SHA256, Tue 01 Apr 2014 14:23:16 BST, Key ID     199e2f91fd431d51
Source RPM  : basesystem-10.0-7.el7.src.rpm
Build Date  : Fri 27 Dec 2013 17:22:15 GMT
Build Host  : ppc-015.build.eng.bos.redhat.com
Relocations : (not relocatable)
Packager    : Red Hat, Inc. <http://bugzilla.redhat.com/bugzilla>
Vendor      : Red Hat, Inc.
Summary     : The skeleton package which defines a simple Red Hat Enterprise Linux system
Description :
Basesystem defines the components of a basic Red Hat Enterprise Linux
system (for example, the package installation order to use during
bootstrapping). Basesystem should be in every installation of a system,
and it should never be removed.


Share SCREEN terminal session in Linux / Screen share between two or more users howto

Wednesday, October 11th, 2017

share-screen-terminal-session-in-linux-share-linux-unix-shell-between-two-or-more-users


1. Short Intro to Screen command and what is Shared Screen Session

Do you have friends who want to learn some GNU / Linux or BSD basics remotely? Do you have people willing to share a terminal session together for educational purposes within a different network? Do you just want to have some fun and show off yourself between two or more users?

If the answer to the questions is yes, then continue on reading, otherwise if you're already aware how this is being done, just ignore this article and do something more joyful.

So let me start.

Some long time ago when I was starting to be a Free Software user and dedicated enthusiast, I've been given by a friend an interesting freeshell hosting access and I stumbled upon / observed an interesting phenomenon, multiple users like 5 or 10 were connected simultaneously to the same shell sharing their command line.

I can't remember what kind of shell I happen to be sharing with the other logged in users with the same account, was that bash / csh / zsh or another one but it doesn't matter, it was really cool to find out multiple users could be standing together on GNU / Linux and *BSD with the same account and use the regular shell for chatting or teaching each others  new Linux / Unix commands e.g. being able to type in shell simultaneously.

The multiple shared shell session was possible thanks to the screen command

For those who hear about screen for a first time, here is the package description:


# apt-cache show screen|grep -i desc -A 1
Description-en: terminal multiplexer with VT100/ANSI terminal emulation
 GNU Screen is a terminal multiplexer that runs several separate "screens" on

Description-md5: 2d86b86ed6058a04c540802e49312f40
Homepage: https://savannah.gnu.org/projects/screen
root@jericho:/usr/local/src/pure-python-otr# apt-cache show screen|grep -i desc -A 2
Description-en: terminal multiplexer with VT100/ANSI terminal emulation
 GNU Screen is a terminal multiplexer that runs several separate "screens" on
 a single physical character-based terminal. Each virtual terminal emulates a


Description-md5: 2d86b86ed6058a04c540802e49312f40
Homepage: https://savannah.gnu.org/projects/screen
Tag: hardware::input:keyboard, implemented-in::c, interface::text-mode,


There is plenty of things to use screen for as it provides you a way to open Virtual Terminals into a single ssh or physical console TTY login session and I've been in love with screen command since day 1 I found out about it.

To start using screen just invoke it into a shell and enter a screen command combinations that make various stuff for you.


2. Some of the most useful Daily Screen Key Combinations for the Sys Admin


To do use the various screen options, use the escape sequence (CTRL + Some Word), following by the command. For a full list of all of the available commands, run man screen, however
for the sake of interest below short listing shows some of most useful screen key combination invoked commands:


Ctrl-a a Passes a Ctrl-a through to the terminal session running within screen.
Ctrl-a c Create a new Virtual shell screen session within screen
Ctrl-a d Detaches from a screen session.
Ctrl-a f Toggle flow control mode (enable/disable Ctrl-Q and Ctrl-S pass through).
Ctrl-a k Detaches from and kills (terminates) the screen session.
Ctrl-a q Passes a Ctrl-q through to the terminal session running within screen (or use Ctrl-a f to toggle whether screen captures flow control characters).
Ctrl-a s Passes a Ctrl-s through to the terminal session running within screen (or use Ctrl-a f to toggle whether screen captures flow control characters).
Ctrl-a :kill Also detaches from and kills (terminates) the screen session.
Ctrl-a :multiuser on Make the screen session a multi-user session (so other users can attach).
Ctrl-a :acladd USER Allow the user specified (USER) to connect to a multi-user screen session.
Ctrl-a p Move around multiple opened Virtual terminals in screen (Move to previous)
Ctrl-a n Move backwards in multiple opened screen sessions under single shell connection


I have to underline strongly for me personally, I'm using the most


CTRL + A + D (to detach session),

CTRL + A + C to open new session within screen (I tend to open multiple sessions for multiple ssh connections with this),

CTRL + A + P, CTRL +  A + N – I use this twoto move around all my open screen Virtual sessions.
 

3. HOW TO ACTUALLY SHARE TERMINAL SESSION BETWEEN MULTIPLE USERS?


3.1 Configuring Shared Sessions so other users can connect

You need to  have a single user account on a Linux or Unix like server lets say that might be the /etc/passwd, /etc/shadow, /etc/group account screen and you have to give the password to all users to be participating into the shared screen shell session.

E.g. create new system account screen

root@jericho:~# adduser screen
Adding user `screen' …
Adding new group `screen' (1001) …
Adding new user `screen' (1001) with group `screen' …
The home directory `/home/screen' already exists.  Not copying from `/etc/skel'.
Enter new UNIX password:
Retype new UNIX password:
passwd: password updated successfully
Changing the user information for screen
Enter the new value, or press ENTER for the default
    Full Name []: Screen user to give users shared access to /bin/bash
    Room Number []:
    Work Phone []:
    Home Phone []:
    Other []:
Is the information correct? [Y/n] Y

Now distribute the user / pass pair around all users who are to be sharing the same virtual bash session via screen and instruct each of them to run:

hipo@jericho:~$  screen -d -m -S shared-session
hipo@jericho:~$

hipo@jericho:~$ screen -list

There is a screen on:
    4095.shared-session    (10.10.2017 20:22:22)    (Detached)
1 Socket in /run/screen/S-hipo.


3.2. Attaching to just created session
 

Simply login with as many users you need with SSH to the remote server and instruct them to run the following command to re-attach to the just created new session by you:

hipo@jericho:~$ screeen -x

That's all folks now everyone can type in simultaneously and enjoy the joys of the screen shared session.

If for some reasons more than one session is created by the simultaneously logged in users either as an exercise or by mistake i.e.:

hipo@jericho:~$ screen -list

There are screens on:
    4880.screen-session    (10.10.2017 20:30:09)    (Detached)
    4865.another-session    (10.10.2017 20:29:58)    (Detached)
    4847.hey-man    (10.10.2017 20:29:49)    (Detached)
    4831.another-session1    (10.10.2017 20:29:45)    (Detached)
4 Sockets in /run/screen/S-hipo.

You have to instruct everyone to connect actually to the exact session we need, as screen -x will ask them to what session they like to connect.

In that case to connect to screen-session, each user has to run with their account:

hipo@jericho:~$ screen -x shared-session


If under some circumstances it happened that there is more than one opened shared screen virtual session, for example screen -list returns:


hipo@jericho:~$ screen -list
There are screens on:
    5065.screen-session    (10.10.2017 20:33:20)    (Detached)
    4095.screen-session    (10.10.2017 20:30:08)    (Detached)

All users have to connect to the exact screen-session created name and ID, like so:

hipo@jericho:~$ screen -x 4095.screen-session


Here is the meaning of used options


-d option instructs screen to detach,
-m makes it multiuser session so other users can attach
-S argument is just to give the screen session a name
-list Sesssion gives the screen-session ID

Once you're over with screen session (e.g. all users that are learning and you show them stuff and ask them to test by themselves and have completed, scheduled tasks), to kill it just press CTRL + A + K
 

4. Share screen /bin/bash shell session with another user

Sharing screen session between different users is even more useful to the shared session of one user as you might have a *nix server with many users who might attach to your opened session directly, instead of being beforehand instructed to connect with a single user.

That's perfect also for educational purposes if you want to learn some Linux to a class of people, as you can use their ordinary accounts and show them stuff on a Linux / BSD  machine.

Assuming that you follow and created already screen-session with screen cmd

hipo@jericho:~$ screen -list
There is a screen on:
        5560.screen-session      (10.10.2017 20:41:06)   (Multi, attached)
1 Socket in /run/screen/S-hipo.

hipo@jericho:~$

Next attach to the session

bunny@jericho:~$ screen -r shared-session
bunny@jericho:~$ Ctrl-a :multiuser on
bunny@jericho:~$ Ctrl-a :acladd user2
bunny@jericho:~$ screen -x UserNameHere/shared-session
 

Here are 2 screenshots on what should happen if you had done above command combinations correctly:

screen-share-session-to-multi-users-screenshot-multiuser-on-on-gnome-terminal2

screen-share-session-to-multi-users-screenshot-multiuser-on-on-gnome-terminal3

In order to be able to share screen Virtual terminal ( VTY ) sessions between separate (different) logged in users, you have to have screen command be suid (SUID bit for screen is disabled in most Linux distributions for security reasons).

Without making SUID the screen binary file, you are to get the error:

hipo@jericho:/home/hipo$ screen -x hipo/shared

Must run suid root for multiuser support.

If you are absolutely sure you know what you're doing here is how to make screen command sticky bit:


root@jericho:/home/hipo# which screen
root@jericho:/home/hipo# /usr/bin/screen
root@jericho:/home/hipo# root@jericho:/home/hipo# root@jericho:/home/hipo# chmod u+s $(which screen)
chmod 755 /var/run/screen
root@jericho:/home/hipo# rm -fr /var/run/screen/*
exit

Best Windows tools to Test (Benchmark) Hard Drives, SSD Drives and RAID Storage Controllers

Wednesday, April 23rd, 2014

atto-windows-hard-disk-benchmark-freeware-tool-screenshot-check-hard-disk-speed-windows
Disk Benchmarking is very useful for people involved in Graphic Design, 3D modelling, system admins  and anyone willing to squeeze maximum of his PC hardware.

If you want to do some benchmarking on newly built Windows server targetting Hard Disk performance, just bought a new hard SSD (Solid State Drives) and you want to test how well Hard Drive I/O operations behave or you want to see a regular HDD benchmarking of group of MS Windows PCs and plan hardware optiomization, check out ATTO Disk Benchmark.

So why exactly ATTO Benchmark? – Cause it is one of the best Windows Free Benchmark tools on the internet.

ATTO is a widely-accepted Disk Benchmark freeware utility to help measure storage system performance. ATTO though being freeware is among top tools utilized in industry. It is very useful in comparing different Hard Disk vendors speed, measure Windows storage systems performance with various transfer sizes and test lengths for reads and writes.

ATTO Disk Benchmark is used by manufacturers of Hardware RAID controllers, its precious tool to test Windows storage controllers, host bus adapters (HBAs).

Here is ATTO Benchmark tool specifications (quote from their webstie):
 

  • Transfer sizes from 512KB to 8MB
  • Transfer lengths from 64KB to 2GB
  • Support for overlapped I/O
  • Supports a variety of queue depths
  • I/O comparisons with various test patterns
  • Timed mode allows continuous testing
  • Non-destructive performance measurement on formatted drives
  • Transfer sizes from 512KB to 8MB
  • Transfer lengths from 64KB to 2GB
  • Support for overlapped I/O
  • Supports a variety of queue depths
  • I/O comparisons with various test patterns
  • Timed mode allows continuous testing
  • Non-destructive performance measurement on formatted drives
  • – See more at: http://www.attotech.com/disk-benchmark/#sthash.rRlgSTOE.dpuf

Here is mirrored latest version of ATTO Disk for Download. Once you get your HDD statistics you will probably want to compare to other people results. On  TomsHardware's world famous Hardware geek site there are plenty of Hard Drives performance Charts

Of course there are other GUI alternatives to ATTO Benchmark one historically famous is NBench

NBench

nbench_benchmark_windows_hard-drive-cpu-and-memory

Nbench is nice little benchmarking program for Windows NT. Nbench reports the following components of performance:

CPU speed: integer and floating operations/sec
L1 and L2 cache speeds: MB/sec
main memory speed: MB/sec
disk read and write speeds: MB/sec

SMP systems and multi-tasking OS efficiency can be tested using up to 20 separate threads of execution.

For Console Geeks or Windows server admins there are also some ports of famous *NIX Hard Disk Benchmarking tools:

NTiogen

NTiogen benchmark was written by Symbios Logic, It's Windows NT port of their popular UNIX benchmark IOGEN. NTIOGEN is the parent processes that spawns the specified number of IOGEN processes that actually do the I/O.
The program will display as output the number of processes, the average response time, the number of I/O operations per second, and the number of KBytes per second. You can download mirror copy of Ntiogen here


There are plenty of other GUI and Console HDD Benchmarking Win Tools, i.e.:

IOMeter (ex-developed by Intel and now abandoned available as open source available on SourceForge)

iometer-benchmark-disk-storage-speed-windows
 

Bench32 – Comprehensive benchmark that measures overall system performance under Windows NT or Windows 95, now obsolete not developed anymore abandoned by producer company.

ThreadMark32 – capable of bench (ex developed and supported by ADAPTEC) but also already unsupported

IOZone – filesystem benchmark tool. The benchmark generates and measures a variety of file operations. Iozone has been ported to many machines and runs under many operating systems.
 

N! B! Important note to make here is above suggested tools will provide you more realistic results than the proprietary vendor tools shipped by your hardware vendor. Using proprietary software produced by a single vendor makes it impossible to analyze and compare different hardwares, above HDD benchmarking tools are for "open systems", e.g. nomatter what the hardware producer is produced results can be checked against each other.
Another thing to consider is even though if you use any of above tools to test and compare two storage devices still results will be partially imaginary, its always best to conduct tests in Real Working Application Environments. If you're planning to launch a new services structure always test it first and don't rely on preliminary returned soft benchmarks.

if you know some other useful benchmarking software i'm missing please share.

What is IPMI (IPKVM), ILO and IDRAC – Remote management interfaces to server / PC on BIOS level

Friday, May 30th, 2014

IPMI-Block-Diagram-ILO-IPKVM-how-it-works
IPMI
Intelligent Platform Management Interface is a standardized computer interface also accessible remotely via Java applet allowing remote management and monitoring access to PC BIOS. IPMI is a way to manage a computer that may be powered off or otherwise unresponsive by using a network connection to the hardware rather than to an operating system or a keyboard physical / screen login shell. The IPMI server standard was introduced by Intel and nowadays supported by more than 200 computer vendors i.e. – Super Micro, Hewlett Packard, Cisco, Dell etc.

Intelligent Platform Management Interface is an open, industry-standard interface that was designed for the management of server systems over network. IPMI interfaces by various vendors have also Virtual Media support (i.e. – Operating System  ISO files could be mounted remotely to a Virtual CD / DVD rom and you can approach installing a bare-metal server without physical presense to it). Just like Power Off / Restart, BIOS Entrance and Virtual Media access is done directly through a web-browser interface over the network or the internet.

HP_IPMI_ILO-screenshot-remote-management-server-console

ILO – stands for Integrated Lights-Out and is  HP Proliant servers remote console to PC / server physical screen. ILO is server integrated chip on HP servers and doesn't need further installations. It gives you a web console using Java showing you server screen just like there is a Monitor connected to the server it is precious for remote system administration purposes as often when there is no SSH  or Remote Desktop to server you can see directly whether the server has completed hanged and try to recover or see a failing hardware notification on the screen to a server with a partially accessible services. Using ILO console access to an HP server one can have a BIOS access remotely to machines already colocated in data canters. In other words ILO is HP's variation of IPMI remote interface also known under business buzz word IPKVM.

DRAC-Dell-Remote-Acccess-console-IPMI-tools-remote-management-bios-interface

DRAC (iDRAC)- Dell's Remote Access Controller is interface card from Dell Inc. offering remote access (out-of-band) management facilities – i.e. DRAC is Dell's variant of HP's ILO – an implementation of Intel's IPMI out-of-band standard. DRAC is also giving you remote way to access no other means accessible server on a software level. Interesting and nice things is Dell provides their DRAC source code, so if you're a developer you can learn how DRAC technology works on a lower level.

ILO, iDRAC (Dell's new generation DRAC for Blade servers) and ILO's remote management interfaces's (IPMI tools) most valuable features is it allows remote system Power On / Shutdown and Remote Restart while monitoring the server screen (hardware output) messages and allowing you see critical hardware issue messages on pre-OS boot time, failure with memory, hard disks etc. and remote interface to do BIOS tuning.

Russian Arcade old school electronic game for your mobile – Russian Eggs (Nu Pogodi)

Thursday, January 30th, 2014


I still remember the days of  "Electronic Games".  As a citizen of Bulgaria – a country which was almost a Soviet Republic (in alliance with the Soviet Union)  and due to existence of separation between Communistic and Democratic societies, we the kids of the Eastern Block didn't have the opportunity to play the so popular in that time in democratic "free world" arcade games on consoles like Nintendo and Atari. Nomatter that in  Soviet Union times there were a couple of electronic games.  Games were not advanced and were copying already concepts existing in games produced by major game company producers like Konami,  Data East, Atari and Nintendo. Russian console like games were a separate game device running its own hardware and software, the major company producing that games was the legendary Electronika.

Nupogodigame-russian-best-arcade-electronic-game-of-1986

Elektronika was so emblematic in Soviet Union times that there is probably no kid who used to be a citizen of the USSR who doesn't remember playing some of  Elektronika's games. The most famous game produced by the company is "Ну Погоди" / Nu Pogodi (Wolf / Vylk) and was popular under emblematic name "Eggs".
the-merry-cook-the-cheerful-cook-veseliy-povar-nintendo-fp-24

The hardware of the Eggs game was actually a clone of famous Nintendo game console  – Nintendo EG-26 Eg.
There were a couple of other games which was remake of "The Wolf / Eggs" like "The Merry (Cheerful) Cook" – "Весельiй Повар"  running on Nintendo FP-24 Chef, Explorers of Space (1989) (running on MG-13) and a couple of others.

MG-13-Explorers-of-Space_1989

So why I bring back this old good memories ? 🙂 Because my readers who remember the Eggs game should know the game has a remake application for Android OS under name Eggs. To install it follow prior link or (Type in Google PlayStore "Eggs" or "Russian Eggs"), install and bring back the mania of the old days of the distant 1989 to 2014!!! 🙂

eggs_electronic-russian-arcade-game

There is no question whoever thought of porting the game for Android was a genious as the size of most middle class mobile smart phones almost perfectly fits the size of the original Nu Pogodi!
The game surely can be a time eater as it is addictive 🙂 The sound effects of the game brings back child memories and are pure joy .
Its nice that the game had a remake asour children can enjoy the same old school arcade game of youth of their fathers 🙂

That's all folks, Enjoy the Wolf 🙂

My struggles to find good substitute for old QWERTY Nokia 9300 Communicator and The Death of QWERTY Smart phones

Monday, January 27th, 2014

Nowadays having a a touch screen mobile phone has become like a standard. I'm not such a big fan of Touch screen technology, thus I've been fighting with the idea to own a touch screen phone for a year or so. Just till recently I happily lived with my old Nokia 9300i with a physical QWERTY keyboard for already 4 years.

Unfortunately lately while talking with my Nokia I started getting frequent voice interruptions missing words in my phone call conversations and need to ask person I'm talking to, to repeat his words / sentence in order to understand what is communicated .. I'm economic person and therefore don't like bying anything new if it is not absolutely necessary so I opened the phone and clean it hoping that this will solve the conversation issues but with no luck. With this half-usable mobile my only option left was to buy a new mobile phone.

I'm not very rigorious on what a mobile phone should be and I'm very much minimalist by heart so I was thinking of bying new cheapest available Nokia phone on the market and solve my "issue" quick and efficient,  only problem was  I'm quite used already of using my handy QWERTY phone as a note taking device thus I preferred to not buy a keypad mobile phone but get again a smartphone with physical QWERTY.

I have consulted with some friends who are more knowledgable on what's latest on mobile phone market with a question what will be a good substitute for my Nokia Communicator 9300i and heard comments like:
'IPhone is the most functional and superior in interface', while some friends and colleagues adviced me:
'Choose an Android based phone as Android is Linux based and gives more freedom to the user as well as has more free applications to install'

I appreaciated my friends help but I didn't like the idea to buy a Smartphone with a touchscreen display – virtual keyboard is not so confortable as having a physical one and besides this is a very slow interface compared to physical keys. Thus initially strongly rejected the idea of bying a phone without a physical keyboard. After some weeks of pondering and checking in the market – in 3 Major mobile operators shops in Bulgaria MTel, Globul and VIVACOM and HANDY store. I've find out currently on the market there is no good price / quality and functionality ratio (qwerty keyboard mobile) available. My options were limited to either by a Nokia Asha 210 or some variance or a Blackberry mobile.

nokia_asha_210_mobile_phone

In first glimpse I liked the Nokia ASHA 210 – QWERTY powered mobile  but after noticing the blue Facebook "F" button got quickly jolted.
The sales lady offered me a couple of other Nokias with Qwerty keyboard as well as a Blackberry 9320 Curve.

blackberry_curve_smart_mobile_phone
After a quick test of all QWERTY mobiles, found the intertface on both is so inferior to IPhone's IOS and Android based phones.
I asked my HP workmates for advice of a good QWERTY bundled mobile phone with Android and was referred to Motorolla Droid 3 – which seems to among the only options on the market for mobile Phone which have both Android Operating System and a Physical QWERTY keyboardMotorolla Droid 3 seemed to be exactly the mobile I was looking for but unfortunately it is not available in Mobile phones stores in Bulgaria and only in bulgaria is only offered for sale as a second hand and I had to buy it over the Internet (I prefer not to buy on the Internet). Even if I bought it as second hand  DROID 3's price is too high for my budget – 250 EUR!

Motorola-Droid-3-mobile-nokia-9300i-substitute

I wanted to buy economic phone and same time to have a good balance between price and phone modernity, same time don't tie myself with mobile operator yearly tax plan thus decided to pay my whole mobile price in cache (no credits, no binding 2 / 3 year conversation plans).

After evaluating the options on Market I stopped on two mobiles identical by price 150 EUR I could choose between Samsung Galaxy Trend Lite or ZTE Blade 3. The sales lady adviced me its better to get the ZTE Blade 3 than Samsung Galaxy Trend Lite (S7350) because ZTE has better Camera (5 Mpixels), a better Display and has much less hardware issues than Samsung Galaxy Lite.

Samsung-Galaxy-Trend-Lite-S7390-smart-mobile-phone


Finally I bought the ZTE Blade 3 and nowdays I'm trying to get used to it and to be honest even with a week passed I still can't get used to the Virtual Keyboard

Android interface is quite shiny but a little bit chaotic if compared to design use interface I've tested on IPhones. Android OS seems to behave very weird at times but in general is quite easy to use. Managing / installing / Removing applications from Google AppStore is done by only 2 clicks. My major concern on Android is its highly addictive. I've catch myself, since last week I spend much more time using my mobile than before with my Nokia Communicator …
ZTE-Blade-III-Black-smart-phone

To conclude it I would say living with a smartphone has its advantagous (you can easily check weather prognosis / news) and do a number of things with it, but it is addictive .. obviously its easy to  become an Android addict and spend your free time on useless stuff like installing / testing new apps and playing with phone. Having a smartphone just like I priorly suspected is a big time eater and it seems my hypothesis  that its better to live without a smart phone is true. But who knows, perhaps its just a moment addictiveness just like with any new thing posession – time will show. In meantime I believe my ZTE Blade III – purchase was a good deal as it gives me opportunity to explore Android OS. I'll stop here with my ranting and excuse myself if the article was too boring …Please drop me a comment with mobile types and names who had QWERTY keyboard and a modern OS. Very sadly it seems the QWERTY hardware keyboard mobiles will soon be dead and gone …

How to disable nginx static requests access.log logging

Monday, March 5th, 2012

NGINX logo Static Content Serving Stop logging

One of the companies, where I'm employed runs nginx as a CDN (Content Delivery Network) server.
Actually nginx, today has become like a standard for delivering tremendous amounts of static content to clients.
The nginx, server load has recently increased with the number of requests, we have much more site visitors now.
Just recently I've noticed the log files are growing to enormous sizes and in reality this log files are not used at all.
As I've used disabling of web server logging as a way to improve Apache server performance in past time, I thought of implying the same little "trick" to improve the hardware utilization on the nginx server as well.

To disable logging, I proceeded and edit the /usr/local/nginx/conf/nginx.conf file, commenting inside every occurance of:

access_log /usr/local/nginx/logs/access.log main;

to

#access_log /usr/local/nginx/logs/access.log main;

Next, to load the new nginx.conf settings I did a restart:

nginx:~# killall -9 nginx; sleep 1; /etc/init.d/nginx start

I expected, this should be enough to disable completely access.log, browser request logins. Unfortunately /usr/local/nginx/logs/access.log was still displaying growing with:

nginx:~# tail -f /usr/local/nginx/logs/access.log

After a bit thorough reading of nginx.conf config rules, I've noticed there is a config directive:

access_log off;

Therefore to succesfully disable logging I had to edit config occurance of:

access_log /usr/local/nginx/logs/access.log main

to

After a bit thorough reading of nginx.conf config rules, I've noticed there is a config directive:

access_log off;

Therefore to succesfully disable logging I had to edit config occurance of:

access_log /usr/local/nginx/logs/access.log main

to

access_log /usr/local/nginx/logs/access.log main
access_log off;

Finally to load the new settings, which thanksfully this time worked, I did nginx restart:

nginx:~# killall -9 nginx; sleep 1; /etc/init.d/nginx start

And hooray! Thanks God, now nginx logging is disabled!

As a result, as expected the load avarage on the server reduced a bit 🙂