Posts Tagged ‘IfModule’

Install and make Apache + PHP to work with PosgreSQL database server on Debian Linux and set up server Web Posgre interface Pgpadmin howto

Wednesday, June 15th, 2016

make-apache-php-work-with-postgresql-pgsql-and-install-postgresql-db-web-admin-interface

In previous article I've wrote on how to install postgresql on Debian Linux using the deb repository this was necessery to import some PostGres DBs, however this was not enough to run the posgresql php based website aimed as connection from Apache / PHP module to PostGre was failing after a bit of investigation and a check in phpinfo(); I've realized the module PHP module for postgres pgsql.so was missing, here is what I did in order to install it:
 

debian:~# apt-get install php5-pgsql phppgadmin libapache2-mod-auth-pgsql 

PHP sessions enable configuration

As it is common a common problem with PHP applications written to use PostGres is to loose sessions and by default PHP does not have configured sessions.save_path it is a very good practice to directly enable it in /etc/php5/apache2/php.ini open the file in text editor:
 

debian:~# vim /etc/php5/apache2/php.ini


Find the commented directive line:
 

;session.save_path = “/tmp”


and uncomment it, i.e.:
 

session.save_path = “/tmp”


Quit saving vim with the usual :wq!

The 3 modules provides pgsql.so for PHP and mod_auth_pgsql.so for Apache2, the 3rd packae phpgadmin provides a Web administration interface for installed PostgreSQL servers Databases, for those experienced with MySQL Database its the same as PHPMyAdmin.


 Here is quick configuration for use of PostgreAdmin interface:

By default PHPPGADMIN installation process configure the Apache2 server' /etc/phppgadmin/apache.conf  to use  /etc/apache2/conf.d/phppgadmin


Here is the default my server package instaleld  file content:


Alias /phppgadmin /usr/share/phppgadmin

<Directory /usr/share/phppgadmin>

DirectoryIndex index.php
AllowOverride None

order deny,allow
deny from all
allow from 127.0.0.0/255.0.0.0 ::1/128
# allow from all

<IfModule mod_php5.c>
  php_flag magic_quotes_gpc Off
  php_flag track_vars On
  #php_value include_path .
</IfModule>
<IfModule !mod_php5.c>
  <IfModule mod_actions.c>
    <IfModule mod_cgi.c>
      AddType application/x-httpd-php .php
      Action application/x-httpd-php /cgi-bin/php
    </IfModule>
    <IfModule mod_cgid.c>
      AddType application/x-httpd-php .php
      Action application/x-httpd-php /cgi-bin/php
    </IfModule>
  </IfModule>
</IfModule>

</Directory>

It is generally a good practice to change the default Alias location of phppgadmin, so edit the file and change it to something like:
 

Alias /phppostgresgadmin /usr/share/phppgadmin


  • Then phpPgAdmin is available at http://servername.com/phppostgresadmin (only from localhost, however in my case I wanted to be able to access it also from other hosts so allowed PostgresGadmin from every hosts, to do so, I've commented in above config


# allow from 127.0.0.0/255.0.0.0 ::1/128


and uncommented #allow from all line, e.g.:
 

allow from all


Also another thing here is in your VirtualHost whenever you plan to access the PHPPGADMIN is to include in config ( in my case this is the file /etc/apache2/sites-enabled/000-default before (</VirtualHost> end line) following Alias:
 

Alias /phpposgreadmin /usr/share/phppgadmin


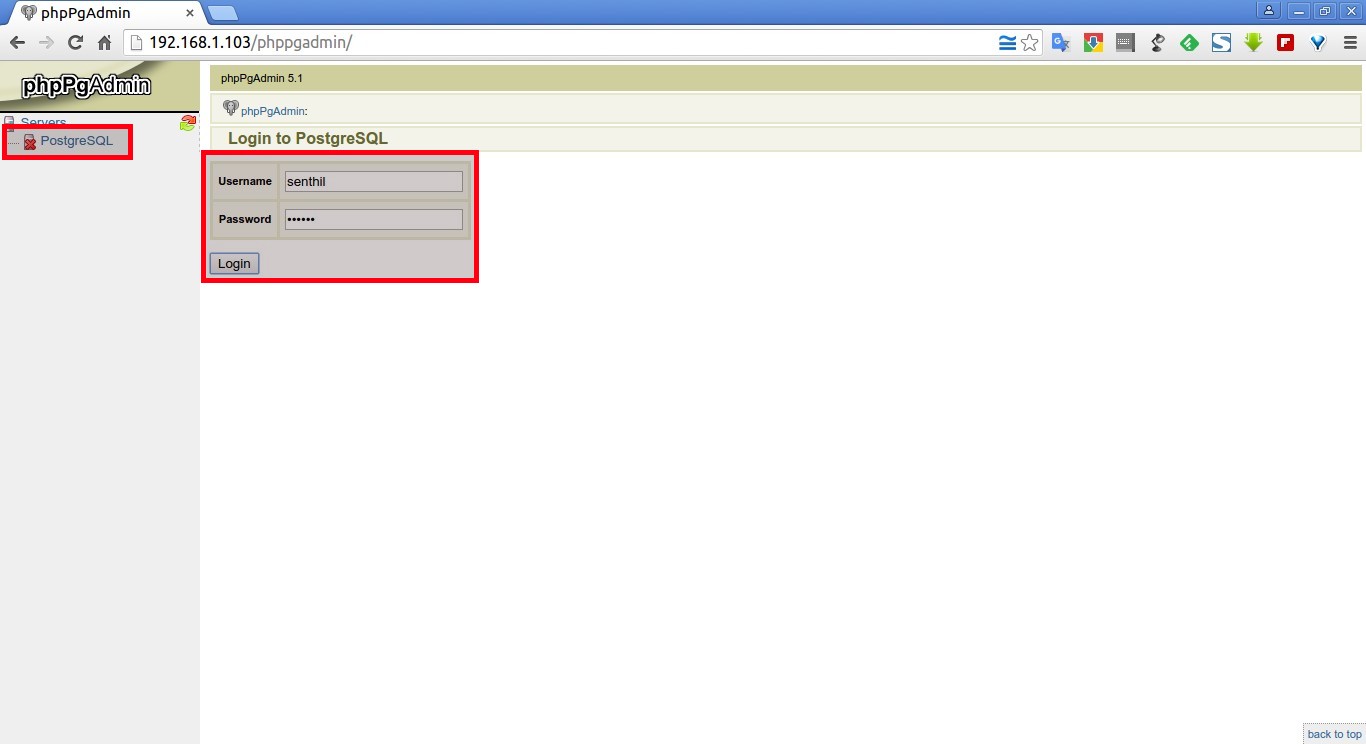
Then to access PostGreSQL PHP Admin interface in Firefox / Chrome open URL:


http://your-default-domain.com/phpposgreadmin

phpPgAdmin-postgresql-php-web-interface-debian-linux-screenshot


Configure access to a remote PostgreSQL Server

With PhpPgAdmin, you can manage many PostgreSQL servers locally (on the localhost) or on remote hosts.

First, you have to make sure that the distant PostgreSQL server can handle your request, that you can connect to it. You can do this by modifying the /etc/postgresql/9.5/main/filepg_hba.conf and adding a line like:

# PhpPgAdmin server access host all db_admin xx.xx.xx.xx 255.255.255.255 md5

Then, you need to add your distant PostgreSQL server into the config file for PhpPgAdmin. This file is  /etc/phppgadmin/config.inc.php the default postgresql port is 5432, however you might have configured it already to use some different port if you're not sure about the port number the postgresql is listening check it out:


debian:~# grep -i port /etc/postgresql/*/main/postgresql.conf
etc/postgresql/9.5/main/postgresql.conf:port = 5433                # (change requires restart)
/etc/postgresql/9.5/main/postgresql.conf:                    # supported by the operating system:
/etc/postgresql/9.5/main/postgresql.conf:# ERROR REPORTING AND LOGGING


To login to phppgadmin interface there is no root administrator user such as in PHP so you will need to priorly create some user and later use it for connection from Postgres Web interface.

To create from console new user in postgres:
 

debian:~# su – postgres
posgres@debian:~$ psql template1
posgres@debian:~$ psql -d template1 -U postgres


Welcome to psql 9.5, the PostgreSQL interactive terminal. Type: \copyright for distribution terms \h for help with SQL commands \? for help on internal slash commands \g or terminate with semicolon to execute query \q to quit template1=#

template1=# CREATE USER MyNewUser WITH PASSWORD 'myPassword';


To add a new database to postgres from shell:

template1=# CREATE DATABASE NewDatabase;
 

template1=# GRANT ALL PRIVILEGES ON DATABASE NewDatabase to MyNewUser;


template1=# q

Last command instructs it to quit if you want to get more info about possible commands do type instead of q ? for general help or for database / table commands only h
If you need to connect to NewDatabase just to test first it works in console before trying it from postgrepgadmin


posgres@debian:~$ psql -d NewDatabase -U MyNewUser


Secure Apache webserver against basic Denial of Service attacks with mod_evasive on Debian Linux

Wednesday, September 7th, 2011

Secure Apache against basic Denial of Service attacks with mod evasive, how webserver DDoS works

One good module that helps in mitigating, very basic Denial of Service attacks against Apache 1.3.x 2.0.x and 2.2.x webserver is mod_evasive

I’ve noticed however many Apache administrators out there does forget to install it on new Apache installations or even some of them haven’t heard about of it.
Therefore I wrote this small article to create some more awareness of the existence of the anti DoS module and hopefully thorugh it help some of my readers to strengthen their server security.

Here is a description on what exactly mod-evasive module does:

debian:~# apt-cache show libapache2-mod-evasive | grep -i description -A 7

Description: evasive module to minimize HTTP DoS or brute force attacks
mod_evasive is an evasive maneuvers module for Apache to provide some
protection in the event of an HTTP DoS or DDoS attack or brute force attack.
.
It is also designed to be a detection tool, and can be easily configured to
talk to ipchains, firewalls, routers, and etcetera.
.
This module only works on Apache 2.x servers

How does mod-evasive anti DoS module works?

Detection is performed by creating an internal dynamic hash table of IP Addresses and URIs, and denying any single IP address which matches the criterias:

  • Requesting the same page more than number of times per second
  • Making more than N (number) of concurrent requests on the same child per second
  • Making requests to Apache during the IP is temporarily blacklisted (in a blocking list – IP blacklist is removed after a time period))

These anti DDoS and DoS attack protection decreases the possibility that Apache gets DoSed by ana amateur DoS attack, however it still opens doors for attacks who has a large bot-nets of zoombie hosts (let’s say 10000) which will simultaneously request a page from the Apache server. The result in a scenario with a infected botnet running a DoS tool in most of the cases will be a quick exhaustion of system resources available (bandwidth, server memory and processor consumption).
Thus mod-evasive just grants a DoS and DDoS security only on a basic, level where someone tries to DoS a webserver with only possessing access to few hosts.
mod-evasive however in many cases mesaure to protect against DoS and does a great job if combined with Apache mod-security module discussed in one of my previous blog posts – Tightening PHP Security on Debian with Apache 2.2 with ModSecurity2
1. Install mod-evasive

Installing mod-evasive on Debian Lenny, Squeeze and even Wheezy is done in identical way straight using apt-get:

deiban:~# apt-get install libapache2-mod-evasive
...

2. Enable mod-evasive in Apache

debian:~# ln -sf /etc/apache2/mods-available/mod-evasive.load /etc/apache2/mods-enabled/mod-evasive.load

3. Configure the way mod-evasive deals with potential DoS attacks

Open /etc/apache2/apache2.conf, go down to the end of the file and paste inside, below three mod-evasive configuration directives:

<IfModule mod_evasive20.c>
DOSHashTableSize 3097DOS
PageCount 30
DOSSiteCount 40
DOSPageInterval 2
DOSSiteInterval 1
DOSBlockingPeriod 120
#DOSEmailNotify hipo@mymailserver.com
</IfModule>

In case of the above configuration criterias are matched, mod-evasive instructs Apache to return a 403 (Forbidden by default) error page which will conserve bandwidth and system resources in case of DoS attack attempt, especially if the DoS attack targets multiple requests to let’s say a large downloadable file or a PHP,Perl,Python script which does a lot of computation and thus consumes large portion of server CPU time.

The meaning of the above three mod-evasive config vars are as follows:

DOSHashTableSize 3097 – Increasing the DoSHashTableSize will increase performance of mod-evasive but will consume more server memory, on a busy webserver this value however should be increased
DOSPageCount 30 – Add IP in evasive temporary blacklist if a request for any IP that hits the same page 30 consequential times.
DOSSiteCount 40 – Add IP to be be blacklisted if 40 requests are made to a one and the same URL location in 1 second time
DOSBlockingPeriod 120 – Instructs the time in seconds for which an IP will get blacklisted (e.g. will get returned the 403 foribden page), this settings instructs mod-evasive to block every intruder which matches DOSPageCount 30 or DOSSiteCount 40 for 2 minutes time.
DOSPageInterval 2 – Interval of 2 seconds for which DOSPageCount can be reached.
DOSSiteInterval 1 – Interval of 1 second in which if DOSSiteCount of 40 is matched the matched IP will be blacklisted for configured period of time.

mod-evasive also supports IP whitelisting with its option DOSWhitelist , handy in cases if for example, you should allow access to a single webpage from office env consisting of hundred computers behind a NAT.
Another handy configuration option is the module capability to notify, if a DoS is originating from a number of IP addresses using the option DOSEmailNotify
Using the DOSSystemCommand in relation with iptables, could be configured to filter out any IP addresses which are found to be matching the configured mod-evasive rules.
The module also supports custom logging, if you want to keep track on IPs which are found to be trying a DoS attack against the server place in above shown configuration DOSLogDir “/var/log/apache2/evasive” and create the /var/log/apache2/evasive directory, with:
debian:~# mkdir /var/log/apache2/evasive

I decided not to log mod-evasive DoS IP matches as this will just add some extra load on the server, however in debugging some mistakenly blacklisted IPs logging is sure a must.

4. Restart Apache to load up mod-evasive debian:~# /etc/init.d/apache2 restart
...

Finally a very good reading which sheds more light on how exactly mod-evasive works and some extra module configuration options are located in the documentation bundled with the deb package to read it, issue:

debian:~# zless /usr/share/doc/libapache2-mod-evasive/README.gz