Posts Tagged ‘limit’

Fix Zabbix selinux caused permission issues on CentOS 7 Linux / cannot set resource limit: [13] Permission denied error solution

Tuesday, July 6th, 2021

zabbix-selinux-logo-fix-zabbix-permission-issues-when-running-on-ceontos-linux-change-selinux-to-permissive-howto.

If you have to install Zabbix client that has to communicate towards Zabbix server via a Zabbix Proxy you might be unpleasently surprised that it cannot cannot be start if the selinux mode is set to Enforcing.
Error message like on below screenshot will be displayed when starting proxy client with systemctl.

zabbix-proxy-cannot-be-started-due-to-selinux-permissions

In the zabbix logs you will see error  messages such as:
 

"cannot set resource limit: [13] Permission denied, CentOS 7"


29085:20160730:062959.263 Starting Zabbix Agent [Test host]. Zabbix 3.0.4 (revision 61185).
29085:20160730:062959.263 **** Enabled features ****
29085:20160730:062959.263 IPv6 support: YES
29085:20160730:062959.263 TLS support: YES
29085:20160730:062959.263 **************************
29085:20160730:062959.263 using configuration file: /etc/zabbix/zabbix_agentd.conf
29085:20160730:062959.263 cannot set resource limit: [13] Permission denied
29085:20160730:062959.263 cannot disable core dump, exiting…


Next step to do is to check whether zabbix is listed in selinux's enabled modules to do so run:
 

[root@centos ~ ]# semodules -l

…..
vhostmd    1.1.0
virt    1.5.0
vlock    1.2.0
vmtools    1.0.0
vmware    2.7.0
vnstatd    1.1.0
vpn    1.16.0
w3c    1.1.0
watchdog    1.8.0
wdmd    1.1.0
webadm    1.2.0
webalizer    1.13.0
wine    1.11.0
wireshark    2.4.0
xen    1.13.0
xguest    1.2.0
xserver    3.9.4
zabbix    1.6.0
zarafa    1.2.0
zebra    1.13.0
zoneminder    1.0.0
zosremote    1.2.0


[root@centos ~ ]# sestatus
# sestatusSELinux status:                 enabled
SELinuxfs mount:                /sys/fs/selinux
SELinux root directory:         /etc/selinux
Loaded policy name:             targeted
Current mode:                   enforcing
Mode from config file:          enforcing
Policy MLS status:              enabled
Policy deny_unknown status:     allowed
Max kernel policy version:      28

To get exact zabbix IDs that needs to be added as permissive for Selinux you can use ps -eZ like so:

[root@centos ~ ]# ps -eZ |grep -i zabbix
system_u:system_r:zabbix_agent_t:s0 1149 ?     00:00:00 zabbix_agentd
system_u:system_r:zabbix_agent_t:s0 1150 ?     00:04:28 zabbix_agentd
system_u:system_r:zabbix_agent_t:s0 1151 ?     00:00:00 zabbix_agentd
system_u:system_r:zabbix_agent_t:s0 1152 ?     00:00:00 zabbix_agentd
system_u:system_r:zabbix_agent_t:s0 1153 ?     00:00:00 zabbix_agentd
system_u:system_r:zabbix_agent_t:s0 1154 ?     02:21:46 zabbix_agentd

As you can see zabbix is enabled and hence selinux enforcing mode is preventing zabbix client / server to operate and communicate normally, hence to make it work we need to change zabbix agent and zabbix proxy to permissive mode.

Setting selinux for zabbix agent and zabbix proxy to permissive mode

If you don't have them installed you might neet the setroubleshoot setools, setools-console and policycoreutils-python rpms packs (if you have them installed skip this step).

[root@centos ~ ]# yum install setroubleshoot.x86_64 setools.x86_64 setools-console.x86_64 policycoreutils-python.x86_64

Then to add zabbix service to become permissive either run

[root@centos ~ ]# semanage permissive –add zabbix_t

[root@centos ~ ]# semanage permissive -a zabbix_agent_t


In some cases you might also need in case if just adding the permissive for zabbix_agent_t try also :

setsebool -P zabbix_can_network=1

Next try to start zabbox-proxy and zabbix-agent systemd services 

[root@centos ~ ]# systemctl start zabbix-proxy.service

[root@centos ~ ]# systemctl start zabbix-agent.service

Hopefully all should report fine with the service checking the status should show you something like:

[root@centos ~ ]# systemctl status zabbix-agent
● zabbix-agent.service – Zabbix Agent
   Loaded: loaded (/usr/lib/systemd/system/zabbix-agent.service; enabled; vendor preset: disabled)
   Active: active (running) since Thu 2021-06-24 07:47:42 CEST; 1 weeks 5 days ago
 Main PID: 1149 (zabbix_agentd)
   CGroup: /system.slice/zabbix-agent.service
           ├─1149 /usr/sbin/zabbix_agentd -c /etc/zabbix/zabbix_agentd.conf
           ├─1150 /usr/sbin/zabbix_agentd: collector [idle 1 sec]
           ├─1151 /usr/sbin/zabbix_agentd: listener #1 [waiting for connection]
           ├─1152 /usr/sbin/zabbix_agentd: listener #2 [waiting for connection]
           ├─1153 /usr/sbin/zabbix_agentd: listener #3 [waiting for connection]
           └─1154 /usr/sbin/zabbix_agentd: active checks #1 [idle 1 sec]

Check the Logs finally to make sure all is fine with zabbix being allowed by selinux.

[root@centos ~ ]# grep zabbix_proxy /var/log/audit/audit.log

[root@centos ~ ]# tail -n 100 /var/log/zabbix/zabbix_agentd.log


If no errors are in and you receive and you can visualize the usual zabbix collected CPU / Memory / Disk etc. values you're good, Enjoy ! 🙂

Fix “Approaching the limit on PV entries, consider increasing either the vm.pmap.shpgperproc or the vm.pmap.pv_entry_max tunable.” in FreeBSD

Monday, May 21st, 2012

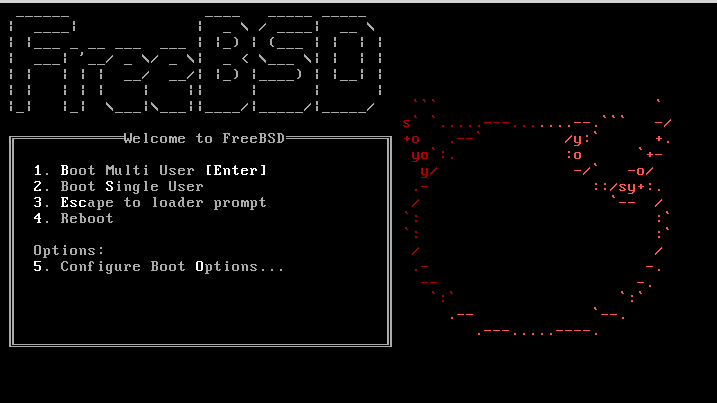
bsdinstall-newboot-loader-menu-pv_entries_consider_increasing_vm_pmap_shpgrepproc

I'm running FreeBSD with Apache and PHP on it and I got in dmesg (kernel log), following error:

freebsd# dmesg|grep -i vm.pmap.shpgperproc
Approaching the limit on PV entries, consider increasing either the vm.pmap.shpgperproc or the vm.pmap.pv_entry_max tunable.

The exact FreeBSD, Apache and php versions I have installed are:
 

freebsd# uname -a ; httpd -V ; php –version
FreeBSD pcfreak 7.2-RELEASE-p4 FreeBSD 7.2-RELEASE-p4 #0: Fri Oct 2 12:21:39 UTC 2009 root@i386-builder.daemonology.net:/usr/obj/usr/src/sys/GENERIC i386
Server version: Apache/2.0.64
Server built: Mar 13 2011 23:36:25Server's Module Magic Number: 20050127:14
Server loaded: APR 0.9.19, APR-UTIL 0.9.19
Compiled using: APR 0.9.19, APR-UTIL 0.9.19
Architecture: 32-bit
Server compiled with….
-D APACHE_MPM_DIR="server/mpm/prefork"
-D APR_HAS_SENDFILE
-D APR_HAS_MMAP
-D APR_HAVE_IPV6 (IPv4-mapped addresses enabled)
-D APR_USE_FLOCK_SERIALIZE
-D APR_USE_PTHREAD_SERIALIZE
-D SINGLE_LISTEN_UNSERIALIZED_ACCEPT
-D APR_HAS_OTHER_CHILD
-D AP_HAVE_RELIABLE_PIPED_LOGS
-D HTTPD_ROOT="/usr/local"
-D SUEXEC_BIN="/usr/local/bin/suexec"
-D DEFAULT_PIDLOG="/var/run/httpd.pid"
-D DEFAULT_SCOREBOARD="logs/apache_runtime_status"
-D DEFAULT_LOCKFILE="/var/run/accept.lock"
-D DEFAULT_ERRORLOG="logs/error_log"
-D AP_TYPES_CONFIG_FILE="etc/apache2/mime.types"
-D SERVER_CONFIG_FILE="etc/apache2/httpd.conf"
PHP 5.3.5 with Suhosin-Patch (cli) (built: Mar 14 2011 00:29:17)
Copyright (c) 1997-2009 The PHP Group
Zend Engine v2.3.0, Copyright (c) 1998-2010 Zend Technologies
with eAccelerator v0.9.6.1, Copyright (c) 2004-2010 eAccelerator, by eAccelerator

After a bunch of research a FreeBSD forums thread , I've found the fix suggested by a guy.

The solution suggested in the forum is to raise up vm.pmap.pv_entry_ma to vm.pmap.pv_entry_max=1743504, however I've noticed this value is read only and cannot be changed on the BSD running kernel;

freebsd# sysctl vm.pmap.pv_entry_max=1743504
sysctl: oid 'vm.pmap.pv_entry_max' is read only

Instead to solve the;

Approaching the limit on PV entries, consider increasing either the vm.pmap.shpgperproc or the vm.pmap.pv_entry_max tunable.
, I had to add in /boot/loader.conf

vm.pmap.pde.mappings=68
vm.pmap.shpgperproc=500
vm.pmap.pv_entry_max=1743504

Adding this values through /boot/loader.conf set them on kernel boot time. I've seen also in the threads the consider increasing either the vm.pmap.shpgperproc is also encountered on FreeBSD hosts running Squid, Dansguardion and other web proxy softwares on busy hosts.

This problems are not likely to happen for people who are running latest FreeBSD releases (>8.3, 9.x), I've read in same above post in newer BSD kernels the vm.pmap is no longer existing in newer kernels.

How to list and exclude table names from a database in MySQL (exclude table names from an show tables in MySQL) by using information_schema

Wednesday, March 30th, 2011

Listing all table names from a MySQL database is a very easy and trivial task that every sql or system administrator out there is aware of.

However excluding certain table names from a whole list of tables belonging to a database is not that commonly used and therefore I believe many people have no clue how to do it when they have to.

Today for one of my sql backup scripts it was necessary that certain tables from a database to be excluded from the whole list of tables for a database I’m backupping.
My example database has the sample name exampledatabase and usually I do list all the table contents from that database with the well known command:

mysql> SHOW tables from exampledatabase;

However as my desire was to exclude certain tables from the list (preferrably with a certain SQL query) I had to ask around in irc.freenode.net for some hints on a ways to achieve my exclude table goals.

I was adviced by some people in #mysql that what I need to achieve my goal is the information_schema mysql structure, which is available since MySQL version 5.0.

After a bit of look around in the information_schema and the respective documentation on mysql.com, thanksfully I could comprehend the idea behind the information_schema, though to be honest the first time I saw the documentation it was completly foggy on how to use this information_schema;
It seems using the information_schema is very easy and is not much different from your normal queries syntax used to do trivial operations in the mysql server.

If you wonder just like I did what is mysql’s information_schema go and use the information_schema database (which I believe is a virtual database that is stored in the system memory).

For instance:

mysql> use information_schema;
Database changed
mysql> show tables
+---------------------------------------+
| Tables_in_information_schema |
+---------------------------------------+
| CHARACTER_SETS |
| COLLATIONS |
| COLLATION_CHARACTER_SET_APPLICABILITY |
| COLUMNS |
| COLUMN_PRIVILEGES |
| KEY_COLUMN_USAGE |
| PROFILING |
| ROUTINES |
| SCHEMATA |
| SCHEMA_PRIVILEGES |
| STATISTICS |
| TABLES |
| TABLE_CONSTRAINTS |
| TABLE_PRIVILEGES |
| TRIGGERS |
| USER_PRIVILEGES |
| VIEWS |
+---------------------------------------+
17 rows in set (0.00 sec)

To get a general view on what each of the tables in the information_schema database contains I used the normal SELECT command for example

mysql> select * from TABLES limit 10;

I used the limit clause in order to prevent being overfilled with data, where I could still see the table fields name to get general and few lines of the table to get an idea what kind of information the TABLES table contains.

If you haven’t got any ecperience with using the information_schema I would advice you do follow my example select and look around through all the listed tables in the information_schema database

That will also give you a few hints about the exact way the MySQL works and comprehends it’s contained data structures.

In short information_schema virtual database and it’s existing tables provides a very thorough information and if you’re an SQL admin you certainly want to look over it every now and then.

A bit of playing with it lead me to a command which is actually a good substitute for the normal SHOW TABLES; mysql command.
To achieve a SHOW TABLES from exampledatabase via the information_schema info structure you can for example issue:

select TABLE_NAME from TABLES where TABLE_SCHEMA='exampledatabase';

Now as I’ve said a few words about information_schema let me go back to the main topic of this small article, which is How to exclude table names from a SHOW tables list

Here is how exclude a number of tables from a complete list of tables belonging to a database:

select TABLE_NAME from TABLES where TABLE_SCHEMA='exampledatabase'
AND TABLE_NAME not in
('mysql_table1_to_exlude_from_list', 'mysql_table2_to_exclude_from_list', 'table3_to_exclude');

In this example the above mysql command will list all the tables content belonging to exampledatabase and instruct the MySQL server not to list the table names with names mysql_table1_to_exlude_from_list, mysql_table2_to_exclude_from_list, table3_to_exclude

If you need to exclude more tables from your mysql table listing just add some more tables after the …’table3_to_exclude’, ‘new_table4_to_exclude’,’etc..’);

Of course this example can easily be adopted to a MySQL backup script which requires the exclusion of certain tables from a backed up database.

An example on how you can use the above table exclude command straight from the bash shell would be:

debian:~# echo "use information_schema; select TABLE_NAME from TABLES where
TABLE_SCHEMA='exampledatabase' AND TABLE_NAME not in
('mysql_table1_to_exlude_from_list', 'mysql_table2_to_exclude_from_list', 'table3_to_exclude',);"
| mysql -u root -p

Now this little bash one-liner can easily be customized to a backup script to create backups of a certain databases with a certain tables (e.g. with excluded number of tables) from the backup.

It’s seriously a pity that by default the mysqldump command does not have an option for a certain tables exclude while making a database dump.
I’ve saw the mysqldump exclude option, being suggested somewhere online as a future feature of mysqldump, I’ve also seen it being reported in the mysql.com’s bug database, I truly hope in the upcoming releases we will see the exclude option to appear as a possible mysqldump argument.
 

How to tune MySQL Server to increase MySQL performance using mysqltuner.pl and Tuning-primer.sh

Tuesday, August 9th, 2011

MySQL Easy performance tuning with mysqltuner.pl and Tuning-primer.sh scripts

Improving MySQL performance is crucial for improving a website responce times, reduce server load and improve overall work efficiency of a mysql database server.

I’ve seen however many Linux System administrators who does belittle or completely miss the significance of tuning a newly installed MySQL server installation.
The reason behind that is probably caused by fact that many people think MySQL config variables, would not significantly improve performance and does not pay back for optimization efforts. Moreover there are a bunch of system admins who has to take care for numerous services so they don’t have time to get good knowledge to optimize MySQL servers.
Thus many admins and webmasters nowdays, think optimizations depend mostly on the side of the website programmers.
It’s also sometimes falsely believed that optimizing a MySQL server could reduce the overall server stability.

With the boom of Internet website building and internet marketing, many webmasters emerged and almost anybody with almost no knowledge on GNU/Linux or minimal or no knowledge on PHP can start his Online store, open a blog or create a website powered by some CMS like joomla.
Thus nowdays many servers even doesn’t have a hired system administrators but are managed by people whose knowledge on *Nix is almost next to zero, this is another reason why dozens of MySQL installations online are a default ones and are not taking a good advantage of the server hardware.

The incrase of website visitors leads people servers expectations for hardware also to grow, thus many companies simply buy a new hardware instead of taking the few time to investigate on how current server hardware can be utilized better.
In that manner of thought I though it will be a good idea to write this small article on Tuning mysql servers with two scripts Tuning-primer.sh and mysqltuner.pl.
The scripts are ultra easy to use and does not require only a minimal knowledge on MySQL, Linux or (*BSD *nix if sql is running on BSD).
Tuning-primer.sh and mysqltuner.pl are therefore suitable for a quick MySQL server optimizations to even people who are no computer experts.

I use this two scripts for MySQL server optimizations on almost every new configured GNU/Linux with a MySQL backend.
Use of the script comes to simply download with wget, lynx, curl or some other web client and execute it on the server host which is already running the MySQL server.

Here is an example of how simple it is to run the scripts to Optimize MySQL:

debian:~# perl mysqltuner.pl
>> MySQLTuner 1.2.0 - Major Hayden >major@mhtx.net<
>> Bug reports, feature requests, and downloads at http://mysqltuner.com/
>> Run with '--help' for additional options and output filtering

——– General Statistics ————————————————–
[–] Skipped version check for MySQLTuner script
[OK] Currently running supported MySQL version 5.1.49-3
[OK] Operating on 64-bit architecture

——– Storage Engine Statistics ——————————————-
[–] Status: +Archive -BDB -Federated +InnoDB -ISAM -NDBCluster
[–] Data in MyISAM tables: 6G (Tables: 952)
[!!] InnoDB is enabled but isn’t being used
[!!] Total fragmented tables: 12

——– Security Recommendations ——————————————-
[OK] All database users have passwords assigned

——– Performance Metrics ————————————————-
[–] Up for: 1d 2h 3m 35s (68M q [732.193 qps], 610K conn, TX: 49B, RX: 11B)
[–] Reads / Writes: 76% / 24%
[–] Total buffers: 512.0M global + 2.8M per thread (2000 max threads)
[OK] Maximum possible memory usage: 6.0G (25% of installed RAM)
[OK] Slow queries: 0% (3K/68M)
[OK] Highest usage of available connections: 7% (159/2000)
[OK] Key buffer size / total MyISAM indexes: 230.0M/1.7G
[OK] Key buffer hit rate: 97.8% (11B cached / 257M reads)
[OK] Query cache efficiency: 76.6% (46M cached / 61M selects)
[!!] Query cache prunes per day: 1822075
[OK] Sorts requiring temporary tables: 0% (1K temp sorts / 2M sorts)
[!!] Joins performed without indexes: 63635
[OK] Temporary tables created on disk: 1% (26K on disk / 2M total)
[OK] Thread cache hit rate: 99% (159 created / 610K connections)
[!!] Table cache hit rate: 4% (1K open / 43K opened)
[OK] Open file limit used: 17% (2K/16K)
[OK] Table locks acquired immediately: 99% (36M immediate / 36M locks)

——– Recommendations —————————————————–
General recommendations:
Add skip-innodb to MySQL configuration to disable InnoDB
Run OPTIMIZE TABLE to defragment tables for better performance
Enable the slow query log to troubleshoot bad queries
Increasing the query_cache size over 128M may reduce performance
Adjust your join queries to always utilize indexes
Increase table_cache gradually to avoid file descriptor limits
Variables to adjust:
query_cache_size (> 256M) [see warning above] join_buffer_size (> 256.0K, or always use indexes with joins) table_cache (> 7200)

You see there are plenty of things, the script reports, for the unexperienced most of the information can be happily skipped without need to know the cryptic output, the section of importance here is Recommendations for some clarity, I’ve made this section to show up bold.

The most imporant things from the Recommendations script output is actually the lines who give suggestions for incrase of certain variables for MySQL.In this example case this are the last three variables:
query_cache_size,
join_buffer_size and
table_cache

All of these variables are tuned from /etc/mysql/my.cnf (on Debian) and derivatives distros and from /etc/my.cnf on RHEL, CentOS, Fedora and the other RPM based Linux distributions.

On some custom server installs my.cnf is also located in /usr/local/mysql/etc/ or some other a bit more unstandard location 😉

Anyways now having the Recommendation from the script, it’s necessery to edit my.cnf and try to double the values for the suggested variables.

First, I check if all the suggested variables are existent in my config with grep , if they’re not then I’ll simply add the variable with doubled size of the suggested values.
P.S: One note here is sometimes some values which are configured, are the default value for the MySQL server and does not have a record in my.cnf

debian:~# grep -E 'query_cache_size|join_buffer_size|table_cache' /etc/mysql/my.cnf table_cache = 7200
query_cache_size = 256M
join_buffer_size = 262144

All of my variables are in the config so, now edit my.cnf and set values to:
table_cache = 14400
query_cache_size = 512M
join_buffer_size = 524288

I always, however preserve the old variable’s value, because sometimes raising the value might create problem and the MySql server might be unable to restart properly.
Thus before going with adding the new values make sure the old ones are commented with # , e.g.:
#table_cache = 7200
#query_cache_size = 256M
#join_buffer_size = 262144

I would recommend vim as editor of choice while editing my.cnf as vim completely rox 😉 If you’re not acquainted to vim use nano or mcedit or your editor of choice 😉 :

debian:~# vim /etc/mysql/my.cnf
...

Assuming that the changes are made, it’s time to restart MySQL to make sure the new values are read by the SQL server.

debian:~# /etc/init.d/mysql restart
* Stopping MySQL database server mysqld [ OK ]
* Starting MySQL database server mysqld [ OK ]
Checking for tables which need an upgrade, are corrupt or were not closed cleanly.

If mysql server fails, however to restart, make sure immediately you reverse back the changed variables to the commented values and restart once again via mysql init script to make server load.

Afterwards start adding the values one by one until find out which one is causing the mysqld to fail.

Now the second script (Tuning-primer.sh) is also really nice for MySQL performance optimizations are necessery. However it’s less portable (as it’s written in bash scripting language).
Consider running this script among different GNU/Linux distributious (especially the newer ones) might produce errors.
Tuning-primer.sh requires some minor code changes to be able to run on FreeBSD, NetBSD and OpenBSD *nices.

The way Tuning-primer.sh works is precisely like mysqltuner.pl , one runs it it gives some info about current running MySQL server and based on certain factors gives suggestions on how increasing or decresing certain my.cnf variables could reduce sql query bottlenecks, solve table locking issues as well as generally improve INSERT, UPDATE query times.

Here is an example output from tuning-primer.sh run on another server:

server:~# wget https://www.pc-freak.net/files/Tuning-primer.sh
...
server:~# sh Tuning-primer.sh
-- MYSQL PERFORMANCE TUNING PRIMER --
- By: Matthew Montgomery -

MySQL Version 5.0.51a-24+lenny5 x86_64

Uptime = 8 days 10 hrs 19 min 8 sec
Avg. qps = 179
Total Questions = 130851322
Threads Connected = 1

Server has been running for over 48hrs.
It should be safe to follow these recommendations

To find out more information on how each of these
runtime variables effects performance visit:
http://dev.mysql.com/doc/refman/5.0/en/server-system-variables.html

SLOW QUERIES
Current long_query_time = 1 sec.
You have 16498 out of 130851322 that take longer than 1 sec. to complete
The slow query log is NOT enabled.
Your long_query_time seems to be fine

MAX CONNECTIONS
Current max_connections = 2000
Current threads_connected = 1
Historic max_used_connections = 85
The number of used connections is 4% of the configured maximum.
Your max_connections variable seems to be fine.

WORKER THREADS
Current thread_cache_size = 128
Current threads_cached = 84
Current threads_per_sec = 0
Historic threads_per_sec = 0
Your thread_cache_size is fine

MEMORY USAGE
Tuning-primer.sh: line 994: let: expression expected
Max Memory Ever Allocated : 741 M
Configured Max Memory Limit : 5049 M
Total System Memory : 23640 M

KEY BUFFER
Current MyISAM index space = 1646 M
Current key_buffer_size = 476 M
Key cache miss rate is 1 / 56
Key buffer fill ratio = 90.00 %
You could increase key_buffer_size
It is safe to raise this up to 1/4 of total system memory;
assuming this is a dedicated database server.

QUERY CACHE
Query cache is enabled
Current query_cache_size = 64 M
Current query_cache_used = 38 M
Current Query cache fill ratio = 59.90 %

SORT OPERATIONS
Current sort_buffer_size = 2 M
Current record/read_rnd_buffer_size = 256.00 K
Sort buffer seems to be fine

JOINS
Current join_buffer_size = 128.00 K
You have had 111560 queries where a join could not use an index properly
You have had 91 joins without keys that check for key usage after each row
You should enable “log-queries-not-using-indexes”
Then look for non indexed joins in the slow query log.
If you are unable to optimize your queries you may want to increase your
join_buffer_size to accommodate larger joins in one pass.

TABLE CACHE
Current table_cache value = 3600 tables
You have a total of 798 tables
You have 1904 open tables.
The table_cache value seems to be fine

TEMP TABLES
Current tmp_table_size = 128 M
1% of tmp tables created were disk based
Created disk tmp tables ratio seems fine

TABLE SCANS
Current read_buffer_size = 128.00 K
Current table scan ratio = 797 : 1
read_buffer_size seems to be fine

TABLE LOCKING
Current Lock Wait ratio = 1 : 1782
You may benefit from selective use of InnoDB.

As seen from script output, there are certain variables which might be increased a bit for better SQL performance, one such variable as suggested is key_buffer_size(You could increase key_buffer_size)

Now the steps to make the tunings to my.cnf are precisely the same as with mysqltuner.pl, e.g.:
1. Preserve old config variables which will be changed by commenting them
2. Double value of current variables in my.cnf suggested by script
3. Restart Mysql server via /etc/init.d/mysql restart cmd.
4. If mysql runs fine monitor mysql performance with mtop or mytop for at least 15 mins / half an hour.

if all is fine run once again the tuning scripts to see if there are no further improvement suggestions, if there are more follow the 4 steps described procedure once again.

It’s also a good idea that these scripts are periodically re-run on the server like once per few months as changes in SQL queries amounts and types will require changes in MySQL operational variables.
The authors of these nice scripts has done great job and have saved us a tons of nerves time, downtimes and money spend on meaningless hardware. So big thanks for the awesome scripts guys 😉
Finally after hopefully succesful deployment of changes, enjoy the incresed SQL server performance 😉

How to fix “imapd-ssl: Maximum connection limit reached for ::ffff:xxx.xxx.xxx.xxx” imapd-ssl error

Saturday, May 28th, 2011

One of the mail server clients is running into issues with secured SSL IMAP connections ( he has to use a multiple email accounts on the same computer).
I was informed that part of the email addresses are working correctly, however the newly created ones were failing to authenticate even though all the Outlook Express email configuration was correct as well as the username and password typed in were a real existing credentials on the vpopmail server.

Initially I thought, something is wrong with his newly configured emails but it seems all the settings were perfectly correct!

After a lot of wondering what might be wrong I was dumb enough not to check my imap log files.

After checking in my /var/log/mail.log which is the default log file I’ve configured for vpopmail and some of my qmail server services, I found the following error repeating again and again:

imapd-ssl: Maximum connection limit reached for ::ffff:xxx.xxx.xxx.xxx" imapd-ssl error

where xxx.xxx.xxx.xxx was the email user computer IP address.

This issues was caused by one of my configuration settings in the imapd-ssl and imap config file:

/usr/lib/courier-imap/etc/imapd

In /usr/lib/courier-imap/etc/imapd there is a config segment called
Maximum number of connections to accept from the same IP address

Right below this commented text is the variable:

MAXPERIP=4

As you can see it seems I used some very low value for the maximum number of connections from one and the same IP address.
I suppose my logic to set such a low value was my desire to protect the IMAP server from Denial of Service attacks, however 4 is really too low and causes problem, thus to solve the mail connection issues for the user I raised the MAXPERIP value to 50:

MAXPERIP=50

Now to force the new imapd and imapd-ssl services to reload it’s config I did a restart of the courier-imap, like so:

debian:~# /etc/init.d/courier-imap restart

That’s all now the error is gone and the client could easily configure up to 50 mailbox accounts on his PC 🙂

How to automatically reboot (restart) Debian GNU Lenny / Squeeze Linux on kernel panic, some general CPU overload or system crash

Monday, June 21st, 2010

If you are a system administrator, you have probably wondered at least once ohw to configure your Linux server to automatically reboot itself if it crashes, is going through a mass CPU overload, e.g. the server load average “hits the sky”.
I just learned from a nice article found here that there is a kernel variable which when enabled takes care to automatically restart a crashed server with the terrible Kernel Panic message we all know.

The variable I’m taking about is kernel.panic for instance kernel.panic = 20 would instruct your GNU Linux kernel to automatically reboot if it experiences a kernel panic system crash within a time limit of 20 seconds.

To start using the auto-reboot linux capabilities on a kernel panic occurance just set the variable to /etc/sysctl.conf

debian-server:~# echo 'kernel.panic = 20' >> /etc/sysctl.conf

Now we will also have to enable the variable to start being use on the system, so execute:

debian-server:~# sysctl -p There you go automatic system reboots on kernel panics is now on.
Now to further assure yourself the linux server you’re responsible of will automatically restart itself on a emergency situation like a system overload I suggest you check Watchdog

You might consider checking out this auto reboot tutorial which explains in simple words how watchdog is installed and configured.
On Debian installing and maintaining watchdog is really simple and comes to installing and enabling the watchdog system service, right afteryou made two changes in it’s configuration file /etc/watchdog.conf

To do so execute:

debian-server:~# apt-get install watchdog
debian-server:~# echo "file = /var/log/messages" >> /etc/watchdog.conf
debian-server:~# echo "watchdog-device = /dev/watchdog" >> /etc/watchdog.conf

Well that should be it, you might also need to load some kernel module to monitor your watchdog.
On my system the kernel modules related to watchdog are located in:

/lib/modules/2.6.26-2-amd64/kernel/drivers/watchdog/
If not then you should certainly try the software watchdog linux kernel module called softdog , to do so issue:
debian-server:~# /sbin/modprobe softdog

It’s best if you load the module while the softdog daemon is disabled.
If you consider auto loadig the softdog software watchdog kernel driver you should exec:

debian-server:~# echo 'softdog' >> /etc/modules

Finally a start of the watchdog is necessery:


debian-server:~# /etc/init.d/watchdog start
Stopping watchdog keepalive daemon....
Starting watchdog daemon....

That should be all your automatic system reboots should be now on! 🙂