Posts Tagged ‘proprietary software’

How to install nginx webserver from source on Debian Linux / Install Latest Nginx on Debian

Wednesday, March 23rd, 2011

Nginx install server logo
If you're running a large website consisting of a mixture of php scripts, images and html. You probably have noticed that using just one Apache server to serve all the content is not that efficient

Each Apache child (I assume you're using Apache mpm prefork consumes approximately (20MB), this means that each client connection would consume 20 mb of your server memory.
This as you can imagine is truly a suicide in terms of memory. Each request for a picture, css or simple html file would ask Apache to fork another process and will consume (20mb of extra memory form your server mem capacity)!.

Taking in consideration all this notes and the need for some efficiency here, the administrator should normally think about dividing the processing of the so called static content from the dynamic content served on the server.

Apache is really a nice webserver software but with all the loaded modules to serve dynamic content, for instance php, cgi, python etc., it's becoming not the best solution for handling a (css, javascript, html, flv, avi, mov etc. files).

Even a plain Apache server installation without (libphp, mod_rewrite mod deflate etc.) is still not dealing efficiently enough with the aforementioned static files content

Here comes the question if Apache is not that quick and efficient in serving static files, what then? The answer is caching webserver! By caching the regular static content files, your website visitors will benefit by experiencing shorter webserver responce files in downloading static contents and therefore will generally hasten your website and improve the end user's experience.

There are plenty of caching servers out there, some are a proprietary software and some are free software.

However the three most popular servers out there for static file content serving are:

  • Squid,
  • Varnish
  • Nginx

In this article as you should have already found out by the article title I'll discuss Nginx

You might ask why exactly Nginx and not some of the other twos, well simply cause Squid is too complicated to configure and on the other hand does provide lower performance than Nginx. On the other hand Varnish is also a good solution for static file webserver, but I believe it is not tested enough. However I should mention that my experience with testing varnish on my own home router is quite good by so far.

If you're further interested into varhisn cache I would suggest you checkout www.varhisn-cache.org .

Now as I have said a few words about squid and varhisn let's proceed to the essence of the article and say few words about nginx

Here is a quote describing nginx in a short and good manner directly extracted from nginx.com

nginx [engine x] is a HTTP and reverse proxy server, as well as a mail proxy server written by Igor Sysoev. It has been running for more than five years on many heavily loaded Russian sites including Rambler (RamblerMedia.com). According to Netcraft nginx served or proxied 4.70% busiest sites in April 2010. Here are some of success stories: FastMail.FM, WordPress.com.

By default nginx is available ready to be installed in Debian via apt-get, however sadly enough the version available for install is pretty much outdated as of time of writting the nginx debian version in lenny's deb package repositories is 0.6.32-3+lenny3

This version was release about 2 years ago and is currently completely outdated, therefore I found it is not a good idea to use this old and probably slower release of nginx and I jumped further to install my nginx from source:
Nginx source installation actually is very simple on Linux platforms.

1. As a first step in order to be able to succeed with the install from source make sure your system you have installed the packages:

debian:~# apt-get install libpcre3 libpcre3-dev libpcrecpp0 libssl-dev zlib1g-dev build-essential

2. Secondly download latest nginx source code tarball

Check out on http://nginx.com/download the latest stable release of nginx and further issue the commands below:

debian:~# cd /usr/local/src
debian:/usr/local/src# wget http://nginx.org/download/nginx-0.9.6.tar.gz

3.Unarchive nginx source code

debian:/usr/local/src#tar -zxvvf nginx-0.9.6.tar.gz
...

The nginx server requirements for me wasn't any special so I proceeded and used the nginx ./configure script which is found in nginx-0.9.6

4. Compline nginx server

debian:/usr/local/src# cd nginx-0.9.6
debian:/usr/local/src/nginx-0.9.6# ./configure && make && make install
+ Linux 2.6.26-2-amd64 x86_64
checking for C compiler ... found
+ using GNU C compiler
+ gcc version: 4.3.2 (Debian 4.3.2-1.1)
checking for gcc -pipe switch ... found
...
...

The last lines printed by the nginx configure script are actually the major interesting ones for administration purposes the default complation options in my case were:

Configuration summary
+ using system PCRE library
+ OpenSSL library is not used
+ md5: using system crypto library
+ sha1 library is not used
+ using system zlib library

nginx path prefix: "/usr/local/nginx"
nginx binary file: "/usr/local/nginx/sbin/nginx"
nginx configuration prefix: "/usr/local/nginx/conf"
nginx configuration file: "/usr/local/nginx/conf/nginx.conf"
nginx pid file: "/usr/local/nginx/logs/nginx.pid"
nginx error log file: "/usr/local/nginx/logs/error.log"
nginx http access log file: "/usr/local/nginx/logs/access.log"
nginx http client request body temporary files: "client_body_temp"
nginx http proxy temporary files: "proxy_temp"
nginx http fastcgi temporary files: "fastcgi_temp"
nginx http uwsgi temporary files: "uwsgi_temp"
nginx http scgi temporary files: "scgi_temp"

If you want to setup nginx server to support ssl (https) and for instance install nginx to a different server path you can use some ./configure configuration options, for instance:

./configure –sbin-path=/usr/local/sbin –with-http_ssl_module

Now before you can start the nginx server, you should also set up the nginx init script;

5. Download and set a ready to use script with cmd:

debian:~# cd /etc/init.d
debian:/etc/init.d# wget https://www.pc-freak.net/files/nginx-init-script
debian:/etc/init.d# mv nginx-init-script nginx
debian:/etc/init.d# chmod +x nginx

6. Configure Nginx

Nginx is a really easy and simple server, just like the Russians, Simple but good!
By the way it's interesting to mention nginx has been coded by a Russian, so it's robust and hard as a rock as all the other Russian creations 🙂
Nginx configuration files in a default install as the one in my case are to be found in /usr/local/nginx/conf

In the nginx/conf directory you're about to find the following list of files which concern nginx server configurations:

deiban:/usr/local/nginx:~# ls -1
fastcgi.conf
fastcgi.conf.default
fastcgi_params
fastcgi_params.default
koi-utf
koi-win
mime.types
mime.types.default
nginx.conf
nginx.conf.default
scgi_params
scgi_params.default
uwsgi_params
uwsgi_params.default
win-utf

The .default files are just a copy of the ones without the .default extension and contain the default respective file directives.

In my case I'm not using fastcgi to serve perl or php scripts via nginx so I don't need to configure the fastcgi.conf and fastcgi_params files, the scgi_params and uwsgi_params conf files are actually files which contain nginx configuration directives concerning the use of nginx to process SSI (Server Side Include) scripts and therefore I skip configuring the SSI conf files.
koi-utf and koi-win are two files which usually you don't need to configure and aims the nginx server to support the UTF-8 character encoding and the mime.types conf is a file which has a number of mime types the nginx server will know how to handle.

Therefore after all being said the only file which needs to configured is nginx.conf

7. Edit /usr/local/nginx/conf/nginx.conf

debian:/usr/local/nginx:# vim /usr/local/nginx/conf/nginx.conf

Therein you will find the following default configuration:

#gzip on;

server {
listen 80;
server_name localhost;

#charset koi8-r;

#access_log logs/host.access.log main;

location / {
root html;
index index.html index.htm;
}
#error_page 404 /404.html;

# redirect server error pages to the static page /50x.html
#
error_page 500 502 503 504 /50x.html;
location = /50x.html {
root html;
}

In the default configuration above you need to modify only the above block of code as follows:

server {
listen 80;
server_name yoursitedomain.com;

#charset koi8-r;

#access_log logs/access.log main;

location / {
root /var/www/yoursitedomain.com/html;
index index.html index.htm;
}

Change the yoursitedomain.com and /var/www/yoursitedomain.com/html with your directory and website destinations.

8. Start nginx server with nginx init script

debian:/usr/local/nginx:# /etc/init.d/nginx start
Starting nginx:

This should bring up the nginx server, if something is miss configured you will notice also some error messages, as you can see in my case in above init script output, thanksfully there are no error messages.
Note that you can also start nginx directly via invoking /usr/local/nginx/sbin/nginx binary

To check if the nginx server has properly started from the command line type:

debian:/usr/local/nginx:~# ps ax|grep -i nginx|grep -v grep
9424 ? Ss 0:00 nginx: master process /usr/local/nginx/sbin/nginx
9425 ? S 0:00 nginx: worker process

Another way to check if the web browser is ready to serve your website file conten,t you can directly access your website by pointing your browser to with http://yoursitedomain.com/, you should get your either your custom index.html file or the default nginx greeting Welcome to nginx

9. Add nginx server to start up during system boot up

debian:/usr/local/nginx:# /usr/sbin/update-rc.d -f nginx defaults

That's all now you have up and running nginx and your static file serving will require you much less system resources, than with Apache.
Hope this article was helpful to somebody, feedback on it is very welcome!
Clean slow Windows PC / Laptop from Spyware, Malware, Viruses, Worms and Trojans – Anti-Malware Program Arsenal

Monday, January 26th, 2015

clean-slow-Windows-computer-notebook-laptop-from-malware-spyware-viruses-worms-and-trojans

Malware Bytes is a great tool to clean a PC in a quick and efficient way from Malware /  Spyware that wormed while browsing infectious site on the internet.
But sometimes PCs that has to be fixed are so badly infected with Spyware, Malware and Viruses that even after running Malware Bytes on boot time, left Work or Viruses do automatically download from the Internet or have been polymorphically renamed to a newer one that escapes Malware Bytes badware database and heroistics
Such problematic PCs are usually unmaintained user PCs whose Anti-Virus procetion with Nod32 or Kaspersky licensing has long expired leaving the PC without any mean of protection / PCs with removed Firewall / AV Program (due to Virus or Malware Infection) or on Computers which were used actively to download Cracked Programs, Games – by small kids or PCs used for watching heavily Porn (by teenagers).

Here is a List of Top Iseful FreeWare anti-Malware softwares, you can use in combination with MalwareBytes to (Clean) / Fix a Windows PC that is in almost unsolvable state (and obviously needs re-install) but contains too much software either obsolete or hard (time wasting) to configure:

Below anti-malware goodies helps in “Resurrecting” even the worst infected PC, so I believe every Win Admin should know them well and in computer clubs and university Windows computer networks with Internet it is recommended to check computers at least once a year …

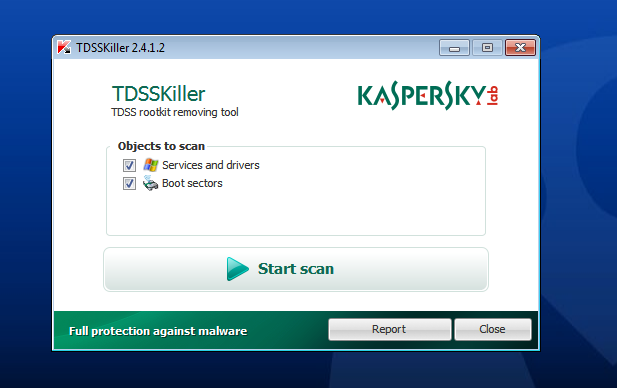
1. Remove Bootkits and Trojans with Kaspersky TDSSKiller

Bootkit is a rootkit which loads when Windows system boots.  To search and destroy bootkits – Download the latest official version of Kaspersky TDSSKiller.

remove-bootkits-and-trojans-with-kaspersky-tdsskiller-screenshot-anti-malware

KASPERSKY TDSSKILLER DOWNLOAD LINK Run Kaspersky (after changing parameters  – enable Detect TDLFS file system) and remove any found infections

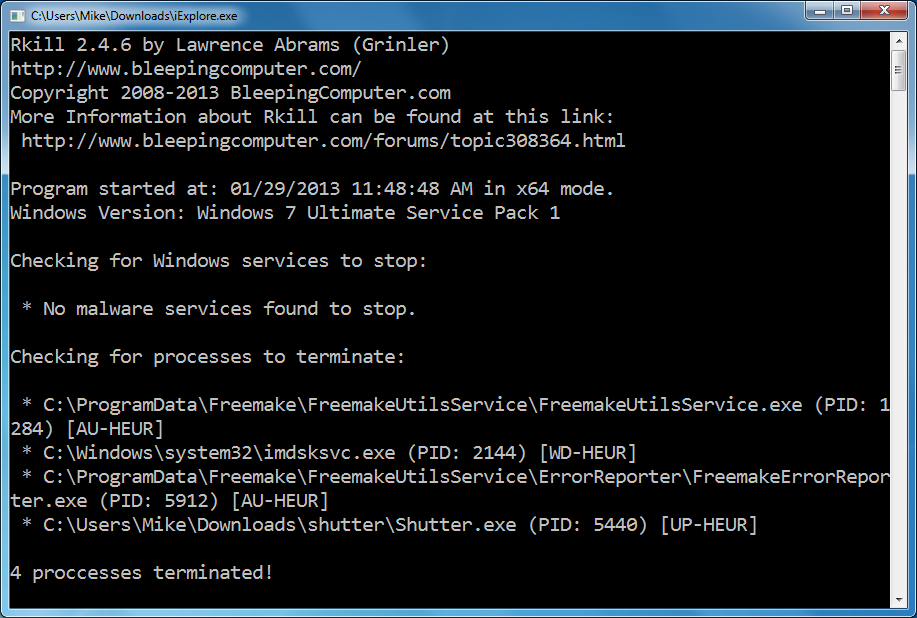
2. Download and use latest official version of RKill to terminate any malicious processes running in background

rkill-terminate-any-malicious-spyware-malware-processes-running-in-background-rkill-logo

Please note that you will have to rename version of RKILL so that malicious software won’t block this utility from running. (link will automatically download RKILL renamed as iExplore.exe)
Double click on iExplore.exe to start RKill and stop any processes associated with Luhe.Sirefef.A.

rkill-terminate-trojan-spyware-processes-windows-xp-7-screenshot

RKill will now start working in the background, please be patient while the program looks for any malicious process and tries to end them.
When the Rkill utility has completed its task, it will generate a log.

Do not reboot your computer after running RKill as the malware programs will start again.

When the Rkill utility has completed its task, it will generate a log. Do not reboot computer after running RKill as the malware programs will start again.

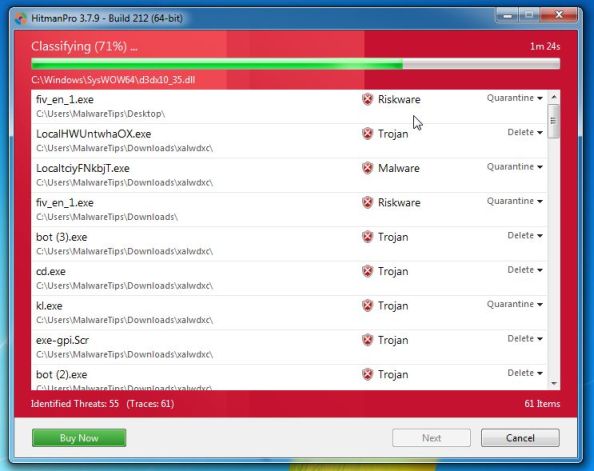
3. Clean (any remaining) malware from your computer with HitmanPro

clean-remaining-malware-from-computer-with-hitmanpro-scanning-screenshot

HITMANPRO DOWNLOAD LINK is here

My Mirror of HitmanPro 3.7 (32 bit) Windows version is here
My Mirror of HitmanPro 3.7 (64 bit) Windows version is here

Because HitmanPro is unfortunately proprietary software, when you run a scan on the computer “Activate free license” button to begin the free 30 days trial, and remove all the malicious files found on your computer.

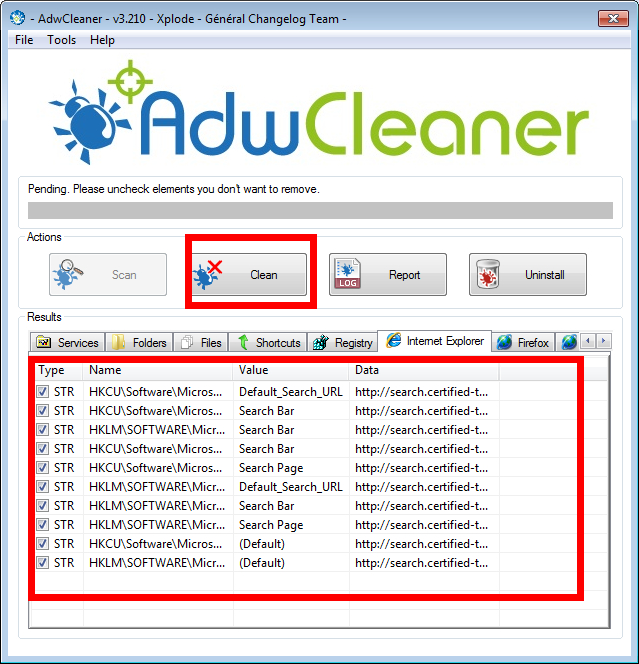
4. Remove Windows adware with AdwCleaner

The AdwCleaner utility will scan your computer and web browser for the malicious files, browser extensions and registry keys, that may have been installed on your computer without your knowledge.

adwcleaner-clean-remove-delete-adware-with-AdwCleaner-found-malware-screenshot

Here isAdwCleaner utility ADWCLEANER DOWNLOAD LINK 
My Download AdwCleaner 4.109 is here

Note that before starting AdwCleaner, close all open programs and internet browsers. After finishing scan AdwCleaner requires a reboot (always backup cause you never know what can happen).

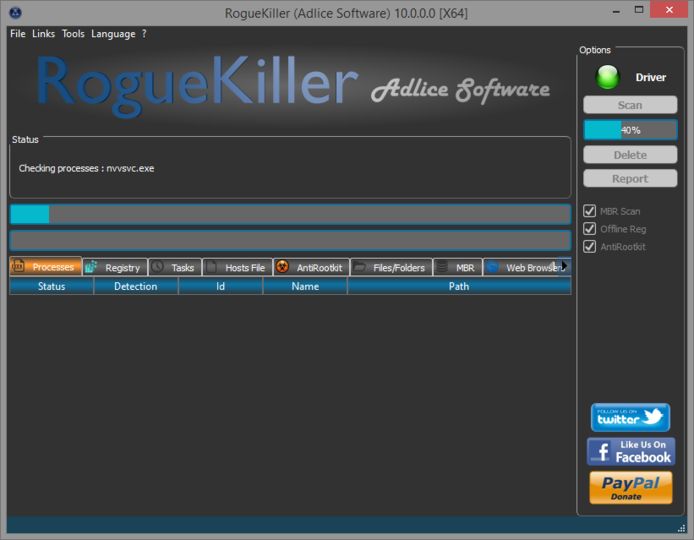
5. Remove any malicious registry keys added by malware with RogueKiller

remove-any-malicious-registry-keys-added-by-malware-with-RogueKiller

RogueKiller is a utility that will scan for the unwanted registry keys and any other malicious files on your computer. It is pretty much like the free software Little Registry Cleaner but it is specialised in removing common malware left junk keys.

download the latest official version of RogueKiller from the below links.

ROGUEKILLER x86 DOWNLOAD LINK (For 32-bit machines)
ROGUEKILLER x64 DOWNLOAD LINK (For 64-bit machines)

Download Mirror link of Roguekiller X86 is here
Download Mirror link of Roguekiller X64 is here

Wait for the Prescan to complete.This should take only a few seconds,  then click on the “Scan” button to perform a system scan. After scan complete delete any found hax0r malicious registries

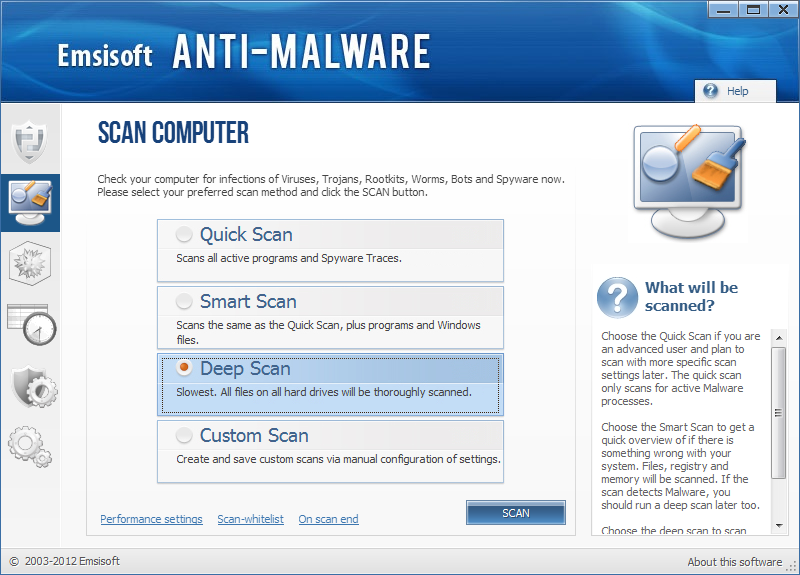
6. Purge any leftover infections on your computer with Emsisoft Anti-Malware

purge-any-left-over-infections-on-your-computer-with-EmsiSoft-anti-malware

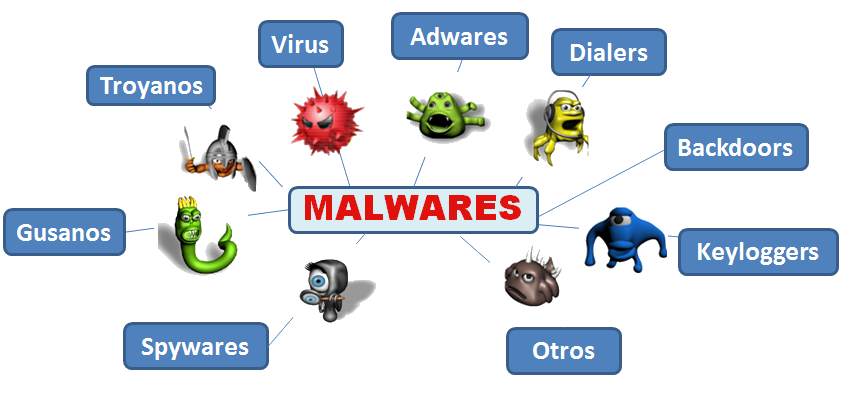
Emsisoft scan (potentially) infected PC for Viruses, Trojans, Spyware, Adware, Worms, Dialers, Keyloggers and other badware.

DOWNLOAD EMSISOFT EMERGENCY KIT HERE  – The link will open in new window tab. Note that EmsiSoftEmergencyKit is huge 168 Mbs!

My mirror of EmsiSoft Emergency kit is here

It is recommended to do the SMART Scan as it is more complete, though if you're in a hurry Quick Scan might also find something ugly. Once Scan completes Quarantine any found infected items.

It is best if all of the 7 Win cleaners are run, e.g.:

(TDSSKiller, RKill, HitmanPro, AdwCleaner, RogueKiller, Little Registry Cleaner  and EmsiSoft) in a consequential order as they're shown in article). Finally a run of Malware Bytes just to make sure nothing has remained is a good idea too.

Hopefully now you should be malware free. If you know other useful Anti-Spyware tools that helped you in case of PC Malware Slowness problems (constant Hard Disk read writes), please drop a comment and I will include them in this list). 
Once badware is removed from your PC or laptop the CPU should no longer show constantly busy with some strange process in taskmgr and notebook should be much more responsive (and if you have power management enabled) it will consume less energy reducing your electricity bills 🙂
 

Any feedback on experience with running above bunch of anti spy programs is also mostly welcome. 

Best Windows tools to Test (Benchmark) Hard Drives, SSD Drives and RAID Storage Controllers

Wednesday, April 23rd, 2014

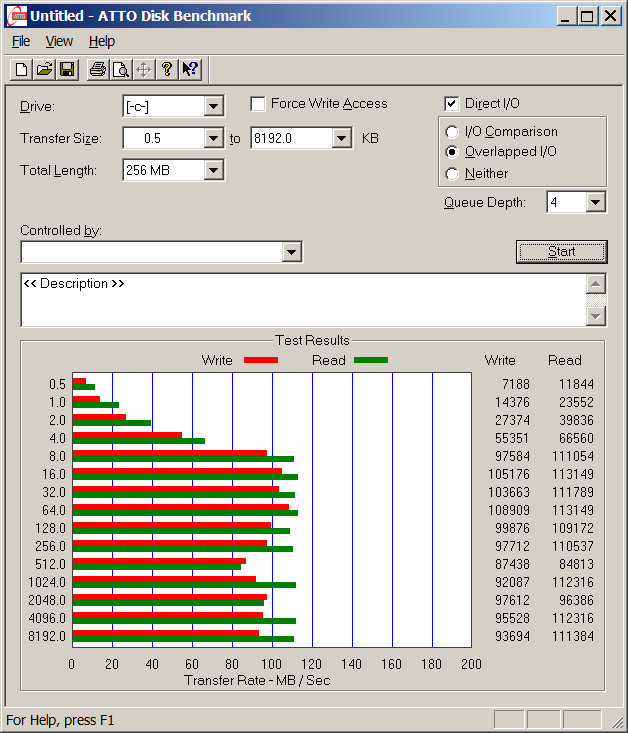
atto-windows-hard-disk-benchmark-freeware-tool-screenshot-check-hard-disk-speed-windows
Disk Benchmarking is very useful for people involved in Graphic Design, 3D modelling, system admins  and anyone willing to squeeze maximum of his PC hardware.

If you want to do some benchmarking on newly built Windows server targetting Hard Disk performance, just bought a new hard SSD (Solid State Drives) and you want to test how well Hard Drive I/O operations behave or you want to see a regular HDD benchmarking of group of MS Windows PCs and plan hardware optiomization, check out ATTO Disk Benchmark.

So why exactly ATTO Benchmark? – Cause it is one of the best Windows Free Benchmark tools on the internet.

ATTO is a widely-accepted Disk Benchmark freeware utility to help measure storage system performance. ATTO though being freeware is among top tools utilized in industry. It is very useful in comparing different Hard Disk vendors speed, measure Windows storage systems performance with various transfer sizes and test lengths for reads and writes.

ATTO Disk Benchmark is used by manufacturers of Hardware RAID controllers, its precious tool to test Windows storage controllers, host bus adapters (HBAs).

Here is ATTO Benchmark tool specifications (quote from their webstie):
 

  • Transfer sizes from 512KB to 8MB
  • Transfer lengths from 64KB to 2GB
  • Support for overlapped I/O
  • Supports a variety of queue depths
  • I/O comparisons with various test patterns
  • Timed mode allows continuous testing
  • Non-destructive performance measurement on formatted drives
  • Transfer sizes from 512KB to 8MB
  • Transfer lengths from 64KB to 2GB
  • Support for overlapped I/O
  • Supports a variety of queue depths
  • I/O comparisons with various test patterns
  • Timed mode allows continuous testing
  • Non-destructive performance measurement on formatted drives
  • – See more at: http://www.attotech.com/disk-benchmark/#sthash.rRlgSTOE.dpuf

Here is mirrored latest version of ATTO Disk for Download. Once you get your HDD statistics you will probably want to compare to other people results. On  TomsHardware's world famous Hardware geek site there are plenty of Hard Drives performance Charts

Of course there are other GUI alternatives to ATTO Benchmark one historically famous is NBench

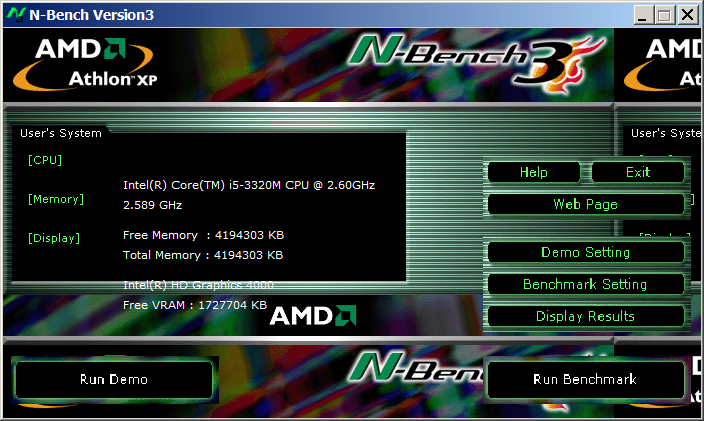
NBench

nbench_benchmark_windows_hard-drive-cpu-and-memory

Nbench is nice little benchmarking program for Windows NT. Nbench reports the following components of performance:

CPU speed: integer and floating operations/sec
L1 and L2 cache speeds: MB/sec
main memory speed: MB/sec
disk read and write speeds: MB/sec

SMP systems and multi-tasking OS efficiency can be tested using up to 20 separate threads of execution.

For Console Geeks or Windows server admins there are also some ports of famous *NIX Hard Disk Benchmarking tools:

NTiogen

NTiogen benchmark was written by Symbios Logic, It's Windows NT port of their popular UNIX benchmark IOGEN. NTIOGEN is the parent processes that spawns the specified number of IOGEN processes that actually do the I/O.
The program will display as output the number of processes, the average response time, the number of I/O operations per second, and the number of KBytes per second. You can download mirror copy of Ntiogen here


There are plenty of other GUI and Console HDD Benchmarking Win Tools, i.e.:

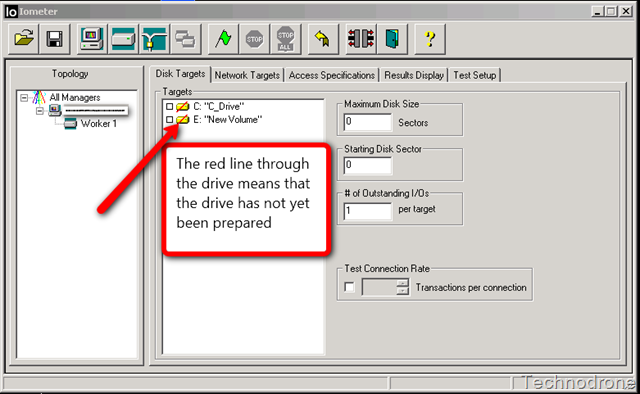
IOMeter (ex-developed by Intel and now abandoned available as open source available on SourceForge)

iometer-benchmark-disk-storage-speed-windows
 

Bench32 – Comprehensive benchmark that measures overall system performance under Windows NT or Windows 95, now obsolete not developed anymore abandoned by producer company.

ThreadMark32 – capable of bench (ex developed and supported by ADAPTEC) but also already unsupported

IOZone – filesystem benchmark tool. The benchmark generates and measures a variety of file operations. Iozone has been ported to many machines and runs under many operating systems.
 

N! B! Important note to make here is above suggested tools will provide you more realistic results than the proprietary vendor tools shipped by your hardware vendor. Using proprietary software produced by a single vendor makes it impossible to analyze and compare different hardwares, above HDD benchmarking tools are for "open systems", e.g. nomatter what the hardware producer is produced results can be checked against each other.
Another thing to consider is even though if you use any of above tools to test and compare two storage devices still results will be partially imaginary, its always best to conduct tests in Real Working Application Environments. If you're planning to launch a new services structure always test it first and don't rely on preliminary returned soft benchmarks.

if you know some other useful benchmarking software i'm missing please share.

Install VMWare tools on Debian and Ubuntu Linux – Enable VMWare Fullscreen and copy paste between OS host and Virtual machine

Wednesday, May 28th, 2014

install-vmware-tools-on-debian-gnu-linux-and-ubuntu-howto

If you need to use Virtual Machine to run some testing on heterogenous Operating Systems and you have chosen VMWare as a Virtual Machine. You will soon notice some of Virtual Machines functionality like copy between host operating system and Virtual Machine, true fullscreen mode and most importantly Copy paste between your host operating system and VMWare is not working. I'm not too much into Virtualization these days so for me it was truely shocking that a proprietary software like VMWare, claimed to be the best and most efficient Virtual Machine nowadays is not supporting copy / paste, fullscreen and copy between host and guest OS.  For those arguing why I'm using VMWare at all as it is proprietary and there is already free software Virtual Machines like QEMU and Oracle's VirtualBox its simply because now I have the chance to install and use VMWare 9 Enterprise on my work place at HP with a free Corporate license – in other words I'm using VMWare just for the sake of educating myself and would always recommend VirtualBox for those looking for good substitute free alternative to VMWare.

Before trying out VMWare, I tried Virtualbox to emulate Linux on my HP work PC running Windows with VirtualBox I was having issues with keyboard not working (because of lack of support of USB, no full screen support and lack of copy / paste between OS-es), I've just recently understood this is not because Virtualbox is bad Virtualization solution but because I forgot to install VirtualBox Oracle VM VirtualBox Extension Pack which allows support for USB, enables copy paste and full screen support. The equivalent to Virtualbox Oracle VM VirtualBox in VMWare world is called VMWare-Tools and once the guest operating system is installed inside VMWare VM, its necessary to install vmware-tools to enable better screen resolution and copy paste.
 

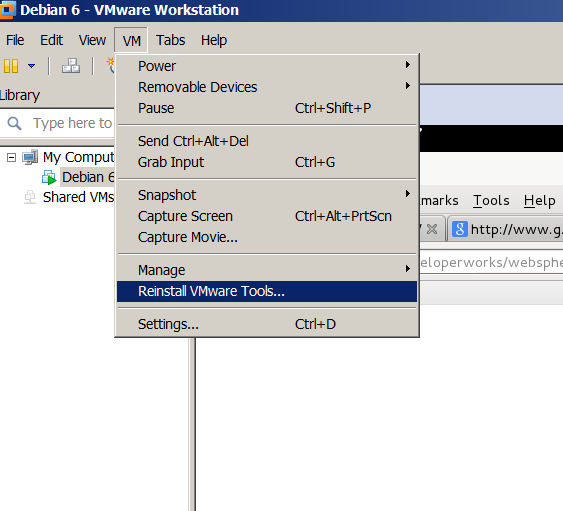
In Windows Virtual Machine installation of vmware-tools is pretty straight forward you go through VMWare's menus


VM -> Install Vmware-tools

install-vmware-tools-on-linux-guest-host-os-debian-redhat-screenshot

follow the instructions and you're done, however as always installing VMWare-tools on Linux is little bit more complicated you need to run few commands from Linux installed inside the Virtual Machine to install vmware-tools. Here is how vmware-tools is installed on Debian / Ubuntu / Linux Mint and rest of Debian based operating systems:

  1. Install Build essentials and gcc You need to have this installed some developer tools as well as GCC compiler in order for the vmware-tools to compile a special Linux kernel module which enables extra support (integration) between the VMWare VM and the installed inside VM Linux distro

apt-get install --yes build-essential gcc
...

2. Install appropriate Linux headers corresponding to current Linux OS installed kernel

apt-get install --yes linux-headers-$(uname -r)
....

3. Mount CD (Virtual) Content to obtain the vmware-tools version for your Linux

Be sure to have first checked from VMWare menus on menus VM -> Intall Vmware Tools
This step is a little bit strange but just do it without too much questioning …


mount /dev/cdrom /mnt/
umount /media/cdrom0/
mount /media/cdrom
mount /dev/sr0 /mnt/cdrom/
mount /dev/sr0 /mnt/


Note that /dev/sr0, might already be mounted and sometimes it might be necessary to unmount it first (don't remember exactly if I unmounted it or not)

4. Copy and Untar VMwareTools-9.2.0-799703.tar.gz

cp -rpf /media/cdrom/VMwareTools-9.2.0-799703.tar.gz /tmp/
cd /tmp/
tar -zxvvf VMwareTools-9.2.0-799703.tar.gz
...

5. Run vmware-tools installer

cd vmware-tools-distrib/
./vmware-install.pl

You will be asked multiple questions you can safely press enter to answer with default settings to all settings, hopefully if all runs okay this will make VMWare Tools installed
 

Creating a new VMware Tools installer database using the tar4 format.
Installing VMware Tools.
In which directory do you want to install the binary files?
[/usr/bin]
What is the directory that contains the init directories (rc0.d/ to rc6.d/)?
[/etc]
What is the directory that contains the init scripts?
[/etc/init.d]
In which directory do you want to install the daemon files?
[/usr/sbin]
In which directory do you want to install the library files?
[/usr/lib/vmware-tools]
The path "/usr/lib/vmware-tools" does not exist currently. This program is
going to create it, including needed parent directories. Is this what you want?
[yes]
In which directory do you want to install the documentation files?
[/usr/share/doc/vmware-tools]
The path "/usr/share/doc/vmware-tools" does not exist currently. This program
is going to create it, including needed parent directories. Is this what you
want? [yes]
The installation of VMware Tools 9.2.0 build-799703 for Linux completed
successfully. You can decide to remove this software from your system at any
time by invoking the following command: "/usr/bin/vmware-uninstall-tools.pl".
Before running VMware Tools for the first time, you need to configure it by
invoking the following command: "/usr/bin/vmware-config-tools.pl". Do you want
this program to invoke the command for you now? [yes]
Initializing…
Making sure services for VMware Tools are stopped.
Stopping VMware Tools services in the virtual machine:
Guest operating system daemon: done
Unmounting HGFS shares: done
Guest filesystem driver: done
[EXPERIMENTAL] The VMware FileSystem Sync Driver (vmsync) is a new feature that creates backups of virtual machines. Please refer to the VMware Knowledge Base for more details on this capability. Do you wish to enable this feature?
[no]
Before you can compile modules, you need to have the following installed…
make
gcc
kernel headers of the running kernel
Searching for GCC…
Detected GCC binary at "/usr/bin/gcc-4.6".
The path "/usr/bin/gcc-4.6" appears to be a valid path to the gcc binary.
Would you like to change it? [no]
Searching for a valid kernel header path…
Detected the kernel headers at "/lib/modules/3.2.0-4-amd64/build/include".
The path "/lib/modules/3.2.0-4-amd64/build/include" appears to be a valid path
to the 3.2.0-4-amd64 kernel headers.
Would you like to change it? [no]
The vmblock enables dragging or copying files between host and guest in a
Fusion or Workstation virtual environment. Do you wish to enable this feature?
[no] yes
make: Leaving directory `/tmp/vmware-root/modules/vmblock-only'

No X install found.
Creating a new initrd boot image for the kernel.
update-initramfs: Generating /boot/initrd.img-3.2.0-4-amd64
Checking acpi hot plug done
Starting VMware Tools services in the virtual machine:
Switching to guest configuration: done
VM communication interface: done
VM communication interface socket family: done
File system sync driver: done
Guest operating system daemon: done
The configuration of VMware Tools 8.6.10 build-913593 for Linux for this
running kernel completed successfully.
You must restart your X session before any mouse or graphics changes take
effect.
You can now run VMware Tools by invoking "/usr/bin/vmware-toolbox-cmd" from the
command line or by invoking "/usr/bin/vmware-toolbox" from the command line
during an X server session.
To enable advanced X features (e.g., guest resolution fit, drag and drop, and
file and text copy/paste), you will need to do one (or more) of the following:
1. Manually start /usr/bin/vmware-user
2. Log out and log back into your desktop session; and,
3. Restart your X session.
Enjoy,
–the VMware team
Found VMware Tools CDROM mounted at /mnt. Ejecting device /dev/sr0 …

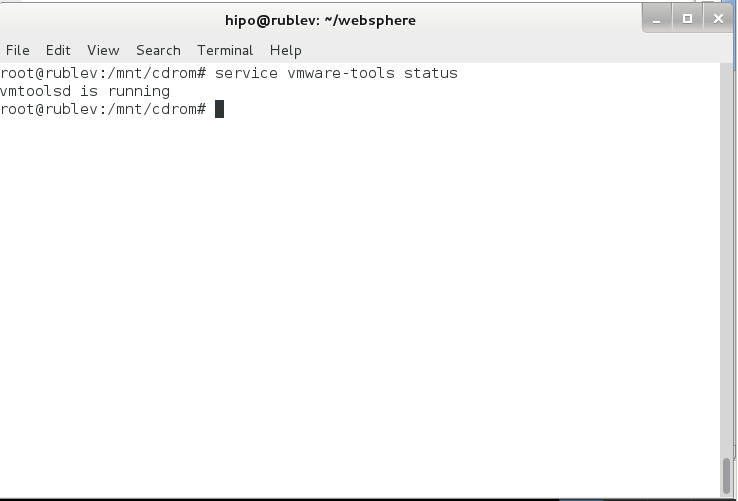
.To make sure vmware-tools compiled modules are loaded into Linux kernel inside VM, restart the Virtual Machine. Once Linux boots again and you login to gnome-terminal to check what is vmware-tools status (e.g. if properly loaded) run:

service vmware-tools status
vmtoolsd is running

install-vmware-tools-on-debian-gnu-linux-and-ubuntu-virtual-machine-screenshot

This method of installing works on Debian 7 (Wheezy) but same steps should work on any Ubuntu and rest of Debian derivatives. For Redhat (RPM) based Linux distributions to install vmware-tools after mounting cdrom drive following above instructions you will have an rpm package instead of .tar.gz archive so all you have to do is install the rpm, e.g. launch smth. like:

rpm -Uhv /mnt/cdrom/VMwareTools-9.2.0-799703.i386.rpm
Cheers 😉

Check your GNU / Linux Desktop for all used “Evil” Non-free ( proprietary ) Software with VRMS

Wednesday, June 26th, 2013

Virtual Richard Stallman VRMS Check what non free software is on your GNU Linux system

If you want to be strict on using only Free Software (in a as in freedom sense), just like Richard Stallman. You will be happy to know there is a tool in Linux called Virtual Richard Stallman ( vrms – report of installed non-free software ) 🙂

On launch vrms simply lists, all software and software documentation installed on Debian GNU / Linux  that is not 100% free software licenses / GPL compatbile. This is software installed via non-free  package Debian repositories or somehow not sticking to the standards of Debian Free Software Guidelines. Of course living with 100% free software is only for the hard core free software evangelists and rarely there is someone who can use computer on daily basis without some bits of proprietary software like flashplugin-nonfree, Skype rar, unrar. I tried for a while living on only 100% free software but didn't succeeded cause some non-free software is still a must to be able to not detach from "Digital Society". Living on only free software is not easy especially if you want to have normal multimedia  stuff on Desktop. Anyways even if you don't plan to purge your non-free software vrms is useful to list what free-software is installed on PC.

noah:~# apt-cache show vrms|grep -i description

Description-en: virtual Richard M. Stallman
 The vrms program will analyze the set of currently-installed packages
 on a Debian-based system, and report all of the packages from the
 non-free and contrib trees which are currently installed.
 .

Install vmrs with:

noah:~# apt-get install --yes vrms


Reading package lists… Done
Building dependency tree      
Reading state information… Done
The following packages were automatically installed and are no longer required:
  liboggkate1 xulrunner-10.0
Use 'apt-get autoremove' to remove them.
The following NEW packages will be installed:
  vrms
0 upgraded, 1 newly installed, 0 to remove and 101 not upgraded.
Need to get 0 B/13.0 kB of archives.
After this operation, 102 kB of additional disk space will be used.
Retrieving bug reports… Done
Parsing Found/Fixed information… Done
Selecting previously unselected package vrms.
(Reading database … 226672 files and directories currently installed.)
Unpacking vrms (from …/apt/archives/vrms_1.16_all.deb) …
Processing triggers for man-db …
Setting up vrms (1.16) …

  Below is a list of all non-free software installed on my Debian 7 Thinkpad:

noah:~# vrms

                Non-free packages installed on noah

acroread                            Adobe Acrobat Reader: Portable Document Format file vi
acroread-data                       data files for acroread
acroread-dictionary-en              English dictionary for for acroread
acroread-escript                    Adobe EScript Plug-In
acroread-l10n-en                    English language package for acroread
firmware-iwlwifi                    Binary firmware for Intel PRO/Wireless 3945 and 802.11
frogatto-data                       2D platformer game starring a quixotic frog
mame                                Multiple Arcade Machine Emulator (MAME)
mame-tools                          Tools for MAME and MESS
mess                                Multi Emulator Super System (MESS)
mess-data                           Data files for the Multi Emulator Super System (MESS)
mozilla-acroread                    Adobe Acrobat(R) Reader plugin for mozilla / konqueror
nikto                               web server security scanner
opera                               Fast and secure web browser and Internet suite
rar                                 Archiver for .rar files
skype                               Skype
teamviewer                          TeamViewer (Remote Control Application)
unrar                               Unarchiver for .rar files (non-free version)
xmame-tools                         Transitional package for mame-tools

                Contrib packages installed on noah

cbedic                              Text-mode Bulgarian/English Dictionary
dosemu                              DOS Emulator for Linux
flashplugin-nonfree                 Adobe Flash Player – browser plugin
frogatto                            2D platformer game starring a quixotic frog
gnome-video-arcade                  Simple MAME frontend
mess-desktop-entries                Desktop entries for MESS ROMs
ttf-mscorefonts-installer           Installer for Microsoft TrueType core fonts
winetricks                          package manager for WINE to install software easily

     Contrib packages with status other than installed on noah

gxmame                              ( dei)  GTK XMame frontend

  19 non-free packages, 0.8% of 2531 installed packages.
  9 contrib packages, 0.4% of 2531 installed packages.


If you want to go the Stallman way and be a 100% Free Software user, Go free and purge all "evil" non-free software  🙂 issue:

# for i in $(vrms -q|grep -v 'Contrib packages'|grep -v 'Non-free'|awk '{ print $1 }' | awk 'NF'); \
do \
apt-get remove --yes $i; dpkg --purge $i; done


For the School-examination

Thursday, January 31st, 2008

Tell me which ideotic government would create a site based on php and would make the serverunder Windows?

Just Guess ours the Bulgarian ministry of Science and Knowledge has started a new site dedicated to helping graduating school pupils with the Future School-examinationthey have to make.

It’s pretty easy to see that just observe:

jericho% telnet zamaturite.bg 80

Trying 212.122.183.208…

Connected to zamaturite.bg.
Escape character is ‘^]’.
HEAD / HTTP/1.0HTTP/1.1 200 OK
Connection: close
Expires: Thu, 19 Nov 1981 08:52:00 GMT
Date: Wed, 30 Jan 2008 19:10:18 GMT
Content-Type: text/html; charset=UTF-8Server: Apache/2.2.6 (Win32) PHP/5.2.5X-Powered-By: PHP/5.2.5Set-Cookie: PHPSESSID=fn5jtjbet7clrapi0a5e5kgvt7; path=/
Cache-Control: no-store, no-cache, must-revalidate, post-check=0, pre-check=0
Pragma: no-cache
Keep-Alive: timeout=5, max=100
Connection closed by foreign host.
jericho%

Just great our Bulgarian government spend money on buying proprietary software OS to run a Free Software based solution.

This example is pretty examplary of what our country looks like. Sad …

END—–

Upgrading Skype 2.0 to Skype 2.2 beta on Debian GNU / Linux – Skype Mic hell

Saturday, December 31st, 2011

Making Skype work with Alsa on Debian GNU / Linux

Though, I'm GNU / Linux user for many years now. I have to say, everything is not so perfect as many people present it.
Configuring even simple things related to multimedia on Linux is often a complete nightmare.
An example, today I've decided to upgrade my 32 bit Skype version 2.0 beta for Linux to 64 bit Skype 2.2 beta .
The reason I was motivated to upgrade skype was basicly 2.

a) My Skype run through 32 bit binary emulation with /usr/bin/linux32

b) I had issues with my skype if someone give me a Skype Call, while I have a flash video or some other stream in Browser (let's say Youtube).
Actually being unable to receive a skype call or initiate one while I have some kind of music running in the background or just some kind of Youtube video paused was really annoying. Hence until now, everytime I wanted to speak over skype I had to close all Browser windows or tabs that are using my sound card and then restart my Skype program ….

Just imagine how ridiculous is that especially for a modern Multimedia supporting OS as Linux is. Of course the problems, I've experienced wasn't directly a problem of Linux. The problems are caused by the fact I have to use the not well working proprietary software version of Skype on my Debian GNU / Linux.
I would love to actually boycott Skype as RMS recommends, but unfortunately until now I can't, since many of my friends as well as employers use Skype to connect with me on daily basis.
So in a way I had to migrate to newer version of skype in order to make my Linux experience a bit more desktop like …

Back to the my skype 2.0 to 2.2. beta upgrade story, the overall Skype upgrade procedure was easy and went smootlhy, setting correct capturing later on however was a crazy task ….
Here is the step by step to follow to make my upgraded skype and internal notebook mic play nice together:

1. Download 64 bit Skype for Debian from skype.com

For the sake of preservation in case it disappears in future, I've made a mirror of skype for debian you can download here
My upgrade example below uses directly the 64 bit Skype 2.2beta binary mirror:

Here are the cmds once can issue if he has to upgrade to 2.2beta straight using my mirrored skype:

debian:~# wget https://www.pc-freak.net/files/skype-debian_2.2.0.35-1_amd64.deb
...

2. Remove the old version of skype

In my case I have made my previous skype installation using .tar.bz2 archive and not a debian package, however for some testing I also had a version of skype 2.0beta installed as a deb so for the sake of clarity I removed the existing skype deb install:

debian:~# dpkg -r skype
...

3. Install skype-debian_2.2.0.35-1_amd64.deb downloaded deb

debian:~# dpkg -i skype-debian_2.2.0.35-1_amd64.deb
...

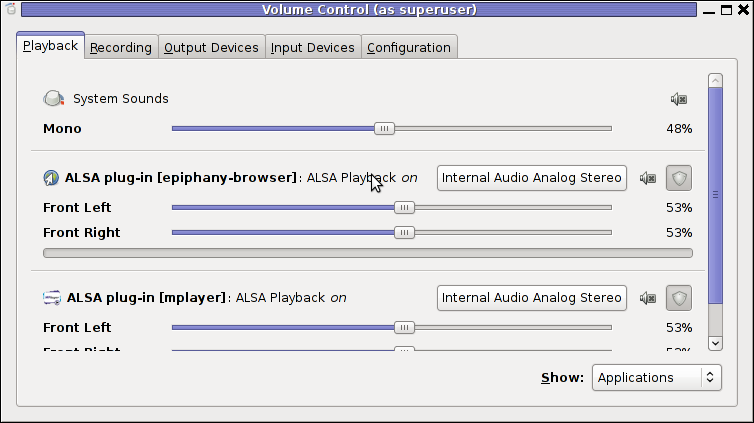
After installing skype, I installed pavucontrol A volume control for the PulseAudio sound server

4. Install pavucontrol

debian:~# apt-get install pavucontrol

PavUcontrol PulseAudio mixer screenshot

Pavucontrol has plenty of sound configurations and enables the user to change many additional settings which cannot be tuned in alsamixer

pavucontrol was necessery to play with until I managed to make my microphone able to record.

5. Build and install latest Debian (Testing) distribution alsa driver

debian:~# aptitude install module-assistant
debian:~# m-a prepare
debian:~# aptitude -t testing install alsa-source
debian:~# m-a build alsa
debian:~# m-a install alsa
debian:~# rmmod snd_hda_intel snd_pcm snd_timer snd soundcore snd_page_alloc
debian:~# modprobe snd_hda_intel
debian:~# echo 'options snd-hda-intel model=auto' >> /etc/modprobe.d/alsa-base.conf

In my case removing the sound drivers and loading them once again did not worked, so I had to reboot my system before the new compiled alsa sound modules gets loaded …
The last line echo 'options snd-hda-intel model=auto' … was necessery for my Thinkpard r61 Intel audio to work out. For some clarity my exact sb model is:

debian:~$ lspci |grep -i audio
00:1b.0 Audio device: Intel Corporation 82801H (ICH8 Family) HD Audio Controller (rev 03)

For other notebooks with different sound drivers echo 'options snd-hda-intel model=auto' … should be omitted.

6. Tune microphone and sound settings in alsamixer

debian:~$ alsamixer

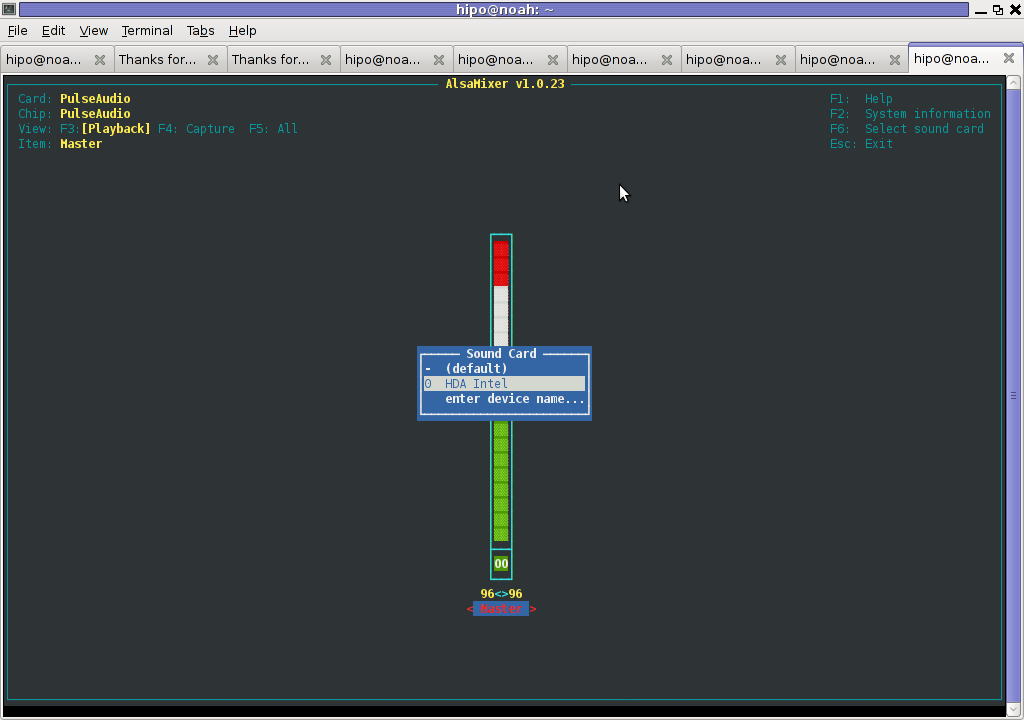
Alsamixer Select Soundcard Debian Linux Screenshot
Right after launching alsamixer I had to press F6: Select Sound Card and choose my sound card (0 HDA Intel).

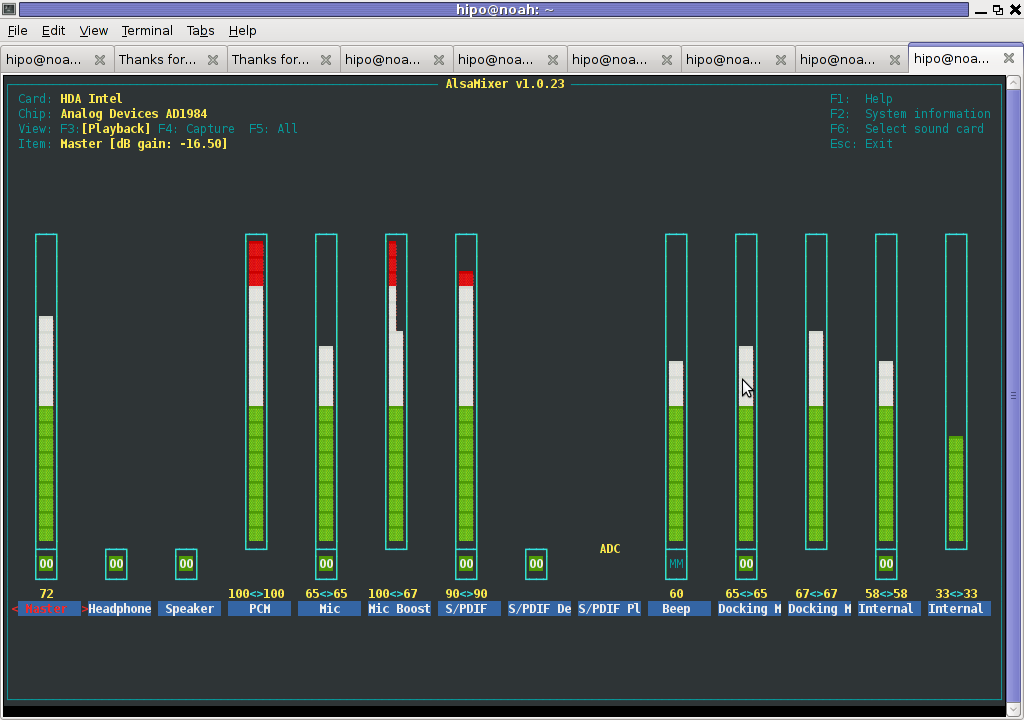
Following my choice I unmuted all the microphones and enabled Microphone Boost as well as did some adjustments to the MIC volume level.

Alsamixer My Intel SoundCard Debian Linux

Setting proper MIC Volume levels is absolutely necessery, otherwise there is a constant noise getting out of the speakers …

7. Use aumix to set some other sound settings

For some unclear reasons, besides alsamixer , I often had to fix stuff in aumix . Honestly I don't understand where exactly aumix fits in the picture with Alsa and my loaded alsa sound blaster module?? If someone can explain I'll be thankful.

Launch aumix to further adjust some sound settings …

debian:~$ aumix

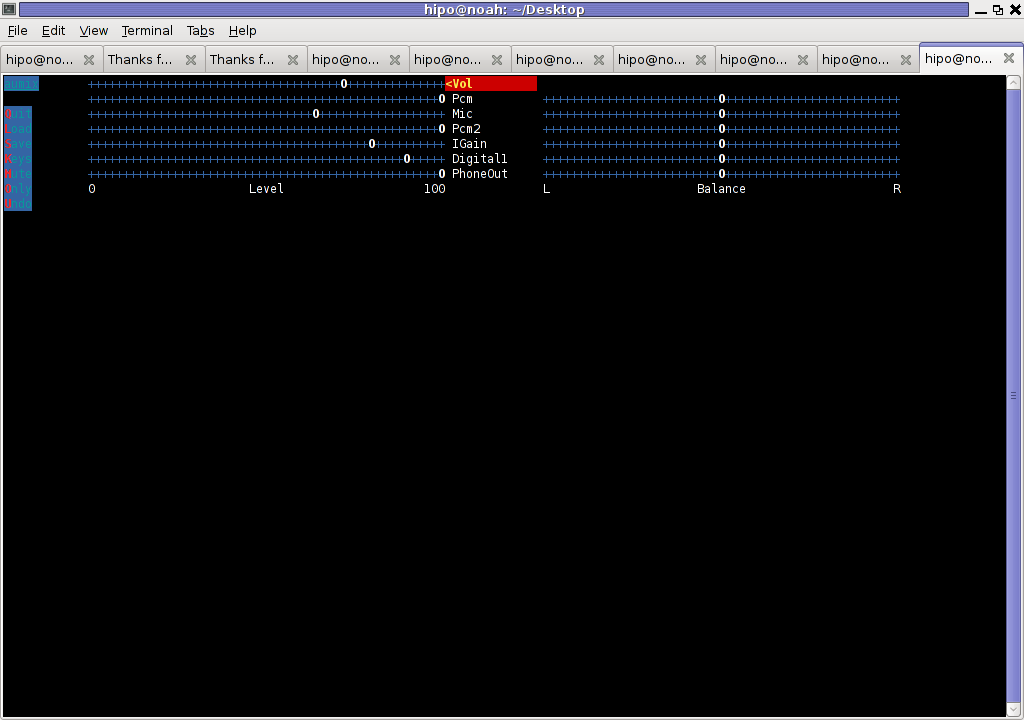
Aumix Debian GNU Linux Squeeze Screenshot

In above screenshot you see, my current aumix settings which works okay with mic and audio output.

9. Test Microphone the mic is capturing sounds correctly

Set ~/.asoundrc configuration for Skype

Edit ~/.asoundrc and put in:

pcm.pulse {
type pulse
}
ctl.pulse {
type pulse
}
pcm.!default {
type pulse
}
ctl.!default {
type pulse
}
pcm.card0 {
type hw
card 0
}
ctl.card0 {
type hw
card 0
}
pcm.dsp0 { type plug slave.pcm "hw:0,0" }
pcm.dmixout {
# Just pass this on to the system dmix
type plug
slave {
pcm "dmix"
}
}
pcm.skype {
type asym
playback.pcm "skypeout"
capture.pcm "skypein"
}
pcm.skypein {
# Convert from 8-bit unsigned mono (default format set by aoss when
# /dev/dsp is opened) to 16-bit signed stereo (expected by dsnoop)
#
# We cannot just use a "plug" plugin because although the open will
# succeed, the buffer sizes will be wrong and we will hear no sound at
# all.
type route
slave {
pcm "skypedsnoop"
format S16_LE
}
ttable {
0 {0 0.5}
1 {0 0.5}
}
}
pcm.skypeout {
# Just pass this on to the system dmix
type plug
slave {
pcm "dmix"
}
}
pcm.skypedsnoop {
type dsnoop
ipc_key 1133
slave {
# "Magic" buffer values to get skype audio to work
# If these are not set, opening /dev/dsp succeeds but no sound
# will be heard. According to the ALSA developers this is due
# to skype abusing the OSS API.
pcm "hw:0,0"
period_size 256
periods 16
buffer_size 16384
}
bindings {
0 0
}
}
I'm not 100% percent if putting those .asoundrc configurations are necessery. I've seen them on archlinux's wiki as a perscribed fix to multiple issues with Skype sound in / out.

Onwardds, for the sake of test if my sound settings set in pavucontrol enables the internal mic to capture sound I used two programs:

1. gnome-sound-recorder
2. arecord

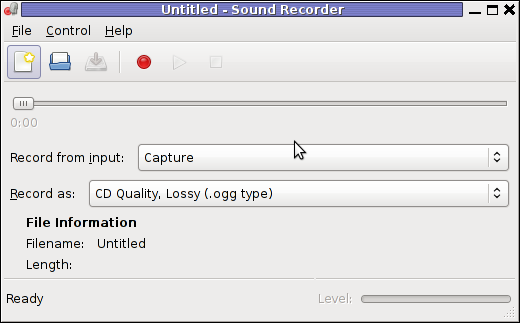
gnome-sound-recorder GNU / Linux Screenshot
gnome-sound-recorder

gnome-sound-recorder is probably used by most GNOME users, though I'm sure Linux noviced did not play with it yet.

arecord is just a simple console based app to capture sound from the microphone. To test if the microphone works I captured a chunk of sounds with cmd:

debian:~$ arecord cow.wav
Recording WAVE 'cow.wav' : Unsigned 8 bit, Rate 8000 Hz, Mono

Later on I played the file with aplay (part of alsa-utils package in Debian), to check if I'll hear if mic succesfully captured my voice, e.g.:

debian:~$ play cow.wav
cow.wav:
File Size: 22.0k Bit Rate: 64.1k
Encoding: Unsigned PCM
Channels: 1 @ 8-bit
Samplerate: 8000Hz
Replaygain: off
Duration: 00:00:02.75
In:100% 00:00:02.75 [00:00:00.00] Out:22.0k [-=====|=====-] Clip:0
Done.

By the way, the aplay ASCII text equailizer is really awesome 😉 aplay is also capable of playing (Ogg Vorbis .ogg) free sound format.

Further on, I launched the new installed version of skype and tested Skype Calls (Mic capturing), with Skype Echo / Sound Test Service
I'll be glad to hear if this small article, helped anybody to fix any skype Linux related issues ?. I would be happy to hear also from people who had similar issues with a different fixes for skype on Linux.
Its also interesting to hear from Ubuntu and other distributions users if following this tutorial had somehow helped in resolving issues with Skype mic.

Little Registry Cleaner (Free Software / Open Source Windows XP Registry Cleaner)

Saturday, December 17th, 2011

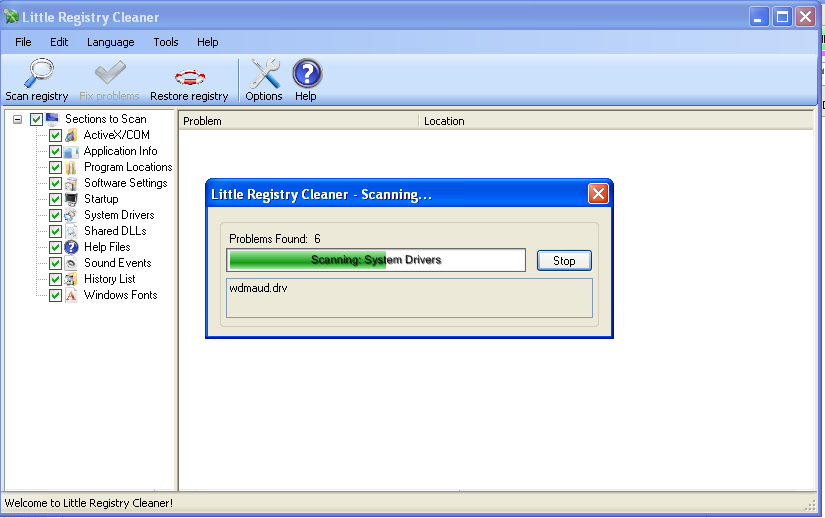
Little Registry Cleaner - Free and Open Source Software Windows XP Registry cleaner / Alternative to Registry Booster
Have you ever wondered, if there is a free (open source) software that could fix Windows XP registry irregularities e.g. (obsolete or unwanted items that build up in the registry over time.)?

I did not either until now, however when I had to fix, few Windows XP computers which was not maintained for a long time fixing the Windows registry was necessery to make the sluggerish computers improve their overall stability and performance.

The reasons of the slowness in computers who run for a long time by users who does not have a "computer culture" are obvious.
Windows programs which has incorrectly placed registry records withint the Windows registry database, Programs which on Uninstall / Removal left behind a lot of registry records just to hang around because of impotent (coders), or records created on purpose on program uninstall to intentionally further track the user behavior etc.
Other reasons why Windows registry gots bloated with time, are due to Malware or polymorphic Viruses which load them selves everytime on Windows load using some obscure registry records.

Though I'm not a big proprietary software lover still my job as a system administrator , enforces me to fix some broken Windowses.
I haven't fixed Windows machines for a long time, so my memories on programs that clean up registry are from my young years.

The software, I've used before to fix Windows 2000 / XP Registry was:

1. Registry Booster

From my current perspective of a free software hobbyist / evangelist it was important for me to clean up the Windows PCs with a program that is Free or Open Source Software.
When I'm asked to fix some Windows computer I always do my best to make most of the programs that roll on the PC to be FOSS.

Using FOSS instead of downloading from torrents, some cracked software has multiple benefits.

1. Usually Free Software is more stable and more robust2. FOSS software for Windows usually does not come with Malware / Spyware as many of the cracked proprietary software

3. Free and Open Source Programs are simplistic in interface and way of use

A bit of research if there is a Free (Open Source) Software immediately lead me to a program called Little Registry Cleaner
You can see a screenshot of the program in the beginning of the article, the program is very easy to install and use and uses some .NET framework classes so right before installing it installs .NET library (code).

The use results of Little Registry Cleaner were amazing. Even though it is a free software the program found and fixed more registry problems than its competitor Windows Registry Booster! 😉