Posts Tagged ‘proxy’

Adding proxy to yum repository on Redhat / Fedora / CentOS and other RPM based Linux distributions, Listing and enabling new RPM repositories

Tuesday, September 7th, 2021

yum-add-proxy-host-for-redhat-linux-centos-list-rpm-repositories-enable-disable-repositories

Sometimes if you work in a company that is following PCI standards with very tight security you might need to use a custom company prepared RPM repositories that are accessible only via a specific custom maintained repositories or alternatively you might need the proxy node  to access an external internet repository from the DMZ-ed firewalled zone where the servers lays .
Hence to still be able to maintain the RPM based servers up2date to the latest security patches and install software with yumone very useful feature of yum package manager is to use a proxy host through which you will reach your Redhat Package Manager files  files.

1. The http_proxy and https_proxy shell variables 

To set  a proxy host you need to define there the IP / Hostname or the Fully Qualified Domain Name (FQDN).

By default "http_proxy and https_proxy are empty. As you can guess https_proxy is used if you have a Secure Socket Layer (SSL) certificate for encrypting the communication channel (e.g. you have https:// URL).

[root@rhel: ~]# echo $http_proxy
[root@rhel: ~]#

2. Setting passwordless or password protected proxy host via http_proxy, https_proxy variables

There is a one time very straight forward to configure proxying of traffic via a specific remote configured server with server bourne again  shell (BASH)'s understood variables:
 

a.) Set password free open proxy to shell environment.

[root@centos: ~]# export https_proxy="https://remote-proxy-server:8080"


Now use yum as usual to update the available installabe package list or simply upgrade to the latest packages with lets say:

[root@rhel: ~]# yum check-update && yum update

b.) Configuring password protected proxy for yum

If your proxy is password protected for even tigher security you can provide the password on the command line as well.

[root@centos: ~]# export http_proxy="http://username:pAssW0rd@server:port/"

Note that if you have some special characters you will have to pass the string inside single quotes or escape them to make sure the password will properly handled to server, before trying out the proxy with yum, echo the variable.

[root@centos: ~]# export http_proxy='http://username:p@s#w:E@192.168.0.1:3128/'
  [root@centos: ~]# echo $http_proxy
http://username:p@s#w:E@server:port/

Then do whatever with yum:

[root@centos: ~]# yum check-update && yum search sharutils


If something is wrong and proxy is not properly connected try to reach for the repository manually with curl or wget

[root@centos: ~]# curl -ilk http://download.fedoraproject.org/pub/epel/7/SRPMS/ /epel/7/SRPMS/
HTTP/1.1 302 Found
Date: Tue, 07 Sep 2021 16:49:59 GMT
Server: Apache
X-Frame-Options: SAMEORIGIN
X-Xss-Protection: 1; mode=block
X-Content-Type-Options: nosniff
Referrer-Policy: same-origin
Location: http://mirror.telepoint.bg/epel/7/SRPMS/
Content-Type: text/plain
Content-Length: 0
AppTime: D=2264
X-Fedora-ProxyServer: proxy01.iad2.fedoraproject.org
X-Fedora-RequestID: YTeYOE3mQPHH_rxD0sdlGAAAA80
X-Cache: MISS from pcfreak
X-Cache-Lookup: MISS from pcfreak:3128
Via: 1.1 pcfreak (squid/4.6)
Connection: keep-alive


Or if you need, you can test the user, password protected proxy with wget as so:

[root@centos: ~]# wget –proxy-user=USERNAME –proxy-password=PASSWORD http://your-proxy-domain.com/optional-rpms/


If you have lynx installed on the machine you can do the remote proxy successful authentication check with it with less typing:

[root@centos: ~]# lynx -pauth=USER:PASSWORD http://proxy-domain.com/optional-rpm/


3. Making yum proxy connection permanent via /etc/yum.conf


Perhaps the easiest and quickest way to add the http_proxy / https_proxy configured is to store it to automatically load on each server ssh login in your admin user (root) in /root/.bashrc or /root/.bash_profile or in the global /etc/profile or /etc/profile.d/custom.sh etc.

However if you don't want to have hacks and have more cleanness on the systems, the recommended "Redhat way" so to say is to store the configuration inside /etc/yum.conf

To do it via /etc/yum.conf you have to have some records there like:

# The proxy server – proxy server:port number 
proxy=http://mycache.mydomain.com:3128 
# The account details for yum connections 
proxy_username=yum-user 
proxy_password=qwerty-secret-pass

4. Listing RPM repositories and their state

As I had to install sharutils RPM package to the server which contains the file /bin/uuencode (that is provided on CentOS 7.9 Linux from Repo: base/7/x86_64 I had to check whether the repository was installed on the server.

To get a list of all yum repositories avaiable 

[root@centos:/etc/yum.repos.d]# yum repolist all
Loaded plugins: fastestmirror
Loading mirror speeds from cached hostfile
 * base: centos.telecoms.bg
 * epel: mirrors.netix.net
 * extras: centos.telecoms.bg
 * remi: mirrors.netix.net
 * remi-php74: mirrors.netix.net
 * remi-safe: mirrors.netix.net
 * updates: centos.telecoms.bg
repo id                                repo name                                                                         status
base/7/x86_64                          CentOS-7 – Base                                                                   enabled: 10,072
base-debuginfo/x86_64                  CentOS-7 – Debuginfo                                                              disabled
base-source/7                          CentOS-7 – Base Sources                                                           disabled
c7-media                               CentOS-7 – Media                                                                  disabled
centos-kernel/7/x86_64                 CentOS LTS Kernels for x86_64                                                     disabled
centos-kernel-experimental/7/x86_64    CentOS Experimental Kernels for x86_64                                            disabled
centosplus/7/x86_64                    CentOS-7 – Plus                                                                   disabled
centosplus-source/7                    CentOS-7 – Plus Sources                                                           disabled
cr/7/x86_64                            CentOS-7 – cr                                                                     disabled
epel/x86_64                            Extra Packages for Enterprise Linux 7 – x86_64                                    enabled: 13,667
epel-debuginfo/x86_64                  Extra Packages for Enterprise Linux 7 – x86_64 – Debug                            disabled
epel-source/x86_64                     Extra Packages for Enterprise Linux 7 – x86_64 – Source                           disabled
epel-testing/x86_64                    Extra Packages for Enterprise Linux 7 – Testing – x86_64                          disabled
epel-testing-debuginfo/x86_64          Extra Packages for Enterprise Linux 7 – Testing – x86_64 – Debug                  disabled
epel-testing-source/x86_64             Extra Packages for Enterprise Linux 7 – Testing – x86_64 – Source                 disabled
extras/7/x86_64                        CentOS-7 – Extras                                                                 enabled:    500
extras-source/7                        CentOS-7 – Extras Sources                                                         disabled
fasttrack/7/x86_64                     CentOS-7 – fasttrack                                                              disabled
remi                                   Remi's RPM repository for Enterprise Linux 7 – x86_64                             enabled:  7,229
remi-debuginfo/x86_64                  Remi's RPM repository for Enterprise Linux 7 – x86_64 – debuginfo                 disabled
remi-glpi91                            Remi's GLPI 9.1 RPM repository for Enterprise Linux 7 – x86_64                    disabled
remi-glpi92                            Remi's GLPI 9.2 RPM repository for Enterprise Linux 7 – x86_64                    disabled
remi-glpi93                            Remi's GLPI 9.3 RPM repository for Enterprise Linux 7 – x86_64                    disabled
remi-glpi94                            Remi's GLPI 9.4 RPM repository for Enterprise Linux 7 – x86_64                    disabled
remi-modular                           Remi's Modular repository for Enterprise Linux 7 – x86_64                         disabled
remi-modular-test                      Remi's Modular testing repository for Enterprise Linux 7 – x86_64                 disabled
remi-php54                             Remi's PHP 5.4 RPM repository for Enterprise Linux 7 – x86_64                     disabled
remi-php55                             Remi's PHP 5.5 RPM repository for Enterprise Linux 7 – x86_64                     disabled
remi-php55-debuginfo/x86_64            Remi's PHP 5.5 RPM repository for Enterprise Linux 7 – x86_64 – debuginfo         disabled
!remi-php56                            Remi's PHP 5.6 RPM repository for Enterprise Linux 7 – x86_64                     disabled
remi-php56-debuginfo/x86_64            Remi's PHP 5.6 RPM repository for Enterprise Linux 7 – x86_64 – debuginfo         disabled
remi-php70                             Remi's PHP 7.0 RPM repository for Enterprise Linux 7 – x86_64                     disabled
remi-php70-debuginfo/x86_64            Remi's PHP 7.0 RPM repository for Enterprise Linux 7 – x86_64 – debuginfo         disabled
remi-php70-test                        Remi's PHP 7.0 test RPM repository for Enterprise Linux 7 – x86_64                disabled
remi-php70-test-debuginfo/x86_64       Remi's PHP 7.0 test RPM repository for Enterprise Linux 7 – x86_64 – debuginfo    disabled
remi-php71                             Remi's PHP 7.1 RPM repository for Enterprise Linux 7 – x86_64                     disabled
remi-php71-debuginfo/x86_64            Remi's PHP 7.1 RPM repository for Enterprise Linux 7 – x86_64 – debuginfo         disabled
remi-php71-test                        Remi's PHP 7.1 test RPM repository for Enterprise Linux 7 – x86_64                disabled
remi-php71-test-debuginfo/x86_64       Remi's PHP 7.1 test RPM repository for Enterprise Linux 7 – x86_64 – debuginfo    disabled
!remi-php72                            Remi's PHP 7.2 RPM repository for Enterprise Linux 7 – x86_64                     disabled
remi-php72-debuginfo/x86_64            Remi's PHP 7.2 RPM repository for Enterprise Linux 7 – x86_64 – debuginfo         disabled
remi-php72-test                        Remi's PHP 7.2 test RPM repository for Enterprise Linux 7 – x86_64                disabled
remi-php72-test-debuginfo/x86_64       Remi's PHP 7.2 test RPM repository for Enterprise Linux 7 – x86_64 – debuginfo    disabled
remi-php73                             Remi's PHP 7.3 RPM repository for Enterprise Linux 7 – x86_64                     disabled
remi-php73-debuginfo/x86_64            Remi's PHP 7.3 RPM repository for Enterprise Linux 7 – x86_64 – debuginfo         disabled
remi-php73-test                        Remi's PHP 7.3 test RPM repository for Enterprise Linux 7 – x86_64                disabled
remi-php73-test-debuginfo/x86_64       Remi's PHP 7.3 test RPM repository for Enterprise Linux 7 – x86_64 – debuginfo    disabled
remi-php74                             Remi's PHP 7.4 RPM repository for Enterprise Linux 7 – x86_64                     enabled:    423
remi-php74-debuginfo/x86_64            Remi's PHP 7.4 RPM repository for Enterprise Linux 7 – x86_64 – debuginfo         disabled
remi-php74-test                        Remi's PHP 7.4 test RPM repository for Enterprise Linux 7 – x86_64                disabled
remi-php74-test-debuginfo/x86_64       Remi's PHP 7.4 test RPM repository for Enterprise Linux 7 – x86_64 – debuginfo    disabled
remi-php80                             Remi's PHP 8.0 RPM repository for Enterprise Linux 7 – x86_64                     disabled
remi-php80-debuginfo/x86_64            Remi's PHP 8.0 RPM repository for Enterprise Linux 7 – x86_64 – debuginfo         disabled
remi-php80-test                        Remi's PHP 8.0 test RPM repository for Enterprise Linux 7 – x86_64                disabled
remi-php80-test-debuginfo/x86_64       Remi's PHP 8.0 test RPM repository for Enterprise Linux 7 – x86_64 – debuginfo    disabled
remi-safe                              Safe Remi's RPM repository for Enterprise Linux 7 – x86_64                        enabled:  4,549
remi-safe-debuginfo/x86_64             Remi's RPM repository for Enterprise Linux 7 – x86_64 – debuginfo                 disabled
remi-test                              Remi's test RPM repository for Enterprise Linux 7 – x86_64                        disabled
remi-test-debuginfo/x86_64             Remi's test RPM repository for Enterprise Linux 7 – x86_64 – debuginfo            disabled
updates/7/x86_64                       CentOS-7 – Updates                                                                enabled:  2,741
updates-source/7                       CentOS-7 – Updates Sources                                                        disabled
zabbix/x86_64                          Zabbix Official Repository – x86_64                                               enabled:    178
zabbix-debuginfo/x86_64                Zabbix Official Repository debuginfo – x86_64                                     disabled
zabbix-frontend/x86_64                 Zabbix Official Repository frontend – x86_64                                      disabled
zabbix-non-supported/x86_64            Zabbix Official Repository non-supported – x86_64                                 enabled:      5
repolist: 39,364

[root@centos:/etc/yum.repos.d]# yum repolist all|grep -i 'base/7/x86_64'
base/7/x86_64                       CentOS-7 – Base              enabled: 10,072


As you can see in CentOS 7 sharutils is enabled from default repositories, however this is not the case on Redhat 7.9, hence to install sharutils there you can one time enable RPM repository to install sharutils 

[root@centos:/etc/yum.repos.d]# yum –enablerepo=rhel-7-server-optional-rpms install sharutils

To install zabbix-agent on the same Redhat server, without caring that I need precisely  know the RPM repository that is providing zabbix agent that in that was (Repo: 3party/7Server/x86_64)  I had to:

[root@centos:/etc/yum.repos.d]# yum –enablerepo \* install zabbix-agent zabbix-sender


Permanently enabling repositories of course is possible via editting or creating fresh new file configuration manually on CentOS / Fedora under directory /etc/yum.repos.d/
On Redhat Enterprise Linux  servers it is easier to use the subscription-manager command instead, like this:
 

[root@rhel:/root]# subscription-manager repos –disable=epel/7Server/x86_64

[root@rhel:/root]# subscription-manager repos –enable=rhel-6-server-optional-rpms

Squid Proxy log timestamp human readable / Convert and beautify Proxy unixtime logs in human-readable form howto

Thursday, February 21st, 2019

ccze-squid-access-log-colorized-with-log-analizer-linux-tool

If you have installed Squid Cache Proxy recently and you need to watch who is accessing the proxy and what Internet (website is viewed) under /var/log/squid/access.log /var/log/store.log /var/log/access.log etc., you will be unpleasently surprised the log's records are logged in a weird human unreadable format called UTC as Squid Proxy server does not store the date / year / hour time information in a human readable format.

Squid uses the format:
<UNIX timestamp>.<Centiseconds> and you have to be a robot of a kind or a math genious to read it 🙂

To display Squid Proxy log in a human readable, luckily you can use below one-liner  regular expression.
 

cat access.log | perl -p -e 's/^([0-9]*)/”[“.localtime($1).”]"/e'


If you have to review squid logs multiple times and on a regular basis you can either set some kind of cmd alias in $HOME/.bashrc such as:

alias readproxylog='cat access.log | perl -p -e 's/^([0-9]*)/”[“.localtime($1).”]"/e'

Or for those who prefer beauty install and use a log beatifier / colorizer such as ccze
 

root@pcfreak:/home/hipo# apt-cache show ccze|grep -i desc -A 3
Description-en: robust, modular log coloriser
 CCZE is a robust and modular log coloriser, with plugins for apm,
 exim, fetchmail, httpd, postfix, procmail, squid, syslog, ulogd,
 vsftpd, xferlog and more.

Description-md5: 55cd93dbcf614712a4d89cb3489414f6
Homepage: https://github.com/madhouse/ccze
Tag: devel::prettyprint, implemented-in::c, interface::commandline,
 role::program, scope::utility, use::checking, use::filtering,

root@pcfreak:/home/hipo# apt-get install –yes ccze


tail -f /var/log/squid/access.loc | ccze -CA


ccze is really nice to view /var/log/syslog errors and make your daily sysadmin life a bit more colorful


tail -f -n 200 /var/log/messages | ccze


tail-ccze-syslog-screenshot viewing in Colors your Linux logs

For a frequent tail + ccze usage with ccze you can add to ~/.bashrc following shell small function
 

tailc () { tail $@ | ccze -A }


Below is a list of supported syntax highlighting colorizer:

$ ccze -l
Available plugins:

Name      | Type    | Description
————————————————————
apm       | Partial | Coloriser for APM sub-logs.
distcc    | Full    | Coloriser for distcc(1) logs.
dpkg      | Full    | Coloriser for dpkg logs.
exim      | Full    | Coloriser for exim logs.
fetchmail | Partial | Coloriser for fetchmail(1) sub-logs.
ftpstats  | Full    | Coloriser for ftpstats (pure-ftpd) logs.
httpd     | Full    | Coloriser for generic HTTPD access and error logs.
icecast   | Full    | Coloriser for Icecast(8) logs.
oops      | Full    | Coloriser for oops proxy logs.
php       | Full    | Coloriser for PHP logs.
postfix   | Partial | Coloriser for postfix(1) sub-logs.
procmail  | Full    | Coloriser for procmail(1) logs.
proftpd   | Full    | Coloriser for proftpd access and auth logs.
squid     | Full    | Coloriser for squid access, store and cache logs.
sulog     | Full    | Coloriser for su(1) logs.
super     | Full    | Coloriser for super(1) logs.
syslog    | Full    | Generic syslog(8) log coloriser.
ulogd     | Partial | Coloriser for ulogd sub-logs.
vsftpd    | Full    | Coloriser for vsftpd(8) logs.
xferlog   | Full    | Generic xferlog coloriser.

At many cases for sysadmins like me that prefer clarity over obscurity, even a better solution is to just change in /etc/squid/squid.conf
the logging to turn it in human-readable form
, to do so add to config somewhere:


Logformat squid %tl.%03tu %6tr %>a %Ss/%03Hs %


You will get log output in format like:


18/Feb/2019:18:38:47 +0200.538 4787 y.y.y.y TCP_MISS/200 41841 GET https://google.com – DIRECT/x.x.x.x text/html


SQUID's format recognized parameters in above example are as follows:


%    a literal % character
>a    Client source IP address
>A    Client FQDN
>p    Client source port
la    Local IP address (http_port)
lp    Local port number (http_port)
sn    Unique sequence number per log line entry
ts    Seconds since epoch
tu    subsecond time (milliseconds)
tl    Local time. Optional strftime format argument
default %d/%b/%Y:%H:%M:%S %z
tg    GMT time. Optional strftime format argument
default %d/%b/%Y:%H:%M:%S %z
tr    Response time (milliseconds)
dt    Total time spent making DNS lookups (milliseconds)


Improve Apache Load Balancing with mod_cluster – Apaches to Tomcats Application servers Get Better Load Balancing

Thursday, March 31st, 2016

improve-apache-load-balancing-with-mod_cluster-apaches-to-tomcats-application-servers-get-better-load-balancing-mod_cluster-logo


Earlier I've blogged on How to set up Apache to to serve as a Load Balancer for 2, 3, 4  etc. Tomcat / other backend application servers with mod_proxy and mod_proxy_balancer, however though default Apache provided mod_proxy_balancer works fine most of the time, If you want a more precise and sophisticated balancing with better load distribuion you will probably want to install and use mod_cluster instead.


So what is Mod_Cluster and why use it instead of Apache proxy_balancer ?
 

Mod_cluster is an innovative Apache module for HTTP load balancing and proxying. It implements a communication channel between the load balancer and back-end nodes to make better load-balancing decisions and redistribute loads more evenly.

Why use mod_cluster instead of a traditional load balancer such as Apache's mod_balancer and mod_proxy or even a high-performance hardware balancer?

Thanks to its unique back-end communication channel, mod_cluster takes into account back-end servers' loads, and thus provides better and more precise load balancing tailored for JBoss and Tomcat servers. Mod_cluster also knows when an application is undeployed, and does not forward requests for its context (URL path) until its redeployment. And mod_cluster is easy to implement, use, and configure, requiring minimal configuration on the front-end Apache server and on the back-end servers.


So what is the advantage of mod_cluster vs mod proxy_balancer ?

Well here is few things that turns the scales  in favour for mod_cluster:


  •     advertises its presence via multicast so as workers can join without any configuration
     
  •     workers will report their available contexts
     
  •     mod_cluster will create proxies for these contexts automatically
     
  •     if you want to, you can still fine-tune this behaviour, e.g. so as .gif images are served from httpd and not from workers…
     
  •     most importantly: unlike pure mod_proxy or mod_jk, mod_cluster knows exactly how much load there is on each node because nodes are reporting their load back to the balancer via special messages
     
  •     default communication goes over AJP, you can use HTTP and HTTPS


1. How to install mod_cluster on Linux ?


You can use mod_cluster either with JBoss or Tomcat back-end servers. We'll install and configure mod_cluster with Tomcat under CentOS; using it with JBoss or on other Linux distributions is a similar process. I'll assume you already have at least one front-end Apache server and a few back-end Tomcat servers installed.

To install mod_cluster, first download the latest mod_cluster httpd binaries. Make sure to select the correct package for your hardware architecture – 32- or 64-bit.
Unpack the archive to create four new Apache module files: mod_advertise.so, mod_manager.so, mod_proxy_cluster.so, and mod_slotmem.so. We won't need mod_advertise.so; it advertises the location of the load balancer through multicast packets, but we will use a static address on each back-end server.

Copy the other three .so files to the default Apache modules directory (/etc/httpd/modules/ for CentOS).
Before loading the new modules in Apache you have to remove the default proxy balancer module (mod_proxy_balancer.so) because it is not compatible with mod_cluster.

Edit the Apache configuration file (/etc/httpd/conf/httpd.conf) and remove the line


LoadModule proxy_balancer_module modules/mod_proxy_balancer.so


Create a new configuration file and give it a name such as /etc/httpd/conf.d/mod_cluster.conf. Use it to load mod_cluster's modules:


LoadModule slotmem_module modules/mod_slotmem.so
LoadModule manager_module modules/mod_manager.so
LoadModule proxy_cluster_module modules/mod_proxy_cluster.so

In the same file add the rest of the settings you'll need for mod_cluster something like:

And for permissions and Virtualhost section

Listen 192.168.180.150:9999
<virtualhost  192.168.180.150:9999="">
<directory>
Order deny,allow
Allow from all 192.168
</directory>
ManagerBalancerName mymodcluster
EnableMCPMReceive
</virtualhost>

ProxyPass / balancer://mymodcluster/


The above directives create a new virtual host listening on port 9999 on the Apache server you want to use for load balancing, on which the load balancer will receive information from the back-end application servers. In this example, the virtual host is listening on IP address 192.168.204.203, and for security reasons it allows connections only from the 192.168.0.0/16 network.
The directive ManagerBalancerName defines the name of the cluster – mymodcluster in this example. The directive EnableMCPMReceive allows the back-end servers to send updates to the load balancer. The standard ProxyPass and ProxyPassReverse directives instruct Apache to proxy all requests to the mymodcluster balancer.
That's all you need for a minimal configuration of mod_cluster on the Apache load balancer. At next server restart Apache will automatically load the file mod_cluster.conf from the /etc/httpd/conf.d directory. To learn about more options that might be useful in specific scenarios, check mod_cluster's documentation.

While you're changing Apache configuration, you should probably set the log level in Apache to debug when you're getting started with mod_cluster, so that you can trace the communication between the front- and the back-end servers and troubleshoot problems more easily. To do so, edit Apache's configuration file and add the line LogLevel debug , then restart Apache.
 

2. How to set up Tomcat appserver for mod_cluster ?
 

Mod_cluster works with Tomcat version 6, 7 and 8, to set up the Tomcat back ends you have to deploy a few JAR files and make a change in Tomcat's server.xml configuration file.
The necessary JAR files extend Tomcat's default functionality so that it can communicate with the proxy load balancer. You can download the JAR file archive by clicking on "Java bundles" on the mod_cluster download page. It will be saved under the name mod_cluster-parent-1.2.6.Final-bin.tar.gz.

Create a new directory such as /root/java_bundles and extract the files from mod_cluster-parent-1.2.6.Final-bin.tar.gz there. Inside the directory /root/java_bundlesJBossWeb-Tomcat/lib/*.jar you will find all the necessary JAR files for Tomcat, including two Tomcat version-specific JAR files – mod_cluster-container-tomcat6-1.2.6.Final.jar for Tomcat 6 and mod_cluster-container-tomcat7-1.2.6.Final.jar for Tomcat 7. Delete the one that does not correspond to your Tomcat version.

Copy all the files from /root/java_bundlesJBossWeb-Tomcat/lib/ to your Tomcat lib directory – thus if you have installed Tomcat in

/srv/tomcat

run the command:


cp -rpf /root/java_bundles/JBossWeb-Tomcat/lib/* /srv/tomcat/lib/ .


Then edit your Tomcat's server.xml file

/srv/tomcat/conf/server.xml.


After the default listeners add the following line:


<listener classname="org.jboss.modcluster.container.catalina.standalone.ModClusterListener" proxylist="192.168.204.203:9999"> </listener>


This instructs Tomcat to send its mod_cluster-related information to IP 192.168.180.150 on TCP port 9999, which is what we set up as Apache's dedicated vhost for mod_cluster.
While that's enough for a basic mod_cluster setup, you should also configure a unique, intuitive JVM route value on each Tomcat instance so that you can easily differentiate the nodes later. To do so, edit the server.xml file and extend the Engine property to contain a jvmRoute, like this:
 

.


<engine defaulthost="localhost" jvmroute="node2" name="Catalina"></engine>


Assign a different value, such as node2, to each Tomcat instance. Then restart Tomcat so that these settings take effect.

To confirm that everything is working as expected and that the Tomcat instance connects to the load balancer, grep Tomcat's log for the string "modcluster" (case-insensitive). You should see output similar to:

Mar 29, 2016 10:05:00 AM org.jboss.modcluster.ModClusterService init
INFO: MODCLUSTER000001: Initializing mod_cluster ${project.version}
Mar 29, 2016 10:05:17 AM org.jboss.modcluster.ModClusterService connectionEstablished
INFO: MODCLUSTER000012: Catalina connector will use /192.168.180.150


This shows that mod_cluster has been successfully initialized and that it will use the connector for 192.168.204.204, the configured IP address for the main listener.
Also check Apache's error log. You should see confirmation about the properly working back-end server:

[Tue Mar 29 10:05:00 2013] [debug] proxy_util.c(2026): proxy: ajp: has acquired connection for (192.168.204.204)
[Tue Mar 29 10:05:00 2013] [debug] proxy_util.c(2082): proxy: connecting ajp://192.168.180.150:8009/ to  192.168.180.150:8009
[Tue Mar 29 10:05:00 2013] [debug] proxy_util.c(2209): proxy: connected / to  192.168.180.150:8009
[Tue Mar 29 10:05:00 2013] [debug] mod_proxy_cluster.c(1366): proxy_cluster_try_pingpong: connected to backend
[Tue Mar 29 10:05:00 2013] [debug] mod_proxy_cluster.c(1089): ajp_cping_cpong: Done
[Tue Mar 29 10:05:00 2013] [debug] proxy_util.c(2044): proxy: ajp: has released connection for (192.168.180.150)


This Apache error log shows that an AJP connection with 192.168.204.204 was successfully established and confirms the working state of the node, then shows that the load balancer closed the connection after the successful attempt.

You can start testing by opening in a browser the example servlet SessionExample, which is available in a default installation of Tomcat.
Access this servlet through a browser at the URL http://balancer_address/examples/servlets/servlet/SessionExample. In your browser you should see first a session ID that contains the name of the back-end node that is serving your request – for instance, Session ID: 5D90CB3C0AA05CB5FE13121E4B23E670.node2.

Next, through the servlet's web form, create different session attributes. If you have a properly working load balancer with sticky sessions you should always (that is, until your current browser session expires) access the same node, with the previously created session attributes still available.

To test further to confirm load balancing is in place, at the same time open the same servlet from another browser. You should be redirected to another back-end server where you can conduct a similar session test.
As you can see, mod_cluster is easy to use and configure. Give it a try to address sporadic single-back-end overloads that cause overall application slowdowns.

Use apt-get with Proxy howto – Set Proxy system-wide in Linux shell and Gnome

Friday, May 16th, 2014

linux-apt-get-configure-proxy-howto-set-proxy-systemwide-in-linux

I juset setup a VMWare Virtual Machine on my HP notebook and installed Debian 7.0 stable Wheezy. Though VMWare identified my Office Internet and configured automatically NAT, I couldn't access the internet from a browser until I remembered all HP traffic is going through a default set browser proxy.
After setting a proxy to Iceweasel, Internet pages started opening normally, however as every kind of traffic was also accessible via HP's proxy, package management with apt-get (apt-get update, apt-get install etc. were failing with errors):


# apt-get update

Ign cdrom://[Debian GNU/Linux 7.2.0 _Wheezy_ – Official i386 CD Binary-1 20131012-12:56] wheezy Release.gpg
Ign cdrom://[Debian GNU/Linux 7.2.0 _Wheezy_ – Official i386 CD Binary-1 20131012-12:56] wheezy Release
Ign cdrom://[Debian GNU/Linux 7.2.0 _Wheezy_ – Official i386 CD Binary-1 20131012-12:56] wheezy/main i386 Packages/DiffIndex
Ign cdrom://[Debian GNU/Linux 7.2.0 _Wheezy_ – Official i386 CD Binary-1 20131012-12:56] wheezy/main Translation-en_US
Err http://ftp.by.debian.org wheezy Release.gpg
  Could not connect to ftp.by.debian.org:80 (86.57.151.3). – connect (111: Connection refused)
Err http://ftp.by.debian.org wheezy-updates Release.gpg
  Unable to connect to ftp.by.debian.org:http:
Err http://security.debian.org wheezy/updates Release.gpg
  Cannot initiate the connection to security.debian.org:80 (2607:ea00:101:3c0b:207:e9ff:fe00:e595). – connect (101: Network is unreachable) [IP: 2607:ea00:101:3c0b:207:e9ff:fe00:e595 80]
Reading package lists…


This error is caused because apt-get is trying to directly access above http URLs and because port 80 is filtered out from HP Office, it fails in order to make it working I had to configure apt-get to use Proxy host – here is how:

a) Create /etc/apt/apt.conf.d/02proxy file (if not already existing)
and place inside:
 

Acquire::http::proxy::Proxy "https://web-proxy.cce.hp.com";
Acquire::ftp::proxy::Proxy "ftp://web-proxy.cce.hp.com";


To do it from console / gnome-terminal issue:
echo ''Acquire::http::Proxy "https://web-proxy.cce.hp.com:8088";' >> /etc/apt/apt.conf.d/02proxy
echo ''Acquire::ftp::Proxy "https://web-proxy.cce.hp.com:8088";' >> /etc/apt/apt.conf.d/02proxy

That's all now apt-get will tunnel all traffic via HTTP and FTP proxy host web-proxy.cce.hp.com and apt-get works again.

Talking about Proxyfing Linux's apt-get, its possible to also set proxy shell variables, which are red and understood by many console programs like Console browsers lynx, links, elinks  as well as wget and curl commands, e.g.:


export http_proxy=http://192.168.1.5:5187/
export https_proxy=$http_proxy
export ftp_proxy=$http_proxy
export rsync_proxy=$http_proxy
export no_proxy="localhost,127.0.0.1,localaddress,.localdomain.com"

For proxies protected with username and password export variables should look like so: echo -n "username:"
read -e username
echo -n "password:"
read -es password
export http_proxy="http://$username:$password@proxyserver:8080/"
export https_proxy=$http_proxy
export ftp_proxy=$http_proxy
export rsync_proxy=$http_proxy
export no_proxy="localhost,127.0.0.1,localaddress,.localdomain.com"

To make this Linux proxy settings system wide on Debian / Ubuntu there is the /etc/environment file add to it:
 

http_proxy=http://proxy.server.com:8080/
https_proxy=http://proxy.server.com:8080/
ftp_proxy=http://proxy.server.com:8080/
no_proxy="localhost,127.0.0.1,localaddress,.localdomain.com"
HTTP_PROXY=http://proxy.server.com:8080/
HTTPS_PROXY=http://proxy.server.com:8080/
FTP_PROXY=http://proxy.server.com:8080/
NO_PROXY="localhost,127.0.0.1,localaddress,.localdomain.com"


To make proxy global (systemwide) for most (non-Debian specific) Linux distributions shell environments create new file /etc/profile.d/proxy.sh and place something like:

function proxy(){
echo -n "username:"
read -e username
echo -n "password:"
read -es password
export http_proxy="http://$username:$password@proxyserver:8080/"
export https_proxy=$http_proxy
export ftp_proxy=$http_proxy
export rsync_proxy=$http_proxy
export no_proxy="localhost,127.0.0.1,localaddress,.localdomain.com"
echo -e "nProxy environment variable set."
}
function proxyoff(){
unset HTTP_PROXY
unset http_proxy
unset HTTPS_PROXY
unset https_proxy
unset FTP_PROXY
unset ftp_proxy
unset RSYNC_PROXY
unset rsync_proxy
echo -e "nProxy environment variable removed."
}

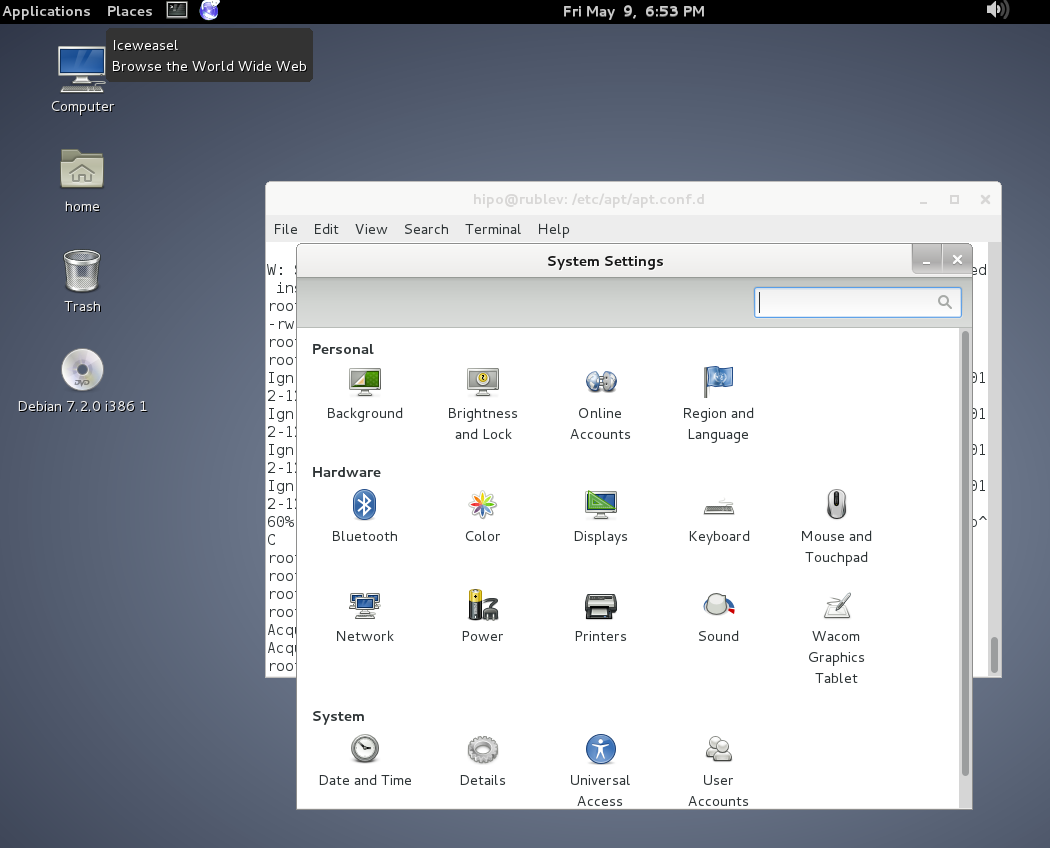
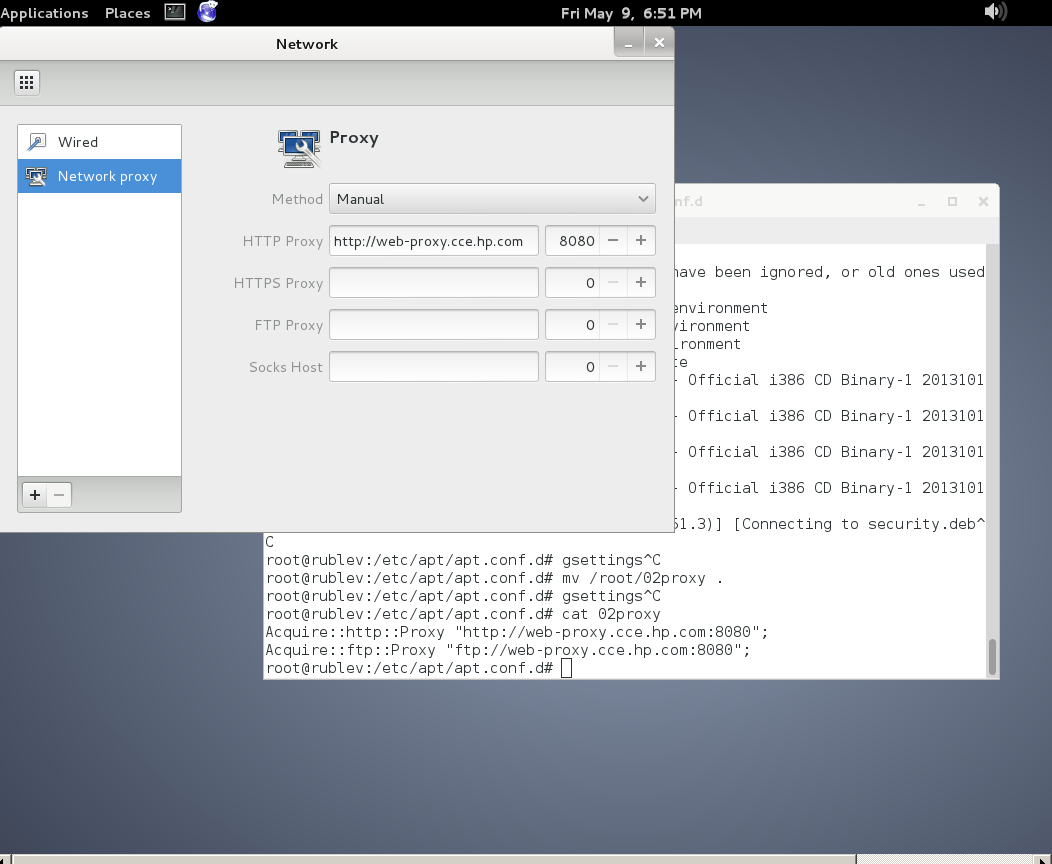
To set Global Proxy (make Proxy Systemwide) for a user in GNOME Desktop environment launch gnome-control-center

And go to Network -> Network Proxy

/images/gnome-configure-systemwide-proxy-howto-picture1

/images/gnome-configure-systemwide-proxy-howto-picture2

To make proxy settings also system wide for some GUI Gnome GTK3 applications

gsettings set org.gnome.system.proxy mode 'manual'
gsettings set org.gnome.system.proxy.http host 'your-proxy.server.com'
gsettings set org.gnome.system.proxy.http port 8080

Fiddler – Windows web debugging proxy for any browser – Linux web debugging applications

Thursday, May 29th, 2014

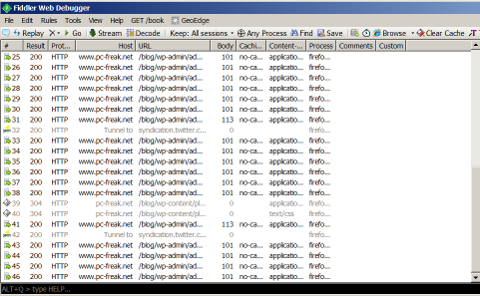
fiddler-web-proxy-debugging-http-https-traffic-in-windows-browser
Earlier I've blogged about helpful web developer or a web hosting system administrator Web Browser plugins . Among the list of useful plugins for debugging sent / received web content on your desktop (HTTPWatchm, HTTPFox, Yslow etc.), I've found another one called Fiddler.

Telerik's Fiddler is a Browser plugin  and a Windows Desktop application to monitor HTTP and HTTPS outbound web traffic and report and provide you with various information useful for:

fiddler-web-debugger-for-browser-and-desktop-for-windows-keep-trac-and-optimize-web-traffic-to-web-servers

  • Performance Testing
  • HTTP / HTTPS
  • Traffic recording
  • Security Testing
  • Web Session Manipulation
  • Encode Decode web traffic
  • Convert strings from / to Base64, Hex, DeflatedSAML etc.
  • Log all URL requests originating from all opened browsers on your Desktop
  • Decrypt / encrypt HTTPS traffic using man in the middle techniques
  • Show tuning details for accessed web pages
     

Fiddler is available to install and use as a desktop application (requires .NET 2) or install as a browser plugin. Perhaps the coolest  Fiddler feature from my perspective is its decrypt / encrypt in Base64 and Hex available from TextWizard menu. The tool is relatively easy to use for those who have experience in web debugging, for novice here is a video explaining tool's basics.

Fiddler doesn't have a Linux build yet but it is possible to run it also on Linux using Mono Framework and a few hacks.

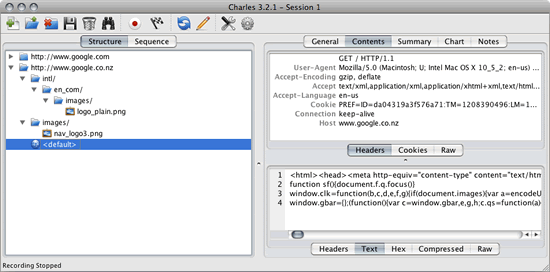
charles-proxy-web-debugging-tool-for-linux-fiddler-alternative
A good native Linux / UNIX alternatives to Fiddler are Nettool, Charles Proxy, Paros Proxy and Web Scarab.

yum add proxy on CentOS, RHEL, Fedora Linux howto

Thursday, June 5th, 2014

yum-via-proxy-yum-package-management-mascot
Whether you had to install a CentOS server in a DMZ-ed network with paranoic system firewall rules or simply you want to use your own created RPM local repository to run RPM installs and CentOS system updates via monitored Proxy you will have to configure yum to use a proxy.

There is a standard way to do it by adding a proxy directive to /etc/yum.conf as explained in CentOS official documetnation.
However for some reason:

proxy=http://your-proxy-url.com:8080
proxy_username=yum-user
proxy_password=qwerty

proxy vars adding to /etc/yum.conf [main] section is not working on CentOS 6.5?
However there is a dirty patch by using the OS environment standard variable http_proxy
To make yum work via proxy in gnome-terminal run first:

export http_proxy=http://your-proxy-server.com:8080

or if proxy is protected by username / password run instead:

export username='yum-user'
export password='qwerty'
export http_proxy="http://$username:$password@your-proxy-server:8080/

Afterwards yum will work via the proxy, i.e.:

yum update && yum upgrade

To make http_proxy exported system wide check my previous post – Set Proxy System-Wide

Hope this helps someone.

Create video from linux console / terminal – Record ssh terminal session as video with asciinema, showterm, termrecord

Thursday, August 21st, 2014

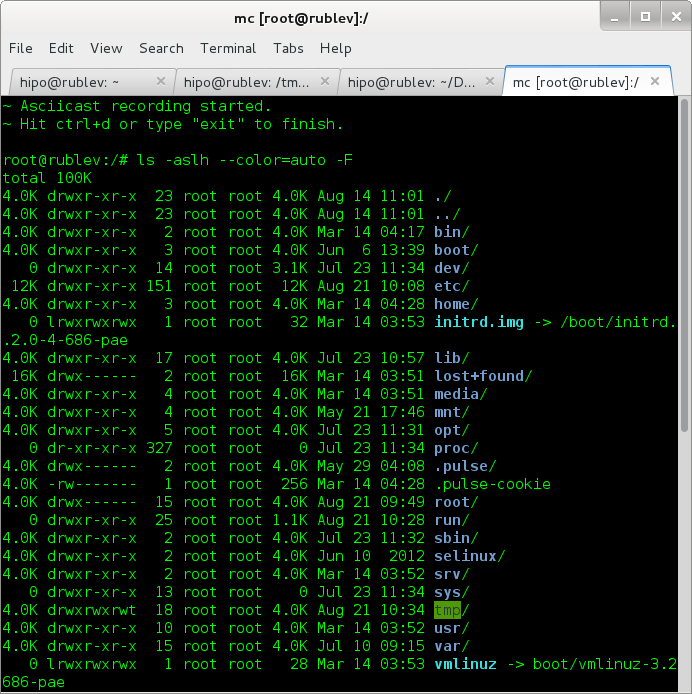
/var/www/images/asciinema-create-and-upload-ascii-terminal-console-videos-debian-gnu-linux-screenshot
You probably already know of existence of two Linux commands available by default across all Linux distributions scriptwhich makes a text based save of all commands executed on console and scriptreplay – which playbacks saved script command typescripts. Using this two you can save terminal sessions without problem, but in order to play them you need to have a Linux / UNIX computer at hand.
However If you want to make a short video record displaying what you have done on Linux console / terminal, you have few other options with which you can share your Linux terminal sessions on the web. In this short article I will go through 3 popular tools to do that – asciinema, showterm and termrecord.

1. Asciinema Current most popular tool to create video from Linux terminal

Here is how ASCIINEMA's website describes it:

"Asciinema is a free and open source solution for recording the terminal sessions and sharing them on the web."

apt-get –yes install python-pip

To install it with pip python package installer

pip install asciinema

Or if the machine is in DMZ secured zone and have access to the internet over a Proxy:

pip install –proxy=http://internet-proxy-host.com:8080 asciinema

It will get installed in /usr/local/bin/asciinema to make a terminal screen video capture just launch it (nomatter if it is privileged or non-privileged user):

asciinema

To finalize and upload the recorded terminal session, just type exit (to exit the shell), hopefully it will get you an upload link.

exit

You can claim authorship on video you issue:

asciinema auth

Use can then embed the new Linux terminal session video to your website.
 

2. ShowTerm – "It's showtime in a terminal near you!"

ShowTerm have same features as AsciiNema. Just like AsciiNema, what it does is it creates a record of your terminal session and then uploads it to showterm.io website, providing you a link over which you can share your terminal lesson / ascii art video / whatever with your friends. ShowTerm is written in, the world famous Ruby on Railsruby web development framework, so you will need to have ruby programming language installed before use. As showterm uses the Internet to upload video, so it is not really an option to create videos from remote terminal session on servers which are in DMZ with no access to the internet, I will explain in a little while how to create video of your terminal / console for private purpose on local server and then share it online on your own site.

a) To install ShowTerm:

– First be sure to have ruby installed:

On Debian / Ubuntu and derives deb Linux, as supersuser:

apt-get install –yes ruby curl

On CentOS / RHEL / Fedora Linux

yum -y install ruby curl

NB! curl is real requirement but as showterm.io website recommends downloading the script with it and later same curl tool is used to upload the created showterm file to http://showterm.io .

– Then to finalize install, download showterm script and make it executable

curl showterm.io/showterm > ~/bin/showterm

% Total    % Received % Xferd  Average Speed   Time    Time     Time  Current
                                       Dload  Upload   Total   Spent    Left  Speed
100  2007  100  2007    0     0   2908      0 –:–:– –:–:– –:–:–  8468

mkdir ~/bin
chmod +x ~/bin/showterm

This will save the script into your home folder ~/bin/showterm

b) Using showterm

To run it to create video from your terminal simply start it and do whatver you will in terminal.

~/bin/showterm

After you're done with the video you like type exit

exit

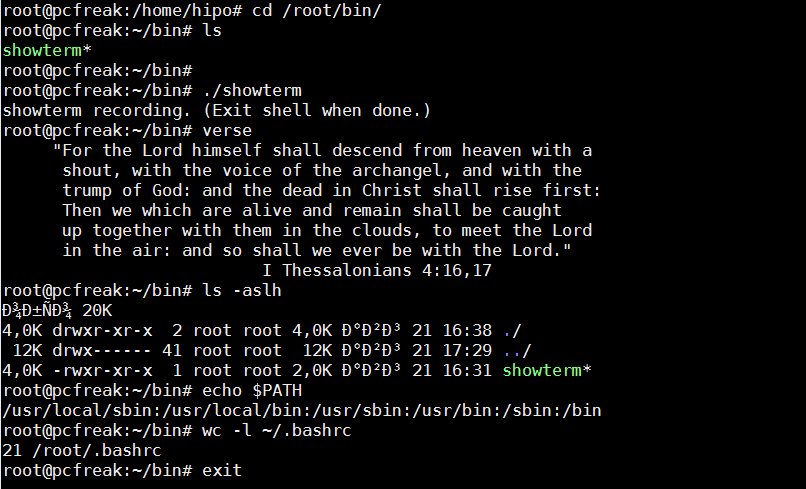
create-video-from-your-linux-console-terminal-with-showterm-screenshot

Note that if your server is behind a proxy curl will not understand proxy set inside Linux shell variable with http_proxy var, to upload the file if you're behind a proxy you will have to pass to curl –proxy setting, once you get the curl line invoked after failure to upload use something like:

curl –proxy $(echo $http_proxy)  https://showterm.herokuapp.com/scripts –data-urlencode cols=80 –data-urlencode lines=24 –data-urlencode scriptfile@/tmp/yCudk.script –data-urlencode timingfile@/tmp/lkiXP.timing

Where assuming proxy is defined already inside http_proxy shell variable.


3. Creating video from your terminal / console on Linux for local (private) use with TermRecord

In my humble view TermRecord is the most awesome of all the 3, as it allows you to make records with an own generated Javascript based video player and allows you to keep the videos on your own side, guaranteeing you independence of external services. Its
 

pip install TermRecord

TermRecord -o /tmp/session.html


You can further access the video in a local browser in Firefox / Chrome / Epiphany type in URL address bar:

/tmp/session.html to play the video

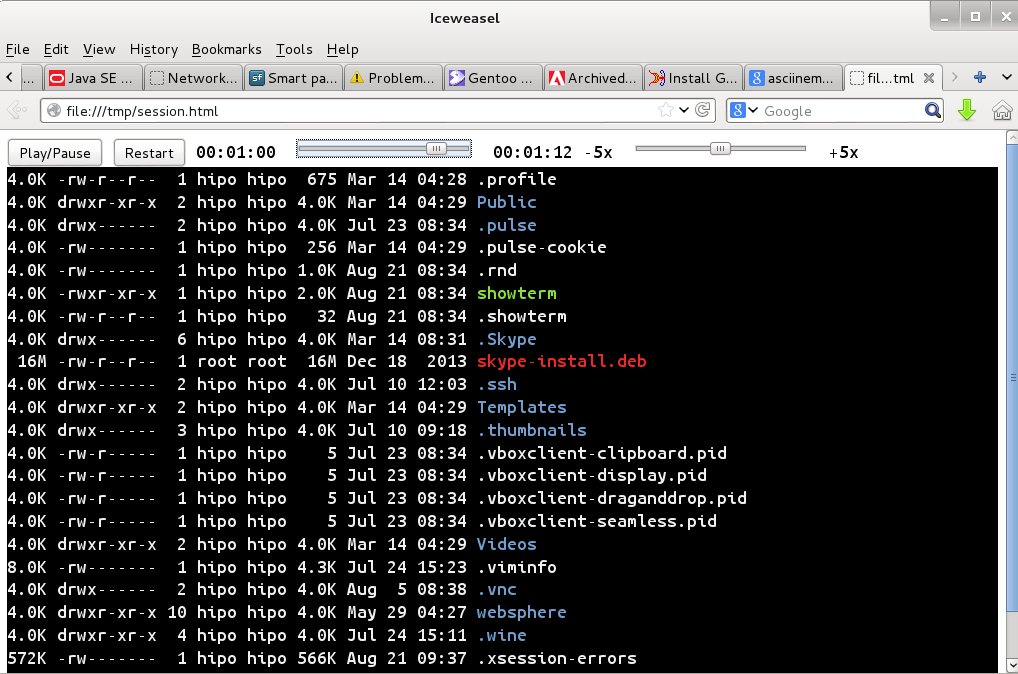
create-video-from-terminal-console-on-gnu-linux-howto-screenshot-with-termrecord

TermRecord uses term.js javascript to create the video web player and play the video which is directly encoded inside session.html.
If you want to share the video online, place it on your webserver and you're done 🙂
Check out my TermRecord generated video terminal sample session here.
 

Preserve Session IDs of Tomcat cluster behind Apache reverse proxy / Sticky sessions with mod_proxy and Tomcat

Wednesday, February 26th, 2014

apache_and_tomcat_merged_logo_prevent_sticky_sessions
Having a combination of Apache webservice Reverse Proxy to redirect invisibly traffic to a number of Tomcat server positioned in a DMZ is a classic task in big companies Corporate world.
Hence if you work for company like IBM or HP sooner or later you will need to configure Apache Webserver cluster with few running Jakarta Tomcat Application servers behind. Scenario with necessity to access a java based application via Tomcat which requires logging (authentication) relaying on establishing and keeping a session ID is probably one of the most common ones and if you do it for first time you will probably end up with Session ID issues.  Session ID issues are hard to capture at first as on first glimpse application will seem to be working but users will have to re-login all the time even though the programmers might have coded for a session to expiry in 30 minutes or so.

… I mean not having configured Session ID prevention to Tomcats will cause random authentication session expiries and users using the Tomcat app will be unable to normally access below application with authenticated credentials. The solution to these is known under term "Sticky sessions"
To configure Sticky sessions you need to already have configured Apache/s with following minimum configuration:

  • enabled mod_proxy, proxy_balancer_module, proxy_http_module and or mod_proxy_ajp (in Apache config)

  LoadModule proxy_module modules/mod_proxy.so
LoadModule proxy_balancer_module modules/mod_proxy_balancer.so
LoadModule proxy_http_module modules/mod_proxy_http.so

  • And configured and tested Tomcats running an Application reachable via AJP protocol

Below example assumes there is Reverse Proxy Load Balancer Apache which has to forward all traffic to 2 tomcats. The config can easily be extended for as many as necessary by adding more BalancerMembers.

In Apache webserver (apache2.conf / httpd.conf) you need to have JSESSIONID configured. These JSESSIONID is going to be appended to each client request from Reverse Proxy to each of Tomcat servers with value opened once on authentication to first Tomcat node to each of the other ones.

<Proxy balancer://mycluster>
BalancerMember ajp://10.16.166.53:11010/ route=delivery1
BalancerMember ajp://10.16.166.66:11010/ route=delivery2
</Proxy>

ProxyRequests Off
ProxyPass / balancer://mycluster/ stickysession=JSESSIONID
ProxyPassReverse / balancer://mycluster/

The two variables route=delivery1 and route=delivery2 are routed to hosts identificators that also has to be present in Tomcat server configurations
In Tomcat App server First Node (server.xml)

<Engine name="Catalina" defaultHost="localhost" jvmRoute="delivery1">

In Tomcat App server Second Node (server.xml)

<Engine name="Catalina" defaultHost="localhost" jvmRoute="delivery2">

Once Sticky Sessions are configured it is useful to be able to track they work fine this is possible through logging each of established JESSSIONIDs, to do so add in httpd.conf

LogFormat "%h %l %u %t \"%r\" %>s %b \"%{Referer}i\" \"%{User-Agent}i\"\"%{JSESSIONID}C\"" combined

After modifications restart Apache and Tomcat to load new configs. In Apache access.log the proof should be the proof that sessions are preserved via JSESSIONID, there should be logs like:
 

127.0.0.1 - - [18/Sep/2013:10:02:02 +0800] "POST /examples/servlets/servlet/RequestParamExample HTTP/1.1" 200 662 "http://localhost/examples/servlets/servlet/RequestParamExample" "Mozilla/5.0 (X11; Linux x86_64; rv:17.0) Gecko/20130807 Firefox/17.0""B80557A1D9B48EC1D73CF8C7482B7D46.server2"

127.0.0.1 - - [18/Sep/2013:10:02:06 +0800] "GET /examples/servlets/servlet/RequestInfoExample HTTP/1.1" 200 693 "http://localhost/examples/servlets/" "Mozilla/5.0 (X11; Linux x86_64; rv:17.0) Gecko/20130807 Firefox/17.0""B80557A1D9B48EC1D73CF8C7482B7D46.server2"

That should solve problems with mysterious session expiries 🙂

How to configure Apache to serve as load balancer between 2 or more Webservers on Linux / Apache basic cluster

Monday, October 28th, 2013

Apache doing load balancer between Apache servers Apache basic cluster howto

Any admin somehow involved in sphere of UNIX Webhosting knows Apache pretty well. I've personally used Apache for about 10 years now and until now I always used it as a single installation on a Linux. Always so far whenever the requirements for more client connections raised up, web hosting companies I worked for did a migration of Website / websites on a newer better (quicker) server hardware configuration. Everyone knows keeping a site on a single Apache server poses great RISK if the machine hangs up for a reason or gets DoSed this makes websites unavailable until reboot and poses unwanted downtime. Though I know pretty well the concept of load balancing until today I never had configured Apache to serve as Load balancer between two or more identical machines set-upped to interpret PHP / Perl scripts. Amazingly load balancing users web traffic happened to be much easier than I supposed. All necessary is a single Apache configured with mod_proxy_balancer which acts as proxy and ships HTTP requests between two Apache servers. Logically its very important that the entry traffic host with Apache mod_proxy_balancer has to be configured to only run only mod_proxy_balancer otherwise it will be eating unnecessary server memory as with each unnecessary loaded Apache module usage of memory resources raise up.

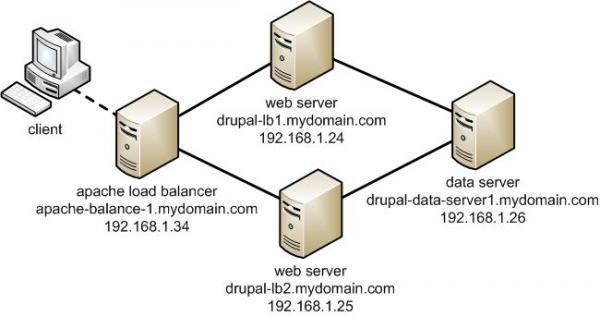
The scenario of my load balancer and 2 webserver hosts behind it goes like this:

a. Apache with load balancer with external IP address – i.e. (83.228.93.76) with DNS record for ex. www.mybalanced-webserver.com
b. Normally configured Apache to run PHP scripts with internal IP address through NAT – (Network address translation) (on 10.10.10.1) – known under host JEREMIAH
c. Second identical Apache to above host running on 10.10.10.1 with IP 10.10.10.2. with internal host ISSIAH.

N.B.! All 3 hosts are running latest  Debian GNU / Linux 7.2 Wheezy
 
After having this in mind, I proceeded with installing the on 83.228.93.76 apache and removing all unnecessary modules.

!!! Important note is if you use some already existent Apache configured to run PHP or any other unnecessary stuff – make sure you remove this otherwise expect severe performance issues !!!
1. Install Apache webserver

loadbalancer:~# apt-get install --yes apache2

2. Enable mod proxy proxy_balancer and proxy_http
On Debian Linux modules are enabled with a2enmod command;

loadbalancer:~# a2enmod proxy
loadbalancer:~# a2enmod proxy_balancer
loadbalancer:~# a2enmod proxy_http

Actually what a2enmod command does is to make symbolic links from /etc/apache2/mods-available/{proxy,proxy_balancer,proxy_http} to /etc/apache2/mods-available/{proxy,proxy_balancer,proxy_http}

3. Configure Apache mod proxy to load balance traffic between JEREMIAH and ISSAIAH webservers

loadbalancer:~# vim /etc/apache2/conf.d/proxy_balancer

/etc/apache2/conf.d/proxy-balancer

Paste inside:

<Proxy balancer://mycluster> BalancerMember http://10.0.0.1 BalancerMember http://10.0.0.4 </Proxy> ProxyPass / balancer://mycluster – See more at: http://www.elastichosts.com/support/tutorials/add-a-front-end-apache-cloud-load-balancer/#sthash.29iPnZpz.dpuf

<Proxy balancer://mycluster>
BalancerMember http://10.10.10.1
BalancerMember http://10.10.10.2
</Proxy>
ProxyPass / balancer://mycluster

<Proxy balancer://mycluster> BalancerMember http://10.0.0.1 BalancerMember http://10.0.0.4 </Proxy> ProxyPass / balancer://mycluster – See more at: http://www.elastichosts.com/support/tutorials/add-a-front-end-apache-cloud-load-balancer/#sthash.29iPnZpz.dpuf

<Proxy balancer://mycluster> BalancerMember http://10.0.0.1 BalancerMember http://10.0.0.4 </Proxy> ProxyPass / balancer://mycluster – See more at: http://www.elastichosts.com/support/tutorials/add-a-front-end-apache-cloud-load-balancer/#sthash.29iPnZpz.dpuf

<Proxy balancer://mycluster> BalancerMember http://10.0.0.1 BalancerMember http://10.0.0.4 </Proxy> ProxyPass / balancer://mycluster – See more at: http://www.elastichosts.com/support/tutorials/add-a-front-end-apache-cloud-load-balancer/#sthash.29iPnZpz.dpuf

<Proxy balancer://mycluster> BalancerMember http://10.0.0.1 BalancerMember http://10.0.0.4 </Proxy> ProxyPass / balancer://mycluster – See more at: http://www.elastichosts.com/support/tutorials/add-a-front-end-apache-cloud-load-balancer/#sthash.29iPnZpz.dpuf


4. Configure Apache Proxy to access traffic from all hosts (by default it is configured to Deny from all)

<Proxy balancer://mycluster> BalancerMember http://10.0.0.1 BalancerMember http://10.0.0.4 </Proxy> ProxyPass / balancer://mycluster – See more at: http://www.elastichosts.com/support/tutorials/add-a-front-end-apache-cloud-load-balancer/#sthash.29iPnZpz.dpuf

loadbalancer:~# vim /etc/apache2/mods-enabled/proxy.conf

Change there Deny from all to Allow from all

Deny from all
/etc/apache2/mods-enabled/proxy.conf

5. Restart Apache

loadbalancer:~# /etc/init.d/apache2 restart

Once again I have to say that above configuration is actually a basic Apache cluster so hosts behind load balancer Apache there should be machines configured to interpret scripts identically. If one Apache server of the cluster dies, the other Apache + PHP host will continue serve and deliver webserver content so no interruption will happen. This is not a round robin type of load balancer. Above configuration will distribute Webserver load requested in ratio 3/4 3 parts will be served by First server and 4th parth will be delivered by 2nd Apache.
Well, that's all load balancer is configured! Now to test it open in browser www.mybalanacer-webserver.com or try to access it by IP in my case: 83.228.93.76

a2enmod proxy

How to download books from Books Google with Google Book Download stand alone program and Greasemonkey with Google Books Downloader script

Thursday, February 7th, 2013

If you are student or just a researcher, you already know most of the good books you can find are on books.google.com. Google Books's is nice, but not all browsers support it well. Older mobile phones has big troubles with it, plus it is always nice to have a stored copy of book on your PC for later review or just to refresh your memory on books previously read.

Thus if you get to task to download Books from Google a quick research reveals few programs claiming to support downloading Books from Google in PDF;

1. Google Books Download standalone application for Windows and Mac OS X

Google Books Download is said to support Save of Google books in PDF, JPEG or PNG format.
This program works good whether you need to extract only certain book pages, however with complete books it often hangs. Other problem is it is  proprietary software, (freeware), so pages book pages it downloads in PDF had a big red color stamp complaining the program is trial.
There is a cracked version available on Piratebay.se's website. But as Piratebay is filtered from here. To test it I had to google it via piratebay proxy: –  with "piratebay  google books download"
.


Google Books Download
, standalone app from Piratebay is at current version 3.1.308.
As you can see from screenshot Google Book Download has two modes of work, one is;
Download Manually
– This is used for manual download a pages from a complete book and converting them to PDF.
Download Automatically – Is purposed to download a complete book from books.google.com and converting it to PDF. Downloading a complete copy of book using this mode is sometimes, hanging, plus it is really, really slow. The reason is each of the pages from the Book is first scanned using OCR (Optical Character Recognition) technology page by page and later after all pages are downloaded in pictures, they're converted to 1 PDF file.

Because Download Automatically loops at certain pages, this makes Google Books Download almost useless for people looking to store a full copy of books on Books.Google.com ….

2. Downloading PDFs from books.google.com with Firefox Greasemonkey and Google Book Downloaderjavascript

a. Install GreaseMonkey Firefox add-on

If you never before heard of Greasemonkey is a Mozilla Firefox Extension that allows users to install scripts that make on-the-fly changes to web page content after or before the page is loaded in the browser (also known as augmented browsing).

b. Install Google book downloader GreaseMonkey javascript

After a FF restart, you're ready to download any book from Books.Google.com.
To use it open the book you want to download and on the left upper corner you will see a Download this book button, press it and the book will be scanned in OCR and saved in PNG picture format. Below is a screenshot showing a sample book to download from books.google.com;

how to download book from google in firefox web browser screenshot


After each book page is succesfully download in page on the left pane you get a download status;

google book download firefox screenshot pictures - Scythian Monks download - how to download books to pictures from Google books on Windows XP, Windows 8

You should keep in mind that the download links of Google Book pages, will have a time expiry, so if you don't hurry up to save the pictures for later use soon links will become inaccessible and showing as broken from Google – I'm not sure how much exactly is google's max expiry time set of links but I guess it should be something 5-10 mins.

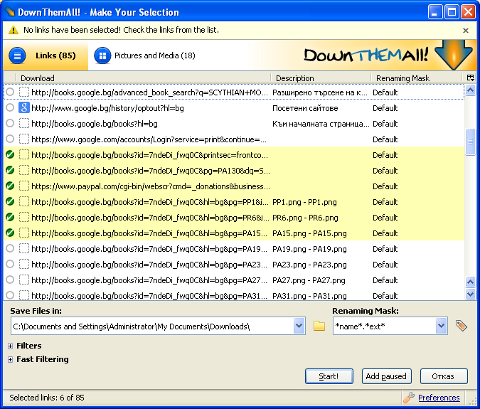
The pages of PDF, gets fetched as pictures one by one so it takes 20 secs or so to get all links to pages. Since Google Books Downloader only provides links to PDF pages it is necessery to either save each of the pictures manually (quite a lot of effort) or Install and use lets say DownThemAll! FF download extension. Using DownThemAll does not completely automates picture downloads, as you need to manually select all pictures for downloading, but at least selecting pages saves some time. To download all book pages with DownThemAll click with right mouse button on the left pane where links to pictures appears and choose download with DownThemAll!. After that tick on all links pointing to books.google.com……. to make them have the green tick as shown in below screenshot;

Once you have all PNGs saved on the PC you need to then convert them to unified PDF file. One way to do this is using ImageMagick's convert command line tool.
To do so install imagemagick for Windows downloading Win binaries from here
There are a bunch of binaries you will need to install named like ImageMagick-*-x86-static.exe

Run cmd.exe, change dir (cd) to folder where the just download book is saved in PNG and issue:


C:\Downloads> convert *.png pdf/my-book-from-pictures.pdf