Few days ago, in the hurry in the small hours of the night, I've done something extremely stupid. Wanting to move out a .tar.gz binary copy of qmail installation to /var/lib/qmail with all the dependent qmail items instead of extracting to admin user /root directory (/root), I've extracted it to the main Operating system root / directrory.
Not noticing this, I've quickly executed rm -rf var with the idea to delete all directory tree under /root/var just 3 seconds later, I've realized I'm issuing the rm -rf var with the wrong location WITH a root user !!!! Being scared on what I've done, I've quickly pressed CTRL+C to immedately cancel the deletion operation of my /var.
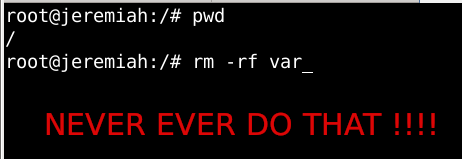
But as you can guess, since the machine has an Slid State Drive drive and SSD memory drive are much more faster in I/O operations than the classical ATA / SATA disks. I was not quick enough to cancel the operation and I've noticed already some part of my /var have been R.I.P-pped in the heaven of directories.
This was ofcourse upsetting so for a while I rethinked the situation to get some ideas on what I can do to recover my system ASAP!!! and I had the idea of course to try to reinstall All my installed .deb debian packages to restore system closest to the normal, before my stupid mistake.
Guess my unpleasent suprise when I have realized dpkg and respectively apt-get apt and aptitude package management tools cannot anymore handle packages as Debian Linux's package dependency database has been damaged due to missing dpkg directory
/var/lib/dpkg
Oh man that was unpleasent, especially since I've installed plenty of stuff that is custom on my Mate based desktop and, generally reinstalling it updating the sytem to the latest Debian security updates etc. will be time consuming and painful process I wanted to omit.
So of course the logical thing to do here was to try to somehow recover somehow a database copy of /var/lib/dpkg if that was possible, that of course led me to the idea to lookup for a way to recover my /var/lib/dpkg from backup but since I did not maintained any backup copy of my OS anywhere that was not really possible, so anyways I wondered whether dpkg does not keep some kind of database backups somewhere in case if something goes wrong with its database.
This led me to this nice Ubuntu thred which has pointed me to the part of my root rm -rf dpkg db disaster recovery solution.
Luckily .deb package management creators has thought about situation similar to mine and to give the user a restore point for /var/lib/dpkg damaged database
/var/lib/dpkg is periodically backed up in /var/backups
A typical /var/lib/dpkg on Ubuntu and Debian Linux looks like so:
hipo@jeremiah:/var/backups$ ls -l /var/lib/dpkg
total 12572
drwxr-xr-x 2 root root 4096 Jul 26 03:22 alternatives
-rw-r–r– 1 root root 11 Oct 14 2017 arch
-rw-r–r– 1 root root 2199402 Jul 25 20:04 available
-rw-r–r– 1 root root 2199402 Oct 19 2017 available-old
-rw-r–r– 1 root root 8 Sep 6 2012 cmethopt
-rw-r–r– 1 root root 1337 Jul 26 01:39 diversions
-rw-r–r– 1 root root 1223 Jul 26 01:39 diversions-old
drwxr-xr-x 2 root root 679936 Jul 28 14:17 info
-rw-r—– 1 root root 0 Jul 28 14:17 lock
-rw-r—– 1 root root 0 Jul 26 03:00 lock-frontend
drwxr-xr-x 2 root root 4096 Sep 17 2012 parts
-rw-r–r– 1 root root 1011 Jul 25 23:59 statoverride
-rw-r–r– 1 root root 965 Jul 25 23:59 statoverride-old
-rw-r–r– 1 root root 3873710 Jul 28 14:17 status
-rw-r–r– 1 root root 3873712 Jul 28 14:17 status-old
drwxr-xr-x 2 root root 4096 Jul 26 03:22 triggers
drwxr-xr-x 2 root root 4096 Jul 28 14:17 updates
Before proceeding with this radical stuff to move out /var/lib/dpkg/info from another machine to /var mistakenyl removed oned. I have tried to recover with the well known:
- extundelete
- foremost
- recover
- ext4magic
- ext3grep
- gddrescue
- ddrescue
- myrescue
- testdisk
- photorec
Linux file deletion recovery tools from a USB stick loaded with a Number of LiveCD distributions, i.e. tested recovery with:
- Debian LiveCD
- Ubuntu LiveCD
- KNOPPIX
- SystemRescueCD
- Trinity Rescue Kit
- Ultimate Boot CD
but unfortunately none of them couldn't recover the deleted files …
The reason why the standard file recovery tools could not recover ?
My assumptions is after I've done by rm -rf var; from sysroot, issued the sync (- if you haven't used it check out man sync) command – that synchronizes cached writes to persistent storage and did a restart from the poweroff PC button, this should have worked, as I've recovered like that in the past) in a normal Sys V System with a normal old fashioned blocks filesystem as EXT2 . or any other of the filesystems without a journal, however as the machine run a EXT4 filesystem with a journald and journald, this did not work perhaps because something was not updated properly in /lib/systemd/systemd-journal, that led to the situation all recently deleted files were totally unrecoverable.
1. First step was to restore the directory skele of /var/lib/dpkg
# mkdir -p /var/lib/dpkg/{alternatives,info,parts,triggers,updates}
2. Recover missing /var/lib/dpkg/status file
The main file that gives information to dpkg of the existing packages and their statuses on a Debian based systems is /var/lib/dpkg/status
# cp /var/backups/dpkg.status.0 /var/lib/dpkg/status
3. Reinstall dpkg package manager to make package management working again
Say a warm prayer to the Merciful God ! and do:
# apt-get download dpkg
# dpkg -i dpkg*.deb
4. Reinstall base-files .deb package which provides basis of a Debian system
Hopefully everything will be okay and your dpkg / apt pair will be in normal working state, next step is to:
# apt-get download base-files
# dpkg -i base-files*.deb
5. Do a package sanity and consistency check and try to update OS package list
Check whether packages have been installed only partially on your system or that have missing, wrong or obsolete control data or files. dpkg should suggest what to do with them to get them fixed.
# dpkg –audit
Then resynchronize (fetch) the package index files from their sources described in /etc/apt/sources.list
# apt-get update
Do apt db constistency check:
# apt-get check
check is a diagnostic tool; it updates the package cache and checks for broken dependencies.
Take a deep breath ! …
Do :
ls -l /var/lib/dpkg
and compare with the above list. If some -old file is not present don't worry it will be there tomorrow.
Next time don't forget to do a regular backup with simple rsync backup script or something like Bacula / Amanda / Time Vault or Clonezilla.
6. Copy dpkg database from another Linux system that has a working dpkg / apt Database
Well this was however not the end of the story … There were still many things missing from my /var/ and luckily I had another Debian 10 Buster install on another properly working machine with a similar set of .deb packages installed. Therefore to make most of my programs still working again I have copied over /var from the other similar set of package installed machine to my messed up machine with the missing deleted /var.
To do so …
On Functioning Debian 10 Machine (Working Host in a local network with IP 192.168.0.50), I've archived content of /var:
linux:~# tar -czvf var_backup_debian10.tar.gz /var
…
Then sftped from Working Host towards the /var deleted broken one in my case this machine's hostname is jericho and luckily still had SSHD and SFTP running processes loaded in memory:
jericho:~# sftp root@192.168.0.50
sftp> get var_backup_debian10.tar.gz
…
Now Before extracting the archive it is a good idea to make backup of old /var remains somewhere for example somewhere in /root
just in case if we need to have a copy of the dpkg backup dir /var/backups
jericho:~# cp -rpfv /var /root/var_backup_damaged
…
jericho:~# tar -zxvf /root/var_backup_debian10.tar.gz
jericho:/# mv /root/var/ /
…
Then to make my /var/lib/dpkg contain the list of packages from my my broken Linux install I have ovewritten /var/lib/dpkg with the files earlier backupped before .tar.gz was extracted.
jericho:~# cp -rpfv /var /root/var_backup_damaged/lib/dpkg/ /var/lib/
7. Reinstall All Debian Packages completely scripts
I then tried to reinstall each and every package first using aptitude with aptitude this is done with
# aptitude reinstall '~i'
However as this failed, tried using a simple shell loop like below:
for i in $(dpkg -l |awk '{ print $2 }'); do echo apt-get install –reinstall –yes $i; done
Alternatively, all .deb package reninstall is also possible with dpkg –get-selections and with awk with below cmds:
dpkg –get-selections | grep -v deinstall | awk '{print $1}' > list.log;
awk '$1=$1' ORS=' ' list.log > newlist.log;
apt-get install –reinstall $(cat newlist.log)
It can also be run as one liner for simplicity:
dpkg –get-selections | grep -v deinstall | awk '{print $1}' > list.log; awk '$1=$1' ORS=' ' list.log > newlist.log; apt-get install –reinstall $(cat newlist.log)
This produced a lot of warning messages, reporting "package has no files currently installed" (virtually for all installed packages), indicating a severe packages problem below is sample output produced after each and every package reinstall … :
dpkg: warning: files list file for package 'iproute' missing; assuming package has no files currently installed
dpkg: warning: files list file for package 'brscan-skey' missing; assuming package has no files currently installed
dpkg: warning: files list file for package 'libapache2-mod-php7.4' missing; assuming package has no files currently installed
dpkg: warning: files list file for package 'libexpat1:amd64' missing; assuming package has no files currently installed
dpkg: warning: files list file for package 'libexpat1:i386' missing; assuming package has no files currently installed
dpkg: warning: files list file for package 'php5.6-readline' missing; assuming package has no files currently installed
dpkg: warning: files list file for package 'linux-headers-4.19.0-5-amd64' missing; assuming package has no files currently installed
dpkg: warning: files list file for package 'libgraphite2-3:amd64' missing; assuming package has no files currently installed
dpkg: warning: files list file for package 'libgraphite2-3:i386' missing; assuming package has no files currently installed
dpkg: warning: files list file for package 'libbonoboui2-0:amd64' missing; assuming package has no files currently installed
dpkg: warning: files list file for package 'libxcb-dri3-0:amd64' missing; assuming package has no files currently installed
dpkg: warning: files list file for package 'libxcb-dri3-0:i386' missing; assuming package has no files currently installed
dpkg: warning: files list file for package 'liblcms2-2:amd64' missing; assuming package has no files currently installed
dpkg: warning: files list file for package 'liblcms2-2:i386' missing; assuming package has no files currently installed
dpkg: warning: files list file for package 'libpixman-1-0:amd64' missing; assuming package has no files currently installed
dpkg: warning: files list file for package 'libpixman-1-0:i386' missing; assuming package has no files currently installed
dpkg: warning: files list file for package 'gksu' missing; assuming package has no files currently installed
dpkg: warning: files list file for package 'liblogging-stdlog0:amd64' missing; assuming package has no files currently installed
dpkg: warning: files list file for package 'mesa-vdpau-drivers:amd64' missing; assuming package has no files currently installed
dpkg: warning: files list file for package 'mesa-vdpau-drivers:i386' missing; assuming package has no files currently installed
dpkg: warning: files list file for package 'libzvbi0:amd64' missing; assuming package has no files currently installed
dpkg: warning: files list file for package 'libzvbi0:i386' missing; assuming package has no files currently installed
dpkg: warning: files list file for package 'libcdparanoia0:amd64' missing; assuming package has no files currently installed
dpkg: warning: files list file for package 'libcdparanoia0:i386' missing; assuming package has no files currently installed
dpkg: warning: files list file for package 'python-gconf' missing; assuming package has no files currently installed
dpkg: warning: files list file for package 'php5.6-cli' missing; assuming package has no files currently installed
dpkg: warning: files list file for package 'libpaper1:amd64' missing; assuming package has no files currently installed
dpkg: warning: files list file for package 'mixer.app' missing; assuming package has no files currently installed
…
After some attempts I found a way to be able to work around the warning message, for each package by simply reinstalling the package reporting the issue with
apt –reinstall $package_name
Though reinstallation started well and many packages got reinstalled, unfortunately some packages such as apache2-mod-php5.6 and other php related ones started failing during reinstall ending up in unfixable states right after installation of binaries from packages was successfully placed in its expected locations on disk. The failures occured during the package setup stage ( dpkg –configure $packagename) …
The logical thing to do is a recovery attempt with something like the usual well known by any Debian admin:
apt-get install –fix-missing
As well as Manual requesting to reconfigure (issue re-setup) of all installed packages also did not produced a positive result
dpkg –configure -a
…
But many packages were still failing due to dpkg inability to execute some post installation scripts from respective .deb files.
To work around that and continue installing the rest of packages I had to manually delete all files related to the failing package located under directory
/var/lib/dpkg/info#
For example to omit the post installation failure of libapache2-mod-php5.6 and have a succesful install of the package next time I tried reinstall, I had to delete all /var/lib/dpkg/info/libapache2-mod-php5.6.postrm, /var/lib/dpkg/info/libapache2-mod-php5.6.postinst scripts and even sometimes everything like libapache2-mod-php5.6* that were present in /var/lib/dpkg/info dir.
The problem with this solution, however was the package reporting to install properly, but the post install script hooks were still not in placed and important things as setting permissions of binaries after install or applying some configuration changes right after install was missing leading to programs failing to fully behave properly or even breaking up even though showing as finely installed …
The final solution to this problem was radical.
I've used /var/lib/dpkg database (directory) from ther other working Linux machine with dpkg DB OK found in var_backup_debian10.tar.gz (linux:~# host with a working dpkg database) and then based on the dpkg package list correct database responding on jericho:~# to reinstall each and every package on the system using Debian System Reinstaller script taken from the internet.
Debian System Reinstaller works but to reinstall many packages, I've been prompted again and again whether to overwrite configuration or keep the present one of packages.
To Omit the annoying [Y / N ] text prompts I had made a slight modification to the script so it finally looked like this:
#!/bin/bash
# Debian System Reinstaller
# Copyright (C) 2015 Albert Huang
# Copyright (C) 2018 Andreas Fendt
#
# This program is free software: you can redistribute it and/or modify
# it under the terms of the GNU General Public License as published by
# the Free Software Foundation, either version 3 of the License, or
# (at your option) any later version.
#
# This program is distributed in the hope that it will be useful,
# but WITHOUT ANY WARRANTY; without even the implied warranty of
# MERCHANTABILITY or FITNESS FOR A PARTICULAR PURPOSE. See the
# GNU General Public License for more details.
#
# You should have received a copy of the GNU General Public License
# along with this program. If not, see <http://www.gnu.org/licenses/>.
#
# —
# This script assumes you are using a Debian based system
# (Debian, Mint, Ubuntu, #!), and have sudo installed. If you don't
# have sudo installed, replace "sudo" with "su -c" instead.
#
pkgs=`dpkg –get-selections | grep -w 'install$' | cut -f 1 | egrep -v '(dpkg|apt)'`
for pkg in $pkgs; do
echo -e "\033[1m * Reinstalling:\033[0m $pkg"
apt-get –reinstall -o Dpkg::Options::="–force-confdef" -o Dpkg::Options::="–force-confold" -y install $pkg || {
echo "ERROR: Reinstallation failed. See reinstall.log for details."
exit 1
}
done
debian-all-packages-reinstall.sh working modified version of Albert Huang and Andreas Fendt script can be also downloaded here.
Note ! Omitting the text confirmation prompts to install newest config or keep maintainer configuration is handled by the argument:
-o Dpkg::Options::="–force-confold
I however still got few NCurses Console selection prompts during the reinstall of about 3200+ .deb packages, so even with this mod the reinstall was not completely automatic.
Note ! During the reinstall few of the packages from the list failed due to being some old unsupported packages this was ejabberd, ircd-hybrid and a 2 / 3 more.
This failure was easily solved by completely purging those packages with the usual
# dpkg –purge $packagename
and reruninng debian-all-packages-reinstall.sh on each of the failing packages.
Note ! The failing packages were just old ones left over from Debian 8 and Debian 9 before the apt-get dist-upgrade towards 10 Duster.
Eventually I got a success by God's grance, after few hours of pains and trials, ending up in a working state package database and a complete set of freshly reinstalled packages.
The only thing I had to do finally is 2 hours of tampering why GNOME did not automatically booted after the system reboot due to failing gdm
until I fixed that I've temprary used ligthdm (x-display-manager), to do I've
dpkg –reconfigure gdm3
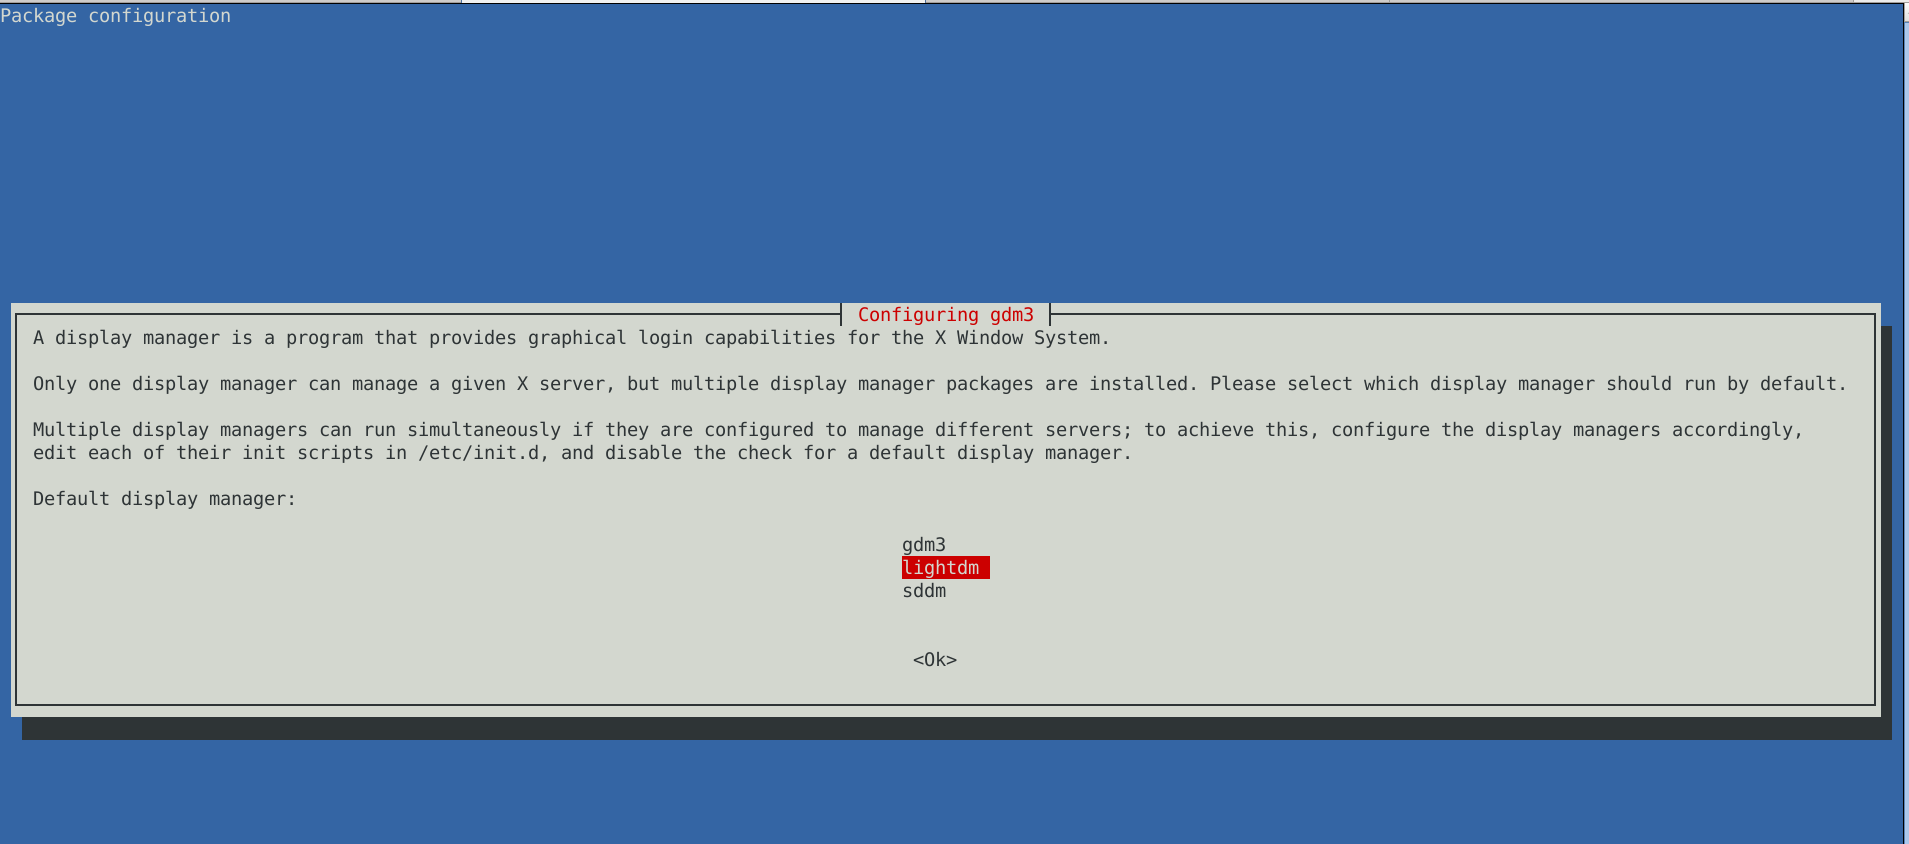
to work around this I had to also reinstall few libraries, reinstall the xorg-server, reinstall gdm and reinstall the meta package for GNOME, using below set of commands:
apt-get install –reinstall libglw1-mesa libglx-mesa0
apt-get install –reinstall libglu1-mesa-dev
apt install –reinstallgsettings-desktop-schemas
apt-get install –reinstall xserver-xorg-video-intel
apt-get install –reinstall xserver-xorg
apt-get install –reinstall xserver-xorg-core
apt-get install –reinstall task-desktop
apt-get install –reinstall task-gnome-desktop
As some packages did not ended re-instaled on system because on the original host from where /var/lib/dpkg db was copied did not have it I had to eventually manually trigger reinstall for those too:
apt-get install –reinstall –yes vlc
apt-get install –reinstall –yes thunderbird
apt-get install –reinstall –yes audacity
apt-get install –reinstall –yes gajim
apt-get install –reinstall –yes slack remmina
apt-get install –yes k3b
pt-get install –yes gbgoffice
pt-get install –reinstall –yes skypeforlinux
apt-get install –reinstall –yes vlc
apt-get install –reinstall –yes libcurl3-gnutls libcurl3-nss
apt-get install –yes virtualbox-5.2
apt-get install –reinstall –yes vlc
apt-get install –reinstall –yes alsa-tools-gui
apt-get install –reinstall –yes gftp
apt install ./teamviewer_15.3.2682_amd64.deb –yes
Note that some of above packages requires a properly configured third party repositories, other people might have other packages that are missing from the dpkg list and needs to be reinstalled so just decide according to your own case of left aside working system present binaries that doesn't belong to any dpkg installed package.
After a bit of struggle everything is back to normal Thanks God! 🙂 !


