Posts Tagged ‘rpf’

Auto restart Apache on High server load (bash shell script) – Fixing Apache server temporal overload issues

Saturday, March 24th, 2012

auto-restart-apache-on-high-load-bash-shell-script-fixing-apache-temporal-overload-issues

I've written a tiny script to check and restart, Apache if the server encounters, extremely high load avarage like for instance more than (>25). Below is an example of a server reaching a very high load avarage:;

server~:# uptime
13:46:59 up 2 days, 18:54, 1 user, load average: 58.09, 59.08, 60.05
load average: 0.09, 0.08, 0.08

Sometimes high load avarage is not a problem, as the server might have a very powerful hardware. A high load numbers is not always an indicator for a serious problems. Some 16 CPU dual core (2.18 Ghz) machine with 16GB of ram could probably work normally with a high load avarage like in the example. Anyhow as most servers are not so powerful having such a high load avarage, makes the machine hardly do its job routine.

In my specific, case one of our Debian Linux servers is periodically reaching to a very high load level numbers. When this happens the Apache webserver is often incapable to serve its incoming requests and starts lagging for clients. The only work-around is to stop the Apache server for a couple of seconds (10 or 20 seconds) and then start it again once the load avarage has dropped to less than "3".

If this temporary fix is not applied on time, the server load gets increased exponentially until all the server services (ssh, ftp … whatever) stop responding normally to requests and the server completely hangs …

Often this server overloads, are occuring at night time so I'm not logged in on the server and one such unexpected overload makes the server unreachable for hours.
To get around the sudden high periodic load avarage server increase, I've written a tiny bash script to monitor, the server load avarage and initiate an Apache server stop and start with a few seconds delay in between.

#!/bin/sh
# script to check server for extremely high load and restart Apache if the condition is matched
check=`cat /proc/loadavg | sed 's/\./ /' | awk '{print $1}'`
# define max load avarage when script is triggered
max_load='25'
# log file
high_load_log='/var/log/apache_high_load_restart.log';
# location of inidex.php to overwrite with temporary message
index_php_loc='/home/site/www/index.php';
# location to Apache init script
apache_init='/etc/init.d/apache2';
#
site_maintenance_msg="Site Maintenance in progress - We will be back online in a minute";
if [ $check -gt "$max_load" ]; then>
#25 is load average on 5 minutes
cp -rpf $index_php_loc $index_php_loc.bak_ap
echo "$site_maintenance_msg" > $index_php_loc
sleep 15;
if [ $check -gt "$max_load" ]; then
$apache_init stop
sleep 5;
$apache_init restart
echo "$(date) : Apache Restart due to excessive load | $check |" >> $high_load_log;
cp -rpf $index_php_loc.bak_ap $index_php_loc
fi
fi

The idea of the script is partially based on a forum thread – Auto Restart Apache on High Loadhttp://www.webhostingtalk.com/showthread.php?t=971304Here is a link to my restart_apache_on_high_load.sh script

The script is written in a way that it makes two "if" condition check ups, to assure 100% there is a constant high load avarage and not just a temporal 5 seconds load avarage jump. Once the first if is matched, the script first tries to reduce the server load by overwritting a the index.php, index.html script of the website with a one stating the server is ongoing a maintenance operations.
Temporary stopping the index page, often reduces the load in 10 seconds of time, so the second if case is not necessery at all. Sometimes, however this first "if" condition cannot decrease enough the load and the server load continues to stay too high, then the script second if comes to play and makes apache to be completely stopped via Apache init script do 2 secs delay and launch the apache server again.

The script also logs about, the load avarage encountered, while the server was overloaded and Apache webserver was restarted, so later I can check what time the server overload occured.
To make the script periodically run, I've scheduled the script to launch every 5 minutes as a cron job with the following cron:

# restart Apache if load is higher than 25
*/5 * * * * /usr/sbin/restart_apache_on_high_load.sh >/dev/null 2>&1

I have also another system which is running FreeBSD 7_2, which is having the same overload server problems as with the Linux host.
Copying the auto restart apache on high load script on FreeBSD didn't work out of the box. So I rewrote a little chunk of the script to make it running on the FreeBSD host. Hence, if you would like to auto restart Apache or any other service on FreeBSD server get /usr/sbin/restart_apache_on_high_load_freebsd.sh my script and set it on cron on your BSD.

This script is just a temporary work around, however as its obvious that the frequency of the high overload will be rising with time and we will need to buy new server hardware to solve permanently the issues, anyways, until this happens the script does a great job 🙂

I'm aware there is also alternative way to auto restart Apache webserver on high server loads through using monit utility for monitoring services on a Unix system. However as I didn't wanted to bother to run extra services in the background I decided to rather use the up presented script.

Interesting info to know is Apache module mod_overload exists – which can be used for checking load average. Using this module once load avarage is over a certain number apache can stop in its preforked processes current serving request, I've never tested it myself so I don't know how usable it is. As of time of writting it is in early stage version 0.2.2
If someone, have tried it and is happy with it on a busy hosting servers, please share with me if it is stable enough?
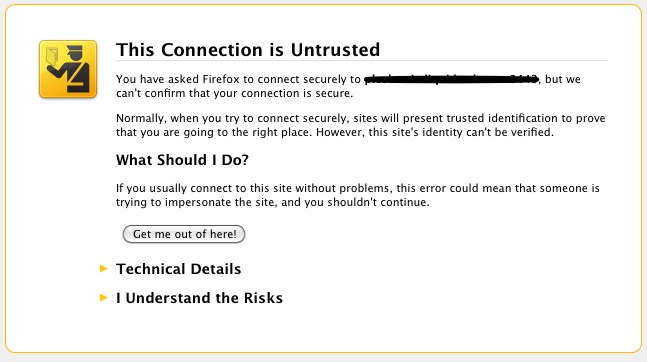
How to generate self signed SSL certificate with openssl on Linux / BSD

Wednesday, November 6th, 2013

How to generate self signed SSL certificate with openssl on Linux / BSD

It is common solution for personal use to generate SSL certificates which are self-signed. Self-signed certificates are dangerous as no authority or company guarantees that remote site is trustable. However for private use having encrypted connection whether you need to transfer personal data is better than not having such. There are plenty of tutorials online pointing how to set-up Apache webserver to provide access via SSL port 443 with self-signed certifacate, but anyways I decided to blog here a one-liner command way, which makes generating self-signed certificate a piece of cake. Self-signed certificates on UNIX are generated with openssl command part of openssl (Secure Socket Layer cryptocgraphic tools).

On Debian Linux to install openssl (if you still don't have it):

apt-get install --yes openssl

On Fedora, RHEL, CentOS etc. same install should be done with:

yum install -y openssl

On FreeBSD to install it use ports;

cd /usr/ports/security/openssl
make install clean

Once openssl is available, here is command to generate self signed SSL certitifacate;
 

openssl req -x509 -nodes -days 3650 -newkey rsa:2048 -keyout my-sitename.key -out my-sitename.crt
Generating a 2048 bit RSA private key
............................................+++
..............................................................+++
writing new private key to 'key.pem'
Enter PEM pass phrase:
Verifying - Enter PEM pass phrase:
-----
You are about to be asked to enter information that will be incorporated
into your certificate request.
What you are about to enter is what is called a Distinguished Name or a DN.
There are quite a few fields but you can leave some blank
For some fields there will be a default value,
If you enter '.', the field will be left blank.
-----
Country Name (2 letter code) [AU]:BG
State or Province Name (full name) [Some-State]:Sofia
Locality Name (eg, city) []:Sofia
Organization Name (eg, company) [Internet Widgits Pty Ltd]:Pc Freak
Organizational Unit Name (eg, section) []:Pc Freak
Common Name (eg, YOUR name) []:www.pc-freak.net
Email Address []:testing@www.pc-freak.net

The generated certificate Private Key file is placed in my-sitename.key
, actual certificate is located in my-sitename.crt -days option tells for how long period certificate will be valid. Regenerating certificate every year (360 days) is good security practice but it is pretty annoying to see your certificate has expered thus for private self signed SSL certificate it is more confortable to generate cert for 10 years time.
To use my-sitename.key and my-sitename.crt copy them to /etc/ssl/crt/

cp -rpf my-sitename.crt /etc/ssl/crt/
cp -rpf my-sitename.key /etc/ssl/crt/

Next what's left is to configure Apache to use new generated certs. Quickest way is to add it inside virtual host. Adding to Apache also depends on Linux distribution where SSL has to be added but in general, what should work is something like:

SSLEngine on
SSLCertificateFile /etc/ssl/crt/my-sitename.crt
SSLCertificateKeyFile /etc/ssl/crt/my-sitename.key

Note that if SSL has to be enabled for specific Virtual Host you will have to place above Apache directives into the Vhost. Though certifiate will only be trusted by your authority RSA 2048 bit encryption in transfer data between your Webserver and Browser should guarantee you extra security of data, not that it is impossible for data to be still sniffed by a skilled hacker but makes data securily transferred in probably 99% of cases 🙂

How to exclude files on copy (cp) on GNU / Linux / Linux copy and exclude files and directories (cp -r) exclusion

Saturday, March 3rd, 2012

I've recently had to make a copy of one /usr/local/nginx directory under /usr/local/nginx-bak, in order to have a working copy of nginx, just in case if during my nginx update to new version from source mess ups.

I did not check the size of /usr/local/nginx , so just run the usual:

nginx:~# cp -rpf /usr/local/nginx /usr/local/nginx-bak
...

Execution took more than 20 seconds, so I check the size and figured out /usr/local/nginx/logs has grown to 120 gigabytes.

I didn't wanted to extra load the production server with copying thousands of gigabytes so I asked myself if this is possible with normal Linux copy (cp) command?. I checked cp manual e.g. man cp, but there is no argument like –exclude or something.

Even though the cp command exclude feature is not implemented by default there are a couple of ways to copy a directory with exclusion of subdirectories of files on G / Linux.

Here are the 3 major ones:

1. Copy directory recursively and exclude sub-directories or files with GNU tar

Maybe the quickest way to copy and exclude directories is through a littke 'hack' with GNU tar nginx:~# mkdir /usr/local/nginx-new;
nginx:~# cd /usr/local/nginx#
nginx:/usr/local/nginx# tar cvf - \. --exclude=/usr/local/nginx/logs/* \
| (cd /usr/local/nginx-new; tar -xvf - )

Copying that way however is slow, in my case it fits me perfectly but for copying large chunks of data it is better not to use pipe and instead use regular tar operation + mv

# cd /source_directory
# tar cvf test.tar --exclude=dir_to_exclude/*\--exclude=dir_to_exclude1/* . \
# mv test.tar /destination_directory
# cd /destination# tar xvf test.tar

2. Copy folder recursively excluding some directories with rsync

P>eople who has experience with rsync , already know how invaluable this tool is. Rsync can completely be used as for substitute=de.a# rsync -av –exclude='path1/to/exclude' –exclude='path2/to/exclude' source destination

This example, can also be used as a solution to my copy nginx and exclude logs directory casus like so:

nginx:~# rsync -av --exclude='/usr/local/nginx/logs/' /usr/local/nginx/ /usr/local/nginx-new

As you can see for yourself, this is a way more readable for the tar, however it will not work on servers, where rsync is not installed and it is unusable if you have to do operations as a regular users on such for that case surely the GNU tar hack is more 'portable' across systems.
rsync has also Windows version and therefore, the same methodology should be working on MS Windows and good for batch scripting.
I've not tested it myself, yet as I've never used rsync on Windows, if someone has tried and it works pls drop me a short msg in comments.
3. Copy directory and exclude sub directories and files with find

Find in collaboration with cp can also be used to exclude certain directories while copying. Actually this method is better than the GNU tar hack and surely more efficient. For machines, where rsync is not installed it is just a perfect way to copy files from location to location, while excluding some directories, here is an example use of find and cp, for the above nginx case:

nginx:~# cd /usr/local/nginx
nginx:~# mkdir /usr/local/nginx
nginx:/usr/local/nginx# find . -type d \( ! -name logs \) -print -exec cp -rpf '{}' /usr/local/nginx-bak \;

This will find all directories inside /usr/local/nginx with find command print them on the screen, then execute recursive copy over each found directory and copy to /usr/local/nginx-bak

This example will work fine in the nginx case because /usr/local/nginx does not contain any files but only sub-directories. In other occwhere the directory does contain some files besides sub-directories the files had to also be copied e.g.:

# for i in $(ls -l | egrep -v '^d'); do\
cp -rpf $i /destination/directory

This will copy the files from source directory (for instance /usr/local/nginx/my_file.txt, /usr/local/nginx/my_file1.txt etc.), which doesn't belong to a subdirectory.

The cmd expression:

# ls -l | egrep -v '^d'

Lists only the files while excluding all the directories and in a for loop each of the files is copied to /destination/directory

If someone has better ideas, please share with me 🙂

How to configure NTP server (ntpd) to synchronize server clock over the Internet on FreeBSD

Friday, February 10th, 2012


FreeBSD ntpd logo / How to configure ntpd to synchronize with internet time servers on FreeBSD

On FreeBSD ntpd , ntpdc , ntpdate , ntpq doesn't need to be installed via a specific package like on GNU/Linux as they're part of the FreeBSD world (binary standardly shipped with FreeBSD basis system).

The FreeBSD handbook has a chapter explaining thoroughfully on ntp on FreeBSD ,however for the lazy ones here is a short few steps tutorial on how to install and configure ntpd on bsd :

1. Copy sample ntp.conf file to /etc/

freebsd# cp -rpf /usr/src/etc/ntp.conf /etc/ntp/

No need for any modifications if you don't want to apply some specific restrictions on whom can access the ntpd server. If you update regularly the FreeBSD system with freebsd-update or directly by rebuilding the FreeBSD kernel / world adding restrictions might be not necessery..

If you check /usr/src/etc/ntp.conf you will notice freebsd project people are running their own ntp servers , by default ntpd will use this servers to fetch timing information. The exact server hosts which as of time of writting are used can be seen in ntp.conf and are:

server 0.freebsd.pool.ntp.org iburst maxpoll 9
server 1.freebsd.pool.ntp.org iburst maxpoll 9
server 2.freebsd.pool.ntp.org iburst maxpoll 9

2. Add ntpd daemon to load on system boot via /etc/rc.conf

By default ntpd is disabled on FreeBSD, you can see if it is disabled or enabled by invoking:

freebsd# /etc/rc.d/ntpd rcvar
# ntpd
ntpd_enable=NO

To Enable ntpd to get loaded each time it boots , following 3 lines has to be added in /etc/rc.conf .

ntpdate_enable="YES"
ntpdate_flags="europe.pool.ntp.org"
ntpd_enable="YES"

Quick way to add them is to use echo :

echo 'ntpdate_enable="YES" >> /etc/rc.conf
echo 'ntpdate_flags="europe.pool.ntp.org" >> /etc/rc.conf
echo 'ntpd_enable="YES" >> /etc/rc.conf

Now as the 3 rc.conf vars are set to "YES", the ntpd can be started. Without having this variables in /etc/rc.conf , "/etc/rc.d/ntpd start" will refuse to start ntpd.

3. Start the ntpd service

freebsd# /etc/rc.d/ntpd start
...

One interesting note to make is ntpd can also operate without specifying any config file (/etc/ntp.conf), the only requirement for the server to start is to have a properly set ntpdate server, like lets say (ntpdate_flags="europe.pool.ntp.org")

4. Permit only certain host or localhost to "talk" to the ntpd server

If you want to imply some ntp server restrictions, the configuration directives are same like on Linux:

To allow only a a host inside a local network with IP 192.168.0.2 as well as localhost, to be able to fetch time information via ntpd server put inside /etc/ntp.conf:

restrict 127.0.0.1
restrict 192.168.0.1 mask 255.255.255.0 nomodify notrap

If you want to prohibit ntpd to serve as a Network Time Server, to any other host except localhost, add in /etc/ntp.conf :

restrict default ignore

Allowing and denying certain hosts can be also done on pf (packet filter) or ipfw firewall level, and in my view is easier (and less confusing), than adding restrictions through ntp.conf. Besides that using directly the server firewall to apply restrictions is more secure. If for instance a remote exploit vulnerability is discovered affecting your ntpd server. this will not affect you externally as access to the UDP port 123 will be disabled on a firewall level.
Something good to mention is NTP servers communicate between each other using the UDP source/destination (port 123). Hence if the NTPD server has to be publicly accessible and there is a firewall already implemented, access to source/dest port 123 should be included in the configured firewall …

5. Check if the ntp server is running properly / ntp server query operations

[root@pcfreak /home/hipo]# ps axuww|grep -i ntp
root 15647 0.0 0.2 4672 1848 ?? Ss 2:49PM 0:00.04 /usr/sbin/ntpd -c /etc/ntp.conf -p /var/run/ntpd.pid -f /var/db/ntpd.drift

To query the now running ntpd server as well as set various configuration options "on the fly" (e.g. without need for ntp.conf edits and init script restart), a tool called ntpdc exists. ntpdc tool could be used to connect to localhost running ntpd as well as to connect and manage remotely a ntpd server.
The most basic use of ntpdc is to check (server peers).:
freebsd# ntpdc localhost
ntpdc> peers
remote local st poll reach delay offset disp
===================================================

kgb.comnet.bg 83.228.93.76 2 64 377 0.00282 -0.050575 0.06059
*billing.easy-la 83.228.93.76 2 64 377 0.01068 -0.057400 0.06770
=ns2.novatelbg.n 83.228.93.76 2 64 377 0.01001 -0.055290 0.06058

ntpdc has also a non-interactive interface, handy if there is a need for requests to a ntpd to be scripted. To check ntpd server peers non-interactively:

freebsd# ntpdc -p localhost
===================================================
kgb.comnet.bg 83.228.93.76 2 64 377 0.00284 -0.043157 0.06184
=billing.easy-la 83.228.93.76 2 64 377 0.01059 -0.042648 0.05811
*ns2.novatelbg.n 83.228.93.76 2 64 377 0.00996 -0.041097 0.06094

ntpdc has plenty of other ntpd query options, e.g. :

ntpdc> help
ntpdc commands:
addpeer controlkey fudge keytype quit timeout
addrefclock ctlstats help listpeers readkeys timerstats
addserver debug host loopinfo requestkey traps
addtrap delay hostnames memstats reset trustedkey
authinfo delrestrict ifreload monlist reslist unconfig
broadcast disable ifstats passwd restrict unrestrict
clkbug dmpeers iostats peers showpeer untrustedkey
clockstat enable kerninfo preset sysinfo version
clrtrap exit keyid pstats sysstats

ntpdc is an advanced query tool for ntpd , servers. Another tool exists called ntpq which syntax is almost identical to ntpdc . The main difference between the two is ntpq is a monitoring tool mostly used just for monitoring purposes, where ntpdc can also change plenty of things in the server configuration.

For people who want to learn more on ntpd the man page is a great reading , containing chapters describing thoroughfully exactly how NTPD time servers operate, etc.

Speed up your DNS resolve if your Internet Service Provider DNS servers fail or resolve slowly / Privacy concerns of public DNS services use

Wednesday, March 30th, 2011

In my experience with many network Internet Service Providers by so far I’ve encountered a lot of DNS oddities and therefore surfing (web) and mail slowness.

It’s sometimes very irritating especially in cases, when I use my internet over Wireless public or university wireless networks.
In principle many of the Wireless routers which distribute the internet especially in organizations are badly configured and the slowness with DNS resolvings is an absolute classic.
If you haven’t encountered that slowness in opening web pages when connected from your University’s canteen, whether it’s fill with people for the lunch break, then I should say you’re really lucky!

My personal experience with this bad configured devices DNS services has been quite negative and every now and then I use to set and use public DNS servers like OpenDNS and Google DNS

Very often when I connect to a wireless network with my notebook running Debian Linux and the internet is too slow in opening pages I automatically set the Google or OpenDNS servers as a default DNS IP resolving servers.

1. DNS IP addresses of Google Public DNS are:

8.8.8.7
and
8.8.8.8

2. OpenDNS Public DNS servers has the IP addresses of:

208.67.222.222
208.67.222.220

I do set up and use the upper public DNS services addresses via the commands:

3. Set and use Google Public DNS services on my Linux debian:~# cp -rpf /etc/resolv.conf /etc/resolv.conf.orig
debian:~# echo "nameserver 8.8.8.7n nameserver 8.8.8.8 n" > /etc/resolv.conf;

I first create backu pof my resolv.conf under the name resolv.conf.orig just to make sure I can revert back to my old DNSes if I need them at some point.

If you prefer to use the OpenDNS services for some let’s say privacy reasons, you do it in the same manner as in the above commands, you only change the IP addresses. 4. Configure and use the OpenDNS public DNS services

debian:~# cp -rpf /etc/resolv.conf /etc/resolv.conf.orig
debian:~# echo "nameserver 208.67.222.222n nameserver 208.67.222.220 n" > /etc/resolv.conf;

Of course using Public DNS services has it’s disadvantages over the domain resolving speed up advantage.
One major issue is that Public DNS services are running on a top of a cloud and if you have red my previous article Cloud Computing a possible threat to users privacy and system administrator employment you might be agaist the idea of using a services which are powered by cloud.

The other primary concern is related to your SECURITY and a PRIVACY by using Public DNS networks, you risk that your Public DNS provider might use some DNS spoof techniques to mislead you and resolve you common domain names which usually resolve to let’s say 1.1.1.1 to let’s say 1.5.5.10

Even though this kind of practices on a side of a public DNS provider is not a likely scenario the possible implications of Public DNS providers using DNS forgery to fool you about domain names locations is a very serious issue.

As public DNS providers does contain again the good old philosophy of cloud computing embedded in themselves and they strive to become some kind of a standard which people might vote to adopt and use, the future implications of a wide adoption of Public DNS servers might be a terrible thing on internet users privacy!!!

Just think about a future scenario where we users of the Internet are forced to use a number of public DNS servers in order to use the Internet!
Usually a very huge companies are possessing the Public DNS services and do pay for the tech equipment required for building up the cluster clouds which provide the DNS services and therefore, if in the short future public DNS becomes a fashion and (God forbid!) a standard which shifts up the regular ISP DNS servers to resolve domains to IPs then it will be terrible.

The corporations which does own the Public DNS service/s might have a direct control over filtering and censoling information posted on any website on the internet.
Even worser if the world decides to adopt public DNS services somewhere in the future this means that large corporations owning the open dns cluster or clusters will be able to check each and every resolving made by any user on the net.
If you think closely such an information possessed by a company is not the best thing we want.

So let me close up this article, I’m not a fan and an evangelist who preaches the use of Public DNS services. Right on Contrary I do honestly hate the idea behind public DNS.
Nevertheless apart from my personal opinion I’m a practical person and using the public DNS servers every now and then when this will accelerate my access to the internet is still an option I do enjoy.

Maybe it’s time for a free software project (a tor like), which will provide users with an OpenDNS alternative which will run on hobbyist computers around the globe (just like with tor).

What’s rather funny is that the loud name OpenDNS is a big lie in reality OpenDNS is not opened it’s a company owned closed source service 😉