Posts Tagged ‘superuser’

How to yum Install Gnome GUI, Latest Guest Addition Tools, Google Chrome latest version and rdesktop / xfreerdp / remmina remote RDP VNC clients On CentOS 7 / 8

Thursday, July 29th, 2021

centos7-logo

I've just reinstalled my CentOS 7 Virtual Machine since after I tried to migrate a .vdi Virtual Box image to the new company laptop using a copy of Virtualbox VM via Microsoft OneDrive was a failure.
Thus I have rebuild all my CentOS Linux programs preinstalled on the old Virtual Machines from scratch, I use this virtual machine for a very simple tasks, so basicly most imporant tools I use is a plain SSH and VNC and Remote Desktop clients just to be able to remotely connect to remote Home based server.


1.Install GNOME Graphical Environment from command line on CentOS 7 with yum and configure it to start GUI on next OS boot


I've used a minimal CentOS installation – ISO CentOS-7-x86_64-DVD-1908.iso and this brings up the OS with a text mode only as usually CentOS is used to roll on Servers and rarely and many times admins did not want to have GUI at all, however my case is different since I do like to use Graphical Environment as I use my CentOS for all kind of testing that can be later applied to a Production machines that doesn't have a GUI, hence to install GNOME on CentOS run below cmds:
 

[root@centos ~ ]# yum group list
Loaded plugins: fastestmirror
There is no installed groups file.
Maybe run: yum groups mark convert (see man yum)
Loading mirror speeds from cached hostfile
Available Environment Groups:
 Minimal Install
 Compute Node
 Infrastructure Server
 File and Print Server
 Basic Web Server
 Virtualization Host
 Server with GUI
 GNOME Desktop
 KDE Plasma Workspaces
 Development and Creative Workstation
Available Groups:
 Compatibility Libraries
 Console Internet Tools
 Development Tools
 Graphical Administration Tools
 Legacy UNIX Compatibility
 Scientific Support
 Security Tools
 Smart Card Support
 System Administration Tools
 System Management
Done


[root@centos ~ ]# yum groupinstall "GNOME Desktop" "Graphical Administration Tools" -y


Enable GUI to be automatically start on CentOS VM boot in systemd this is configured with the "targets" instead of the well known classical runlevels (the well known /etc/inittab) is now obsolete in newer Linux distros.

[root@centos ~ ]# ln -sf /lib/systemd/system/runlevel5.target /etc/systemd/system/default.target


2. Install Guest Additions Tools on CentOS


The most basic thing to do once I've had the CentOS Linux release 7.7.1908 (Core) rolled out on the VirtualBox is of course to enable Guest Additions Tools

First I had to install of course Guest Additions Tools to allow myself to have a copy paste in clip board via the Host Machine (Windows 10) and the Guest Machine.
To do I had to:

[root@centos ~ ]# yum install kernel-headers.x86_64 -y

[root@centos ~ ]# rpm -Uvh https://dl.fedoraproject.org/pub/epel/epel-release-latest-7.noarch.rpm

[root@centos ~ ]#  yum install perl gcc dkms kernel-devel kernel-headers make bzip2

To check the required VBoxLinuxAdditions.run script kernel headers are at place:

[root@centos ~ ]# ls -l /usr/src/kernels/$(uname -r)


You should get a list of kernel header files

Then once I've done the Insert Guest Additions CD Image from the VirtualBox VM upper menu. I've had to mount and load the guest additions via the script:
 

[root@centos ~ ]# mkdir /mnt/cdrom
[root@centos ~ ]# mount /dev/cdrom /mnt/cdrom
[root@centos ~ ]# sh VBoxLinuxAdditions.run

After rebooting the Virtual Machine, I've used the full screen functionality to test and configured immediately Shared Clipboard and Drag and Drop to be both set to (Bidirectional) as well as configured a Shared folder to provide my Windows Desktop under /mnt/shared_folder (as read write) as I usually do to be able to easily copy files from the VM and to the Windows.

3. Install Google Chrome on the CentOS Virtual Machine with yum
 

Next I've installed the chrome browser that was pretty trivial it is up to fetching the required 32 or 64 bit latest chrome binary this is usually on URL:

[root@centos ~ ]# wget https://dl.google.com/linux/direct/google-chrome-stable_current_x86_64.rpm

and installing Google Chrome with superuser with command:

[root@centos ~ ]# yum install ./google-chrome-stable_current_*.rpm -y


Loaded plugins: fastestmirror, langpacks
Examining ./google-chrome-stable_current_x86_64.rpm: google-chrome-stable-92.0.4515.107-1.x86_64
Marking ./google-chrome-stable_current_x86_64.rpm to be installed
Resolving Dependencies
–> Running transaction check
—> Package google-chrome-stable.x86_64 0:92.0.4515.107-1 will be installed
–> Processing Dependency: liberation-fonts for package: google-chrome-stable-92.0.4515.107-1.x86_64
Loading mirror speeds from cached hostfile
 * base: mirror.digitalnova.at
 * epel: fedora.ipacct.com
 * extras: mirror.digitalnova.at
 * updates: mirror.digitalnova.at
–> Processing Dependency: libvulkan.so.1()(64bit) for package: google-chrome-stable-92.0.4515.107-1.x86_64
–> Running transaction check
—> Package liberation-fonts.noarch 1:1.07.2-16.el7 will be installed
–> Processing Dependency: liberation-narrow-fonts = 1:1.07.2-16.el7 for package: 1:liberation-fonts-1.07.2-16.el7.noarch
—> Package vulkan.x86_64 0:1.1.97.0-1.el7 will be installed
–> Processing Dependency: vulkan-filesystem = 1.1.97.0-1.el7 for package: vulkan-1.1.97.0-1.el7.x86_64
–> Running transaction check
—> Package liberation-narrow-fonts.noarch 1:1.07.2-16.el7 will be installed
—> Package vulkan-filesystem.noarch 0:1.1.97.0-1.el7 will be installed
–> Finished Dependency Resolution

Dependencies Resolved

================================================================================
 Package                 Arch   Version         Repository                 Size
================================================================================
Installing:
 google-chrome-stable    x86_64 92.0.4515.107-1 /google-chrome-stable_current_x86_64
                                                                          259 M
Installing for dependencies:
 liberation-fonts        noarch 1:1.07.2-16.el7 base                       13 k
 liberation-narrow-fonts noarch 1:1.07.2-16.el7 base                      202 k
 vulkan                  x86_64 1.1.97.0-1.el7  base                      3.6 M
 vulkan-filesystem       noarch 1.1.97.0-1.el7  base                      6.3 k

Transaction Summary
================================================================================
Install  1 Package (+4 Dependent packages)

Total size: 263 M
Total download size: 3.8 M
Installed size: 281 M
Is this ok [y/d/N]: y
Downloading packages:
(1/4): liberation-fonts-1.07.2-16.el7.noarch.rpm           |  13 kB   00:00     
(2/4): liberation-narrow-fonts-1.07.2-16.el7.noarch.rpm    | 202 kB   00:00     
(3/4): vulkan-filesystem-1.1.97.0-1.el7.noarch.rpm         | 6.3 kB   00:00     
(4/4): vulkan-1.1.97.0-1.el7.x86_64.rpm                    | 3.6 MB   00:00     
——————————————————————————–
Total                                              3.0 MB/s | 3.8 MB  00:01     
Running transaction check
Running transaction test
Transaction test succeeded
Running transaction
  Installing : vulkan-filesystem-1.1.97.0-1.el7.noarch                      1/5 
  Installing : vulkan-1.1.97.0-1.el7.x86_64                                 2/5 
  Installing : 1:liberation-narrow-fonts-1.07.2-16.el7.noarch               3/5 
  Installing : 1:liberation-fonts-1.07.2-16.el7.noarch                      4/5 
  Installing : google-chrome-stable-92.0.4515.107-1.x86_64                  5/5 
  Verifying  : vulkan-1.1.97.0-1.el7.x86_64                                 1/5 
  Verifying  : 1:liberation-narrow-fonts-1.07.2-16.el7.noarch               2/5 
  Verifying  : 1:liberation-fonts-1.07.2-16.el7.noarch                      3/5 
  Verifying  : google-chrome-stable-92.0.4515.107-1.x86_64                  4/5 
  Verifying  : vulkan-filesystem-1.1.97.0-1.el7.noarch                      5/5 

Installed:
  google-chrome-stable.x86_64 0:92.0.4515.107-1                                 

Dependency Installed:
  liberation-fonts.noarch 1:1.07.2-16.el7                                       
  liberation-narrow-fonts.noarch 1:1.07.2-16.el7                                
  vulkan.x86_64 0:1.1.97.0-1.el7                                                
  vulkan-filesystem.noarch 0:1.1.97.0-1.el7             


4. Install usable Windows VNC and remote desktop (RDP Client) for CentOS Linux


There is a plenty of clients to choice from if you need to have an RDP client for Linux, but perhaps the most useful ones I usually use are remmina / rdesktop and freerdp. Usually I use remmina on Debian Linux, but under the VM somehow I was not able to make remmina work in Full Screen mode while connected to remote Windows 7 VPS server, thus I've first tried xfreerdp (that comes from default CentOS repositories) and is open source alternative to rdesktop (which is non free distributed binary).
 

[root@centos ~ ]$ sudo yum -y install freerdp


The basic use is:

[hipo@centos ~ ]$ xfreerdp –toggle-fullscreen <remote-server-address>


Unfortunately I did not succeeded to make xfreerdp be able to show me remote desktop in FullScreen mode so had to use additional repository package called nux-dextop to have rdesktop at my disposal.

To install it had to run:

[root@centos ~ ]# rpm –import http://li.nux.ro/download/nux/RPM-GPG-KEY-nux.ro 
[root@centos ~ ]# rpm -Uvh http://li.nux.ro/download/nux/dextop/el7/x86_64/nux-dextop-release-0-1.el7.nux.noarch.rpm    
[root@centos ~ ]# yum install rdesktop

To connect to the remote RDP host in Fullscreen with rdesktop :
 

rdesktop -f <remote-server-address>

windows-7-remote-desktop-screenshot-connected-with-rdesktop

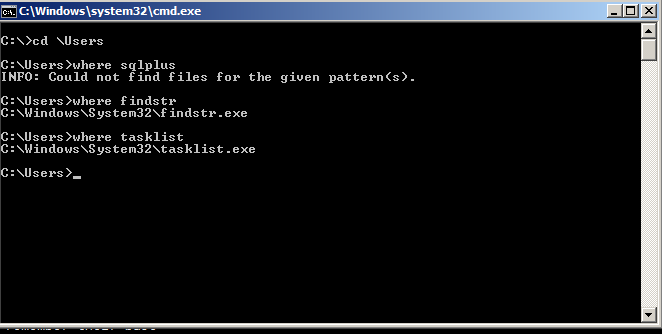
As telnet is not installed by default and it is so useful to check ports

5. Install GNU Image Manipulation Program for better screnshotting and Graphic edits


I usually do install GIMP (GNU Image Manipulation Program) since this is my favourite tool to make screenshot on Linux as well as do some minor graphic edits whenever necessery. I warmly recommend gimp to anyone. If you don't have basic GIMP tool and you plan to be daily working a lot with Linux sooner or later some skills with the program will be of a major use even for the most advanced sysadmin :)_

root@centos ~ ]# yum install -y gimp


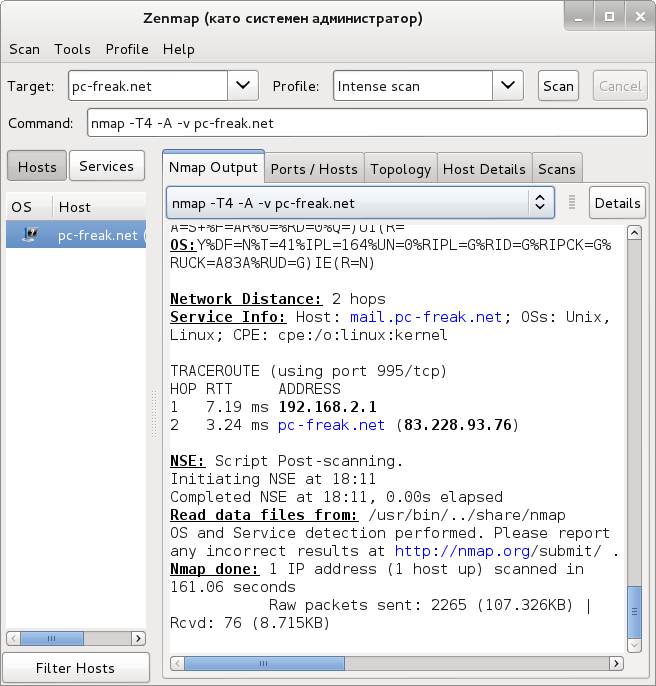
6. Install useful administration tools for daily sysadmin work – telnet, nmap, iftop, htop, iotop, iptraf-ng, tcpdump


Having basic analys tools and remote communication port testing, DNS, resolving and connection, cpu, mem statistics I find mostly useful. 

[root@centos .ssh]# yum install telnet nmap iftop htop vnstat sysstat iptraf-ng bind-utils -y


7. Set Open Explorer and SHOW Desktop key binding shortcuts for GNOME (to make daily work easier)


Another useful I do use in my newly installed Virtual Machines is the key combination of Windows (button key) + E – to easily open the GNOME equivalent of Windows Explorer (Nautilus) and Windows (key) + D to hide the active selected Window and Show Desktop. This is configured pretty easy in GNOME through:
 

gnome-control-center

Keyboard (Section)

Perhaps there is other stuff I need to add on the freshly installed Operating System if I remember something else interesting

configure-home-folder-and-hide-all-normal-windows-gnome-key-binding-howto-screenshot


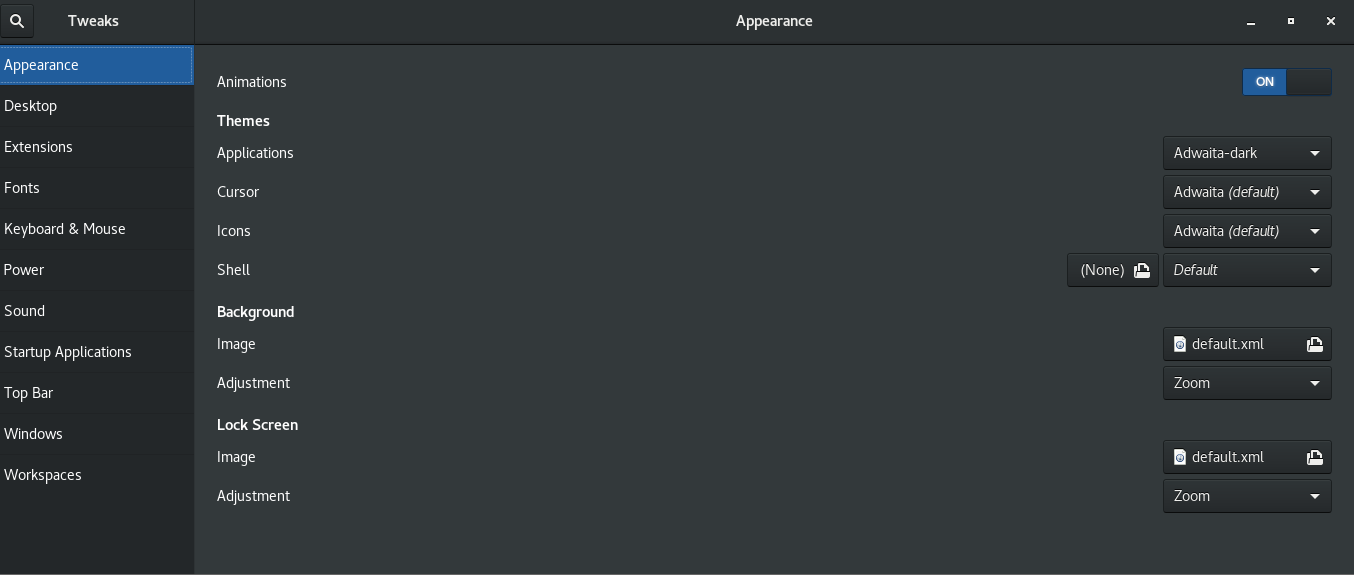
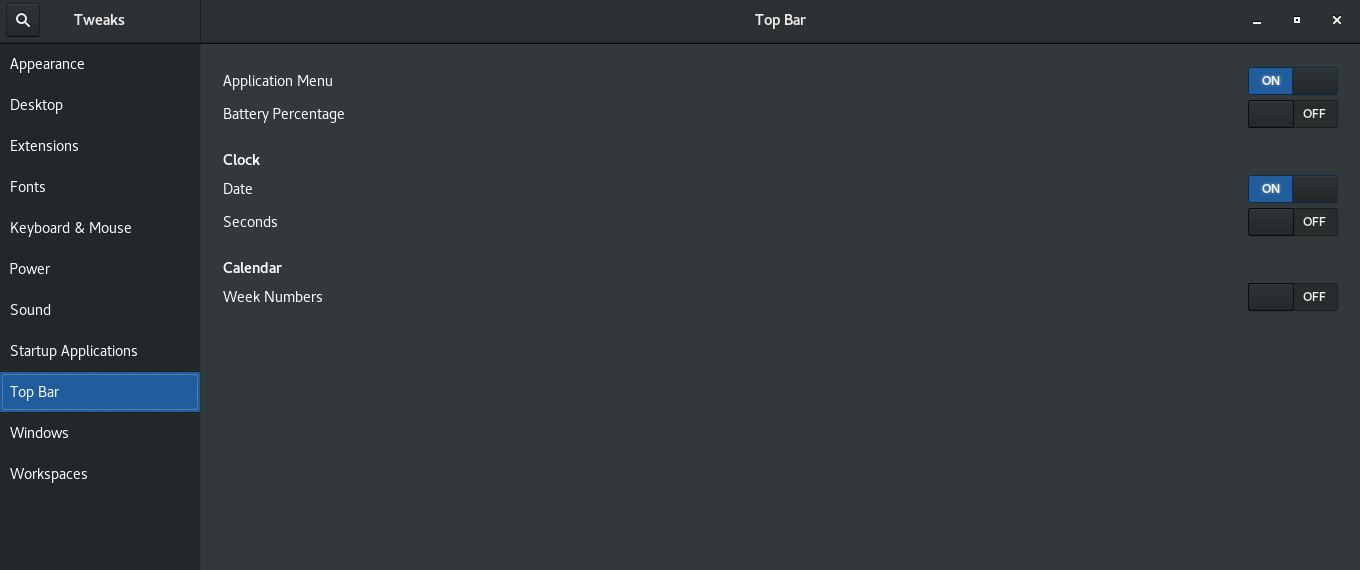
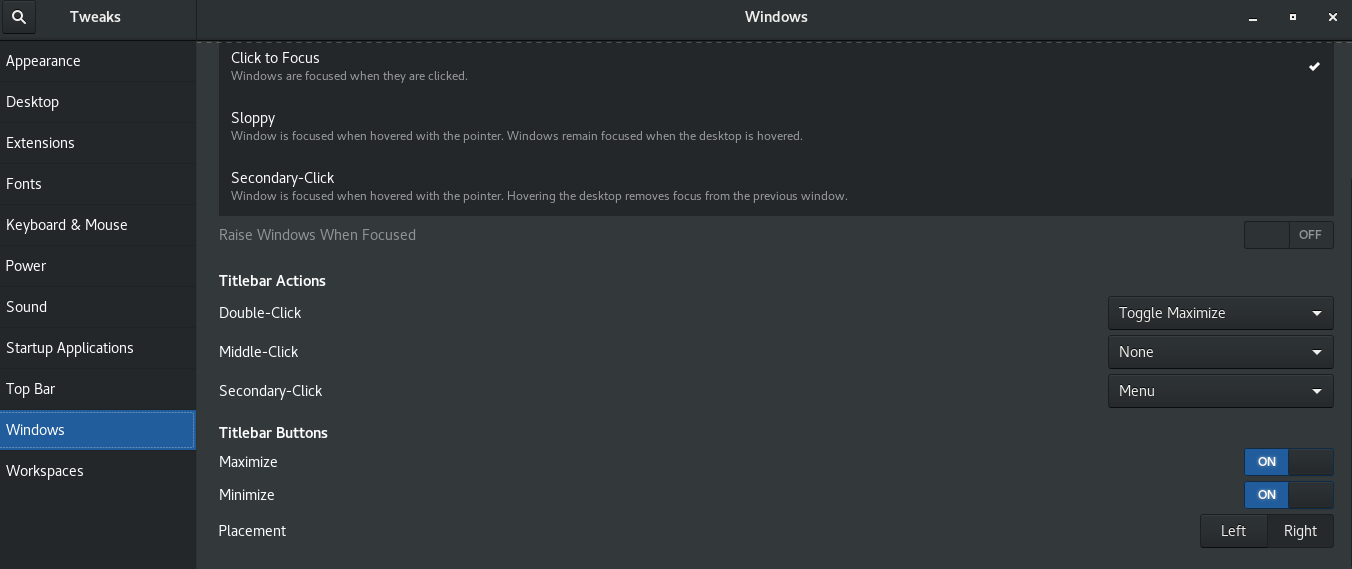
8. Install gnome-tweaks to tweak a bit the desktop icon positionsing and additional gnome-shell extras

[root@centos hipo]# yum install -y gnome-shell-extension-workspace-indicator.noarch gnome-shell-extension-workspace-indicator.noarch gnome-shell-extension-suspend-button.noarch gnome-shell-extension-refresh-wifi.noarch gnome-shell-extension-updates-dialog.noarch gnome-shell-extension-windowoverlay-icons.noarch gnome-shell-extension-places-menu.noarch gnome-shell-extension-drive-menu.noarch gnome-shell-extension-apps-menu.noarch gnome-shell-extension-auto-move-windows.noarch gnome-tweaks gnome-shell-extension-systemMonitor.noarch gnome-shell-extension-openweather.noarch gnome-shell-extension-user-theme.noarch gnome-shell-extension-topicons-plus.noarch


Next step is to use gnome-tweaks to set multiple custom preference stuff you like on the gnome 3.28 GUI 


gnome-tweak-tool1

gnome-tweak-tool2

gnome-tweak-tool3

9. Change ( Fix) timezone to correct time on the Virtual Machine

[root@localhost ~]# timedatectl 
      Local time: Fri 2021-07-30 12:20:51 CEST
  Universal time: Fri 2021-07-30 10:20:51 UTC
        RTC time: Fri 2021-07-30 10:20:48
       Time zone: Europe/Berlin (CEST, +0200)
     NTP enabled: yes
NTP synchronized: yes
 RTC in local TZ: no
      DST active: yes
 Last DST change: DST began at
                  Sun 2021-03-28 01:59:59 CET
                  Sun 2021-03-28 03:00:00 CEST
 Next DST change: DST ends (the clock jumps one hour backwards) at
                  Sun 2021-10-31 02:59:59 CEST
                  Sun 2021-10-31 02:00:00 CET

[root@localhost ~]# ls -l /etc/localtime
lrwxrwxrwx. 1 root root 35 Jul 29 14:03 /etc/localtime -> ../usr/share/zoneinfo/Europe/Berlin


To change to correct timezone, you need to find out the long name for the timezone you want to use. The timezone naming convention usually uses “Region/City” format.

To list all available time zones, you can either list the files in the /usr/share/zoneinfo directory or use the timedatectl command.

[root@centos ~]# timedatectl list-timezones|tail -n 10
Pacific/Pohnpei
Pacific/Port_Moresby
Pacific/Rarotonga
Pacific/Saipan
Pacific/Tahiti
Pacific/Tarawa
Pacific/Tongatapu
Pacific/Wake
Pacific/Wallis
UTC


As I'm situated in Sofia Bulgaria to set the correct timezone to UTC (Universal Time Clock)  + 2 Hrs, i've checked the correct Continent/Country like so:

[root@centos ~]# timedatectl list-timezones|grep -i Sofia
Europe/Sofia

Once I've my Capital / Country time location  identified to set to it:

[root@centos ~]# timedatectl set-timezone your_time_zone


10. Configure remote connection hostname SSH aliases via ssh config ( ~/.ssh/config)


I'm having separate Virtual Machines running on my OpenXen virtualization Hypervisor server at different ports which I remember by heart under different hostnames, this saves me time to always type on command line long commands such as:


#  ssh long-hostname -p Port_number

 to make accessibility to remote machines via a simple Hostname Aliases, that forwards to remote port (that gets forwarded via a Local Network configure Netwrork Address Translation), I use the .ssh/config nice Host / Hostname / User / Port directives like below samples:

[hipo@centos .ssh]$ cat config 
Host pcfreak
User root
Port 2248
HostName 83.228.93.76

Host freak
User root
Port 2249
HostName 213.91.190.233


Host pcfrxenweb
User root
Port 2251
Hostname 83.228.93.76

Host pcfrxen
User root
Port 2250
Hostname 213.91.190.233

Now to connect to pcfrxen for example I simply type:

ssh pcfrxen

type in the password to remote VM and I'm in 🙂

The same could be achieved also with Adding Custom Hostname IP Aliases via ~/.bashrc or iteration script as I've explained earlier that fakes like custom /etc/hosts, but I usuaully prefer to use .ssh/config instead like explained above.

Note that above steps should work also on RHEL / Fedora Linux with a minor modifications, as usually this two distros share the RPM package manager. If someone tries to follow the guide and have success on any of this distros please drop a comment with feedback.

How to add local user to admin access via /etc/sudoers with sudo su – root / Create a sudo admin group to enable users belonging to group become superuser

Friday, January 15th, 2021

sudo_logo-how-to-add-user-to-sysadmin-group

Did you had to have a local users on a server and you needed to be able to add Admins group for all system administrators, so any local user on the system that belongs to the group to be able to become root with command lets say sudo su – root / su -l root / su – root?
If so below is an example /etc/sudoers file that will allow your users belonging to a group local group sysadmins with some assigned group number

Here is how to create the sysadmins group as a starter

linux:~# groupadd -g 800 sysadmins

Lets create a new local user georgi and append the user to be a member of sysadmins group which will be our local system Administrator (superuser) access user group.

To create a user with a specific desired userid lets check in /etc/passwd and create it:

linux:~# grep :811: /etc/passwd || useradd -u 811 -g 800 -c 'Georgi hip0' -d /home/georgi -m georgi

Next lets create /etc/sudoers (if you need to copy paste content of file check here)and paste below configuration:

linux:~# mcedit /etc/sudoers

## Updating the locate database
# Cmnd_Alias LOCATE = /usr/bin/updatedb


## Storage
# Cmnd_Alias STORAGE = /sbin/fdisk, /sbin/sfdisk, /sbin/parted, /sbin/partprobe, /bin/mount, /bin/umount

## Delegating permissions
# Cmnd_Alias DELEGATING = /usr/sbin/visudo, /bin/chown, /bin/chmod, /bin/chgrp

## Processes
# Cmnd_Alias PROCESSES = /bin/nice, /bin/kill, /usr/bin/kill, /usr/bin/killall

## Drivers
# Cmnd_Alias DRIVERS = /sbin/modprobe

Cmnd_Alias PASSWD = /usr/bin/passwd [a-zA-Z][a-zA-Z0-9_-]*, \\
!/usr/bin/passwd root

Cmnd_Alias SU_ROOT = /bin/su root, \\
                     /bin/su – root, \\
                     /bin/su -l root, \\
                     /bin/su -p root


# Defaults specification

#
# Refuse to run if unable to disable echo on the tty.
#
Defaults   !visiblepw

#
# Preserving HOME has security implications since many programs
# use it when searching for configuration files. Note that HOME
# is already set when the the env_reset option is enabled, so
# this option is only effective for configurations where either
# env_reset is disabled or HOME is present in the env_keep list.
#
Defaults    always_set_home
Defaults    match_group_by_gid

Defaults    env_reset
Defaults    env_keep =  "COLORS DISPLAY HOSTNAME HISTSIZE KDEDIR LS_COLORS"
Defaults    env_keep += "MAIL PS1 PS2 QTDIR USERNAME LANG LC_ADDRESS LC_CTYPE"
Defaults    env_keep += "LC_COLLATE LC_IDENTIFICATION LC_MEASUREMENT LC_MESSAGES"
Defaults    env_keep += "LC_MONETARY LC_NAME LC_NUMERIC LC_PAPER LC_TELEPHONE"
Defaults    env_keep += "LC_TIME LC_ALL LANGUAGE LINGUAS _XKB_CHARSET XAUTHORITY"

#
# Adding HOME to env_keep may enable a user to run unrestricted
# commands via sudo.
#
# Defaults   env_keep += "HOME"
Defaults    secure_path = /sbin:/bin:/usr/sbin:/usr/bin

## Next comes the main part: which users can run what software on
## which machines (the sudoers file can be shared between multiple
## systems).
## Syntax:
##
##      user    MACHINE=COMMANDS
##
## The COMMANDS section may have other options added to it.
##
## Allow root to run any commands anywhere
root    ALL=(ALL)       ALL

## Allows members of the 'sys' group to run networking, software,
## service management apps and more.
# %sys ALL = NETWORKING, SOFTWARE, SERVICES, STORAGE, DELEGATING, PROCESSES, LOCATE, DRIVERS

## Allows people in group wheel to run all commands
%wheel  ALL=(ALL)       ALL

## Same thing without a password
# %wheel        ALL=(ALL)       NOPASSWD: ALL

## Allows members of the users group to mount and unmount the
## cdrom as root
# %users  ALL=/sbin/mount /mnt/cdrom, /sbin/umount /mnt/cdrom
## Allows members of the users group to shutdown this system
# %users  localhost=/sbin/shutdown -h now

%sysadmins            ALL            = SU_ROOT, \\
                                   NOPASSWD: PASSWD

## Read drop-in files from /etc/sudoers.d (the # here does not mean a comment)
#includedir /etc/sudoers.d

zabbix  ALL=(ALL) NOPASSWD:/usr/bin/grep


Save the config and give it a try now to become root with sudo su – root command

linux:~$ id
uid=811(georgi) gid=800(sysadmins) groups=800(sysadmins)
linux:~$ sudo su – root
linux~#

w00t Voila your user is with super rights ! Enjoy 🙂


Rsync copy files with root privileges between servers with root superuser account disabled

Tuesday, December 3rd, 2019


rsync-copy-files-between-two-servers-with-root-privileges-with-root-superuser-account-disabled

Sometimes on servers that follow high security standards in companies following PCI Security (Payment Card Data Security) standards it is necessery to have a very weird configurations on servers,to be able to do trivial things such as syncing files between servers with root privileges in a weird manners.This is the case for example if due to security policies you have disabled root user logins via ssh server and you still need to synchronize files in directories such as lets say /etc , /usr/local/etc/ /var/ with root:root user and group belongings.

Disabling root user logins in sshd is controlled by a variable in /etc/ssh/sshd_config that on most default Linux OS
installations is switched on, e.g. 

grep -i permitrootlogin /etc/ssh/sshd_config
PermitRootLogin yes


Many corporations use Vulnerability Scanners such as Qualys are always having in their list of remote server scan for SSH Port 22 to turn have the PermitRootLogin stopped with:


PermitRootLogin no


In this article, I'll explain a scenario where we have synchronization between 2 or more servers Server A / Server B, whatever number of servers that have already turned off this value, but still need to
synchronize traditionally owned and allowed to write directories only by root superuser, here is 4 easy steps to acheive it.


1. Add rsyncuser to Source Server (Server A) and Destination (Server B)


a. Execute on Src Host:


groupadd rsyncuser
useradd -g 1000 -c 'Rsync user to sync files as root src_host' -d /home/rsyncuser -m rsyncuser


b. Execute on Dst Host:


groupadd rsyncuser
useradd -g 1000 -c 'Rsync user to sync files dst_host' -d /home/rsyncuser -m rsyncuser


2. Generate RSA SSH Key pair to be used for passwordless authentication


a. On Src Host
 

su – rsyncuser

ssh-keygen -t rsa -b 4096


b. Check .ssh/ generated key pairs and make sure the directory content look like.


[rsyncuser@src-host .ssh]$ cd ~/.ssh/;  ls -1

id_rsa
id_rsa.pub
known_hosts


3. Copy id_rsa.pub to Destination host server under authorized_keys


scp ~/.ssh/id_rsa.pub  rsyncuser@dst-host:~/.ssh/authorized_keys


Next fix permissions of authorized_keys file for rsyncuser as anyone who have access to that file (that exists as a user account) on the system
could steal the key and use it to run rsync commands and overwrite remotely files, like overwrite /etc/passwd /etc/shadow files with his custom crafted credentials
and hence hack you 🙂
 

Hence, On Destionation Host Server B fix permissions with:
 

su – rsyncuser; chmod 0600 ~/.ssh/authorized_keys
[rsyncuser@dst-host ~]$


An alternative way for the lazy sysadmins is to use the ssh-copy-id command


$ ssh-copy-id rsyncuser@192.168.0.180
/usr/bin/ssh-copy-id: INFO: Source of key(s) to be installed: "/root/.ssh/id_rsa.pub"
/usr/bin/ssh-copy-id: INFO: attempting to log in with the new key(s), to filter out any that are already installed
/usr/bin/ssh-copy-id: INFO: 1 key(s) remain to be installed — if you are prompted now it is to install the new keys
root@192.168.0.180's password: 


For improved security here to restrict rsyncuser to be able to run only specific command such as very specific script instead of being able to run any command it is good to use little known command= option
once creating the authorized_keys


4. Test ssh passwordless authentication works correctly


For that Run as a normal ssh from rsyncuser

On Src Host


[rsyncuser@src-host ~]$ ssh rsyncuser@dst-host


Perhaps here is time that for those who, think enabling a passwordless authentication is not enough secure and prefer to authorize rsyncuser via a password red from a secured file take a look in my prior article how to login to remote server with password provided from command line as a script argument / Running same commands on many servers 

5. Enable rsync in sudoers to be able to execute as root superuser (copy files as root)


For this step you will need to have sudo package installed on the Linux server.

Then, Execute once logged in as root on Destionation Server (Server B)


[root@dst-host ~]# grep 'rsyncuser ALL' /etc/sudoers|wc -l || echo ‘rsyncuser ALL=NOPASSWD:/usr/bin/rsync’ >> /etc/sudoers


Note that using rsync with a ALL=NOPASSWD in /etc/sudoers could pose a high security risk for the system as anyone authorized to run as rsyncuser is able to overwrite and
respectivle nullify important files on Destionation Host Server B and hence easily mess the system, even shell script bugs could produce a mess, thus perhaps a better solution to the problem
to copy files with root privileges with the root account disabled is to rsync as normal user somewhere on Dst_host and use some kind of additional script running on Dst_host via lets say cron job and
will copy gently files on selective basis.

Perhaps, even a better solution would be if instead of granting ALL=NOPASSWD:/usr/bin/rsync in /etc/sudoers is to do ALL=NOPASSWD:/usr/local/bin/some_copy_script.sh
that will get triggered, once the files are copied with a regular rsyncuser acct.


6. Test rsync passwordless authentication copy with superuser works


Do some simple copy, lets say copy files on Encrypted tunnel configurations located under some directory in /etc/stunnel on Server A to /etc/stunnel on Server B

The general command to test is like so:
 

rsync -aPz -e 'ssh' '–rsync-path=sudo rsync' /var/log rsyncuser@$dst_host:/root/tmp/


This will copy /var/log files to /root/tmp, you will get a success messages for the copy and the files will be at destination folder if succesful.


On Src_Host run:


[rsyncuser@src-host ~]$ dst=FQDN-DST-HOST; user=rsyncuser; src_dir=/etc/stunnel; dst_dir=/root/tmp;  rsync -aP -e 'ssh' '–rsync-path=sudo rsync' $src_dir  $rsyncuser@$dst:$dst_dir;


7. Copying files with root credentials via script


The simlest file to use to copy a bunch of predefined files  is best to be handled by some shell script, the most simple version of it, could look something like this.
 

#!/bin/bash
# On server1 use something like this
# On server2 dst server
# add in /etc/sudoers
# rsyncuser ALL=NOPASSWD:/usr/bin/rsync

user='rsyncuser';

dst_dir="/root/tmp";
dst_host='$dst_host';
src[1]="/etc/hosts.deny";
src[2]="/etc/sysctl.conf";
src[3]="/etc/samhainrc";
src[4]="/etc/pki/tls/";
src[5]="/usr/local/bin/";


for i in $(echo ${src[@]}); do
rsync -aPvz –delete –dry-run -e 'ssh' '–rsync-path=sudo rsync' "$i" $rsyncuser@$dst_host:$dst_dir"$i";
done


In above script as you can see, we define a bunch of files that will be copied in bash array and then run a loop to take each of them and copy to testination dir.
A very sample version of the script rsync_with_superuser-while-root_account_prohibited.sh 
 

Conclusion


Lets do short overview on what we have done here. First Created rsyncuser on SRC Server A and DST Server B, set up the key pair on both copied the keys to make passwordless login possible,
set-up rsync to be able to write as root on Dst_Host / testing all the setup and pinpointing a small script that can be used as a backbone to develop something more complex
to sync backups or keep system configurations identicatial – for example if you have doubts that some user might by mistake change a config etc.
In short it was pointed the security downsides of using rsync NOPASSWD via /etc/sudoers and few ideas given that could be used to work on if you target even higher
PCI standards.


Windows equivalent of Linux which, whereis command – Windows WHERE command

Friday, June 6th, 2014

windows-find-commands-full-location-where-which-linux-commands-equivalent-in-windows-where-screenshot
In Linux there are the which and whereis commands showing you location of binaries included in $PATH # which lsof /usr/bin/lsof

# whereis lsof
lsof: /usr/bin/lsof /usr/share/man/man8/lsof.8.gz

so question arises what is which / whereis command Linux commands Windows equivalent?

In older Windows Home / Server editions – e.g. – Windows XP, 2000, 2003 – there is no standard installed tool to show you location of windows %PATH% defined executables. However it is possible to add the WHERE command binary by installing Resource Kit tools for administrative tasks.

windows-resource-kit-tools-install-where-linux-command-equivalent-in-windows


In Windows Vista / 7 / 8 (and presumably in future Windows releases), WHERE command is (will be) available by default

C:\Users\Georgi>WHERE SQLPLUS
D:\webdienste\application\oracle\11.2.0\client_1\BIN\sqlplus.exe

Cheers! 🙂

ZenMap Nmap multi platform Graphical frontend for checking port security

Saturday, June 15th, 2013

graphic program to scan remote network server port security on GNU Linux and Windows ZenMap

Recently I wrote little article with some examples for scanning server port security with Nmap. I forgot to mention in the article that there is also Nmap frontend GUI program called ZenMap. ZenMap port is available for both Windows and Linux. In Debian, Ubuntu, Mint and other debian derivative distributions ZenMap is available from standard package repositories;

 noah:~# apt-cache show zenmap|grep -i description -A 3

Description-en: The Network Mapper Front End
 Zenmap is an Nmap frontend. It is meant to be useful for advanced users
 and to make Nmap easy to use by beginners. It was originally derived
 from Umit, an Nmap GUI created as part of the Google Summer of Code.
Description-md5: 4e4e4c6aeaa4441484054473e97b7168
Tag: implemented-in::python, interface::x11, network::scanner, role::program,
 uitoolkit::gtk, use::scanning, x11::application
Section: net

To install  ZenMap on Debian / Ubuntu Linux:

noah:~# apt-get install --yes zenmap
...

In Fedora, CentOS and other RPM based Linux-es to install ZenMap run:

noah:~# yum -y install nmap-frontend nmap
...

To use Nmap's Frontend full functionality, you have to run it as (root) superuser:

hipo@noah:~$ sudo su
[sudo] password for hipo:
noah:~# zenmap

Zenmap saves, a lot of time as there is no need to  remember Nmap's arguments or run few Nmap scans until you get essential information for remote scanned machine.
It automatically gives details on Remote server running services (fingerprint)

Zenmap remote server security services scan with services software version

Very useful report it makes as well is network (and host) topology diagram,

network scanner remote host Linux Windows toplogy guess ZenMap screenshot

ZenMap is just Nmap frontend and under the GUI it does use Nmap with various arguments to do produce scan results. In Nmap Output tab, you can see a lot of verbose info.

Zenmap Linux Windows GUI port scanne nmap output tab screen Debian / Ubuntu Linux

Happy scanning 🙂