Posts Tagged ‘tool’

How to add (.srt , .sub) subtitles to .flv flash movie video on Linux

Friday, April 15th, 2011

how-to-add-srt-subtitles-to-flv-flash-movie-video-on-linux
If you're on Linux the questions like, how can I convert between video and audio formats, how to do photo editing etc. etc. have always been a taugh question as with it's diversity Linux often allows too many ways to do the same things.

In the spirit of questioning I have been recently curious, how can a subtitles be added to a flash video (.flv) video?

After some research online I've come up with the below suggested solution which uses mplayer to do the flash inclusion of the subtitles file.

mplayer your_flash_movie.flv -fs -subfont-text-scale 3

While including the subtitles to the .flv file, it's best to close up all the active browsers and if running something else on the desktop close it up.
Note that above's mplayer example for (.srt and .sub) subtitle files example is only appropriate for a .flv movie files which already has a third party published subtitle files.

What is interesting is that often if you want to make custom subtitles to let's say a video downloaded from Youtube on Linux the mplayer way pointed above will be useless. Why?

Well the Linux programs that allows a user to add custom subtitles to a movie does not support the flv (flash video) file format.

My idea on how to create custom subtitles and embed them into a flv movie file is very simple and it goes like this:

1. Convert the .flv file format to let's say .avi or .mpeg
2. Use gnome-subitles or subtitleeditor to create the subtitles for the .avi or .mpeg file
3. Convert back the .avi/.mpeg file with included subtitles to .flv (flash video format)

This methodology is really long and time consuming, but pitily as far as my understanding goes it's the only way to do that on your Linux until now.

To make the conversations between .flv and .avi format you will need to use the ffmpeg – (FFMpeg command line tool video converter), here is how:

– Convert .flv to .avi

debian:~# /usr/bin/ffmpeg -i input_flvfilename.flv output_avifilename.avi

– Convert .avi file to .flv

debian:~# /usr/bin/ffmpeg -y -i /path/to/your/avi/input_avifilename.avi -acodec mp3 -ar 22050 -f flv
/path/to/your/flv/output_flvfilename.flv

The required overall tools which you will have to have installed on your Debian or Ubuntu Linux are:

1. ffmpeg
2. gnome-subtitles
3. subtitleeditor
4. mplayer

You will also have to spend some time to get to know gnome-subtitles or subtitleeditor, but it won't be that long until you get the idea on how to use them.

PortQRY Native Windows command line Nmap like port scanner – Check status of remote host ports on Windows

Monday, June 30th, 2014

Windows_command_line_and_gui_port-scanner-portqry-like-nmap-check-status-of-remote-host-service-windows-xp-7-2000-2003-2008-server
Linux users know pretty well Nmap (network mapper) tool which is precious in making a quick server host security evaluation.
Nmap binary port is available for Windows too, however as nmap is port for its normal operation you have to install WinPcap (Packet Capture Library).
And more importantly it is good to mention if you need to do some remote port scanning from Windows host, there is Microsoft produced native tool called PortQry (Port Query).

PortQRY is a must have tool for the Windows Admin as it can help you troubleshoot multiple network issues.
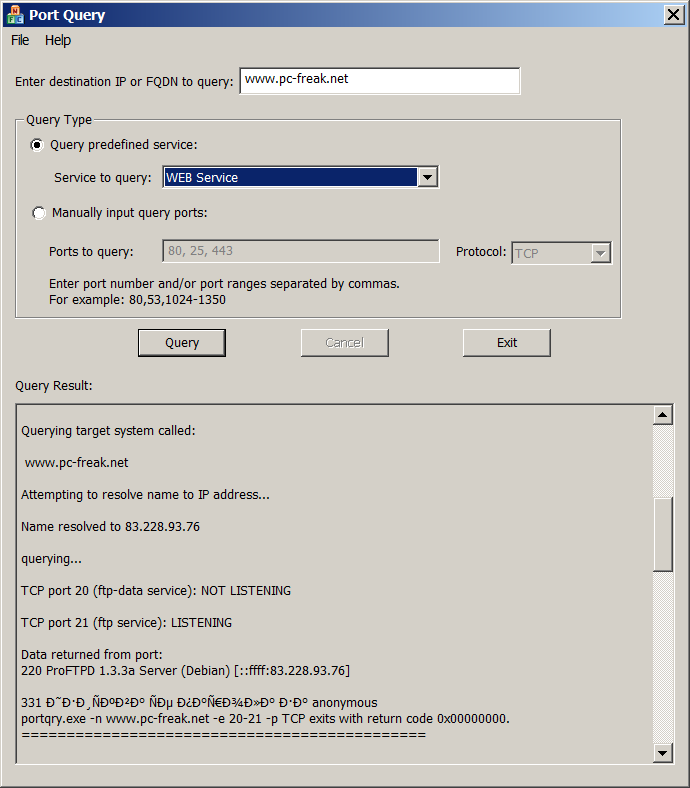
windows-nmap-native-alternative-portqry-gui-ui-web-service-port-scan-screenshot
As of time of writting this post PortQRY is at version 2, PortQRY tool has also a GUI (UI) Version for those lazy to type in command line.

Port Query UI tool (portqueryui.exe) is a tool to query open ports on a machine. This tool makes use of command line version port query tool (portqry.exe). The UI provides the following functionalities:

   1. Following "Enter destination IP or FQDN to query:”, an edit box needs the user to specify the IP address or FDQN name of the destination to query port status.

   2. The end user is able to choose Query type:

        – Predefined services type. It groups ports into service, so that you can query multiple ports for a service by a single click. Service includes "Domains and Trusts", "DNS Queries", "NetBIOS     communication", "IPSEC", "Networking", "SQL Service", "WEB Service", "Exchange Server",          "Netmeeting", and other services.

You can check detail port and protocol info for each service category by opening Help -> Predefined Services…

PORTQRY is part of Windows Server 2003 Support Tools and can be added to any NT based Windows (XP, 2003, Vista, 7, 8)
 You can download portqry command line tool here or my mirrored portqry version command line port scanner here and PortQRY UI here.

PortQRY comes in PortQryV2.exe package which when run extracts 3 files: PortQry.exe program, EULA and readme file. Quickest way to make portqry globally accessible from win command prompt is to copy it to %SystemRoot% (The environment variable holding default location for Windows Installation directory).
It is good idea to add PortQRY to default PATH folder to make it accessible from command line globally.

PorQry has 3 modes of operation:

Command Line Mode, Interactive Mode and Local Mode

portqry-windows-native-security-port-network-scanner-nmap-equivalent-help-screenshot
 

Command Line Mode – is when it is invoked with parameters.

Interactive Mode is when it runs in interactive CLI console
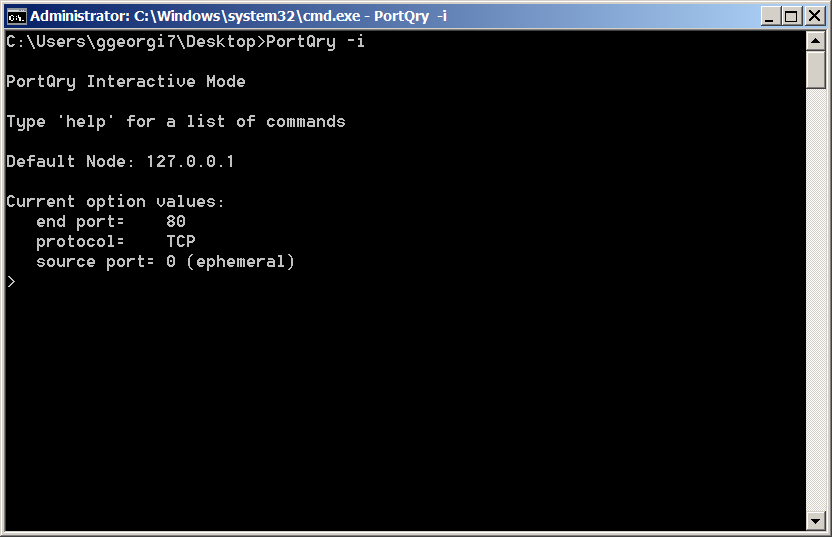
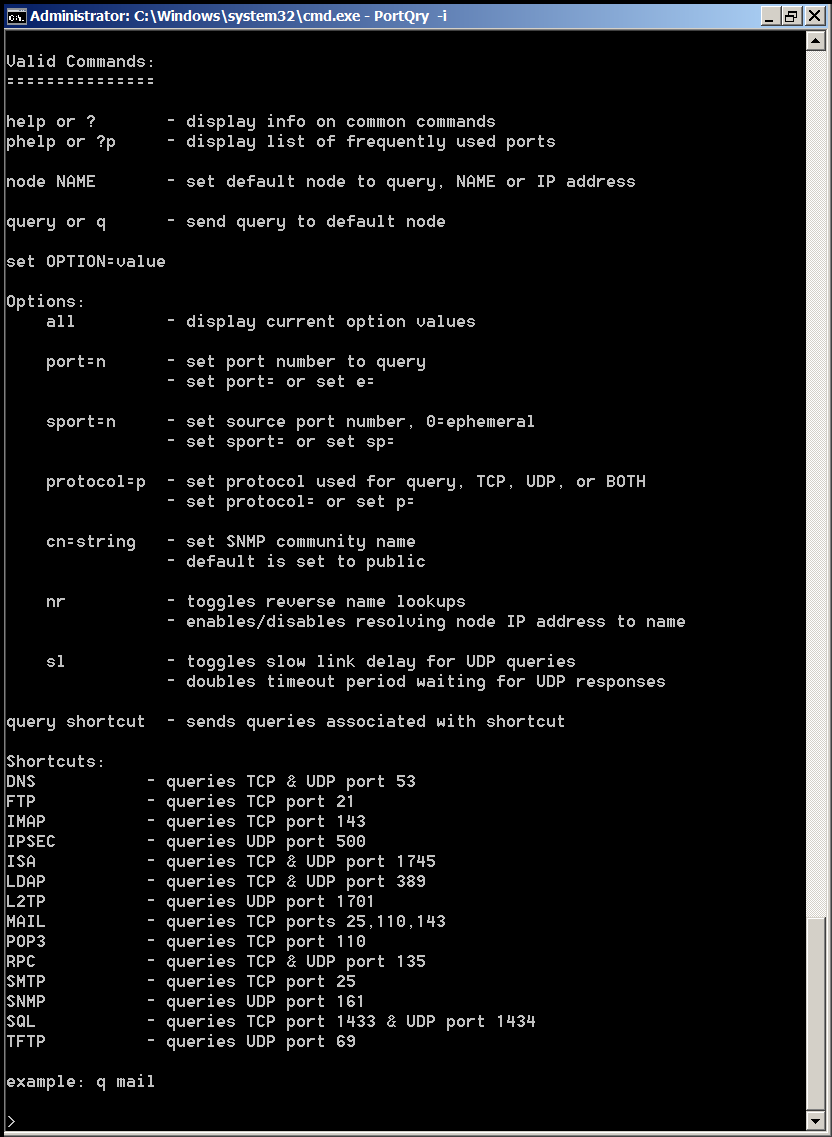
portqry-windows-native-security-port-network-scanner-nmap-equivalent-interactive-mode-screenshot

portqry-windows-native-security-port-network-scanner-nmap-equivalent-interactive-mode-help-screenshot
and Local Mode is used whether information on local system ports is required.
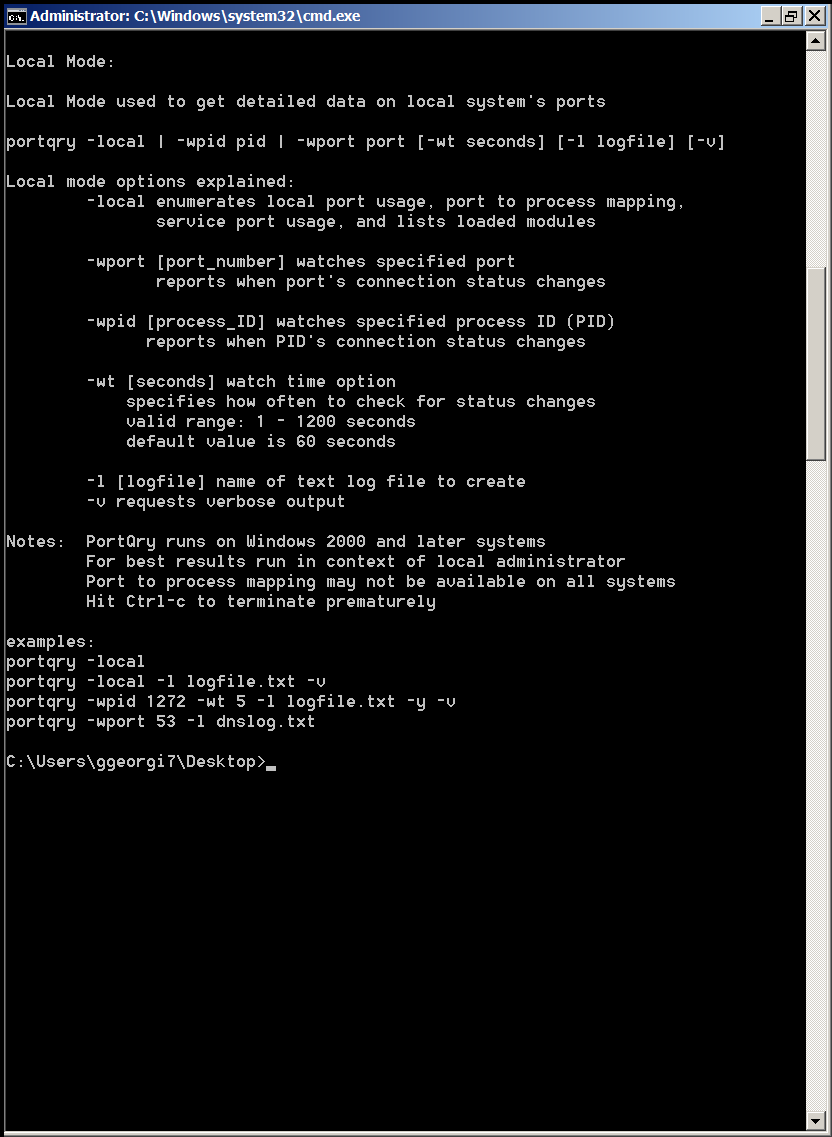
portqry-windows-native-security-port-network-scanner-nmap-equivalent-local-mode-screenshot


Here are some examples on basic usage of portqry:
 

1. Check if remote server is running webserver is listening on (HTTPS protocol) TCP port 80

portqry -n servername -e 80
 

Querying target system called:

 www.pc-freak.net

Attempting to resolve name to IP address…


Name resolved to 83.228.93.76

querying…

TCP port 80 (http service): FILTERED

2. Check whether some common Samba sharing and DNS UDP ports are listening

portqry -n servername -p UDP -o 37,53,88,135
 

Querying target system called:

servername

Attempting to resolve name to IP address…


Name resolved to 74.125.21.100

querying…

UDP port 37 (time service): NOT LISTENING

UDP port 53 (domain service): NOT LISTENING

UDP port 88 (kerberos service): NOT LISTENING

UDP port 135 (epmap service): NOT LISTENING

3. Scan open ports in a port range – Check common services port range (port 1-1024)

portqry -n 192.168.1.20 -r 1:1024 | find ": LISTENING"

4. Logging network scan output to file

Portqry –n localhost –e 135 -l port135.txt
 

Querying target system called:

 localhost

Attempting to resolve name to IP address…


Name resolved to 127.0.0.1

querying…

TCP port 135 (epmap service): LISTENING

Using ephemeral source port
Querying Endpoint Mapper Database…
Server's response:

UUID: d95afe70-a6d5-4259-822e-2c84da1ddb0d
ncacn_ip_tcp:localhost[49152]

UUID: 2f5f6521-cb55-1059-b446-00df0bce31db Unimodem LRPC Endpoint
ncacn_np:localhost[PIPEwkssvc]

Total endpoints found: 38


5. Scanning UDP and TCP protocols port

PortQry -n www.pc-freak.net -e 25 -p both


Querying target system called:

 www.pc-freak.net

Attempting to resolve name to IP address…


Name resolved to 83.228.93.76

querying…

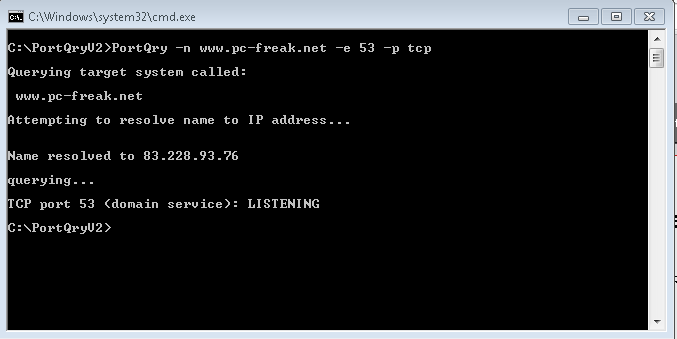
TCP port 53 (domain service): LISTENING

UDP port 53 (domain service): LISTENING or FILTERED

Sending DNS query to UDP port 53…


6. Checking remote server whether LDAP ports are listening

Portqry -remotehost.com -p tcp -e 389
Portqry -n remotehost.com -p tcp -e 636
Portqry -n remotehost.com -p both -e 3268
Portqry -n remotehost.com -p tcp -e 3269


7. Making SNMP community name requests

portqry -n host2 -cn !my community name! -e 161 -p udp


8. Initiating scan from pre-selected source port

A network socket request initiation is useful from certain port because, some remote services expect connection from certain ports, lets say you're connecting to mail server, you might want to set as a source port – port 25, to make remote server another SMTP is connecting.

portqry -n www.pc-freak.net -e 25 -sp 25


9. Scanning whether server ports required by Active Directories are opened

Common ports used in Windows hosts to communicate between each other to sustain Active Directory are:

88 (Kerberos)
135 (RPC)
389 (LDAP)
445 (CIFS)
3268 (Global Catalog)

portqry -n remote-host.com -o 88,135,389,445,3268 -p both

portqry has also a silent mode with the "-q" switch if you want to get only whether a port is LISTENING (opened).

On port scan it returns three major return codes (very useful for scripting purposes);

  • returncode 0 – if port / service is listening
  • returncode 1 – if service is not listening
  • returncode 2 – if service is listening or filtered

PortQry is very simple port scanner for win sysadms and is precious tool for basic network debugging (services)  on Windows farms, however it doesn't have the powerful cracker functionality, application / OS versioning etc. like Nmap.


Ditaa convert ASCII diagrams into bitmap graphic (pictures)

Monday, May 12th, 2014

ditta_convert-ascii-art-diagram-to-png-jpg-picture
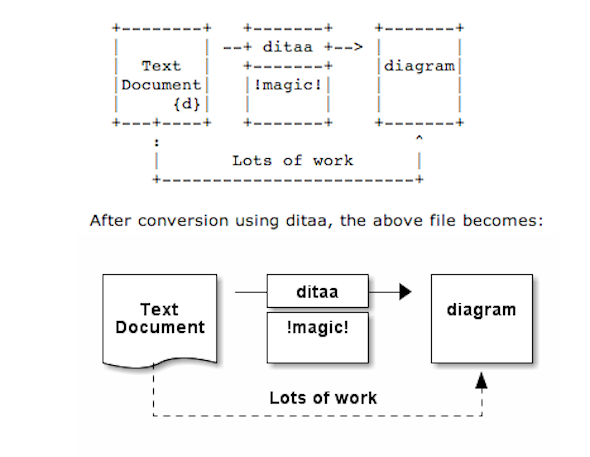
As part of my passion for ASCII art, I've found another interesting tool useful to ASCII art maniacs like me, the tool is called ditta and is able to convert manually drawn ASCII art diagrams to graphics, below is tool description from my debian apt-cache as well as a screenshot:

 apt-cache show ditaa|grep -i ditaa -A 4

Package: ditaa
Priority: optional
Section: graphics
Installed-Size: 164
Maintainer: David Paleino <dapal@debian.org>

Filename: pool/main/d/ditaa/ditaa_0.9+ds1-2_all.deb
Size: 107270
MD5sum: 05ec52d9274b954b053f1835ca5d7a7f
SHA1: 792d91d05fff2a2a19c0ebce317351d138436c18
SHA256: c4319d32e7918aab782e2f38cdad745bc9023f9f09a999033d983095ee4f70d5

 DiTAA is a small command-line utility that can convert diagrams drawn using
 ASCII art ("drawings" that contain characters that resemble lines, like | /
 and -), into proper bitmap graphics.
 .
 DiTAA also uses special markup syntax to increase the possibilities of shapes
 and symbols that can be rendered.
Homepage: http://ditaa.org


To install ditaa on Debian and Ubuntu Linux:

debian:~# apt-get install --yes ditaa
...

Ditaa text diagram to Graphics converter is also available in Fedora Linux and in Source RPMs to be used on Redhat Based RPM distributions.
To install in most of RPM based Linuxes:

[root@fedora:~]# yum install -y ditaa

For most people probably Ditta will not be of any value except as a PoC and of a Hack value just like Ditaa's home page suggests. Nomatter that Ditta is cool but has just 2 drawback it doesn't understand non-latin characters i.e. Cyrillic and requires Java Virtual Machine .. but if you're a real geek you will do  the sacrifice to install a whole bunch of the heavy java for the sake of some oldschool fun 🙂 Being written in Java makes Ditta multi-platform, but you will need a Java VM version of at least 1.6 (it doesn't work with Java 1.5).

The format Ditta understands is close to HTML

<ditaa [optional parameters]>
 
... (some ditaa-code) ...
 
</ditaa>


There are also special tags understood by Ditta which are automatically turned into shaped graphical buttons and forms.
 

Possible tags

Not all shape selector tags are documented on the ditaa site. A quick source scan revealed:

tag Description
{c} decision(Choice)
{d} document
{io} input/output, parallelogram
{mo} manual operation
{o} ellipse, circle
{s} storage
{tr} trapezoid (looks like an inverted {mo} )

Here is an example Ditta code
 

<ditaa round noedgesep right>
+--------+   +-------+    +-------+
|        | --+ ditaa +--> |       |
|  Text  |   +-------+    |diagram|
|Document|   |!magic!|    |       |
|     {d}|   |  c478 |    |       |
+---+----+   +-------+    +-------+
:                         ^
|       Lots of work      :
+-------------------------+
</ditaa>

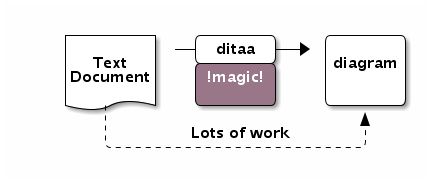
This Ditta code will generate following picture:

ditaa_convert-ascii-art-picture-to-graphic-png-jpg-bmp


To learn more on ditta please check Ditaa's Project homepage on Sourceforge
Many thanks to Cybercity's 30 Cool Open Source Software of 2013 for inspiring this post.

luckyBackup Linux GUI back-up and synchronization tool

Wednesday, May 14th, 2014

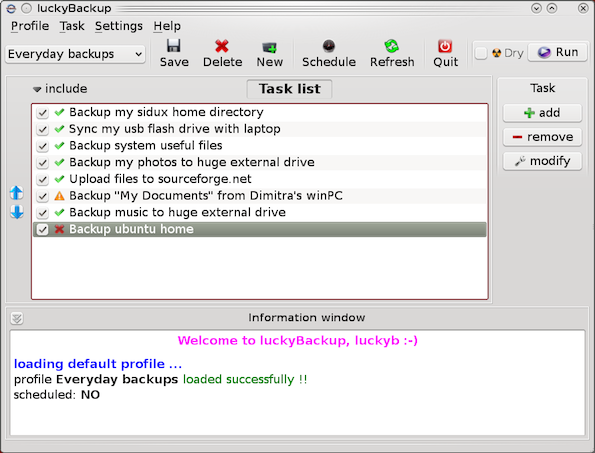
luckybackup_best-linux-graphical-tool-for-backup_linux_gui-defacto-standard-tool
If you're a using GNU / Linux  for Desktop and you're already tired of creating backups by your own hacks using terminal and you want to make your life a little bit more easier and easily automate your important files back up through GUI program take a look at luckyBackup.

Luckibackup is a GUI frontend to the infamous rsync command line backup  tool. Luckibackup is available as a package in almost all modern Linux distributions its very easy to setup and can save you a lot of time especially if you have to manage a number of your Workplace Desktop Office Linux based computers.
Luckibackup is an absolute must have program for Linux Desktop start-up users. If you're migrating from Microsoft Windows realm and you're used to BackupPC, Luckibackup is probably the defacto Linux BackupPC substitute.

The sad news for Linux GNOME Desktop users is luckibackup is written in QT and it using it will load up a bit your notebook.
It is not installed by default so once a new Linux Desktop is installed you will have to install it manually on Debian and Ubuntu based Linux-es to install Luckibackup apt-get it.

debian:~# apt-get install --yes luckibackup
...

On Fedora and CentOS Linux install LuckiBackup via yum rpm package manager

[root@centos :~]# yum -y install luckibackup
.

Luckibackup is also ported for OpenSuSE Slackware, Gentoo, Mandriva and ArchLinux. In 2009 Luckibackup won the prize of Sourceforge Community Choice Awards for "best new project".

luckyBackup copies over only the changes you've made to the source directory and nothing more.
You will be surprised when your huge source is backed up in seconds (after the first backup).

Whatever changes you make to the source including adding, moving, deleting, modifying files / directories etc, will have the same effect to the destination.
Owner, group, time stamps, links and permissions of files are preserved (unless stated otherwise).

Luckibackup creates different multiple backup "snapshots".Each snapshot is an image of the source data that refers to a specific date-time.
Easy rollback to any of the snapshots is possible. Besides that luckibackup support Sync (just like rsync) od any directories keeping the files that were most recently modified on both of them.

Useful if you modify files on more than one PCs (using a flash-drive and don't want to bother remembering what did you use last. Luckibackup is capable of excluding certain files or directories from backupsExclude any file, folder or pattern from backup transfer.

After each operation a logfile is created in your home folder. You can have a look at it any time you want.

luckyBackup can run in command line if you wish not to use the gui, but you have to first create the profile that is going to be executed.
Type "luckybackup –help" at a terminal to see usage and supported options.
There is also TrayNotification – Visual feedback at the tray area informs you about what is going on.


Fiddler – Windows web debugging proxy for any browser – Linux web debugging applications

Thursday, May 29th, 2014

fiddler-web-proxy-debugging-http-https-traffic-in-windows-browser
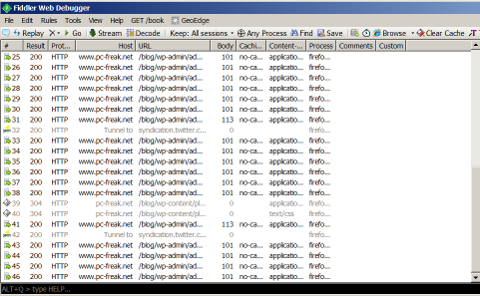
Earlier I've blogged about helpful web developer or a web hosting system administrator Web Browser plugins . Among the list of useful plugins for debugging sent / received web content on your desktop (HTTPWatchm, HTTPFox, Yslow etc.), I've found another one called Fiddler.

Telerik's Fiddler is a Browser plugin  and a Windows Desktop application to monitor HTTP and HTTPS outbound web traffic and report and provide you with various information useful for:

fiddler-web-debugger-for-browser-and-desktop-for-windows-keep-trac-and-optimize-web-traffic-to-web-servers

  • Performance Testing
  • HTTP / HTTPS
  • Traffic recording
  • Security Testing
  • Web Session Manipulation
  • Encode Decode web traffic
  • Convert strings from / to Base64, Hex, DeflatedSAML etc.
  • Log all URL requests originating from all opened browsers on your Desktop
  • Decrypt / encrypt HTTPS traffic using man in the middle techniques
  • Show tuning details for accessed web pages
     

Fiddler is available to install and use as a desktop application (requires .NET 2) or install as a browser plugin. Perhaps the coolest  Fiddler feature from my perspective is its decrypt / encrypt in Base64 and Hex available from TextWizard menu. The tool is relatively easy to use for those who have experience in web debugging, for novice here is a video explaining tool's basics.

Fiddler doesn't have a Linux build yet but it is possible to run it also on Linux using Mono Framework and a few hacks.

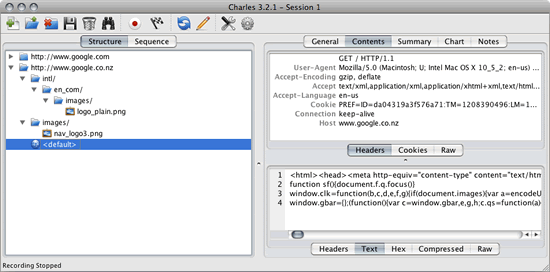
charles-proxy-web-debugging-tool-for-linux-fiddler-alternative
A good native Linux / UNIX alternatives to Fiddler are Nettool, Charles Proxy, Paros Proxy and Web Scarab.

How to read ext2 / ext3 / ext4 Linux filesystem and Mac OS X HFS+ partitions from Windows

Thursday, November 27th, 2014

access-linux-drives-filesystem-disks-from-microsoft-windows-howto-picture
If you are using a Dual-boot PC with installed M$ Windows and GNU .Linux OS storing many of your Documents / Music / Movie data on Linux's ext3 / ext4 filesystem partition  but using often also Windows PC for Professional Graphic Design or Photoshop CS5 / Coreldraw Graphics Suite X7 / 3D Studio / Adobe Drewmweaver you will certainly want to be able to mount (Map drive) as a drive Linux partitions ext3 / ext4 or Mac OS's HFS+ read / use it straight from Windows.

Below are few softs that does allow mounting Mac and Linux (Debian, Ubuntu, Fedora, SuSE etc.) partitions on Windows

1. Mapping Linux ext3 and ext4 as a Windows drive

There are number of programs that can map Linux partition as a drive / directly explore Linux FS content. Most famous (free) ones are:

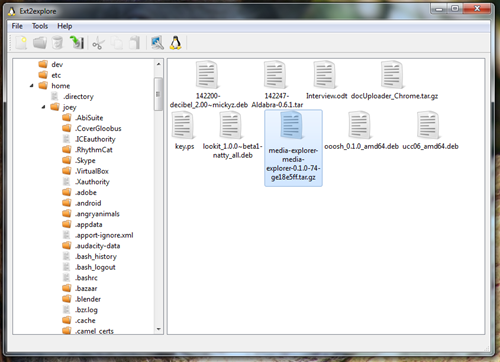
  • Ext2Explore (also known as Ext2Read) – Probably best historically known Windows driver that does Linux ext FS reading 


    ext2explore-access-ubuntu-debian-fedora-suse-linux-from-your-windows-screenshot
     

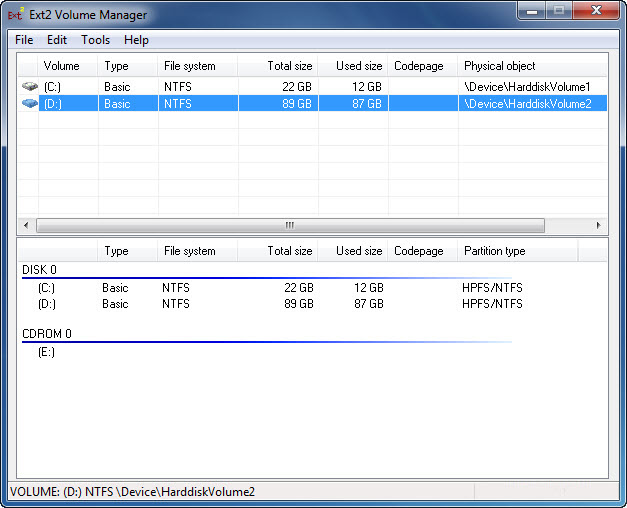
  • Ext2FSD – Open source file system driver for Windows (2K / XP / WIN7 / WIN8 – both x86 and 64 bit arch) supports ext2 / ext3 FSs and even CIFS protocol shares over network mounts. Ext4 filesystems are supported in read only mode only. It supports many language codepage utf8, cp936, cp950 etc..- Cyrillic file names shown correctly 🙂


    ext2fsd-mount-linux-partitions-in-microsoft-windows-screenshot
     

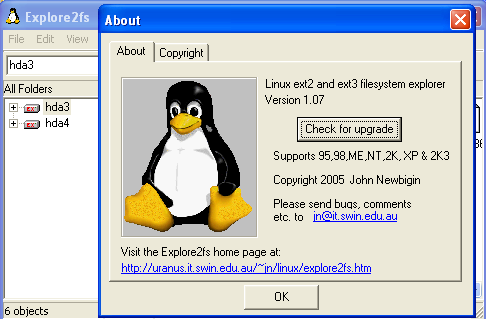
  • Explore2FS – GUI explorer tool for accessing ext2 and ext3 filesystems. It runs under all versions of Windows and can read almost any ext2 and ext3 filesystem.


    explore2fs-linux-partitions-from-widnows-screenshot
     

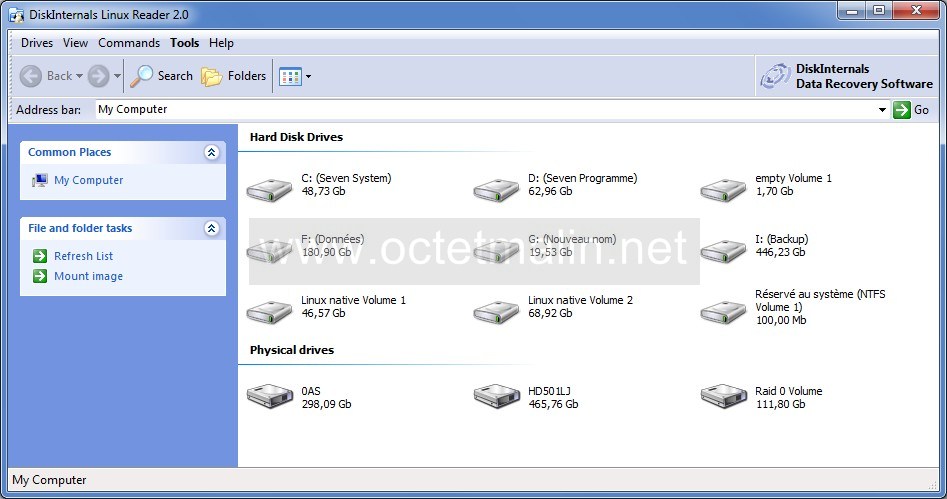
  • Disk Internals Linux reader – A freeware tool for reading and extracting files from EXT2/EXT3/EXT4, HFS, UFS2, Reiser4, and ReiserFS partitions in Windows.


    disk-internals-linux-reader-2.0-screenshot-proprietary-linux-filesystem-reader-mounter-for-windows


Other useful multiplatorm Linux FS reader unfortunately proprietary one is ParagonExtFS – proprietary software having version for both Win OS and Mac (Supports also mounting Linux partitionons Mac).

Note that if you copy some files using some of above tools to Windows permissions held in Linux could screw up, so it is not a good idea to try backup Linux configuration files to Windows's partitions 🙂

2. Read Copy files from Mac OS HFS+ filesystem to Windows

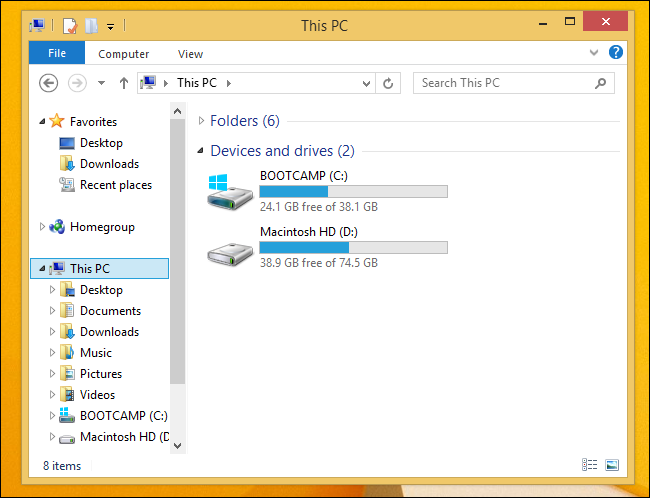
Apple has Boot Camp driver package which allows Mac OS's HFS+ to be viewable from Windows.

reading-Mac-OSX-HFS-plus-partitions-from-ms-windows-with-bootcamp-driver

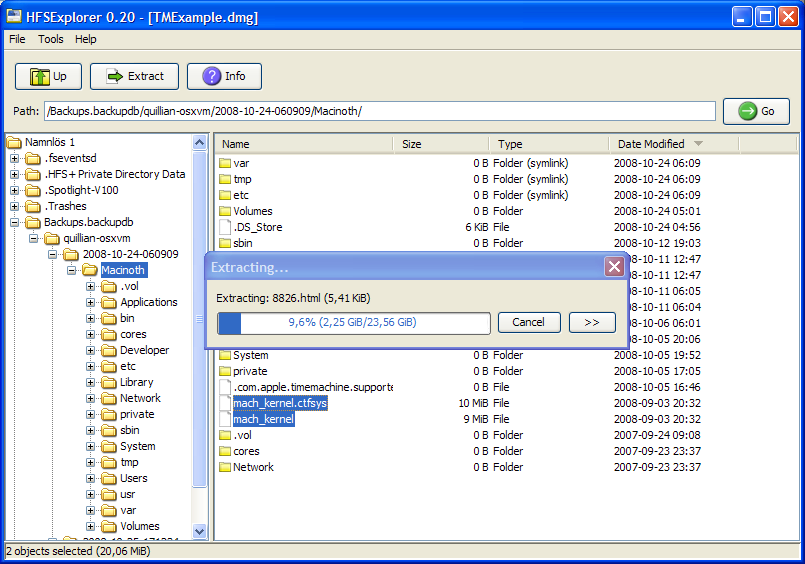
For people who don't intend to continuosly read data HFS+ it might be better to not load Boot Camp but use:

hfsexplorer-explorero-allowing-read-access-to-mac-osx-from-ms-windows-os

 Only problem with Boot Camp and HFSExplorer is it allows you to read data from Mac OS filesystem only read only.If you want to write to HFS+ filesystem from Windows you will need:

  • Proprietary Paragon HFS+ (or)

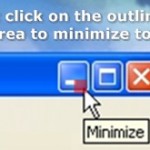
Windows XP / 7, Minimize any program to system tray free software – RBTray, Trayconizer and Windows HideIT

Monday, January 5th, 2015

rbtray-screenshot1-on-ms-windows-minimize-any-application-systray-winblows
As Linux admin, I'm already aware of AllTray *NIX application able to send any application to GNOME / KDE tray.
But what If you have a program on Windows XP / 7 / 8,  that doesn't have a minimize to tray functionality and you want to send it to tray?
I.e. what if you want to send programs like Notepad (that doesn't by default go to win systray) to Windows  tray in order to prevent them mess up with other Open Windows minimized windows?

After a quick research on the topic I found these 3 – RBtray, Trayconizer, HideIt, Below is a very quick review on each

.

1. Minimize any Windows program to tray with RBTray

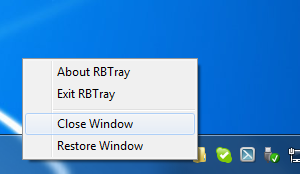
rbtray_windows-7-screenshot-minimize-any-application-to-tray-minimize-notepad
If you want to stick to open source (GPL) software a tiny free software proggie that does the trick is RBTray current latest RBtray is 4.3 release is download mirror is here.

To use RBTray you don't need to do anything, once program is unarchived from archive, once launched there will be no system application that it is running, but you can go to any minimized program (not in tray) and by clicking with right mouse button on minimize button you will the app minimize to tray.

Here is how RBTray works (taken from archive README file):

Installing:
Extract the 32-bit or 64-bit binaries (depending on your OS) to a
 folder, e.g.
C:Program FilesRBTray.  Double click RBTray.exe to start it.  If you want it
to automatically start after you reboot, create a shortcut to RBTray.exe in
your Start menu's Startup group.

Using:
Right click on any program's minimize button to minimize it to the tray.  To
restore, single-click the program's icon in the tray.

Exiting:
Right click on any tray icon created by RBTray and click Exit RBTray in the
popup menu.  Or run RBTray.exe with the –exit parameter.


2. Miminize any app to system tray with Trayconizer

trayconizer_screenshot-microsoft-windows-minimize-notepad
Trayconizer is the other tray minizer tool you might want to check out, Windows tray minize application a download mirror of Trayconizer is here. As of time of writing this post (current) latest Trayconizer version is 1.1.1.

Trayconizer allows you to minimize virtually any application to the system tray rather than having it take up valuable space in your taskbar. The screen shot to the left shows Trayconizer minimizing Notepad to the system tray. Trayconizer is definitely the tool of choice of system administrators who need to keep minimized windows program to system tray each time on boot as it can be easily run from command line.

Using Trayconizer is simple. To start Trayconizer on Notepad, you would execute: C:PathToTrayconizer.exe C:WindowsNotepad.exe.

You can create a shortcut in your Startup group to execute Trayconizer on a program that you use frequently but want to keep tucked out of the way in the system tray when you're not using it. There is even an option for starting the application initially in the minimized state.

Trayconizer will automatically shut itself down when you close the program you are Trayconizing. Additionally, multiple Trayconized programs are handled by a single instance of Trayconizer to avoid wasting system resources.

Trayconizer requires no DLL's beyond the base Win32 API libraries and will not store any entries in your registry.

3. Minimize any program to Windows systray with Windows HideIT

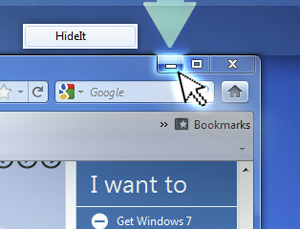
windows-hideit-minimize-to-tray-screenshot-send-any-running-windows-program-to-systray

Another good tool useful in hiding (minimizing) Windows programs which are lacking the minimize option embedded built-in is Windows HideIT.

Hideit official download website is here, note that with Hideit, Its pretty confusing to find where to download in (so to download look in the right upper corner for a download button) HideIT Download Mirror is here.

Hideit should be able to minimize any Application to sysytem tray, while Rbtray fails ith some. Both RBtray and Windows
HIdeIT will popup with a blue down-arrow on Tray icon once launched and you can show / hide minimized applications from there.

All RbTray, Trayconizer and HideIt tray minimizers should work on virtually all NT 4.0 Windows XP / 2000 / Vista / 7 / 8 though I haven't tested on all of 'em yet. If you happen to find it working on  Win NT 4.0 / 8 etc., please drop a comment.

Secure Apache webserver against basic Denial of Service attacks with mod_evasive on Debian Linux

Wednesday, September 7th, 2011

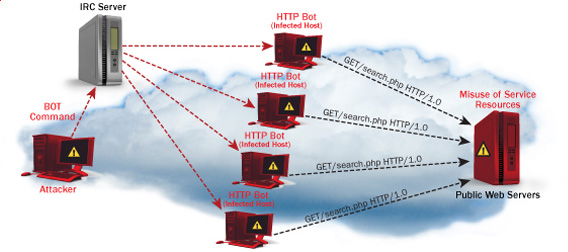
Secure Apache against basic Denial of Service attacks with mod evasive, how webserver DDoS works

One good module that helps in mitigating, very basic Denial of Service attacks against Apache 1.3.x 2.0.x and 2.2.x webserver is mod_evasive

I’ve noticed however many Apache administrators out there does forget to install it on new Apache installations or even some of them haven’t heard about of it.
Therefore I wrote this small article to create some more awareness of the existence of the anti DoS module and hopefully thorugh it help some of my readers to strengthen their server security.

Here is a description on what exactly mod-evasive module does:

debian:~# apt-cache show libapache2-mod-evasive | grep -i description -A 7

Description: evasive module to minimize HTTP DoS or brute force attacks
mod_evasive is an evasive maneuvers module for Apache to provide some
protection in the event of an HTTP DoS or DDoS attack or brute force attack.
.
It is also designed to be a detection tool, and can be easily configured to
talk to ipchains, firewalls, routers, and etcetera.
.
This module only works on Apache 2.x servers

How does mod-evasive anti DoS module works?

Detection is performed by creating an internal dynamic hash table of IP Addresses and URIs, and denying any single IP address which matches the criterias:

  • Requesting the same page more than number of times per second
  • Making more than N (number) of concurrent requests on the same child per second
  • Making requests to Apache during the IP is temporarily blacklisted (in a blocking list – IP blacklist is removed after a time period))

These anti DDoS and DoS attack protection decreases the possibility that Apache gets DoSed by ana amateur DoS attack, however it still opens doors for attacks who has a large bot-nets of zoombie hosts (let’s say 10000) which will simultaneously request a page from the Apache server. The result in a scenario with a infected botnet running a DoS tool in most of the cases will be a quick exhaustion of system resources available (bandwidth, server memory and processor consumption).
Thus mod-evasive just grants a DoS and DDoS security only on a basic, level where someone tries to DoS a webserver with only possessing access to few hosts.
mod-evasive however in many cases mesaure to protect against DoS and does a great job if combined with Apache mod-security module discussed in one of my previous blog posts – Tightening PHP Security on Debian with Apache 2.2 with ModSecurity2
1. Install mod-evasive

Installing mod-evasive on Debian Lenny, Squeeze and even Wheezy is done in identical way straight using apt-get:

deiban:~# apt-get install libapache2-mod-evasive
...

2. Enable mod-evasive in Apache

debian:~# ln -sf /etc/apache2/mods-available/mod-evasive.load /etc/apache2/mods-enabled/mod-evasive.load

3. Configure the way mod-evasive deals with potential DoS attacks

Open /etc/apache2/apache2.conf, go down to the end of the file and paste inside, below three mod-evasive configuration directives:

<IfModule mod_evasive20.c>
DOSHashTableSize 3097DOS
PageCount 30
DOSSiteCount 40
DOSPageInterval 2
DOSSiteInterval 1
DOSBlockingPeriod 120
#DOSEmailNotify hipo@mymailserver.com
</IfModule>

In case of the above configuration criterias are matched, mod-evasive instructs Apache to return a 403 (Forbidden by default) error page which will conserve bandwidth and system resources in case of DoS attack attempt, especially if the DoS attack targets multiple requests to let’s say a large downloadable file or a PHP,Perl,Python script which does a lot of computation and thus consumes large portion of server CPU time.

The meaning of the above three mod-evasive config vars are as follows:

DOSHashTableSize 3097 – Increasing the DoSHashTableSize will increase performance of mod-evasive but will consume more server memory, on a busy webserver this value however should be increased
DOSPageCount 30 – Add IP in evasive temporary blacklist if a request for any IP that hits the same page 30 consequential times.
DOSSiteCount 40 – Add IP to be be blacklisted if 40 requests are made to a one and the same URL location in 1 second time
DOSBlockingPeriod 120 – Instructs the time in seconds for which an IP will get blacklisted (e.g. will get returned the 403 foribden page), this settings instructs mod-evasive to block every intruder which matches DOSPageCount 30 or DOSSiteCount 40 for 2 minutes time.
DOSPageInterval 2 – Interval of 2 seconds for which DOSPageCount can be reached.
DOSSiteInterval 1 – Interval of 1 second in which if DOSSiteCount of 40 is matched the matched IP will be blacklisted for configured period of time.

mod-evasive also supports IP whitelisting with its option DOSWhitelist , handy in cases if for example, you should allow access to a single webpage from office env consisting of hundred computers behind a NAT.
Another handy configuration option is the module capability to notify, if a DoS is originating from a number of IP addresses using the option DOSEmailNotify
Using the DOSSystemCommand in relation with iptables, could be configured to filter out any IP addresses which are found to be matching the configured mod-evasive rules.
The module also supports custom logging, if you want to keep track on IPs which are found to be trying a DoS attack against the server place in above shown configuration DOSLogDir “/var/log/apache2/evasive” and create the /var/log/apache2/evasive directory, with:
debian:~# mkdir /var/log/apache2/evasive

I decided not to log mod-evasive DoS IP matches as this will just add some extra load on the server, however in debugging some mistakenly blacklisted IPs logging is sure a must.

4. Restart Apache to load up mod-evasive debian:~# /etc/init.d/apache2 restart
...

Finally a very good reading which sheds more light on how exactly mod-evasive works and some extra module configuration options are located in the documentation bundled with the deb package to read it, issue:

debian:~# zless /usr/share/doc/libapache2-mod-evasive/README.gz