Posts Tagged ‘Tools’

Improve MobaXterm Best Windows terminal client with some additional settings tune ups / Install extra Linux Cygwin tools on MobaXterm and various post install configuration goodies

Friday, January 20th, 2023

mobaxterm-logo_400x400-terminal-client-tune-up-howto-for-a-new-install

Earlier I've written a an article MobaXTerm: A good gnome-terminal like tabbed SSH client for Windows / Windows Putty Tabs Alternative in which I've introduced the best in my opinion SSH / Telnet / VNC / RDP / Xserver in one Terminal client emulator for Windows operating systems.

The client has been around for quite some time and it has been improving rapidly over the last 10 years, where it now more looks like a separate Operating System than a single terminal client. It's size is quite compact as well and my opinion and every self respectiving developer, system administrator, IT geek or a hacker would definitely
use the mobaxterm at home or at work place on a daily. I guess some of my readers, who have already migrated SuperPutty / SecureCRT or Putty / XMing or whatever kind of exotic Remote SSH Console terminal is used could validate this 🙂

Therefore as I've set up Mobaxterm on a multiple computers all around, I've found it useful to write a small article with some post-install hints (tune ups) one can do immediately once he has installed the Desktop or Portable Apps version of mobaxterm on desktop PC / notebook.
 

1. Set up your bashrc server / command aliases

Lets say you need to setup some rules for connectivity via a socks proxy to dig holes over a harsh company firewalls or add
custom options to every ssh client attempt to remote server, or simply alias some of your servers with custom connectivity options
and so on simply open vi / vim text editor from mobaxterm local terminal and place inside your rules, for example that could be anything like:


alias ssh='ssh -o stricthostkeychecking=no -o passwordauthentication=yes -o PreferredAuthentications=password  -v'
alias sftp='sftp -o stricthostkeychecking=no -o passwordauthentication=yes -o PreferredAuthentications=password'

alias work-server='ssh UserName@work-server -v -o passwordauthentication=yes -o PreferredAuthentications=password'

alias proxy='ssh -D 3128 UserName@proxyIP-host1 -o ConnectTimeout=80'
alias proxy1='ssh -D 3128 UserName@proxy-host2 -p 443 -o ConnectTimeout=60'
alias proxy3='ssh -D 3128 Username@proxy-host3 -p 443 -o ConnectTimeout=60'

Simply open the terminal and setup whatever you require
export ftp_proxy="http://proxy-host:8080"
export https_proxy="https://proxy-host:8080"
export http_proxy="http://proxy-host:8080"
export HTTP_PROXY="http://proxy-host:8080"
export HTTPS_PROXY="http://proxy-host:8080"


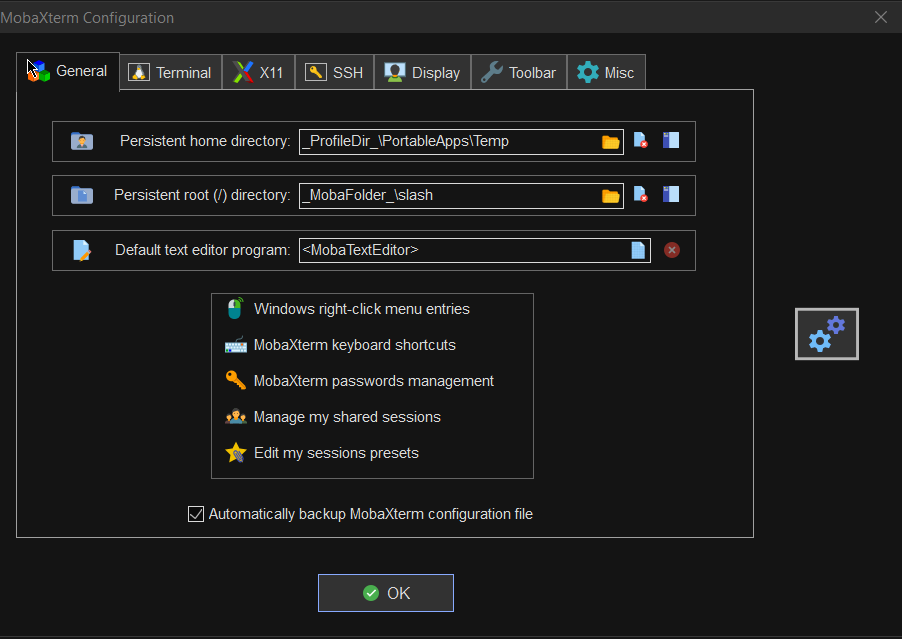
2. Set mobaxterm presistent directory / persistent root directory and default text editor

Make sure you have properly defined at least Persistent directory / Persistent directory if you want to keep the files under your /home/mobaxterm and root directory be able to save your data from local mobaxterm terminal work you have done.

To do so o to Configuration -> General

MobaXterm-persistent-home-directory
 

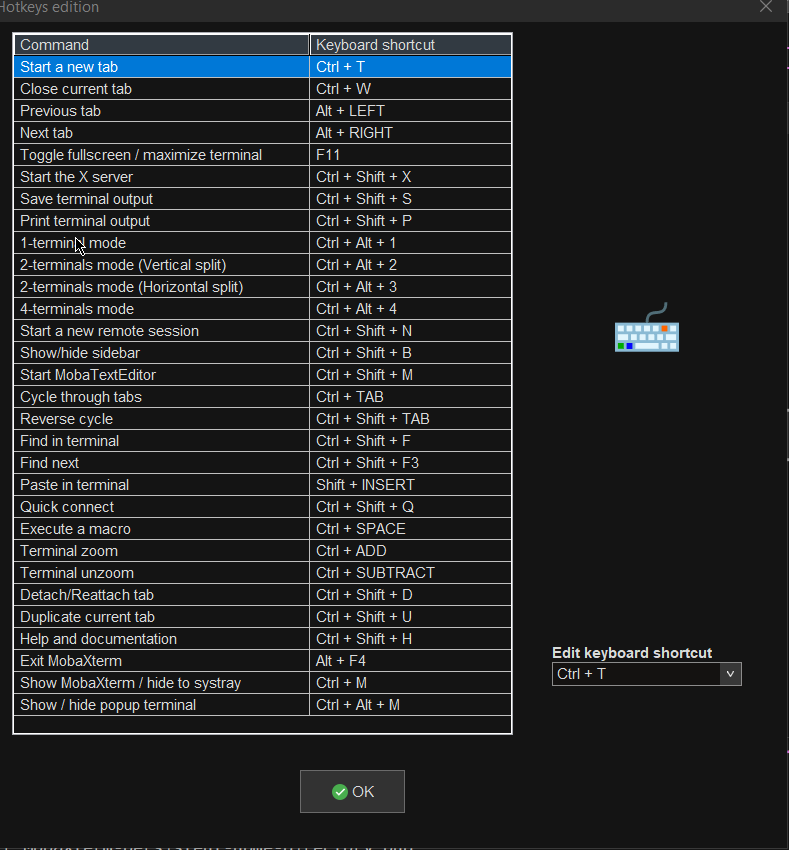
3. Change default settings for Opening / Closing Terminal tabs just like in gnome-terminal

MobaXterm is really awesome as the developer, followed pretty much the logic of some common GNU / Linux Terminal clients like Gnome-Terminal and KDE's default Konsole terminal.

One of the first things to do once Mobaxterm is installed on the PC is to set up nice key binds as default onces might be heard to learn at the beginning or you might have already the habit to use the certain set of key combinations on your Linux desktop:

Common once are:

1. Open tab / Close tab common once I bind to are (CTRL + T / CTRL + W)
2. Previous tab move / Next tab move keys common one I use are (ALT + LEFT / ALT + RIGHT)
3. Find in terminal (CTRL + F)

rebind-mobaxterm-standard-keys
 

4. Make MobaXterm to automatically open a terminal to not Start local terminal every time

By default mobaxterm it is really annoying cause every time you run it after system reboot you have to select
Start local terminal
Once you run the terminal you get this prompt and you have to press on Start local terminal

mobaxterm-start-local-terminal


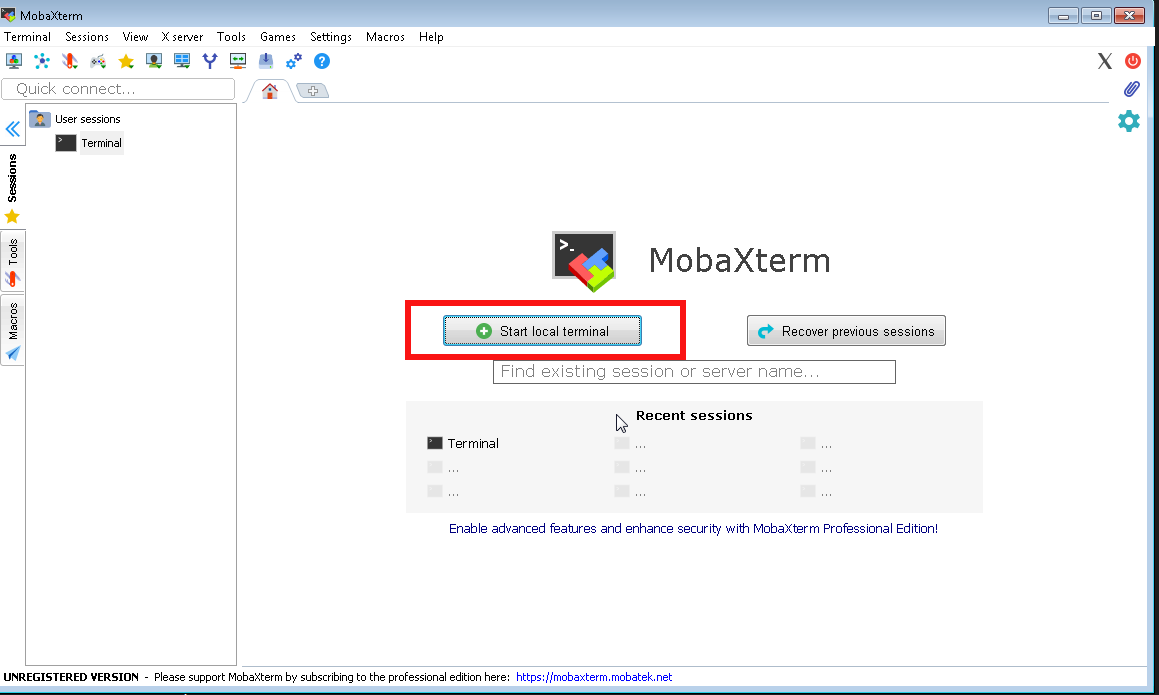
How to make Mobaxterm automatically open local Terminal Tab on every boot?
 

To fix this so every time a local terminal is spawn on MobaXterm you have get to:
 

Settings -> Configuration -> Misc


Open the Following tab at startup by default it will be

<Home (Pinned)>

Change it to:

<Terminal>

mobaxterm-open-the-followintab-tab-in-startup

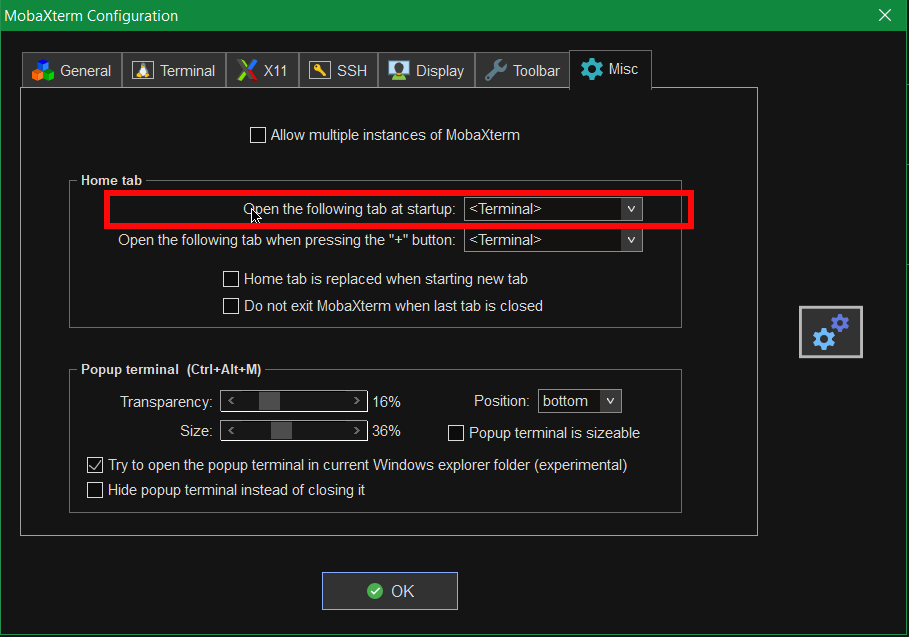
That's it on next login your Local Terminal with /bin/bash.exe will auto load !
 

[hipo.WINDOWS-PC] ➤ env|grep -i SHELL
SHELL=/bin/bash.exe
PATH=/bin:/drives/c/Users/hipo/DOCUME~1
/MobaXterm/slash/bin:/drives/c/Windows:/drives/c/Windows/system32:/drives/c/Windows/system32:/drives/c/Windows:/drives/c/Windows/System32/Wbem:
/drives/c/Windows/System32/WindowsPowerShell/v1.0:/drives/c/Windows/sysnative
PSModulePath=C:\Windows\system32\WindowsPowerShell\v1.0\Modules\
CMDPATH=C:\Windows\system32;C:\Windows;C:\Windows\System32\Wbem;
C:\Windows\System32\WindowsPowerShell\v1.0\;C:\Windows\sysnative\;
C:\Users\hipo\DOCUME~1\MobaXterm\slash\bin
WINPATH=C:\Windows\system32;C:\Windows;C:\Windows\System32\Wbem;C:\Windows\System32\WindowsPowerShell\v1.0\;C:\Windows\sysnative\


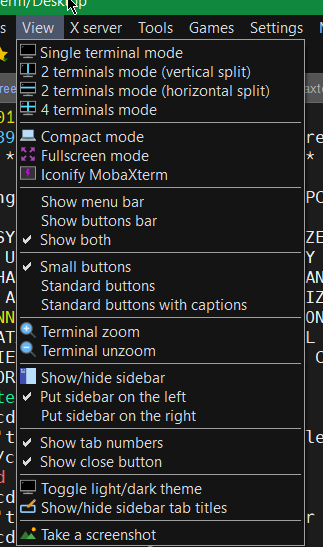
5. Make menu buttons to appear smaller


Go to menu and select
View -> (Small Buttons)

mobaxterm-select-small-buttons-screenshot

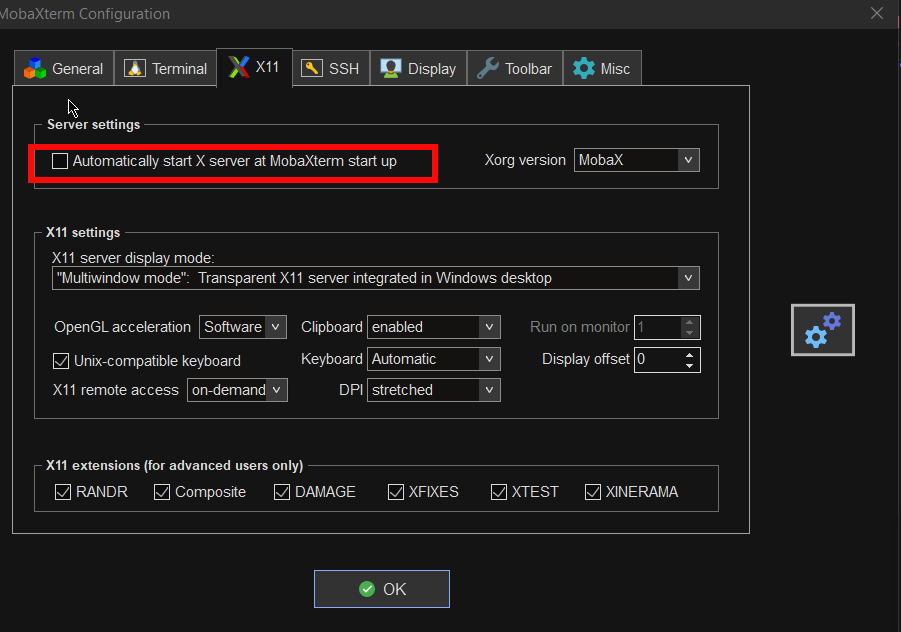
6. Disable auto start of XServer to prevent a port listener on the machine on TCP port

By default mobaxterm opens XServer listener, so you can immediately connect from a remote SSH servers missing Xserver and install software requiring an XServer, for example software such as Oracle Database or some MiddleWare WebLogig or IBM's Web Sphere. This is useful but if you want to have a good security only allow this server on a purpose. Otherwise the XServer will run in parallel with rest of your Moba and just load up your PC and eat up some RAM memory. To disable it go to:

mobaxterm-x11-automatically-start-X-server-disable-stop-at-startup

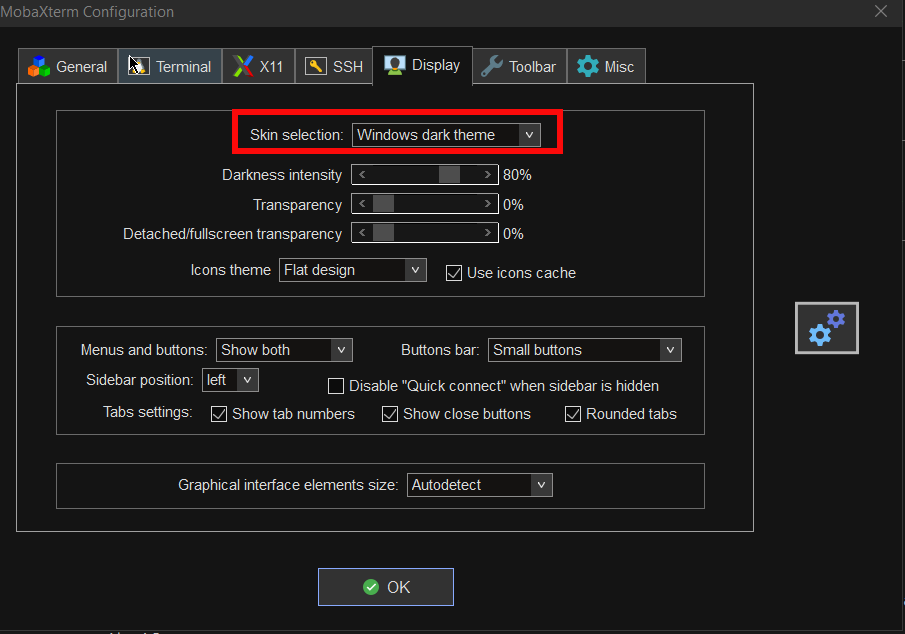
7. Change the mobaxterm Default theme to Dark

This is optional I like to set the Theme to Dark, also as a Theme for Windows as well as for MobaxTerm, the aim of that is simply to not put extra stress on my eye sight. Being on the PC around 8 to 10 hours and spending some 6 to 8 hours on console work is enough. If you want to do as well.

mobaxterm-change-default-theme-to-dark-theme

8. Install additional set of common Linux tools to mobaxterm to use on Windows
 

Tools such as:

1. Midnight Commander (mc)
2. Wget
3. Curl
4. Vim
5. Screen
6. Rsync
7. Perl
8. W3m
9. dosunix
10. unix2dos
11. gnupg
12. diffutils
13. mysql
14. mpg123
15. whois


If you want to have a set of packages pre-installed that are including above as well as the rest of mine, here is a dump of my installed mobapt manager packages:

For more simply use the experimental Mobaxterm  Graphical Package installer
 

[hipo.WINDOWS-PC] ➤  for i in $(cat Downloads/installed-packages-mobaxterm.txt ); do apt-cyg install $i; done
 

Found package GeoIP-database

Installing GeoIP-database
Downloading GeoIP-database-20180505-1.tar.xz…
Unpacking GeoIP-database-20180505-1.tar.xz…


Running postinstall scripts
Package GeoIP-database installed.

Rebasing new libraries

Found package adwaita-icon-theme

Installing adwaita-icon-theme
Downloading adwaita-icon-theme-3.26.1-1.tar.xz…


You will be prompted for a single Yes for the respository

MobApt Packages Manager

mobapt-pkg-manager-install-git-from-gui-mobaxterm-package-installer

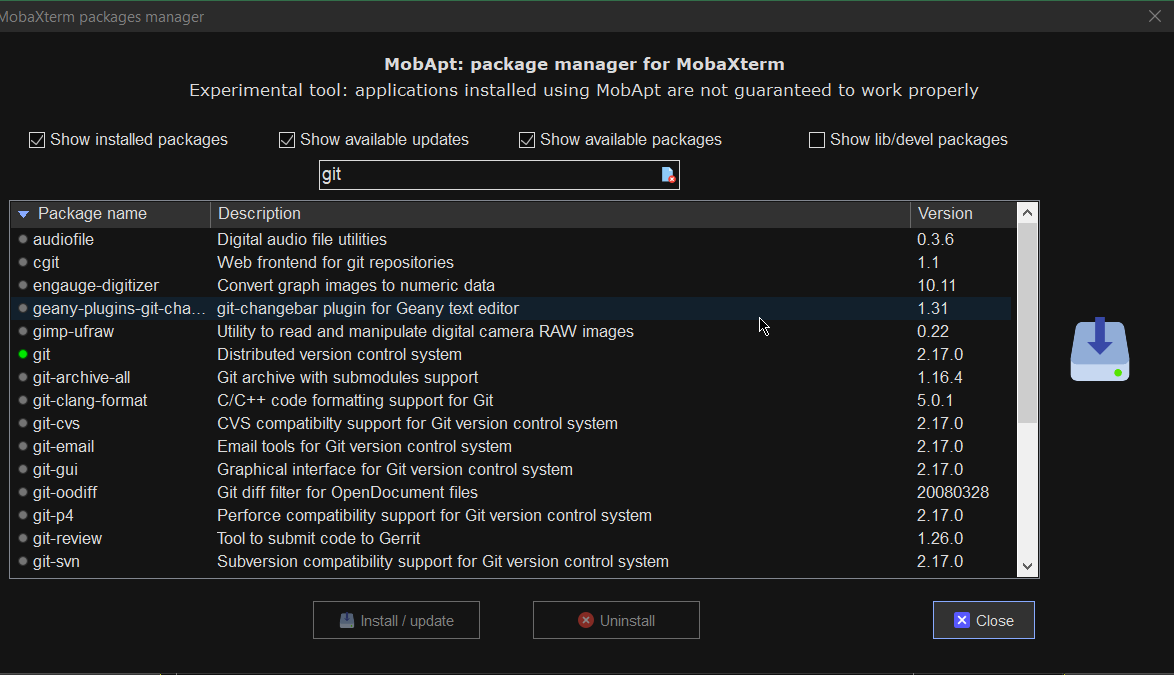
Though it is said it is experimental, I have to say the MobApt Apt Manager works quite good, I never had any issues with it so far.

9. Mobaxterm.ini the settings storage file that can help you move your configurations

If you have to prepeare new MobaXterm on multiple PCs frequently perhaps it is best to just copy the Mobaxterm.ini file. 
Here is an example of my mobaxterm.ini for download.
 

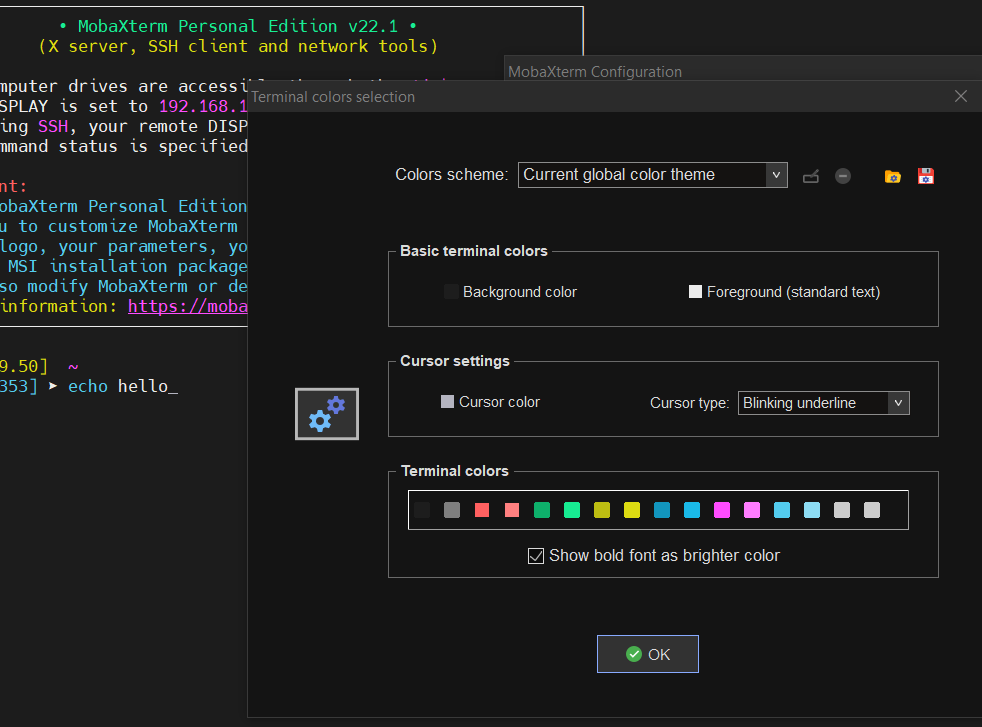
10. Change terminal colors and curor type and enable blinking (customizations)


Settings -> Configuration -> Terminal -> (Default Terminal Color Settings)


mobaxterm-change-terminal-colors-and-blinking-cursor-setting-screenshot

11. Use very useful moba Tools
 

mobaxterm-terminal-great-useful-tools-screenshot
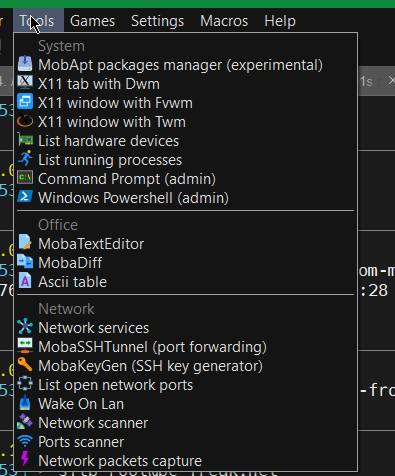
For sysadmins Moba has plenty of other jems such as:

  • Network Port scanner such as Nmap with GUI

  • list open network ports (GUI interface to netmap)

  • SSH tunnel tool

  • Moba Diff

  • Wake on Lan

  • Network Packet capturer (such as tcpdump)

  • List running processes (such as taskmgr in simple form)

  • List machine hardware devices (such as Windows Device manager)

 
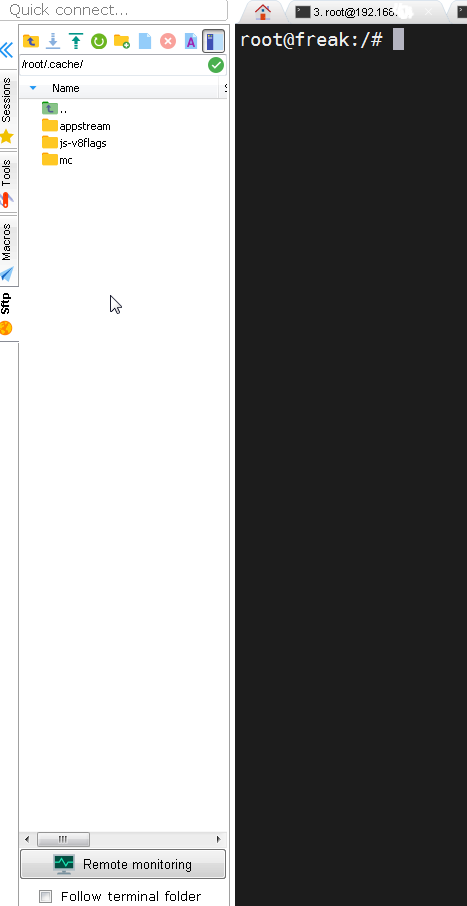
12. Remote monitoring of opened ssh session


To enable remote monitoring for a Saved session simply use the "Remote monitoring" button on the down left corner of the terminal.

mobaxterm-remote-monitoring-of-remote-ssh-server-screenshot-button

Or to enable it for a new host, open:

1. "Saved sessions"
2. Click over "User sessions"
3. New Session -> (SSH)
4. Basic SSH Settings (Remote host) -> OK
5. Click over the new created session
6. Click on Remote monitoring for the opened session

remote-monitoring-from-mobaxterm-screenshot

13. Play some mobaxterm console games

As you might have pissed off of configuring go on and enjoy some of the great console games, some of which are also present on a normal Linux new distribution installation. 🙂
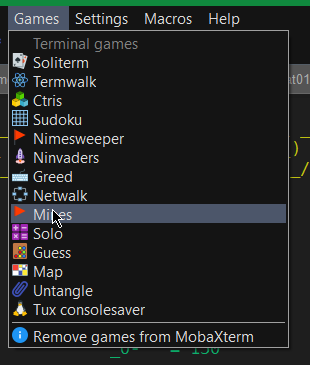
mobaxterm-list-of-games-screenshot

List of Moba Games

teamwalk-mobaxterm-console-connect-network-routers-game
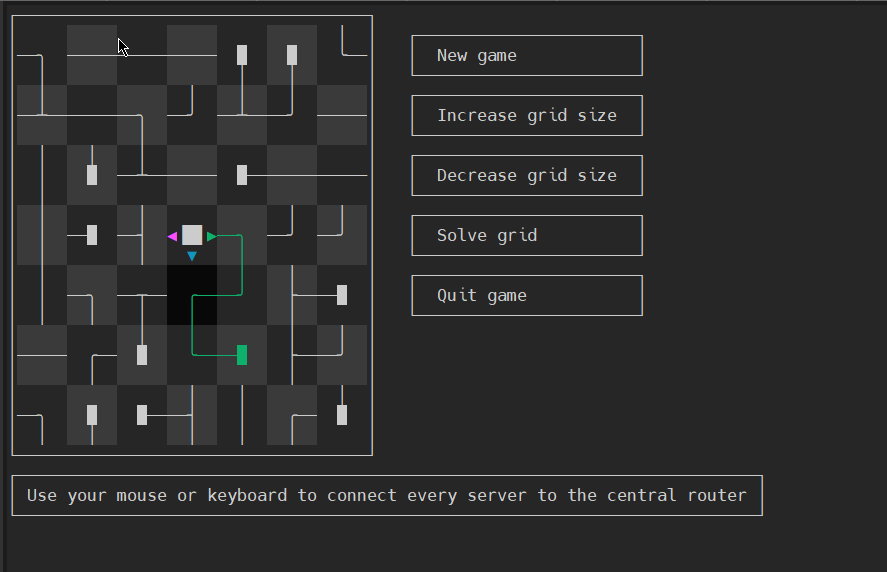
TeamWalk (Use your mouse or keyboard to connect every server to the central router)

ctris-console-text-game-mobaxterm

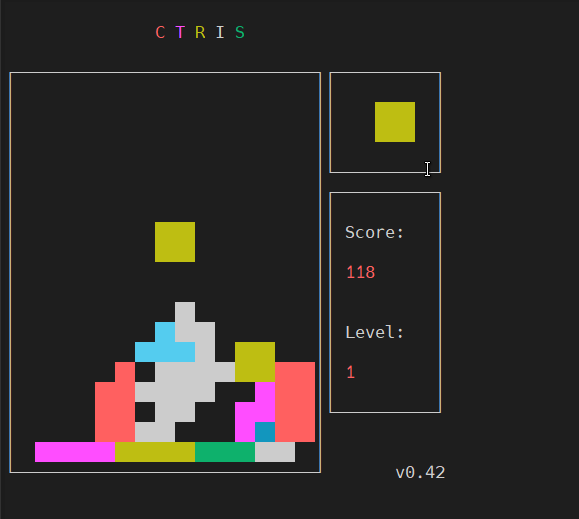
Ctris Console tetris from Mobaxterm

solitaire-text-console-game-played-on-mobaxterm-screenshot

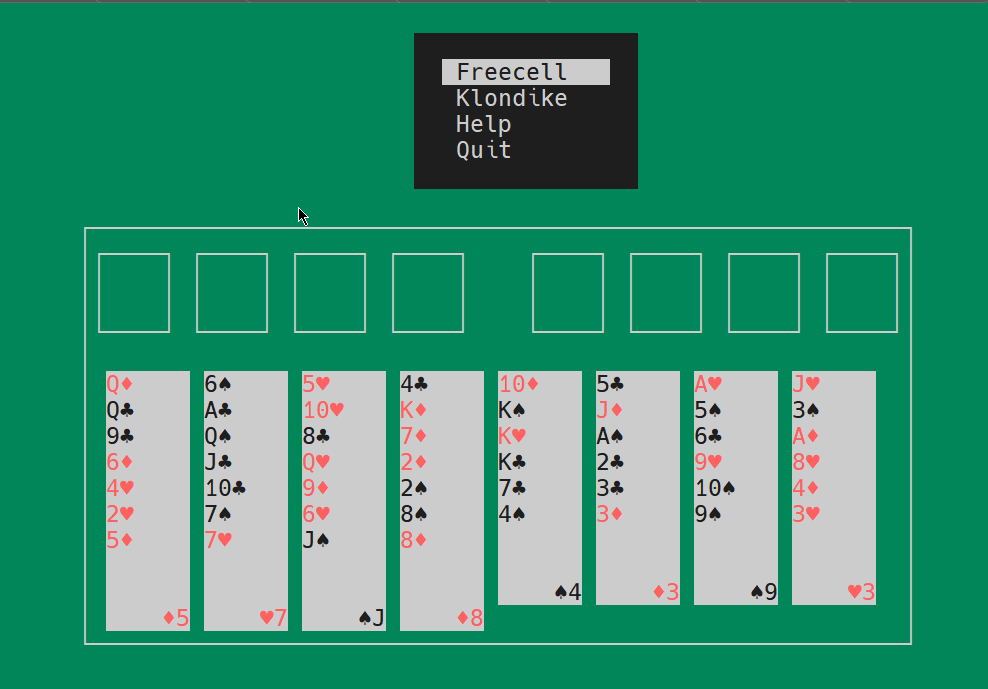
Text console Solitaire from Moba
 

Ninvaders-console-game-mobaxterm

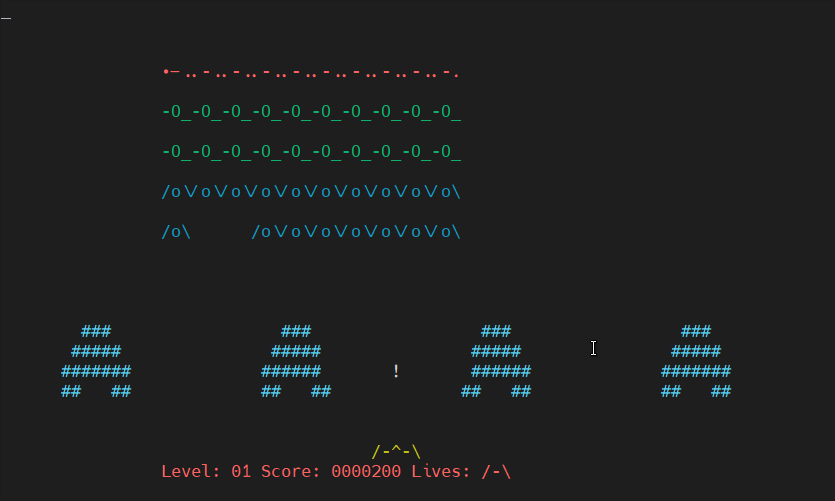
Here is NinVaders (Text Version of Space Invaders Arcade Classic)
 

Enjoy ! 🙂

Tools to scan a Linux / Unix Web server for Malware and Rootkits / Lynis and ISPProtect – clean Joomla / WordPress and other CMS for malware and malicious scripts and trojan codes

Monday, March 14th, 2016

Linux-BSD-Unix-Rootkit-Malware-XSS-Injection-spammer-scripts-clean-howto-manual

If you have been hacked or have been suspicious that someone has broken up in some of the shared web hosting servers you happent o manage you already probably have tried the server with rkhuter, chroot and unhide tools which gives a general guidance where a server has been compromised

However with the evolution of hacking tools out there and the boom of Web security XSS / CSS / Database injections and PHP scripts vulnerability catching an intruder especially spammers has been becoming more and more hard to achieve.

Just lately a mail server of mine's load avarage increased about 10 times, and the CPU's and HDD I/O load jump over the sky.
I started evaluating the situation to find out what exactly went wrong with the machine, starting with a hardware analysis tools and a physical check up whether all was fine with the hardware Disks / Ram etc. just to find out the machine's hardware was working perfect.
I've also thoroughfully investigated on Logs of Apache, MySQL, TinyProxy and Tor server and bind DNS and DJBDns  which were happily living there for quite some time but didn't found anything strange.

Not on a last place I investigated TOP processes (with top command) and iostat  and realized the CPU high burst lays in exessive Input / Output of Hard Drive. Checking the Qmail Mail server logs and the queue with qmail-qstat was a real surprise for me as on the queue there were about 9800 emails hanging unsent, most of which were obviously a spam, so I realized someone was heavily spamming through the server and started more thoroughfully investigating ending up to a WordPress Blog temp folder (writtable by all system users) which was existing under a Joomla directory infrastructure, so I guess someone got hacked through the Joomla and uploaded the malicious php spammer script to the WordPress blog. I've instantly stopped and first chmod 000 to stop being execuded and after examing deleted view73.php, javascript92.php and index8239.php which were full of PHP values with binary encoded values and one was full of encoded strings which after being decoding were actually the recepient's spammed emails.
BTW, the view*.php javascript*.php and index*.php files were owned by www-data (the user with which Apache was owned), so obviously someone got hacked through some vulnerable joomla or wordpress script (as joomla there was quite obscure version 1.5 – where currently Joomla is at version branch 3.5), hence my guess is the spamming script was uploaded through Joomla XSS vulnerability).

As I was unsure wheteher the scripts were not also mirrored under other subdirectories of Joomla or WP Blog I had to scan further to check whether there are no other scripts infected with malware or trojan spammer codes, webshells, rootkits etc.
And after some investigation, I've actually caught the 3 scripts being mirrored under other webside folders with other numbering on filename view34.php javascript72.php, index8123.php  etc..

I've used 2 tools to scan and catch malware the trojan scripts and make sure no common rootkit is installed on the server.

1. Lynis (to check for rootkits)
2. ISPProtect (Proprietary but superb Website malware scanner with a free trial)

1. Lynis – Universal security auditing tool and rootkit scanner

Lynis is actually the well known rkhunter, I've used earlier to check servers BSD and Linux servers for rootkits.
To have up-to-date version of Lynis, I've installed it from source:
 

cd /tmp
wget https://cisofy.com/files/lynis-2.1.1.tar.gz
tar xvfz lynis-2.1.1.tar.gz
mv lynis /usr/local/
ln -s /usr/local/lynis/lynis /usr/local/bin/lynis


Then to scan the server for rootkits, first I had to update its malware definition database with:
 

lynis update info


Then to actually scan the system:
 

lynis audit system


Plenty of things will be scanned but you will be asked on a multiple times whether you would like to conduct different kind fo system services and log files, loadable kernel module rootkits and  common places to check for installed rootkits or server placed backdoors. That's pretty annoying as you will have to press Enter on a multiple times.

lynis-asking-to-scan-for-rootkits-backdoors-and-malware-your-linux-freebsd-netbsd-unix-server

Once scan is over you will get a System Scan Summary like in below screenshot:

lynis-scanned-server-for-rootkit-summer-results-linux-check-for-backdoors-tool

Lynis suggests also a very good things that might be tampered to make the system more secure, so using some of its output when I have time I'll work out on hardening all servers.

To prevent further incidents and keep an eye on servers I've deployed Lynis scan via cron job once a month on all servers, I've placed under a root cronjob on every first dae of month in following command:


server:~# crontab -u root -e
0 3 1 * * /usr/local/bin/lynis –quick 2>&1 | mail -s "lynis output of my server" admin-mail@my-domain.com)


2. ISPProtect – Website malware scanner

ISPProtect is a malware scanner for web servers, I've used it to scan all installed  CMS systems like WordPress, Joomla, Drupal etc.
ISPProtect is great for PHP / Pyhon / Perl and other CMS based frameworks.
ISPProtect contains 3 scanning engines: a signature based malware scanner, a heuristic malware scanner, and a scanner to show the installation directories of outdated CMS systems.
Unfortunately it is not free software, but I personally used the FREE TRIAL option  which can be used without registration to test it or clean an infected system.
I first webserver first locally for the infected site and then globally for all the other shared hosting websites.

As I wanted to check also rest of hosted websites, I've run ISPProtect over the all bunch of installed websites.
Pre-requirement of ISPProtect is to have a working PHP Cli and Clamav Anti-Virus installed on the server thus on RHEL (RPM) based servers make sure you have it installed if not:
 

server:~# yum -y install php

server:~# yum -y install clamav


Debian based Linux servers web hosting  admins that doesn't have php-cli installed should run:
 

server:~# apt-get install php5-cli

server:~# apt-get install clamav


Installing ISPProtect from source is with:

mkdir -p /usr/local/ispprotect
chown -R root:root /usr/local/ispprotect
chmod -R 750 /usr/local/ispprotect
cd /usr/local/ispprotect
wget http://www.ispprotect.com/download/ispp_scan.tar.gz
tar xzf ispp_scan.tar.gz
rm -f ispp_scan.tar.gz
ln -s /usr/local/ispprotect/ispp_scan /usr/local/bin/ispp_scan


To initiate scan with ISPProtect just invoke it:
 

server:~# /usr/local/bin/ispp_scan


ispprotect-scan-websites-for-malware-and-infected-with-backdoors-or-spamming-software-source-code-files

I've used it as a trial

Please enter scan key:  trial
Please enter path to scan: /var/www

You will be shown the scan progress, be patient because on a multiple shared hosting servers with few hundred of websites.
The tool will take really, really long so you might need to leave it for 1 hr or even more depending on how many source files / CSS / Javascript etc. needs to be scanned.

Once scan is completed scan and infections found logs will be stored under /usr/local/ispprotect, under separate files for different Website Engines and CMSes:

After the scan is completed, you will find the results also in the following files:
 

Malware => /usr/local/ispprotect/found_malware_20161401174626.txt
Wordpress => /usr/local/ispprotect/software_wordpress_20161401174626.txt
Joomla => /usr/local/ispprotect/software_joomla_20161401174626.txt
Drupal => /usr/local/ispprotect/software_drupal_20161401174626.txt
Mediawiki => /usr/local/ispprotect/software_mediawiki_20161401174626.txt
Contao => /usr/local/ispprotect/software_contao_20161401174626.txt
Magentocommerce => /usr/local/ispprotect/software_magentocommerce_20161401174626.txt
Woltlab Burning Board => /usr/local/ispprotect/software_woltlab_burning_board_20161401174626.txt
Cms Made Simple => /usr/local/ispprotect/software_cms_made_simple_20161401174626.txt
Phpmyadmin => /usr/local/ispprotect/software_phpmyadmin_20161401174626.txt
Typo3 => /usr/local/ispprotect/software_typo3_20161401174626.txt
Roundcube => /usr/local/ispprotect/software_roundcube_20161401174626.txt


ISPProtect is really good in results is definitely the best malicious scripts / trojan / trojan / webshell / backdoor / spammer (hacking) scripts tool available so if your company could afford it you better buy a license and settle a periodic cron job scan of all your servers, like lets say:


server:~# crontab -u root -e
0 3  1 * *   /usr/local/ispprotect/ispp_scan –update && /usr/local/ispprotect/ispp_scan –path=/var/www –email-results=admin-email@your-domain.com –non-interactive –scan-key=AAA-BBB-CCC-DDD


Unfortunately ispprotect is quite expensive so I guess most small and middle sized shared hosting companies will be unable to afford it.
But even for a one time run this tools worths the try and will save you an hours if not days of system investigations.
I'll be glad to hear from readers if aware of any available free software alternatives to ISPProtect. The only one I am aware is Linux Malware Detect (LMD).
I've used LMD in the past but as of time of writting this article it doesn't seems working any more so I guess the tool is currently unsupported / obsolete.


Easy access to all Management Tools on Microsoft Windows 7 and Windows Vista with “GodMode” / A little known hidden Windows feature

Thursday, October 11th, 2012

Windows 7 Vista God Mode little known windows hidden feature, GodMode Microsoft Windows 7 and MS Vista, built in microsoft windows hack shortcut

Are you looking for a quick way to find some kind of security issue with a particular Windows 7 install? You’re an IT geek or your regular daily IT job includes fixing a lot of Windows 7 and Vista broken computers?

I’m sure you will be puzzled to hear about Microsoft embedded default “hack” (feature / shortcut) GodMode. I’m not how exactly “GodMode” should be called is it a security leak? a nice pro admin required feature? or a bad joke with M$ users M$ developers did …

Now you probably still wonder what is GodMode, it is an easy to create Shortcut directory, which when created does an automatic link to all Administrator and Settings services on a Windows OS Desktop PC or Notebook.
GodMode is like all administrator programs link to all management tools accessible via one specific to create (New Directory). It is a sort of Shortcut to everything one accesses from Start Menu, Control Panel and all admin PC interfaces.
GodMode is super handy if you hate to use the messed up and hard to memorize tools in Control Panel ….

Here is a list of all the Utilities you can change via creating the “GodMode” shortcut (New Folder):

Action Center, Administrative Tools, AutoPlay, Backup and Restore, BitLocker Drive Encryption,
Color, Management, Credential Manager, Date and Time, Default Programs, Desktop Gadgets, Device Manager,
Devices and Printer, Display, Easy of Access Center, Folder Options, Fonts, Gettings Started, HomeGroup,
Indexing Options, Internet Options, Keyboard, Mouse, Network and Sharing Center, Notification Area Icons,
Performance Information and Tools, Personalization, Phone and Modem, Power Options, Programs and Features,
Recovery, Region and Language, RemoteApp and Desktop Connections, Sound, Speech Recognition, Sync Center,
System, Taskbar and Start Menu, Troubleshoting, User Accounts, Windows CardSpace, Windows Defender,
Windows Firewall, Windows Update

GodMode is really AWESOME! Its THE DREAM OF THE WINDOWS SYSTEM ADMINISTRATOR COME TRUE 🙂

To get access to all this handy Linked under one Shortcut utilities, all you have to do is create a New Folder (on Windows Desktop plot or anywhere on the Hard Drive) with the following string (name) as New Folder name:


GodMode:{ED7BA470-8E54-465E-825C-99712043E01C}

You will get on your Desktop (or whatever New Directory is created) a Shortcut to all system available management tools.
Below are two screenshots of “GodMode” :):

Windows 6 Vista Godmode hack link to all admin tools feature

GodMode is an handy shortcut for tech savvys and for anyone running a PC repair shop it will certainly be previous one to know of.
Using it one can save really a lot of time, screen pondering and obsolete clicks.

GodMode “trick” should work on all M$ Windows 7 / Vista (Pro, Home, Business, Laziness) or whatever. From security standpoint it is a big joke as it can give so easy to way to a possible malicious easier to review system configs and look up for things to break.
I wondery Why Microsoft developers call it GodMode at all? It is just a shortcut and it doesn’t grant you administrator (god like) system access ? Well anyways, Enjoy 😉