Posts Tagged ‘ubuntu linux’

How to upgrade single package with their dependencies on Debian and Ubuntu Linux

Friday, March 16th, 2012

Debian GNU / Linux apt-get upgrade a package selection of a whole bunch of packages ready to upgrade apt artistic logo

Are you a Debian System Administrator and you recently run apt-get upgrade && apt-get upgrade finding out there are plenty of new packagesfor upgrade? Do you need only a pre-selected number of packages to upgrade with apt?
I run apt-get update && apt-get upgrade on one of our company Debian servers, just to see there are a number of packages to be upgraded among which there was some I didn't wanted to upgrade. Here is a little paste output from apt-get upgrade:

debian:~# apt-get update && apt-get upgrade
Hit http://security.debian.org squeeze/updates Release.gpg
...
Hit http://security.debian.org squeeze/updates/main amd64 Packages
Fetched 128 kB in 0s (441 kB/s)
Reading package lists... Done
Building dependency tree
Reading state information... Done
The following packages will be upgraded:
at imagemagick libdbd-pg-perl libfreetype6 libmagickcore3 libmagickcore3-extra libmagickwand3 libmysqlclient16 mysql-client
mysql-client-5.1 mysql-common mysql-server mysql-server-5.1 mysql-server-core-5.1
Do you want to continue [Y/n]
14 upgraded, 0 newly installed, 0 to remove and 0 not upgraded.

From first sight it seems logical to issue apt-get upgrade packagename to upgrade only single package with its package dependencies, instead of the whole group the above packs. However doing:
apt-get upgrade imagemagick will still try to upgrade all the packages instead of just imagemagick and its dependency package deb libmagickcore3

debian:~# apt-get upgrade imagemagick
Reading package lists... Done
Building dependency tree
Reading state information... Done
The following packages will be upgraded:
at imagemagick libdbd-pg-perl libfreetype6 libmagickcore3 libmagickcore3-extra libmagickwand3 libmysqlclient16 mysql-client
mysql-client-5.1 mysql-common mysql-server mysql-server-5.1 mysql-server-core-5.1
14 upgraded, 0 newly installed, 0 to remove and 0 not upgraded.
Do you want to continue [Y/n]

Doing all package,upgrade is not a good idea in my case, since upgrading mysql-server will require a MySQL server restart (something which we cannot afford to do right now) on this production server.
MySQL server restart during upgrade is never a good idea especially on productive busy (heavy loaded) SQL servers.
A restart of the MySQL server serving thousands of requests per second could lead often to crashed tables and hence temporary server downtime etc.

Still it is a good idea to upgrade the rest of packages with their newer versions. For exmpl. to upgrade; imagemagick, at , libfreetype6 and so on.

In order to upgrade only this 3 ones and their respective package dependencies, issue:

debian:~# apt-get --yes install imagemagick at libfreetype6

Repeat the apt-get install command with passing all the single package name you want to be upgraded and voila you're done :).
Be sure the apt-get install packagename upgrade doesn't require also upgrade of myssql-server, mysql-client, mysql-common or mysql-server-core-5.1 or any of the package name you want to preserve from upgrading.

How to add extra plugins, effects, brushes and functionality to GIMP on GNU / Linux

Tuesday, February 28th, 2012

How to add extra plugins, effects brushes and functionality to GIMP on Debian and Ubuntu Linux / GIMP logo head pictureThese days, I'm playing with The GIMP. I've been a GNU / Linux, FreeBSD user for already 11 years now but as I'm doing mostly system administration and I don't have much expertise in Panting or Computer Graphical Design, I've never put much time to learn more in the interesting area of graphical design. Hence until just recently, Just until now, I've never spend time with the GIMP (GNU Image Manipulation Program) and never realized how powerful this great program is. The more I learn about GIMP functionalities and how it works the more it makes me determined to learn some basic web design 🙂
The functionality which The GIMP offers in a basic install is quite rich, however by default on most Debian and Ubuntu installations many of the great plugins which easifies the way to edit pictures is missing.

Example for a very valuable functionality which is not present with standard gimp package installed on Debian and Ubuntu are:
 

Here I will mention here few words on:

  • GIMP FX-Foundry Collection

GIMP FX-Foundry is a thoroughful collection of GIMP scripts (addon plugins), that automates many of the operations which requires a professional web design skills and gives an easy intuitive interface through which very robust "high level" graphic design can be accomplished. This additional GIMP extensions helps to create very unique design in just few simple steps, as well as gives multiple tools for the sake of easy pro design creation. For anyone looking for quick edit of images with GIMP FX-Foundry is a must have GIMP plugins extension. The script pack is located on http://gimpfx-foundry.sourceforge.net/

To install FX-Foundry scripts collection on Debian / Ubuntu / Linux Mint and other based Linux distributions:

debian:~# apt-get install --yes gimp-plugin-registry
...

gimp-plugin-registry package name is based on GIMP Plugin registry's website
. Gimp plugin registry contains many helpful design goodies 🙂

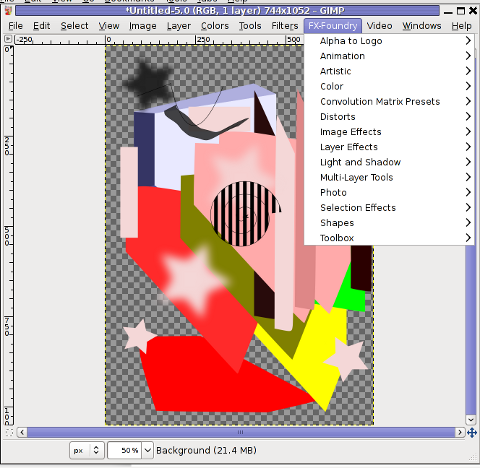
Once installed you will notice GIMP with a new menu on the main menus bar reading FX-Foundry :

GIMP Screenshot GNU Linux Debian additional FX Foundry menu

GIMP FX Foundry extensionos package contains 124 scripts for additional graphics manipulation. The collection contains less scripts than the ones provided by gimp-plugin-registry. package has 156 scripts inside.

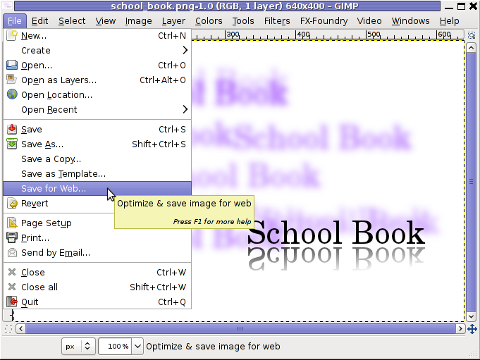
One of the most helpful GIMP addition from the package is the inclusion of Save for Web button under:

File -> Save for Web

GIMP Save for Web menu suitable for reduced size images for HTML image producing on Debian GNU / Linux screenshot

Another very helpful .deb package which adds up to GIMP's design possibilities is gimp-data-extras .

gimp-data-extras adds 111 new GIMP Fill in Patterns , which can be used through the Blend Tool to Fill selected areas with color gradients.

To install gimp-data-extras on Debian:

debian:~# apt-get install --yes gimp-data-extras
...

Generally once installed this package will add to GIMP – an extra set of brushes, palettes, and gradients for The GIMP as you can read in the package description.

I was also quite stunned to find out the good old GIMP is capable of basic Video editting!!

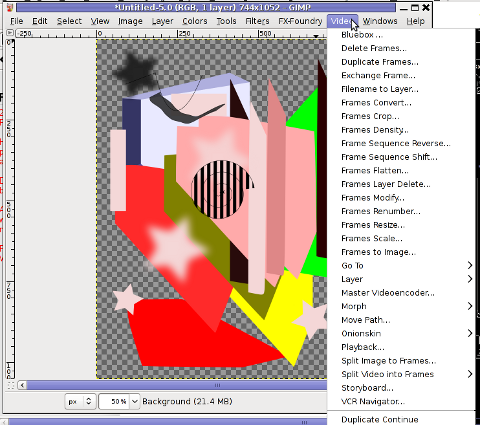
On Debian and Ubuntu there is a package called gimp-gap which once installed adds an extra Video menu.

GIMP Screenshot GNU Debian linux adding GIMP extra Video editting capabilities

I've not tested the GIMP video editting capabilities yet, however I intend to learn something about it immediately when I have some free time left. You see the enormous list of Video editting possibilities GIMP obtaines with gimp-gap which btw stands for (The GIMP Animation Package).

To install gimp-gap:

debian:~# apt-get install --yes gimp-gap

I've noticed also the following list of others useful GIMP additions (mainly helpful in Web, Brochure and Logo Graphic Design) to install them:

debian:~# apt-get --yes install gimp-gmic gimp-ufraw gtkam-gimp gimp-gluas \gimp-dimage-color gimp-dds gimp-dcraw gimp-cbmplugs flegita-gimp gimp-texturize \gimp-resynthesizer gimp-lensfun gimp-gutenprint gtkam-gimp mrwtoppm-gimp

Here is the package description of the packages above command will install:

  • gimp-cbmplugs – plugins for The GIMP to import/export Commodore 64 files
  • gimp-data-extras – An extra set of brushes, palettes, and gradients for The GIMP
  • gimp-dcraw – GIMP plug-in for loading RAW digital photos
  • gimp-dds – DDS (DirectDraw Surface) plugin for the gimp
  • gimp-dimage-color – GIMP plugin to convert Minolta DiMAGE pictures to sRGB colour space
  • gimp-gap – The GIMP Animation Package
  • gimp-gluas – Lua environment plug-in for GIMP
  • gimp-gmic – GIMP plugin for GREYC's Magic Image Converter
  • gimp-gutenprint – print plugin for the GIMP
  • gimp-lensfun – Gimp plugin to correct lens distortion using the lensfun library
  • gimp-normalmap – Normal map plugin for GIMP
  • gimp-plugin-registry – repository of optional extensions for GIMP
  • gimp-resynthesizer – Gimp plugin for texture synthesis
  • gimp-texturize – generates large textures from a small sample
  • gimp-ufraw – gimp importer for raw camera images
  • flegita-gimp – Gnome Gimp scan plugin.
  • gtkam-gimp – gtkam gimp plugin to open digital camera pictures
  • mrwtoppm-gimp – GIMP-plugin to support Minolta DiMAGE 5/7/7i RAW images

Now after installing all this plugins and seeing all GIMP's power, I'm starting to wonder why are still people ranting Adobe PhotoShop is feature rich.
That's all, enjoy the great new GIMP features. Happy picture editting 😉

How to fix upside-down / inverted web camera laptop Asus K51AC issue on Ubuntu Linux and Debian GNU / Linux

Monday, February 13th, 2012

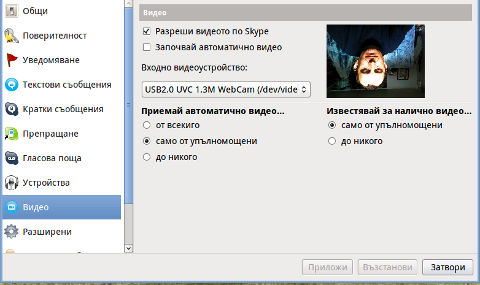
Skype Video Inverted bat like linux screenshot

Does your camera show video correctly in cheese but shows captured video upside-down (inverted) in skype ?
This is an issue a friend of mine experienced on his Asus K51AC-SX037D laptop on both Ubuntu and Debian Linux.
As you can see in the picture above it is funny as with this bug the person looks like a batman 😉
As the webcam upside-down issue was present on both latest Ubuntu 11.10 and latest stable Debian Squeeze 6.02, my guess was other GNU / Linux rpm based distro like Fedora might have applied a fix to this weird Skype inverted video (bat human like) issue.
Unfortunately testing the webcam with Skype on latest both Fedora 16 and Linux Mint 12 appeared to produce the same webcam bug.

A bit of research for the issue online and try outs of a number of suggested methods to resolve the issue led finally to a work around, thanks to this post
Here is few steps to follow to make the webcam show video like it should:

1. Install libv4l-0 package

root@linux:~# apt-get --yes install libv4-0
...

Onwards to start skype directly from terminal and test the camera type:

hipo@linux:~$ LD_PRELOAD=/usr/lib/libv4l/v4l1compat.so skype

This is the work around for 32 bit Linux install, most people however will probably have installed 64 bit Linux, for 64bit Linux installs the above command should be little different:

hipo@linux:~$ LD_PRELOAD=/usr/lib32/libv4l/v4l1compat.so skype

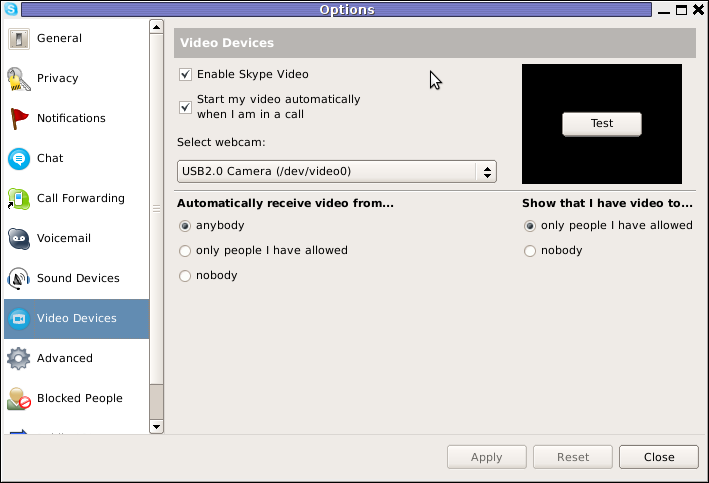
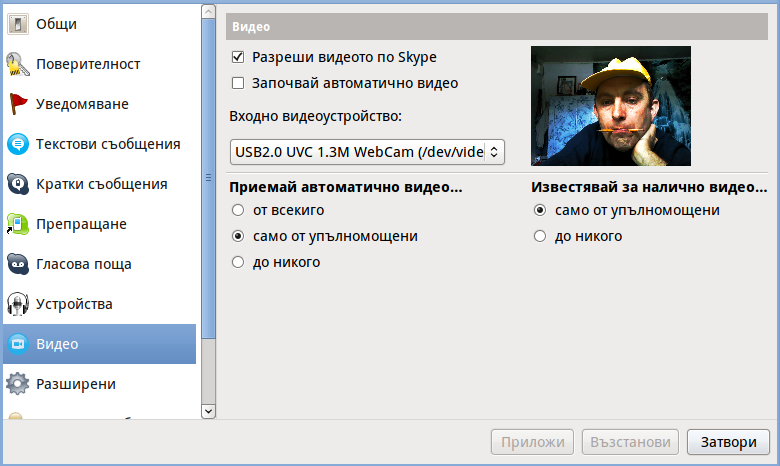
Once skype is launched test the camera and see if the camera capture is now uninverted, through menus:

S -> Options -> Video Devices -> Test

Skype Options Video devices screenshot

2. Create a skype Wrapper script Launcher

To make skype launch everytime with exported shell variable:
LD_PRELOAD=/usr/lib32/libv4l/v4l1compat.so

A new skype wrapper bash shell script should be created in /usr/local/bin/skype , the file should contain:

#!/bin/sh
LD_PRELOAD=/usr/lib32/libv4l/v4l1compat.so
/usr/bin/skype

To create the script with echo in a root terminal issue;

root@linux:~# echo '#!/bin/sh' >> /usr/local/bin/skype
root@linux:~# echo 'LD_PRELOAD=/usr/lib32/libv4l/v4l1compat.so' >> /usr/local/bin/skype
root@linux:~# echo '/usr/bin/skype' >> /usr/local/bin/skype
root@linux:~# chmod +x /usr/local/bin/skype

3. Edit the Skype gnome menu to substitute /usr/bin/skype Skype Launcher with /usr/local/bin/skype

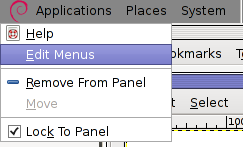
Gnome 2 has a handy menu launcher, allowing to edit and add new menus and submenus (menus and items) to the Application menu, to launch the editor one has to click over Applications with last mouse button (right button) and choose Edit Menus

GNOME Edit menus screenshot

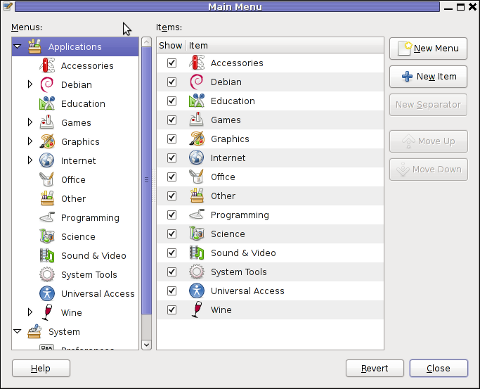
The menu editor like the one in the below screenshot will appear:

GNOME 2 Menu Editor Screenshot

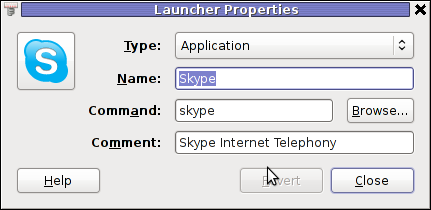
In the preceeding Launcher properties window, Command: skype has to be substituted with:

GNOME2 Skype screenshot Launcher properties

Command: /usr/local/bin/skype

For console freaks who doesn't want to bother in editting Skype Launcher via GUI /usr/share/applications/skype.desktop file can be editted in terminal. Inside skype.desktop substitute:

Exec=skype

with

Exec=/usr/local/bin/skype

Skype fixed inverted bat like screenshot

As one can imagine the upside-down video image in Skype is not a problem because of Linux, but rather another bug in Skype (non-free) software program.
By the way everyone, who is using his computer with Free Software operating system FreeBSD, Linux etc. knows pretty well by experience, that Skype is a very problematic software; It is often a cause for system unexpected increased system loads, problems with (microphone not capturing), camera issues, issues with pulseaudio, problem with audio playbacks … Besides the long list of bugs there are unexpected display bugs in skype tray icon, bugs in skype messanger windows and at some rare occasions the program completely hangs and had to be killed with kill command and re-launched again.

Another worrying fact is Skype's versions available for GNU / Linux and BSD is completely out of date with its "competitor" operating systems MS Windows, MacOS X etc.
For people like me and my friend who want to use free operating system the latest available skype version is not even stable … current version fod download from skype's website is (Skype 2.2Beta)!

On FreeBSD the skype situation is even worser, freebsd have only option to run Skype ver 1.3 or v. 2.0 at best, as far as I know skype 2.2 and 2.2beta is not there.

Just as matter of comparison the latest Skype version on Windows is 5.x. Windows release is ages ahead its Linux and BSD ver. From a functional point of view the difference between Linux's 2.x and Windows 5.x is not that much different, what makes difference is is the amount of bugs which Linux and BSD skype versions contain…
Skype was about 6 months ago bought by Microsoft, therefore the prognosis for Skype Linux support in future is probably even darker. Microsoft will not probably bother to release new version of Skype for their competitor free as in freedom OSes.

I would like to thank my friend and brother in Christ Stelian for supplying me with the Skype screenshots, as well as for being kind to share how he fixed his camera with me.

Geki2 and Geki3 a Xenon 2 Megablast like games for GNU / Linux and FreeBSD

Thursday, December 22nd, 2011

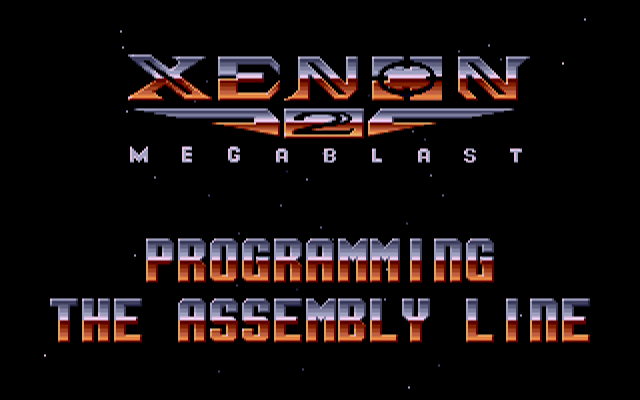
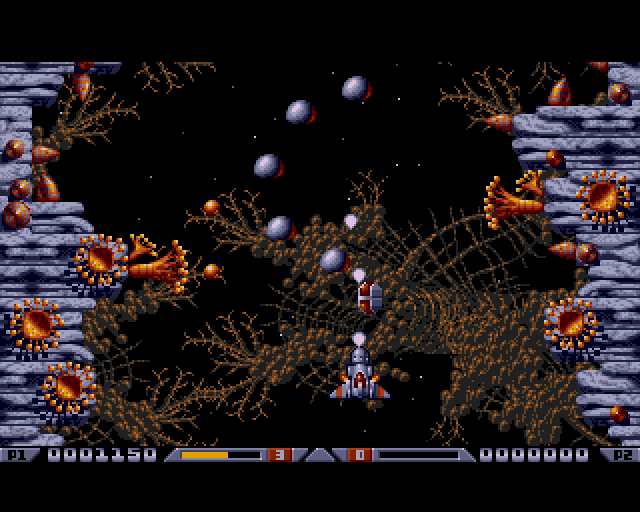
Do you remember the old arcade spaceship shooter Xenon 2 Megablast? I do 😉 For all those who are too young to remember, here are two screenshots:

Xenon2 Main game Screen PC DOS ver

Xenon 2 megablast PC DOS level screenshot

Even though Xenon 2 Megablast original can now be played using dosbox DOS emulator. Its interesting to mention I've found two Linux games that more or less can be qualitified to resemble Xenon 2.
The games are Native Free Software games and existing in package repositories of most Linux distributions and *BSD port trees.

Geki 2 and Geki 3 are of a less quality to Xenon but still, the game experience is nice and is among the Arcade shooter games to bring you fun in the boring days if you're on GNU / Linux or FreeBSD Free OS platforms.

Installing Geki2 and Geki3 on Debian and Ubuntu Linux is standard with apt:

debian:~# apt-get install geki2 geki3
...

On Debian GNU / Linux , after installed the games would not create GNOME Applications -> Games -> game startup shortcuts, however the game startups will get added in GNOME Applications Menu under:

Applications -> Debian -> Games -> Action -> Geki 2
and
Applications -> Debian -> Games -> Action -> Geki 3

The games can be launched also manually with commands:

geki2

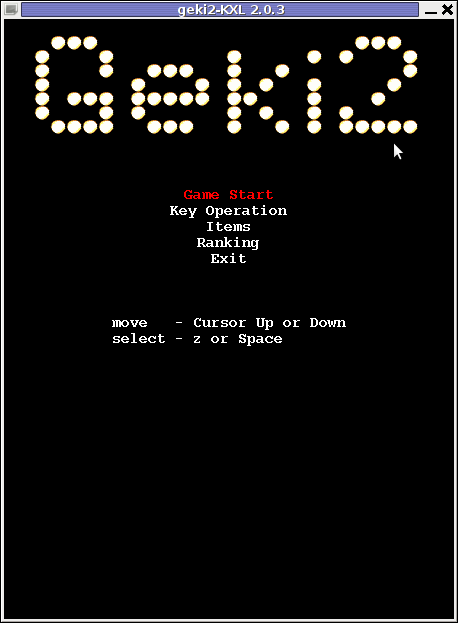
Geki 2 Linux Xenon 2 like game Main Menu

or

geki3
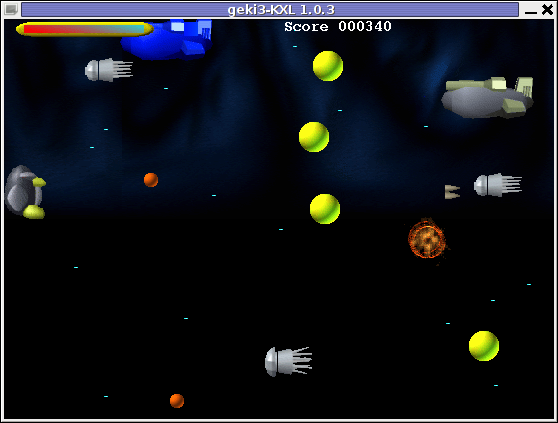
Geki3 gameplay screenshot Debian Linux

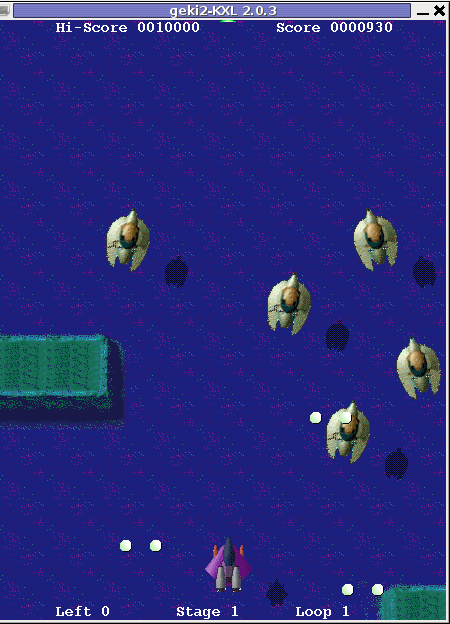
Geki 2 is a way closer to Xenon 2 as it has similar look and feel and the same vertical direction the spaceship is navigated.
In Geki 3 still the shoot 'em' up spaceship like arcade is present, however instead of penguin you have to fly a flying penguin, as well as the spaceship move direction is horizontal.

 Both the games have the same sound and music effects. The game music and effects are not of top quality but are not bad. In general  the games surely gives some of the arcade atmosphere.

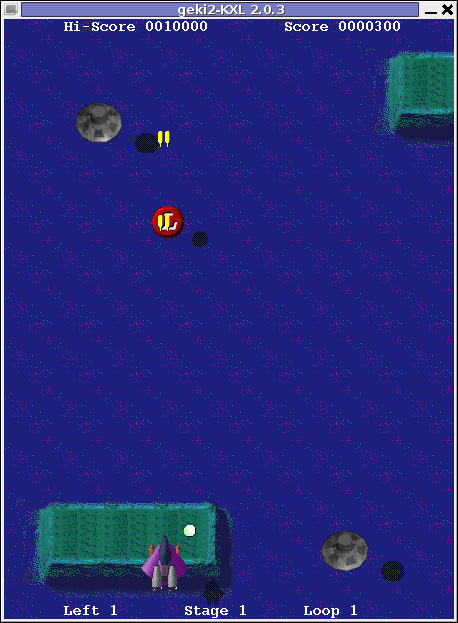
Geki 2 GNU Linux Xenon 2 like vertical shooter arcade
Geki 2 Xenon 2 Megablast like on Debian Linux

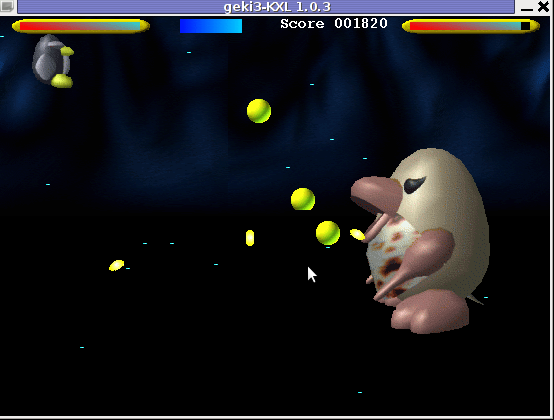
In the tradition of the arcade games at the end of each level in both games you face the Level Boss Enemy, you should destroy.

Geki3 Level boss Debian Linux Screenshot
As you can see in below's screenshot the overall graphics of GEKI 3 is poorer while compared to GEKI 2

still GEKI 2 gampley is fun and addictive and I would say not less enjoyable than GEKI 2.
 At times I even think that Geki 3 is more fun because it is more dynamic.

 Maybe other reason, why I enjoyed more Geki 3 is also the fact that Geki 2 is a way harder to play. Dying only 3 times in the game you get  GAME OVER  and the next game you're started from the beginning of the same level you died in …

Geki2 Linux different shooting Screenshot

 Something really annoying that affects both the games; there is no option to play them in Fullscreen mode! ARGH!

Game controls for Geki2 and Geki3 are identical as follows:

Up - Arrow up key
Down - Down arrow key
Right - Right arrow key
left - Left arrow key
Shoot - z or Space
Pause - s

Geki2 and Geki3 are fun and can kill some time, but definitely aren't that (professional) as other spaceship shoot'em'up arcades for Linux and BSD. Games like Starfighter , Critical Mass or  powermanga .
 Lest that they are two worthy to install and play on your Free Software OS.

How to mount /proc and /dev and in chroot on Linux

Wednesday, April 20th, 2011

I’m using a backtrack Linux to recover a broken Ubuntu Linux, to fix this disastrous situation I’m using the Ubuntu Linux through chroot after mounting my /dev/sda1, where my Linux resides with:

linux-recovery:~# mkdir /mnt/test1
linux-recovery:~# mount /dev/sda1 /mnt/test1
linux-recovery:~# chroot /mnt/test1
ubuntu:~#

I consequently needed to mount up the /proc and /dev partition inside the chroot environment.

Here is how I did it:

ubuntu:~# mount /proc
ubuntu:~# mount -a

Next I switched on on a different virtual console in the backtrack and to mount /dev issued the commands:

linux-recovery:~# mount --bind /dev /mnt/test1/dev

Now once again, I can use theapt-get inside the chroot to fix up the whole mess …