Posts Tagged ‘update’

Generate and Add UUID for every existing Redhat / CentOS / RHEL network interface to configuration if missing howto

Saturday, August 5th, 2023

linux-fix-missing-uid-on-redhat-centos-fedora-networking-logo

If you manage old Linux machines it might be after the update either due to update mess or because of old system administrators which manually included the UUID to the config forgot to include it in the present network configuration in /etc/sysconfig/networking-scripts/ifcfg-* Universally Unique IDentifier (UUID)128-bit label I used a small one liner after listing all the existing configured LAN interfaces reported from iproute2 network stack with ip command. As this might be useful to someone out there here is the simple command that returns a number of commands to later just copy paste to console once verified there are no duplicates of the UUID already in the present server configuration with grep.

In overall to correct the configs and reload the network with the proper UUIDs here is what I had to do:


# grep -rli UUID /etc/sysconfig/network-scripts/ifcfg-*

No output from the recursive grep means UUIDs are not present on any existing interface, so we can step further check all the existing machines network ifaces and generate the missing UUIDs with uuidgen command

# ip a s |grep -Ei ': <'|sed -e 's#:##g' |grep -v '\.' |awk '{ print $2 }'
ifcfg-venet0
ifcfg-eth0
ifcfg-eth1

ifcfg-eth2
ifcfg-eth3

I've stumbled on that case on some legacy Linux inherited from other people sysadmins and in order to place the correct 

# for i in $(ip a s |grep -Ei ': <'|sed -e 's#:##g' |grep -v '\.' |awk '{ print $2 }'); do echo "echo UUID=$(uuidgen $i)"" >> ifcfg-$i"; done|grep -v '\-lo' 
echo UUID=26819d24-9452-4431-a9ca-176d87492b75 >> ifcfg-venet0
echo UUID=3c7e8848-0232-436f-a52a-46db9a03eb33 >> ifcfg-eth0
echo UUID=1fc0454d-bf23-417d-b960-571fc04754d2 >> ifcfg-eth1
echo UUID=5793c1e5-4481-4f09-967e-2cceda85c35f >> ifcfg-eth2
echo UUID=65fdcaf6-d271-4845-a8f1-0ec478c375d1 >> ifcfg-eth3


As you can see I exclude the loopback interface -lo from the ouput as it is not necessery to have UUID for it.
That's all folks problem solved. Enjoy

Megaraid SAS software installation on CentOS Linux

Saturday, October 20th, 2012

With a standard el5 on a new Dell server, it may be necessary to install the Dell Raid driver, otherwise the OMSA always reports an error and hardware monitoring is therefore obsolete:

Previously, the megaraid_sys package was now called mptlinux

For this we need the following packages in advance:

# yum install gcc kernel-devel
Now the driver stuff:

# yum install dkms mptlinux
That should have built the new module, better test it:

# modinfo mptsas

# dkms status
After a kernel update it may be necessary to build the driver for the new version:

# dkms build -m mptlinux -v 4.00.38.02

# dkms install -m mptlinux -v 4.00.38.02

Monitoring chronyd time service is synchronized, get additional time server values with Zabbix userparameter script

Monday, March 21st, 2022

monitoring-chronyc-time-server-synchronization-zabbix-logo

If you''re running a server infrastructure and your main monitoring system is Zabbix. Then a vital check you might want to setup is to monitor the server time synchronization to a central server. In newer Linux OS-es ntpd time server is started to be used lesser and many modern Linux distributions used in the corporate realm are starting to recommend using chrony as a time synchronization client / server.

In this article, I'll show you how you can quickly setup monitoring of chronyd process and monitoring whether the time is successfully synchronizing with remote Chronyd time server. This will be done with a tiny one liner shell script setup as userparameter It is relatively easy then to setup an Action Alert


1. Create userparameter script to send parsed chronyd time synchronization to Zabbix Server

chronyc tracking provides plenty of useful data which can give many details about info such as offset, skew, root delay, stratum, update interval.

[root@server: ~]# chronyc tracking
Reference ID    : 0A32EF0B (fkf-intp01.intcs.meshcore.net)
Stratum         : 3
Ref time (UTC)  : Fri Mar 18 12:42:31 2022
System time     : 0.000032544 seconds fast of NTP time
Last offset     : +0.000031102 seconds
RMS offset      : 0.000039914 seconds
Frequency       : 3.037 ppm slow
Residual freq   : +0.000 ppm
Skew            : 0.023 ppm
Root delay      : 0.017352410 seconds
Root dispersion : 0.004285847 seconds
Update interval : 1041.6 seconds
Leap status     : Normal

[root@server zabbix_agentd.d]# cat userparameter_chrony.conf 
UserParameter=chrony.json,chronyc -c tracking | sed -e s/'^'/'{"chrony":[“‘/g -e s/’$’/'”]}'/g -e s/','/'","'/g
[root@server zabbix_agentd.d]#

The -c option passed to chronyc is printing the chronyc tracking command ouput data in comma-separated values ( CSV ) format.

2. Create Necessery Item key to get chronyd processes and catch the userparameter data


  • First lets create a an Item key to calculate the chronyd daemon proc.num
    proc.num – simply returns the number of processes in the process list just like a simple
    pgrep servicename command does.


monitroing-chronyc_zabbix_item_report_to-zabbix

Second lets create the Item for the userparameter script, the chrony.json key should be the same as the key given in the userparameter script.

obtain-chronyc-statistic-variables-from-remote-chronyd-to-zabbix-windows

Create Chrony Zabbix Triggers 
 

Expression 

{server-host:proc.num[chronyd].last()}<1


will be triggered if the process of chronyd on the server is less than 1


chronyc_monitoring_process-is-not-running-screenshot

Next configure

{server-host:chrony[Leap status].iregexp[Not synchronised) ]=1


to trigger Alert Chronyd is Not synchronized if the Expression check occurs.

chronyd-is-not-synchronized-trigger-iregexp

Reload the zabbix-agent on the server
 

To make zabbix-agent locally installed on the machine read the userparameter into memory  (in my case this is zabbix-agent-4.0.28-1.el8.x86_64) installed on Redhat 8.3 (Ootpa), you have to restart it.

[root@server: ~]# systemctl restart zabbix-agent
[root@server: ~]# systemctl status zabbix-agent

● zabbix-agent.service – Zabbix Agent
   Loaded: loaded (/usr/lib/systemd/system/zabbix-agent.service; enabled; vendor preset: disabled)
   Active: active (running) since Thu 2021-12-16 16:41:02 CET; 3 months 0 days ago
 Main PID: 862165 (zabbix_agentd)
    Tasks: 6 (limit: 23662)
   Memory: 20.6M
   CGroup: /system.slice/zabbix-agent.service
           ├─862165 /usr/sbin/zabbix_agentd -c /etc/zabbix/zabbix_agentd.conf
           ├─862166 /usr/sbin/zabbix_agentd: collector [idle 1 sec]
           ├─862167 /usr/sbin/zabbix_agentd: listener #1 [waiting for connection]
           ├─862168 /usr/sbin/zabbix_agentd: listener #2 [waiting for connection]
           ├─862169 /usr/sbin/zabbix_agentd: listener #3 [waiting for connection]
           └─862170 /usr/sbin/zabbix_agentd: active checks #1 [idle 1 sec]

Warning: Journal has been rotated since unit was started. Log output is incomplete or unavailable.


In a short while you should be seeing in the chrony.json key History data fed by the userparameter Script.

In Zabbix Latest data, you will see plenty of interesting time synchronization data get reported such as Skew, Stratum, Root Delay, Update Interval, Frequency etc.

chronyd-zabbix-reported-time-synchronization-offset-leap-residual-freq-root-delay-screenshot

To have an email Alerting further, go and setup a new Zabbix Action based on the Trigger with your likings and you're done. 
The tracked machine will be in zabbix to make sure your OS clock is not afar from the time server. Repeat the same steps if you need to track chronyd is up running and synchronized on few machines, or if you have to make it for dozens setup a Zabbix template.

Windows XP multicore not detected after CPU update – XP Enable multicore after singlecore install

Friday, April 8th, 2016

windows-xp-add-multicore-with-command-after-multiple-cpu-not-detected
These days it is not common to install Windows XP however for some old unsupproted applications that still work on XP in many countries  in Africa, Asia, Europe and even America. Custom patched Windows XP is still heaveily used for some corporate businesses in accounting and on airports and other government institutions even to these day, I'm aware of Windows still heavily used especially in  Russia, Belarus,Ukraine, Kazakhstan, Armenia, Bulgaria etc.

Hence still there is plenty of softwares designed to work XP the good old Win XP and thus often XP needs to be emulated on VMs though officially not supported any longer  by Microsoft (its Support lifecycle End was for a last time on April 14, 2009).

Now I guess these days I guess nobody doesn't install and use Windows XP on a normal hardware PC Desktop / laptop but XP is continually installed on Virtual machine servers VMWare / VirtualBox.

Hence if you happen to have already migrated or installed some old Windows XP operating systems under VMWare for a corporate clients single core machine (no matter virtual or physical) and the client requires an update of hardware of the Virtual Machine you will be surprised that even though you add a second / third etc. core (new CPUs) the virtual machine hardware and restart the Windows XP installation.

It seems XP is designed to remember the install time CPU model hardware so once the VM and doesn't have a way to update its HAL (Hardware Abstraction Layer) definitions if you install it in Virtualbox thus to make XP recognize the extra added CPU cores it is necessery to do a small hack with a devcon.exe utility downloadable from Microsoft site to do the trick

1. Download the command line devicemanager utility (devcon.exe) from Microsoft Development Network MSDN here.

Note that it will work only if you use the correct version depending whether XP is  (x86/x64) bit install so check it out from My Computer -> Properties.

windows-xp-multicore-not-detected-enable-add-multicore-after-singlecore-windows-xp-install-with-devcon-exe

2  Next. Execute the following 2 commands:

    devcon sethwid @ROOT\ACPI_HAL\0000 := +acpiapic_mp !acpiapic_up
    devcon update c:\windows\inf\hal.inf acpiapic_mp

devcon.exe will  let the automatic hardware detection find out the extra CPU (multicores) added.
Wait 'till you get prompted for a reboot.
Be brave Reboot! 🙂

There is pretty much more fun useful things you can do with devcon.exe such as disabling USBs from command line,

DEVCON-command-DisableUSB_on-windows-xp-7-8-howto

listing your PCI devices and so on:

devcon-windows-command-to-list-pci-devices-on-xp7-win8-win10

You should now see all cores, hooray cores will appear in Task Manager / System Information.

How to update macos from terminal / Check and update remotely Mac OS X software from console

Friday, October 23rd, 2015

../files/how-to-update-mac-osx-notebook-from-terminalsoftware-update-command-line-mac-screnshot-1

If you happen to have to deal with Mac OS X (Apple) notebook or Desktop PC (Hackintosh) etc. and you’re sysadmin or console freak being pissed off Mac’s GUI App Store update interface and you want to “keep it simple stupid” (KISS) in an Debian Linux like apt-get manner then you can also use Mac’s console application (cli) terminal to do the updates manually from command line with:

softwareupdate

command.

how-to-update-mac-osx-notebook-from-terminalsoftware-update-command-line-mac-screnshot

To get help about softwareupdate pass it on the -h flag:

softwareupdate -h

1. Get a list of available Mac OS updates

Though not a very likely scenario of course before installing it is always a wise thing to see what is being updated to make sure you will not upgrade something that you don’t want to.
This is done with:

softwareupdate -l

However in most cases you can simply skip this step as updating directly every package installed on the Mac with a new version from Apple will not affect your PC.
Anyways it is always a good idea to keep a backup image of your OS before proceeding with updates with let’s say Time Machine Mac OS backup app.

2. Install only recommended Updates from Apple store

softwareupdate -irv


Above will download all updates that are critical and thus a must to have in order to keep Mac OS security adequate.
Translated into Debian / Ubuntu Linux language, the command does pretty much the same as Linux’s:

apt-get –yes update

3. Install All Updates available from AppleStore

To install absolutely all updates provided by Apple’s package repositories run:

softwareupdate -iva

One note to make here is that always when you keep updating make sure your notebook is switched on to electricity grid otherwise if due to battery discharge it shutoffs during update your Mac will crash in a very crappy hard to recover state that might even cost you a complete re-install or a need to bring a PC to a Mac Store technical support guy so beware, you’re warned!

4. Installing all updates except Specific Softwares from Terminal

Often if you have a cracked software or a software whose GUI interface changed too much and you don’t want to upgrade it but an update is offered by Apple repos you can add the -i ingnore option:

softwareupdate -i [update_name(s)]

For example:

softwareupdate -i Safari-version-XXXX

5. View Mac OS Software Update History

The quickest way to see the update history is with System Information app, e.g.:

/Applications/Utilities/System Information.app

How to get a list and Backup (Save Enabled Plugins) / Restore Enabled (Active) plugins in WordPress site with SQL query

Wednesday, January 14th, 2015

get-list-and-backup-restore-enabled-active-plugins-only-in-wordpress-with-sql-mysql-query

Getting a snapshot of all active plugins and keeping it for future in case if you install some broken plugin and you have to renable all enabled plugins from scratch is precious thing in WordPress.

… It is really annoying when you decide to try to enable few new plugins and out of a sudden your WordPress site / blog starts hanging (when accessed in browser)…

To fix it you have to Disable All Plugins and Re-enable all that used to work. However if you don't keep a copy of the plugins which were previously working and you're like me and have 109 plugins installed of which only 50 are in (Active) state / used. It could take you a day or two until you come up with a similar list to the ones you previously used … Thanksfully there is some prevention you can take by dumping a list of all plugins that are currently active and in later time only enable those in the list.


# mysql -u root -p
Enter password:

mysql> USE blog_db;

Here is the output I get in the moment:
 

mysql> DESCRIBE wp_options;
+————–+———————+——+—–+———+—————-+
| Field        | Type                | Null | Key | Default | Extra          |
+————–+———————+——+—–+———+—————-+
| option_id    | bigint(20) unsigned | NO   | PRI | NULL    | auto_increment |
| option_name  | varchar(64)         | NO   | UNI |         |                |
| option_value | longtext            | NO   |     | NULL    |                |
| autoload     | varchar(20)         | NO   |     | yes     |                |
+————–+———————+——+—–+———+—————-+


mysql> SELECT * FROM wp_options WHERE option_name = 'active_plugins';

|        38 | active_plugins | a:50:{i:0;s:45:"add-to-any-subscribe/add-to-any-subscribe.php";i:1;s:19:"akismet/akismet.php";i:2;s:43:"all-in-one-seo-pack/all_in_one_seo_pack.php";i:3;s:66:"ambrosite-nextprevious-post-link-plus/ambrosite-post-link-plus.php";i:4;s:49:"automatic-tag-selector/automatic-tag-selector.php";i:5;s:27:"autoptimize/autoptimize.php";i:6;s:35:"bm-custom-login/bm-custom-login.php";i:7;s:45:"ckeditor-for-wordpress/ckeditor_wordpress.php";i:8;s:47:"comment-info-detector/comment-info-detector.php";i:9;s:27:"comments-statistics/dcs.php";i:10;s:31:"cyr2lat-slugs/cyr2lat-slugs.php";i:11;s:49:"delete-duplicate-posts/delete-duplicate-posts.php";i:12;s:45:"ewww-image-optimizer/ewww-image-optimizer.php";i:13;s:34:"feedburner-plugin/fdfeedburner.php";i:14;s:39:"feedburner-widget/widget-feedburner.php";i:15;s:63:"feedburner_feedsmith_plugin_2.3/FeedBurner_FeedSmith_Plugin.php";i:16;s:21:"feedlist/feedlist.php";i:17;s:39:"force-publish-schedule/forcepublish.php";i:18;s:50:"google-analytics-for-wordpress/googleanalytics.php";i:19;s:81:"google-sitemap-generator-ultimate-tag-warrior-tags-addon/UTWgoogleSitemaps2_1.php";i:20;s:36:"google-sitemap-generator/sitemap.php";i:21;s:24:"headspace2/headspace.php";i:22;s:29:"my-link-order/mylinkorder.php";i:23;s:27:"php-code-widget/execphp.php";i:24;s:43:"post-plugin-library/post-plugin-library.php";i:25;s:35:"post-to-twitter/post-to-twitter.php";i:26;s:28:"profile-pics/profile-pic.php";i:27;s:27:"redirection/redirection.php";i:28;s:42:"scripts-to-footerphp/scripts-to-footer.php";i:29;s:29:"sem-dofollow/sem-dofollow.php";i:30;s:33:"seo-automatic-links/seo-links.php";i:31;s:23:"seo-slugs/seo-slugs.php";i:32;s:41:"seo-super-comments/seo-super-comments.php";i:33;s:31:"similar-posts/similar-posts.php";i:34;s:21:"sociable/sociable.php";i:35;s:44:"strictly-autotags/strictlyautotags.class.php";i:36;s:16:"text-control.php";i:37;s:19:"tidy-up/tidy_up.php";i:38;s:37:"tinymce-advanced/tinymce-advanced.php";i:39;s:33:"tweet-old-post/tweet-old-post.php";i:40;s:33:"w3-total-cache/w3-total-cache.php";i:41;s:44:"widget-settings-importexport/widget-data.php";i:42;s:54:"wordpress-23-related-posts-plugin/wp_related_posts.php";i:43;s:23:"wp-minify/wp-minify.php";i:44;s:27:"wp-optimize/wp-optimize.php";i:45;s:33:"wp-post-to-pdf/wp-post-to-pdf.php";i:46;s:29:"wp-postviews/wp-postviews.php";i:47;s:55:"wp-simple-paypal-donation/wp-simple-paypal-donation.php";i:48;s:46:"wp-social-seo-booster/wpsocial-seo-booster.php";i:49;s:31:"wptouch-pro-3/wptouch-pro-3.php";} | yes      |

Copy and paste this CVS format data to a text file or a Word document for later reference ..

To restore back to normal only active WordPress plugins, first launch following SQL query to disable all enabled wordpress plugins:

UPDATE wp_options SET option_value = 'a:0:{}' WHERE option_name = 'active_plugins';

To restore above "backupped" list of active WP plugins you have to copy paste the saved content and paste it into above UPDATE query substituting option_value=' ' with the backupped string.

P.S. – This query should work on WordPress 3.x on older wordpress ver 2.x use instead:

UPDATE wp_options SET option_value = ' ' WHERE option_name = 'active_plugins';

Because pasting the backupped Active plugins list CSV is a messy and unreadable from command line it is recommended for clarity to use PHPMyAdmin frontend (whenever it is available) on server. This little hint is a real time-saver and saves a lot of headaches. Before proceeding to any Db UPDATE SQL queries always backup your Blog database, with time structure of WordPress data changes!, so in future releases this method might not be working, however if it helped you and works on your version please drop a comment with WordPress version on which this helped you.

Enjoy! 🙂


Make MySQL existing users to have access from any or particular host after SQL migration

Tuesday, July 1st, 2014

make_mysql_existing_users_have-access-from-any-or-particular-host-after-SQL-migration
Recently I've done a migration of MySQL server from host A (running and configured to serve requests on (localhost – 127.0.0.1) to host B (server2.host.com)
There are already existing users in mysql which are allowed to only access the database server from localhost as until now the applciation was sending SQL queries straight on localhost. Now the architecture has to change to use the MySQL Database remotely.

Hence I've migrated the MySQL server by dumping all the existing the databases on MySQL host A  with:

mysqldump -u root -p --all-databases > alldbs_dump.sql


And then importing the databases on host B with

mysql -u root -p < alldbs_dump.sql

Though this migrated the data from Host A to Host B, still the application on Host A was failing to succesfully use its data from database on Host B, because of inability to properly authenticate. It couldn't authenticate because MySQL on Host B's users are not configured to have access from IP address of Host A, but only allowed the application users to be able to connect on localhost..

I've used following SQL CLI query to check Hosts allowed to connect to MySQL (in this case localhost):

# mysql -u root -p
mysql> use mysql;
mysql> select * from user where user like '%eameiotest%' and Host='localhost';


To fix that I logged on MySQL server on Host B with mysql cli and issued for each of the users the application was using:

UPDATE mysql.user SET Host='%' WHERE Host='localhost' AND User='eameiotest';
 

UPDATE mysql.user SET Host='%' WHERE Host='localhost' AND User='eameiotest2';
 

UPDATE mysql.user SET Host='%' WHERE Host='localhost' AND User='eameiotest3';


On execution, If you get errors like:
 

ERROR 1062 (23000): Duplicate entry '%-eameiotest' for key 'PRIMARY'


Don't think that there is no solution, as I've read some threads online claiming the only way to get around this issue is to dump mysql database and re-import it, this is not necessery. There is a work around to this MySQL bug.

To work-around the error, you will first have to set the user allowed access host to empty – ' ' :


UPDATE mysql.user SET Host='' WHERE Host='localhost' AND User='eameiotest';
 

UPDATE mysql.user SET Host='' WHERE Host='localhost' AND User='eameiotest2';
 

UPDATE mysql.user SET Host='' WHERE Host='localhost' AND User='eameiotest3';


And re-issue again commands:
 

UPDATE mysql.user SET Host='%' WHERE Host='localhost' AND User='eameiotest';
 

UPDATE mysql.user SET Host='%' WHERE Host='localhost' AND User='eameiotest2';
 

UPDATE mysql.user SET Host='%' WHERE Host='localhost' AND User='eameiotest3';


You might want to also issue:
 

GRANT ALL PRIVILEGES ON yourdatabase-name.* TO 'eameiotest1'@'server-host';

GRANT ALL PRIVILEGES ON yourdatabase-name.* TO 'eameiotest2'@'server-host';

GRANT ALL PRIVILEGES ON yourdatabase-name.* TO 'eameiotest3'@'server-host';
 

This should have solve the app connection issues, Cheers 🙂


Monitoring Disk use, CPU Load, Memory use and Network in one console ncurses interface – Glance

Thursday, August 14th, 2014

monitoring-disk-use-memory-cpu-load-and-network-in-one-common-interfaces-with-glances-Linux-BSD-UNIX
If you're Linux / UNIX / BSD system administrator you already have experience with basic admin's system monitoring:

  •     CPU load
  •     OS Name/Kernel version
  •     System load avarage and Uptime
  •     Disk and Network Input/Output I/O operations by interface
  •     Process statistics / Top loading processes etc.
  •     Memory / SWAP usage and free memory
  •     Mounted partitions


Such info is provided by command line tools such as:

top, df, free, sensors, ifconfig, iotop, hddtemp, mount, nfsstat, nfsiostat, dstat, uptime, nethogs iptraf

etc.

There are plenty of others advanced tools also Web based server monitoring visualization  tools, such as Monit, Icanga, PHPSysInfo, Cacti which provide you statistics on computer hardware and network utilization

So far so good, if you already are used to convenience of web *NIX based monitoring but you don't want to put load on the servers with such and you're lazy to write custom scripts that show most important monitoring information – necessery for daily system administration monitoring and prevention from downtimes and tracking bottlenecks you will be glad to hear about Glances
 

Glances is a free (LGPL) cross-platform curses-based monitoring tool which aims to present a maximum of information in a minimum of space, ideally to fit in a classical 80×24 terminal or higher to have additionnal information. Glances can adapt dynamically the displayed information depending on the terminal size. It can also work in a client/server mode for remote monitoring.


1. Installing Glances curses-based monitoring tool on Debian 7 / Ubuntu 13+ / Mint  Linux

We have to install python-pip (python package installer tool) to later install Glances

apt-get install –yes 'python-dev' 'python-jinja2' 'python-psutil'
                        'python-setuptools' 'hddtemp' 'python-pip' 'lm-sensors'


Before proceeding to install Glances to make Thermal sensors working (if supported by hardware) run:


 sensors-detect

Glances is written in Python and uses psutil library to obtain monitoring statistic values, thus it is necessery to install few more Python libraries:

pip install 'batinfo' 'pysensors'

If you're about to use pip – Python package installer tool, behind a proxy server use instead:
 

pip install –proxy=http://your-proxy-host.com:8080 'batinfo' 'pysensors'

Then install Glances script itself again using pip
 

pip install 'Glances'

Downloading/unpacking Glances
  Downloading Glances-2.0.1.tar.gz (3.3Mb): 3.3Mb downloaded
  Running setup.py egg_info for package Glances
    
Downloading/unpacking psutil>=2.0.0 (from Glances)
  Downloading psutil-2.1.1.tar.gz (216Kb): 216Kb downloaded
  Running setup.py egg_info for package psutil

Successfully installed Glances psutil


Then run glances from terminal
 

glances -t 3

-t 3 option tells glances to refresh collected statistics every 3 seconds

glances-console-monitoring-tool-every-systemad-ministrator-should-know-and-use-show-memory-disk-cpu-mount-point-statistics-in-common-shared-screen-linux-freebsd-unix


2. Installing Glances monitoring console tool on CentOS / RHEL / Fedora / Scientific Linux

Installing glances on CentOS 7 / Fedora and rest of RPM based distributions can be done by adding external RPM repositories, cause glances is not available in default yum repositories.

To enable Extra-packages repositories:
 

rpm -ivh http://dl.fedoraproject.org/pub/epel/6/x86_64/epel-release-6-8.noarch.rpm


Then update yum to include new repository's packages into package list and install python-pip and python-devel rpms
 

yum update
yum install python-pip python-devel


Glances-console-server-stateScreenhot-on-CentOS-Linux-monitoring-in-ncurses-Linux-BSD

There is also FreeBSD port to install Glances on FreeBSD:
 

cd /usr/sysutils/py-glances
make install


Enjoy 🙂 !


How to stop / start services in boot time and install / remove / update SuSE SLES (Suse Enterprise Linux Server)?

Friday, February 6th, 2015

Suse-Logo-stop-start-services-on-linux-boot-time-howto-chkconfig
If you're long time Linux sysadmin but you haven't need to adminster SuSE Linux still and your company buys other business / company which already owns some SuSE servers and you need to deal with them, even though you're just starting up with SuSE Linux but you had already plenty of experience with other Linux distributions Fedora / RHEL / CentOS, don't worry set up / stop / start a service (daemon) to boot on Linux boot time is just the same as any other Redhat (RPM) Linux based distributions. it is done by multiple shell scripts located in /etc/init.d directory which can be manually stopped start by issuing the script with an argument e.g
 

suse:/etc/init.d# cd /etc/init.d/
suse:/etc/init.d# ./snmpd 
Usage: ./snmpd {start|stop|try-restart|restart|force-reload|reload|status}


To configure how each of the /etc/init.d/ existent service boots you can the use good old /sbin/chkconfig (a script written in perl) – which you already know from Fedora / CentOS and other RPM distros.

1. Get a list of all enabled on boot SuSE Linux services

To get a list of all set up to run on boot SuSE server services with chkconfig:


suse:/etc/init.d# /sbin/chkfong –list 

Makefile                  0:off  1:off  2:off  3:off  4:off  5:off  6:off
OVCtrl                    0:off  1:off  2:off  3:on   4:on   5:on   6:off
SuSEfirewall2_init        0:off  1:off  2:off  3:off  4:off  5:off  6:off
SuSEfirewall2_setup       0:off  1:off  2:off  3:off  4:off  5:off  6:off
Tivoli_lcfd1              0:off  1:off  2:on   3:on   4:off  5:on   6:off
Tivoli_lcfd1.bkp          0:off  1:off  2:off  3:off  4:off  5:off  6:off
aaeventd                  0:off  1:off  2:off  3:off  4:off  5:off  6:off
acpid                     0:off  1:off  2:on   3:on   4:off  5:on   6:off
alsasound                 0:off  1:off  2:on   3:on   4:off  5:on   6:off
apache2-eis               0:off  1:off  2:off  3:off  4:off  5:off  6:off
atd                       0:off  1:off  2:off  3:off  4:off  5:off  6:off
auditd                    0:off  1:off  2:off  3:on   4:off  5:on   6:off
autofs                    0:off  1:off  2:off  3:off  4:off  5:off  6:off
autoyast                  0:off  1:off  2:off  3:off  4:off  5:off  6:off
boot.apparmor             0:off  1:off  2:on   3:on   4:off  5:on   6:off  B:on
cron                      0:off  1:off  2:on   3:on   4:off  5:on   6:off
dbus                      0:off  1:off  2:off  3:on   4:off  5:on   6:off
earlykbd                  0:off  1:off  2:off  3:off  4:off  5:on   6:off
earlysyslog               0:off  1:off  2:off  3:off  4:off  5:on   6:off
esound                    0:off  1:off  2:off  3:off  4:off  5:off  6:off
evms                      0:off  1:off  2:off  3:off  4:off  5:off  6:off
fbset                     0:off  1:on   2:on   3:on   4:off  5:on   6:off
firstboot                 0:off  1:off  2:off  3:off  4:off  5:off  6:off
fixperms                  0:off  1:off  2:off  3:off  4:off  5:off  6:off
gpm                       0:off  1:off  2:off  3:off  4:off  5:off  6:off
gssd                      0:off  1:off  2:off  3:off  4:off  5:off  6:off
gwproxy                   0:off  1:off  2:on   3:on   4:off  5:on   6:off
haldaemon                 0:off  1:off  2:off  3:on   4:off  5:on   6:off
hp-health                 0:off  1:off  2:on   3:on   4:on   5:on   6:off
hp-ilo                    0:off  1:off  2:off  3:on   4:off  5:on   6:off
hp-snmp-agents            0:off  1:off  2:on   3:on   4:on   5:on   6:off
hpsmhd                    0:off  1:off  2:off  3:on   4:on   5:on   6:off
idmapd                    0:off  1:off  2:off  3:off  4:off  5:off  6:off
ipmi                      0:off  1:off  2:off  3:off  4:off  5:off  6:off
ipmi.hp                   0:off  1:off  2:off  3:off  4:off  5:off  6:off
irq_balancer              0:off  1:on   2:on   3:on   4:off  5:on   6:off
itcaIBMTivoliCommonAgent0  0:off  1:off  2:on   3:on   4:off  5:on   6:off
jboss                     0:off  1:off  2:off  3:off  4:off  5:off  6:off
joystick                  0:off  1:off  2:off  3:off  4:off  5:off  6:off
kadmind                   0:off  1:off  2:off  3:off  4:off  5:off  6:off
kbd                       0:off  1:on   2:on   3:on   4:off  5:on   6:off  S:on
kdump                     0:off  1:off  2:off  3:off  4:off  5:off  6:off
kpropd                    0:off  1:off  2:off  3:off  4:off  5:off  6:off
krb524d                   0:off  1:off  2:off  3:off  4:off  5:off  6:off
krb5kdc                   0:off  1:off  2:off  3:off  4:off  5:off  6:off
ldap                      0:off  1:off  2:off  3:on   4:off  5:on   6:off
lm_sensors                0:off  1:off  2:off  3:off  4:off  5:off  6:off
lw_agt                    0:off  1:off  2:off  3:off  4:off  5:off  6:off
mdadmd                    0:off  1:off  2:off  3:off  4:off  5:off  6:off
microcode                 0:off  1:on   2:on   3:on   4:off  5:on   6:off  S:on
multipathd                0:off  1:off  2:off  3:off  4:off  5:off  6:off
mysql                     0:off  1:off  2:off  3:off  4:off  5:off  6:off
network                   0:off  1:off  2:on   3:on   4:off  5:on   6:off
nfs                       0:off  1:off  2:off  3:on   4:off  5:on   6:off
nfsboot                   0:off  1:off  2:off  3:on   4:off  5:on   6:off
nfsserver                 0:off  1:off  2:off  3:off  4:off  5:off  6:off
nohup.out                 0:off  1:off  2:off  3:off  4:off  5:off  6:off
novell-zmd                0:off  1:off  2:off  3:off  4:off  5:off  6:off
nscd                      0:off  1:off  2:off  3:on   4:off  5:on   6:off
ntp                       0:off  1:off  2:on   3:on   4:off  5:on   6:off
openct                    0:off  1:off  2:off  3:off  4:off  5:off  6:off
opsware-agent             0:off  1:off  2:off  3:on   4:on   5:on   6:off
osddownt                  0:off  1:off  2:off  3:on   4:on   5:on   6:off
ovpa                      0:on   1:off  2:on   3:on   4:off  5:on   6:off
pcscd                     0:off  1:off  2:off  3:off  4:off  5:off  6:off
pctl                      0:off  1:off  2:on   3:on   4:off  5:on   6:off
portmap                   0:off  1:off  2:off  3:on   4:off  5:on   6:off
postfix                   0:off  1:off  2:off  3:on   4:off  5:on   6:off
powerd                    0:off  1:off  2:off  3:off  4:off  5:off  6:off
powersaved                0:off  1:off  2:off  3:off  4:off  5:off  6:off
random                    0:off  1:off  2:on   3:on   4:off  5:on   6:off
raw                       0:off  1:off  2:off  3:off  4:off  5:off  6:off
resmgr                    0:off  1:off  2:on   3:on   4:off  5:on   6:off
rpasswdd                  0:off  1:off  2:off  3:off  4:off  5:off  6:off
rpmconfigcheck            0:off  1:off  2:off  3:off  4:off  5:off  6:off
rrdtools                  0:off  1:off  2:off  3:on   4:off  5:on   6:off
rsyncd                    0:off  1:off  2:off  3:off  4:off  5:off  6:off
saslauthd                 0:off  1:off  2:off  3:off  4:off  5:off  6:off
skeleton.compat           0:off  1:off  2:off  3:off  4:off  5:off  6:off
slurpd                    0:off  1:off  2:off  3:off  4:off  5:off  6:off
smartd                    0:off  1:off  2:off  3:off  4:off  5:off  6:off
smpppd                    0:off  1:off  2:off  3:off  4:off  5:off  6:off
snmpd                     0:off  1:off  2:on   3:on   4:off  5:on   6:off
splash                    0:off  1:on   2:on   3:on   4:off  5:on   6:off  S:on
splash_early              0:off  1:off  2:on   3:on   4:off  5:on   6:off
sshd                      0:off  1:off  2:off  3:on   4:off  5:on   6:off
suseRegister              0:off  1:off  2:off  3:off  4:off  5:off  6:off
svcgssd                   0:off  1:off  2:off  3:off  4:off  5:off  6:off
syslog                    0:off  1:off  2:on   3:on   4:off  5:on   6:off
sysstat                   0:off  1:off  2:off  3:off  4:off  5:off  6:off
tecad_logfile             0:off  1:off  2:off  3:on   4:off  5:on   6:off
tomcat55                  0:off  1:off  2:off  3:off  4:off  5:off  6:off
tomcat_eis                0:off  1:off  2:off  3:off  4:off  5:off  6:off
tpmgwproxy.sh             0:off  1:off  2:on   3:on   4:off  5:on   6:off
uc4_smgrp                 0:off  1:off  2:off  3:on   4:off  5:on   6:off
uc4_smgrq1                0:off  1:off  2:off  3:on   4:off  5:on   6:off
xbis-ldap-tool            0:off  1:off  2:off  3:off  4:off  5:off  6:off
xdm                       0:off  1:off  2:off  3:off  4:off  5:on   6:off
xfs                       0:off  1:off  2:off  3:off  4:off  5:off  6:off
xinetd                    0:off  1:off  2:off  3:off  4:off  5:off  6:off
ypbind                    0:off  1:off  2:off  3:off  4:off  5:off  6:off
xinetd based services:
        chargen:            off
        chargen-udp:        off
        daytime:            off
        daytime-udp:        off
        echo:               off
        echo-udp:           off
        netstat:            off
        rsync:              off
        servers:            off
        services:           off
        systat:             off
        time:               off
        time-udp:           off


2. Stop / Disable a service in all Linux boot runlevels or in a concrete one

As you should know already in Linux there are multiple runlevels in which server can boot, under normal circumstances SuSE servers (as of time of writting) this article boots into runlevel 3, if you'r'e  unsure about the runlevel you can check it with runlevel command:
 

 suse:/etc/init.d# /sbin/runlevel
N 3

To stop a service on all possible boot runlevels – 1,2,3,4,5
 

suse:/etc/init.d# /sbin/chkconfig xinetd off


If you want to stop xinetd or any other service just for certain runlevels (lets say run-level 3,4,5):
 

suse:/etc/init.d# chkconfig –level 345 xinetd off


3. Start / Enable a service for a runlevel or all boot levels 1,2,3,4,5

To disable boot.apparmor on all boot runlevels –  kernel enhancement that enabled to set a limited set of resources for services (good for tightened security, but often creating issues with some external server configured services).
 

suse:/etc/init.d# chkconfig boot.apparmor off


Or for single boot modes again with –level option:
 

suse:/etc/init.d# chkconfig –level 345 boot.apparmor off


suse:/etc/init.d# chkconfig xfs off 


4. SuSE Linux Package management zypper console tool

If you need / wonder how to install /remove / update a service on a SuSE Linux server, take a look at zypper tool.
zypper is  a  command-line  interface to ZYPP system management library.

To install a package / service with zypper the syntax is very much like yum, for example:
 

suse: ~# zypper install vim -emacs


will remove emacs editor and install Vi Improved

The equivalent of yum -y  Fedora command in SuSE Enterprise Linux is –non-interactive option


suse:~# zypper –non-interactive install


In SuSE it is pretty annoying when you're asked for accepting licensing on some proprietary (external vendor) non-free software packages to get around this:
 

suse:~# zypper patch –auto-agree-with-licenses


To keep the SuSE server up2date – i.e. SLES equivalent of CentOS's yum update && yum upgrade


suse:~# zypper list-patches
Loading repository data…
Reading installed packages…
 
Repository                          | Name      | Version | Category | Status
————————————+———–+———+———-+——-
Updates for openSUSE 11.3 11.3-1.82 | lxsession | 2776    | security | needed


suse:~# zypper patch-check
Loading repository data…
Reading installed packages…
5 patches needed (1 security patch)


To look for a certain package with Zypper (equivalent of yum search packagename)

suse: ~# zypper search apache


To verify whether an RPM installed package dependecies are OK:
 

suse:~# zypper verify


The equivalent of Fedora yum update command in SuSE (SLES) are:

suse:~# zypper refresh


To force a complete refresh and rebuild of the database, including a forced download of raw metadata.
 

suse:~# zypper refresh -fdb


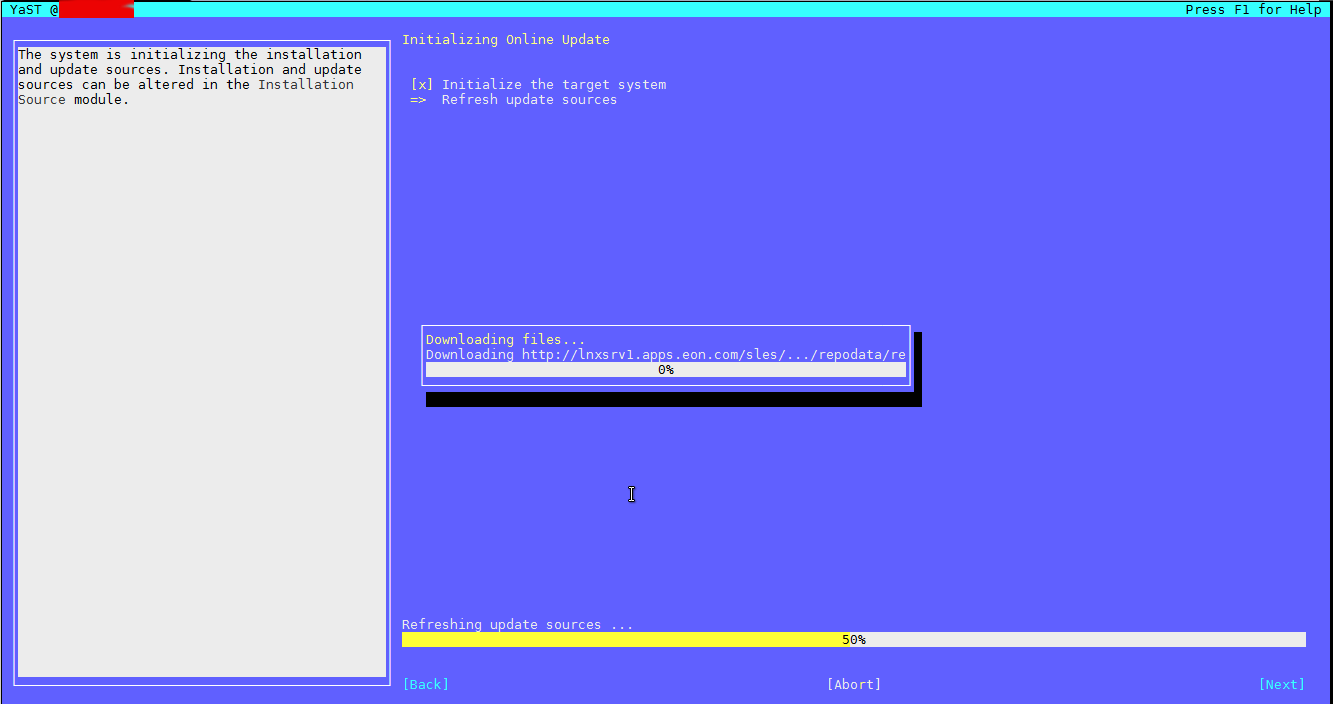
For people that are used to ncurses (midnight commander) like text interface you can also use yoast2 (text GUI) package manager:
 

suse:~# yoast2


update-linux-suse-server-with-yoast2-ncurses-package-text-gui-management-tool

If a package is messed you can always go back and use good old RPM (Redhat Package Manager) to solve it.


How to change Outlook Signature – modify and delete Microsoft Outlook email signatures

Monday, February 17th, 2014

I'm using Mozilla Thunderbird over the last 5 years in my life. Just now in my new job place in Hewlett Packard, in order to have well functional mail (with exchange server) – I started using Microsoft Outlook.
Logically a little while after I started my work I have to update my Outlook E-mail signature to reflect my contact details (job position title, email, stand-alone / mobile phone, office address etc.). As of moment of writting I'm using Microsoft Outlook 14.0.6123.5001 (32 bit) part of Microsoft Office Professional Plus 2010.

Its a kind of irony that I had to use Microsoft products after all these years trying my best to avoid using Microsoft technologies but heh, this is life … Though this article will be a bit trivial I decided to blog it because already I had to change email signature for a 3rd time over the last 3 months and every now and then after a month time I tend to forget how I did it last time.

Here is how I changed Email Signature in Outlook:

1. Click on "New-Email" (located below File menu)

2. Click on "Insert" (menu tab)

3. Click on "Signature"

microsoft-outlook-pop3-mail-client-change-signature-screenshot

4. Click on "New" button

As you see Outlook is written in very intelligent manner 🙂
It is possible to have more than one signature and change them every now and then (I guess that's made for Schizophrenic people who like changing their signature a couple of times a day accepting different personalities 🙂 🙂 🙂
For already existing signatures just edit the old one – click on Edit Signature

microsoft-outlook-exchange-how-to-change-email-signature
http://www.clarion.edu/273437/
 

  • Rename Signatures:

        Perform steps 1-4 in ('Create Signatures') except click "Rename button instead of 'New' and begin typing new name.

  • Delete Signatures:

        Perform steps 1-4 in ('Create Signatures') except click 'Delete" button instead of 'New'.

  • Modify Signatures:

        Highlight signature name you wish to modify under

  1. "Select Signature to Edit" then modify signature.

  2. Click "Save" button to save any signature changes made.