I have never did a proper install of Windows XP on Debian before hand. Even though I experimented once long time ago. I had zero success with installing Windows XP Service Pack 2 . The only Windows I can make correctly working before hand on these early days on my Debian powered notebook with qemu virtual machine emulator was Windows 2000 .
I decided to give it another go today as I hoped the qemu has advanced and I’ve seen many reports online of people who were able to correctly make Windows XP SP2 work out.
As I’ve seen many blog posts online of people who succesfully run with qemu Windows XP SP2, in order to escape from repeating the other guys experience and conduct a fresh experiment, I decided to give qemu a try with Microsoft.Windows.XP.Professional.SP3.Integrated.June.2011.Corporate
Before I proceed with using latest qemu I,
1. Installed qemu using the usual:
debian:~# apt-get install --yes qemu qemu-keymaps qemu-system qemu-user qemu-utils uml-utilities

...
Afterwards,
2. Created a new directory where the qemu Windows image will be stored:
debian:~# su hipo

hipo@noah:~$ mkdir windows

hipo@noah:~$ cd windows

hipo@noah:/home/hipo/windows$
As a following step I loaded the tun kernel module which is necessery for Qemu to properly handle the Windows LAN networking.
3. Load and set proper permissions for tun kernel module
In case if /dev/net is not existing first step is to create the proper device, however in most cases /dev/net should be there:
debian:~# mkdir -p /dev/net

debian:~# mknod /dev/net/tun c 10 200
As a next step its necessery to load tun kernel module and set the proper permissions:
debian:~# modprobe tun

debian:~# echo 'tun' >> /etc/modules

debian:~# chgrp users /dev/net/tun

debian:~# chmod g+w /dev/net/tun
Next step is to create an image file with dd or with qemu-img which will be holding the Virtual Machine Windows installation.
4. Create image file for Windows using dd
I decided to create a the image file to be with a size of 5 Gigabytes, this is of course custom so other people might prefer having it less or more the absolute minimum for a proper Windows XP SP3 install is 2000 Megabytes.
debian:~# su hipo -; cd windows;

debian:/home/hipo/windows$ dd of=hd.img bs=1024 seek=5000000 count=0

0+0 records in

0+0 records out

0 bytes (0 B) copied, 1.5505e-05 s, 0.0 kB/s
Notice here that the file dd will create will appear like 0 kb file until the Windows install from a BootCD is run with qemu.
5. Download an image of Microsoft.Windows.XP.Professional.SP3.Integrated.June.2011.Corporate from thepiratebay.org
Microsoft.Windows.XP.Professional.SP3.Integrated.June.2011.Corporate is currently available for download from the thepiratebay.org if in the times to come it is not available it will most likely be available from torrentz.net, isohunt.com etc. so I’ll skip more explanations with this step and let you use your favourite torrent program of choice to download the MS Windows iso. Just to make a note here I used transmission as this is my favourite torrent client. After downloading the iso I used K3B to burn the Image file as Bootable ISO. I’m naturally a GNOME user so to burn it as Image I just open it with K3B by using the GNOME menu and selecting Open with K3B
Next I instructed qemu to boot from the just burnt CD.
6. Boot windows Installation with Qemu from the Boot CD
debian:/home/hipo/windows$ qemu -boot d -cdrom /dev/cdrom -hda hd.img
Notice here that I’m running the qemu virtual machine emulator with a non-privileged reasons. This is important as qemu might have holes in the emulation of Windows Networking stack which if executed as root superuser. Can allow some malicious attacker to remotely compromise your GNU / Linux PC …
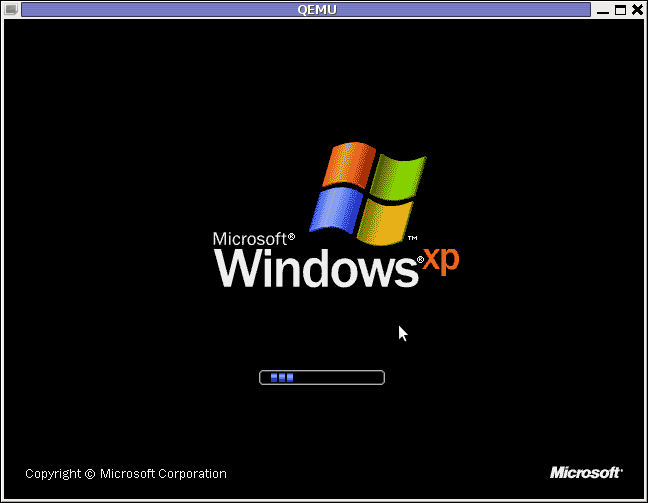
Qemu window will pop-up where one installs the Windows as it will install it using an ordinary PC. To switch qemu to fullscreen mode to have the complete feeling like installing Windows on an non-emulated PC ctrl + alt + f can be pressed.
The Windows installation took like 1 hour 20 minutes on my dual core 1.8 Ghz notebook with 2 GB of RAM. But I should say while installing I had multiple applications running; xmms, transmission, epiphany, icedove, evince etc. probably if I just run the Virtual Machine with no other applications to extra load my PC, probably the Windows install would have been done in max 50 minutes time.
After the installation is complete. To
7. Further run the installed Windows
debian:/home/hipo/windows$ qemu -hda hd.img -boot c

...
As a next step its necessery to;
8. Bring up the tap0 interface and configure it for the user
I’m running my qemu emulator with my user hipo , so I run cmds:
debian:/home/hipo/windows$ su - root

debian:~# tunctl -u hipo

Set 'tap0' persistent and owned by uid 1000
9. Enable ip_forwarding and arp proxy and for wlan0 and tap0
debian:~# echo 1 > /proc/sys/net/ipv4/conf/wlan0/proxy_arp

debian:~# echo 1 > /proc/sys/net/ipv4/conf/tap0/proxy_arp

debian:~# echo 1 > /proc/sys/net/ipv4/conf/tap0/proxy_arp
10. Install the proper Network Drivers inside Windows
That’s just in case, if they’re not supported by the Windows default existing drivers.
To do so, I downloaded my LAN drivers from the Vendor and put it on USB and sticked the USB drive to my laptop. In order to make the Kingston USB drive I used to transfer my LAN and Video drivers. I had to restart qemu with the parameter -usb -usbdevice host:0951:1625 , where I used lsusb to check and get the correct USB ID 0951:1625, like shown in the command below:
debian:~# lsusb |grep -i kingston

Bus 001 Device 006: ID 0951:1625 Kingston Technology DataTraveler 101 II
After on I booted again the Windows XP with the following command line in order to make qemu detect the USB Drive:
debian:/home/hipo/windows# sudo qemu -boot c -hda hd.img -usb -usbdevice host:0951:1625
One oddity here is that in order for qemu to detect the USB stick, I had to run it via sudo with super user privileges.Don’t ask me why this is the only way it worked …
Next on used the Windows device manager from Control Panel -> System -> Device Manager to point my undetected hardware to the correct Win drivers.
For the GUI preferring user qemu has a nice GNOME GUI interface called qemu-launcher, if you like to use qemu via it instead of scripting the qemu launcher commands, you can install and use via:
debian:~# apt-get install --yes qemu-launcher qemuctl

...

debian:/home/hipo/windows$ qemu-launcher
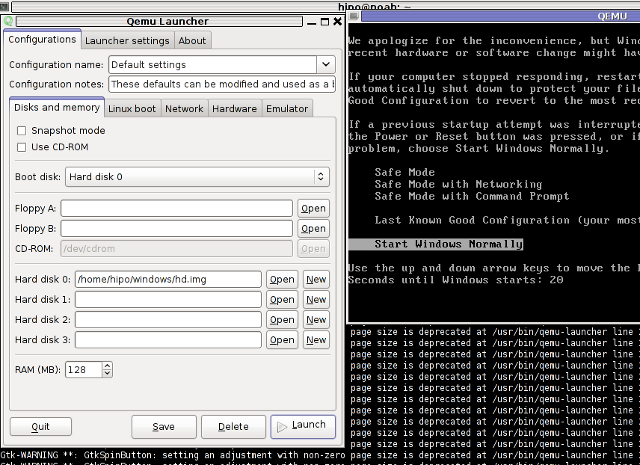
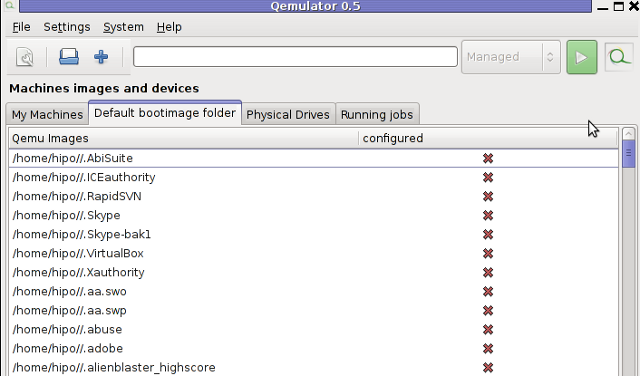
Another GUI alternative to qemu-launcher, which easifys the work with qemu is qemulator; here is a screenshot: