Often when, you do something on your PC, you need to make a quick screenshot of a screen area.. Yes GNOME's feature to take complete screenshots of Screen with Print Screen SysRQ and consequential picture edit with GIMP is one way, but this is far away from quick. This method to chop out of a complete display screenshot usually takes from 40 secs to 1 minute to properly cut and save a selection of the whole picture.
Another common use, that I love in GNOME is the ALT + Print Screen SysRQ key combination. alt+ print scr sysrq is handy while taking a single window screenshot is desired. Anyways often you only need to make a screenshot of a tiny area of the screen. Many people might think this is not possible currently in GNOME, but they will be wrong as there are no impossible but hard things to achieve on Linux / FreeBSD 😉
There are at least two ways using a predefined command for taking quick area screen snapshot.
1. Taking quick area screenshot by using ImageMagick's import command
To use import you will need to have installed ImageMagick – swiss army knife of command line image manipulation 😉
For area screenshot with import, press ALT+F2 and type inside Run Application box:
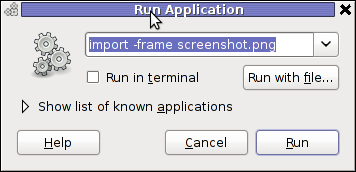
import -frame screenshot.png
Now make the selection of the exact screen area you would like to screeshot in file screenshot.png
Note that screenshot.png file will be saved by default in your home directory as it is read from $HOME shell variable:
hipo@noah:~$ echo $HOME/home/hipo

hipo@noah:~$ ls -al screenshot.png

-rw-r--r-- 1 hipo hipo 4950 Mar 14 21:11 screenshot.png
You see my $HOME equals /home/hipo, therefore screenshot.png just grabbed is saved in there.
One downside of taking the screenshot with import is that picture snapshot is not further edittable, if it has to be further processed with GIMP or some other graphic editor program.
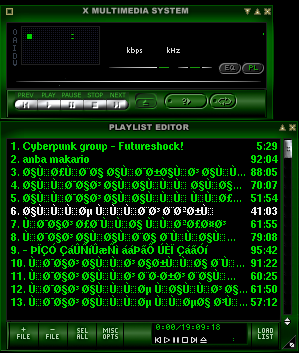
In the screenshot, below I show you one screen area of my XMMS taken with import -frame screenshot.png cmd:
Trying to open the screenshot.png, file with GIMP displays the following error in GIMP:
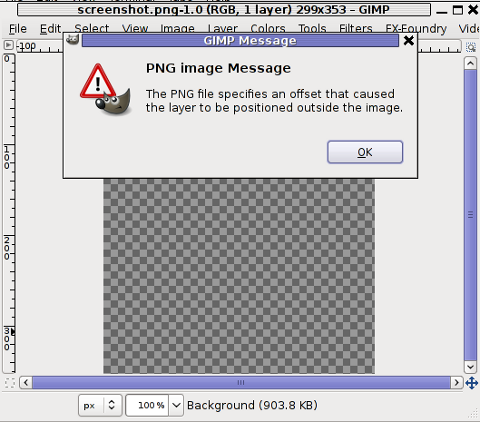
Not all area snapshots taken with import -frame, create this issue sometimes screenshots are opening in GIMP but only area of the screenshot.png is visible in gimp.
Thanksfull, there is work around to this issue by converting the import generated PNG format picture to JPEG with ImageMagick's convert and then edit the .JPEG with GIMP etc.:
hipo@noah:~$ convert screenshot.png screenshot.jpg
Hence to permanently work around it, in case you intend to apply (GIMP modifications), once area snapshot is made instruct import to save its output picture in .jpeg, e.g.:
hipo@noah:~$ import -frame screenshot.jpeg
2. Taking quick area screenshot using gnome-screenshot cmd
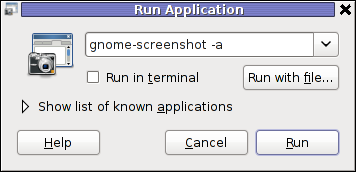
Once again invoke the GNOME command Launcher by pressing Alt+F2 (holding alt and pressing F2) and type in the launch box:
gnome-screenshot -a
Below is a small area from my desktop, chopped with gnome-screenshot 🙂
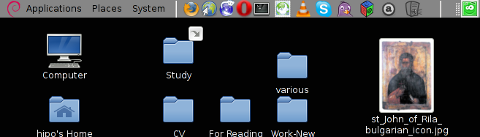
You see on above screenshot a tiny (picture) icon one of the greatest, if not the greatest bulgarian saint – saint John of Rila. St. John's lived as hermit for many years in Rila mountain and by God's grace possessed incorruptable body. His incorruptable body is still kept and can be venerated in Rila Monastery. The monastery is located 160 km from Bulgaria's capital city Sofia
St. Johns first Bulgarian established monastery Rila Monastery is currently the biggest functioing monastery in Bulgaria. The saints monastery is considered one of the most holy places in Bulgaria. If you have a travel or plan a holiday in Bulgaria, I warmly recommend you go there and venerate the saint incorruptable relics.
3. Binding keys to allow quick area screenshot taking with gnome-screenshot in GNOME
This configuration is for GNOME 2.x and is tested to work on my Debian (Squeeze 6.0), GNOME ver. 2.30.2, it should work in earlier Ubuntu versions shipped with GNOME 2.2.xx too. As I've red on the Internet it works well with Ubuntu 10.10Binding a key for screenshot area grab, should be working properly also on any GNOME 2.2.x supporting OS, including the BSD family OSes (FreeBSD, OpenBSD, NetBSD)…
a) setting gnome-screenshot key binding for interactive screenshot area grab
Navigate the mouse cursor to GNOME main menus panel in left top, where you see (Applications, Places, System).
Therein use menus:
System -> Preferences -> Keybord Shortcuts -> Add ->
Alternatively if you prefer you can directly invoke the Keyboard Shortcuts configuration with command:
hipo@noah:~$ gnome-keybinding-properties
Further on, assign a shortcut by filling in something like:
name: grab-screen-area

command: gnome-screenshot -i -a
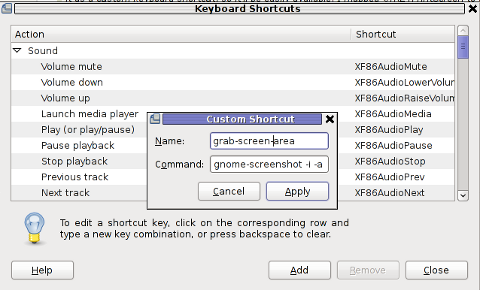
press Apply and next map a key to the new defined key binding:
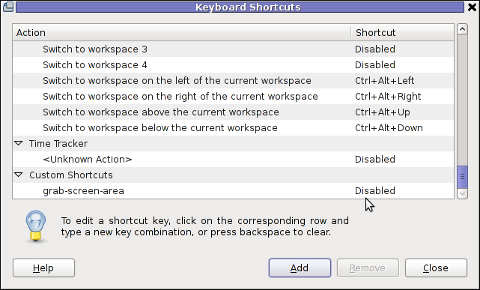
Under the Shortcut column click on Disabled and assign some key combination to invoke the cmd for example Ctrl+F4
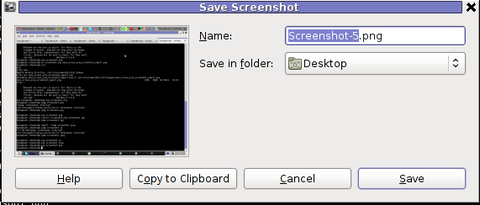
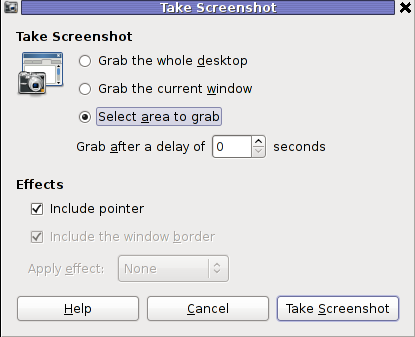
The command gnome-screenshot -i makes gnome-screenshot, show interactive make screenshot dialog like the one in below screenshot.
b) creating gnome-screenshot -a area screenshot key binding for quick area screenshots "on the fly"
The procedure is precisely the same as with adding interactive screenshot; Under Keyboard Shortcuts GNOME config assign new key binding by pressing Add button and adding:
name: grab-screen-area1

command: gnome-screenshot -a
Once again in Shortcut column in line starting with grab-screen-area1 add your desired key switch. I personally like Ctrl+Print Screen SysRQ as it is close to the default GNOME key combination assigned for taking screenshot for a Windows Alt+Print SysRq
It was logical, that this key binding should work and a direct selection mouse cursor to appear once Alt+Print SysRQ is pressed, however for some reason this is not working (hmm, maybe due to bug) ??
Thanksfully it is always possible to substitute the just assigned gnome-screenshot -a key binding with import -frame /home/hipo/Desktop/screenshot.png
If you have followed literally my article so far and you did tried to place a bind for gnome-screenshot -a, modifty grab-screen-area1 to be something like:
name: grab-screen-area1

command: import -frame /home/hipo/Desktop/screenshot.png
Where modify the path /home/hipo/Desktop/screenshot.png, to wherever you prefer the region screep capture to be stored.
c) bind keys for delayed screenshot
This also a handy binding, especially if you every now and then need to make screenshots of screen with a few secs interval.
Add one more keyboard shortcut;
name: grab-screen-area2

command: gnome-screenshot -d 5
Assign a key to make a screenshot of the active display after a delay of 5 seconds. I prefer Ctrl+F5
Onwards every time you would like to make an area screenshot, just use the defined keys:
Ctrl+F4 - will prompt you interactively for the precise type of screenshot you would like to take

Ctrl+Print SysRQ - will prompt you for a direct area to select and once selected will immediately screenshot it

Ctrl+F5 -  would do delayed screenshot of entire screen after a delay of 5 seconds
4. Adding border and drop shadow effects with gnome-screenshot Actually, there is plenty of interesting things to do with Screenshots which I never thought were possible.
While reading gnome-screenshot's man page, I've stumbled to an interesting argument:
-e, --effect=EFFECT,

Add an effect to the outside of the screenshot border. EFFECT can be ``shadow'' (adding drop shadow), ``border'' (adding

rectangular space around the screenshot) or ``none'' (no effect). Default is ``none''.
This would have been a nice feature but as of time of writting this article, untofrtunately it is not working in GNOME 2.30.2. I'm not sure if this is a local Debian bug, however I suspect on other Linux distributions with different GNOME build configuration, this features might be working well. My guess here is drop shadow effect and border effect are not working because, gnome-screenshot was compiled without (support for ImageMagick?).
Anyways the way the feature is supposed to be work is by invoking commands:
:
hipo@noah:~$ gnome-screenshot --border-effect=shadow

hipo@noah:~$ nome-screenshot --border-effect=border
The same basic effects, are also available through GIMP's menus:
Image -> Effects
5. Setting default behaviour of gnome-screenshot in gconf-editor GConf (Gnome config registry db)
Experienced, GNOME users should already know about the existence of gconf-editor and the gnome registry database. For those who have don't, coming from MS-Windows background gconf-editor is GNOME (graphical environment) equivalent to Microsoft Windows registry regedit command
gconf-editor can be used to atune the way the screenshots are taken by default. To do so, launch gconf-editor cmd and follow to sub-structure:
/ -> apps -> gnome-screenshot
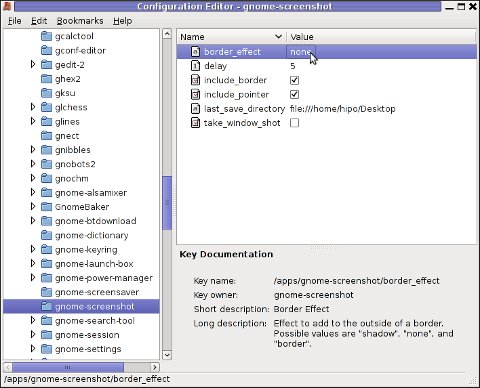
The settings in above screenshot are configurations which are used by default by gnome-screenshot, right after install.
You can play with the options to change the default way PrintScreen SysRQ key press will take screenshots.
Here is one example for changing the gnome-screenshot default GNOME behaviour:
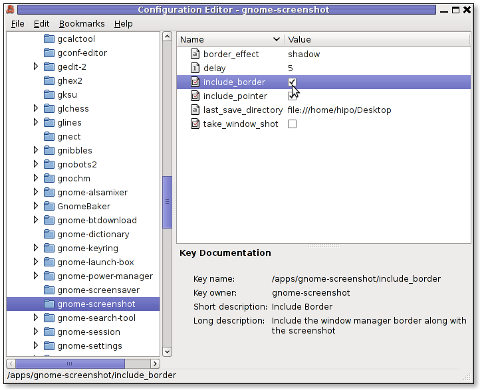
As you can see in above screenshot, I've changed my default gnome-screenshot snap taking to include a drop shadow effect:
Name | Value

border_effect | shadow include_border | (tick on)

last_save_directory | file://home/hipo/Desktop
As you see you can also control, where by default gnome-screenshot will save its screenshots, by default, its saved in $HOME/Desktop
. If you prefer some custom directory to only contain Screenshots taken for instance $HOME/Screenshots, create the directory:
hipo@noah:~$ mkdir ~/Screenshots
and then change the value for last_save_directory gconf var:
last_save_directory | file://home/hipo/Screenshots
Once settings are applied screenshots with Print Screen SysRQ key will be made with Shadow Border effect and saved in /home/hipo/Screenshots
Strangely enough, changing gnome-screenshot default screenshotting values to include screenshot effects like drop shadow or screenshot border effect works just fine.
Even though gnome-screenshot –border-effect=shadow and gnome-screenshot –border-effect=border doesn't directly affect the current screenshot to be made, I've later noticed writting this two commands in the gnome-terminal, does change the border settings for gconf-editor screenshot border.
If you enjoyed, this article and you intend to become "a professional screnshotter" :), you might also enjoy my two other articles:
Happy screenshotting 😉


How to restore accidently removed Gnome volume control in GNOME in GNU / Linux
Sunday, January 22nd, 2012Accidently I've removed the Gnome Volume Control while trying to remove an applet nearby from the GNOME main menu panel. Unfortunately in GNOME 2, I couldn't find a way to to return back (restore) Gnome Volume Control to the main panel. After a bit of pondering, I've managed to find a way.
Here is how I managed to restore it back:
1. Navigate to:
System > Preference > Startup Applications
2. Click on Add, then add and type the following:Name: Volume control
Command: gnome-volume-control-applet
Comment: Launch volume control applet
Adding the gnome-volume-control-applet will launch it every time a new gnome session (with the same user) is initiated. On next gnome login you will see the icon to appear again in the notification area. Cheers 😉
Tags: applet, area, Auto, Cheers, Click, command, Comment, control, Draft, Gnome, gnu linux, icon, launch, Linux, login, menu, menu panel, Navigate, notification, notification area, panel, preference, startup, startup applications, system, time, type, volume control, way
Posted in FreeBSD, Gnome, Linux, Linux and FreeBSD Desktop | No Comments »