Posts Tagged ‘bashrc’

Adding custom user based host IP aliases load custom prepared /etc/hosts from non root user on Linux – Script to allow define IPs that doesn’t have DNS records to user preferred hostname

Wednesday, April 14th, 2021

adding-custom-user-based-host-aliases-etc-hosts-logo-linux

Say you have access to a remote Linux / UNIX / BSD server, i.e. a jump host and you have to remotely access via ssh a bunch of other servers
who have existing IP addresses but the DNS resolver recognized hostnames from /etc/resolv.conf are long and hard to remember by the jump host in /etc/resolv.conf and you do not have a way to include a new alias to /etc/hosts because you don't have superuser admin previleges on the hop station.
To make your life easier you would hence want to add a simplistic host alias to be able to easily do telnet, ssh, curl to some aliased name like s1, s2, s3 … etc.


The question comes then, how can you define the IPs to be resolvable by easily rememberable by using a custom User specific /etc/hosts like definition file? 

Expanding /etc/hosts predefined host resolvable records is pretty simple as most as most UNIX / Linux has the HOSTALIASES environment variable
Hostaliases uses the common technique for translating host names into IP addresses using either getaddrinfo(3) or the obsolete gethostbyname(3). As mentioned in hostname(7), you can set the HOSTALIASES environment variable to point to an alias file, and you've got per-user aliases

create ~/.hosts file

linux:~# vim ~/.hosts

with some content like:
 

g google.com
localhostg 127.0.0.1
s1 server-with-long-host1.fqdn-whatever.com 
s2 server5-with-long-host1.fqdn-whatever.com
s3 server18-with-long-host5.fqdn-whatever.com

linux:~# export HOSTALIASES=$PWD/.hosts

The caveat of hostaliases you should know is this will only works for resolvable IP hostnames.
So if you want to be able to access unresolvable hostnames.
You can use a normal alias for the hostname you want in ~/.bashrc with records like:

alias server-hostname="ssh username@10.10.10.18 -v -o stricthostkeychecking=no -o passwordauthentication=yes -o UserKnownHostsFile=/dev/null"
alias server-hostname1="ssh username@10.10.10.19 -v -o stricthostkeychecking=no -o passwordauthentication=yes -o UserKnownHostsFile=/dev/null"
alias server-hostname2="ssh username@10.10.10.20 -v -o stricthostkeychecking=no -o passwordauthentication=yes -o UserKnownHostsFile=/dev/null"

then to access server-hostname1 simply type it in terminal.

The more elegant solution is to use a bash script like below:

# include below code to your ~/.bashrc
function resolve {
        hostfile=~/.hosts
        if [[ -f “$hostfile” ]]; then
                for arg in $(seq 1 $#); do
                        if [[ “${!arg:0:1}” != “-” ]]; then
                                ip=$(sed -n -e "/^\s*\(\#.*\|\)$/d" -e "/\<${!arg}\>/{s;^\s*\(\S*\)\s*.*$;\1;p;q}" "$hostfile")
                                if [[ -n “$ip” ]]; then
                                        command "${FUNCNAME[1]}" "${@:1:$(($arg-1))}" "$ip" "${@:$(($arg+1)):$#}"
                                        return
                                fi
                        fi
                done
        fi
        command "${FUNCNAME[1]}" "$@"
}

function ping {
        resolve "$@"
}

function traceroute {
        resolve "$@"
}

function ssh {
        resolve "$@"
}

function telnet {
        resolve "$@"
}

function curl {
        resolve "$@"
}

function wget {
        resolve "$@"
}


Now after reloading bash login session $HOME/.bashrc with:

linux:~# source ~/.bashrc

ssh / curl / wget / telnet / traceroute and ping will be possible to the defined ~/.hosts IP addresses just like if it have been defined global wide on System in /etc/hosts.

Enjoy
 

Play Dune2 on Debian Linux with dosbox – Dune 2 Mother of all Real Time Strategy games

Saturday, March 1st, 2014

medium_1809-dune-ii-the-building-of-a-dynasty_one_of_best_games_ever_linux_windows.gif

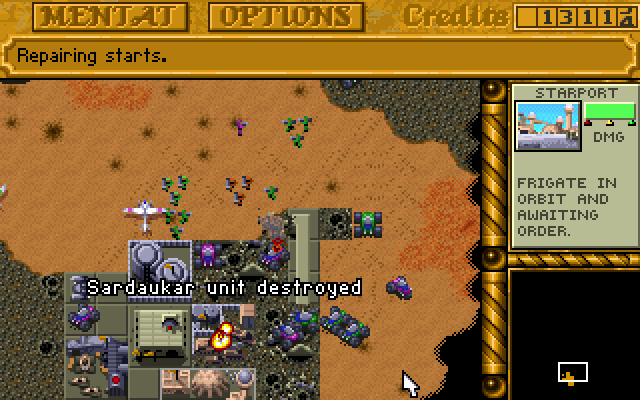
Dune II: The Building of a Dynasty (known also as Dune II: Battle for Arrakis in Europe is a game that my generation will never forget. Dune 2 is the "first" computer Real Time Strategy (RTE) game of the genre of the Warcraft I and Warcraft II / III and later Command and Conquer – Red Aleart, Age of Empires I / II and Starcraft …

dune2-unit-destroyed

I've grown up with Dune2 and the little computer geek community in my school was absolutely crazy about playing it. Though not historically being the first Real Time Strategy game, this Lucas Inc. 
game give standards that for the whole RTE genre for years and will stay in history of Computer Games as one of best games of all times.

I've spend big part of my teenager years with my best friends playing Dune2 and the possibility nowadays to resurrect the memories of these young careless years is a blessing.  Younger computer enthusiasts and gamers probably never heard of Dune 2 and this is why I decided to place a little post here about this legendary game.

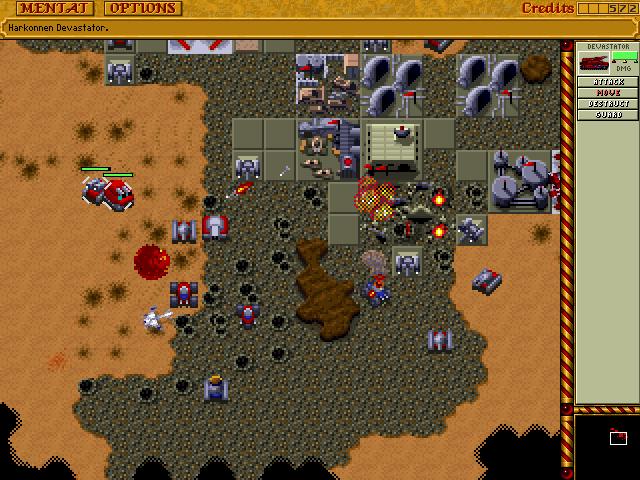
dune-2-tank-vehicle - one of best games computer games ever

Its worthy out of curiosity or for fun to play Dune 2 on modern OS be it Windows or Linux. Since Dune is DOS game, it is necessary to play it via DOS emulator i.e. – (DosBox). 
Here is how I run dune2 on my Debian Linux:

1. Install dosbox DOS emulator

apt-get install --yes dosbox

2. Download Dune2 game executable

You can download my mirror of dune2 here

Note that you will need unzip to uanrchive it, if you don't have it installed do so:

apt-get install --yes unzip

cd ~/Downloads/
wget https://www.pc-freak.net/files/dune-2.zip

3.  Unzip archive and create directory to mount it emulating 'C:\' drive

mkdir -p ~/.dos/Dune2
cd ~/.dos/Dune2

unzip ~/Downloads/dune-2.zip
 

4. Start dosbox and create permanent config for C: drive auto mount


dosbox

To make C:\ virtual drive automatically mounted you have to write a dosbox config from inside dbox console

config -writeconf /home/hipo/.dosbox.conf

My home dir is in /home/hipo, change this with your username /home/username

Then exit dosbox console with 'exit' command

To make dune2 game automatically mapped on Virtual C: drive:

echo "mount c /home/hipo/.dos" >> ~/.dosbox.conf

Further to make dosbox start each time with ~/.dosbox.conf add alias to your ~/.bashrc 

vim ~/.bashrc
echo "alias dosbox='dosbox -conf /home/hipo/.dosbox.conf'" >> ~/.bashrc
source ~/.bashrc

Then to run DUNE2 launch dosbox:

dosbox

and inside console type:

c:
cd Dune2
Dune2.exe

dune2-first-real-time-strategy-game-harkonen-screenshot

For the lazy ones who would like to test dune you can play dune 2 online on this website

Linux find files while excluding / ignoring some files – Show all files on UNIX excluding hidden . (dot) files

Friday, August 22nd, 2014

linux-find-files-while-excluding-ignoring-some-files-show-all-files-on-unix-excluding-hidden-dot-files
A colleague of mine (Vasil) asked me today, how he can recursively chmod to all files in a directory while exclude unreadable files for chmod (returning permission denied). He was supposed to fix a small script which was supposed to change permissions like :

chmod 777 ./
chmod: cannot access `./directory': Permission denied
chmod: cannot access `./directory/file': Permission denied
chmod: cannot access `./directory/onenote': Permission denied

First thing that came to my mind was to loop over it with for loop and grep out only /directory/ and files returning permissioned denied.

for i in $(find . -print | grep -v 'permission denied'); do echo chmod 777 $i; done

This works but if chmod has to be done to few million of files, this could be a real resource / cpu eater.

The better way to do it is by only using Linux find command native syntax to omit files.

find . -type f ( -iname "*" ! -iname "onenote" ! -iname "file" )

Above find will print all files in . – current directory from where find is started, except files: onenote and file.
To exclude
 

Search and show all files in Linux / UNIX except hidden . (dot) files

Another thing he wanted to do is ignore printing of hidden . (dot) files like .bashrc, .profile and .bash_history while searching for files – there are plenty of annoying .* files.

To ignore printing with find all filesystem hidden files from directory:

find . -type f ( -iname "*" ! -iname ".*" )

on web hosting webservers most common files which is required to be omitted on file searches is .htaccess

find . -type f ( -iname "*" ! -iname ".htaccess" )

  In order to print only all hidden files in directory except .bashrc and .bash_profile:

find . -type f ( -iname '.*' ! -iname '.bashrc' ! -iname '.bash_profile' )

Another useful Linux find use for scripting purposes is listing only all files presented in current directory (simulating ls), in case if you wonder why on earth to use find and not a regular ls command?, this is useful for scripts which has to walk through millions of files (for reference see how to delete million of files in same folder with Linux find):

find . ! -name . -prune

./packages
./bin
./package

"! -name . " –  means any file other than current directory

prune – prunes all the directories other than the current directory.

A more readable way to list only files in current folder with find is – identical to what above cmd:

find ./* -prune

./packages
./bin
./mnt

If you want to exclude /mnt folder and its sub-directories and files with find by using prune option:

find . -name tmp -prune -o -print


SL Animated console train for your Linux – useless commans to cheer you up when you mistype ls

Tuesday, February 18th, 2014

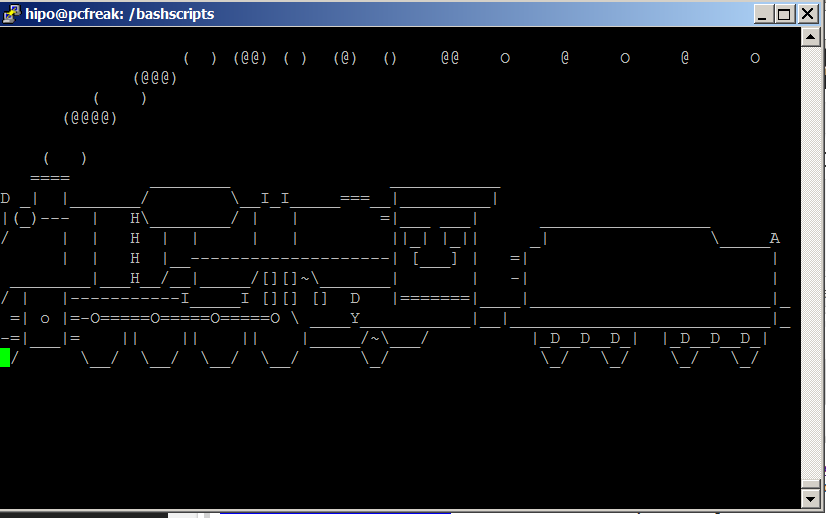
sl-cool-program-to-cheer-you-up-when-you-make-a-mistake-on-linux-console

Some time ago I blogged about how to make your sysadmin more enjoyable with figlet and toilet console ASCII art text generators
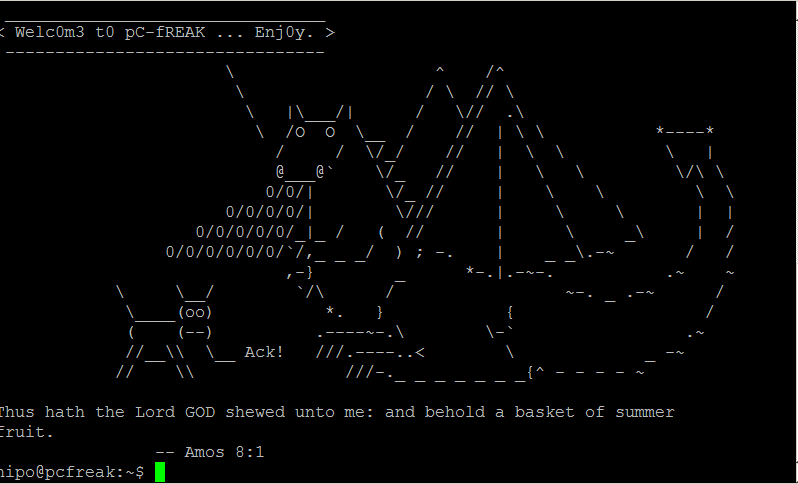
Besides toilet and figlet another cool entertainment proggie is cowsay. On my home Linux router I use cowsay together with a tiny shell script to generate me a random Cow Ascii Art fun picture each time I login to my Linux. cowrand is set to run for my user through ~/.bashrc.

cowsay print cheerful pictures on your linux console / terminal login how to

In the spirit of ascii art fun arts today I've stumbled on another cool  and uselesss few kilobytes program called "SL". SL is very simple all it does is it cheers up you by displaying a an animated train going through the screen once you type by mistake "sl" instead of ls (list command).
To enjoy it on debian based distributions install it with apt:

# apt-get install --yes sl

SL 's name is a playful joke itself as well it stands for Steam Locomotive.

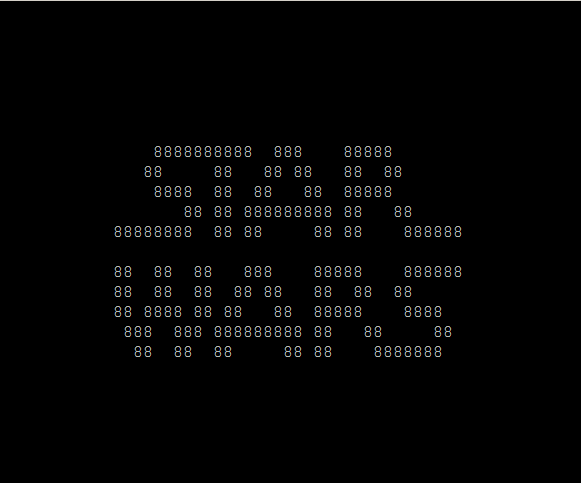
To get some more ASCII art fun, try telnetting to  towel.blinkenlights.nl – There is a synthesised ASCII Art text version video of Star Wars – Episode IV

# telnet towel.blinkenlights.nl

watch all star_wars episode 1 in ascii art video

If you know other cool ASCII art animation scripts / ASCII art games or anything related to ASCII art for Linux / Windows, please drop me a comment.
 

Linux: Limiting user processes to prevent Denial of Service / ulimit basics explained

Monday, May 20th, 2013

Linux limiting max user processes with ulimit preventing fork-bombs ulimit explained

To prevent from various DoS taking advantage of unlimited forks and just to tighten up security it is good idea to limit the number of maximum processes users can spawn on Linux system. In command line such preventions are done using ulimit command.

To get list of current logged in user ulimit settings

hipo@noah:~$ ulimit -a

core file size          (blocks, -c) 0
data seg size           (kbytes, -d) unlimited
scheduling priority             (-e) 0
file size               (blocks, -f) unlimited
pending signals                 (-i) 16382
max locked memory       (kbytes, -l) 64
max memory size         (kbytes, -m) unlimited
open files                      (-n) 1024
pipe size            (512 bytes, -p) 8
POSIX message queues     (bytes, -q) 819200
real-time priority              (-r) 0
stack size              (kbytes, -s) 8192
cpu time               (seconds, -t) unlimited
max user processes              (-u) unlimited
virtual memory          (kbytes, -v) unlimited
file locks                      (-x) unlimited

As you see from above output, there is plenty of things, that can be limited with ulimit.
Through it user can configure maximum number of open files (by default 1024), e.g.:

open files                      (-n) 1024

You can also set the max size of file (in blocks) user can open – through:

file size               (blocks, -f) unlimited

As well as limiting user processes to be unable to use more than maximum number of CPU time via:

cpu time               (seconds, -t) unlimited

ulimit is also used to assign whether Linux will produce the so annoying often large produced core files. Those who remember early time Linux distributions certainly remember GNOME and GNOME apps crashing regularly producing those large useless files. Most of modern Linux distrubutions has core file produce disabled, i.e.:

core file size          (blocks, -c) 0

For Linux distributions, where for some reason core dumps are still enabled – you can disable them by running:>

noah:~# ulimit -Sc 0

By default depending on Linux distribution max user processes ulimit is either unlimited in Debian and other deb based distributions or on RPM based Linuces versions of  (Fedora, RHEL, CentOS, Redhat) is 32768.

To ulimit a current logged in user to be able to spawn maximum of 50 processes;

hipo@noah:~$ ulimit -Su 50
hipo@noah:~$ ulimit -a

core file size          (blocks, -c) 0
data seg size           (kbytes, -d) unlimited
scheduling priority             (-e) 0
file size               (blocks, -f) unlimited
pending signals                 (-i) 16382
max locked memory       (kbytes, -l) 64
max memory size         (kbytes, -m) unlimited
open files                      (-n) 1024
pipe size            (512 bytes, -p) 8
POSIX message queues     (bytes, -q) 819200
real-time priority              (-r) 0
stack size              (kbytes, -s) 8192
cpu time               (seconds, -t) unlimited
max user processes              (-u) 50
virtual memory          (kbytes, -v) unlimited
file locks                      (-x) unlimited

-Su – assigns max num of soft limit to 50, to set a hard limit of processes, there is the -Hu parameter.

Imposing ulimit user restrictions, lets say a max processes user can run is set via /etc/security/limits.conf

In limits.conf, there are some commented examples, e.g., here is paste from Debian:

#*               soft    core            0
#root            hard    core            100000
#*               hard    rss             10000
#@student        hard    nproc           20
#@faculty        soft    nproc           20
#@faculty        hard    nproc           50
#ftp             hard    nproc           0
#ftp             –       chroot          /ftp
#@student        –       maxlogins       4

The @student example above, i.e.:

@student        hard    nproc           20

– sets maximum number of 20 processes for group student (@ – at sign signifies limitation is valid for users belonging to group).

As you can see there are soft and hard limit that can be assigned for user / group. soft limit sets limits for maximum spawned processes by by non-root users, soft limit can be modified by non-privileged user.
hard limit assigns maximum num of processes for programs running and only privileged user root can impose changes to that.
To add my user hipo to have limit of maximum 100 parallel running processes I had to add to /etc/security/limits.conf

hipo@noah:~$ echo 'hipo hard nproc 100' >> /etc/security/limits.conf

ulimit shell command is a wrapper around the setrlimit system call. Thus setrlimit instructs Linux kernel with interrupts depending on ulimit assigned settings.

One note to make here is whether limiting user has to use Linux system in Graphical Environment, lets say GNOME you should raise the max number of spawned processes to some high number for example at least 200 / 300 procs.

After limitting user max processes, You can test whether system is secure against fork bomb DoS by issuing in shell:

hipo@noah:~$ ulimit -u 50
hipo@noah~:$ :(){ :|:& };:
[1] 3607
hipo@noah:~$ bash: fork: Resource temporarily unavailable
bash: fork: Resource temporarily unavailable

Due to the limitation, attempt to fork more than 50 processes is blocked and system is safe from infamous denial of service fork bomb attack

How to change Debian GNU / Linux console (tty) language to Bulgarian or Russian Language

Wednesday, April 25th, 2012

Debian has a package language-env. I haven't used my Linux console for a long time. So I couldn't exactly remember how I used to be making the Linux console to support cyrillic language (CP1251, bg_BG.UTF-8) etc.

I've figured out for the language-env existence in Debian Book on hosted on OpenFMIBulgarian Faculty of Mathematics and Informatics website.
The package info with apt-cache show displays like that:

hipo@noah:~/Desktop$ apt-cache show language-env|grep -i -A 3 description
Description: simple configuration tool for native language environment
This tool adds basic settings for natural language environment such as
LANG variable, font specifications, input methods, and so on into
user's several dot-files such as .bashrc and .emacs.

What is really strange, is the package maintainer is not Bulgarian, Russian or Ukrainian but Japanese.
As you see the developer is weirdly not Bulgarian but Japanese Kenshi Muto. What is even more interesting is that it is another japanese that has actually written the script set-language-env contained within the package. Checking the script in the header one can see him, Tomohiro KUBOTA

Before I've found about the language-env existence, I knew I needed to have the respective locales installed on the system with:

# dpkg-reconfigure locales

So I run dpkg-reconfigure to check I have existing the locales for adding the Bulgarian language support.
Checking if the bulgarian locale is installed is also possible with /bin/ls:

# ls -al /usr/share/i18n/locales/*|grep -i bg
-rw-r--r-- 1 root root 8614 Feb 12 21:10 /usr/share/i18n/locales/bg_BG

The language-env contains a perl script called set-language-env which is doing the actual Debian Bulgarization / cyrillization. The set-language-env author is another Japanese and again not Slavonic person.

Actually set-language-env script is not doing the Bulgariazation but is a wrapper script that uses a number of "hacks" to make the console support cyrillic.

Further on to make the console support cyrillic, execute:

hipo@noah:~$ set-language-env
Setting up users' native language environment
by modifying their dot-files.
Type "set-language-env -h" for help.
1 : be (Bielaruskaja,Belarusian)
2 : bg (Bulgarian)
3 : ca (Catala,Catalan)
4 : da (Dansk,Danish)
5 : de (Deutsch,German)
6 : es (Espanol,Spanish)
7 : fr (Francais,French)
8 : ja (Nihongo,Japanese)
9 : ko (Hangul,Korean)
10 : lt (Lietuviu,Lithuanian)
11 : mk (Makedonski,Macedonian)
12 : pl (Polski,Polish)
13 : ru (Russkii,Russian)
14 : sr (Srpski,Serbian)
15 : th (Thai)
16 : tr (Turkce,Turkish)
17 : uk (Ukrajins'ka,Ukrainian)
Input number > 2

There are many questions in cyrillic list necessery to be answered to exactly define if you need cyrillic language support for GNOME, pine, mutt, console etcetera.
The script will create or append commands to a number of files on the system like ~/.bash_profile
The script uses the cyr command part of the Debian console-cyrillic package for the actual Bulgarian Linux localization.

As said it was supposed to also do a localization in the past of many Graphical environment programs, as well as include Bulgarian support for GNOME desktop environment. Since GNOME nowdays is already almost completely translated through its native language files, its preferrable that localization to be done on Linux install time by selecting a country language instead of later doing it with set-language-env. If you failed to set the GNOME language during Linux install, then using set-language-env will still work. I've tested it and even though a lot of time passed since set-language-env was heavily used for bulgarization still the GUI env bulgarization works.

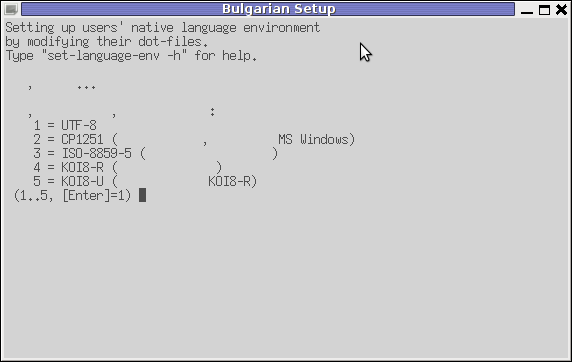
If set-language-env is run in gnome-terminal the result, the whole set of question dialogs will pop-up in new xterm and due to a bug, questions imposed will be unreadable as you can see in below screenshot:

set-language-env command screenshot in Debian GNU / Linux gnome-terminal

If you want to remove the bulgarization, later at certain point, lets you don't want to have the cyrillic console or programs support use:

# set-language-env -r
Setting up users native language environment' 

For anyone who wish to know more in depth, how set-language-env works check the README files in /usr/share/doc/language-env/ one readme written by the author of the Bulgarian localization part of the package Anton Zinoviev is /usr/share/doc/language-env/README.be-bg-mk-sr-uk

Alternative way to kill X in Linux with Alt + Printscreen + K

Sunday, October 31st, 2010

I’ve recently realized that the CTRL + ALT + BACKSPACE keyboard combination is no longer working in Debian unstable.

This good old well known keyboard combination to restart X is not working with my xorg 7.5+8 under my Gnome 2.30 desktop
However thanksfully there is another combination to kill the X server if for instance if your Gnome desktop hangs.

If that happens simply press ALT + PRINTSCREEN + K this will kill your X and then reload the (Gnome Display manager) gdm.

Another suggestion I’ve red in the forums of a way to enable back CTRL+ALT+BACKSPACE is to put in either .bashrc or .xinitrc the following command

setxkbmap -option terminate:ctrl_alt_bksp

BTW It’s better that the above command is placed in ~/.xinitrc.

I’ve also red on some forums that in newer releases of Ubuntu. The CTRL+ALT+BACKSPACE can be enabled using a specific command, e.g. with:

dontzap -disable