Posts Tagged ‘bin’

Rsync copy files with root privileges between servers with root superuser account disabled

Tuesday, December 3rd, 2019


rsync-copy-files-between-two-servers-with-root-privileges-with-root-superuser-account-disabled

Sometimes on servers that follow high security standards in companies following PCI Security (Payment Card Data Security) standards it is necessery to have a very weird configurations on servers,to be able to do trivial things such as syncing files between servers with root privileges in a weird manners.This is the case for example if due to security policies you have disabled root user logins via ssh server and you still need to synchronize files in directories such as lets say /etc , /usr/local/etc/ /var/ with root:root user and group belongings.

Disabling root user logins in sshd is controlled by a variable in /etc/ssh/sshd_config that on most default Linux OS
installations is switched on, e.g. 

grep -i permitrootlogin /etc/ssh/sshd_config
PermitRootLogin yes


Many corporations use Vulnerability Scanners such as Qualys are always having in their list of remote server scan for SSH Port 22 to turn have the PermitRootLogin stopped with:


PermitRootLogin no


In this article, I'll explain a scenario where we have synchronization between 2 or more servers Server A / Server B, whatever number of servers that have already turned off this value, but still need to
synchronize traditionally owned and allowed to write directories only by root superuser, here is 4 easy steps to acheive it.


1. Add rsyncuser to Source Server (Server A) and Destination (Server B)


a. Execute on Src Host:


groupadd rsyncuser
useradd -g 1000 -c 'Rsync user to sync files as root src_host' -d /home/rsyncuser -m rsyncuser


b. Execute on Dst Host:


groupadd rsyncuser
useradd -g 1000 -c 'Rsync user to sync files dst_host' -d /home/rsyncuser -m rsyncuser


2. Generate RSA SSH Key pair to be used for passwordless authentication


a. On Src Host
 

su – rsyncuser

ssh-keygen -t rsa -b 4096


b. Check .ssh/ generated key pairs and make sure the directory content look like.


[rsyncuser@src-host .ssh]$ cd ~/.ssh/;  ls -1

id_rsa
id_rsa.pub
known_hosts


3. Copy id_rsa.pub to Destination host server under authorized_keys


scp ~/.ssh/id_rsa.pub  rsyncuser@dst-host:~/.ssh/authorized_keys


Next fix permissions of authorized_keys file for rsyncuser as anyone who have access to that file (that exists as a user account) on the system
could steal the key and use it to run rsync commands and overwrite remotely files, like overwrite /etc/passwd /etc/shadow files with his custom crafted credentials
and hence hack you 🙂
 

Hence, On Destionation Host Server B fix permissions with:
 

su – rsyncuser; chmod 0600 ~/.ssh/authorized_keys
[rsyncuser@dst-host ~]$


An alternative way for the lazy sysadmins is to use the ssh-copy-id command


$ ssh-copy-id rsyncuser@192.168.0.180
/usr/bin/ssh-copy-id: INFO: Source of key(s) to be installed: "/root/.ssh/id_rsa.pub"
/usr/bin/ssh-copy-id: INFO: attempting to log in with the new key(s), to filter out any that are already installed
/usr/bin/ssh-copy-id: INFO: 1 key(s) remain to be installed — if you are prompted now it is to install the new keys
root@192.168.0.180's password: 


For improved security here to restrict rsyncuser to be able to run only specific command such as very specific script instead of being able to run any command it is good to use little known command= option
once creating the authorized_keys


4. Test ssh passwordless authentication works correctly


For that Run as a normal ssh from rsyncuser

On Src Host


[rsyncuser@src-host ~]$ ssh rsyncuser@dst-host


Perhaps here is time that for those who, think enabling a passwordless authentication is not enough secure and prefer to authorize rsyncuser via a password red from a secured file take a look in my prior article how to login to remote server with password provided from command line as a script argument / Running same commands on many servers 

5. Enable rsync in sudoers to be able to execute as root superuser (copy files as root)


For this step you will need to have sudo package installed on the Linux server.

Then, Execute once logged in as root on Destionation Server (Server B)


[root@dst-host ~]# grep 'rsyncuser ALL' /etc/sudoers|wc -l || echo ‘rsyncuser ALL=NOPASSWD:/usr/bin/rsync’ >> /etc/sudoers


Note that using rsync with a ALL=NOPASSWD in /etc/sudoers could pose a high security risk for the system as anyone authorized to run as rsyncuser is able to overwrite and
respectivle nullify important files on Destionation Host Server B and hence easily mess the system, even shell script bugs could produce a mess, thus perhaps a better solution to the problem
to copy files with root privileges with the root account disabled is to rsync as normal user somewhere on Dst_host and use some kind of additional script running on Dst_host via lets say cron job and
will copy gently files on selective basis.

Perhaps, even a better solution would be if instead of granting ALL=NOPASSWD:/usr/bin/rsync in /etc/sudoers is to do ALL=NOPASSWD:/usr/local/bin/some_copy_script.sh
that will get triggered, once the files are copied with a regular rsyncuser acct.


6. Test rsync passwordless authentication copy with superuser works


Do some simple copy, lets say copy files on Encrypted tunnel configurations located under some directory in /etc/stunnel on Server A to /etc/stunnel on Server B

The general command to test is like so:
 

rsync -aPz -e 'ssh' '–rsync-path=sudo rsync' /var/log rsyncuser@$dst_host:/root/tmp/


This will copy /var/log files to /root/tmp, you will get a success messages for the copy and the files will be at destination folder if succesful.


On Src_Host run:


[rsyncuser@src-host ~]$ dst=FQDN-DST-HOST; user=rsyncuser; src_dir=/etc/stunnel; dst_dir=/root/tmp;  rsync -aP -e 'ssh' '–rsync-path=sudo rsync' $src_dir  $rsyncuser@$dst:$dst_dir;


7. Copying files with root credentials via script


The simlest file to use to copy a bunch of predefined files  is best to be handled by some shell script, the most simple version of it, could look something like this.
 

#!/bin/bash
# On server1 use something like this
# On server2 dst server
# add in /etc/sudoers
# rsyncuser ALL=NOPASSWD:/usr/bin/rsync

user='rsyncuser';

dst_dir="/root/tmp";
dst_host='$dst_host';
src[1]="/etc/hosts.deny";
src[2]="/etc/sysctl.conf";
src[3]="/etc/samhainrc";
src[4]="/etc/pki/tls/";
src[5]="/usr/local/bin/";


for i in $(echo ${src[@]}); do
rsync -aPvz –delete –dry-run -e 'ssh' '–rsync-path=sudo rsync' "$i" $rsyncuser@$dst_host:$dst_dir"$i";
done


In above script as you can see, we define a bunch of files that will be copied in bash array and then run a loop to take each of them and copy to testination dir.
A very sample version of the script rsync_with_superuser-while-root_account_prohibited.sh 
 

Conclusion


Lets do short overview on what we have done here. First Created rsyncuser on SRC Server A and DST Server B, set up the key pair on both copied the keys to make passwordless login possible,
set-up rsync to be able to write as root on Dst_Host / testing all the setup and pinpointing a small script that can be used as a backbone to develop something more complex
to sync backups or keep system configurations identicatial – for example if you have doubts that some user might by mistake change a config etc.
In short it was pointed the security downsides of using rsync NOPASSWD via /etc/sudoers and few ideas given that could be used to work on if you target even higher
PCI standards.


Install simscan on Qmail for better Mail server performance and get around unexisting suid perl in newer Linux Debian / Ubuntu servers

Tuesday, August 18th, 2015

qmail-fixing-clamdscan-errors-and-qq-errors-qmail-binary-migration-few-things-to-check-outclamav_logo-installing-clamav-antivirus-to-scan-periodically-debian-server-websites-for-viruses

I've been stuck with qmail-scanner-queue for a while on each and every new Qmail Mail server installation, I've done, this time it was not different but as time evolves and Qmail and Qmail Scanner Wrapper are not regularly updated it is getting, harder and harder to make a fully functional Qmail on newer Linux server distribution releases.

I know many would argue QMAIL is already obsolete but still I have plenty of old servers running QMAIL whose migration might cause more troubles than just continuing to use QMAIL. Moreover QMAIL once set-upped works like a charm.

I've been recently experiencing severe issues with clamdscan errors and I tried to work around this with compiling and using a suid wrapper, however still the clamdscan errors continued and as qmail-scanner is not actively developed and it is much slower than simscan, I've finally decided to give simscan as a mean to fix the clamdscan errors and thanksfully this worked as a solution.

Here is what I did "rawly" to make simscan work on this install:
 

Make sure simscan is properly installed on Debian Linux 7 or Ubuntu servers and probably (should work) on other Deb based Linuxes by following below steps:
 

a) Configure simscan with following compile time options as root (superuser)

./configure \
–enable-user=qscand \
–enable-clamav \
–enable-clamdscan=/usr/local/bin/clamdscan \
–enable-custom-smtp-reject=y \
–enable-per-domain=y \
–enable-attach=y \
–enable-dropmsg=n \
–enable-spam=y \
–enable-spam-hits=5 \
–enable-spam-passthru=y \
–enable-qmail-queue=/var/qmail/bin/qmail-queue \
–enable-ripmime=/usr/local/bin/ripmime \
–enable-sigtool-path=/usr/local/bin/sigtool \
–enable-received=y


b) Compile it


 make && make install-strip

c) Fix any wrong permissions of simscan queue directory


chmod g+s /var/qmail/simscan/

chown -R qscand:qscand /var/qmail/simscan/
chmod -R 777 simscan/chown -R qscand:qscand simscan/
chown -R qscand:qscand simscan/

d) Add some additional simscan options (how simscan is how to perform scans)

The restart qmail to make mailserver start using simscan instead of qmail-scanner, run below command (again as root):

echo ":clam=yes,spam=yes,spam_hits=8.5,attach=.vbs:.lnk:.scr:.wsh:.hta:.pif" > /var/qmail/control/simcontrol


e) Run /var/qmail/bin/simscanmk in order to convert /var/qmail/control/simcontrol into the /var/qmail/control/simcontrol.cdb database

/var/qmail/bin/simscanmk
/var/qmail/bin/simscanmk -g

f) Modify /service/qmail-smtpd/run to set simscan to be default Antivirus Wrapper Scanner

vim /service/qmail-smtpd/run

I'm using thibs's run script so I've uncommented the line there:

QMAILQUEUE="$VQ/bin/simscan"

Below two lines should stay commented as qmail-scanner is no longer used:

##QMAILQUEUE="$VQ/bin/qmail-scanner-queue"
##QMAILQUEUE="$VQ/bin/qmail-scanner-queue.pl"
export QMAILQUEUE

qmailctl restart
* Stopping qmail-smtpdssl.
* Stopping qmail-smtpd.
* Sending qmail-send SIGTERM and restarting.
* Restarting qmail-smtpd.
* Restarting qmail-smtpdssl.

g) Test whether simscan is properly sending / receiving emails:

echo "Testing Email" >> /tmp/mailtest.txt
env QMAILQUEUE=/var/qmail/bin/simscan SIMSCAN_DEBUG=3 /var/qmail/bin/qmail-inject hipo@my-mailserver.com < /tmp/mailtest.txt

Besides that as I'm using qscand:qscand as a user for my overall Qmail Thibs install I had to also do:

chown -R qscand:qscand /var/qmail/simscan/
chmod -R 777 simscan/
chown -R qscand:qscand simscan/


It might be a good idea to also place that lines in /etc/rc.local to auto change permissions on Linux boot, just in case something wents wrong with permissions.

Yeah, I know 777 is unsecure but without this permissions, I was still getting errors, plus the server doesn't have any accounts except the administrator, so I do not worry other system users might sniff on email 🙂

h) Test whether Qmail mail server send / receives fine with simscan

After that I've used another mail server with mail command to test whether mail is received:
 

mail -s "testing email1234" hipo@new-configured-qmail-server.com
asdfadsf
.
Cc:

Then it is necessery to also install latest clamav daemon from source in my case that's on Debian GNU / Linux 7, because somehow the Debian shipped binary version of clamav 0.98.5+dfsg-0+deb7u2 does fail to scan any incoming or outgoing email with error:
 

clamdscan: corrupt or unknown clamd scanner error or memory/resource/perms problem – exit status -1/72057594037927935

So to fix it you will have to install clamav on Debian Linux from source.


Voilla, that's all finally it worked !

‘host-name’ is blocked because of many connection errors; unblock with ‘mysqladmin flush-hosts’

Sunday, May 20th, 2012

mysql-logo-host-name-blocked-because-of-many-connection-errors
My home run machine MySQL server was suddenly down as I tried to check my blog and other sites today, the error I saw while trying to open, this blog as well as other hosted sites using the MySQL was:

Error establishing a database connection

The topology, where this error occured is simple, I have two hosts:

1. Apache version 2.0.64 compiled support externally PHP scripts interpretation via libphp – the host runs on (FreeBSD)

2. A Debian GNU / Linux squeeze running MySQL server version 5.1.61

The Apache host is assigned a local IP address 192.168.0.1 and the SQL server is running on a host with IP 192.168.0.2

To diagnose the error I've logged in to 192.168.0.2 and weirdly the mysql-server was appearing to run just fine:
 

debian:~# ps ax |grep -i mysql
31781 pts/0 S 0:00 /bin/sh /usr/bin/mysqld_safe
31940 pts/0 Sl 12:08 /usr/sbin/mysqld –basedir=/usr –datadir=/var/lib/mysql –user=mysql –pid-file=/var/run/mysqld/mysqld.pid –socket=/var/run/mysqld/mysqld.sock –port=3306
31941 pts/0 S 0:00 logger -t mysqld -p daemon.error
32292 pts/0 S+ 0:00 grep -i mysql

Moreover I could connect to the localhost SQL server with mysql -u root -p and it seemed to run fine. The error Error establishing a database connection meant that either something is messed up with the database or 192.168.0.2 Mysql port 3306 is not properly accessible.

My first guess was something is wrong due to some firewall rules, so I tried to connect from 192.168.0.1 to 192.168.0.2 with telnet:
 

freebsd# telnet 192.168.0.2 3306
Trying 192.168.0.2…
Connected to jericho.
Escape character is '^]'.
Host 'webserver' is blocked because of many connection errors; unblock with 'mysqladmin flush-hosts'
Connection closed by foreign host.

Right after the telnet was initiated as I show in the above output the connection was immediately closed with the error:

Host 'webserver' is blocked because of many connection errors; unblock with 'mysqladmin flush-hosts'Connection closed by foreign host.

In the error 'webserver' is my Apache machine set hostname. The error clearly states the problems with the 'webserver' apache host unable to connect to the SQL database are due to 'many connection errors' and a fix i suggested with mysqladmin flush-hosts

To temporary solve the error and restore my normal connectivity between the Apache and the SQL servers I logged I had to issue on the SQL host:

mysqladmin -u root -p flush-hostsEnter password:

Thogh this temporar fix restored accessibility to the databases and hence the websites errors were resolved, this doesn't guarantee that in the future I wouldn't end up in the same situation and therefore I looked for a permanent fix to the issues once and for all.

The permanent fix consists in changing the default value set for max_connect_error in /etc/mysql/my.cnf, which by default is not too high. Therefore to raise up the variable value, added in my.cnf in conf section [mysqld]:

debian:~# vim /etc/mysql/my.cnf
...
max_connect_errors=4294967295

and afterwards restarted MYSQL:

debian:~# /etc/init.d/mysql restart
Stopping MySQL database server: mysqld.
Starting MySQL database server: mysqld.
Checking for corrupt, not cleanly closed and upgrade needing tables..

To make sure the assigned max_connect_errors=4294967295 is never reached due to Apache to SQL connection errors, I've also added as a cronjob.

debian:~# crontab -u root -e
00 03 * * * mysqladmin flush-hosts

In the cron I have omitted the mysqladmin -u root -p (user/pass) input options because for convenience I have already stored the mysql root password in /root/.my.cnf

Here is how /root/.my.cnf looks like:

debian:~# cat /root/.my.cnf
[client]
user=root
password=a_secret_sql_password

Now hopefully, this would permanently solve SQL's 'failure to accept connections' due to too many connection errors for future.

Create video from linux console / terminal – Record ssh terminal session as video with asciinema, showterm, termrecord

Thursday, August 21st, 2014

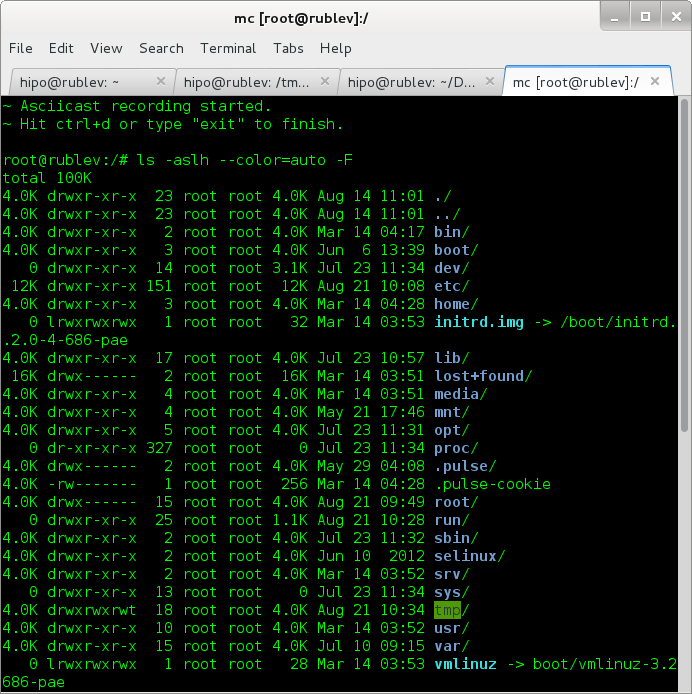
/var/www/images/asciinema-create-and-upload-ascii-terminal-console-videos-debian-gnu-linux-screenshot
You probably already know of existence of two Linux commands available by default across all Linux distributions scriptwhich makes a text based save of all commands executed on console and scriptreplay – which playbacks saved script command typescripts. Using this two you can save terminal sessions without problem, but in order to play them you need to have a Linux / UNIX computer at hand.
However If you want to make a short video record displaying what you have done on Linux console / terminal, you have few other options with which you can share your Linux terminal sessions on the web. In this short article I will go through 3 popular tools to do that – asciinema, showterm and termrecord.

1. Asciinema Current most popular tool to create video from Linux terminal

Here is how ASCIINEMA's website describes it:

"Asciinema is a free and open source solution for recording the terminal sessions and sharing them on the web."

apt-get –yes install python-pip

To install it with pip python package installer

pip install asciinema

Or if the machine is in DMZ secured zone and have access to the internet over a Proxy:

pip install –proxy=http://internet-proxy-host.com:8080 asciinema

It will get installed in /usr/local/bin/asciinema to make a terminal screen video capture just launch it (nomatter if it is privileged or non-privileged user):

asciinema

To finalize and upload the recorded terminal session, just type exit (to exit the shell), hopefully it will get you an upload link.

exit

You can claim authorship on video you issue:

asciinema auth

Use can then embed the new Linux terminal session video to your website.
 

2. ShowTerm – "It's showtime in a terminal near you!"

ShowTerm have same features as AsciiNema. Just like AsciiNema, what it does is it creates a record of your terminal session and then uploads it to showterm.io website, providing you a link over which you can share your terminal lesson / ascii art video / whatever with your friends. ShowTerm is written in, the world famous Ruby on Railsruby web development framework, so you will need to have ruby programming language installed before use. As showterm uses the Internet to upload video, so it is not really an option to create videos from remote terminal session on servers which are in DMZ with no access to the internet, I will explain in a little while how to create video of your terminal / console for private purpose on local server and then share it online on your own site.

a) To install ShowTerm:

– First be sure to have ruby installed:

On Debian / Ubuntu and derives deb Linux, as supersuser:

apt-get install –yes ruby curl

On CentOS / RHEL / Fedora Linux

yum -y install ruby curl

NB! curl is real requirement but as showterm.io website recommends downloading the script with it and later same curl tool is used to upload the created showterm file to http://showterm.io .

– Then to finalize install, download showterm script and make it executable

curl showterm.io/showterm > ~/bin/showterm

% Total    % Received % Xferd  Average Speed   Time    Time     Time  Current
                                       Dload  Upload   Total   Spent    Left  Speed
100  2007  100  2007    0     0   2908      0 –:–:– –:–:– –:–:–  8468

mkdir ~/bin
chmod +x ~/bin/showterm

This will save the script into your home folder ~/bin/showterm

b) Using showterm

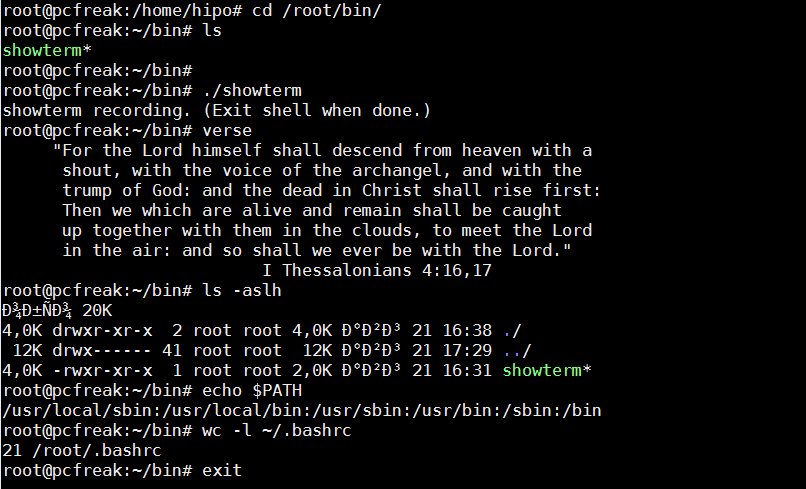
To run it to create video from your terminal simply start it and do whatver you will in terminal.

~/bin/showterm

After you're done with the video you like type exit

exit

create-video-from-your-linux-console-terminal-with-showterm-screenshot

Note that if your server is behind a proxy curl will not understand proxy set inside Linux shell variable with http_proxy var, to upload the file if you're behind a proxy you will have to pass to curl –proxy setting, once you get the curl line invoked after failure to upload use something like:

curl –proxy $(echo $http_proxy)  https://showterm.herokuapp.com/scripts –data-urlencode cols=80 –data-urlencode lines=24 –data-urlencode scriptfile@/tmp/yCudk.script –data-urlencode timingfile@/tmp/lkiXP.timing

Where assuming proxy is defined already inside http_proxy shell variable.


3. Creating video from your terminal / console on Linux for local (private) use with TermRecord

In my humble view TermRecord is the most awesome of all the 3, as it allows you to make records with an own generated Javascript based video player and allows you to keep the videos on your own side, guaranteeing you independence of external services. Its
 

pip install TermRecord

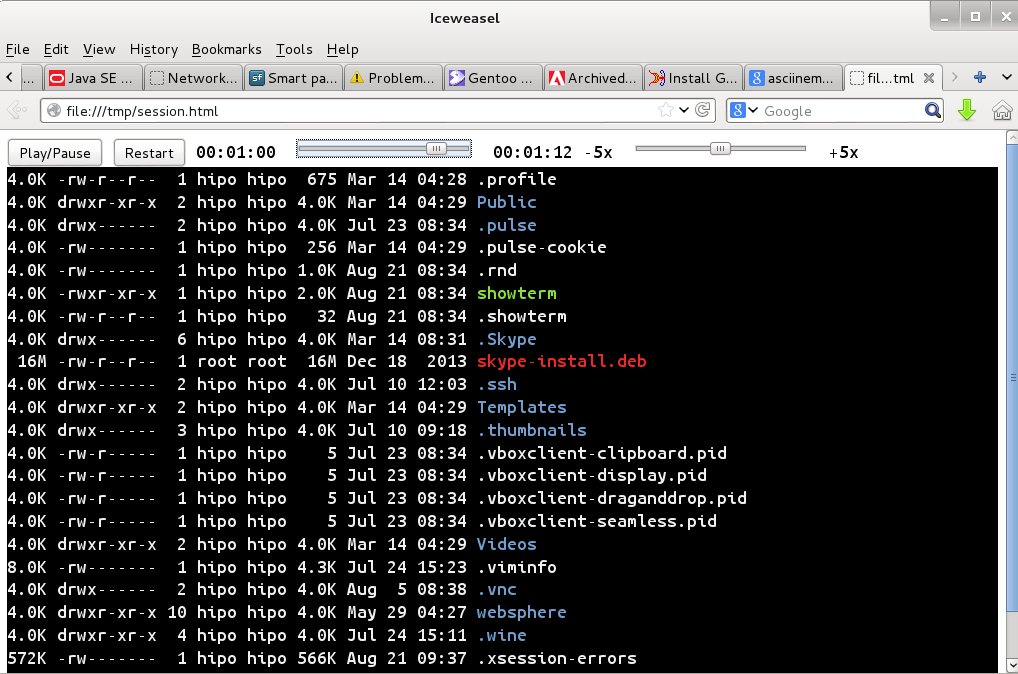
TermRecord -o /tmp/session.html


You can further access the video in a local browser in Firefox / Chrome / Epiphany type in URL address bar:

/tmp/session.html to play the video

create-video-from-terminal-console-on-gnu-linux-howto-screenshot-with-termrecord

TermRecord uses term.js javascript to create the video web player and play the video which is directly encoded inside session.html.
If you want to share the video online, place it on your webserver and you're done 🙂
Check out my TermRecord generated video terminal sample session here.
 

Adding Listing and Deleting SSL Certificates in keystore Tomcat Application server / What is keystore

Thursday, December 5th, 2013

Apache Tomcat keystore delete import list logo

 I work on ongoing project where Tomtat Application servers configured to run Clustered located behind Apache with mod_proxy configured to use ReverseProxy are used. One of customers which required a java application deployment experienced issues with application's capability to connect to SAP database.

After some investigation I figured out, the application is unable to connect to the SAP db server becuse remote host webserver running some SAP related stuff was not connecting due to expired certificate in Tomcat Keystore known also as JKS / Java Keystore– (.keystore) – which is a file containing multiple remote hosts imported certificates.

The best and shortest definition of keystore is:

Keystore entry = private + public key pair = identified by an alias

The keystore protects each private key with its individual password, and also protects the integrity of the entire keystore with a (possibly different) password.

Managing Java imported certificates later used by Tomcat is done with a command line tool part of JDK (Java Development Kit) called keystore. Keystore is usually located under /opt/java/jdk/bin/keytool. My Java VM is installed in /opt/ anyways usual location of keytool is $JAVA_HOME/bin/

Keytool has capabilities to create / modify / delete or import new SSL certificates and then Java applications can access remote applications which requires Secure Socket Layer handshake . Each certificate kept in .keystore file (usually located somewhere under Tomcat web app server directory tree), lets say – /opt/tomcat/current/conf/.keystore

1. List current existing imported SSL certificates into Java's Virtual Machine

tomcat-server:~# /opt/java/jdk/bin/keytool -list -keystore /opt/tomcat/current/conf/.keystore
password:
Command returns output similar to;

Entry type: trustedCertEntry

Owner: CN=www.yourhost.com, OU=MEMBER OF E.ON GROUP, OU=DEVICES, O=E.GP AG, C=DE
Issuer: CN=E.ON Internal Devices Sub CA V2, OU=CA, O=EGP, C=DE
Serial number: 67460001001c6aa51fd25c0e8320
Valid from: Mon Dec 27 07:05:33 GMT 2010 until: Fri Dec 27 07:05:22 GMT 2013
Certificate fingerprints:
         MD5:  D1:AA:D5:A9:A3:D2:95:28:F1:79:57:25:D3:6A:16:5E
         SHA1: 73:CE:ED:EC:CA:18:E4:E4:2E:AA:25:58:E0:2B:E4:D4:E7:6E:AD:BF
         Signature algorithm name: SHA1withRSA
         Version: 3

Extensions:

#1: ObjectId: 2.5.29.15 Criticality=true
KeyUsage [
  DigitalSignature
  Key_Encipherment
  Key_Agreement
]

#2: ObjectId: 2.5.29.19 Criticality=true
BasicConstraints:[
  CA:false
  PathLen: undefined
]

#3: ObjectId: 1.3.6.1.5.5.7.1.1 Criticality=false
AuthorityInfoAccess [
  [
   accessMethod: 1.3.6.1.5.5.7.48.2
   accessLocation: URIName: http://yourhost.com/cacerts/egp_internal_devices_sub_ca_v2.crt,
   accessMethod: 1.3.6.1.5.5.7.48.2
   accessLocation: URIName: http://www.yourhost1.com/certservices/cacerts/egp_internal_devices_sub_ca_v2.crt]
]

#4: ObjectId: 2.5.29.14 Criticality=false
SubjectKeyIdentifier [
KeyIdentifier [
0000: D3 52 C7 63 0F 98 BF 6E   FE 00 56 5C DF 35 62 22  .R.c…n..V\.5b"
0010: F2 B9 5B 8F                                        ..[.
]

Note that password that will be promtped has is by default changeit (in case if you don't have explicitly changed it from Tomcat's default config server.xml).

2. Delete Old expired SSL host Certificate from Java Keystore
It is good practice to always make backup of old .keystore before modifying, so I ran:

tomcat-server:~# cp -rpf /opt/tomcat/current/conf/.keystore /opt/tomcat/current/conf/.keystore-05-12-2013

In my case first I had to delete old expired SSL certificate with:

tomcat-server:~# /opt/java/jdk/bin/keytool -delete -alias "your-hostname" -v -keystore /opt/tomcat/current/conf/.keystore

Then to check certificate is no longer existent in keystore chain;
tomcat-server:~# /opt/java/jdk/bin/keytool -list -keystore /opt/tomcat/current/conf/.keystore

-keystore – option is obligitory it does specify where keystore file is located
-list – does list the certificate
-v – stands for verbose


3. Finally to import new SSL from already expored via a browser url in keystore

tomcat-server:~# /opt/java/jdk/bin/keytool -importcert -file /tmp/your-hostname.cer -alias your-hostname.com -keystore /opt/tomcat/current/conf/.keystore

More complete information on how to deal with keystore is available from Apache Tomcat's SSL Howto – a must read documentation for anyone managing Tomcat.

Fix vnstat error “eth0: Not enough data available yet.” on Debian GNU / Linux

Monday, November 21st, 2011

Vnstat GNU Linux console terminal traffic statistics logo

After installing vnstat to keep an eye on server IN and OUT traffic on a Debian Squeeze server. I used the usual:

debian:~# vnstat -u -i eth0

In order to generate the initial database for the ethernet interface used by vnstat to generate its statistics.

However even though /var/lib/vnstat/eth0 got generated with above command statistics were not further generated and trying to check them with command:

debian:~# vnstat --days

Returned the error message:

eth0: Not enough data available yet.

To solve the eth0: Not enough data available yet. message I tried completely removing vnstat package by purging the package e.g.:

debian:~# apt-get --yes remove vnstat
...
debian:~# dpkg --purge vnstat
...

Even though dpkg –purge was invoked /var/lib/vnstat/ refused to be removed since it contained vnstat’s db file eth0

Therefore I deleted by hand before installing again vnstat:

debian:~# rm -rf /var/lib/vnstat/

Tried installing once again vnstat “from scratch”:

debian:~# apt-get install vnstat
...

After that I tried regenerating the vnstat db file eth0 once again with vnstat -u -i eth0 , hoping this should fix the error but it was no go and after that the error:

debian:~# vnstat --hours
eth0: Not enough data available yet.

persisted.

I checked in Debian bugs mailing lists and I found, some people complaining about the same issue with some suggsetions on how the error can be work arouned, anyways none of the suggestions worked for me.

Being irritated I further removed / purged once again vnstat and decided to give it a try by installing vnstat from source
As of time of writting this article, the latest stable vnstat version is 1.11 .
Therefore to install vnstat from source I issued:

debian:~# cd /usr/local/src
debian:/usr/local/src# wget http://humdi.net/vnstat/vnstat-1.11.tar.gz
...
debian:/usr/local/src# tar -zxvvf vnstat-1.11.tar.gz
debian:/usr/local/src# cd vnstat-1.11
debian:/usr/local/src/vnstat-1.11# make & make all & make install
debian:/usr/local/src/vnstat-1.11# cp examples/vnstat.cron /etc/cron.d/vnstat
debian:/usr/local/src/vnstat-1.11# vnstat -u -i eth0
Error: Unable to read database "/var/lib/vnstat/eth0".
Info: -> A new database has been created.

As a last step I put on root crontab to execute:

debian:~# crontab -u root -e

*/5 * * * * /usr/bin/vnstat -u >/dev/null 2>&1

This line updated vnstat db eth0 database, every 5 minutes. After the manual source install vnstat works, just fine 😉