Posts Tagged ‘capability’
Tuesday, October 12th, 2010 I'm studying Project Management, right now. In that spirit of thoughts I and a couple of other guys are building a Project Plan.
As it Project Plan it's necessary to put a GANTT Chart in it to show visually the project timeline (the phases), the duration and the inter-relation between the different tasks which leads the project to an actual completion.
After a bit of thorough research online on available software to deal with project management and particularly, ones that are capable to build a GANTT charts on Linux / BSD.
I've come with the following list of software capable to be a substitute for the Microsoft Project software.
Redmine GANTT Chart
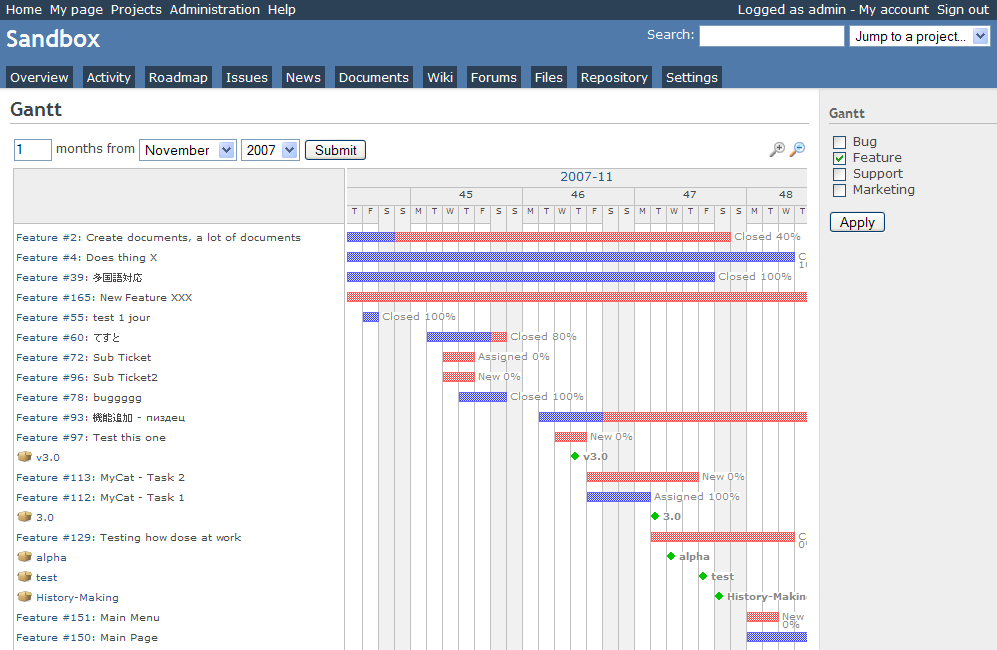
1. Gantt Project
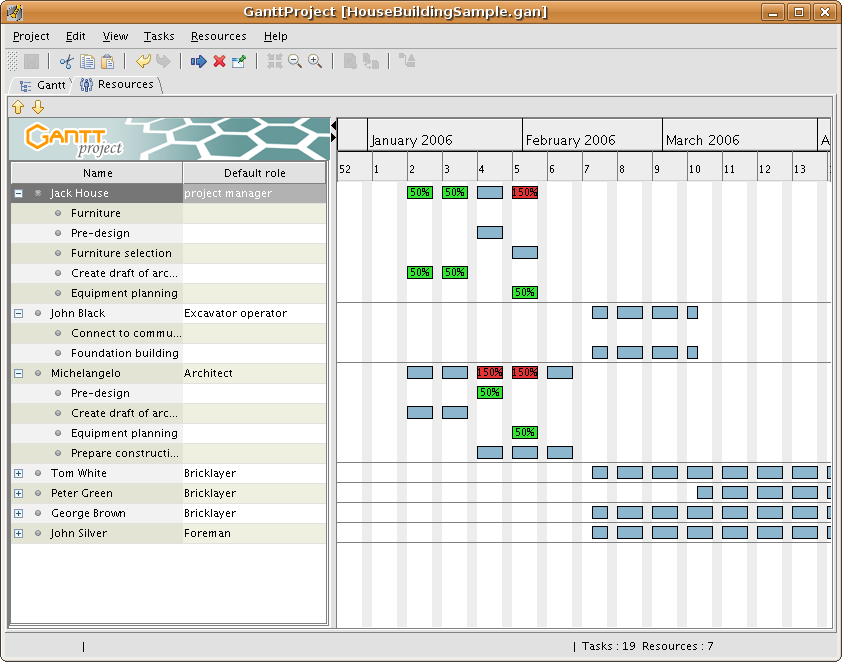 GANTTProject Chart
2. Gnome Planner
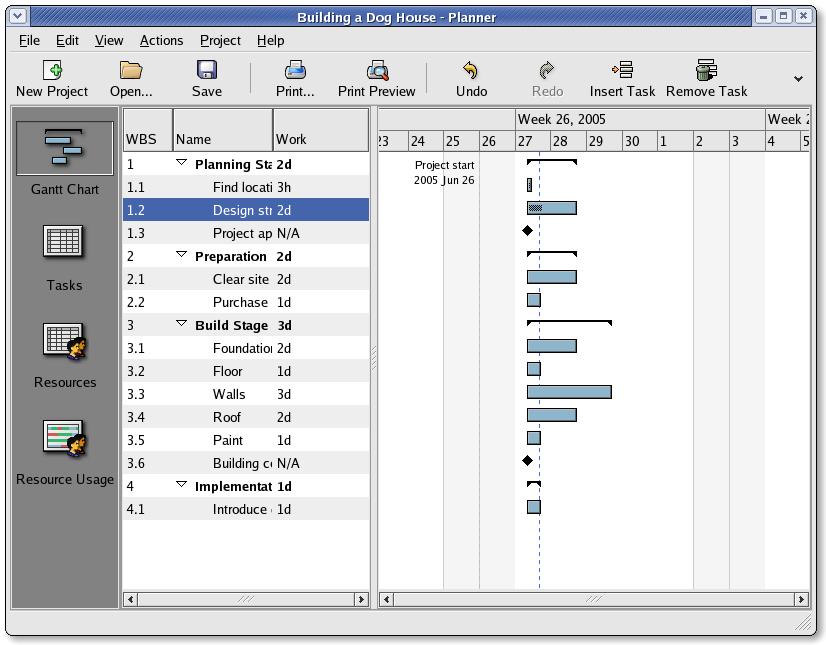 Planner GANTT Chone Chart
3. Task Juggler Project Manager with GANTT Capability for (KDE)
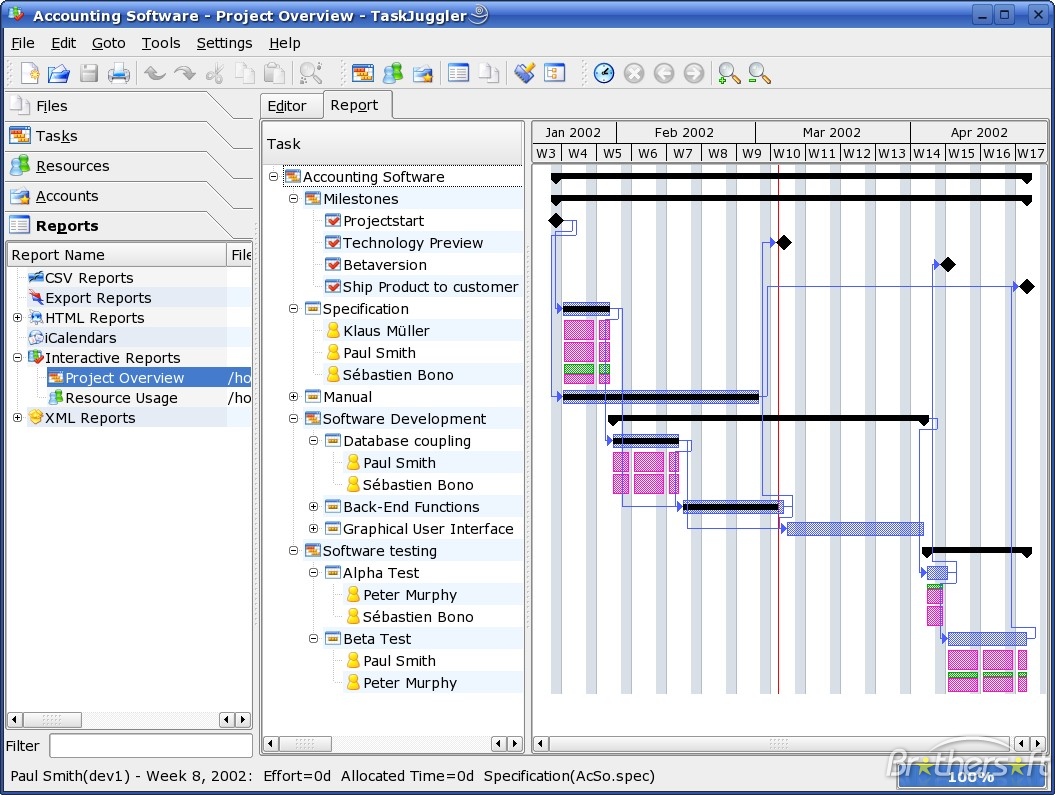 Task Juggler
4. JxProject – This software is not free, though it can be considered almost free
Take a look also at:
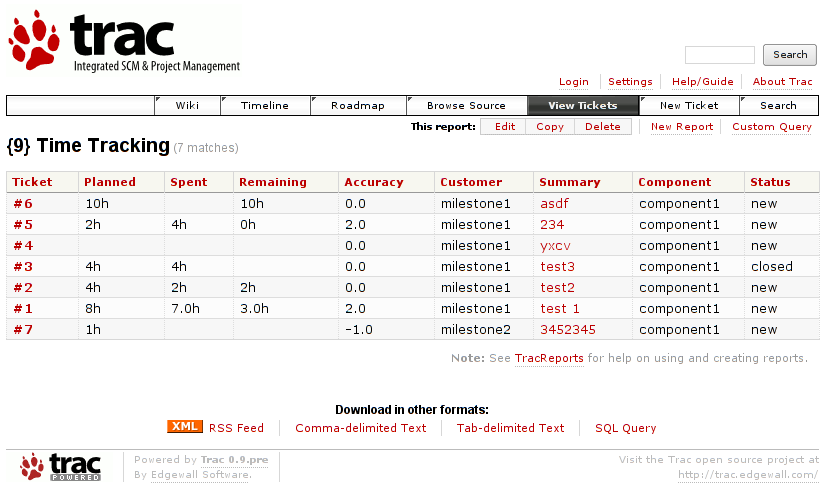
5. Trac , though it doesn't really support GANTT charts it's a lovely software to be used for PM.
Another option you have is to try out:
6. PHProjekt
Update 20.09.2016 – PHPProject Old download link is no longer active
It is this link http://www.phprojekt.com/, but the page doesn’t seem to be active any more. I thought you might want to update.
If you are looking for an alternative please check out http://wiht.link/PHProjekt-PM, it may make a suitable replacement.
Kind Regards,
Tom Wilcox
That piece of softwre really looks promising, especially if we consider that it's web based and how much essential is today to have an anline tools for doing the ordinary desktop jobs.
You can even check an online demo of the PHPProjekt software here
If you're a type of KDE user you definitely has to try out Kplato
As I've tested the software the software is easy to be used, however it still is missing some essential parts that Microsoft Project includes so it's not 100% substitute.
Also it's not able to open Microsoft Project (MPP) files, neither able to save the charts in the .mpp format.
Moving ahead I've came across DotProject 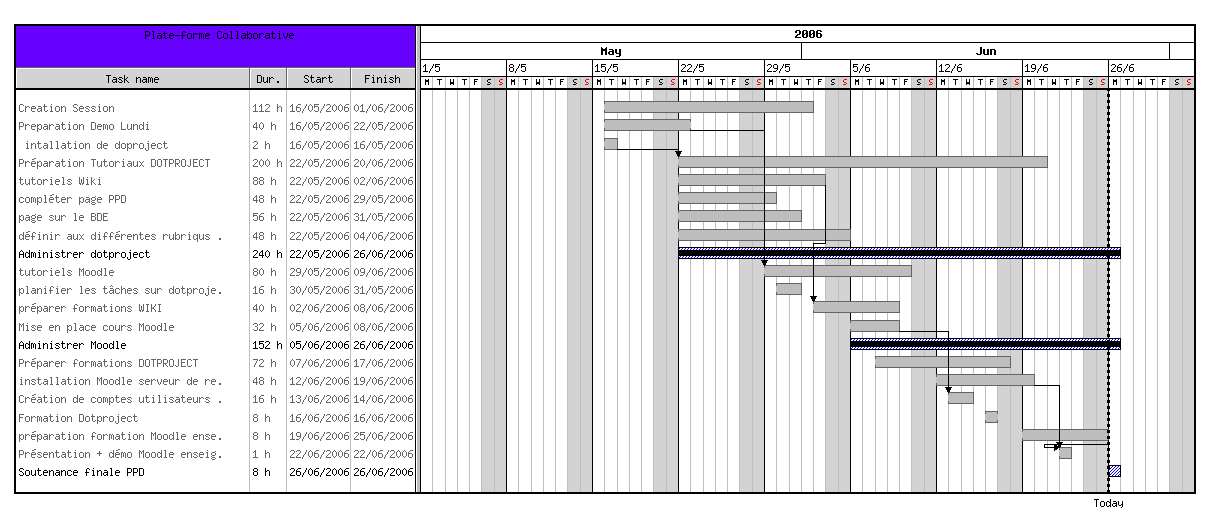
DottProject Gantt Chart
I haven't took the time to test it myself but however, as I go through the software website the project looked quite good.
Lastly you can take a look at: 7. PStricks as a mean of project management, however I think it doesn't support GANTT chart building.
>
Tags: anline, available software, BSD, building, capability, Chart, check, completion, demo, Desktop, doesn, Drawing GANTT Charts and Project Management on Linux, duration, GANTT, gantt chart, gantt charts, Gnome, jobs, Juggler, Linux, linux microsoft, look, Microsoft, Microsoft Project, microsoft project software, mpp, mpp format, online, option, page doesn, PHProjekt, piece, project, project management, project mpp, Project Plan, project timeline, software, software website, Spirit, substitute, support, time, trac, type, unix
Posted in Business Management, Curious Facts, Everyday Life, Linux | 1 Comment »
Tuesday, May 31st, 2011 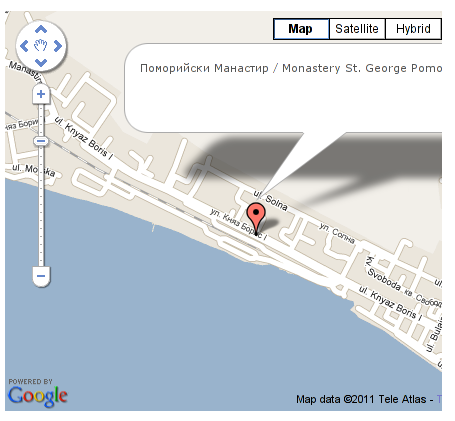
It’s a wise idea that every website has a address location map on it’s website, for that reason Google maps is just great.
To install Google maps capability to joomla one can use a plugin called Google Maps .
You can straighly download Joomla’s Googlemap plugin from here
Afterwards use Extension Manager to install the plugin e.g. follow:
Extensions -> Install/Uninstall (Choose File)
and click on Upload File & Install button.
To further enable and configure the Joomla Googlemap plugin you will have to go to the location:
Extensions -> Plugin Manager
Therein you will have to find and enable the Google Maps plugin which is to be found in the column named Plugin Manager
On my Joomla installation the plugin was located in the second page with modules, so if you don’t find the module on the listing with modules on the first page, make sure you scroll to the bottom of the page and click on Next button.
Therein in the list you will most likely notice Google Maps use the Enable button to enable it.
Next step is to configure the plugin, to do so press on the plugin name Google Maps
All configuration necessery here is to place Googlemaps API Key in the respective field (you will see it among config options).
Issuing a new Google Maps api key takes just few seconds, if you already have a gmail account just go to http://code.google.com/apis/maps/signup.html and take few seconds to issue the key.
You will get the key right on your gmail account after being issued (to repeat myself issuing takes few seconds so no worrier here).
Once having the key place it in the Googlemaps API Key field and configuring Address (which is one of the list of many options the plugin provides) you will be done with configuration.
To display a google map the location you just configured go to the Article Manager , select the article where you want the google mapslocation picture of your address to appear and type in the Article something like:
{mosmap|text='Exact street address location'|zoom='15'|zoomType='Large'|zoomNew='0'}
After you saved the article a very nice Google map showing you the location’s streets will appear on your web page in the article link where placed.
You can further conifgure a number of things related to the google maps just embedded into joomla, one thing you might want to play with is the zoom level.You see in below’s code is equal to 15, e.g. zoom=’15’
Set it to another one if you want to regulate your googlemaps zoom level.
For more thoroughful options take a look at the extensive plugin documentation and play with the many settings
Tags: address location, amp, article manager, Button, capability, config, config options, download, Extension, Gmail, gmail account, google, google map, google maps, Googlemap, Googlemaps, Install, installation, key, key field, level, location, ManagerTherein, Maps, necessery, page, plugin, plugin name, reason, street, type, upload, wise idea, worrier
Posted in Joomla, Various, Web and CMS | 2 Comments »
Tuesday, June 28th, 2011 Did you have to regenerate your SSL certificate for your mail server’s IMAP and IMAP SSL service?
Did you have to find out if the newly installed certificates are fine after install?
Here is how:
root@server-hosting [/usr/local ]# openssl s_client -connect imap.example.com:993

root@server-hosting [/usr/local ]# openssl s_client -connect imap.example.com:143 -starttls imap
The output returned by this two commands will be the imap and imaps configured certificates as well as extensive info concerning the installed SSL, the last chunk of info to be spit is most crucial to know if certificate is fine.
It should be something like:
...

New, TLSv1/SSLv3, Cipher is AES256-SHA

Server public key is 1024 bit

Secure Renegotiation IS supported

Compression: NONE

Expansion: NONE

SSL-Session:

Protocol : TLSv1

Cipher : AES256-SHA

Session-ID: 0B69E91022CB56D64F56CFA08405944D9C4C0069EE4097890B98F1406CF084D5

Session-ID-ctx:

Master-Key: 13745B94E0C5A0604EB7529E7409251961DFD5F4134F3A8F

Key-Arg : None

Start Time: 1309265383

Timeout : 300 (sec)

Verify return code: 18 (self signed certificate)

---

. OK CAPABILITY completed

closed
Tags: AES, aes256, Arg, bitSecure, capability, certificate, Certificates, chunk, Cipher, client, com, DFD, ID-ctx, imap, imaps, info, key, mail server, Master, master key, nbsp nbsp nbsp nbsp nbsp, NONESSL-Session, openssl, Protocol, public key, renegotiation, root, root server, session, session id, SHA, something, ssl certificate, ssl service, sslv3, Timeout
Posted in Linux, System Administration | 1 Comment »
Monday, June 20th, 2011 
Being a remote system administrator for many years from now, I’ve experienced many times sudden Linux crashes, mostly caused by system hardware overloads.
This is a common thing especially on busy Web Servers with (Apache/MySQL). Situations like this are really messy and many times in order to bringt the server back online, one has to either physically go to the Data Center or contact the Technical support to request a server reboot.
In this terrible times, data loss might occur if the Server reset button is used to cold reboot it.
Happily in 99% of the cases the data loss which might occur could be prevented with Linux’s kernel capability to support the Magic SysRQ key !
Having the Magic SysRQ key functionality being supported in Linux in past times wasn’t that common, thanksfully these days this has changed andlmost every Linux distrubution supports this handy feature.
Now you might wonder what is the magic with those Magic SysRQ key ?
Let me explain, Magic SysRQ is a kernel level functionality which supports even completely crashed Linux systems with the horrifying:
Kernel Panic
message to be properly shutdown.
Using Magic SysRQ instead of the mostly used indiced cold reboots is really advantageous, as all the opened files by programs on the crashed server which hanged will be properly saved and closed and thus possible data loss caused by the sudden server crash will be minimized.
One other good thing about the Magic SysRQ Key keyboard combination is that initiating the Magic SysRQ could be made blindly (no need for server monitor or display to present any error messages on the failed server).
Now to check if the magic sysrq is enabled on a server one should issue the command:
Here are some Magic SysRQ keyboard combinations one can use in case of server failure:
ALT+SYSRQ+M to dump memory info;

ALT+SYSRQ+P to dump processes states;

ALT+SYSRQ+S to sync disks;

ALT+SYSRQ+U to unmount all mounted filesystems;

ALT+SYSRQ+E to terminate processes;

ALT+SYSRQ+I to kill all processes

ALT+SYSRQ+U to try to unmount once again;

ALT+SYSRQ+B to reboot.
I would skip to explain what each of the keyboard combinations will do as I believe the above description explains it well.
One classics of combinations one might want to issue on a failed Linux server supporting the Magic SysRQ would be:
ALT+SYSRQ+R

ALT+SYSRQ+E

ALT+SYSRQ+I

ALT+SYSRQ+S

ALT+SYSRQ+U

ALT+SYSRQ+B
The ALT+SYSRQ+REISUB key combination is very popular among system administrators.
Also Magic SysRQ is heavily used by kernel developers as it includes many handy debugging options.
If you try the Magic SysRQ key on older servers and you realize it doesn’t react you will have to recompile the linux kernel and enable the CONFIG_MAGIC_SYSRQ kernel time compilation option.
The Magic SysRQ can also be initiated remotely on a properly running server 😉 by initiating:
server:~# echo b > /proc/sysrq-trigger
This command would be useful if you want to just have fun and test that magic sysrq works on your system for sure 😉
To sum it up using the Magic SysRQ will guarantee your locked up, server a Safe Reboot and will hopefully save you a lot of time for backups recovery.
Tags: apache mysql, Button, capability, center, crash, data, description, distrubution, EALT, error messages, feature, filesystems, handy feature, info, kernel level, key, keyboard combination, keyboard combinations, level, level functionality, memory info, need, RALT, Reboot, reset, reset button, Safely, server crash, server failure, server reset, servers, sync, system administrator, system hardware, Technical, technical support, terrible times, time, UALT, web servers
Posted in Linux, System Administration | 5 Comments »
Thursday, April 21st, 2011 As I’m manually configuring a Xserver via xorg.conf I have noticed a block of code in:
Section "Monitor"

Identified "Generic Monitor"

Option "DPMS"

EndSection
That triggered my curiousity to research further what is DPMS . A very quick google search revealed that DPMS’s purpose is to communicate to communicate between the monitor and the computer, to make the computer turn off the (CRT or LED) based monitor if the computer is not used
Thus in short to rephrase DPMS is a power saving handy Xorg feature. I many custom configured xorg.conf like the mine I’m building right now does not include DPMS as many people doesn’t have idea what DPMS is and how to enable it.
DPMS is also an interface to the Energy start power-saving capability if not all, most of the modern day monitor screens.
DPMS enables the Xserver to control automatically the computer screen and thus reduces the overall computer power consumption.
To enable the use of DPMS on my Linux, all I had to do is place a couple of configuration directives in my xorg.conf .:
Here is how I enabled DPMS in my Xorg server:
1. Edit with a text editor /etc/X11/xorg.conf
2. Find the Monitor Section , e.g.:
Section "Monitor"

....

EndSection
3. Add inside the Monitor Section
Options "DPMS" "true"
4. Lookup for the ServeryLayout section , e.g.:
Section "ServerLayout"

...

EndSection
5. Place inside the ServerLayout section For instance the following options:
Option "StandbyTime" "20"

Option "SuspendTime" "10"

Option "OffTime "25"
You might like to change the options StandbyTime, SuspendTIme or OffTime to match your likings.
6. As a last step restart the Xorg server.
Press Ctrl+Alt+BackSpace or by issuing:
host:~# pkill -HUP X
Test that DPMS is loaded properly by reviewing /var/log/Xorg.0.log for example:
host:~# grep -i /var/log/Xorg.0.log

(II) Loading extensions DPMS
Tags: Alt, backspace, capability, computer power consumption, computer screen, configuration directives, consumption, CRT, curiousity, custom, dpms, feature, google, instance, interface, likings, Linux, OffTime, option, place, power, Press, rephrase, screen, screens, Search, server press, StandbyTime, text, turn, Xorg, xserver, xtest
Posted in Linux, Linux and FreeBSD Desktop, Linux Audio & Video | No Comments »

 GANTTProject Chart
  Planner GANTT Chone Chart
  Task Juggler
 ![]()


