I've faced some issues with crappy sound in some of the games I'm playing on my Debian . Also I ometimes, have issues with sound while watching movies with VLC or Totem... Sound issues with Skype are also seldomly occuring during skype calls etc. etc.
Recently I've realized many of this crappy sound issues origins from PulseAudio – the sound server GNOME desktop env uses to manage all sound just before passing it through ALSA.
I've found on the internet many suggested ways on how to workaround these issues. Many of the things suggested as workarounds, however was outdated and referred to old versions of GNOME / Pulseaudio and therefore was unusable on my Debian 6 Squeeze….
What I found most helpful is fixes and workarounds for pulseaudio list compiled by people in the Fedora community on fedorasolved.org's website – http://fedorasolved.org/Members/fenris02/pulseaudio-fixes-and-workarounds
Some of the fixes and work arounds suggeted on the above link, I have already applied, others was not applicable for Debian.
Anyways the things which I found most important and I believe many people who runs Debian need to implement from the list to solve pulseaudio crappy sound issues is concluded in the below 5 steps.
1. Install few packages related to pulseaudio
apt-get install paman padevchooser paprefs pulseaudio pulseaudio-esound-compat pulseaudio-module-x11 pulseaudio-module-zeroconf pulseaudio-utils
2. Edit ~/.asoundrc and include
pcm.pulse { type pulse }
ctl.pulse { type pulse }
Quickest way is by issuing:
echo 'pcm.pulse { type pulse }' >> ~/.asoundrc

echo 'ctl.pulse { type pulse }' >> ~/.asoundrc
3. Change in the pulseaudio server configuration file ( /etc/pulse/daemon.conf ):
debian:~# vim /etc/pulse/daemon.conf
Look up for the lines:
; default-fragments = 4

; default-fragment-size-msec = 25
Substitute this two lines with:
default-fragments = 8

default-fragment-size-msec = 5
4. Enable Simultaneous Output in PulseAudio preferences
Navigate to the GNOME menus:
System -> PulseAudio Preferences
Choose the "Simultaneous Output" tab and select:
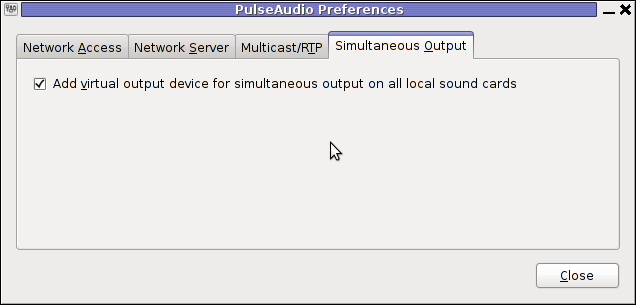
Add virtual output device for simultaneous output on all local sound cards
5. Log Off Gnome and restart PulseAudio
To load the new changed settings in /etc/pulse/daemon.conf restart of pulseaudio server is required, right after a Logoff from the current opened gnome session;
To do so LogOff with the trivial:
System -> Log Out
Login as root in console;
Press CTRL+ALT+F1, login with root and issue:
debian:~# /etc/init.d/pulseaudio restart

...
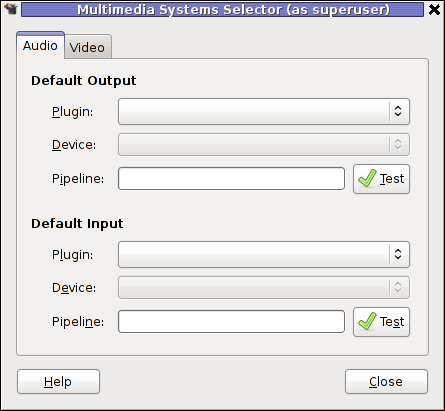
N.B.; In some cases it might be necessery to do some adjustments are made in gstreamer properties , to change settings there launch:
Tampering with gstreamer-properties used to fix for me some problems with ALSA and PulseAudio in the past, so it might be worthy to check it out and experiment a bit with it as well.
debian:~$ gstreamer-properties
Now many of the crappy sound games or applications should start working just fine. Enjoy 😉