If you need to use Virtual Machine to run some testing on heterogenous Operating Systems and you have chosen VMWare as a Virtual Machine. You will soon notice some of Virtual Machines functionality like copy between host operating system and Virtual Machine, true fullscreen mode and most importantly Copy paste between your host operating system and VMWare is not working. I'm not too much into Virtualization these days so for me it was truely shocking that a proprietary software like VMWare, claimed to be the best and most efficient Virtual Machine nowadays is not supporting copy / paste, fullscreen and copy between host and guest OS. For those arguing why I'm using VMWare at all as it is proprietary and there is already free software Virtual Machines like QEMU and Oracle's VirtualBox its simply because now I have the chance to install and use VMWare 9 Enterprise on my work place at HP with a free Corporate license – in other words I'm using VMWare just for the sake of educating myself and would always recommend VirtualBox for those looking for good substitute free alternative to VMWare.
Before trying out VMWare, I tried Virtualbox to emulate Linux on my HP work PC running Windows with VirtualBox I was having issues with keyboard not working (because of lack of support of USB, no full screen support and lack of copy / paste between OS-es), I've just recently understood this is not because Virtualbox is bad Virtualization solution but because I forgot to install VirtualBox Oracle VM VirtualBox Extension Pack which allows support for USB, enables copy paste and full screen support. The equivalent to Virtualbox Oracle VM VirtualBox in VMWare world is called VMWare-Tools and once the guest operating system is installed inside VMWare VM, its necessary to install vmware-tools to enable better screen resolution and copy paste.
In Windows Virtual Machine installation of vmware-tools is pretty straight forward you go through VMWare's menus
VM -> Install Vmware-tools
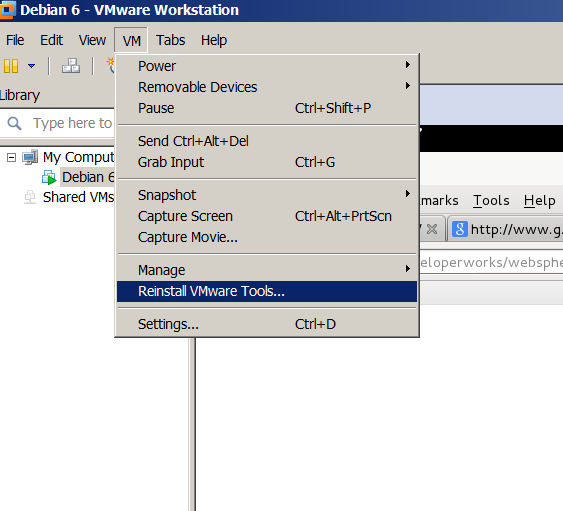
follow the instructions and you're done, however as always installing VMWare-tools on Linux is little bit more complicated you need to run few commands from Linux installed inside the Virtual Machine to install vmware-tools. Here is how vmware-tools is installed on Debian / Ubuntu / Linux Mint and rest of Debian based operating systems:
1. Install Build essentials and gcc You need to have this installed some developer tools as well as GCC compiler in order for the vmware-tools to compile a special Linux kernel module which enables extra support (integration) between the VMWare VM and the installed inside VM Linux distro
apt-get install --yes build-essential gcc

...
2. Install appropriate Linux headers corresponding to current Linux OS installed kernel
apt-get install --yes linux-headers-$(uname -r)

....
3. Mount CD (Virtual) Content to obtain the vmware-tools version for your Linux
Be sure to have first checked from VMWare menus on menus VM -> Intall Vmware Tools
This step is a little bit strange but just do it without too much questioning …
mount /dev/cdrom /mnt/

umount /media/cdrom0/

mount /media/cdrom

mount /dev/sr0 /mnt/cdrom/

mount /dev/sr0 /mnt/
Note that /dev/sr0, might already be mounted and sometimes it might be necessary to unmount it first (don't remember exactly if I unmounted it or not)
4. Copy and Untar VMwareTools-9.2.0-799703.tar.gz
cp -rpf /media/cdrom/VMwareTools-9.2.0-799703.tar.gz /tmp/

cd /tmp/

tar -zxvvf VMwareTools-9.2.0-799703.tar.gz

...
5. Run vmware-tools installer
cd vmware-tools-distrib/

./vmware-install.pl
You will be asked multiple questions you can safely press enter to answer with default settings to all settings, hopefully if all runs okay this will make VMWare Tools installed
Creating a new VMware Tools installer database using the tar4 format.
Installing VMware Tools.
In which directory do you want to install the binary files?
[/usr/bin]
What is the directory that contains the init directories (rc0.d/ to rc6.d/)?
[/etc]
What is the directory that contains the init scripts?
[/etc/init.d]
In which directory do you want to install the daemon files?
[/usr/sbin]
In which directory do you want to install the library files?
[/usr/lib/vmware-tools]
The path "/usr/lib/vmware-tools" does not exist currently. This program is
going to create it, including needed parent directories. Is this what you want?
[yes]
In which directory do you want to install the documentation files?
[/usr/share/doc/vmware-tools]
The path "/usr/share/doc/vmware-tools" does not exist currently. This program
is going to create it, including needed parent directories. Is this what you
want? [yes]
The installation of VMware Tools 9.2.0 build-799703 for Linux completed
successfully. You can decide to remove this software from your system at any
time by invoking the following command: "/usr/bin/vmware-uninstall-tools.pl".
Before running VMware Tools for the first time, you need to configure it by
invoking the following command: "/usr/bin/vmware-config-tools.pl". Do you want
this program to invoke the command for you now? [yes]
Initializing…
Making sure services for VMware Tools are stopped.
Stopping VMware Tools services in the virtual machine:
Guest operating system daemon: done
Unmounting HGFS shares: done
Guest filesystem driver: done
[EXPERIMENTAL] The VMware FileSystem Sync Driver (vmsync) is a new feature that creates backups of virtual machines. Please refer to the VMware Knowledge Base for more details on this capability. Do you wish to enable this feature?
[no]
Before you can compile modules, you need to have the following installed…
make
gcc
kernel headers of the running kernel
Searching for GCC…
Detected GCC binary at "/usr/bin/gcc-4.6".
The path "/usr/bin/gcc-4.6" appears to be a valid path to the gcc binary.
Would you like to change it? [no]
Searching for a valid kernel header path…
Detected the kernel headers at "/lib/modules/3.2.0-4-amd64/build/include".
The path "/lib/modules/3.2.0-4-amd64/build/include" appears to be a valid path
to the 3.2.0-4-amd64 kernel headers.
Would you like to change it? [no]
The vmblock enables dragging or copying files between host and guest in a
Fusion or Workstation virtual environment. Do you wish to enable this feature?
[no] yes
make: Leaving directory `/tmp/vmware-root/modules/vmblock-only'No X install found.
Creating a new initrd boot image for the kernel.
update-initramfs: Generating /boot/initrd.img-3.2.0-4-amd64
Checking acpi hot plug done
Starting VMware Tools services in the virtual machine:
Switching to guest configuration: done
VM communication interface: done
VM communication interface socket family: done
File system sync driver: done
Guest operating system daemon: done
The configuration of VMware Tools 8.6.10 build-913593 for Linux for this
running kernel completed successfully.
You must restart your X session before any mouse or graphics changes take
effect.
You can now run VMware Tools by invoking "/usr/bin/vmware-toolbox-cmd" from the
command line or by invoking "/usr/bin/vmware-toolbox" from the command line
during an X server session.
To enable advanced X features (e.g., guest resolution fit, drag and drop, and
file and text copy/paste), you will need to do one (or more) of the following:
1. Manually start /usr/bin/vmware-user
2. Log out and log back into your desktop session; and,
3. Restart your X session.
Enjoy,
–the VMware team
Found VMware Tools CDROM mounted at /mnt. Ejecting device /dev/sr0 …
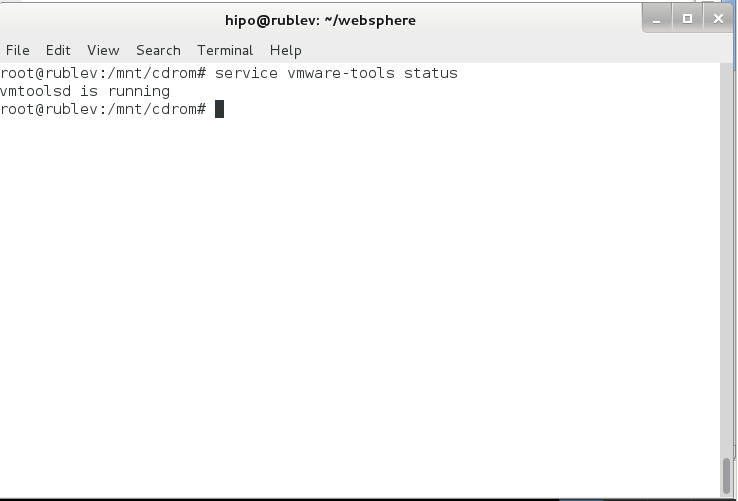
.To make sure vmware-tools compiled modules are loaded into Linux kernel inside VM, restart the Virtual Machine. Once Linux boots again and you login to gnome-terminal to check what is vmware-tools status (e.g. if properly loaded) run:
service vmware-tools status

vmtoolsd is running
This method of installing works on Debian 7 (Wheezy) but same steps should work on any Ubuntu and rest of Debian derivatives. For Redhat (RPM) based Linux distributions to install vmware-tools after mounting cdrom drive following above instructions you will have an rpm package instead of .tar.gz archive so all you have to do is install the rpm, e.g. launch smth. like:
rpm -Uhv /mnt/cdrom/VMwareTools-9.2.0-799703.i386.rpm
Cheers 😉







