Posts Tagged ‘distro’

Using GeoIP on Linux: Country-Based Filtering, Logging, and Traffic Control

Friday, January 16th, 2026

geoip-on-linux-country-based-filtering-logging-traffic-control-logo

GeoIP is one of those technologies that quietly sits in the background of many systems, yet it can be extremely powerful when used correctly. Whether you want to block traffic from specific countries, analyze access logs, or add geographic context to security events, GeoIP can be a valuable addition to your Linux toolbox.

In this article, we’ll go deeper and look at real GeoIP usage examples for:

  • Log analysis
  • Firewalls
  • Apache HTTP Server
  • HAProxy

All examples are based on typical GNU/Linux server environments.

What Is GeoIP? 

GeoIP maps an IP address to geographic data such as:

  • Country
  • City
  • ASN / ISP (depending on database)

Most modern systems use MaxMind GeoLite2 databases (

.mmdb

format).

Keep in Mind ! :
GeoIP data is approximate. VPNs, proxies, mobile networks, and CGNAT reduce accuracy. GeoIP should be treated as a heuristic, not a guarantee.

1. Installing GeoIP Databases on Linux deb based distro

On Debian / Ubuntu:

#

apt install geoipupdate

Configure

/etc/GeoIP.conf

with your MaxMind license key and run:  

# geoipupdate

Databases are usually stored in:

/usr/share/GeoIP/

2. GeoIP for Log Analysis (to get idea of where does your traffic origins from)

GeoIP with Apache HTTP Server

Apache can use GeoIP in two main ways:

  1. To do IP origin Logging 

  2. Do Access control based on IP origin

An altenartive GeoIP common use is to post-processing logs to find out attempts to breach your security.

Lets say you want to

Find top attacking countries against your SSHd service.

# grep "Failed password" /var/log/auth.log | \
awk '{print $(NF-3)}' | \
while read ip; do geoiplookup $ip; done |
\ sort | uniq -c | sort -nr


This command will provide you a visibility on attack sources georaphical Country origin

3. Installing Apache GeoIP Module

For legacy GeoIP (older systems):

# apt install libapache2-mod-geoip

For modern systems, GeoIP2 is preferred:

# apt install libapache2-mod-geoip2

Enable the module:

# a2enmod geoip2
# systemctl reload apache2

4. Configure GeoIP Logging in Apache (basic config)

Add country code to access logs:

LogFormat "%h %l %u %t \"%r\" %>s %b %{GEOIP_COUNTRY_CODE}e" geoip
CustomLog /var/log/apache2/access.log geoip

This allows you to analyze traffic by country later without blocking users.

5. Country-Based Filter Blocking in Apache based on IP origin

Example: allow only selected countries:

<IfModule mod_geoip2.c>
SetEnvIf GEOIP_COUNTRY_CODE ^(BG|DE)$ AllowCountry
Deny from all
Allow from env=AllowCountry
</IfModule>

Use this carefully. Blocking at the web server layer is better than firewall-level blocking, but still risky if you have global users.

6. Apply GeoIP to Apache Virtual Host

You can apply GeoIP rules per site:

<VirtualHost *:80>
ServerName example.com
<IfModule mod_geoip2.c>
SetEnvIf GEOIP_COUNTRY_CODE CN BlockCountry >
Deny from env=BlockCountry
</IfModule>
</VirtualHost>

This is useful when only specific applications need filtering.

Firewall vs Application Layer GeoIP (Pros and Cons)

Layer

Pros

Cons

Firewall

Early blocking

Hard to debug

Apache

Flexible per-site rules

App overhead

HAProxy

Centralized control

Requires careful config

Logs only

Safest

No blocking

7. Apply GeoIP to HAProxy

HAProxy is an excellent place to apply GeoIP logic because:

  • It sits in front of applications
  • ​Rules are fast and explicit
  • Logging is centralized

a. Preparing GeoIP Filtering to HAProxy service

HAProxy supports GeoIP2 via Lua or native ACLs using

.mmdb

Example directory:

/usr/share/GeoIP/GeoLite2-Country.mmdb

b. GeoIP-Based Access Control Lists ( ACLs ) in HAProxy

Basic country-based blocking:

frontend http_in
bind *:80

acl from_china src -m geoip CN
acl from_russia src -m geoip RU

http-request deny if from_china
http-request deny if from_russia

default_backend web_servers

This blocks traffic early, before it hits Apache or nginx.

c. GeoIP-Based Routing across different haproxy backends

Instead of blocking, you can route traffic differently:


acl eu_users src -m geoip DE FR NL
use_backend eu_backend if eu_users
default_backend global_backend

This is useful for:

  • Geo-based load balancing
  • Regional content
  • Legal compliance separation

d. GeoIP Logging config for HAProxy

Add country code to logs:

log-format "%ci:%cp [%t] %ft %b %s %TR/%Tw/%Tc/%Tr/%Ta %ST %B %CC"

(%CC = country code)

This makes traffic analysis extremely efficient.

Keep in Mind !

Use HAProxy or web server level for enforcement, and firewall GeoIP only when absolutely necessary.

8. Fail2ban + GeoIP: Smarter Bans, Better Context

Fail2ban is excellent at reacting to abusive behavior, but by default it only sees IP addresses, not where they come from. Adding GeoIP allows you to:

  • Tag bans with country information
  • Apply different ban policies per region
  • Detect unusual behavior patterns

a. GeoIP-Enriched Fail2ban Logs

Fail2ban itself doesn’t natively evaluate GeoIP rules, but you can enrich logs post-ban.

Example action script (

/etc/fail2ban/action.d/geoip-notify.conf

):


[Definition]
actionban = echo "Banned from $(geoiplookup | cut -d: -f2)" >> /var/log/fail2ban-geoip.log
Enable it in a jail:
[sshd]
enabled = true
action = iptables[name=SSH] geoip-notify

Enable it in a jail:

[sshd]

enabled = true action = iptables[name=SSH] geoip-notify

Resulting log entry:

Banned 185.220.101.1 from Germany

This provides visibility without changing ban logic — a safe first step.


b. Use GeoIP-Aware Ban Policies 

You can also adjust ban times based on country.

Example strategy:

  • Short ban for local country
  • Longer ban for known high-noise regions

This is usually implemented via multiple jails and post-processing scripts rather than direct GeoIP matching inside Fail2ban.

Best practice:
Let Fail2ban do behavior detection — let GeoIP provide context, not decisions.

9. GeoIP with nftables (Linux Modern Firewall Layer)

iptables +

xt_geoip

is considered legacy. On modern systems, nftables is the preferred approach.

a. Using GeoIP Sets in nftables

nftables does not natively include GeoIP, but you can integrate GeoIP via generated IP sets.

Workflow:

  1. Convert GeoIP country IP ranges into nftables sets

  2. Load them dynamically

Example set definition:


table inet filter {
set geo_block {
type ipv4_addr
flags interval
}
}

Populate the set using a script:

nft add element inet filter geo_block { 1.2.3.0/24, 5.6.0.0/16 }

Then apply it:


chain input {
type filter hook input priority 0;
ip saddr @geo_block drop
}

b. Automating GeoIP ->  nftables

Typical automation pipeline:

GeoLite2 → country CSV → IP ranges → nftables set

Run this daily via cron.

Warning:

  • Large country sets = memory usage
  • Firewall reloads must be atomic
  • Test on non-production systems first

10. GeoIP Dashboard: Turning Logs into Insight

Blocking is optional — insight is mandatory.

a. Simple GeoIP Log Dashboard (CLI-Based)

Apache example:

# awk '{print $NF}' /var/log/apache2/access.log | \
sort | uniq -c | sort -nr

Where $NF contains country code.

Sample Result:

1243 US

987 DE

422 FR

310 CN

This already tells a story.

b. Visual Dashboard with ELK / Grafana

For larger environments:

HAProxy / Apache -> JSON logs Enrich logs with GeoIP

Send to:

  • ELK Stack
  • Loki + Grafana
  • Graylog

Metrics you want:

  • Requests per country
  • Errors per country
  • Bans per country
  • Login failures per country

This helps distinguish:

  • Marketing traffic
  • Legit users
  • Background Internet noise

11.  Create a Layered GeoIP Strategy

A sane, production-ready model using GeoIP would include something like:

  1. Logging first
    Apache / HAProxy logs with country codes

  2. Behavior detection
    Fail2ban reacts to abuse

  3. Traffic shaping
    HAProxy routes or rate-limits

  4. Firewall last
    nftables drops only obvious garbage

GeoIP is strongest when it supports decisions, not when it makes them alone.

12. Best Practices to consider

  • Prefer visibility over blocking
  • Avoid blanket country bans
  • Always log before denying

Combine GeoIP with:

  • Fail2ban
  • Rate limits
  • CAPTCHA or MFA
  • Keep GeoIP databases (regularly) updated
  • Test rules with real IPs before deploying

13. Common Mistakes to Avoid

Blocking entire continents Using GeoIP as authentication Applying firewall GeoIP without logs Forgetting database updates Assuming GeoIP accuracy

Close up

GeoIP is not a silver bullet against vampire attacks – but when used thoughtfully, it becomes a powerful signal enhancer and can give you a much broader understanding on what is going on inside your network traffic.

Whether you’re using it to filter out segment of evil intruders based on logs, routing traffic intelligently, or filtering obvious abusea, GeoIP fits naturally into a layered security model and is used across corporations and middle and even small sized businesses nowadays.

Used conservatively, GeoIP follows the classic Unix philosophy:

Small datasets, Simple rules, Real-world effectiveness, combined with rest of tools it gives info and ways to protect better your networks and server infra.

yum search file in all installable RPM, find out which rpm package provides binary file or missing library dependency on CentOS / RHEL / Fedora

Friday, August 23rd, 2024

images/centos-rhel-yum-clean-var-cache-yum

Sometimes if you have a missing library or a file you know should be available via an rpm but you're not sure which RPM you have to install you have to look up for library or binary file amongs all available installable r[ms on Redhat Linux / CentOS / Fedora or other RPM based distro.

It is really annoying especially, if you try to install an rpm binary and the package does not install due to missing dependency library. Having a missing dependency package could happen, if you use some custom internal prepared repository that is mirroring from original rpm repositories and the RPM Repositories are situated behind a DMZ firewall network (such scenarios are common for corporations and IT companies).
 
Finding out which file is provided by which package on Debian / Ubuntu and other deb based linux distributions is easy and done via the

# apt-file search filename

Thus if you're a system administrator coming from a Debian GNU / Linux sysadmin realm into the wonderful world of redhats, you will want to have an alternative to apt-file tool. You will be happy to find out that that this tedious task is easily done in RPM based Linux and is integrated straight into yum package manager too.

The command to search which rpm package provides a file is:

# yum whatprovides 'nc'

[root@rhel-linux ~]# yum whatprovides nc
Loaded plugins: fastestmirror, versionlock
Loading mirror speeds from cached hostfile
2:nmap-ncat-6.40-19.el7.x86_64 : Nmap's Netcat replacement
Repo        : base
Matched from:
Provides    : nc


2:nmap-ncat-6.40-19.el7.x86_64 : Nmap's Netcat replacement
Repo        : @base
Matched from:
Provides    : nc


yum whatprovides search_file_name can be also invoked with its shortcut yum provides 'search_file_name'

[root@rhel-server ~]# yum provides '/bin/ls'
Loaded plugins: fastestmirror, versionlock
Loading mirror speeds from cached hostfile
coreutils-8.22-24.el7.x86_64 : A set of basic GNU tools commonly used in shell scripts
Repo        : base
Matched from:
Filename    : /bin/ls

coreutils-8.22-24.el7_9.2.x86_64 : A set of basic GNU tools commonly used in shell scripts
Repo        : updates
Matched from:
Filename    : /bin/ls

 Here is another example:

[root@rhel-server ~]# yum -q provides '*lesspipe.sh*'
less-458-9.el7.x86_64 : A text file browser similar to more, but better
Repo        : base
Matched from:
Filename    : /usr/bin/lesspipe.sh

source-highlight-3.1.6-6.el7.i686 : Produces a document with syntax highlighting
Repo        : base
Matched from:
Filename    : /usr/bin/src-hilite-lesspipe.sh

source-highlight-3.1.6-6.el7.x86_64 : Produces a document with syntax highlighting
Repo        : base
Matched from:
Filename    : /usr/bin/src-hilite-lesspipe.sh

spirv-tools-2019.1-4.el7.x86_64 : API and commands for processing SPIR-V modules
Repo        : epel
Matched from:
Filename    : /usr/bin/spirv-lesspipe.sh

You can search for any file and if the RPm repository is defined under /etc/yum/repos.d/* and enabled, yum whatprovides command should be able to find it and tell you which RPM package you have to install to have the file installed Redhat way.

  • You can list all enabled RPM repositories with cmd:
     

[root@rhel-server ~]# yum repolist enabled
Loaded plugins: fastestmirror, versionlock
Loading mirror speeds from cached hostfile
repo id                                                   repo name                                                                      status
3party                                                    Third party packages – x86_64                                                   2,631
base/7/x86_64                                             CentOS-7 – Base                                                                10,072
cr/7/x86_64                                               CentOS-7 – CR                                                                       0
epel/7/x86_64                                             EPEL packages for RedCent 7 – x86_64                                           13,791
extras/7/x86_64                                           CentOS-7 – Extras                                                                 526
updates/7/x86_64                                          CentOS-7 – Updates                                                              5,802
zabbix-6.0                                                Zabbix 6.0 repo                                                                   429
repolist: 33,251
 

  • To list disable RPM repositories:
     

# yum repolist disabled


To list all present available repositories that could be enabled and are set via the /etc/yum.repos.d/* configs

# yum repolist all

GUI wep/wpa cracking through Gerix Wifi Cracker NG (GUI for cracking wireless networks)

Thursday, December 10th, 2009

gerix-wifi-cracker-hack-into-wireless

I found a neat program that facilitates work on cracking
a wep or wpa secured wireless network. The program is called
Gerix Wifi Cracker NG and is a part of the
backtrack penetration testinglinux distro
Gerix Wifi Cracker itself is located here , it's cool cause the author even has prepared a deb
package with the nifty GUI wireless cracker
. The slogan of the soft is also a killer,it reads:
"The software that even your grandmother knows how to use!",
a bunch of nice granda's pictures are included as well 🙂

Linux: How to see / change supported network bandwidth of NIC interface and get various eth network statistics with ethtool

Monday, January 19th, 2015

linux-how-to-see-change-supported-network-bandwidth-of-NIC-interface-and-view-network-statistics
If you're a novice Linux sysadmin and inherited some dedicated servers without any documentation and hence on of the first things you have to do to start a new server documentation is to check the supported TCP/IP network speed of servers Network (ethernet) Interfaces. On Linux this is very easy task to verify the speed of LAN card supported Local / Internet traffic install ethtool (if not already preseont on the servers) – assuming you're dealing with Debian / Ubuntu Linux servers.

1. Install ethtool on Deb and RPM based distros

dedi-server1:~# apt-cache show ethtool|grep -i desc -A 3
Description: display or change Ethernet device settings
 ethtool can be used to query and change settings such as speed, auto-
 negotiation and checksum offload on many network devices, especially
 Ethernet devices.

dedi-server1:~# apt-get install –yes ethtool
..

ethtool should be installed by default on CentOS / Fedora / RHEL and  syntax is same like on Debs. If you happen to miss ethtool on any (SuSE) / RedHat / RPM based distro install it with yum

[root@centos:~] # yum -y install ethtool


2. Get ethernet configurations

To check the current eth0 / eth1 / ethX network (Speed / Duplex) and other network related configuration configuration:
 

dedi-server5:~# ethtool eth0

Settings for eth0:
        Supported ports: [ TP ]
        Supported link modes:   10baseT/Half 10baseT/Full
                                100baseT/Half 100baseT/Full
                                1000baseT/Full
        Supports auto-negotiation: Yes
        Advertised link modes:  10baseT/Half 10baseT/Full
                                100baseT/Half 100baseT/Full
                                1000baseT/Full

        Advertised pause frame use: No
        Advertised auto-negotiation: Yes
        Speed: 1000Mb/s
        Duplex: Full
        Port: Twisted Pair
        PHYAD: 1
        Transceiver: internal
        Auto-negotiation: on
        MDI-X: off
        Supports Wake-on: pumbag
        Wake-on: g
        Current message level: 0x00000001 (1)
        Link detected: yes

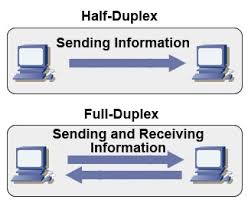
Having a NIC configured to act as Duplex is very important as Duplex communication enables LAN card to communicate both sides (Sent / Receive) packets simultaneously.

full-duplex-half-duplex-explained-picture

Probably most interesting parameters for most admins are the ones that are telling whether the NIC UpLink is 10megabyte / 100 megabyte or 1Gigabyte as well as supported Receive / Send ( Transfer ) speeds of LAN, a common useful ethtool admin use to just show current LAN ethernet interface speed:

server-admin1:~# ethtool eth0 |grep -i speed
        Speed: 1000Mb/s


To get info about NIC (kernel module / driver) used with ethtool:

dedi-server3:~# ethtool -i eth0 driver: e1000e
version: 1.2.20-k2
firmware-version: 1.8-0
bus-info: 0000:06:00.0

3. Make LAN Card blink to recognize eth is mapped to which Physical LAN

Besides that ethtool has many other useful use cases, for example if you have a server with 5 lan or more LAN cards, but you're not sure to which of all different EthX interfaces correspond, a very useful thing is to make eth0, eth1, eth2, eth3, etc. blink for 5 seconds in order to identify which static IP is binded physically to which NIC , here is how:

ethtool -p eth0 5


Then you can follow the procedure for any interface on the server and map them with a sticker 🙂

Ethtool is also useful for getting "deep" (thorough) statistics on Server LAN cards, this could be useful to identify sometimes hard to determine broadcast flood attacks:
 

4. Get network statistics with ethtool for interfaces
 

dedi-server5:~# ethtool -S eth0|grep -vw 0
NIC statistics:
     rx_packets: 6196644448
     tx_packets: 7197385158
     rx_bytes: 2038559235701
     tx_bytes: 8281206569250
     rx_broadcast: 357508947
     tx_broadcast: 172
     rx_multicast: 34731963
     tx_multicast: 20
     rx_errors: 115
     multicast: 34731963
     rx_length_errors: 115
     rx_no_buffer_count: 26391
     rx_missed_errors: 10059
     tx_timeout_count: 3
     tx_restart_queue: 2590
     rx_short_length_errors: 115
     tx_tcp_seg_good: 964136993
     rx_long_byte_count: 2038559235701
     rx_csum_offload_good: 5824813965
     rx_csum_offload_errors: 42186
     rx_smbus: 383640020

5. Turn on Auto Negotiation and change NIC set speed to 10 / 100 / 1000 Mb/s

Auto-negotiation is important as an ethernet procedure by which two communication devices (2 network cards) choose common transmission parameters such as speed, duplex mode, and flow control in order to achieve maximum transmission speed over the network. On 1000BASE-T basednetworks the standard is a mandatory. There is also backward compatability for older 10BASE-T Networks.

a) To raise up NIC to use 1000 Mb/s in case if the bandwidth was raised to 1Gb/s but NIC settings were not changed:

dedi-server1:~# ethtool -s eth0 speed 1000 duplex half autoneg off


b) In case if LAN speed has to be reduced for some weird reason to 10 / 100Mb/s


dedi-server1:~# ethtool -s eth0 speed 10 duplex half autoneg off

dedi-server1:~# ethtool -s eth0 speed 100 duplex half autoneg off

c) To enable disable NIC Autonegotiation:

dedi-server1:~# ethtool -s eth0 autoneg on


6. Change Speed / Duplex settings to load on boot

a) Set Network to Duplex on Fedora / CentOS etc.

Quickest way to do it is of course to use /etc/rc.local. If you want to do it following distribution logic on CentOS / RHEL Linux:

Add to /etc/sysconfig/network-scripts/ifcfg-eth0

vim /etc/sysconfig/network/-scripts/ifcfg-eth0

ETHTOOL_OPTS="speed 1000 duplex full autoneg off"

To load the new settings restart networking (be careful to have physical access to server if something goes wrong 🙂 )

service network restart

b) Change network speed / duplex setting on Debian / Ubuntu Linux

Add at the end of /etc/network/interfaces

vim /etc/network/interfaces

post-up ethtool -s eth0 speed 100 duplex full autoneg off

7. Tune NIC ring buffers

dedi-server1:~# ethtool -g eth0

Ring parameters for eth0:
Pre-set maximums:
RX:             4096
RX Mini:        0
RX Jumbo:       0
TX:             4096
Current hardware settings:
RX:             256
RX Mini:        0
RX Jumbo:       0
TX:             256

As you can see the default setting of RX (receive) buffer size is low 256 and on busy servers with high traffic loads, depending on the hardware NIC vendor this RX buffer size varies.
Through increasing the Rx/Tx ring buffer size , you can decrease the probability of discarding packets in the NIC during a scheduling delay.
A change in rx buffer ring requires NIC restart so (be careful not to loose connection to remote server), be sure to have iLO access to it.

Here is how to raise Rx ring buffer size 4 times from default value:

ethtool -G eth0 rx 4096 tx 4069

How to disable IPv6 on Debian / Ubuntu / CentOS and RHEL Linux

Friday, December 9th, 2011

I have few servers, which have automatically enabled IPv6 protocols (IPv6 gets automatically enabled on Debian), as well as on most latest Linux distribituions nowdays.

Disabling IPv6 network protocol on Linux if not used has 2 reasons:

1. Security (It’s well known security practice to disable anything not used on a server)
Besides that IPv6 has been known for few criticil security vulnerabilities, which has historically affected the Linux kernel.
2. Performance (Sometimes disabling IPv6 could have positive impact on IPv4 especially on heavy traffic network servers).
I’ve red people claiming disabling IPv6 improves the DNS performance, however since this is not rumors and did not check it personally I cannot positively confirm this.

Disabling IPv6 on all GNU / Linuces can be achieved by changing the kernel sysctl settings net.ipv6.conf.all.disable_ipv6 by default net.ipv6.conf.all.disable_ipv6 equals 1 which means IPv6 is enabled, hence to disable IPv6 I issued:

server:~# sysctl net.ipv6.conf.all.disable_ipv6=0

To set it permanently on system boot I put the setting also in /etc/sysctl.conf :

server:~# echo 'net.ipv6.conf.all.disable = 1 >> /etc/sysctl.conf

The aforedescribed methods should be working on most Linux kernels version > 2.6.27 in that number it should work 100% on recent versions of Fedora, CentOS, Debian and Ubuntu.

To disable IPv6 protocol on Debian Lenny its necessery to blackist the ipv6 module in /etc/modprobe.d/blacklist by issuing:

echo 'blacklist ipv6' >> /etc/modprobe.d/blacklist

On Fedora / CentOS there is a another universal “Redhat” way disable IPv6.

On them disabling IPv6 is done by editting /etc/sysconfig/network and adding:

NETWORKING_IPV6=no
IPV6INIT=no

I would be happy to hear how people achieved disabling the IPv6, since on earlier and (various by distro) Linuxes the way to disable the IPv6 is probably different.
 

Alto to stop Iptables IPV6 on CentOS / Fedora and RHEL issue:

# service ip6tables stop

# service ip6tables off

Raspberry Pi – Cheap portable credit-card sized single board Linux computer box

Thursday, November 7th, 2013

RaspberryPi tiny-computer running Linux and free software Logo

Not of a the latest thing out there but I believe a must know for every geek is existence of Raspberry Pi mini computer Linux board. It is a geek credit-card sized mini PC on extremely cheap price between 25$ and 35$ bucks (e.g. Raspberry Pi model A and Raspberry Pi Model B).

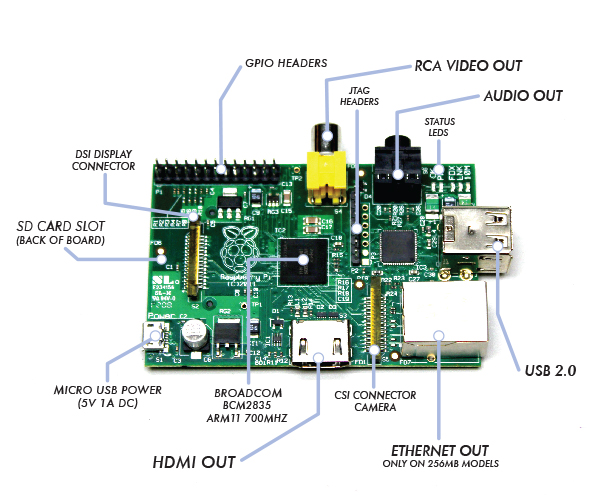
Raspberry Pi hardware you get for this ultra low price is as follows:

  • Broadcom BCM2835 system on chip
  • ARM Mobile processor model ARM1176JZF running at 700 Mhz (overlocking up to 1Ghz is possible – overclocked RP is called Turbo 🙂 )!
  • VideoCore IV GPU with 512 MBytes of ram
  • No Build hard disk or solid-state drive but instead designed to use SD-Card as a Storage
  • two video outputs
  • composite RCA and an HDMI port
  • 3.5mm audio output
  • 2 or 1SD/MMC/SDIO card slot (depending on device model A or model B)
  • Micro USB adapter power charger 500mA  (2.5 watts) – Model and 700mA (3.5 watts)

Raspberry PI mini computer hardware running Linux explained picture

The idea of whole device is to make cheap affordable device for pupils and people from third countries who can't afford to pay big money for a full-featured computer. Achievement is unique all you need to Raspberry Pi credit card sized device is external keyboard a mouse, SD-card and a monitor, this makes a 700Mhz featured almost fully functional computer for less than lets say 80$ whether used with a second hand monitor / mouse and kbd :). A fully functional computer or full functional thin client for as less as 80$ yes that's what RaspberryPi is!

It is recommendable that SD-Card storage on which it is installed is at least 4GB as this is part of its minimum requirement, however it is best if you can get an SD-Card of 32GBytes whether you plan to use its whole graphic functionalities.

Raspberry Pi Hardware is not too powerful to run a version of Windows as well as there is no free version of MS-Windows for ARM Processor, so basicly device is planned to run free software OSes GNU / Linux. 5 operating systems are working fine with the mini-board device as time of writting;
 

  • Raspbian – Debian "Wheezy" Linux port
  • Pidora – Fedora mixed version ported to run on Raspberry Pi
  • Risk OS port
  • Arch Linux port for ARM devices
  • Slackware Arm
    FreeBSD / NetBSD
  • QtonPi

Recommended and probably best distro port is for Debian Squeeze

To boot an OS into raspberry PI dowbnload respective image from raspberrypi.org

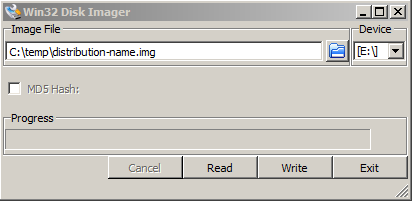
– Use application for copying and extracting image to SD-Card like Win32 Disk Imager – whether on Windows platform

Win32DiskImager burning raspberry PI mini Linux card board computer box image

– Or from Linux format SD-Card with gparted (N!B! format disk to be in FAT32 filesystem), extrat files and copy them to SD-CARD.

Once Raspberry Pi loads up it will drop you into Linux console, so further configuration will have to be done manually with invoking plenty of apt-get commands (which I will not talk about here as there are plenty of manuals already) – you will have to manually install your Desktop … Default shipped Web browser in Debian is Midori and due to lack of ported version of flash player for ARM streaming video websites like youtube.com / vimeo.com does not work in browser. There is a Google Chrome for Raspberry Pi port but just like with Midori heavy object loaded websites works very slow and thus not very suitable for multimedia.

raspberry pi cheaest portable linux powered computer sized of a credit card

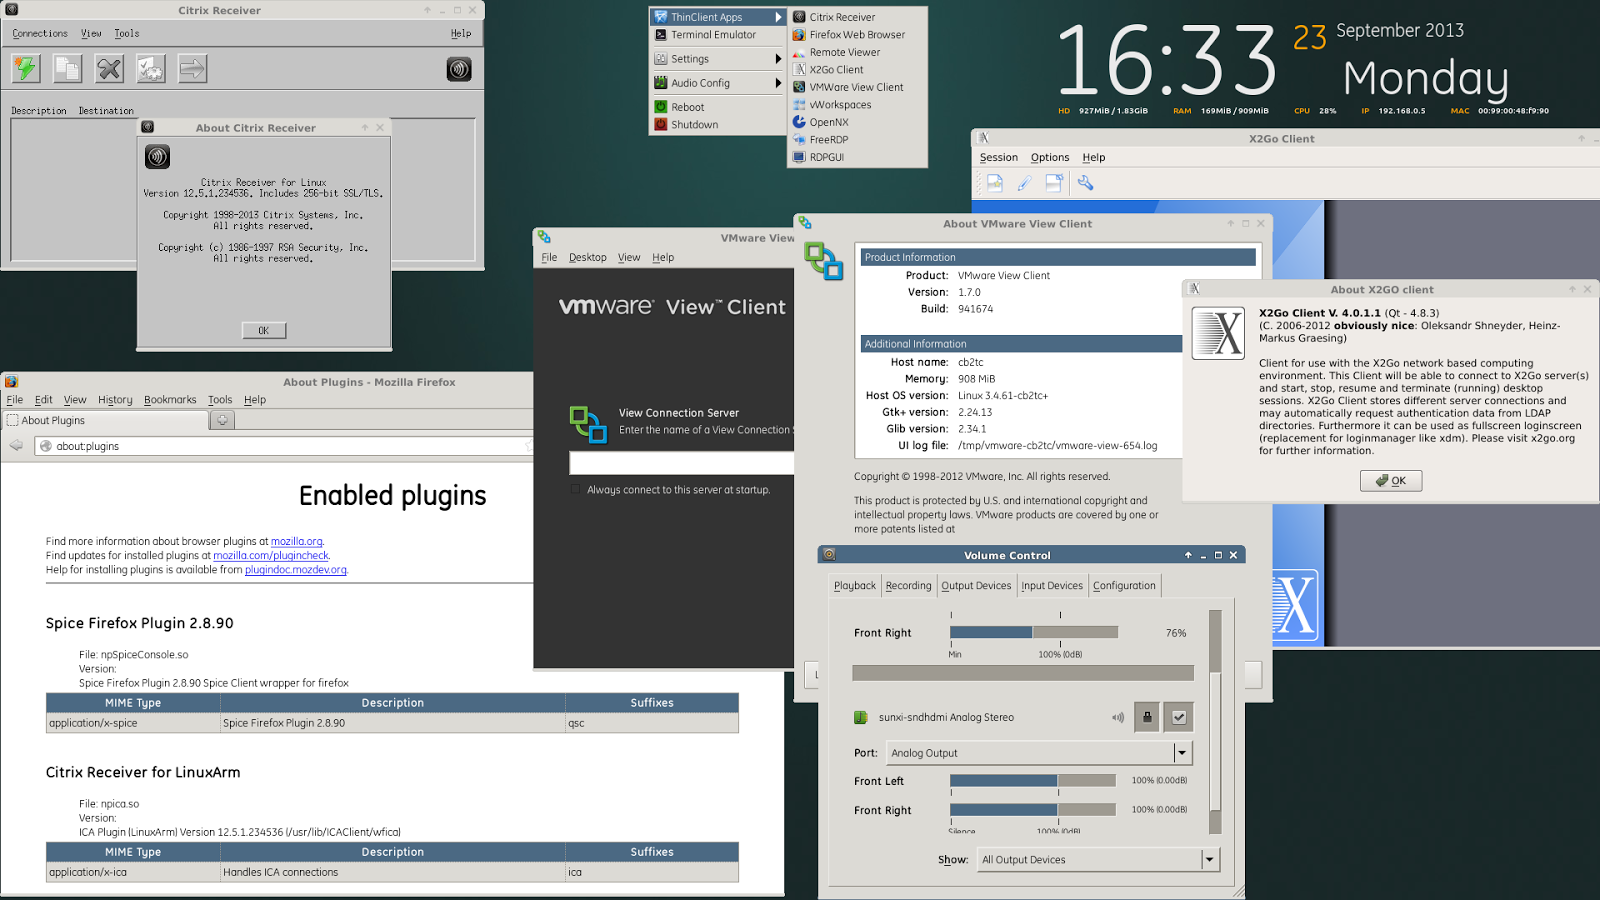
Raspberry Pi device is very suitable for ThinClient use there is a special separate project – Raspberry ThinClient Project – using which a hobbyist can save 400$ for buying proprietary ThinClient.

RaspberryPI linux as a free software hardware thinclient picture


New FreeBSD version is out – Hello FreeBSD 9.2

Tuesday, October 1st, 2013

new version of FreeBSD is out FreeBSD 9.2

FreeBSD 9.2 is out today. There are mostly improvements in FreeBSD's ZFS. As usual BSD packages are updated with new ones. This version of BSD does not include anything revolutionary. Below are all the major changes in the distro. A list of all new introduced supports in that release as usual is in BSD's release notes

To all BSD users – Happy new BSD release 🙂

Create ASCII Art Text banners in GNU / Linux console and terminal with figlet and toilet

Tuesday, January 15th, 2013

Create fun and colorful text ASCII art banner logos on Linux (figlet and toilet)

As an old school hobbyist, I'm a kind of ASCII art freak. Free Software is just great for this text / console maniacs like me, who spend their youth years in a DOS (Disk Opearting System) command prompt.
For long time, I'm researching the cool programs which has to do somehow with ASCII Art, in that relation I decided to write few ones of figlet and toilettwo nice programs capable of generating ASCII art text beautiful banners based on a typed in text string. Obviously toilet developer Sam Hocevar had a great sense of humor 🙂

To play with figlet and toilet install them, according to (rpm or deb based package manager on distro) with yum / apt-get.

yum -y install toilet figlet
....

apt-get --yes install toilet figlet
....

There are no native tool packages for Slackware, so Slackaware Linux users need to compile figlet from source code – available on figlet's home page figlet.org

Once figlet and toilet are installed, here is few sample use cases;
 

hipo@noah:~/Desktop$ figlet hello world!             

figlet ascii art banner hello world
 

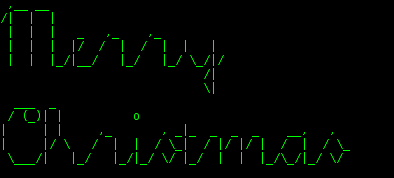
hipo@noah:~/Desktop$ figlet -f script Merrcy Christmas

figlet merry christmas text in ascii art with script font linux

Plenty of figlet font examples are available on Figlet's website example section – very cool stuff btw 🙂 To take a quick look on all fonts available for toilet – ascii art banner creation. Type in your console tty or terminal; for i in $(dpkg -L toilet-fonts|grep -i /usr/share/figlet); do toilet -f $(echo $i|sed -e "s#.tlf##g" -e "s#/usr/share/figlet/##g") test; done

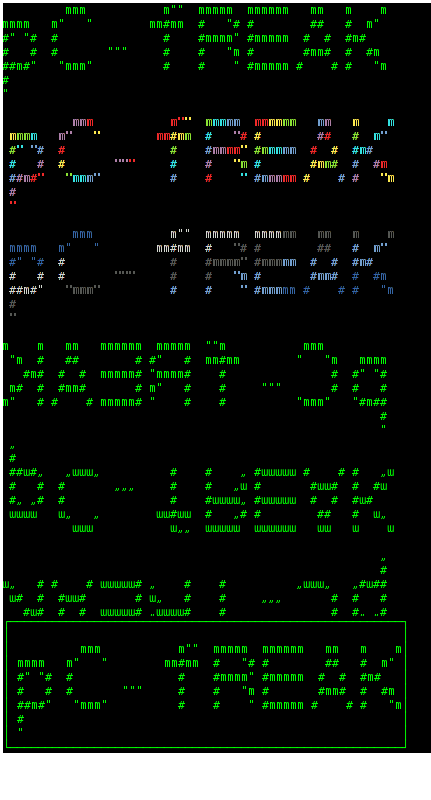
On below picture, I made a screenshot of my gnome terminal with most fonts installed by toilet-fonts (fonts package).

ascii art banner create generate program linux figlet toilet with fonts on debian linux screenshot pic - how to create ascii banners linux

There are about 150 fonts, most of which needs to be downloaded and installed manually. A quick search online led me to a fonts collection of 263 figlet ascii art fonts – you can download a mirror of the file figletfonts40.zip here. To aid up toilet and  with those 263 extra fonts (on Debian) do; wget https://www.pc-freak.net/files/figletfonts40.zip cd /usr/share/figlets unzip figletfonts40.zip Note: you have to have installed unzip in advance, unzip is not in default install, so if you don't have it fetch it with; apt-get install --yes unzip toilet and figlet are partially compatible, between each other so most fonts should work okay on both.

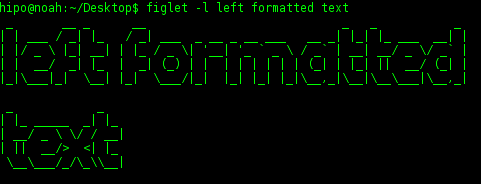
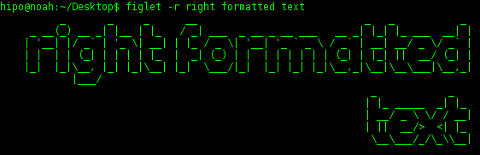
figlet supports, also simple formatting of ASCII art banner, here is few examples with formatting; a.) format to center  

$ figlet -c bla bla

figlet centered ascii art text bla bla screenshot

b.) format to left


figlet ascii art banner left formatted text debian gnu linux

c. right formatting


figlet ascii art banner right formatted ascii art text debian linux generator

d. format to terminal width By default text that figlet generates is to suit for 80 rows terminals, normally on higher resolution in gnome-terminal and other Linux environments, terminals are not dimensioned 80×25, thus it is useful for longer sentences text to display text in accordance to terminal size;

figlet ascii art banner sentence phrase to terminal width banner debian gnu linux

The cool thing and advantage of toilet over figlet is toilet can print out ASCII art banners in colors – very very cool stuff; To quickly test all filters issue; for i in $(toilet -F list|awk '{ print $1 }'|grep -v Available|sed -e 's#"##g'); do toilet -F $i pC-fREAK; done Change text pC-fREAK with whatever you like;

> using toilet to create funny ascii-art banners linux pc-freak logo pictures

Very nice use of toilet or figlet, can be if it is placed to produce some nice message in ASCII banner on each user login. Other nice fun applications  is together with cowsay.

apt-cache show cowsay|grep -i description -A 5 Description: A configurable talking cow Cowsay (or cowthink) will turn text into happy ASCII cows, with speech (or thought) balloons. If you don't like cows, ASCII art is available to replace it with some other creatures (Tux, the BSD daemon, dragons, and a plethora of animals, from a turkey to an elephant in a snake).

In case interested in using cowsay on system logins, I suggest you check out my tiny cowrand script which uses cowsay and shows random cow ASCII art picture on each user login.

Also a good use if you're Christian is to combine, some nice Holy Scriptures  verse in text ascii with  some encouraging daily bible phrase from verse or fortune.

Apart from fun, common use of ASCII art slogans is in e-mail or blog comments ASCII art signatures, also they are certainly good for creating unusual (text) advertisements and even can be used to save printer ink:) cause text generated in ASCII art logo is not massive like most text fonts are 🙂 Last but not least  ASCII art banners are useful in generation of ASCII slogans as an art; after all ASCII art is one of innovative arts of 21st century 🙂

Xubuntu improve default picture viewing with gpicview

Tuesday, March 13th, 2012

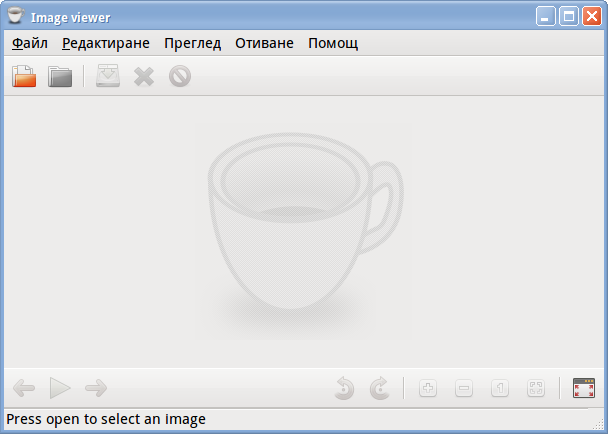
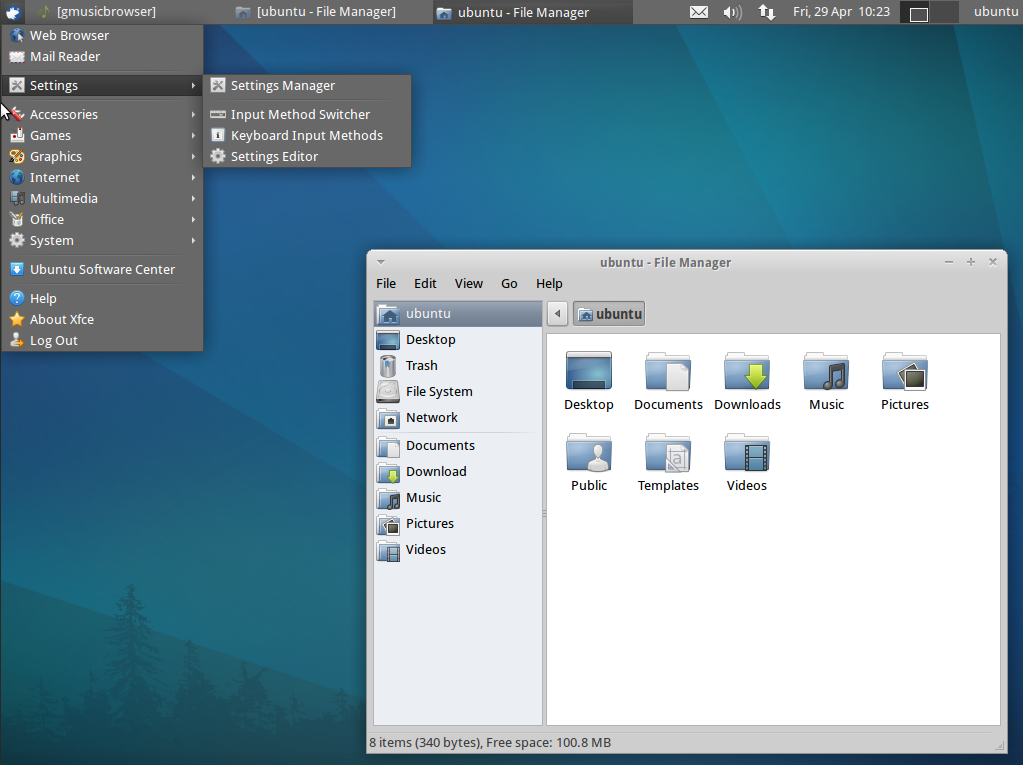
The default picture viewer on Xubuntu's XFCE is risterroro. Risterroro is quite lightweight, but anyways is lacking even basic functionality with reading a number of pictures in a directory and showing, them one by one lacks any picture automated slider. The lack of picture back/forward functionality makes picture viewing very inconvenient on those Linux distro.

Ristretto Screenshot on Xubuntu Linux Desktop

Thanksfully this kind of unconfortable default behaviour on Xubuntu can easily be changed to use a handy picture viewer program called gpicview xubuntu-linux:~# apt-get install --yes gpicview

gpicviewer grandmothers screenshot on Xubuntu Linux

Gpicview is a good minimalistic program which has all the functionality of the default GNOME picture viewer program eog – (eye of the Gnome). If you're aaccustomed to GNOME's eog you can always install and use eog instead 🙂