
As an ex-Windows user I'm still addicted to Windows User brainwashing as an ex-victim of Windows 95 / 98 and XP:), so I tend to love very much and its still hard for me to forget some major Key Binding (Windows Key Combinations).
On every new Desktop Linux I install, I have the habit to configure few great key combination shortcuts that makes my digital life much easier.
I use usually as a graphical environment GNOME and recently switched to MATE (GNOME 2 fork, cause GNOME 3 is totally messed up and unworthy to me), that's why this article is targetting this two Linux GUI envs, I'll be glad to hear in article comments for any other useful key bindings and how to configure similar key bindings for other Major Linux graphical environments (Cinnamon, KDE Plasma, XFCE, LXDE).
1. Configuring Lock Screen (Win button + L), Open Explorer(Win button + E), View Desktop (Win + D) in MATE graphic env
——— WINDOWS BUTTON, OFTEN USED KEY SHORTCUTS ———
Windows + E – Open new Windows File Explorer
Windows + L – Lock Computer
Windows + M – To minimize All Windows
Windows + D – Show Desktop (similar to Windows +M though it doesn't switch to Desktop)
Win – + / – To Maginfy Text and Windows
Shift + Win + Left/Right Arrow – (In Windows if you have multiple monitors connected to the same computer lets say Right Monitor and Left, that combination switches between left monitor and right monitor)
——————————————————————–
The list goes on but I'm not used to all of them, I'll stop here and continue on with how to remake some of my favourite Windows keybindings in Gnu / Linux
Either run it from Menus:
System -> Settings -> Hardware -> Keyboard Shortcuts
Or run command
$ mate-keybinding-properties
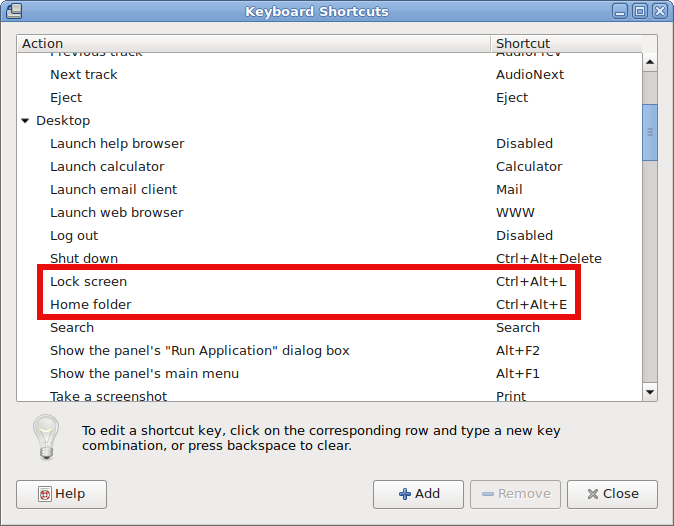
After rebinding the Windows:
– Lock Screen and Open New Nautilus Explorer Window (Home folder) variable to be invoked with Windows button, the result
is as that:
Scroll down Mate Keyboard shortcuts and you'll find
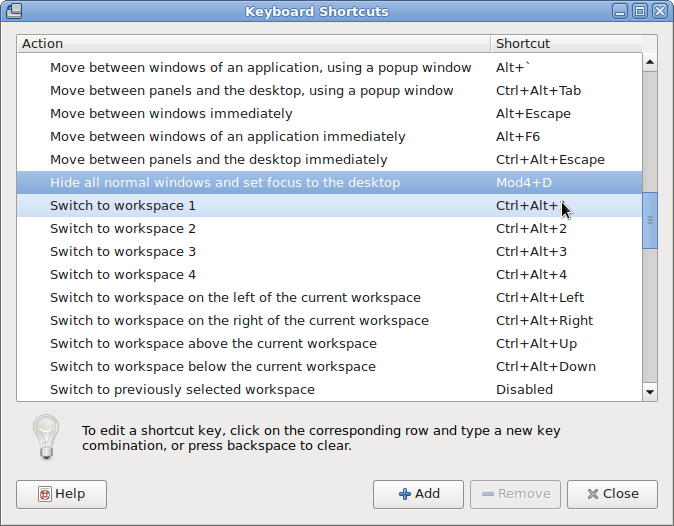
also how to configure Windows Button and D Key Combination, following 2 more screenshots showing how to do it note that MOD Key appears once you press Windows Keyboard Key + something (e.g. MATE recognizes MOD Key as Win Key):
Before the change to bind Win Key + D to work:
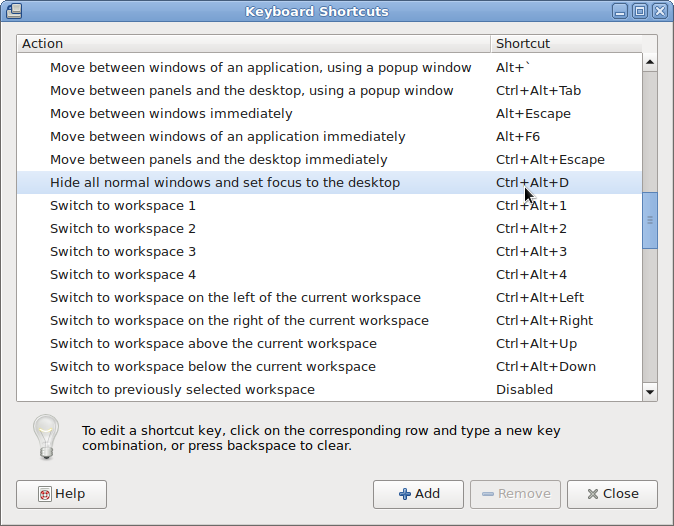
When configured Win Button + D looks like so:
2. Configuring Lock Screen (Win button + L), Open Explorer(Win button + E), View Desktop (Win + D) in GNOME
Usually in GNOME until > version 3.X.X (in older GNOME graphic environment access to KeyBinding Properties was done via:
System -> Preferences -> Keybord Shortcuts -> Add ->
In fallback gnome with Metacity (if installed along with GNOME Desktop 3.2.X environment to access Key Bindings):
d
System->Apps->Metacity->global_keybindings
Also it is possible to remap keys via dconf-editor, I've written a small article earlier explaining how to remap Screenshotting buttons with dconf-editor but the example could be easily adapted, so you can edit almost everything.
Besides that you can use a command to run the keyboard configuration (in older GNOMEs) via:
linux:~$ gnome-keybinding-properties
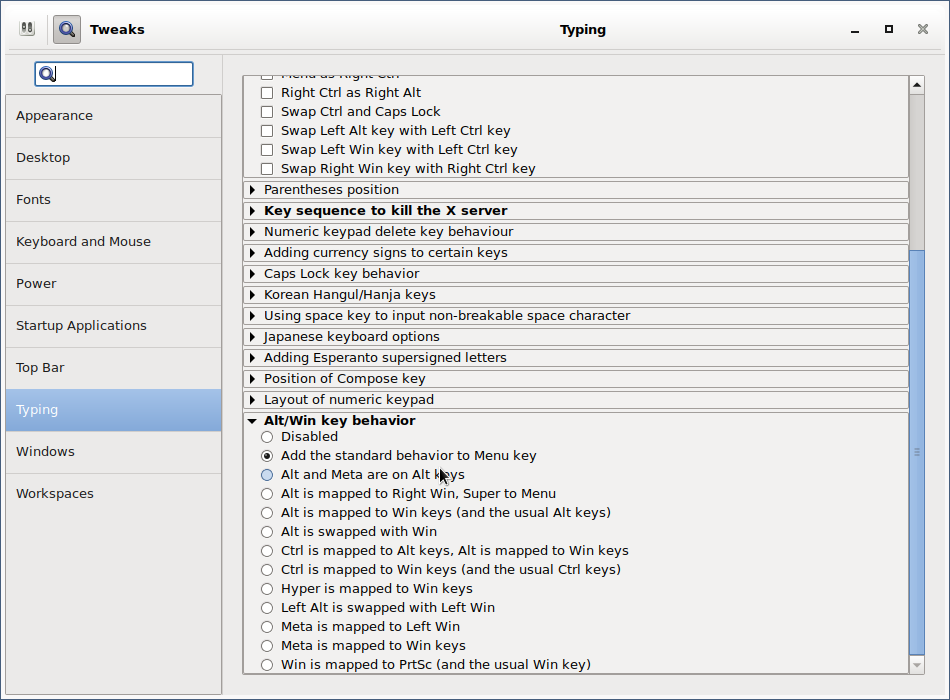
Just for information for those who might know, many Key Binding interesting options are available via gnome-tweak-tool, so if you don't have it yet install it and give it a try:
linux:~# apt-get install –yes gnome-tweak-tool
As you can see, there are plenty of options to make Win (key) to act like Alt (key):
linux:~# gnome-tweak-tool
After configuring the changes enjoy your WINDOWS Button + L, WINDOWS + E and WINDOWS + D WORKING AGAIN HOORAY !!! 🙂
3. Most used shortcuts in Gnome and Nautilus
Below are most used shortcuts thanks to LinuxQuestions Forum for providing them
Howdy! I thought that it would be useful to post a practical selection of shortcut keys for GNOME (the Desktop Environment) and Nautilus (the File Manager) and some information about customizing shortcut keys in Ubuntu. I wrote it especially for Ubuntu beginners, but I hope it will prove useful for all.
2.1 GNOME/Nautilus shortcut keys – Very useful for the keyboard maniax like me :):
Ctrl-H: show hidden files
Ctrl-N: new window
Ctrl-Shift-N: create new folder
Alt-Home : jump to home folder
Alt-Enter : file / folder properties
F9 : toggle side-pane
Alt-F1 : launch applications menu
Alt-F2 : launch "run application" dialogue
Ctrl-Alt – Right/Left arrow : move to the next virtual desktop
Ctrl-Alt-Shift – Right/Left arrow : take current window to the next virtual desktop
Ctrl-Alt-D: minimize all windows, and gives focus to the desktop.
Alt-Tab: switch between windows. When you use these shortcut keys, a list of windows that you can select is displayed. Release the keys to select a window.
Ctrl-Alt-Tab: switch the focus between the panels and the desktop. When you use these shortcut keys, a list of items that you can select is displayed. Release the keys to select an item.
Ctrl-Alt-L: lock the screen (tested only in Ubuntu)
Ctrl-L: shortcut for opening locations-by default the path is the home folder*
/ : same as Ctrl-L but has the root (/) as default path* (shortcut found on here)
* both shortcuts can be used while you are on the desktop (no window active)
Ctrl-T : move to trash (in Nautilus)
Quite dangerous key combination because many of us are used to press these keys in order to open a new tab. Because we all delete items using the Delete key, I recommend to deactivate this shortcut key. To do that, go to System » Preferences » Appearance » Interface. Select Editable menu shortcut keys and close the dialog box. Click on the Edit menu in the File Browser. Click the Empty Trash item (it has Ctrl-T as the keyboard shortcut) Press the Delete key to get rid of the shortcut.
You can find all GNOME shortcut keys here
2.2 How to create a custom hotkey to launch whatever application you want in GNOME
As an example, we will set a lock-screen shortcut.
Open "gconf-editor" as the user as you're logged in in GNOME (typing gconf-editor in the terminal or "Run Application").
Go to apps > metacity > keybinding_commands
Here we have a list of twelve slots for commands.
Double click on e.g. "run_command_1"
In Key Value Type in the name of the application or command you want to launch (e.g. gnome-screensaver-command –lock).
Go to apps -> Metacity -> global_keybindings
Double click on e.g. "run_command_1"
Change the key value to whatever key combination you like (e.g. <Ctrl><Alt>L).Press "Ok".
2.3.How to create/change GNOME shortcuts
Click on System -> Preferences -> Keyboard Shortcuts
Click the action in the list and press Enter.
Press the new key or key combination you want to assign to the action. (To clear a shortcut, press the Backspace key)
Hope it helps, Enjoy Life .;)