Posts Tagged ‘drive’

How to disable PC Spaker on Debian and Ubuntu Linux

Sunday, May 13th, 2012


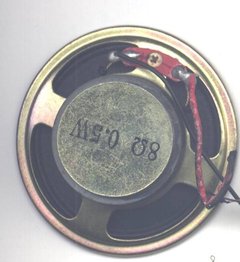
How to disable pc-speaker on Linux / PC-Speaker Old Desktop Computer picture

A PC Speaker is helpful as it could be used as a tool for diagnosing system hardware failures (different systems produce different beep sequences depending on the machine BIOS type).
Using the instructions for the respective BIOS vendor and version one could determine the type of problem experienced by a machine based on the sequence and frequency of sounds produced by the SPEAKER.
Lets say a hardware component on a server is down with no need for a monitor or screen to be attached you can say precisely if it is the hard drive, memory or fan malfunctioning…

Generally speaking historically embedded PC Speaker was inseparatable part of the Personal Computers, preceding the soundblasters, now this is changing but for compitability sake many comp equipment vendors still produce machines with pc-speaker in.
Some newer machines (mostly laptops) are factory produced with no PC-SPEAKER component anymore.
For those who don't know what is PC SPEAKER, it is a hardware device capable of emitting very simple short beep sounds at certain system occasions.

Talking about PC-Speaker, it reminds me of the old computer days, where we used pc-speakers to play music in DOS quite frequently.
It was wide practice across my friends and myself to use the pc-speaker to play Axel Folly and other mod files because we couldn't afford to pay 150$ for a sound cards. Playing a song over pc-speaker is quite a nice thing and it will be a nice thing if someone writes a program to be able to play songs on Linux via the pc-speaker for the sake of experiment.

As of time of writting, I don't know of any application capable of playing music files via the pc-speaker if one knows of something like this please, drop me a comment..

As long as it is used for hardware failure diagnosis the speaker is useful, however there are too many occasions where its just creating useless annoying sounds.
For instance whether one uses a GUI terminal or console typing commands and hits multiple times backspace to delete a mistyped command. The result is just irritating beeps, which could be quite disturbing for other people in the room (for example if you use Linux as Desktop in heterogeneous OS office).
When this "unplanned" glitchering beeps are experienced 100+ times a day you really want to break the computer, as well as your collegues are starting to get mad (if not using their headphones) 🙂

Hence you need sometimes to turn off the pc-speaker to save some nerves.

Here is how this is done on major Linux distros.

On Debian and most other distros, the PC SPEAKER is controlled by a kernel module, so to disable communication with the speaker you have to remove the kernel module.

On Debian and Fedora disabling pcspeaker is done with:

# modprobe -r pcspkr

Then to permanently disable load of the pcspkr module on system boot:

debian:~# echo 'blacklist pcspkr' >> /etc/modprobe.d/blacklist.conf

On Ubuntu to disable load on boot /etc/modprobe.d/blacklist, file should be used:

ubuntu:~# echo 'blacklist pcspkr' >> /etc/modprobe.d/blacklist
Well that's all folks …

How to mount NTFS Windows XP filesystem on FreeBSD, NetBSD, OpenBSD

Friday, May 11th, 2012

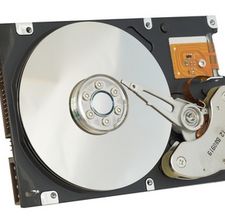
Mounting NTFS hdd partitions on FreeBSD logo picture

A friend of mine bring home a Seagate External Hard Disk Drive using USB 3 as a communication media. I needed to attach the hard disk to my FreeBSD router to transfer him some data, the External HDD is formatted to use NTFS as a main file partition and hence to make the file transfers I had to somehow mount the NTFS partition on the HDD.

FreeBSD and other BSDs, just like Linux does not have embedded NTFS file system mount support.
In order to add an external write support for the plugged hdd NTFS I looked in the ports tree:

freebsd# cd /usr/ports
freebsd# make search name='ntfs'
Port: fusefs-ntfs-2010.10.2
Path: /usr/ports/sysutils/fusefs-ntfs
Info: Mount NTFS partitions (read/write) and disk images
Maint: ports@FreeBSD.org
B-deps: fusefs-libs-2.7.4 libiconv-1.13.1_1 libtool-2.4 libublio-20070103 pkg-config-0.25_1
R-deps: fusefs-kmod-0.3.9.p1.20080208_7 fusefs-libs-2.7.4 libiconv-1.13.1_1 libublio-20070103 pkg-config-0.25_1
WWW: http://www.tuxera.com/community/

Port: ntfsprogs-2.0.0_1
Path: /usr/ports/sysutils/ntfsprogs
Info: Utilities and library to manipulate NTFS partitions
Maint: ports@FreeBSD.org
B-deps: fusefs-libs-2.7.4 libiconv-1.13.1_1 libublio-20070103 pkg-config-0.25_1
R-deps: libublio-20070103 pkg-config-0.25_1
WWW: http://www.linux-ntfs.org/
freebs# cd sysutils/fusefs-ntfs/
freebsd# ls
Makefile distinfo files/ pkg-descr pkg-plist
freebsd# cat pkg-descr
The ntfs-3g driver is an open source, freely available read/write NTFS
driver, which provides safe and fast handling of the Windows XP, Windows
Server 2003 and Windows 2000 filesystems. Almost the full POSIX filesystem
functionality is supported, the major exceptions are changing the file
ownerships and the access rights.
WWW: http://www.tuxera.com/community/

Using ntfs-3g I managed to succeed mounting the NTFS on my old PC running FreeBSD ver. 7_2

1. Installing fuserfs-ntfs support on BSD

Before I can use ntfs-3g, to mount the paritition, I had to install fuserfs-ntfs bsd port, with:

freebsd# cd /usr/ports/sysutils/fusefs-ntfs
freebsd# make install clean
.....

I was curious if ntfsprogs provides other utilities to do the ntfs mount but whilst trying to install it I realized it is already installed as a dependency package to fusefs-ntfs.

fusefs-ntfs package provides a number of utilities for creating, mounting, fixing and doing various manipulations with Microsoft NTFS filesystems.

Here is a list of all the executable utilities helpful in NTFS fs management:

freebsd# pkg_info -L fusefs-ntfs\* | grep -E "/bin/|/sbin|README"
/usr/local/bin/lowntfs-3g
/usr/local/bin/ntfs-3g
/usr/local/bin/ntfs-3g.probe
/usr/local/bin/ntfs-3g.secaudit
/usr/local/bin/ntfs-3g.usermap
/usr/local/bin/ntfscat
/usr/local/bin/ntfscluster
/usr/local/bin/ntfscmp
/usr/local/bin/ntfsfix
/usr/local/bin/ntfsinfo
/usr/local/bin/ntfsls
/usr/local/sbin/mkntfs
/usr/local/sbin/ntfsclone
/usr/local/sbin/ntfscp
/usr/local/sbin/ntfslabel
/usr/local/sbin/ntfsresize
/usr/local/sbin/ntfsundelete
/usr/local/share/doc/ntfs-3g/README
/usr/local/share/doc/ntfs-3g/README.FreeBSD

The README and README.FreeBSD are wonderful, reading for those who want to get more in depth knowledge on using the up-listed utilities.

One utility, worthy to mention, I have used in the past is ntfsfix. ntfsfix resolve issues with NTFS partitions which were not unmounted on system shutdown (electricity outage), system hang up etc.

2. Start fusefs (ntfs) and configure it to auto load on system boot

Once fuserfs-ntfs is installed, if its necessery ntfs fs mounts to be permanently supported on the BSD system add fusefs_enable="YES" to /etc/rc.conf(the FreeBSD services auto load conf).

freebsd# echo 'fusefs_enable="YES"' >> /etc/rc.conf

One note to make here is that you need to have also dbus_enable="YES" and hald_enable="YES" in /etc/rc.conf, not having this two in rc.conf will prevent fusefs to start properly. Do a quick grep to make sure this two variables are enabled:

Afterwards fsusefs load up script should be run:

freebsd# /usr/local/etc/rc.d/fusefs start
Starting fusefs.

Another alternative way to load ntfs support on the BSD host is to directly load fuse.ko kernel module:

freebsd# /sbin/kldload fuse.ko

3. Mounting the NTFS partition

In my case, the Seagate hard drive was detected as da0, where the NTFS partition was detected as s1 (da0s1):

freebsd# dmesg|grep -i da0
da0 at umass-sim0 bus 0 target 0 lun 0
da0: Fixed Direct Access SCSI-4 device
da0: 40.000MB/s transfers
da0: 953869MB (1953525164 512 byte sectors: 255H 63S/T 121601C)br />GEOM_LABEL: Label for provider da0s1 is ntfs/Expansion Drive.
GEOM_LABEL: Label for provider da0s1 is ntfs/Expansion Drive.

Therefore further to mount it one can use mount_ntfs (to quickly mount in read only mode) or ntfs-3g for (read / write mode):

If you need to just quickly mount a disk drive to copy some data and umount it with no need for writting to the NTFS partition do;

freebsd# /sbin/mount_ntfs /dev/ad0s1 /mnt/disk

Note that mount_ntfs command is a native BSD command and have nothing to do with ntfs-3g. Therefore using it to mount NTFS is not the same as mounting it via ntfs-3g cmd

freebsd# /usr/local/bin/ntfs-3g -o rw /dev/da0s1 /mnt/disk/

Something, I've noticed while using ntfs-3g is, it fails to properly exit even when the ntfs-3g shell execution is over:

freebsd# ps ax |grep -i ntfs|grep -v grep
18892 ?? Is 0:00.00 /usr/local/bin/ntfs-3g -o rw /dev/da0s1 /mnt/disk/

I dunno if this is some kind of ntfs-3g bug or feature specific to all versions of FreeBSD or it is something local to FBSD 7.2

Thought ntfs-3g, keeps appearing in process list, praise God as of time of writting NTFS support on FreeBSD prooved to be stable.
Read / Write disk operations to the NTFS I tested it with works great. Just about 5 years ago I still remember write mode was still experimental. Now it seems NTFS mounts can be used with no hassle even on production machines.

4. Auto mounting NTFS partition on FreeBSD system boot

There are two approaches towards 'the problem' I can think of.
The better way to auto mount on boot (in my view) is through /etc/fstab use

If /etc/fstab + ntfs-3g is to be used, you will however change the default /sbin/mount_ntfs command to point to /usr/local/bin/ntfs-3g, i.e.:

freebsd# mv /sbin/mount_ntfs /sbin/mount_ntfs.orig
freebsd# ln -s /usr/local/bin/ntfs-3g /sbin/mount_ntfs

Then to mount /dev/da0s1 via /etc/fstab add line:

/dev/ad0s1 /mnt/disk ntfs rw,late 0 0

To not bother with text editor run:

freebsd# echo '/dev/ad0s1 /mnt/disk ntfs rw,late 0 0' >> /etc/fstab

I've red in posts in freebsd forums, there is also a way to use ntfs-3g for mounting partitions, without substituting the original bsd /sbin/mount_ntfs, the exact commands suggested to be used with no need to prior mv /sbin/mount_ntfs to /sbin/mount_ntfs.orig and link it to ntfs is:

/dev/ad0s1 /disk ntfs rw,mountprog=/usr/local/bin/ntfs-3g,late 0 0

For any other NTFS partitions, for instance /dev/ad0s2, /dev/ad2s1 etc. simply change the parititon name and mount points.

The second alternative to adding the NTFS to auto mount is through /etc/rc.local. /etc/rc.local content will be executed very late in system boot. :

echo '/usr/local/bin/ntfs-3g -o rw /dev/da0s1' >> /etc/rc.local

One disadvanage of using /etc/rc.local for mounting the partition is the hanging ntfs-3g in proc list:

freebsd# ps ax |grep -i ntfs|grep -v grep
18892 ?? Is 0:00.00 /usr/local/bin/ntfs-3g -o rw /dev/da0s1 /mnt/disk/

Though, I haven't tested it yet. Using the same methodology should be perfectly working on PC-BSD, DragonFlyBSD, NetBSD and OpenBSD.
I will be glad if someone who runs any of the other BSDs can confirm, following this instructions works fine on these BSDs too.
diskinfo Linux hdparm FreeBSD equivalent command for disk info and benchmarking

Thursday, March 8th, 2012

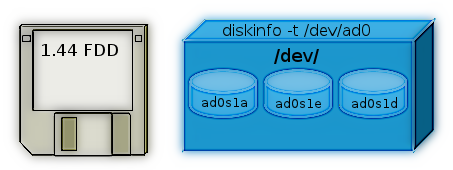
FreeBSD Linux hdparm equivalent is diskinfo artistic logo

On Linux there is the hdparm tool for various hard disk benchmarking and extraction of hard disk operations info.
As the Linux manual states hdparmget/set SATA/IDE device parameters

Most Linux users should already know it and might wonder if there is hdparm port or equivalent for FreeBSD, the aim of this short post is to shed some light on that.

The typical use of hdparm is like this:

linux:~# hdparm -t /dev/sda8

/dev/sda8:
Timing buffered disk reads: 76 MB in 3.03 seconds = 25.12 MB/sec
linux:~# hdparm -T /dev/sda8
/dev/sda8:
Timing cached reads: 1618 MB in 2.00 seconds = 809.49 MB/sec

The above output here is from my notebook Lenovo R61i.
If you're looking for alternative command to hdparm you should know in FreeBSD / OpenBSD / NetBSD, there is no exact hdparm equivalent command.
The somehow similar hdparm equivallent command for BSDs (FreeBSD etc.) is:
diskinfo

diskinfo is not so feature rich as linux's hdparm. It is just a simple command to show basic information for hard disk operations without no possibility to tune any hdd I/O and seek operations.
All diskinfo does is to show statistics for a hard drive seek times I/O overheads. The command takes only 3 arguments.

The most basic and classical use of the command is:

freebsd# diskinfo -t /dev/ad0s1a
/dev/ad0s1a
512 # sectorsize
20971520000 # mediasize in bytes (20G)
40960000 # mediasize in sectors
40634 # Cylinders according to firmware.
16 # Heads according to firmware.
63 # Sectors according to firmware.
ad:4JV48BXJs0s0 # Disk ident.

Seek times:
Full stroke: 250 iter in 3.272735 sec = 13.091 msec
Half stroke: 250 iter in 3.507849 sec = 14.031 msec
Quarter stroke: 500 iter in 9.705555 sec = 19.411 msec
Short forward: 400 iter in 2.605652 sec = 6.514 msec
Short backward: 400 iter in 4.333490 sec = 10.834 msec
Seq outer: 2048 iter in 1.150611 sec = 0.562 msec
Seq inner: 2048 iter in 0.215104 sec = 0.105 msec

Transfer rates:
outside: 102400 kbytes in 3.056943 sec = 33498 kbytes/sec
middle: 102400 kbytes in 2.696326 sec = 37978 kbytes/sec
inside: 102400 kbytes in 3.178711 sec = 32214 kbytes/sec

Another common use of diskinfo is to measure hdd I/O command overheads with -c argument:

freebsd# diskinfo -c /dev/ad0s1e
/dev/ad0s1e
512 # sectorsize
39112312320 # mediasize in bytes (36G)
76391235 # mediasize in sectors
75784 # Cylinders according to firmware.
16 # Heads according to firmware.
63 # Sectors according to firmware.
ad:4JV48BXJs0s4 # Disk ident.

I/O command overhead:
time to read 10MB block 1.828021 sec = 0.089 msec/sector
time to read 20480 sectors 4.435214 sec = 0.217 msec/sector
calculated command overhead = 0.127 msec/sector

Above diskinfo output is from my FreeBSD home router.

As you can see, the time to read 10MB block on my hard drive is 1.828021 (which is very high number),
this is a sign the hard disk experience too many read/writes and therefore needs to be shortly replaced with newer faster one.
diskinfo is part of the basis bsd install (bsd world). So it can be used without installing any bsd ports or binary packages.

For the purpose of stress testing hdd, or just some more detailed benchmarking on FreeBSD there are plenty of other tools as well.
Just to name a few:
 

  • rawio – obsolete in FreeBSD 7.x version branch (not available in BSD 7.2 and higher)
  • iozone, iozone21 – Tools to test the speed of sequential I/O to files
  • bonnie++ – benchmark tool capable of performing number of simple fs tests
  • bonnie – predecessor filesystem benchmark tool to bonnie++
  • raidtest – test performance of storage devices
  • mdtest – Software to test metadata performance on filsystems
  • filebench – tool for micro-benchmarking storage subsystems

Linux hdparm allows also changing / setting various hdd ATA and SATA settings. Similarly, to set and change ATA / SATA settings on FreeBSD there is the:

  • ataidle

tool.

As of time of writting ataidle is in port path /usr/ports/sysutils/ataidle/

To check it out install it as usual from the port location:

FreeBSD also has also the spindown port – a small program for handling automated spinning down ofSCSI harddrive
spindown is useful in setting values to SATA drives which has problems with properly controlling HDD power management.

To keep constant track on hard disk operations and preliminary warning in case of failing hard disks on FreeBSD there is also smartd service, just like in Linux.
smartd enables you to to control and monitor storage systems using the Self-Monitoring, Analysisand Reporting Technology System (S.M.A.R.T.) built into most modern ATA and SCSI hard disks.
smartd and smartctl are installable via the port /usr/ports/sysutils/smartmontools.

To install and use smartd, ataidle and spindown run:

freebsd# cd /usr/ports/sysutils/smartmontools
freebsd# make && make install clean
freebsd# cd /usr/ports/sysutils/ataidle/
freebsd# make && make install clean
freebsd# cd /usr/ports/sysutils/spindown/
freebsd# make && make install clean

Check each one's manual for more info.

Drunk

Monday, February 26th, 2007

I drinked 100 gr. of Rom and a beer after that and I got drunk. I have some problems with one of the servers in DBG. I hope the machine’s hard drive didn’t die. If the hdd is dead it would be very very bad for me. Tomorrow I have test in Management. As usual I haven’t study :]] I’m listening to Pantera and I want to drink more .. which is not good at all. END—–

Cleaning Packard Bell Hera GL laptop running Windows XP from Viruses and Spyware (Viruses / Spyware which can make CD drive and Wireless seem unworking)

Tuesday, December 13th, 2011

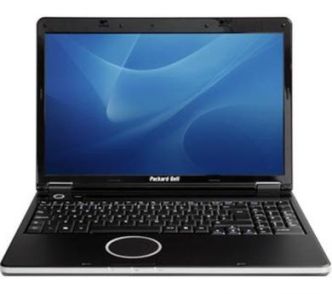
Packard Bell Hera GL Fixing Broken RaLink Wireless

Yesterday, one (girl)friend of mine brought me one Packard Bell notebook, which had a 2 years old Windows installed on it.
As one can imagine Windows XP on it is full of Spyware and Viruses. Besides the software problems the notebook had some hardware problems with the CD / DVD which is not reading CD / DVDs at all.

Initially I thought, the CD unable to read problems are caused by the infected Windows, however even restarting the PC with a bootable Hirens BootCD and a Whoppix liveCD and trying to boot from it failed this convinced me its a CD / DVD combo drive hardware failure.

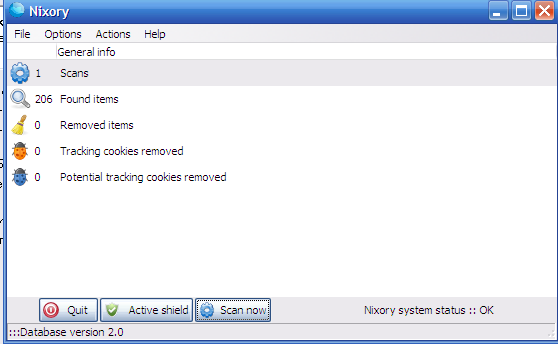
By the way, I’ve just recently found out about Nixory – Is a nice Free Software Open Source AntiSpyware tool for Firefox, IE and Chrome.

Nixory Windows XP Screenshot

I hope it will get a sharp development and soon, when some friend asks me to fix his stupid non free-Windows PC, I would not have to use a trial version of Malware Bytes but directly use only Nixory

Anyways after using Nixory, MalwareBytes and Avira and thoroughfully scanned the system in Safe Mode and found and deleted some 15 Spyware / Viruses and tampered a bit with the Wireless Driver settings all the notebook devices started working fine again.

The wireless had also one really odd problem on this Packard BellHera GL, even though the notebook wireless antenna was capable of detecting all the wireless networks it couldn’t properly connect to any of it but failed to get proper IP addresses.
Partially the unable to grab an IP via wireless router dhcp server got fixed by using the Wireless restart Button (located on the Notebook corpus).
However even after cleaning up the Virus and Spyware the Wireless Networks connectivity problems on this Packard Bell continued, until I changed also few settings in the Control PanelI never thought Viruses / Spyware infected can have some bad impact on Wireless Card and CD drive make them unsusable though they showed like working correctly in Windows Control Panel -> System ??

In the meantime I reinstalled the Wireless Driver for the notebook, the Wireless card on the notebook was showing up itself under the name of Ralink 802.11n Wireless Lan Card in Windows Device Manager

After re-installing the wireless driver I had to also change few settings for the Wireless Network Connection using the menus Properties -> Configure -> Extended; therein everywhere for each Value I make it be Enable and for Power Saving Mode , I’ve choose the Value option of CAM

After a system reboot, everything started working finally fine. One last thing to add is that before I fixed the Ralink wireless to work under Windows, I tried to use a Bootable Linux LiveCD but even there the wireless was failing to connect to the wireless networks (maybe this shit wireless device has some issues with its Linux drivers).

How to convert html pages to text in console / terminal on GNU / Linux and FreeBSD

Thursday, December 8th, 2011

HTML to Plain Text Convertion on GNU / Linux and FreeBSD

I’m realizing the more I’m converting to a fully functional GUI user, the less I’m doing coding or any interesting stuff…
I remembered of the old glorious times, when I was full time console user and got a memory on a nifty trick I was so used to back in the day.
Back then I was quite often writing shell scripts which were fetching (html) webpages and converting the html content into a plain TEXT (TXT) files

In order to fetch a page back in the days I used lynx(a very simple UNIX text browser, which by the way lacks support for any CSS or Javascipt) in combination with html2text – (an advanced HTML-to-text converter).

Let’s say I wanted to fetch a my personal home page https://www.pc-freak.net/, I did that via the command:

$ lynx -source https://www.pc-freak.net/ | html2text > pcfreak_page.txt

The content from www.pc-freak.net got spit by lynx as an html source and passed html2pdf wchich saves it in plain text file pcfreak_page.txt
The bit more advanced elinks – (lynx-like alternative character mode WWW browser) provides better support for HTML and even some CSS and Javascript so to properly save the content of many pages in plain html file its better to use it instead of lynx, the way to produce .txt using elinks files is identical, e.g.:

$ elinks -source https://www.pc-freak.net/blog/ | html2text > pcfreak_blog_page.txt

By the way back in the days I was used more to links , than the superior elinks , nowdays I have both of the text browsers installed and testing to fetch an html like in the upper example and pipe to html2text produced garbaged output.

Here is the time to tell its not even necessery to have a text browser installed in order to fetch a webpage and convert it to a plain text TXT!. wget file downloading tools supports source dump as well, for all those who did not (yet) tried it and want to test it:

$ wget -qO- https://www.pc-freak.net | html2text Anyways of course, some pages convertion of text inside HTML tags would not properly get saved with neither lynx or elinks cause some texts might be embedded in some elinks or lynx unsupported CSS or JavaScript. In those cases the GUI browser is useful. You can use any browser like Firefox, Epiphany or Opera ‘s File -> Save As (Text Files) embedded functionality, below is a screenshot showing an html page which I’m about to save as a plain Text File in Mozilla Firefox:

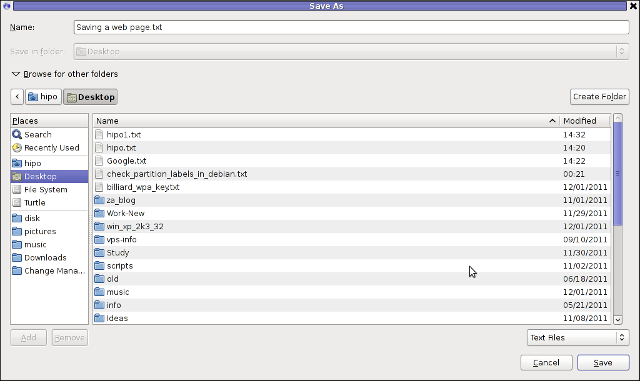
Firefox iceWeasel Opera etc. save html webpage as plain text on GNU / Linux, FreeBSD

Besides being handy in conjunction with text browsers, html2text is also handy for converting .html pages already existing on the computer’s hard drive to a plain (.TXT) text format.
One might wonder, why would ever one would like to do that?? Well I personally prefer reading plain text documents instead of htmls 😉
Converting an html files already existing on hard drive with html2text is done with cmd:

$ html2text index.html >index.txt

To convert a whole directory full of .html (documentation) or whatever files to plain text .TXT , cd the directory with HTMLs and issue the one liner bash loop command:

$ cd html/
html$ for i in $(echo *.html); do html2text $i > $(echo $i | sed -e 's#.html#.txt#g'); done

Now lay off your back and enjoy reading the dox like in the good old hacker days when .TXT files were fashionable 😉

How to check any filesystem for bad blocks using GNU / Linux or FreeBSD with dd

Monday, November 28th, 2011

Check any filesystem partition for BAD BLOCKS with DD on GNU Linux and FreeBSD

Have you looked for a universal physical check up tool to check up any filesystem type existing on your hard drive partitions?
I did! and was more than happy to just recently find out that the small UNIX program dd is capable to check any file system which is red by the Linux or *BSD kernel.

I’ll give an example, I have few partitions on my laptop computer with linux ext3 filesystem and NTFS partition.
My partitions looks like so:

noah:/home/hipo# fdisk -l
Disk /dev/sda: 160.0 GB, 160041885696 bytes
255 heads, 63 sectors/track, 19457 cylinders
Units = cylinders of 16065 * 512 = 8225280 bytes
Sector size (logical/physical): 512 bytes / 512 bytes
I/O size (minimum/optimal): 512 bytes / 512 bytes
Disk identifier: 0x2d92834c
Device Boot Start End Blocks Id System
/dev/sda1 1 721 5786624 27 Unknown
Partition 1 does not end on cylinder boundary.
/dev/sda2 * 721 9839 73237024 7 HPFS/NTFS
/dev/sda3 9839 19457 77263200 5 Extended
/dev/sda5 9839 12474 21167968+ 83 Linux
/dev/sda6 12474 16407 31593208+ 83 Linux
/dev/sda7 16407 16650 1950448+ 82 Linux swap / Solaris
/dev/sda8 16650 19457 22551448+ 83 Linux

For all those unfamiliar with dddd – convert and copy a file this tiny program is capable of copying data from (if) input file to an output file as in UNIX , the basic philosophy is that everything is a file partitions themselves are also files.
The most common use of dd is to make image copies of a partition with any type of filesystem on it and move it to another system
Looking from a Windows user perspective dd is the command line Norton Ghost equivalent for Linux and BSD systems.
The classic way dd is used to copy let’s say my /dev/sda1 partition to another hard drive /dev/hdc1 is by cmds:

noah:/home/hipo# dd if=/dev/sda1 of=/dev/hdc1 bs=16065b

Even though the basic use of dd is to copy files, its flexibility allows a “trick” through which dd can be used to check any partition readable by the operating system kernel for bad blocks

In order to check any of the partitions listed, let’s say the one listed with filesystem HPFS/NTFS on /dev/sda2 using dd

noah:/home/hipo# dd if=/dev/sda2 of=/dev/null bs=1M

As you can see the of (output file) for dd is set to /dev/null in order to prevent dd to write out any output red by /dev/sda2 partition. bs=1M instructs dd to read from /dev/sda2 by chunks of 1 Megabyte in order to accelerate the speed of checking the whole drive.
Decreasing the bs=1M to less will take more time but will make the bad block checking be more precise.
Anyhow in most cases bs of 1 Megabyte will be a good value.

After some minutes (depending on the partition size), dd if, of operations outputs a statistics informing on how dd operations went.
Hence ff some of the blocks on the partition failed to be red by dd this will be shown in the final stats on its operation completion.
The drive, I’m checking does not have any bad blocks and dd statistics for my checked partition does not show any hard drive bad block problems:

71520+1 records in
71520+1 records out
74994712576 bytes (75 GB) copied, 1964.75 s, 38.2 MB/s

The statistics is quite self explanatory my partition of s size 75 GB was scanned for 1964 seconds roughly 32 minutes 46 seconds. The number of records red and written are 71520+1 e.g. (records in / records out). This means that all the records were properly red and wrote to /dev/null and therefore no BAD blocks on my NTFS partition 😉

How to copy CD or DVD on GNU/Linux and FreeBSD using console or terminal

Monday, November 14th, 2011

CD Burning Console Terminal Linux / FreeBSD picture

These days more and more people start to forget the g* / Linux old times when we used to copy CDs from console using dd in conjunction with mkisofs .

Therefore to bring some good memories back of the glorious console times I decided to come up with this little post.

To copy a CD or DVD the first thing one should do is to make an image copy of the present inserted CD into the CD-drive with dd :

1. Make copy of the CD/DVD image using dd

# dd if=/dev/cdrom of=/tmp/mycd.iso bs=2048 conv=notrunc

/dev/cdrom is the location of the cdrom device, on many Linuces including (Debian) /dev/cdrom is just a link to the /dev/ which corresponds to the CD drive. Note on FreeBSD the location for the CD Drive is /dev/acd0
/tmp/mycd.iso instructs dd CD image creation to be placed in /tmp/ directory.
bs argument instructs it about the byte size portions by which the content of the CD-Drive inserted CD will be read. bs value of 2048 is actually only 2KB per dd read, increasing this value will decrease the time required for the CD image to be extracted.

2. Prepare CD image file to be ready for burning

After dd completes the image copy operation, next to prepare the extracted image / ISO to be ready for burning mkisofs is used:

# mkisofs -J -L -r -V TITLE -o /tmp/imagefile.iso /tmp/mycd.iso

The -J option makes the CD compatible for Pcs running Microsoft Windows. The -V TITLE option should be changed to whatever title the new CD should have, -r will add up status bar for the mkisofs operation.
-r is passed to create specific file permissions on the newly created CD, -o specifies the location where mkisofs will produce its file based on the CD image /tmp/mycd.iso .

3. Burning the mkisofs image file to a CD/DVD on GNU / Linux

linux:~# cdrecord -scanbus
linux:~# cdrecord dev=1,0,0 /tmp/imagefile.iso

If all wents okay with cdrecord operation, after a while the CD should be ready.

4. Burning the mkisofs image file to CD on FreeBSD

freebsd# burncd -f /dev/acd0 data /tmp/imagefile.iso fixate