Posts Tagged ‘elinks’

Check server Internet connectivity Speedtest from Linux terminal CLI

Friday, August 7th, 2020

check-server-console-speedtest

If you are a system administrator of a dedicated server and you have no access to Xserver Graphical GNOME / KDE etc. environment and you wonder how you can track the bandwidth connectivity speed of remote system to the internet and you happen to have a modern Linux distribution, here is few ways to do a speedtest.
 

1. Use speedtest-cli command line tool to test connectivity


speedtest-cli is a tiny tool written in python, to use it hence you need to have python installed on the server.
It is available both for Redhat Linux distros and Debians / Ubuntus etc. in the list of standard installable packages.

a) Install speedtest-cli on Fedora / CentOS / RHEL
 

On CentOS / RHEL / Scientific Linux lower than ver 8:


$ sudo yum install python

On CentOS 8 / RHEL 8 user type the following command to install Python 3 or 2:


$sudo yum install python3
$ sudo yum install python2


On Fedora Linux version 22+


$ sudo dnf install python
$ sudo dnf install pytho3


Once python is at place download speedtest.py or in case if link is not reachable download mirrored version of speedtest.py on www.pc-freak.net here


$ wget -O speedtest-cli https://raw.githubusercontent.com/sivel/speedtest-cli/master/speedtest.py
$ chmod +x speedtest-cli


Then it is time to run script speedtest-screenshot-linux-terminal-console-cli-cmd
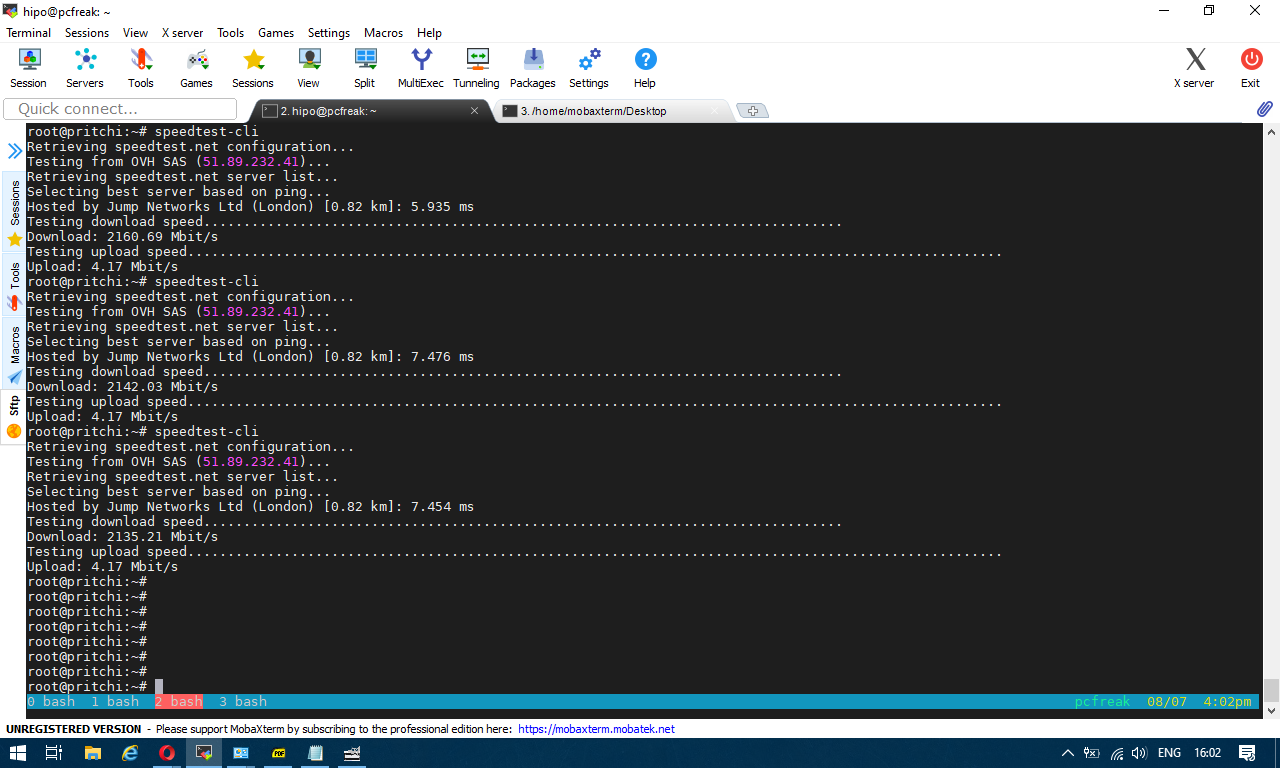
To test enabled Bandwidth on the server


$ python speedtest-cli


b) Install speedtest-cli on Debian

On Latest Debian 10 Buster speedtest is available out of the box in regular .deb repositories, so fetch it with apt


# apt install –yes speedtest-cli


You can give now speedtest-cli a try with –bytes arguments to get speed values in bytes instead of bits or if you want to generate an image with test results in picture just like it will appear if you use speedtest.net inside a gui browser, use the –share option
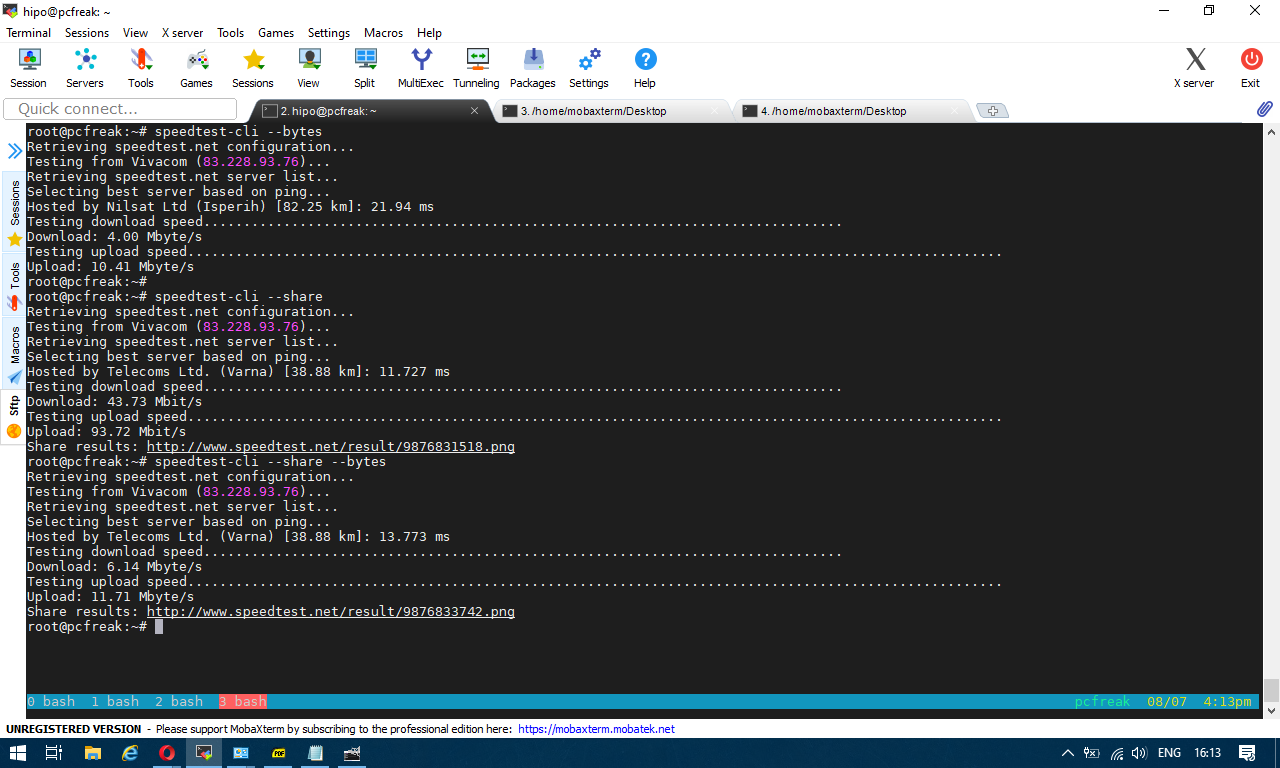
speedtest-screenshot-linux-terminal-console-cli-cmd-options


2. Getting connectivity results of all defined speedtest test City Locations


Speedtest has a list of servers through which a Upload and Download speed is tested, to run speedtest-cli to test with each and every server and get a better picture on what kind of connectivity to expect from your server towards the closest region capital cities, fetch speedtest-servers.php list and use a small shell loop below is how:


root@pcfreak:~#  wget http://www.speedtest.net/speedtest-servers.php
–2020-08-07 16:31:34–  http://www.speedtest.net/speedtest-servers.php
Преобразувам www.speedtest.net (www.speedtest.net)… 151.101.2.219, 151.101.66.219, 151.101.130.219, …
Connecting to www.speedtest.net (www.speedtest.net)|151.101.2.219|:80… успешно свързване.
HTTP изпратено искане, чакам отговор… 301 Moved Permanently
Адрес: https://www.speedtest.net/speedtest-servers.php [следва]
–2020-08-07 16:31:34–  https://www.speedtest.net/speedtest-servers.php
Connecting to www.speedtest.net (www.speedtest.net)|151.101.2.219|:443… успешно свързване.
HTTP изпратено искане, чакам отговор… 307 Temporary Redirect
Адрес: https://c.speedtest.net/speedtest-servers-static.php [следва]
–2020-08-07 16:31:35–  https://c.speedtest.net/speedtest-servers-static.php
Преобразувам c.speedtest.net (c.speedtest.net)… 151.101.242.219
Connecting to c.speedtest.net (c.speedtest.net)|151.101.242.219|:443… успешно свързване.
HTTP изпратено искане, чакам отговор… 200 OK
Дължина: 211695 (207K) [text/xml]
Saving to: ‘speedtest-servers.php’
speedtest-servers.php                  100%[==========================================================================>] 206,73K  –.-KB/s    in 0,1s
2020-08-07 16:31:35 (1,75 MB/s) – ‘speedtest-servers.php’ saved [211695/211695]

Once file is there with below loop we extract all file defined servers id="" 's 
 

root@pcfreak:~# for i in $(cat speedtest-servers.php | egrep -Eo 'id="[0-9]{4}"' |sed -e 's#id="##' -e 's#"##g'); do speedtest-cli  –server $i; done
Retrieving speedtest.net configuration…
Testing from Vivacom (83.228.93.76)…
Retrieving speedtest.net server list…
Retrieving information for the selected server…
Hosted by Telecoms Ltd. (Varna) [38.88 km]: 25.947 ms
Testing download speed……………………………………………………………………..
Download: 57.71 Mbit/s
Testing upload speed…………………………………………………………………………………………
Upload: 93.85 Mbit/s
Retrieving speedtest.net configuration…
Testing from Vivacom (83.228.93.76)…
Retrieving speedtest.net server list…
Retrieving information for the selected server…
Hosted by GMB Computers (Constanta) [94.03 km]: 80.247 ms
Testing download speed……………………………………………………………………..
Download: 35.86 Mbit/s
Testing upload speed…………………………………………………………………………………………
Upload: 80.15 Mbit/s
Retrieving speedtest.net configuration…
Testing from Vivacom (83.228.93.76)…

…..


etc.

For better readability you might want to add the ouput to a file or even put it to run periodically on a cron if you have some suspcion that your server Internet dedicated lines dies out to some general locations sometimes.
 

3. Testing UPlink speed with Download some big file from source location


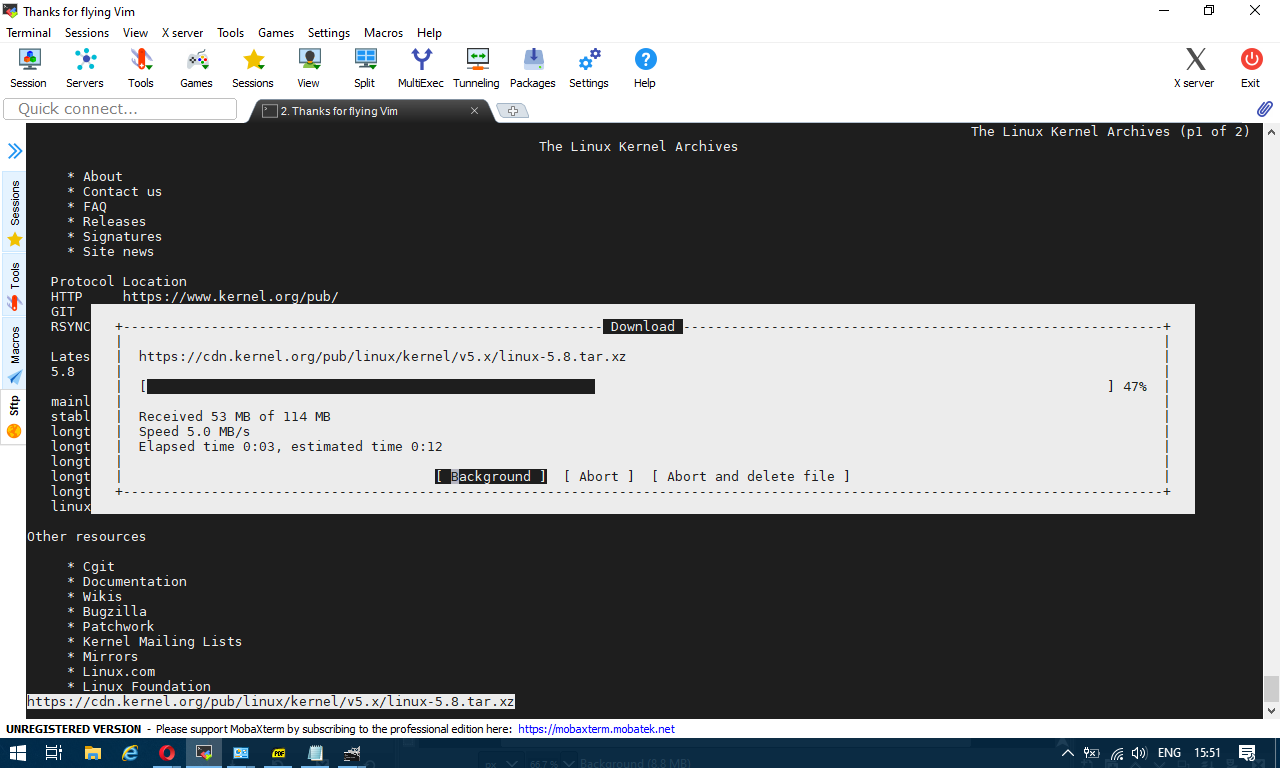
In the past a classical way to test the bandwidth connectivity of your Internet Service Provider was to fetch some big file, Linux guys should remember it was almost a standard to roll a download of Linux kernel source .tar file with some test browser as elinks / lynx / w3c.
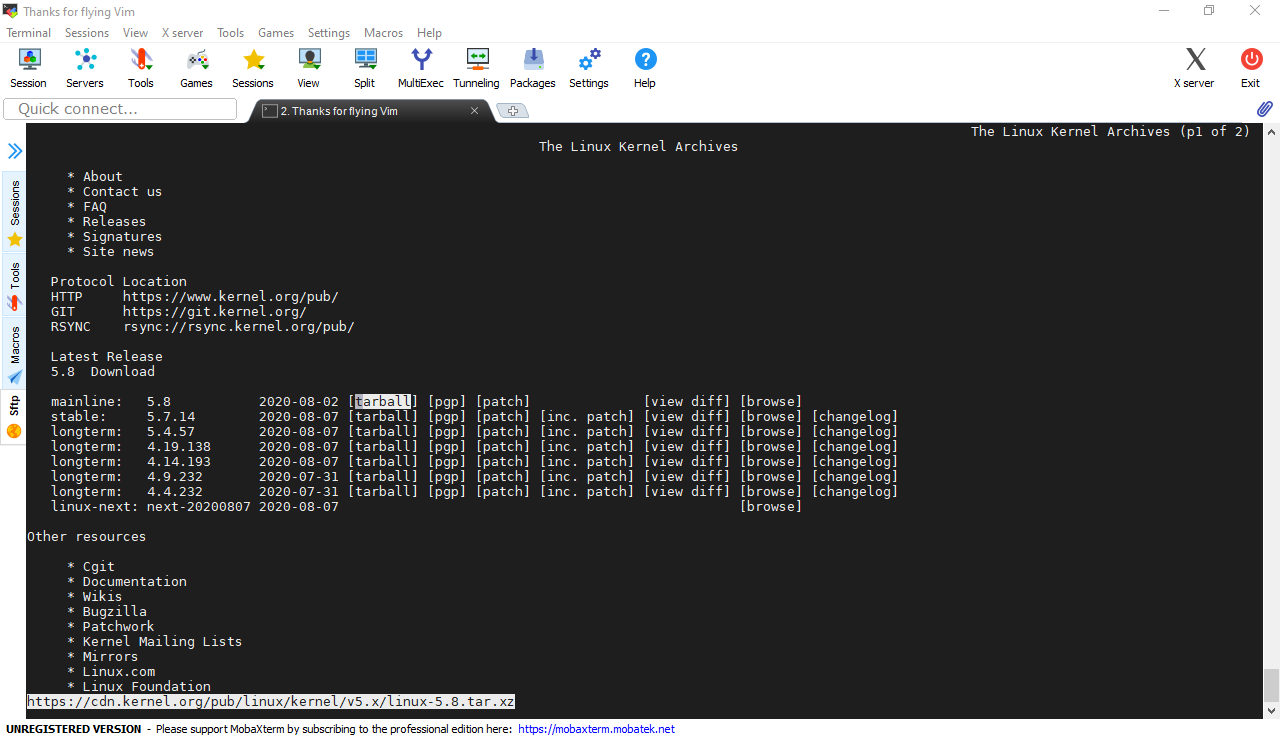
speedtest-screenshot-kernel-org-shot1 speedtest-screenshot-kernel-org-shot2
or if those are not at hand test connectivity on remote free shell servers whatever file downloader as wget or curl was used.
Analogical method is still possible, for example to use wget to get an idea about bandwidtch connectivity, let it roll below 500 mb from speedtest.wdc01.softlayer.com to /dev/null few times:


$ wget –output-document=/dev/null http://speedtest.wdc01.softlayer.com/downloads/test500.zip

$ wget –output-document=/dev/null http://speedtest.wdc01.softlayer.com/downloads/test500.zip

$ wget –output-document=/dev/null http://speedtest.wdc01.softlayer.com/downloads/test500.zip


# wget -O /dev/null –progress=dot:mega http://cachefly.cachefly.net/10mb.test ; date
–2020-08-07 13:56:49–  http://cachefly.cachefly.net/10mb.test
Resolving cachefly.cachefly.net (cachefly.cachefly.net)… 205.234.175.175
Connecting to cachefly.cachefly.net (cachefly.cachefly.net)|205.234.175.175|:80… connected.
HTTP request sent, awaiting response… 200 OK
Length: 10485760 (10M) [application/octet-stream]
Saving to: ‘/dev/null’

     0K …….. …….. …….. …….. …….. …….. 30%  142M 0s
  3072K …….. …….. …….. …….. …….. …….. 60%  179M 0s
  6144K …….. …….. …….. …….. …….. …….. 90%  204M 0s
  9216K …….. ……..                                    100%  197M=0.06s

2020-08-07 13:56:50 (173 MB/s) – ‘/dev/null’ saved [10485760/10485760]

Fri 07 Aug 2020 01:56:50 PM UTC


To be sure you have a real picture on remote machine Internet speed it is always a good idea to run download of random big files on a certain locations that are well known to have a very stable Internet bandwidth to the Internet backbone routers.

4. Using Simple shell script to test Internet speed


Fetch and use speedtest.sh


wget https://raw.github.com/blackdotsh/curl-speedtest/master/speedtest.sh && chmod u+x speedtest.sh && bash speedtest.sh


5. Using iperf to test connectivity between two servers 


iperf is another good tool worthy to mention that can be used to test the speed between client and server.

To use iperf install it with apt and do on the server machine to which bandwidth will be tested:


# iperf -s 


On the client machine do:


# iperf -c 192.168.1.1 


where 192.168.1.1 is the IP of the server where iperf was spawned to listen.

6. Using Netflix fast to determine Internet connection speed on host


Fast

fast is a service provided by Netflix. Its web interface is located at Fast.com and it has a command-line interface available through npm (npm is a package manager for nodejs) so if you don't have it you will have to install it first with:

# apt install –yes npm


Note that if you run on Debian this will install you some 249 new nodejs packages which you might not want to have on the system, so this is useful only for machines that has already use of nodejs.


$ fast


     82 Mbps ↓


The command returns your Internet download speed. To get your upload speed, use the -u flag:


$ fast -u


   ⠧ 80 Mbps ↓ / 8.2 Mbps ↑


7. Use speedometer / iftop to measure incoming and outgoing traffic on interface


If you're measuring connectivity on a live production server system, then you might consider that the measurement output might not be exactly correct especially if you're measuring the Uplink / Downlink on a Heavy loaded webserver / Mail Server / Samba or DNS server.
If this is the case a very useful tools to consider to extract the already taken traffic used on your Incoming and Outgoing ( TX / RX ) Network interfaces
are speedometer and iftop, they're present and installable depending on the OS via yum / apt or the respective package manager.


To install on Debian server:


# apt install –yes iftop speedometer


The most basic use to check the live received traffic in a nice Ncurses like text graphic is with: 


# speedometer -r 
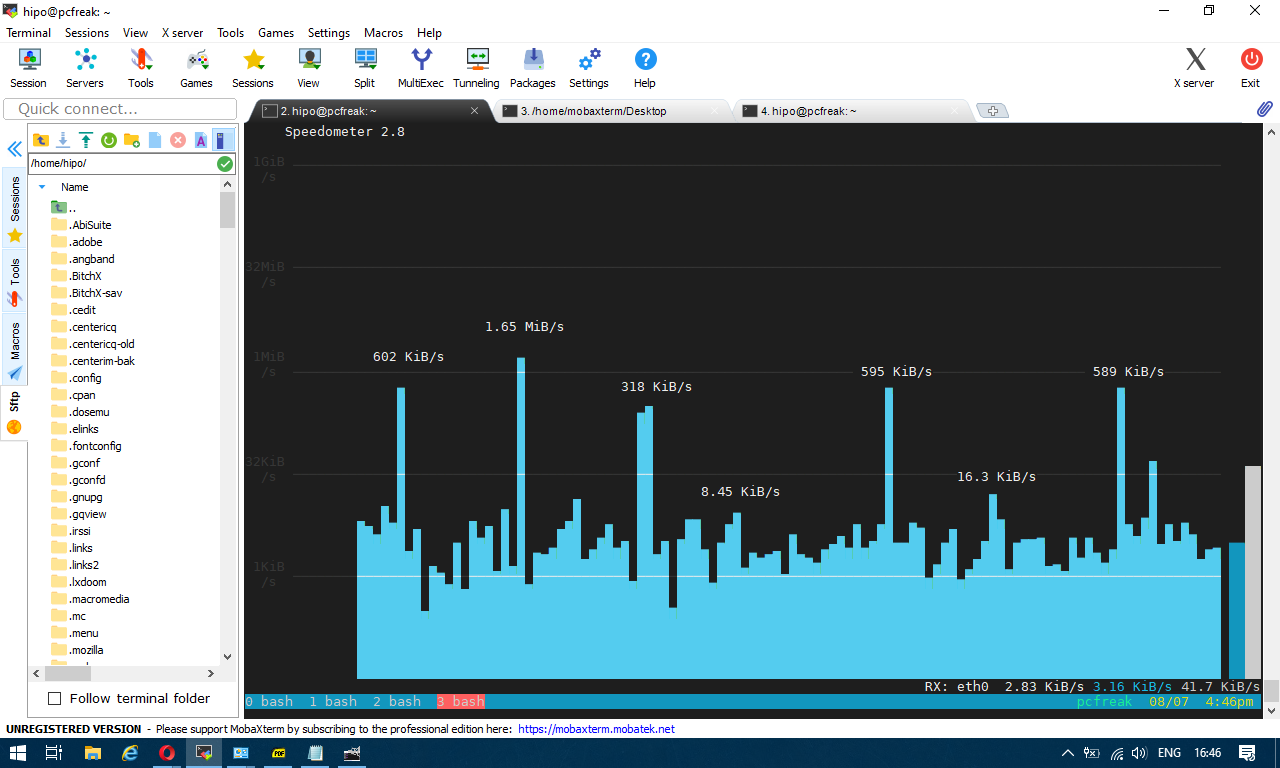

speedometer-check-received-transmitted-network-traffic-on-linux1

To generate real time ASCII art graph on RX / TX traffic do:


# speedometer -r eth0 -t eth0
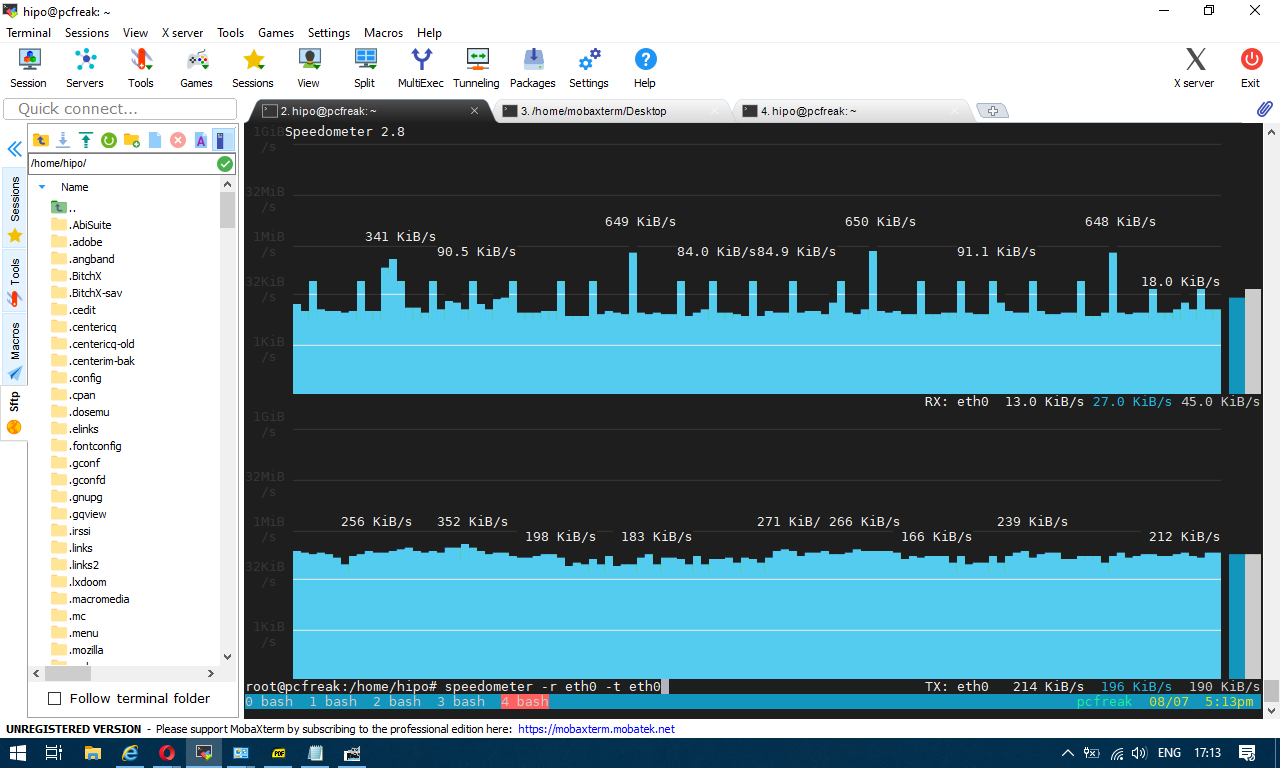

speedometer-check-received-transmitted-network-traffic-on-linux


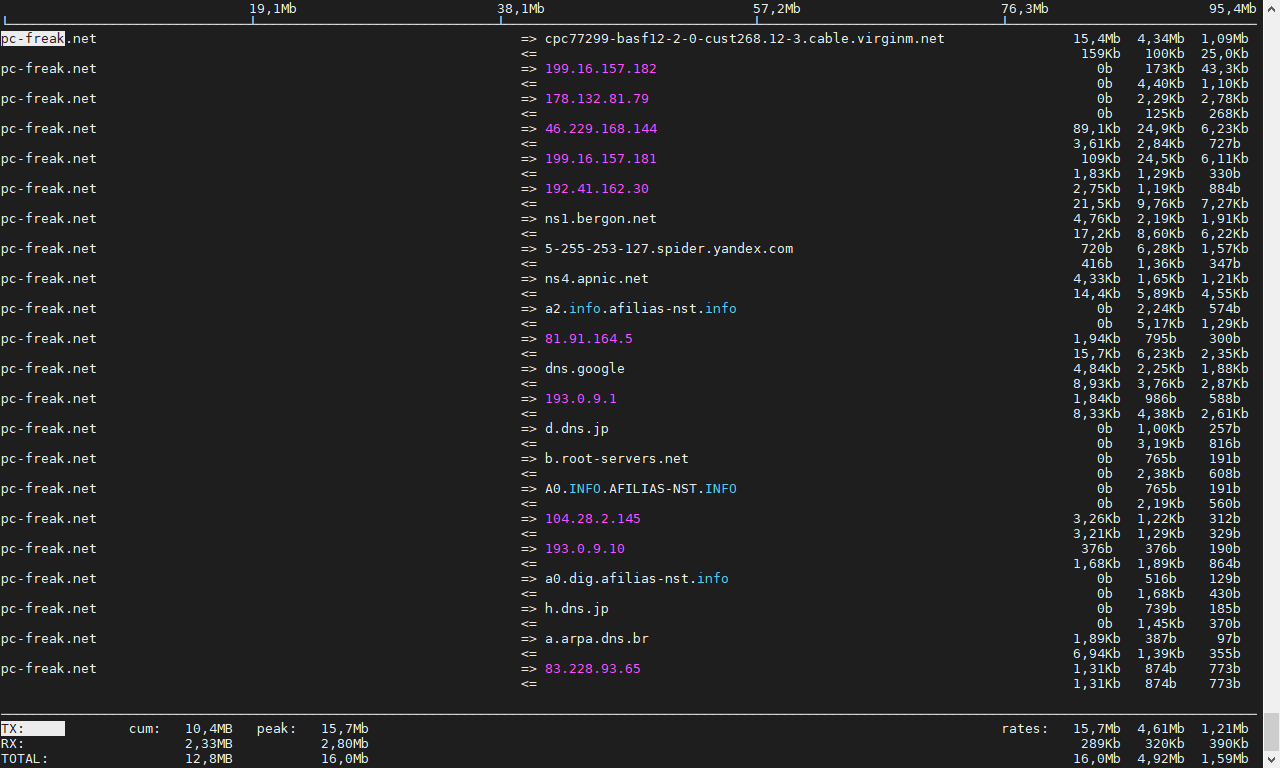
# iftop -P -i eth0


iftop-show-statistics-on-connections-screenshot-pcfreak


Enable printing from Windows and Macs remotely through Linux Print server – Share Brother Printer DCP-1610W with Linux CUPS and Samba Windows Share

Thursday, March 23rd, 2017

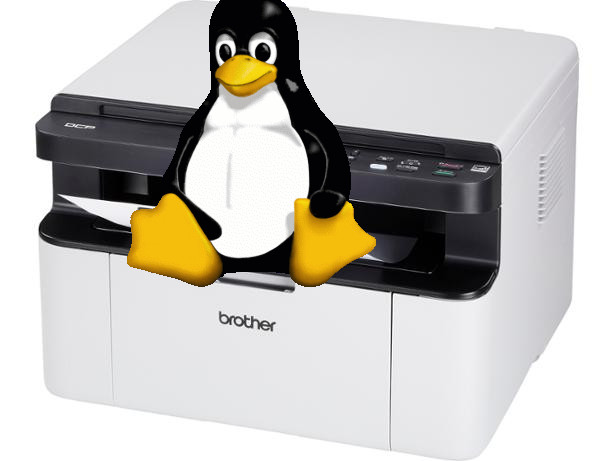
Brother-Printer-model-DCP-1610W-printer-scanner-and-copier-in-one-picture
I've recently bought a new Printer model Brother DCP 1610W and as in my home I have already a small Linux router and a web server where this blog and a couple of other websites runs and I need multiple PC / notebook / mobile phone enabled people to print on the Printer easily pretty much like a Printing server for a Small Office environment.

To do that of course I needed it configured to be accessible remotely for print via LAN and Wireless network. The task is not a complex one and printing remotely over the network is a standard thing many company organizations / universities and univerities does for quite some time and hence nowadays most printers are network connect ready so you just have to place them inside your home or corporate network and use the time to configure them via their web configuration interface or even some have their own embedded wifi adapter, as well as many printers nowdays can even be ready to print directly by just connecting the Printer to the Wi-Fi network and installing its drivers on a Win host.

Anyhow the most common way for both home printer configurations and corporate I'm aware of still is to Share the printer via Windows Server or Win Server Domain so anyone connected to the Network to be able to Add the printer via Winblows.

In the case i'm going to describe below my home the Wi-Fi router is connected to an 5 Port Network Switch (HUB) which on its hand is connected to the Linux router which serves multiple things (a Linux router, a hosting server (web server and a database server hosted, a mail server, traffic proxy server, a firewall and a NAT router), I decided to Share the printer to Wi-Fi connected and LAN clients directly switched via an UTP cable to the switch by using the good old Linux Samba Sharing server.

I did not actually do that for a really long time hence before I started I did some quick research to get an idea on the general steps to partake to succeed in Sharing the Printer over the network of this Debian's Wiki SystemPrinting Guide was mostly helpful.


1. Downloading and Installing necessery Brother Printer deb packages
 

A small remark to make here is my Linux server is running Debian GNU / Linux and hence this article is giving details on how Printer can be Shared on Debian though a minor adaptation of the article should make it possible to install also on any RHEL / CentOS / SuSE etc. Redhat based RPM Linux distribution.)

First step to do is to download Brother printer vendor provided drivers as of moment of writting this article they're here

To download the drivers get the proper links and use wget or curl to download all the necessery .deb archives in lets say in /root/brother-printer-drivers e.g. before that create the folder with:
 

root@linux:/root# mkdir /root/brother-printer-drivers

Also it might be helpful for those who need some other Brother Printer Linux driver complete list of Brother Printer all Linux drivers as of time of writting this post is found on this URL here

Next you need to install following Brother printer driver deb packages brscan-skey brscan4 dcp1610wcupswrapper dcp1610wlpr

root@linux:/root# cd brother-printer-drivers
root@linux:/root/brother-printer-drivers# dpkg -i –force-all brscan-skey-0.2.4-1.amd64.deb

root@linux:/root# dpkg -i –force-all brscan4-0.4.4-1.amd64.deb

root@linux:/root# dpkg -i –force-all dcp1610wcupswrapper-3.0.1-1.i386.deb

root@linux:/root# dpkg -i –force-all dcp1610wlpr-3.0.1-1.i386.deb

root@linux/root# cd  ../


Once installed dpkg -l should show like so:
 

root@linux:/root# dpkg -l |grep -i brother
ii  brscan-skey                                0.2.4-1                      Brother Linux scanner S-KEY tool
ii  brscan4                                    0.4.4-1                      Brother Scanner Driver
ii  dcp1610wcupswrapper                        3.0.1-1                      Brother DCP-1610W CUPS wrapper driver
ii  dcp1610wlpr                                3.0.1-1                      Brother DCP-1610W LPR driver

Brother's vendor provided packages will install drivers under /opt/brother
 

root@linux:/root# ls -al /opt/brother/
общо 16
drwxr-xr-x 4 root root 4096 яну 26 13:58 ./
drwxr-xr-x 3 root root 4096 яну 26 13:55 ../
drwxr-xr-x 3 root root 4096 яну 26 13:58 Printers/
drwxr-xr-x 4 root root 4096 яну 26 13:58 scanner/


2. Installing CUPS Printing Service and related Filters and Postscript packages necessery for PDF processing on CUPS server side


root@linux:/root#  apt-get install –yes cups cups-client cups-common cups-pdf cups-ppdc foomatic-db foomatic-db-engine foomatic-filters foomatic-filters-ppds openprinting-ppds lpr hp-ppd hpijs cups-pdf ghostscript-cups

Your printing should work normally without cups-pdf and ghostscript-cups packages installed but I install them just in case if PDF processing is problematic you can skip that.

It is also useful to install sane and sane-utils packages if you're going to use the brother's scanner capabilities.

root@linux:/root# apt-get install –yes sane sane-utils

Note that considering that all packages installed fine and the CUPS service is running, this should have set a proper printer into /etc/printcap a short database used to describe printers. printcap file is being used by UNIX's spooling system and allows you to dynamic addition and deletion of printers, for Linux / *Nix hosts which have more than one printer connected and added in CUPs records for the various printer goes there.
With a single Brother DCP-1610W Printer like my case is you should have records similar to these:

root@linux:~/brother-printer-drivers# cat /etc/printcap
DCP1610W:\
        :mx=0:\
        :sd=/var/spool/lpd/DCP1610W:\
        :sh:\
        :lp=/dev/usb/lp0:\
        :if=/opt/brother/Printers/DCP1610W/lpd/filter_DCP1610W:


3. Adding a Printer in CUPS the easy way through CUPS Printing System Web Interface


CUPS has a nice web interface for setting up and administering printers and print queues.

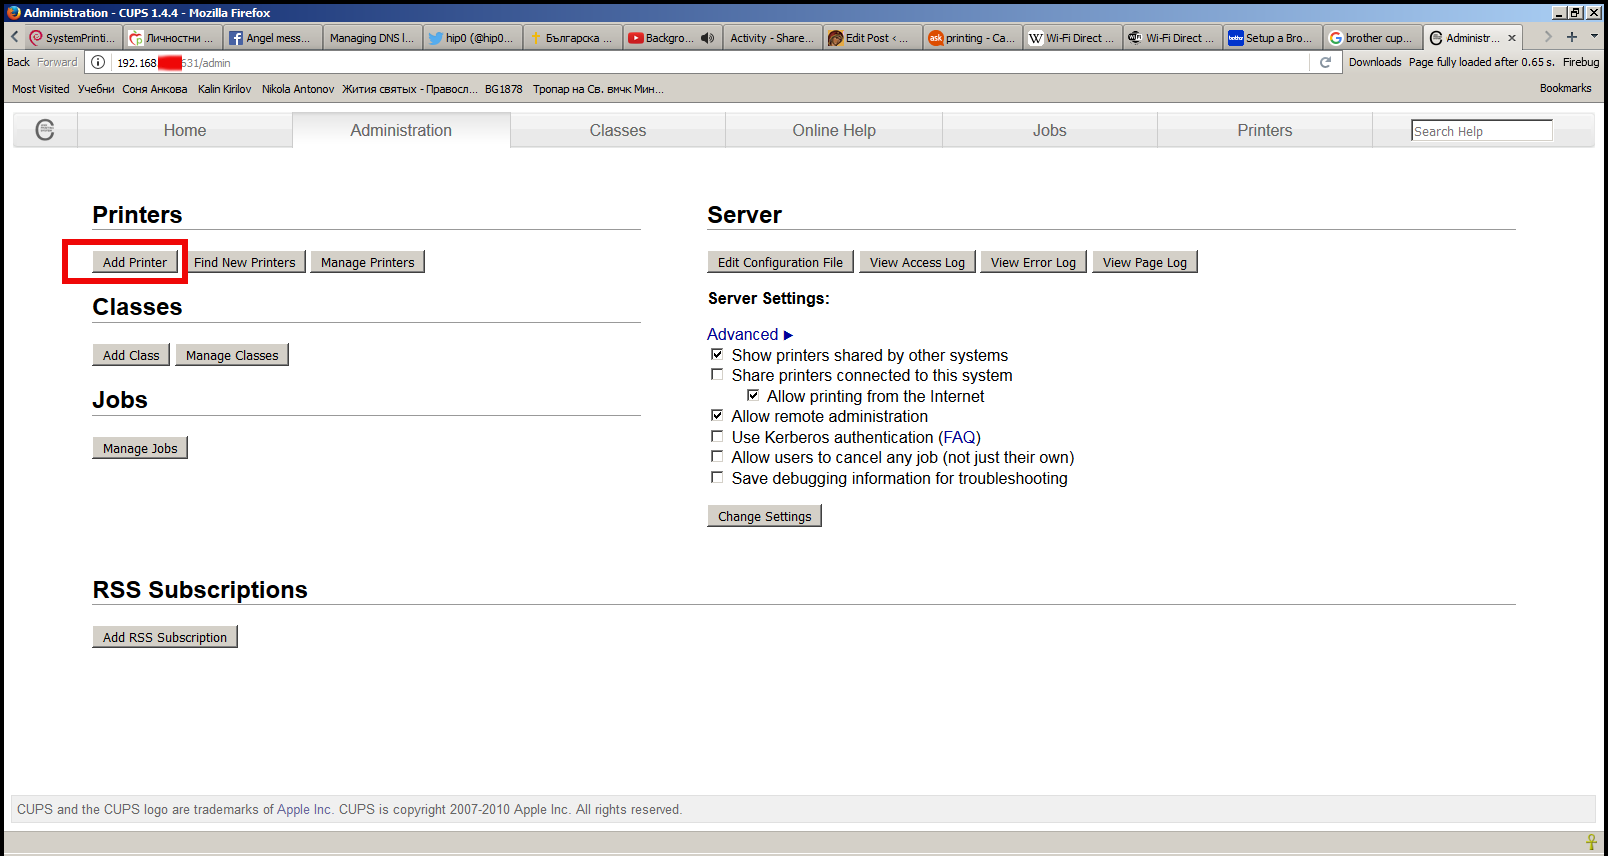
Below is a selfexplanatory screenshot of Add Printer screen 

add-a-new-printer-cups-web-admin-interface-screenshot-in-a-firefox-browser  .


Use your favourite browser (Firefox, Opera, Chromium, lynx, elinks – yes the great news is console / terminal browsers are also supported well by cups web iface) to display interface and add a printer via the Administration screen. If you are asked for a username and password see here.

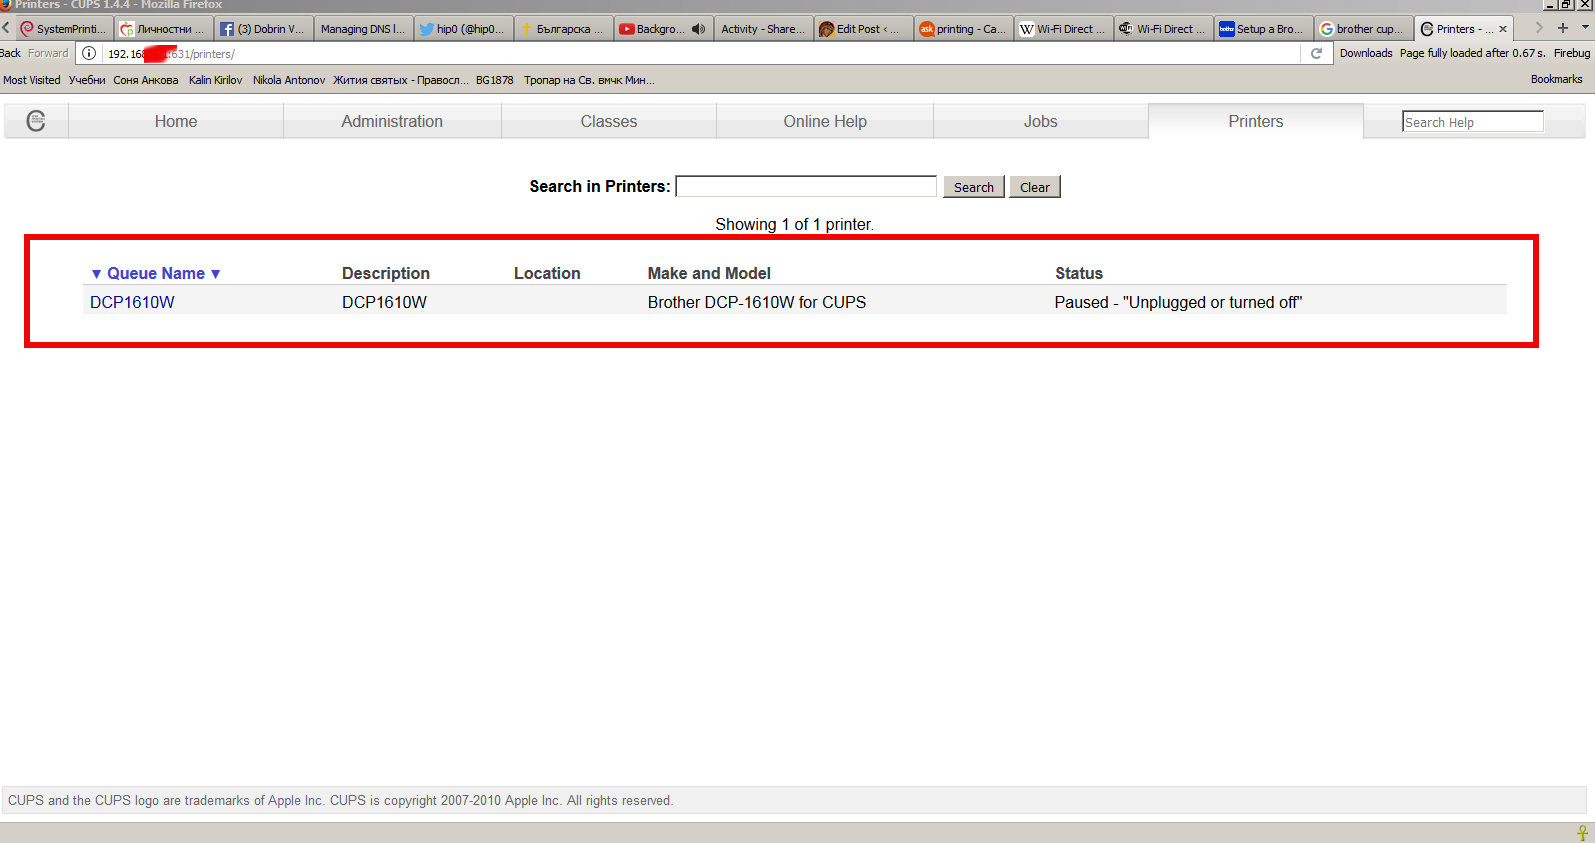
cups-web-admin-interface-accessed-in-browser-listing-brother-dcp1610w-printer-screenshot

There are three sections. The first is for local printers; that is, printers which are usually attached to the machine you are using. These are very often printers using a USB connection but can be parallel or serial port printers.

Adding a USB printer is a common occurance and one should automatically be detected as a local printer and a URI (Unified Resource Indicator) for its connection displayed on the next page.
 

The Other Network Printers section requires you to specify the destination for the remote print queue/printer, which could be on the local network or many kilometres away. AppSocket is almost always available on a network printer and other devices and requires only the IP address of the printer and a port number. An Internet Printing Protocol (IPP) URI is the preferrred choice for connecting to another CUPS server because it is CUPS' native protocol. ipp14 is the ipp backend from CUPS 1.4 and Debian-specific. It is provided because some devices do not work with the current ipp backend, which has a stricter adherence to the IPP standard. A Line Printer Daemon (LPD) URI could be considered if the remote printing service does not support IPP satisfactorily or at all. As before, when a remote print queue is doing the filtering choose RAW as the Make/Manufacturer.


4. Printer Status and Control testing whether CUPS printing is up and running


Once cups is installed and hopefully up and running you should see the cups process up and running to check it do:

root@linux:/root# /etc/init.d/cups status; ps axuwwf|grep -i cups|grep -v grep
Status of Common Unix Printing System: cupsd is running.
root      2815  0.0  0.0  75364  2912 ?        Ss   Mar17   0:00 /usr/sbin/cupsd -C /etc/cups/cupsd.conf

To get some further testing you can also use lpstat command and should get ouput similar to belows:
 

root@linux:/root# lpstat -t
scheduler is running
no system default destination
device for DCP1610W: usb://Brother/DCP-1610W%20series
DCP1610W accepting requests since Fri Mar 17 23:03:37 2017
printer DCP1610W disabled since Fri Mar 17 23:03:37 2017 –
        Unplugged or turned off

At the moment of issuing above command it shows printer is disabled because of moment of execution the printer was turned off for a while cause I was not needing it you should get usually an output of enabled and ready to print.

lpstat is also about to report whether a queue is accepting jobs and what is yet to be printed you can do


5. Install and Configure Samba Sharing Server on the Linux server


You can setup CUPS to allow Windows machines to print to a CUPS server using an http address.

First, install the samba package. When you are asked to use WINS, say yes.

root@linux:/root#  apt-get install samba

Next you might want to set setup your /etc/cups/cupsd.conf file by default CUPS would listen to LPD's port 631 if you don't have a strong firewall isolating you from the Internet on port 631 you might want to change that port to another one lets say to Port 49651.


I personally prefer keep the default port 631 and do use a robust firewall. If you want to change it modify config to something like:

# Our private connection we listen to Listen *:49651 # Allow machines on local network to use printers <Location /printers> Order allow,deny Allow 192.168.0.* Allow 192.168.1.* </Location>

If you like to filter access to CUPs daemon to receive Printing requests to be originating only from the local network place in smb.conf also something with your private network ranges:

# Allow machines on local network to use printers

<Location /printers>
Order allow,deny
Allow 192.168.0.*
Allow 192.168.1.*
Allow 192.168.2.*
</Location>
<Location />
  # Allow remote administration…
  Order allow,deny
##  Allow all
Allow 192.168.0.*
Allow 192.168.1.*
Allow 192.168.2.*
</Location>
<Location />
  # Allow remote administration…
  Order allow,deny
##  Allow all
Allow 192.168.0.*
Allow 192.168.1.*
Allow 192.168.2.*
</Location>
<Location /admin>
  # Allow remote administration…
  Order allow,deny
##  Allow all
Allow 192.168.0.*
Allow 192.168.1.*
Allow 192.168.2.*
</Location>


This will listen on port 49651 from any network. You may use some other port number besides 631. Note that the dynamic and/or private ports as specified by the IANA are in the range 49152 through 65535. Also, this will only allow computers from the local network to print to the CUPS printers.
 

6. Use CUPS Printing server to print over the network directly


Next you need to restart the CUPS daemon once again as it will be used for samba printing


# service cups restart


Now on each Windows machine, Choose that you want to install a network printer and that you want to install a printer on the Internet or home/office network. The URL you will use should be smth like:


http://<cups_server_hostname>:49651/printers/DCP1610W


Lastly, select the Brother downloaded from Internet or the one that's available on the Install CD, for any other vendor printer if it is lets say HP Printer or Canon to install use the respective provided driver or as a last resort use the Generic section driver labeled MS Publisher Color Printer.


7. Configure Samba to Share CUPS network enabled printer


I've done a minor changes in default installed /etc/samba/smb.conf to make the printer accessible from The Samba server here is the main things to consider changing:
 

# Change this to the workgroup/NT-domain name your Samba server will part of
   workgroup = WORKGROUP

#   security = user
security = share

[printers]
   comment = PC Freak Printer
   browseable = yes
   path = /var/spool/samba
   printable = yes
   guest ok = yes
   read only = yes
   create mask = 0700

# Windows clients look for this share name as a source of downloadable
# printer drivers
[print$]
   comment = Printer Drivers
   path = /var/lib/samba/printers
   browseable = yes
   read only = yes
   guest ok = yes


Next restart Samba server to make the new setting take affect:
 

root@linux:/# /etc/init.d/samba restart
Stopping Samba daemons: nmbd smbd.
Starting Samba daemons: nmbd smbd.
root@linux:/# ps axu|grep -E "smb|nmb"
root     21887  0.0  0.0 169588  1904 ?        Ss   16:53   0:00 /usr/sbin/nmbd -D
root     21892  0.0  0.0 197560  3272 ?        Ss   16:53   0:00 /usr/sbin/smbd -D
root     21894  0.0  0.0 197560  1564 ?        S    16:53   0:00 /usr/sbin/smbd -D
root     21899  0.0  0.0 112368   840 pts/6    S+   16:53   0:00 grep -E smb|nmb

root@linux:/#

Complete current smb.conf configuration I use to make the Brother Printer DCP 1610W accesible via network share is here

This section needs updating as you can setup print server via samba print sharing just by uploading drivers.

When printing to windows printers in an NT domain using SMB the Device URI should use similar to:


smb://username:password@domain/server/printername


This allows Samba to authenticate against a domain controller for acces to the printer queue.

In my case as you can see in below smb.conf configuration I've configured Samba security = share which will allow anyone to access the samba server without authentication so you can omit  username:password@ part

One good way to determine the printername  (in case you are not sure of) is to use smbclient command line tool. computername refers to the name of the machine that shares the printer:


smbclient -L copmputername


computername is the name of the samba server machine or its IP address


E.g.
 

hipo@linux:~$ smbclient -L //192.168.0.1/
Enter Attitude's password:
Domain=[WORKGROUP] OS=[Unix] Server=[Samba 3.5.6]

        Sharename       Type      Comment
        ———       —-      ——-
        print$          Disk      Printer Drivers
        IPC$            IPC       IPC Service (pcfreak server)
        DCP1610W        Printer   DCP1610W
Domain=[WORKGROUP] OS=[Unix] Server=[Samba 3.5.6]

        Server               Comment
        ———            ——-
        PCFREAK              pcfreak server

        Workgroup            Master
        ———            ——-
        WORKGROUP            WORKGROUP


Check the ouput for entries of Type "Printer":


The resulting (Linux / Mac OS) Samba Share access URL from the output above would be

smb://192.168.0.1/DCP1610W


8. Adding Printer to your Windows machines to enable actual Remote Samba Sharing printing

Assuming you already know the Printer share name, here is what I needed to do to have the Printer Added on each of Windows Desktop PCs and Notebooks


Control Panel -> Devices and Printers -> Add a printer -> (Add a Network wireless or bluetooth printer)

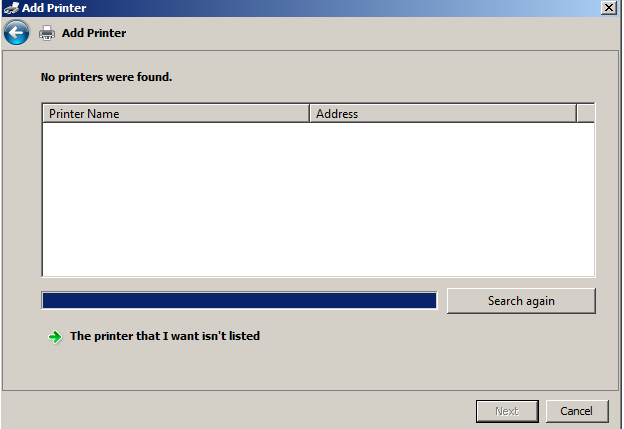
Then instead of Searching the printer to click on:

The printer that I wasn't listed

add-samba-network-share-brother-dcp-1610w-printer-to-windows-7-machine-no-printer-found-from-add-printer

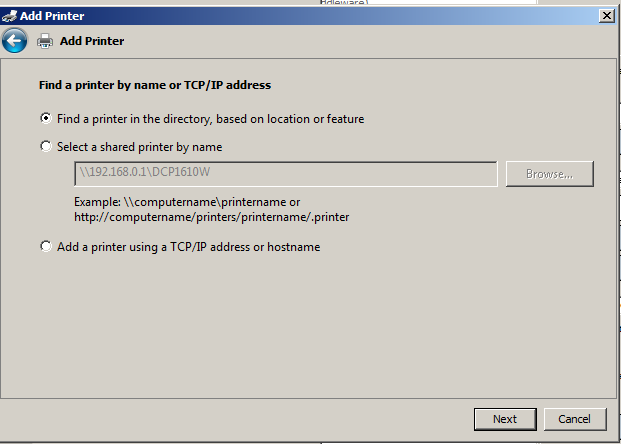
Then type in the URL or IP (as in my case) leading to the printer as you see in below screenshot:


9. Printer Samba Sharing Using Macintosh notebook as the Client and Debian as the Server


1. Assuming you have cups to set up the printer on Debian as described above.

2. On the Mac (OS X 10.4+) start Print and Fax from System Preferences. Use the + button to add a printer.

3. Look first in the "Default" tab. If the automagic printer-sharing has worked, and your Mac is connected to the local network properly, then the Debian-based printer should already be visible in the list.

Just select it and use the recommended print driver. If you face problems you can try to play with
Gutenprint Printer drivers to make it printing.

4. If your printer is not visible in the Default tab, then try adding it on the "IP" tab.

Pick IPP as the protocol, give the plain IP address of the server in the address box (in my case that's 192.168.0.1, and in the Queue box put
"printers/DCP1610W

Put whatever helps you identify the printer in the Name and Location boxes (fields), and choose a printer driver than matches Brother DCP1610W or with another printer installed whatever you used to set up the printer on Debian .
Finally Pray that God help you to make it work and press the Add button. If you prayed honestly and repenting for your sins perhaps you will have mercy and it will work, of course if not try to research online on how to fix it further by God's grace.

Note that making printing work on Mac is a little bit of tricky and it might cause you some extra effort / nerves to complete.


10. Some other Useful maintanance commands you might need in future CUPS Printer queue jobs maintance


For displaying or setting print queue options and defaults:

lpoptions -p <print_queue_name> -l

Stopping and starting print queues. Acceptance and rejection of jobs sent to a destination:
 

cupsdisable <print_queue_name>
cupsenable <print_queue_name>
cupsaccept <print_queue_name>
cupsreject <print_queue_name>


To Cancel all jobs on a destination and additionally delete job data files:

cancel -a <print_queue_name>
cancel -a -x <print_queue_name>

That's all folks, Thanks God the printer should be working. Enjoy!

Browse the web graphically in text console TTYs with w3m-img and links2 on Debian, Ubuntu, Fedora and CentOS Linux

Sunday, May 6th, 2012

links2 (links console graphics) www browser logo picture

Lately, I'm starting to use my tty consoles more and more. Most of the people should be probably aware of the existence of lynx, elinks and w3m text browsers enabling the console geeks to browse or debug web pages in plain text mode.

Anyhow, for people who did not used one of the aforementioned browsers to text brose the net I warmly suggest you give them a try. A good review on 'em is in one of my  previous post – Text mode console browsing with lynx, elinks, w3m and links text browsers

For people dedicated to only use console and text mode console on their Personal Computer, simply installing and using this text browsers will not allow you to view any images tags in the html.

Nowdays one of the reasons many people would decide not to use console for web is because they want to see pictures. Hence I believe by having the opportunity to have almost fully functional text browsing in Linux cosnole /  terminal many might choose not to bother with heavy resource consuming desktop browsers like Firefox, Google Chrome, Opera etc..

Another good reason why you might want to use a console browser instead of its Desktop resource monsters, would be improved efficiency of work. It is a well evident fact keyboard access to commands is always faster than mouse and GUI!

Besides that, I'm convinced there should be many hard core geeks out there, who still can happily live without Macromedia Flash ads and Videos in Web. For this group of users having support for graphical browsing in console is also a must.
Following my previous thoughts there should be many people who doesn't have a specific requirement for GUI programs but still use (mutt, ssh, vim, mpg321, zgv etc.).

I'm sure there are plenty of this people who do most of their work in text console and use the X windows server in conjunction with mimalistic graphical environment like (DropBox, XFCE …) for the one and only reason to view  pictures embedded in web pages.

I'm one of all this guys prior mentioned, keen on console tty browsing. Therefore while checking the available console browsers few days ago, I've stumbled on a text console w3m browser capable of displaying website with images in console called w3m-img.

w3m-img is displays pictures in web over a plain console tty or in X terminals (mlterm, xterm etc.).

Here is the description returned by apt-cache show w3m-img

debian:~# apt-cache show w3m-img|grep -i description -A 3
Description: inline image extension support utilities for w3m
w3m-img provides some utilities to support inline images for w3m
on terminal emulator in X Window System environments and Linux
framebuffer.

w3m-img doesn't rely on svgalib for displaying the pictures, but comes with its own written console image display & rendering library called w3mimgdisplay. – /usr/lib/w3m/w3mimgdisplay.

One w3m-img pre-requirement in order to be able to display pictures in plain text console ttys is to have the Linux kernel framebuffer enabled..

Actually, framebuffer is enabled by default on latest stable Debian and derivatives as well as on most other Linux releases as of time of writing.
Framebuffer is also active on other RPM based distros (Fedora, CentOS, SuSE) etc.

The Frambebuffer on or off is controlled via some directives added in grub or lilo configuration files – (depending on the installed boot loader).

Some people can only boot their PCs with the framebuffer kernel support switched off at boot time or the system will not boot Linux at all.
Unfortunately this unlucky ones, would not be able to use the picture rendering w3m-img capabilities but don't be desperate, there is hope 🙂

For people who can't run their Linux distro with a framebuffer kernel support enabled there is a custom hacked version of linksconsole text browser called links-graphic. links-graphic supports both console graphical text browsing using the framebuffer or alternatively svgalib as a console graphics render machine.

I used to be actively using links-graphics WWW browser quite often about 8 years ago and just remembering it brings me good memories of the good old console "hacking" years 🙂

Anyways, w3m-img packaged version is currently available for both rpm and deb based Linux distributions. Here is how to install on both.

1.Install and use w3m-img on Debian, Ubuntu, Mint Linux-es

debian:~# apt-get --yes install w3m-img
....

This should install w3m-img, if of course there is already no previous install of w3m package on the system.

In case you have the w3m deb installed, you will have to first remove the existing w3m installed version before installing the w3m-img package, otherwise you will probably end up with an installation conflict (at least I got such a dependency conflict while apt-getting). Probably the conflict would never occur if aptitude install w3m-img is used instead of apt ….

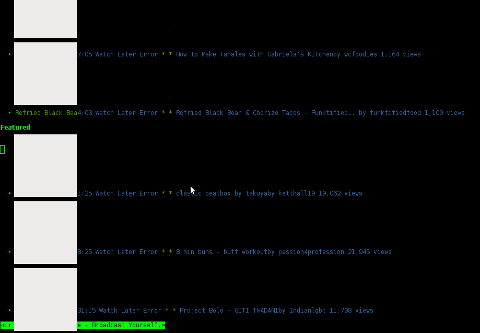
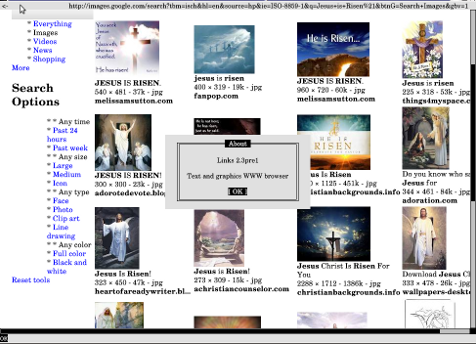
Usage of w3m-img is exactly the same as using the w3m text only browser version. Below is a screenshot example of w3m-img in action:

debian:~# w3m http://images.google.com

w3m-img text (console) browsing images.google.com screenshot

Jesus Christ Pantocrator Orthodox icon google image search screenshot Debian Squeeze Linux

As you can see in the upper screenshots w3m-img displays pictures pretty nice, whether even images.google.com search functionality works fine.

Generally IMHO a lot of pages looks cool with w3m-img.
Some elements placement during rendering, comes at odd positions but this is normal, since original w3m text browser doesn't have any support for Javascript 1 / 2.

For those people who would like to have both javascript basic support and images in a plain text console browsing you, again you will have to compile links2 WWW browser from source manually with svgalib support enabled.

2. Installing w3m-img to text-browse with images on Fedora, CentoS, RHEL, Redhat etc.

[root@centos ~]# yum -y install w3m-img
....

A very cool thing of w3m graphical console browser is it support  most major image formats including animated GIF files 🙂

The way animated GIFs are viewed is very old school, here is a notice extracted from README.img contained in the pack.
 

Notice
If you want to see GIF animation, please hit a suitable key, such
as 'h', 'l', etc., repeatedly, because a frame is rewritten
according to the re-drawing demand from w3m.
Some code in w3mimg/fb/fb.c was originally written by Mr. Yamasaki.
http://www.sainet.or.jp/~yamasaki/download/fb-sample.tar.gz

As one can read in order to see an animated GIF file with w3m you will have to keep pumping the h or l key or Enter key 😀 😀 😀 (like a nintendo game ain't it?)

Here is the also the complete list of Supported browser features mentioned in README.img
 

Support

* Display inline image (GIF,PNG,JPEG, etc.) on terminals
(xterm,rxvt, etc.) of X11 or Linux framebuffer device.
* Support inline image of img tag.
Support of attributes "width", "height", and "align".
* Direct display of image file which header is "Content-type: image/*"
* Support of

tag.
Support of attributes "shape" and "coords" of

tag.
* Support of an attribute "ismap" of img tag.
"w3m" adds coordinate of the cursor as ?, to url, and sends url.
* Support of an attribute "type=image" of img tag.
"w3m" sends coordinate of the cursor as .x=&.y=.
* Asynchronous loading of image files.
* Using cache of image file as pixmap.
* Support of GIF animation when use GdkPixbuf.

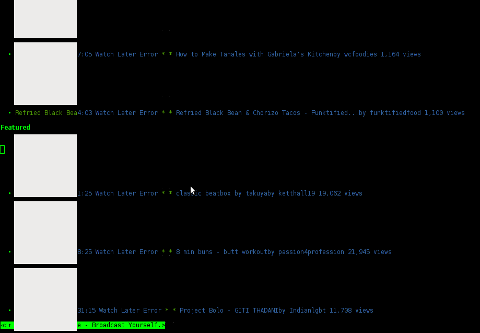
Something else which I find worthy to mention is the browser behaviour, whether a webpage has Adobe Flash .swf or .flv files embedded. If such files are contained in website source code, they will be simply ignored and the w3m keeps running stable (no strange flash crashes! hooray!).

While website with flash is opened in w3m, Adobe Flash's field on the screen shows either a blank rectangle or an empty square (depending on the site embedded flash banner dimensions and form).

W3m-Img text web browser with picture viewing support adobe flash enabled youtube.com opened screenshot

Stability of w3m in opening flash website is something really nice. I say this because I still remember how terrible the situation with links with svgalib support compiled in used to be. I remember back in the day with links2 most "flash enabled" websites lead the browser to a ugly core dump.

3. Install and use links2 on Debian and derivatives Linux to browse in console graphically with javascript support

As aforementioned, there is a hacked version of links browser called links-graphics
This hacked version is available as a package within Debian, Ubuntu and presumably most if not all of the rest deb based Linux repos.

On Fedora and the other RPM family Linuces links-graphics, should be downloaded separately as rpm and installed and is inavailable through default rpm repositories.

On Debian distros links-graphics is available by installing links2.
debian:~# apt-get install --yes links2
....

Later to start links2 in graphics mode in lets say tty1 on a machine booted its kernel with framebuffer support, type:

debian:~# links2 -driver fb http://images.google.com

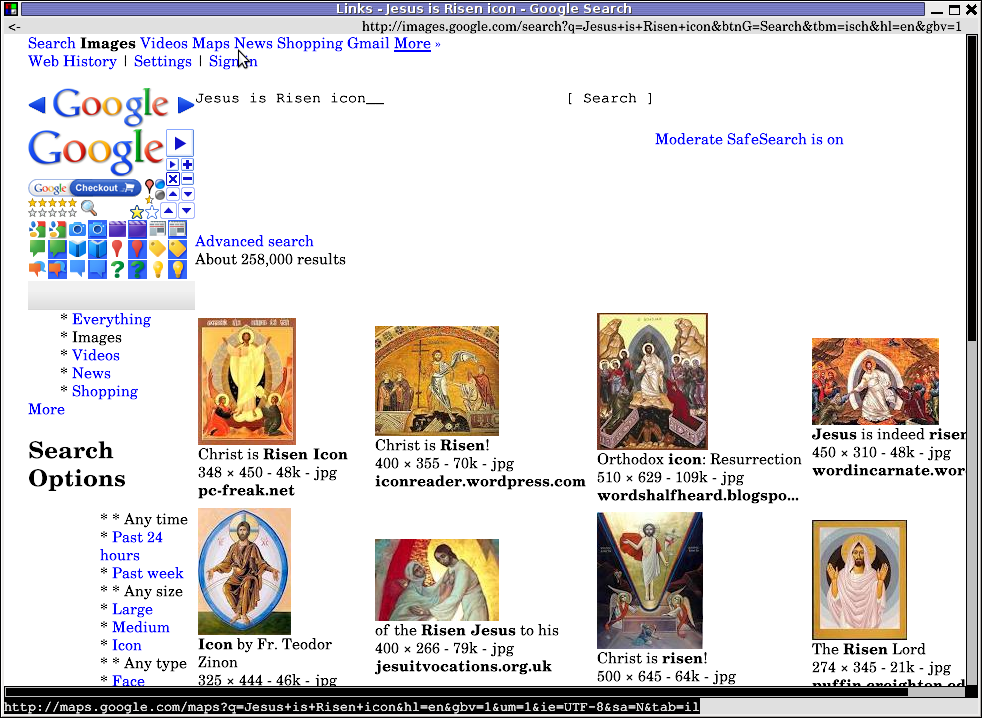
Actually links2 looks, way better in console than w3m but this is quite normal, as links is way more "user friendly GUI text browser".

For those, using their console ttys without framebuffer enabled you can alternatively run links2 with its svgalib graphics support like so:

debian:~# links2 -driver svgalib -mode 320x200x16 http://images.google.com

links graphics / xlinks images in X window on Debian GNU / Linux screenshot

Note that the svgalib driver is not working on my machine, as my Linux kernel framebuffer is already enabled. Probably if I want to use links2 through  svgalib I will have to reboot and boot machine with framebuffer kernel support switched off…

links2 also supports X window graphics and is a great for Graphical environment WWW browser substitute to CPU intensive Iceweasel / Firefox or Google Chrome.

Links2 can be also used as a default browser in X windows (GUI) with any graphic manager. In my view it is   perfect web browser  for scientists and people who does not need support for Adobe Flash Player or HTML5 standards.

To use links in XFCE or GNOME Desktop env, the quickest way is to prepare new Application Launcher to run command:

debian:~# links2 -g

Google Images links2 graphics in GNOME desktop env screenshot

It is useful to use a quick alias to links -g in my ~/.bashrc in order to allow easier browsing from console by typing xlinks someurladdress.com

If you want to add this xlinks shell alias  exec:

debian:~# echo 'alias xlinks='links2 -g $1' >> ~/.bashrc

4. Install links with graphics console support on Fedora, CentOS and RHEL

[root@fedora ~]# cd /usr/local/src
[root@fedora src]# wget -q http://jakub.horky.net/rpm/links/links-2.1pre15-2/links-2.1pre15-2.i386.rpm
[root@fedora src]# rpm -ivh --nodeps links-2.1pre15-2/links-2.1pre15-2.i386.rpm
Preparing... ########################################### [100%]
Installing... ########################################### [100%]

If you get some errors with missing libraries after installing and launching links2, try to resolve them by manually linking them with ln cmd or look for the library package rpm versions and install them via yum. Another way is to fetch the links2 source from Links2 official website links.twibright.com and build from source.

Since the last time in 8 years ago I used links2,  it evolved a lot. The version now did not crash as before with flash websites are viewed.  Generally Links2 now is way more  stable.
To sum it up most people, will probably want to use Links2 for console graphical browsing as the speed and support for HTML and Javascript and web site formatting is way advanced than w3m-img

I haven't compared the speed of opening pages, but since w3m-img is html and graphics render is more simple than xlinks I suppose at some occasions w3m-img will be faster in site rendering.
However still links2 performs really light fast and its web page opening time is swift and more than good.. If xlinks opening performance is compared to most (if not all) traditional desktop browsers used nowdays Links2 will definitely beat them.

A good links2 application instead of a traditional desktop browser is also for people who aim at  improving website browsing time.

I haven't thoroughfully enough, researched on other text console grahic browser alternatives programs. If I miss something and you know amy other better ones please let me know.

Wish you a Happy Browsing 😉

Text mode (console) browsing with tabs with Elinks / Text browsers – (lynx, elinks, links and w3m) useful HTTP debugging tools for Linux and FreeBSD servers

Friday, April 27th, 2012

The last days, I'm starting to think the GUI use is making me brainless so I'm getting back to my old habits of using console.
I still remember with a grain of nostalgy how much more efficient I used to be when the way to interact with my computer was primary in text mode console.
Actually, I'm starting to get this idea the more new a software is the more inefficient it makes your use of computer, not to mention the hardware resources required by newer software is constantly increasing.

With this said, I started occasionally browsing again like in the old days by using links text browser.
In the old days I mostly used lynx and its more advanced "brother" text browser links.
The main difference between lynx and links is that lynx does not have any support for the terrible "javascript", whether links supports most of the Javascript ver 2.
Also links and has a midnight commander like pull down menus on the screen top, – handy for people who prefer some more interactivity.

In the past I remember I used also to browse graphically in normal consoles (ttys) with a hacked version of links calledTThere is also a variation of linksxlinks suitable for people who would like to have graphical browser in console (ttys).

I used xlinks quite heavily in the past, when I have slower computer P166Mhz with 64MB of memory 2.5 GB HDD (What a times boy what a times) .
Maybe when I have time I will install it on my PC and start using it again like in the old days to boost my computer use efficiency…
I remember the only major xlinks downside was it doesn't included support for Adobe flash (though this is due to the bad non-free software nature of Adobe lack of proper support for free software and not a failure of xlinks developers. Anyways for me this wasn't a big trouble since, ex Macromedia (Adobe) Flash support is not something essential for most of my work…

links2 is actually the naming of links version 2. elinks emerged later (if I remember correctly, as fork project of links).
elinks difference with links constitutes in this it supports tabbed browsing as well as colors (links browser displays results monochrome).

Having a tabbed browsing support in tty console is a great thing…
I personally belive text browsing if properly used can in many ways outbeat, graphic browsing in terms of performance and time spend to obtain data. I'm convinced text browsing is superior for two reasons:
1. with text there is way less elements to obstruct your attention.
– No graphical annoying flash banners, no annoying taking the attention pictures

2. Navigating in web pages using the keyboard is more efficient than mouse
– Using keyboard shorcuts is always quicker than mouse, generally keboard has always been a quicker way to access computer commands.

Another reason to use text browsing is, it is mostly the text part of a page that matters, most of the pages that provide images to better explain a topic are bloated (this is my personal view though, i'm sure designer guys will argue me :D).
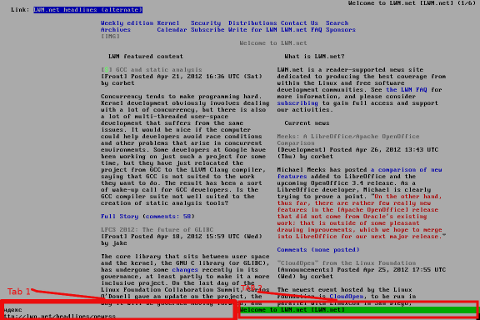
Here is a screenshot of a my links text browser in action, I'm sorry the image is a bit unreadable, but after taking a screenshot of the console and resizing it with GIMP this is what I got …

Links text console browser screenshot with 2 tabs opened Debian GNU / Linux

For all those new to Linux who didn't tried text browsing yet and for those interested in computer history, I suggest you install and give a try to following text browsers:
 

  • lynx
  • (Supports colorful text console text browsing)
    lynx text console browser Debian Squeeze GNU / Linux Screenshot

  • links
  • Links www text console browser screenshot on Debian Linux

  • elinks
  • (Supports colors filled text browsing and tabs)
    elinks opened duckduckgo.com google alternative search engine in mlterm terminal Debian Linux

  • w3m
  • w3m one of the oldest text console browsers screenshot Debian Linux Squeeze 6.2

By the way having the 4 text browsers is very useful for debugging purposes for system administrators too, so in any case I think this 4 web browsers are absoutely required software for newly installed GNU / Linux or BSD* based servers.

For Debian and the derivatives Linux distributions, the 4 browsers are available as deb packages, so install them with following apt 1 liner:
 

debian:~# apt-get –yes install w3m elinks links lynx
….

FreeBSD users can install the browsers using, cmd:
 

freebsd# cd /usr/ports/www/w3mfreebsd# make install clean
….
freebsd# cd /usr/ports/www/elinksfreebsd# make install clean
….
freebsd# cd /usr/ports/www/linksfreebsd# make install clean
….
freebsd# cd /usr/ports/www/lynxfreebsd# make install clean
….

In links using the tabs functionality appeared, somewhere near the 2001 or 2000 (at least that was the first time I saw links with tabbed browsing enabled). My first time to saw links support opening multiple pages within the same screen under tabs was on Redhat Linux 9

Opening multiple pages in tabs in the text browser is done by pressing the t key and typing in the desired URL to open isnide.
For more than 2 tabs, again t has to be pressed and same procedure goes on and on.
It was pretty hard for me to figure out how I can do a text browsing with tabs, though I found a way to open new tabs it took me some 10 minutes in pondering how to switch between the new opened links browser tabs.

Hence, I thought it would be helpful to mention here how tabs can be switched in links text browser. Actually it turned it is pretty easy to Switch tabs tabs back and foward.

1 tab to move backwards is done with < (key), wheter switching one tab forward is done with the > key.

On UK and US qwerty keyboards alignment the movement a tab backward and forward is done with holding shift and pressing < onwards holding both keys simultaneously and analogously with pressing shift + >