Though, I'm GNU / Linux user for many years now. I have to say, everything is not so perfect as many people present it.
Configuring even simple things related to multimedia on Linux is often a complete nightmare.
An example, today I've decided to upgrade my 32 bit Skype version 2.0 beta for Linux to 64 bit Skype 2.2 beta .
The reason I was motivated to upgrade skype was basicly 2.
a) My Skype run through 32 bit binary emulation with /usr/bin/linux32
b) I had issues with my skype if someone give me a Skype Call, while I have a flash video or some other stream in Browser (let's say Youtube).
Actually being unable to receive a skype call or initiate one while I have some kind of music running in the background or just some kind of Youtube video paused was really annoying. Hence until now, everytime I wanted to speak over skype I had to close all Browser windows or tabs that are using my sound card and then restart my Skype program ….
Just imagine how ridiculous is that especially for a modern Multimedia supporting OS as Linux is. Of course the problems, I've experienced wasn't directly a problem of Linux. The problems are caused by the fact I have to use the not well working proprietary software version of Skype on my Debian GNU / Linux.
I would love to actually boycott Skype as RMS recommends, but unfortunately until now I can't, since many of my friends as well as employers use Skype to connect with me on daily basis.
So in a way I had to migrate to newer version of skype in order to make my Linux experience a bit more desktop like …
Back to the my skype 2.0 to 2.2. beta upgrade story, the overall Skype upgrade procedure was easy and went smootlhy, setting correct capturing later on however was a crazy task ….
Here is the step by step to follow to make my upgraded skype and internal notebook mic play nice together:
1. Download 64 bit Skype for Debian from skype.com
For the sake of preservation in case it disappears in future, I've made a mirror of skype for debian you can download here
My upgrade example below uses directly the 64 bit Skype 2.2beta binary mirror:
Here are the cmds once can issue if he has to upgrade to 2.2beta straight using my mirrored skype:
debian:~# wget https://www.pc-freak.net/files/skype-debian_2.2.0.35-1_amd64.deb

...
2. Remove the old version of skype
In my case I have made my previous skype installation using .tar.bz2 archive and not a debian package, however for some testing I also had a version of skype 2.0beta installed as a deb so for the sake of clarity I removed the existing skype deb install:
debian:~# dpkg -r skype

...
3. Install skype-debian_2.2.0.35-1_amd64.deb downloaded deb
debian:~# dpkg -i skype-debian_2.2.0.35-1_amd64.deb

...
After installing skype, I installed pavucontrol – A volume control for the PulseAudio sound server
4. Install pavucontrol
debian:~# apt-get install pavucontrol
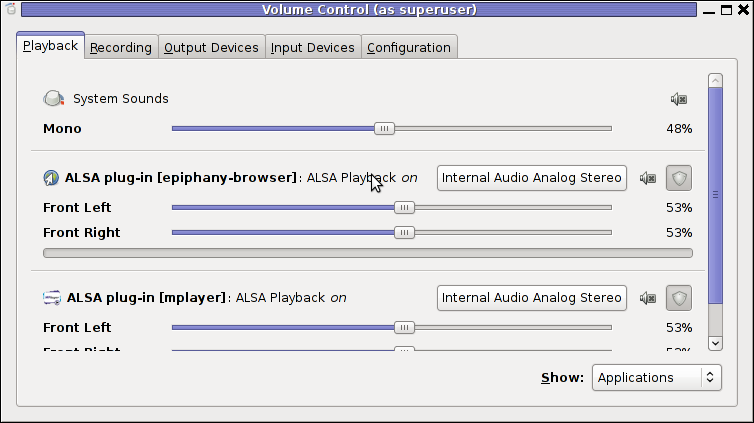
Pavucontrol has plenty of sound configurations and enables the user to change many additional settings which cannot be tuned in alsamixer
pavucontrol was necessery to play with until I managed to make my microphone able to record.
5. Build and install latest Debian (Testing) distribution alsa driver
debian:~# aptitude install module-assistant

debian:~# m-a prepare

debian:~# aptitude -t testing install alsa-source

debian:~# m-a build alsa

debian:~# m-a install alsa

debian:~# rmmod snd_hda_intel snd_pcm snd_timer snd soundcore snd_page_alloc

debian:~# modprobe snd_hda_intel

debian:~# echo 'options snd-hda-intel model=auto' >> /etc/modprobe.d/alsa-base.conf
In my case removing the sound drivers and loading them once again did not worked, so I had to reboot my system before the new compiled alsa sound modules gets loaded …
The last line echo 'options snd-hda-intel model=auto' … was necessery for my Thinkpard r61 Intel audio to work out. For some clarity my exact sb model is:
debian:~$ lspci |grep -i audio

00:1b.0 Audio device: Intel Corporation 82801H (ICH8 Family) HD Audio Controller (rev 03)
For other notebooks with different sound drivers echo 'options snd-hda-intel model=auto' … should be omitted.
6. Tune microphone and sound settings in alsamixer
debian:~$ alsamixer
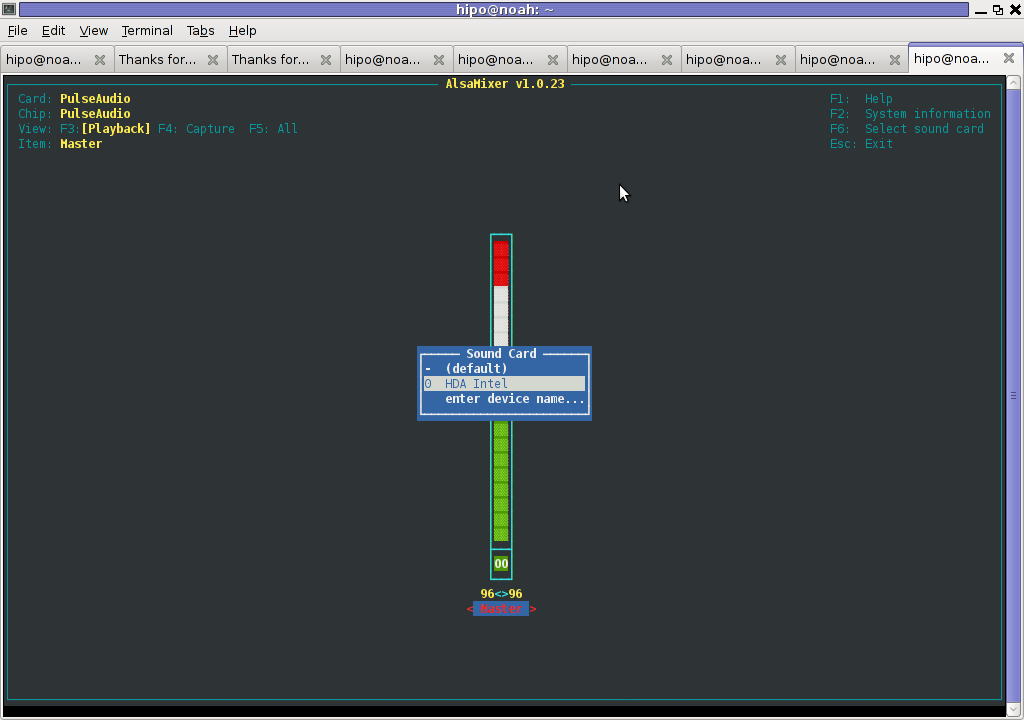
Right after launching alsamixer I had to press F6: Select Sound Card and choose my sound card (0 HDA Intel).
Following my choice I unmuted all the microphones and enabled Microphone Boost as well as did some adjustments to the MIC volume level.
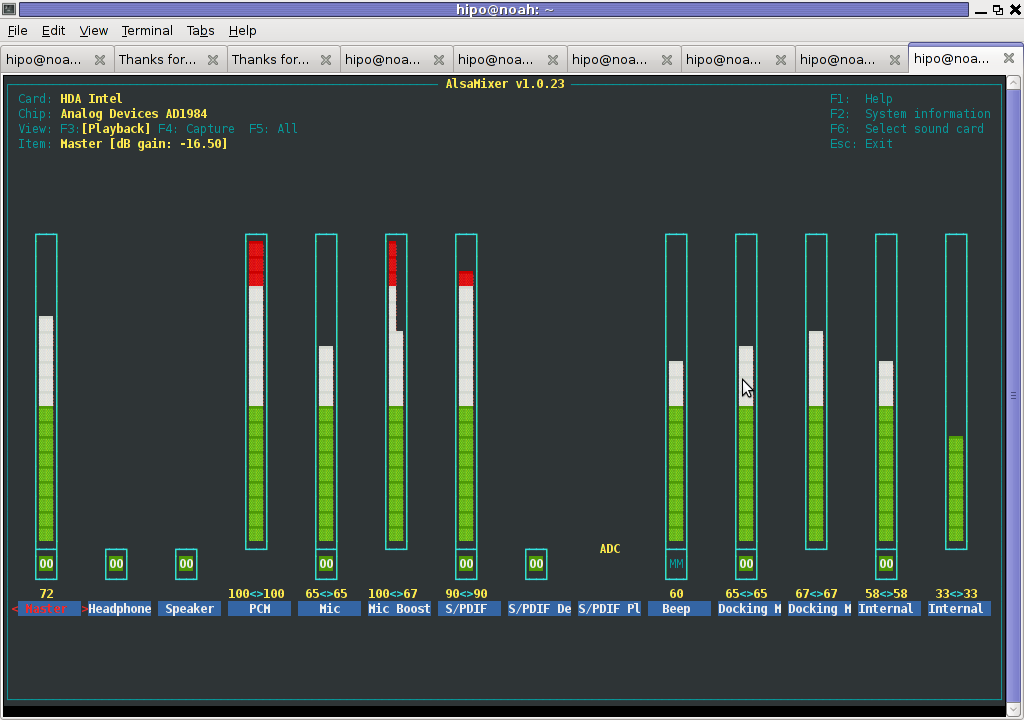
Setting proper MIC Volume levels is absolutely necessery, otherwise there is a constant noise getting out of the speakers …
7. Use aumix to set some other sound settings
For some unclear reasons, besides alsamixer , I often had to fix stuff in aumix . Honestly I don't understand where exactly aumix fits in the picture with Alsa and my loaded alsa sound blaster module?? If someone can explain I'll be thankful.
Launch aumix to further adjust some sound settings …
debian:~$ aumix
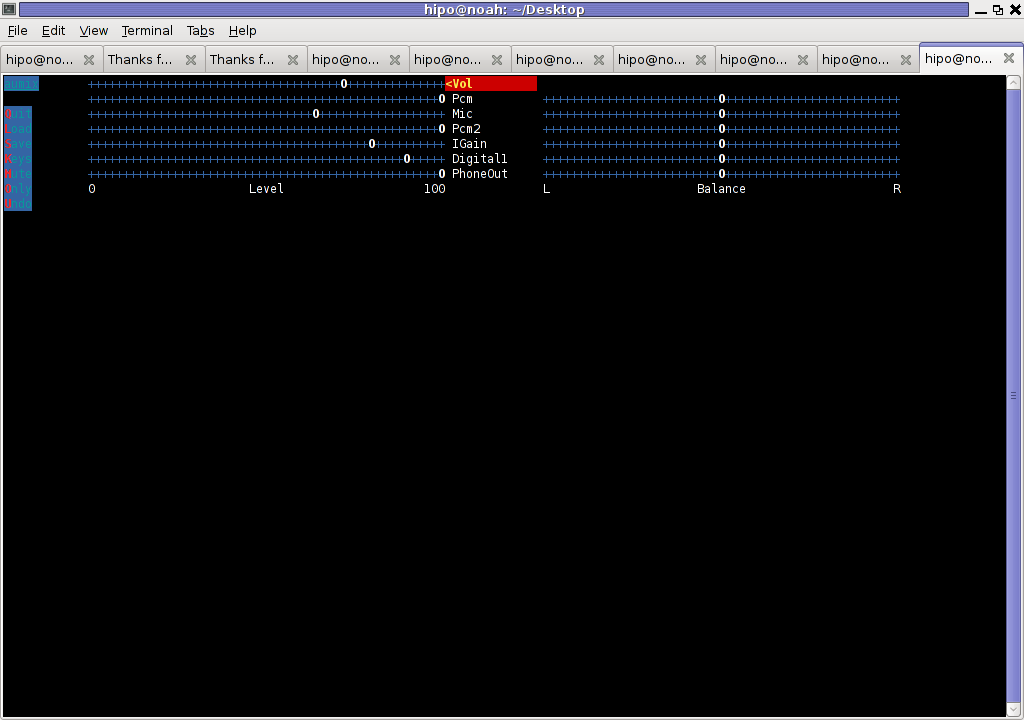
In above screenshot you see, my current aumix settings which works okay with mic and audio output.
9. Test Microphone the mic is capturing sounds correctly
Set ~/.asoundrc configuration for Skype
Edit ~/.asoundrc and put in:
pcm.pulse {

type pulse

}

ctl.pulse {

type pulse

}

pcm.!default {

type pulse

}

ctl.!default {

type pulse

}

pcm.card0 {

type hw

card 0

}

ctl.card0 {

type hw

card 0

}

pcm.dsp0 { type plug slave.pcm "hw:0,0" }

pcm.dmixout {

# Just pass this on to the system dmix

type plug

slave {

pcm "dmix"

}

}

pcm.skype {

type asym

playback.pcm "skypeout"

capture.pcm "skypein"

}

pcm.skypein {

# Convert from 8-bit unsigned mono (default format set by aoss when

# /dev/dsp is opened) to 16-bit signed stereo (expected by dsnoop)

#

# We cannot just use a "plug" plugin because although the open will

# succeed, the buffer sizes will be wrong and we will hear no sound at

# all.

type route

slave {

pcm "skypedsnoop"

format S16_LE

}

ttable {

0 {0 0.5}

1 {0 0.5}

}

}

pcm.skypeout {

# Just pass this on to the system dmix

type plug

slave {

pcm "dmix"

}

}

pcm.skypedsnoop {

type dsnoop

ipc_key 1133

slave {

# "Magic" buffer values to get skype audio to work

# If these are not set, opening /dev/dsp succeeds but no sound

# will be heard. According to the ALSA developers this is due

# to skype abusing the OSS API.

pcm "hw:0,0"

period_size 256

periods 16

buffer_size 16384

}

bindings {

0 0

}

}
I'm not 100% percent if putting those .asoundrc configurations are necessery. I've seen them on archlinux's wiki as a perscribed fix to multiple issues with Skype sound in / out.
Onwardds, for the sake of test if my sound settings set in pavucontrol enables the internal mic to capture sound I used two programs:
1. gnome-sound-recorder

2. arecord
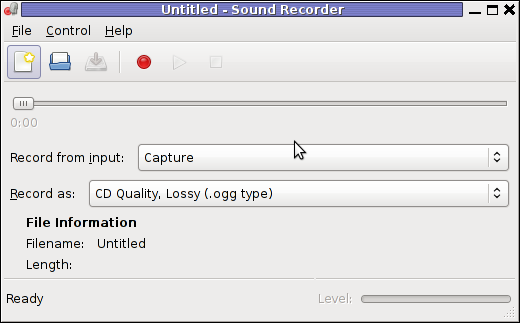
gnome-sound-recorder
gnome-sound-recorder is probably used by most GNOME users, though I'm sure Linux noviced did not play with it yet.
arecord is just a simple console based app to capture sound from the microphone. To test if the microphone works I captured a chunk of sounds with cmd:
debian:~$ arecord cow.wav

Recording WAVE 'cow.wav' : Unsigned 8 bit, Rate 8000 Hz, Mono
Later on I played the file with aplay (part of alsa-utils package in Debian), to check if I'll hear if mic succesfully captured my voice, e.g.:
debian:~$ play cow.wav

cow.wav:

File Size: 22.0k Bit Rate: 64.1k

Encoding: Unsigned PCM

Channels: 1 @ 8-bit

Samplerate: 8000Hz

Replaygain: off

Duration: 00:00:02.75

In:100% 00:00:02.75 [00:00:00.00] Out:22.0k [-=====|=====-] Clip:0

Done.
By the way, the aplay ASCII text equailizer is really awesome 😉 aplay is also capable of playing (Ogg Vorbis .ogg) free sound format.
Further on, I launched the new installed version of skype and tested Skype Calls (Mic capturing), with Skype Echo / Sound Test Service
I'll be glad to hear if this small article, helped anybody to fix any skype Linux related issues ?. I would be happy to hear also from people who had similar issues with a different fixes for skype on Linux.
Its also interesting to hear from Ubuntu and other distributions users if following this tutorial had somehow helped in resolving issues with Skype mic.