Posts Tagged ‘GUI’
Friday, August 19th, 2011 I'm tuning a Windows 2003 for better performance and securing it against DoS of service attacks. After applying all the changes I needed to restart the WebServer for the new configurations to take effect.
As I'm not a GUI kind of guy I found it handy there is a fast command to restart the Microsoft Internet Information Server. The command to restart IIS is:
c:> iisreset
Tags: command, DoS, effect, GUI, guy, IIS, iisreset, information, Internet, internet information server, kind, line, Microsoft, microsoft iis, microsoft internet information server, performance, server, Service, webserver, Windows, windows command
Posted in IIS, System Administration, Windows | 1 Comment »
Thursday, April 17th, 2014 
For a decomissioning project just recently I had the task to stop Microsoft IIS on Windows Server system.
If you have been into security for a while you know well how many vulnerabilities Microsoft (Internet Information Server) Webserver used to be. Nowadays things with IIS are better but anyways it is better not to use it if possible …
Nomatter what the rason if you need to make IIS stop serving web pages here is how to do it via command line:
At Windows Command Prompt, type:
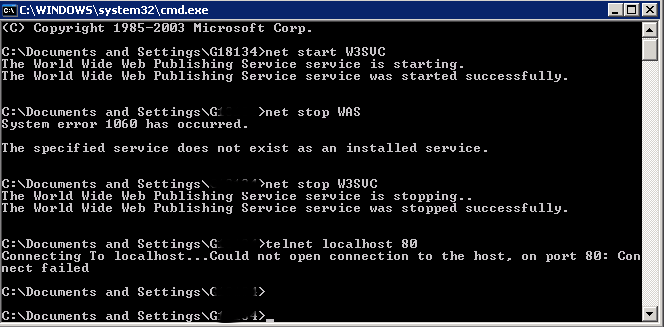
net stop WAS
If the command returns error message to stop it type:
net stop W3SVC
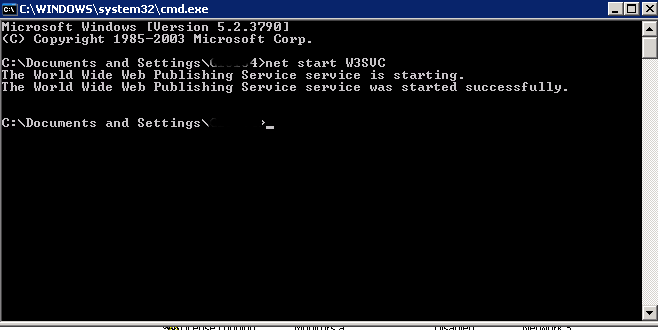
Just in case you have to start it again run:
net start W3SVC
For those who prefer to do it from GUI interface, launch services.msc command from Windows Run:
> services.msc
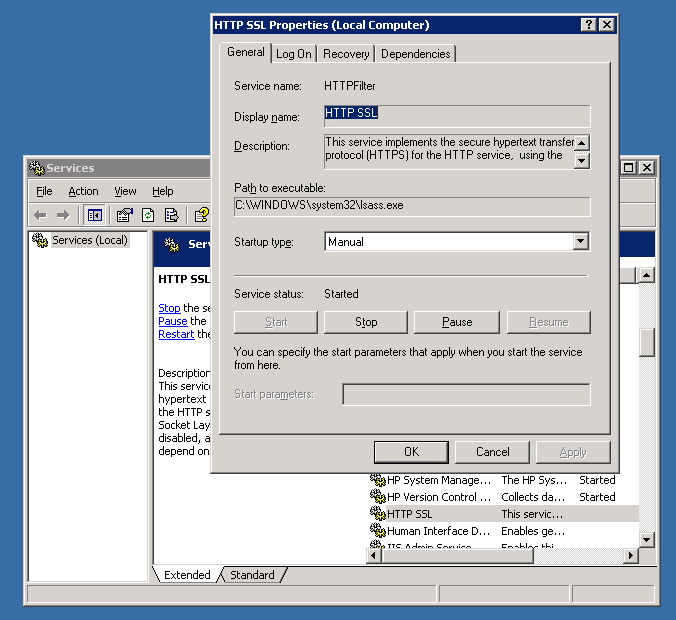
In list of services lookup for
IIS Admin Service and HTTP SSL
a) (Click over it with right mouse button -> Properties)
b) Set Startup type to Manual
c) Click Stop Button
You're done now IIS is stopped to make sure it is stopped you can run from cmd.exe:
telnet localhost 80
when not working you should get 'Could not open connection to the host. on port 80: Connection failed' like shown up in screenshot.
Tags: Click Stop Button, cmd, command, connection, exe, GUI, host, IIS, launch, line, localhost, lookup, make, Microsoft Internet Information Server Webserver, need, net, nomatter, run, task, web, Windows Run
Posted in IIS, System Administration, Web and CMS | No Comments »
Friday, November 6th, 2015 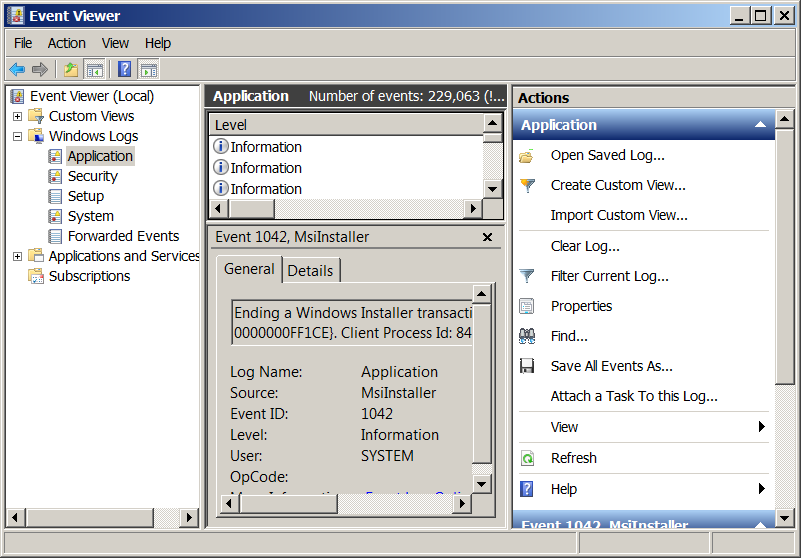
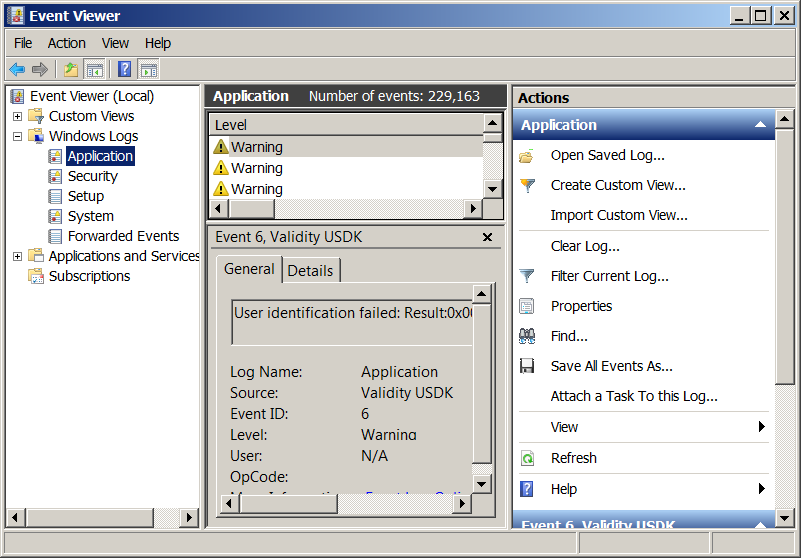
If you’re a sysadmin which needs to deal with Microsoft Windows servers locally or remotely via Remote Desktop RDP client (MSTSC.EXE) or inside a Windows Domain Controller, you will have to frequently debug Windows isseus or Application caused errors by reviewing debug information stored in Event Logs.
Event Viewer is a precious tool to debug often errors with missing libraries or failing programs on Windows boot and thus on M$ Windows it is the Swiss Army knife of sysadmin.
However as staring Event Viewer using the GUI menus, takes a lot of step and looses you time, e.g., you have to navigate to menus:
1. Start button Picture of the Start button
2. clicking Control Panel
3. clicking System and Security
4. clicking Administrative Tools
5.then double-clicking Event Viewer.
6. Granting Administrator permission required If you’re prompted for an administrator password or confirmation
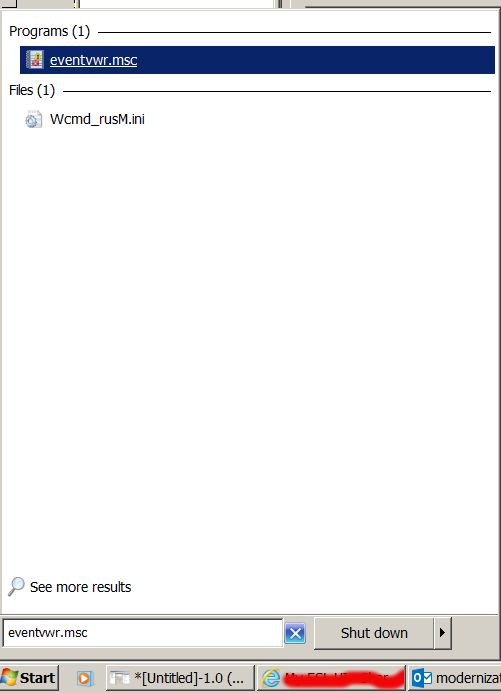
It is much handier to just start it with a shortcut:
Press Windows (Button) + R
– To invoke run prompt
and type:
eventvwr.msc
In case if you’re running eventvwr.msc to connect to remote Windows Server run from command prompt (cmd.exe):
eventvwr.msc /computer=OTHER_Computer_Name
Tags: administrator password, command prompt, confirmation, deal, Event Logs, Event Viewer, exe, Granting Administrator, GUI, How to, information, lot, microsoft windows, MSTSC, run, running, Start, sysadmin, time, Windows Domain Controller, windows server
Posted in Curious Facts, Everyday Life, System Administration, Various, Windows | No Comments »
Monday, February 23rd, 2015 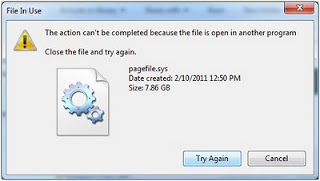
I've had a task today to deploy a new WAR (Web Application Archive) Tomcat file on Apache Tomcat server running on Windows server 2008 R2 UAT environment.
The client Tomcat application within war is providing a frontend to an proprietary Risk Analysis application called Risiko Management (developed by a German vendor called Schleupen).
The update of WAR file was part of a version upgrade of application so, both "Risk Analysis" desktop standalone server RiskKit and the Web frontend was developed by Schleupen had to be updated.
In order to update I followed the usual .WAR Tomcat Javafile upadate Tomcat process.
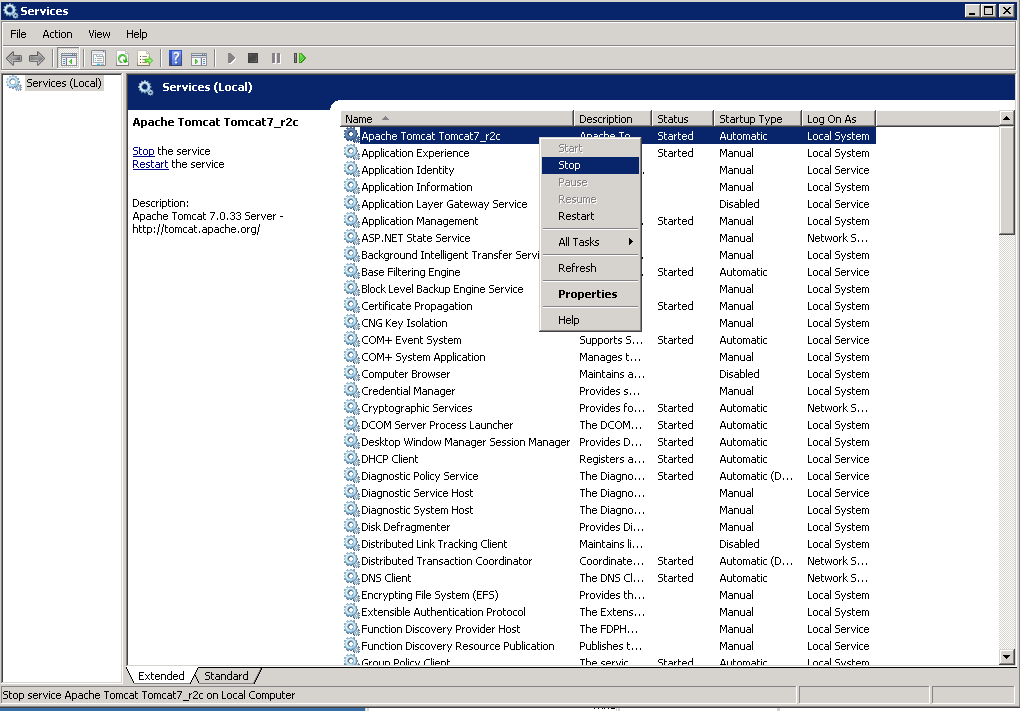
1. Stopped Tomcat running service Instance via services.msc command e.g.
Start (menu) -> Run
services.msc
2. Move (by Renaming) old risk-analysis.war to risk-analysis_backup_2015.war
and also rename the automatically Tomcat extracted folder (named same name as the WAR archive file directory – D:\web\Apache-Tomcat-7.0.33\webapps\Risiko-Analysis\ to :\web\Apache-Tomcat-7.0.33\webapps\Risiko-Analysis_backup_2015, i.e. run:
C:\Users\risk-analysis> D:
D:\>
D:\> CD \Web\Apache-Tomcat-7.0.33\webapps\
D:\Web\Apache-Tomcat-7.0.33\webapps> move risk-analysis.war risk-analysis_2015.war
D:\Web\Apache-Tomcat-7.0.33\webapps> move Risiko-Analysis\ Risiko-Analysis_backup_2015\
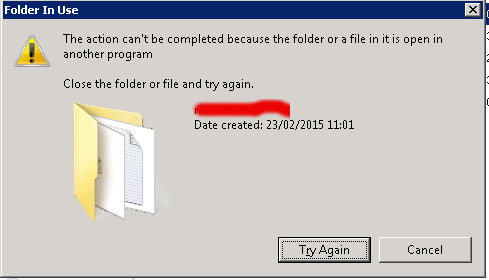
But unfortunately I couldn't rename it and I got below error:

Also I tried copying it using Windows Explorer Copy / Paste but this didn't worked either, and I got below error :
3. Finding what Locks a directory or File on M$ Windows
Obviously, the reason for unable to copy the directory was something was locking it. Actually there are plenty of locked files many running applications like Explorer do. A good example for all time locked file is Windows (swap file) pagefile.sys – this is Windows Linux equivalent of swap filesystem (enabled / disabled with spapon / swapoff commands).
Having the directory locked was a strange problem, because the Tomcat process was not running as I checked closely both in Windows taskmgr GUI interface and manually grepped for the process with tasklist command like so:
d:\>tasklist /m|find /i "tomcat"
tomcat7.exe 4396 ntdll.dll, kernel32.dll, KERNELBASE.dll,
For people like me who use primary Linux , above command shows you very precious debugging information, it shows which Windows libraries (DLL) are loaded in memory and used by the process
(Note that when Tomcat is running, it is visible with command)
D:\> wmic.exe process list brief | find /i "tomcat"
526 tomcat7.exe 8 4396 49 156569600
Just for those wondering the 156569600 number is number of bytes loaded in Windows memory used by Tomcat.
After tomcat was stopped above command returned empty string meaning obviously that tomcat is stopped ..
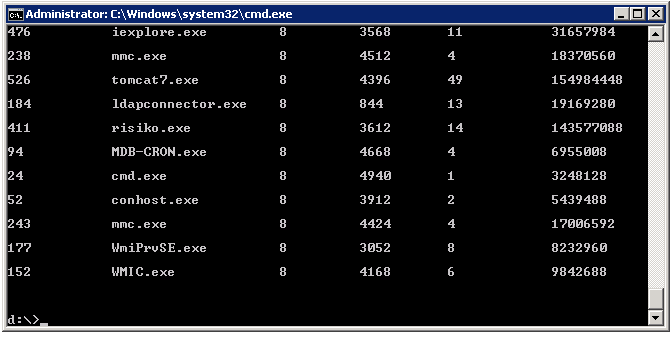
BTW, wmic command is very useful to get a list of process names (to list all running processes):
D:> wmic.exe process list brief
Well obviously something was locking this directory (some of its subdirectories or a file name within the directory / folder), so I couldn't rename it just like that.
In Linux finding which daemon (service) is locking a file is pretty easy with lsof command (for those new to lsof check my previous article how to how to check what process listens on network port in Linux), however it was unknown to me how I can check which running service is locking a file and did a quick google search which pointed me to the famous handle part of SysInternals tools.
The command tool Handle.exe was exactly what I was looking for.
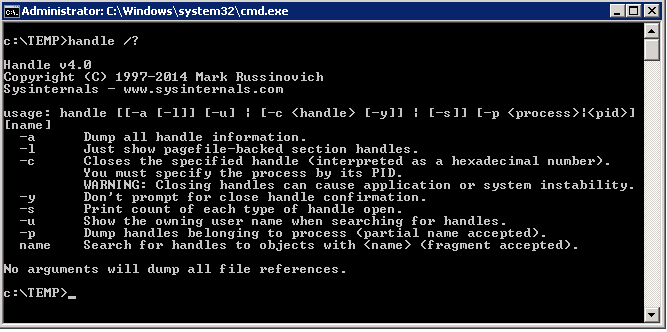
To get list of all opened (locked) files and see which application has opened it just exec command without arguments, you will get
plenty of useful info which will help you to better understand what Windows OS is doing invisible in the background and what app uses what.
handle is pretty much Windows equivalent command of Linux lsof
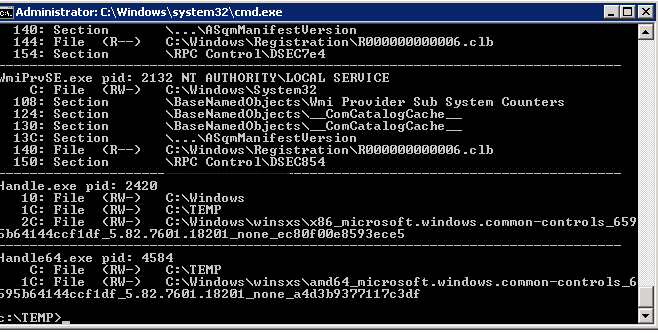
To get which file was locked by Tomcat I used handle in conjuntion with find /i command which is pretty much like Linux's grep equivalent
C:\TEMP> Handle.exe | FIND /I "Tomcat"
1C: File (RW-) D:\Web\Apache-Tomcat-7.0.33\webapps\Risk-Analysis\images\app
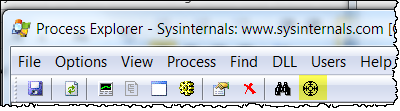
Alternatively if you have sysinternals and prefer GUI environment you can use SysInternals Process Explorer (press CTRL + F) and look for a string:
Next to handle I found also another GUI program (Internet Explorer extension) WhoLockMe, that can be used to show you all running programs and locked files by this programs.
WhoLockMe is pretty straight forward to use, though it shows GUI output you have to run the command from cmd line. Below is sample output screenshot of wholockme.
To Install Wholockme
Unzip "WhoLockMe.zip" in a directory (for exemple : "C:\Program Files\WhoLockMe")
Launch "Install.bat" or execute this Windows registry modification command :
regsvr32 "C:\Program Files\WhoLockMe\WhoLockMe.dll"
To Uninstall WhoLockMe – if you need to later:
Execute command :
regsvr32 /u "C:\Program Files\WhoLockMe\WhoLockMe.dll"
Reboot (Or Kill Explorer.exe).
Removes the "C:\Program Files\WhoLockMe" directory and its contents.
Probably there are other ways to find out what is locking a file or direcotry using powershell scripts or .bat (batch) scripting. If you know of other way using default Windows embedded commands, please share in comments.
Tags: check, cmd line, command, directory, exec, file, filesystem, GUI, Launch Install, list, process, Windows Explorer Copy Paste, Windows Linux
Posted in Curious Facts, System Administration, Various, Web and CMS, Windows | No Comments »
Wednesday, May 14th, 2014 
If you're a using GNU / Linux for Desktop and you're already tired of creating backups by your own hacks using terminal and you want to make your life a little bit more easier and easily automate your important files back up through GUI program take a look at luckyBackup.
Luckibackup is a GUI frontend to the infamous rsync command line backup tool. Luckibackup is available as a package in almost all modern Linux distributions its very easy to setup and can save you a lot of time especially if you have to manage a number of your Workplace Desktop Office Linux based computers.
Luckibackup is an absolute must have program for Linux Desktop start-up users. If you're migrating from Microsoft Windows realm and you're used to BackupPC, Luckibackup is probably the defacto Linux BackupPC substitute.
The sad news for Linux GNOME Desktop users is luckibackup is written in QT and it using it will load up a bit your notebook.
It is not installed by default so once a new Linux Desktop is installed you will have to install it manually on Debian and Ubuntu based Linux-es to install Luckibackup apt-get it.
debian:~# apt-get install --yes luckibackup

...
On Fedora and CentOS Linux install LuckiBackup via yum rpm package manager
[root@centos :~]# yum -y install luckibackup

.
Luckibackup is also ported for OpenSuSE Slackware, Gentoo, Mandriva and ArchLinux. In 2009 Luckibackup won the prize of Sourceforge Community Choice Awards for "best new project".
luckyBackup copies over only the changes you've made to the source directory and nothing more.
You will be surprised when your huge source is backed up in seconds (after the first backup).
Whatever changes you make to the source including adding, moving, deleting, modifying files / directories etc, will have the same effect to the destination.
Owner, group, time stamps, links and permissions of files are preserved (unless stated otherwise).
Luckibackup creates different multiple backup "snapshots".Each snapshot is an image of the source data that refers to a specific date-time.
Easy rollback to any of the snapshots is possible. Besides that luckibackup support Sync (just like rsync) od any directories keeping the files that were most recently modified on both of them.
Useful if you modify files on more than one PCs (using a flash-drive and don't want to bother remembering what did you use last. Luckibackup is capable of excluding certain files or directories from backups – Exclude any file, folder or pattern from backup transfer.
After each operation a logfile is created in your home folder. You can have a look at it any time you want.
luckyBackup can run in command line if you wish not to use the gui, but you have to first create the profile that is going to be executed.
Type "luckybackup –help" at a terminal to see usage and supported options.
There is also TrayNotification – Visual feedback at the tray area informs you about what is going on.
Tags: ArchLinux, area, backups, bit, command, Debian, Easy, file, GUI, line, linux desktop, little bit, look, make, manager, package, program, project, rpm, rsync, snapshots, terminal, time, tool, transfer, Ubuntu, use, Workplace Desktop Office Linux, yum
Posted in Computer Security, Everyday Life, Linux and FreeBSD Desktop, System Administration | No Comments »
Wednesday, May 21st, 2014 
In Linux to check uptime there is the uptime command, so how is it possible to check your system uptime – e.g. check when was last time Windows host was rebooted?
Or in other words what is Windows server equivalent to Linux's uptime command?
To check uptime on Windows OS, there is the:
net statistics server
command a shorter reference to this command is
net stats srv
To run it quickest way is to press Windows (button)+r type cmd.exe and exec command in Windows command prompt:
C:UsersGeorgi>net statistics server

Server Statistics for \SM07862
Statistics since 21.05.2014 09:55:21
Sessions accepted 1

Sessions timed-out 0

Sessions errored-out 0
Kilobytes sent 0

Kilobytes received 0
Mean response time (msec) 0
System errors 0

Permission violations 0

Password violations 0
Files accessed 0

Communication devices accessed 0

Print jobs spooled 0
Times buffers exhausted
Big buffers 0

Request buffers 0
The command completed successfully.
C:UsersGeorgi>
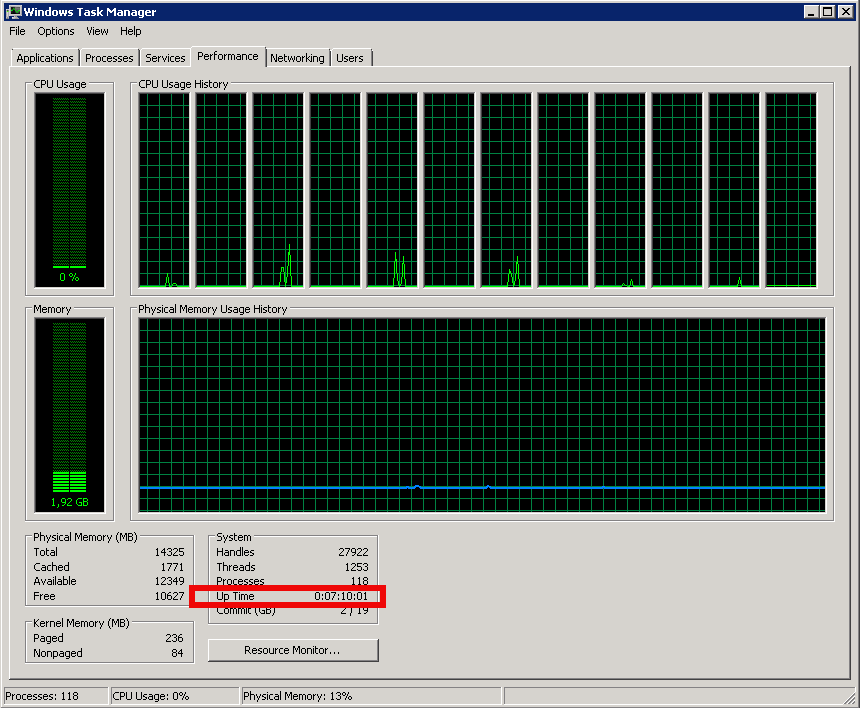
Statistics since 21.05.2014 09:55:21 – shows when system booted last time, so to check the difference between current time and when system booted last – you need to check current time with time command
C:UsersGeorgi>time

The current time is: 16:59:26,60

Enter the new time:
Alternative command to check when Windows system booted is:
C:UsersGeorgi>systeminfo|findstr "System Boot Time"

System Boot Time: 21.05.2014, 09:54:11

System Manufacturer: HP

System Model: ProLiant BL460c G7

System Type: x64-based PC

System Directory: C:Windowssystem32

Boot Device: DeviceHarddiskVolume1

System Locale: de;German (Germany)

Time Zone: (UTC+01:00) Amsterdam, Berlin, Bern, Rome, Stockholm, Vienna
C:UsersGeorgi>
If you want to check Windows boot time "the Windows way" through the GUI, launch Windows Task Manager – run taskmgr command and go to Performance tab
Tags: buffers, check, command, current time, GUI, How to, last, last time, microsoft windows, net, Print, server, Server Statistics, sessions, statistics, system, system boot time, time, Windows
Posted in Everyday Life, System Administration, Various, Windows | No Comments »
Wednesday, June 4th, 2014 
I'm experimenting with different Virtual Machines these days, because often running VMWare together with other Virtual Machines (like VirtualBox) might be causing crashes or VM instability – hence it is always best to have VMWare completely stopped. Unfortunately VMWare keeps running a number of respawning processes (vmnat.exe, vmnetdhcp.exe, vmware-authd.exe, vmware-usbarbitrator64.exe) which cannot be killed from Task Manager with Process Kill – End Tree option. Thus to make this services stop it is necessery run from cmd.exe (which is Run as Administrator):
NET STOP "VMware Workstation Server"

NET STOP "VMware USB Arbitration service"

NET STOP "VMware NAT Service"

NET STOP "VMware DHCP Service"

NET STOP "VMware Authorization Service"
If you will be doing regular START / STOP of VMWare on Windows servers it will be handy to create a little batch script stop-vmware.bat containing:
@ECHO OFF
NET STOP "VMware Workstation Server"
NET STOP "VMware USB Arbitration service"
NET STOP "VMware NAT Service"
NET STOP "VMware DHCP Service"
NET STOP "VMware Authorization Service"
Later whether it is necessery to start VMWare from Windows command line execute above services in reverse order (to prevent from getting warnings or errors on vmware dependent services.
NET START "VMware Authorization Service"

NET START "VMware DHCP Service"

NET START "VMware NAT Service"

NET START "VMware USB Arbitration service"

NET START "VMware Workstation Server"
To script it as a start script create file start-vmware.bat with:
NET START "VMware Authorization Service"

NET START "VMware DHCP Service"

NET START "VMware NAT Service"

NET START "VMware USB Arbitration service"

NET START "VMware Workstation Server"
Of course it is possible to also stop / start VMWare from GUI's Windows Services interface by righclicking on services with VMWare names and selecting "Start" / "Stop".
Tags: cmd, command, exe, file, GUI, make, necessery, order, script, virtual machines, VirtualBox
Posted in Everyday Life, Various, Virtual Machines | No Comments »
Saturday, January 21st, 2012 
XFCE in Xubuntu looks quite nice, the developers of Xubuntu made it look and work really well.
Anyways XFCE was lacking many of the features that GNOME offers (among which the most important one in that case was creating Icons on the desktop).
Even though creation of XFCE icons on the desktop has ways to be done, this is quite a complex process and its complete un-interactive. Besides that I could not find a way to add programs to XFce's main menus (as icons).
Therefore Xubuntu's Xfce is not suitable gui envorinment for Linux novice who had no knowledge on Linux commands and stuffs.
On the other hand I've seen many users coming from Windows world to Linux to have cope approximately well with GNOME.
Therefore I decided to subsitute Xubuntu's XFCE with GNOME
I used apt-get to install GNOME desktop environment like so:
root@xubuntu-desktop:~# apt-get install --yes gnome-desktop-environment

...
Now simply logout from Xfce and on the GDM login screen I had to choose GNOME
Installing gnome using the above apt command should be also the same on most if not all Debian GNU / Linux based distros.
Tags: Auto, command, creation, customize, Debian, debian gnu, Desktop, desktop manager, developers, Draft, GDM, Gnome, gnome desktop environment, GUI, hand, Icons, Installing, knowledge, Linux, linux commands, login, main menus, manager, novice, process, root, screen, stuffs, substitute, way, Windows, XFCE, Xubuntu
Posted in Gnome, Linux, Linux and FreeBSD Desktop, Linux Audio & Video, System Administration | 1 Comment »
Monday, July 9th, 2012 
2 of the wordpress installations, I take care for had been reported an annoying bug today by some colleagues.
The bug consisted in double trailing slash at the end of the domain url e.g.;
http://our-company-domainname.com//
As a result in the urls everywhere there was the double trailing slash appearing i.e.::
http://our-company-domainname.com//countact-us/

http://our-company-domainname.com//languages/
etc.
The bug was reported to happen in the multiolingual version of the wordpress based sites, as the Qtranslate plugin is used on this installations to achieve multiple languages it seemed at first logical that the double slash domain and url wordpress issues are caused for some reason by qTranslate.
Therefore, I initially looked for the cause of the problem, within the wordpress admin settings for qTranslate plugin. After not finding any clue pointing the bug to be related to qTranslate, I've then checked the settings for each individual wordpress Page and Post (There in posts usually one can manually set the exact url pointing to each post and page).
The double slash appeared also in each Post and Page and it wasn't possible to edit the complete URL address to remove the double trailin slashes. My next assumption was the cause for the double slash appearing on each site link is because of something wrong with the sites .htaccess, therefore I checked in the wp main sites directory .htaccess
Strangely .htacces seemed OKAY and there was any rule that somehow might lead to double slashes in URL. WP-sites .htaccess looked like so:
server:/home/wp-site1/www# cat .htaccess
RewriteEngine On
RewriteBase /
# Rewrite rules for new content and scripts folder
RewriteRule ^jscripts/(.*)$ wp-includes/js/$1
RewriteRule ^gallery/(.*)$ wp-content/uploads/$1
RewriteRule ^modules/(.*)$ wp-content/plugins/$1
RewriteRule ^gui/(.*)/(.*)$ wp-content/themes/$1/$2 [L]
# Disable direct acceees to wp files if referer is not valid
#RewriteCond %{THE_REQUEST} .wp-*
#RewriteCond %{REQUEST_URI} .wp-*
#RewriteCond %{REQUEST_URI} !.*media-upload.php.*
#RewriteCond %{HTTP_REFERER} !.*cadia.*
#RewriteRule . /error404 [L]
# Standard WordPress rewrite
RewriteCond %{REQUEST_FILENAME} !-f
RewriteCond %{REQUEST_FILENAME} !-d
RewriteRule . /index.php [L]
Onwards, I thought a possible way to fix bug by adding mod_rewrite rules in .htaccess which would do a redirect all requests to http://www.our-company-domainname.com//contact-us/ to http://www.our-company-domainname.com//contact-us/ etc. like so:
RewriteRule ^/(.*)$ /$1
This for unknown reasons to me didn't worked either, finally thanks God I remembered to check the variables in wp-config.php (some month ago or so I added there some variables in order to improve the wordpress websites opening times).
I've figured out I did a mistake in one of the variables by adding an ending slash to the URL. The variable added was:
define('WP_HOME','http://our-company-domainname.com/');
whether instead it should be without the ending trailing slash like so:
define('WP_HOME','http://our-company-domainname.com');
By removing the ending trailing slash:
define('WP_HOME','http://our-company-domainname.com/');
to:
define('WP_HOME','http://our-company-domainname.com');
fixed the issue.
Cheers 😉
Tags: annoying bug, assumption, Auto, care, cause, clue, colleagues, content themes, Draft, exact url, FILENAME, folderRewriteRule, GUI, HTTP, index, languages, mod, nbsp, Onwards, page, php, plugin, reason, referer, rewrite, RewriteCond, RewriteEngine, RewriteRule, scripts, slashes, something, standard, Strangely, url address, URLs, Wordpress, wp, WP-sites, www cat
Posted in System Administration, Wordpress | No Comments »
Wednesday, May 9th, 2012 I never liked Mandrake Linux, since day 1 I saw it.
Historically Mandrake Linux was one of the best Linux distributions available for free download in the "Linux scene" some 10 to 12 years ago.
Mandrake was simple gui oriented and trendy. It also one the Linux distribution with the most simplified installer program and generally a lot of GUI software for easy configuration and use by the end user.
Though it's outside nice look, still for me it was like an "intuition" that Mandrake is not so good as it appeared.
Now many years later I found by chance that Mandrake has been sued to change their Operating System name with another, due to a law suit requit by the copyright holders of Mandrake The Magician comics. "Mandrake the Magician" used to be a very popular before the Second World war in the 1930's.

It obviously not a co-incidence that the Mandrake names was after this comics and not the mandrake herb plants available in Europe, Africa and Asia. This is clear in Mandrake Linux distro earlier mascot, you see below:

Later on they changed Mandrake's logo to loose the connection with Mandrake The Magician and used another new crafted logo:

Its quite stunning nowdays magician obsession, has so heavily infiltrated our lives that even something like a Free Softwre Linux distribution might have some kind of reference to magician and occult stuff (I saw this from the position of being Christian) …
Later due to the name copyright infringement Mandrake Linux was renamed first to Mandragora Linux.
Instead of putting some nice name non related to occultism or magic stuff the French commercian company behind Mandrake rename it to another non-Christian name Mandragora.
Interestingly the newer name Mandragora as one can read in wikipedia means:
Mandragora (demon), in occultism
Well apparently, someone from the head developers of this Linux distribution has a severe obsession with magic and occultism.
Later MandrakeSoft (The French Company behind Mandrake Linux) renamed finally the distribution to Mandriva under the influence of the merger of Mandrake with the Brazillian company Connectiva this put also an over to the legal dispute copyright infringement dispute with Hearst Corporation (owning the rights of Mandrake the Magician).
Having in mind all fact on current Mandriva "dark names history", I think it is better we Christians avoid it …
Tags: Auto, best linux distributions, chance, comics, commercian, connection, Copyright, copyright infringement, demon, dispute, distribution, download, Draft, europe africa, Free, free softwre, GUI, HEAD, herb plants, intuition, law suit, Linux, linux distribution, linux distro, linux scene, Magician, Mandragora, Mankdrake, nbsp, non, obsession, operating system, quot, requit, second world war, software, someone, something, wel, Wikipedia
Posted in Everyday Life, Various | 3 Comments »


