Posts Tagged ‘hosts’
Thursday, April 7th, 2011 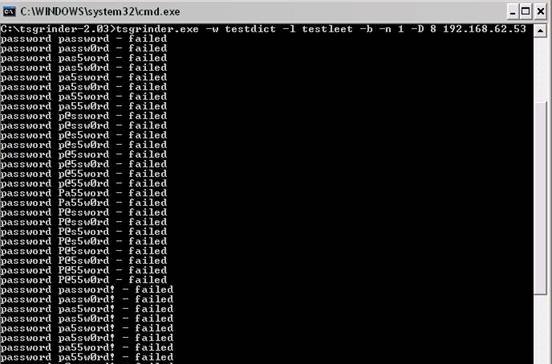
If you’re a a remote Linux many other Unix based OSes, you have defitenily faced the security threat of many failed ssh logins or as it’s better known a brute force attack
During such attacks your /var/log/messages or /var/log/auth gets filled in with various failed password logs like for example:
Feb 3 20:25:50 linux sshd[32098]: Failed password for invalid user oracle from 95.154.249.193 port 51490 ssh2

Feb 3 20:28:30 linux sshd[32135]: Failed password for invalid user oracle1 from 95.154.249.193 port 42778 ssh2

Feb 3 20:28:55 linux sshd[32141]: Failed password for invalid user test1 from 95.154.249.193 port 51072 ssh2

Feb 3 20:30:15 linux sshd[32163]: Failed password for invalid user test from 95.154.249.193 port 47481 ssh2

Feb 3 20:33:20 linux sshd[32211]: Failed password for invalid user testuser from 95.154.249.193 port 51731 ssh2

Feb 3 20:35:32 linux sshd[32249]: Failed password for invalid user user from 95.154.249.193 port 38966 ssh2

Feb 3 20:35:59 linux sshd[32256]: Failed password for invalid user user1 from 95.154.249.193 port 55850 ssh2

Feb 3 20:36:25 linux sshd[32268]: Failed password for invalid user user3 from 95.154.249.193 port 36610 ssh2

Feb 3 20:36:52 linux sshd[32274]: Failed password for invalid user user4 from 95.154.249.193 port 45514 ssh2

Feb 3 20:37:19 linux sshd[32279]: Failed password for invalid user user5 from 95.154.249.193 port 54262 ssh2

Feb 3 20:37:45 linux sshd[32285]: Failed password for invalid user user2 from 95.154.249.193 port 34755 ssh2

Feb 3 20:38:11 linux sshd[32292]: Failed password for invalid user info from 95.154.249.193 port 43146 ssh2

Feb 3 20:40:50 linux sshd[32340]: Failed password for invalid user peter from 95.154.249.193 port 46411 ssh2

Feb 3 20:43:02 linux sshd[32372]: Failed password for invalid user amanda from 95.154.249.193 port 59414 ssh2

Feb 3 20:43:28 linux sshd[32378]: Failed password for invalid user postgres from 95.154.249.193 port 39228 ssh2

Feb 3 20:43:55 linux sshd[32384]: Failed password for invalid user ftpuser from 95.154.249.193 port 47118 ssh2

Feb 3 20:44:22 linux sshd[32391]: Failed password for invalid user fax from 95.154.249.193 port 54939 ssh2

Feb 3 20:44:48 linux sshd[32397]: Failed password for invalid user cyrus from 95.154.249.193 port 34567 ssh2

Feb 3 20:45:14 linux sshd[32405]: Failed password for invalid user toto from 95.154.249.193 port 42350 ssh2

Feb 3 20:45:42 linux sshd[32410]: Failed password for invalid user sophie from 95.154.249.193 port 50063 ssh2

Feb 3 20:46:08 linux sshd[32415]: Failed password for invalid user yves from 95.154.249.193 port 59818 ssh2

Feb 3 20:46:34 linux sshd[32424]: Failed password for invalid user trac from 95.154.249.193 port 39509 ssh2

Feb 3 20:47:00 linux sshd[32432]: Failed password for invalid user webmaster from 95.154.249.193 port 47424 ssh2

Feb 3 20:47:27 linux sshd[32437]: Failed password for invalid user postfix from 95.154.249.193 port 55615 ssh2

Feb 3 20:47:54 linux sshd[32442]: Failed password for www-data from 95.154.249.193 port 35554 ssh2

Feb 3 20:48:19 linux sshd[32448]: Failed password for invalid user temp from 95.154.249.193 port 43896 ssh2

Feb 3 20:48:46 linux sshd[32453]: Failed password for invalid user service from 95.154.249.193 port 52092 ssh2

Feb 3 20:49:13 linux sshd[32458]: Failed password for invalid user tomcat from 95.154.249.193 port 60261 ssh2

Feb 3 20:49:40 linux sshd[32464]: Failed password for invalid user upload from 95.154.249.193 port 40236 ssh2

Feb 3 20:50:06 linux sshd[32469]: Failed password for invalid user debian from 95.154.249.193 port 48295 ssh2

Feb 3 20:50:32 linux sshd[32479]: Failed password for invalid user apache from 95.154.249.193 port 56437 ssh2

Feb 3 20:51:00 linux sshd[32492]: Failed password for invalid user rds from 95.154.249.193 port 45540 ssh2

Feb 3 20:51:26 linux sshd[32501]: Failed password for invalid user exploit from 95.154.249.193 port 53751 ssh2

Feb 3 20:51:51 linux sshd[32506]: Failed password for invalid user exploit from 95.154.249.193 port 33543 ssh2

Feb 3 20:52:18 linux sshd[32512]: Failed password for invalid user postgres from 95.154.249.193 port 41350 ssh2

Feb 3 21:02:04 linux sshd[32652]: Failed password for invalid user shell from 95.154.249.193 port 54454 ssh2

Feb 3 21:02:30 linux sshd[32657]: Failed password for invalid user radio from 95.154.249.193 port 35462 ssh2

Feb 3 21:02:57 linux sshd[32663]: Failed password for invalid user anonymous from 95.154.249.193 port 44290 ssh2

Feb 3 21:03:23 linux sshd[32668]: Failed password for invalid user mark from 95.154.249.193 port 53285 ssh2

Feb 3 21:03:50 linux sshd[32673]: Failed password for invalid user majordomo from 95.154.249.193 port 34082 ssh2

Feb 3 21:04:43 linux sshd[32684]: Failed password for irc from 95.154.249.193 port 50918 ssh2

Feb 3 21:05:36 linux sshd[32695]: Failed password for root from 95.154.249.193 port 38577 ssh2

Feb 3 21:06:30 linux sshd[32705]: Failed password for bin from 95.154.249.193 port 53564 ssh2

Feb 3 21:06:56 linux sshd[32714]: Failed password for invalid user dev from 95.154.249.193 port 34568 ssh2

Feb 3 21:07:23 linux sshd[32720]: Failed password for root from 95.154.249.193 port 43799 ssh2

Feb 3 21:09:10 linux sshd[32755]: Failed password for invalid user bob from 95.154.249.193 port 50026 ssh2

Feb 3 21:09:36 linux sshd[32761]: Failed password for invalid user r00t from 95.154.249.193 port 58129 ssh2

Feb 3 21:11:50 linux sshd[537]: Failed password for root from 95.154.249.193 port 58358 ssh2
This brute force dictionary attacks often succeed where there is a user with a weak a password, or some old forgotten test user account.
Just recently on one of the servers I administrate I have catched a malicious attacker originating from Romania, who was able to break with my system test account with the weak password tset .
Thanksfully the script kiddie was unable to get root access to my system, so what he did is he just started another ssh brute force scanner to crawl the net and look for some other vulnerable hosts.
As you read in my recent example being immune against SSH brute force attacks is a very essential security step, the administrator needs to take on a newly installed server.
The easiest way to get read of the brute force attacks without using some external brute force filtering software like fail2ban can be done by:
1. By using an iptables filtering rule to filter every IP which has failed in logging in more than 5 times
To use this brute force prevention method you need to use the following iptables rules:
linux-host:~# /sbin/iptables -I INPUT -p tcp --dport 22 -i eth0 -m state -state NEW -m recent -set

linux-host:~# /sbin/iptables -I INPUT -p tcp --dport 22 -i eth0 -m state -state NEW

-m recent -update -seconds 60 -hitcount 5 -j DROP
This iptables rules will filter out the SSH port to an every IP address with more than 5 invalid attempts to login to port 22
2. Getting rid of brute force attacks through use of hosts.deny blacklists
sshbl – The SSH blacklist, updated every few minutes, contains IP addresses of hosts which tried to bruteforce into any of currently 19 hosts (all running OpenBSD, FreeBSD or some Linux) using the SSH protocol. The hosts are located in Germany, the United States, United Kingdom, France, England, Ukraine, China, Australia, Czech Republic and setup to report and log those attempts to a central database. Very similar to all the spam blacklists out there.
To use sshbl you will have to set up in your root crontab the following line:
*/60 * * * * /usr/bin/wget -qO /etc/hosts.deny http://www.sshbl.org/lists/hosts.deny
To set it up from console issue:
linux-host:~# echo '*/60 * * * * /usr/bin/wget -qO /etc/hosts.deny http://www.sshbl.org/lists/hosts.deny' | crontab -u root -
These crontab will download and substitute your system default hosts with the one regularly updated on sshbl.org , thus next time a brute force attacker which has been a reported attacker will be filtered out as your Linux or Unix system finds out the IP matches an ip in /etc/hosts.deny
The /etc/hosts.deny filtering rules are written in a way that only publicly known brute forcer IPs will only be filtered for the SSH service, therefore other system services like Apache or a radio, tv streaming server will be still accessible for the brute forcer IP.
It’s a good practice actually to use both of the methods 😉
Thanks to Static (Multics) a close friend of mine for inspiring this article.
Tags: amanda, apache, brute force, example feb, Failed, fax, ftpuser, hosts, info, invalid user, Linux, log, log messages, logins, logs, majordomo, malicious attacker, mark, maximal protection, oracle, password, peter, port, postgres, protection, root, Secure, secure shell, security, security threat, Shell, sophie, ssh, ssh secure shell, system, temp, test, test1, testuser, threat, tomcat, toto, trac, unix, upload, user1, user2, user3, user5, var, webmaster
Posted in Linux, System Administration | 6 Comments »
Saturday, August 20th, 2011 I’ve recently had to build a Linux server with some other servers behind the router with NAT.
One of the hosts behind the Linux router was running a Window GRE encrypted tunnel service. Which had to be accessed with the Internet ip address of the server.
In order < б>to make the GRE tunnel accessible, a bit more than just adding a normal POSTROUTING DNAT rule and iptables FORWARD is necessery.
As far as I’ve read online, there is quite of a confusion on the topic of how to properly configure the GRE tunnel accessibility on Linux , thus in this very quick tiny tutorial I’ll explain how I did it.
1. Load the ip_nat_pptp and ip_conntrack_pptp kernel module
linux-router:~# modprobe ip_nat_pptp

linux-router:~# modprobe ip_conntrack_pptp
These two modules are an absolutely necessery to be loaded before the remote GRE tunnel is able to be properly accessed, I’ve seen many people complaining online that they can’t make the GRE tunnel to work and I suppose in many of the cases the reason not to be succeed is omitting to load this two kernel modules.
2. Make the ip_nat_pptp and ip_nat_pptp modules to load on system boot time
linux-router:~# echo 'ip_nat_pptp' >> /etc/modules

linux-router:~# echo 'ip_conntrack_pptp' >> /etc/modules
3. Insert necessery iptables PREROUTING rules to make the GRE tunnel traffic flow
linux-router:~# /sbin/iptables -A PREROUTING -d 111.222.223.224/32 -p tcp -m tcp --dport 1723 -j DNAT --to-destination 192.168.1.3:1723

linux-router:~# /sbin/iptables -A PREROUTING -p gre -j DNAT --to-destination 192.168.1.3
In the above example rules its necessery to substitute the 111.222.223.224 ip address withe the external internet (real IP) address of the router.
Also the IP address of 192.168.1.3 is the internal IP address of the host where the GRE host tunnel is located.
Next it’s necessery to;
4. Add iptables rule to forward tcp/ip traffic to the GRE tunnel
linux-router:~# /sbin/iptables -A FORWARD -p gre -j ACCEPT
Finally it’s necessery to make the above iptable rules to be permanent by saving the current firewall with iptables-save or add them inside the script which loads the iptables firewall host rules.
Another possible way is to add them from /etc/rc.local , though this kind of way is not recommended as rules would add only after succesful bootup after all the rest of init scripts and stuff in /etc/rc.local is loaded without errors.
Afterwards access to the GRE tunnel to the local IP 192.168.1.3 using the port 1723 and host IP 111.222.223.224 is possible.
Hope this is helpful. Cheers 😉
Tags: bootup, Cheers, configure, confusion, dport, encrypted tunnel, external internet, flow, Forward, GRE, gre tunnel, Hope, host, hosts, How to, init, init scripts, Insert, internal ip address, internet ip address, ip nat, iptables, iptables firewall, kernel module, kernel modules, linux router, linux server, Load, make, modprobe, module linux, necessery, POSTROUTING, pptp, reason, redirect, sbin, system boot, tcp, topic, traffic flow, tutorial, window
Posted in Linux, System Administration | 6 Comments »
Monday, October 28th, 2013 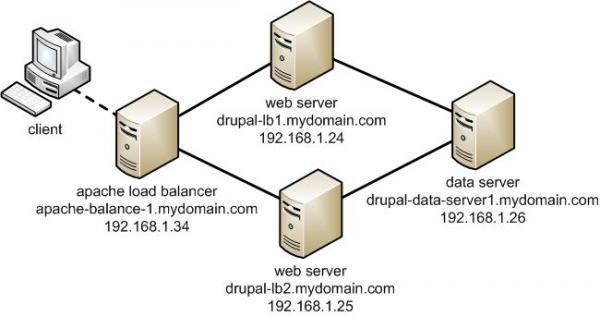
Any admin somehow involved in sphere of UNIX Webhosting knows Apache pretty well. I've personally used Apache for about 10 years now and until now I always used it as a single installation on a Linux. Always so far whenever the requirements for more client connections raised up, web hosting companies I worked for did a migration of Website / websites on a newer better (quicker) server hardware configuration. Everyone knows keeping a site on a single Apache server poses great RISK if the machine hangs up for a reason or gets DoSed this makes websites unavailable until reboot and poses unwanted downtime. Though I know pretty well the concept of load balancing until today I never had configured Apache to serve as Load balancer between two or more identical machines set-upped to interpret PHP / Perl scripts. Amazingly load balancing users web traffic happened to be much easier than I supposed. All necessary is a single Apache configured with mod_proxy_balancer which acts as proxy and ships HTTP requests between two Apache servers. Logically its very important that the entry traffic host with Apache mod_proxy_balancer has to be configured to only run only mod_proxy_balancer otherwise it will be eating unnecessary server memory as with each unnecessary loaded Apache module usage of memory resources raise up.
The scenario of my load balancer and 2 webserver hosts behind it goes like this:
a. Apache with load balancer with external IP address – i.e. (83.228.93.76) with DNS record for ex. www.mybalanced-webserver.com
b. Normally configured Apache to run PHP scripts with internal IP address through NAT – (Network address translation) (on 10.10.10.1) – known under host JEREMIAH
c. Second identical Apache to above host running on 10.10.10.1 with IP 10.10.10.2. with internal host ISSIAH.
N.B.! All 3 hosts are running latest Debian GNU / Linux 7.2 Wheezy
After having this in mind, I proceeded with installing the on 83.228.93.76 apache and removing all unnecessary modules.
!!! Important note is if you use some already existent Apache configured to run PHP or any other unnecessary stuff – make sure you remove this otherwise expect severe performance issues !!!
1. Install Apache webserver
loadbalancer:~# apt-get install --yes apache2
2. Enable mod proxy proxy_balancer and proxy_http
On Debian Linux modules are enabled with a2enmod command;
 loadbalancer:~# a2enmod proxy

loadbalancer:~# a2enmod proxy_balancer

loadbalancer:~# a2enmod proxy_http
Actually what a2enmod command does is to make symbolic links from /etc/apache2/mods-available/{proxy,proxy_balancer,proxy_http} to /etc/apache2/mods-available/{proxy,proxy_balancer,proxy_http}
3. Configure Apache mod proxy to load balance traffic between JEREMIAH and ISSAIAH webservers
loadbalancer:~# vim /etc/apache2/conf.d/proxy_balancer
/etc/apache2/conf.d/proxy-balancer
Paste inside:
<Proxy balancer://mycluster> BalancerMember http://10.0.0.1 BalancerMember http://10.0.0.4 </Proxy> ProxyPass / balancer://mycluster – See more at: http://www.elastichosts.com/support/tutorials/add-a-front-end-apache-cloud-load-balancer/#sthash.29iPnZpz.dpuf
<Proxy balancer://mycluster>
BalancerMember http://10.10.10.1
BalancerMember http://10.10.10.2
</Proxy>
ProxyPass / balancer://mycluster
<Proxy balancer://mycluster> BalancerMember http://10.0.0.1 BalancerMember http://10.0.0.4 </Proxy> ProxyPass / balancer://mycluster – See more at: http://www.elastichosts.com/support/tutorials/add-a-front-end-apache-cloud-load-balancer/#sthash.29iPnZpz.dpuf
<Proxy balancer://mycluster> BalancerMember http://10.0.0.1 BalancerMember http://10.0.0.4 </Proxy> ProxyPass / balancer://mycluster – See more at: http://www.elastichosts.com/support/tutorials/add-a-front-end-apache-cloud-load-balancer/#sthash.29iPnZpz.dpuf
<Proxy balancer://mycluster> BalancerMember http://10.0.0.1 BalancerMember http://10.0.0.4 </Proxy> ProxyPass / balancer://mycluster – See more at: http://www.elastichosts.com/support/tutorials/add-a-front-end-apache-cloud-load-balancer/#sthash.29iPnZpz.dpuf
<Proxy balancer://mycluster> BalancerMember http://10.0.0.1 BalancerMember http://10.0.0.4 </Proxy> ProxyPass / balancer://mycluster – See more at: http://www.elastichosts.com/support/tutorials/add-a-front-end-apache-cloud-load-balancer/#sthash.29iPnZpz.dpuf
4. Configure Apache Proxy to access traffic from all hosts (by default it is configured to Deny from all)
<Proxy balancer://mycluster> BalancerMember http://10.0.0.1 BalancerMember http://10.0.0.4 </Proxy> ProxyPass / balancer://mycluster – See more at: http://www.elastichosts.com/support/tutorials/add-a-front-end-apache-cloud-load-balancer/#sthash.29iPnZpz.dpuf
loadbalancer:~# vim /etc/apache2/mods-enabled/proxy.conf
Change there Deny from all to Allow from all
Deny from all
/etc/apache2/mods-enabled/proxy.conf
5. Restart Apache
loadbalancer:~# /etc/init.d/apache2 restart
Once again I have to say that above configuration is actually a basic Apache cluster so hosts behind load balancer Apache there should be machines configured to interpret scripts identically. If one Apache server of the cluster dies, the other Apache + PHP host will continue serve and deliver webserver content so no interruption will happen. This is not a round robin type of load balancer. Above configuration will distribute Webserver load requested in ratio 3/4 3 parts will be served by First server and 4th parth will be delivered by 2nd Apache.
Well, that's all load balancer is configured! Now to test it open in browser www.mybalanacer-webserver.com or try to access it by IP in my case: 83.228.93.76
a2enmod proxy
Tags: Apache Proxy, apache server, apache2, com, command, conf, configured, hosts, How to, JEREMIAH, load balancer, load balancing, proxy, running, traffic, webserver, www
Posted in Linux, System Administration, Web and CMS | 1 Comment »
Friday, July 12th, 2013 
I had a Linux router which does NAT for a local network located behind a CISCO router receiving internet via its WAN interface routing traffic to Linux with IP 192.168.1.235. The Linux router has few network interfaces and routes traffic for networks; 192.168.1.0/24 and 192.168.10.0/24. Another Linux with IP 192.168.1.8 had to talk to 192.168.10.0/24 (because it was necessary to be able access ISCO's router web interface accessible via a local network interface with IP (192.168.10.1). Access to 192.168.10.1 wasn't possible from 192.168.1.8 because routing on NAT-ting Linux (192.168.1.235) to 192.168.10.0/24 network was missing. To make 192.168.1.8 Linux communicate with 192.168.10.1, had to add following routing rules with ip command on both the Linux with IP 192.168.1.235 and Linux host behind NAT (192.168.1.8).
1. On Server (192.168.1.235) run in root shell and add to /etc/rc.local
# /sbin/ip r add 192.168.10.0/24 via 192.168.1.235
And then copy paste same line before exit 0 in /etc/rc.local
Its good idea always to check routing, after adding anything new, here is mine:
# ip r show
192.168.5.0/24 dev eth0 proto kernel scope link src 192.168.5.1
192.168.4.0/24 dev eth0 proto kernel scope link src 192.168.4.1
192.168.3.0/24 dev eth0 proto kernel scope link src 192.168.3.1
192.168.2.0/24 dev eth0 proto kernel scope link src 192.168.2.1
192.168.1.0/24 dev eth0 proto kernel scope link src 192.168.1.235
192.168.0.0/24 dev eth0 proto kernel scope link src 192.168.0.1
192.168.10.0/24 dev eth1 proto kernel scope link src 192.168.10.2
default via 192.168.10.1 dev eth1
2. And also on Second Linux host (192.168.1.8)
# /sbin/ip r add 192.168.10.0/24 via 192.168.1.235
To make routing permanent again paste in /etc/rc.local before exit 0
After above rules, I can normally ping and access hosts on class C network 192.168.10.1-255 from 192.168.1.8.
Tags: cisco, cisco router, hosts, kernel, Linux, linux router, local network, network interface, network interfaces, root shell, ting, traffic, wan interface, web interface
Posted in Linux, Networking, System Administration | No Comments »
Thursday, June 20th, 2013 
In general Linux has fame for being Virus Free Operating System. During the 13 last years as dedicated GNU / Linux user, I've seen Linux servers with binaries infected with Viruses, however the hosts, were severely messed hosts because noone updated them on time and script kiddy crackers has "hacked" multiple times. In lifetime one of my old testing computers got infected with Virus because of my mistake of running "suspicious" pre-compiled "cracker" software binaries with no MD5 verification and "questionable" websites…
I share this story because, I want to beat-up the Myth that Linux cannot have Viruses. It CAN but not very likely to happen 🙂
As a Desktop user over the last 10 years, even though I installed plenty of packages from third party sources and never happened to infect my computer with Virus – or at least if I infected I never knew it. A lot of popular MS-Windows Anti-Virus programs, has already ports for Linux. Just to mention few non-free Linux AV software providing install binaries;
- Avast
- BitDefender
- AVG
- Dr. Web
Though risk of Viruses on Linux is so tiny, it is useful to have ANTI-Virus Software to check files received from Skype, E-mails and onse downloaded with Browser. I always prefer so until now I used Clamav Antivirus to keep an eye periodically on my Desktop Linux host and servers running mail servers (those who run Mail Servers know how useful is Clamav in stopping tons of E-mail attached Malware Viruses and Trojans).
I use mostly Debian Linux, so on every new server or Desktop one of first things I did was to install it, i.e.:
 # apt-get --yes install clamav

...
Before I knew Clamav AV for Windows has GUI, anyways till recently I didn't know if there is some kind of free software AV Graphical frontend for Linux. I just found out about ClamTK
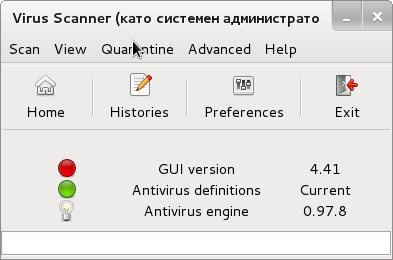
ClamTK is available in most Linux distributions from default package repositories
On Debian and Ubuntu to install it run common:
 debian:~# apt-get --yes clamtk

...
On Fedora and CentOS Linux to install:
[root@fedora ~]# yum -y install clamtk

...
Its best to run it as root superuser (or via sudo) to make ClamTK able read all files or mounts on system:
hipo@debian:~$ sudo clamtk
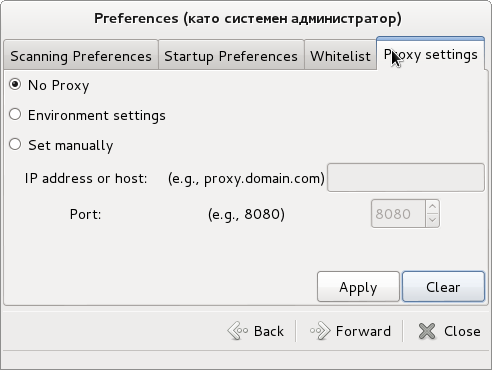
ClamTK is very simple to use and there are only few configuration options;
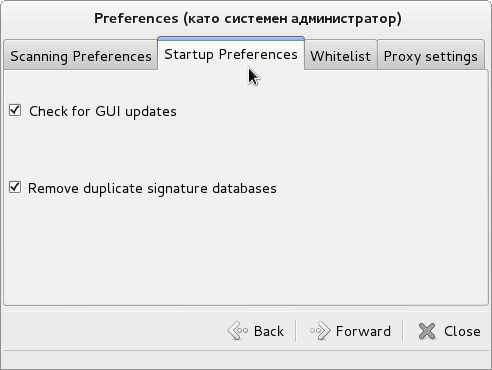
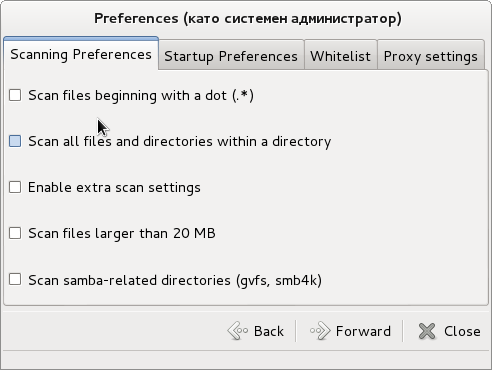
ClamTK is very useful when used with mounted Samba Shared (Mapped) Windows drives to scan for Viruses and malware, i.e, after mounting share using cmd like:
# smbmount //192.168.2.28/projects /mnt/projects -o user=USERNAME
Tags: anti virus, binaries, crackers, fame, hosts, Linux, linux user, mistake, multiple times, script kiddy, servers, testing computers, virus program, Viruses
Posted in Linux and FreeBSD Desktop, System Administration, Various | 4 Comments »
Thursday, March 14th, 2013 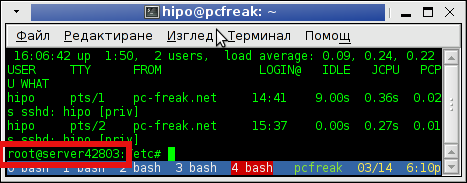
I had to configure a newly purchased dedicated server from UK2. New servers cames shipped with some random assigned node hostname like server42803. This is pretty annoying, and has to be changed especially if your company has a naming server policy in some format like; company-s1#, company-s2#, company-sN#.
Changing hostname via hosts definition file /etc/hosts to assign the IP address of the host to the hostname is not enough for changing the hostname shown in shell via SSH user login.
To display full hostname on Debian and Ubuntu, had to type:
server42803:~# hostname

server42803.uk2net.com
To change permanently server host to lets say company-s5;
 server42803:~# cat /etc/hostname | \

sed -e 's#server42803.uk2net.com#company-s5#' > /etc/hostname
To change for current logged in SSH session:
 server42803:~# hostname company-s5

company-s5:~#
Finally because already old hostname is red by sshd, you have to also restart sshd for new hostname to be visible on user ssh:
company-s5:~# /etc/init.d/ssh restart

...
As well as run script:
company-s5:~# /etc/init.d/hostname.sh
Mission change host accomplished, Enjoy 🙂
Tags: hostname, hosts, ip address, Linux, node, server host, server policy, servers, session 3a, Shell, sshd, type 3a, ubuntu linux
Posted in Everyday Life, Linux, System Administration, Various | No Comments »
Monday, February 11th, 2013 
These days, almost every home wireless ISP network router, ADSL modem etc. has its own local running DNS service. Generally this is very good as it puts off the burden of Internet Service Provider DNS servers and "saves" multitude of users from so common overloads with ISP DNS Servers – caused by ISP DNS Service unable to handle the incoming user DNS (Domain resolve) traffic. Common scenario, where ISP DNS servers is unable to handle DNS traffic is when few thousands of users belonging to ISP gets infected with a Worm, Trojan horse or Virus doing plenty of DNS Spoofs and distributed DDoS attacks.
Though local DNS service (daemons) on local Cable and Wireless Network Routers is something designed to be good it becomes another bottleneck for DNS resolve problems, Calling the ISP tech support for help is often loose of time, as in ISPs it is so rare to find someone understanding Linux Networking.
The periodic issues with DNS resolving from home routers in my observations has 3 main reasons;
- Local Cheap network Wireless routers with slow hardware (CPU) and little memory are unable to handle DNS requests, because of torrent Downloads
- DNS Wireless Router can't handle DNS requests to its DNS local service, because a small local network of computers with a landline and wireless (lets say 5 to 10) is trying to access the Internet (browsing) – again due to its low hardware paremeters router CPU heats up cause of multitude of DNS requests
- Something is wrong with general network topology of PCs behind the router. Often people buy a router and use it shared with their neighbors – tampering with Router settings messing it up.
DNS resolving problems are even harder to track whether Internet provider has policy to deliver Internet via automated IP assignment protocol (DHCP),
A very common scenario, I've seen is Internet coming via ISP ADSL / Network router installed at home and mis-configured due to a custom user installation, or because of ISP technician who installed router in hurry or lacked good competency and messed up with Router Network configuration.
During the years I had to install various Linux distributions for Desktop use in networks located behind such mis-configured Network Hubs. Because of this mis-configured DNS, even though Linux hosts succesfully graps the IP addresses for host IP, Gateway and DNS, they occasionally create problems with Internet Connection leaving the user with impression that Linux is not ready for Desktop use or somehow it is the the Linux distro fault.
After giving an introduction I will continue further to exact problem I've faced with one such mis-configured just today. The same issue has happened in my sysadmin practice over and over again so many times. So finally I decided to write this small story explaining the whole scenario, its causes and fix.
I'm writing this little post from another Linux installation like this which is living on a small local network served by a Vivacom ISP through ADSL Commtrend SmartAX MT882 Router.
The Commtrend does NAT (Network Address Translation)-ting for whole local network, auto-assigning some DNS server to Natted IP PCs local Network addresses in IP raneg; (172.16.0.0-255). The DNS the router assigns for internet is with IP (172.16.0.1), where in reality the DNS on the router is run on Network interface with IP 1921.68.1.1, in other words belonging to the router from another network. Thus PCs connected via a UTP land-line cable connection does not see 192.168.1.1 – meaning Domain name resolving works not at all.
The solution is to assign a static IP address for DNS of Google Public DNS or Open DNS, while leaving the Linux host to automatically assign LAN IP and Gateway using DHCP – (Dynamic Host Configuration Protocol).
By default most Linux distributions use DNS configured in /etc/resolv.conf as a host DNS servers, however as CommTrend Network Router does provide settings for DNS Servers to be used for resolving along with other settings on each Linux host boot settings from /etc/resolv.conf gets ovewritted with the unreachable (from 172.16.0.255), nameserver 192.168.1.1.
Thus to work-around this on most all Linux distributions you can set /etc/resolv.conf to be overwritten adding a line to /etc/rc.local script (before its last line – exit 0);
 echo 'nameserver 8.8.8.8' > /etc/resolv.conf

echo 'nameserver 8.8.4.4' >> /etc/resolv.conf
This method is universal, but the problem with it arises, if on the Linux host is planned to run 24 hours a day. DHCP Servers on router has configured DHCP Expiry lease time, which is different on different routers but usually few hours i.e. (4 hrs). Thus in 4 hours, due to DHCP Lease expiry the Linux host will question the DHCP Server for IP, getting together with DHCP IP and Gateway Settings also a DNS IP (overwritting again /etc/resolv.conf – with local running ISP Router IP – 192.168.1.1). One stupid solution of course is to use good old Windows philosophy (reboot it and it will work).
Other little more intelligent but not very efficient solution to problem is to set a cronjob, to run every 1 minute and overwrite /etc/resolv.conf DNS setting.
# crontab -u root -e
*/1 * * * * echo -e 'nameserver 8.8.8.8\nnameserver 8.8.4.4' > /etc/resolv.conf >/dev/null 2>&1
Since the cronjob to overwrite DNS IPs runs every one minute it is possible the host ends up without internet from few secs to 1 minute, this might happen quite rare so for a desktop this is ok. Other inconvenience is it puts a tiny load on system every 1 minute.
Final and best solution is to configure DNS server from /etc/dhcp/dhclient.conf for Ethernet Interface eth0. Inside /etc/dhcp/dhclient.conf for eth0 make sure you have:
# vi /etc/dhcp/dhclient.conf
interface "eth0" {

prepend domain-name-servers 8.8.8.8;

prepend domain-name-servers 8.8.4.4;

prepend domain-name-servers 208.67.222.222;

prepend domain-name-servers 208.67.220.220;

}
Tags: adsl modem, boot time, dns servers, hosts, hurry, internet service provider, isp network, Linux, local service, network router, network routers, overwrite, wireless isp, worm virus, worst case
Posted in Everyday Life, Linux, Linux and FreeBSD Desktop, System Administration, Various | 1 Comment »
Friday, December 21st, 2012 This post might be a bit trivial for the Linux gurus, but for novices Linux users hopefully helpful. I bet, all Linux users know and use the so common used last command.
last cmd provides information on last logged in users over the last 1 month time as well as shows if at present time of execution there are logged in users. It has plenty of options and is quite useful. The problem with it I have often, since I don't get into the habit to use it with arguments different from the so classical and often used:
last | less
back in time when learning Linux, is that whether run it like this I can't see full hostname of users who logged in or is currently logged in from remote hosts consisting of longer host names strings than 16 characters.
To show you what I mean, here is a chunk of last | less output taken from my home router www.pc-freak.net.
 # last|less

root     pts/1        ip156-108-174-82 Fri Dec 21 13:20   still logged in

root     pts/0        ip156-108-174-82 Fri Dec 21 13:18   still logged in

hipo     pts/0        ip156-108-174-82 Thu Dec 20 23:14 - 23:50  (00:36)

root     pts/0        g45066.upc-g.che Thu Dec 20 22:31 - 22:42  (00:11)

root     pts/0        g45066.upc-g.che Thu Dec 20 21:56 - 21:56  (00:00)

play     pts/2        vexploit.net.s1. Thu Dec 20 17:30 - 17:31  (00:00)

play     pts/2        vexploit.net.s1. Thu Dec 20 17:29 - 17:30  (00:00)

play     pts/1        vexploit.net.s1. Thu Dec 20 17:27 - 17:29  (00:01)

play     pts/1        vexploit.net.s1. Thu Dec 20 17:23 - 17:27  (00:03)

play     pts/1        vexploit.net.s1. Thu Dec 20 17:21 - 17:23  (00:02)

root     pts/0        ip156-108-174-82 Thu Dec 20 13:42 - 19:39  (05:56)

reboot   system boot  2.6.32-5-amd64   Thu Dec 20 11:29 - 13:57 (1+02:27)

root     pts/0        e59234.upc-e.che Wed Dec 19 20:53 - 23:24  (02:31)
The hostname last cmd output as you can see is sliced, so one cannot see full hostname. This is quite inconvenient, especially, if you have on your system some users who logged in with suspicious hostnames like the user play which is a user, I've opened for people to be able to play my system installed Cool Linux ASCII (text) Games. In normal means, I would skip worrying about the vexploit.net.s1….. user, however as I've noticed one of the ascii games similar to nethack called hunt was kept hanging on the system putting a load of about 50% on the CPU and was run with the play user and according to logs, the last logged in username with play was containing a hostname with "vexploit.net" as a hostname.
This looked to me very much like a script kiddie, attempt to root my system, so I killed hunt, huntd and HUNT hanging processes and decided investigate on the case.
I wanted to do whois on the host, but since the host was showing incomplete in last | less, I needed a way to get the full host. The first idea I got is to get the info from binary file /var/log/wtmp – storing the hostname records for all logged in users:
# strings /var/log/wtmp | grep -i vexploit | uniq

vexploit.net.s1.fti.net
To get in a bit raw format, all the hostnames and IPs (whether IP did not have a PTR record assigned):
strings /var/log/wtmp|grep -i 'ts/' -A 1|less
Another way to get the full host info is to check in /var/log/auth.log – this is the Debian Linux file storing ssh user login info; in Fedora and CentOS the file is /var/log/secure.
# grep -i vexploit auth.log

Dec 20 17:30:22 pcfreak sshd[13073]: pam_unix(sshd:auth): authentication failure; logname= uid=0 euid=0 tty=ssh ruser= rhost=vexploit.net.s1.fti.net  user=play
Finally, I decided to also check last man page and see if last is capable of showing full hostname or IPS of previously logged in hosts. It appears, last is having already an argument for that so my upper suggested methods, turned to be useless overcomplexity. To show full hostname of all hosts logged in on Linux over the last month:
# last -a |less
root     pts/2        Fri Dec 21 14:04   still logged in    ip156-108-174-82.adsl2.static.versatel.nl

root     pts/1        Fri Dec 21 13:20   still logged in    ip156-108-174-82.adsl2.static.versatel.nl

root     pts/0        Fri Dec 21 13:18   still logged in    ip156-108-174-82.adsl2.static.versatel.nl

hipo     pts/0        Thu Dec 20 23:14 - 23:50  (00:36)     ip156-108-174-82.adsl2.static.versatel.nl

root     pts/0        Thu Dec 20 22:31 - 22:42  (00:11)     g45066.upc-g.chello.nl

root     pts/0        Thu Dec 20 21:56 - 21:56  (00:00)     g45066.upc-g.chello.nl

play     pts/2        Thu Dec 20 17:30 - 17:31  (00:00)     vexploit.net.s1.fti.net

play     pts/2        Thu Dec 20 17:29 - 17:30  (00:00)     vexploit.net.s1.fti.net

play     pts/1        Thu Dec 20 17:27 - 17:29  (00:01)     vexploit.net.s1.fti.net

play     pts/1        Thu Dec 20 17:23 - 17:27  (00:03)     vexploit.net.s1.fti.net

play     pts/1        Thu Dec 20 17:21 - 17:23  (00:02)     vexploit.net.s1.fti.net

root     pts/0        Thu Dec 20 13:42 - 19:39  (05:56)     ip156-108-174-82.adsl2.static.versatel.nl

reboot   system boot  Thu Dec 20 11:29 - 14:58 (1+03:28)    2.6.32-5-amd64

root     pts/0        Wed Dec 19 20:53 - 23:24  (02:31)     e59234.upc-e.chello.nl
Listing all logged in users remote host IPs (only) is done with last's "-i" argument:
 # last -i

root     pts/2        82.174.108.156   Fri Dec 21 14:04   still logged in

root     pts/1        82.174.108.156   Fri Dec 21 13:20   still logged in

root     pts/0        82.174.108.156   Fri Dec 21 13:18   still logged in

hipo     pts/0        82.174.108.156   Thu Dec 20 23:14 - 23:50  (00:36)

root     pts/0        80.57.45.66      Thu Dec 20 22:31 - 22:42  (00:11)

root     pts/0        80.57.45.66      Thu Dec 20 21:56 - 21:56  (00:00)

play     pts/2        193.252.149.203  Thu Dec 20 17:30 - 17:31  (00:00)

play     pts/2        193.252.149.203  Thu Dec 20 17:29 - 17:30  (00:00)

play     pts/1        193.252.149.203  Thu Dec 20 17:27 - 17:29  (00:01)

play     pts/1        193.252.149.203  Thu Dec 20 17:23 - 17:27  (00:03)

play     pts/1        193.252.149.203  Thu Dec 20 17:21 - 17:23  (00:02)

root     pts/0        82.174.108.156   Thu Dec 20 13:42 - 19:39  (05:56)

reboot   system boot  0.0.0.0          Thu Dec 20 11:29 - 15:01 (1+03:31)
One note to make here is on every 1st number of month last command clear ups the records storing for user logins in /var/log/wtmp and nullifies the file.
Though the other 2 suggested, methods are not necessary, as they are provided in last argument. They're surely a mus do routine, t when checking a system for which doubting it could have been intruded (hacked). Checking both /var/log/wtmp and /var/log/auth.log / and /var/log/auth.log.1 content and comparing if the records on user logins match is a good way to check if your login logs are not forged. It is not a 100% guarantee however, since sometimes attacker scripts wipe out their records from both files. Out of security interest some time, ago I've written a small script to clean logged in user recordfrom /var/log/wtmp and /var/log/auth.log – log_cleaner.sh – the script has to be run as a super to have write access to /var/log/wtmp and /var/log/auth.log. It is good to mention for those who don't know, that last reads and displays its records from /var/log/wtmp file, thus altering records in this files will alter last displayed login info.
Thanks God in my case after examing this files as well as super users in /etc/passwd, there was no "signs", of any succesful breach.
Tags: chunk, execution, freak, fri dec, habit, host names, hostname, hosts, learning linux, Linux, linux gurus, linux users, present time
Posted in Computer Security, FreeBSD, Linux, System Administration | No Comments »
Friday, April 13th, 2012 1. Dump all installed server packages from Debian Linux server1
First it is necessery to dump a list of all installed packages on the server from which the intalled deb packages 'selection' will be replicated.
debian-server1:~# dpkg --get-selections \* > packages.txt
The format of the produced packages.txt file will have only two columns, in column1 there will be the package (name) installed and in column 2, the status of the package e.g.: install or deinstall
Note that you can only use the –get-selections as root superuser, trying to run it with non-privileged user I got:
hipo@server1:~$ dpkg --set-selections > packages.txt

dpkg: operation requires read/write access to dpkg status area
2. Copy packages.txt file containing the installed deb packages from server1 to server2
There is many way to copy the packages.txt package description file, one can use ftp, sftp, scp, rsync … lftp or even copy it via wget if placed in some Apache directory on server1.
A quick and convenient way to copy the file from Debian server1 to server2 is with scp as it can also be used easily for an automated script to do the packages.txt file copying (if for instance you have to implement package cloning on multiple Debian Linux servers).
 root@debian-server1:~# scp ./packages.txt hipo@server-hostname2:~/packages.txt

The authenticity of host '83.170.97.153 (83.170.97.153)' can't be established. RSA key fingerprint is 38:da:2a:79:ad:38:5b:64:9e:8b:b4:81:09:cd:94:d4. Are you sure you want to continue connecting (yes/no)? yes Warning: Permanently added '83.170.97.153' (RSA) to the list of known hosts. hipo@83.170.97.153's password:

packages.txt
As this is the first time I make connection to server2 from server1, I'm prompted to accept the host RSA unique fingerprint.
3. Install the copied selection from server1 on server2 with apt-get or dselect
debian-server2:/home/hipo# apt-get update

...

debian-server2:/home/hipo# apt-get upgrade

Reading package lists... Done

Building dependency tree

Reading state information... Done

debian-server2:/home/hipo# dpkg --set-selections < packages.txt

debian-server2:/home/hipo# apt-get -u dselect-upgrade --yes
The first apt-get update command assures the server will have the latest version of the packages currently installed, this will save you from running an outdated versions of the installed packages on debian-server2
Bear in mind that using apt-get sometimes, might create dependency issues. This is depending on the exact package names, being replicated in between the servers
Therefore it is better to use another approach with bash for loop to "replicate" installed packages between two servers, like so:
debian-server2:/home/hipo# for i in $(cat packages.txt |awk '{ print $1 }'); do aptitude install $i; done
If you want to automate the questioning about aptitude operations pass on the -y
debian-server2:/home/hipo# for i in $(cat packages.txt |awk '{ print $1 }'); do aptitude -y install $i; done
Be cautious if the -y is passed as sometimes some packages might be removed from the server to resolve dependency issues, if you need this packages you will have to again install them manually.
4. Mirroring package selection from server1 to server2 using one liner
A quick one liner, that does replicate a set of preselected packages from server1 to server2 is also possible with either a combination of apt, ssh, awk and dpkg or with ssh + dpkg + dselect :
a) One-liner code with apt-get unifying the installed packages between 2 or more servers
debian-server2:~# apt-get --yes install `ssh root@debian-server1 "dpkg -l | grep -E ^ii" | awk '{print $2}'`

...
If it is necessery to install on more than just debian-server2, copy paste the above code to all servers you want to have identical installed packages as with debian-server1 or use a shor for loop to run the commands for each and every host of multiple servers group.
In some cases it might be better to use dselect instead as in some situations using apt-get might not correctly solve the package dependencies, if encountering problems with dependencies better run:
debian-server2:/home/hipo# ssh root@debian-server1 'dpkg --get-selections' | dpkg --set-selections && dselect install
As you can see using this second dselect installed "package" mirroring is also way easier to read and understand than the prior "cryptic" method with apt-get, hence I personally think using dselect method is a better.
Well that's basically it. If you need to synchronize also configurations, either an rsync/scp shell script, should be used with all defined server1 config files or in case if a cloning of packages between identical server machines is necessery dd or some other tool like Norton Ghost could be used.
Hope this helps, someone.
Tags: apache, aptitude, authenticity, b4, clone, cloning, copying, deb packages, debian linux, deinstall, dependency, description, dpkg, dump, file, fingerprint, hosts, instance, lftp, Linux, linux servers, Mirroring, necessery, operation, package, package description, Permanently, privileged user, quot, root, rsync, scp, server packages, server1, server2, sftp, ssh, wget
Posted in Linux, System Administration | No Comments »
Tuesday, January 30th, 2007 Today. I had exam on marketing. The exam started 50 minutes later because the teachers had some sort of meating.I was able to get most of the test answers from one collegue but I’m not sure are her answers correct.I hope if God give me a help I would pass. After that me and some others from my group tried to get the anwers or the exam for our next exam which is tomorrow and is in the Accounting discipline.Unluckily we were not able to find anything. As usual I don’t know anything and I hope on a miracle and God’smercy to take the exam. I invited Habib to come home to explain me some of the matters. But my mind was toooverheaded with information so I was not in a mood for studying. After that we went out with Habib, Mitko,Toto and Sami. All started well until the Zuio’s father come to our table ( we were drinking beer on the fountain).He come and started kissing all of the guys around he started talking total bullshits to Habib and otherpersons in the coffee terrible picture The Classical “Bai Ganio” in action. After that we walked for some timewith Habib on the way to his home. And drinked a coffee on the “Zhurnalist” Coffee. Now I’m home again.After some problems luckily, I was able to start skype’s microphone to work under my FreeBSD.I have to sit on my back and study for few ours. Thanks God I didn’t have any problems with my Servers.Glory is for the Lord of Hosts.END—–
Tags: Accounting, anwers, bai, Beer, coffee, collegue, discipline, drinking beer, Economics, end, exam, Father, freebsd, Ganio, god, habib, help, home, hosts, lord of hosts, meating, microphone, miracle, Mitko, quot, sami, servers, sort, study, test, test answers, tomorrow, toto, Unluckily, way, Zuio
Posted in Everyday Life | No Comments »


