Posts Tagged ‘Module’

Play Midis on Linux / Make Linux MIDI Ready for the Future – Enable embedded MIDI music to play in a Browser, Play MIDIs with VLC and howto enjoy Midis in Text Console

Wednesday, October 4th, 2017

how-to-play-midi-on-gnu-linux-in-graphic-environment-console-and-browser-midi-synthesizer-and-linux-tux-together


Play Midis on Linux or Make Linux MIDI Ready for the Future – Enable embedded MIDI music to play in a Browser, Play MIDIs with VLC and howto enjoy Midis in Text Console HOWTO


Playing MIDI has been quite a lot of fun historically,

if you grow up in the days when personal computers were still young and the Sound Blaster was a luxury, before the raise of Mp3 music format, you have certainly enjoyed the beeping of PC Speaker and later on during 386 and 486 / 586 computers the enjoyment of playing tracked music such as S3M and MOD,

in that good days playing MIDI music was the only alternative for PC maniacs who doesn't own a CD Drive (which itself) was another luxury and even thouse who had a CD ROM device, were mainly playing music in CD audio format (.CDA).
Anyhow MIDI was a cheap and a CPU unintensive way to listen to equivalent of favourite popular Audio Songs and for those who still remember many of the songs were recreated in MIDI format, just with a number of synthesized instruments without any voice (as MIDI is usually).

The same was true also for the good old days of raise of Mobile Phones, when polyphonic was a standard as CPU power was low MIDI was a perfect substitute for the CPU heavy Encoded MP3s / OGG and other formats that required a modern for that time Intel CPU running in 50+ Mhz usually 100 / 166Mhz was perfect for the days to play Mp3 but still even on that PCs we listened to Midi songs.

Therefore if you're one of those people like me who still enjoy to play some Midi Music in the year 2017 and feel a bit like Back into the Future movie and a Free Software fan and user, especially if you're a novice GNU  / Linux Free Software user, you will be unpleasently surprised that most today's default Linux distributions doesn't have an easy way to play Midi music format out of the box right after install.

Hence below article aims to give you an understanding on

How you can play Midi Music on GNU / Linux Operating System

First, lets Prepare to load necessery Linux kernel modules to make sure MIDI can be played by soundcard:

In /etc/modules make sure you have the following list of modules loaded:
 

linux-desktop:~# cat /etc/modules
3c59x
snd-emu10k1
snd-pcm-oss
snd-mixer-oss
snd-seq-oss

!Note the modules are working as of time of writting and in time can change to some other modules, depending on how the development of ALSA (Advanced Linux Sound Architecture) goes, and if the developers decide to rename the upmentioned modules

If you just have added the modules to /etc/modules with vim / nano to reload modules into the Linux kernel run:


linux-desktop:~# modprobe -a


Secondly, Installing a whole bunch of MIDI music related program tools can be achieved in Debian by installing the multimedia-midi package, e.g.:


linux-desktop:~# apt-get install –yes multimedia-midi


1. Playing Midi in Graphical environment with a double click using VLC


How to make MIDI easy listanable in Linux graphical environment like GNOME / KDE / XFCE desktop ?


If you want to make Midi music execution sa easy as  just clicking on the .MIDI file format on Linux you can do that with a midi extension available for VLC (Video Lan Client) Universal Multi Platform Media Player player

To install it on Debian Ubuntu GNU / Linux
 

# apt-get install –yes vlc-plugin-fluidsynth


Необходимо е да се изтеглят 6754 B архиви.
След тази операция ще бъде използвано 35,8 kB допълнително дисково пространство.
Изт:1 http://deb.debian.org/debian stretch/main amd64 vlc-plugin-fluidsynth amd64 2.2.6-1~deb9u1 [6754 B]
Изтеглени 6754 B за 0с (33,6 kB/сек)           
Selecting previously unselected package vlc-plugin-fluidsynth:amd64.
(Reading database … 382976 files and directories currently installed.)
Preparing to unpack …/vlc-plugin-fluidsynth_2.2.6-1~deb9u1_amd64.deb …
Unpacking vlc-plugin-fluidsynth:amd64 (2.2.6-1~deb9u1) …
Setting up vlc-plugin-fluidsynth:amd64 (2.2.6-1~deb9u1) …
Processing triggers for libvlc-bin:amd64 (2.2.6-1~deb9u1) …


Besides making your MIDI play on the GUI environment easy as a a point and click VLC will also be able to play MIDIs on GNU / Linux from your favourite browser (nomatter Firefox / Chrome or Opera), even though the player would play in a new PopUP Window it is easy to select once MIDI file from a random website for example – here is a directory listing of Webserver with Doom II Soundtrack in MIDI format , click over any file from list and Choose option for VLC to always remember that MIDI files has to be opened with VLC player.


2. Enable Firefox / IceWeasel browser to Support Website embedded MIDI files


So VLC could make you listen the downloadable MIDIs from Web pages but,
 

What if you have stumbled on an old website which was configured with very OLD HTML Code to play some nice music (or even different MIDI songs) for each part of the website (for each webpage) and you want to have the Websites created with embedded MIDIs to automatically play on Linux oncce you visit the site?


Sadly default support in Browser for MIDI across all GNU / Linux, I've used so far never worked out of the box, not that still anyone is developing modern websites with MIDIs, but still for the sake of backward compitability and for sake of interactivity it is worthy to enable embedded MIDI support in Linux

But with a couple of tunings as usual GNU / Linux can do almost everything, so here is how to enable embedded browser support for Midi on Linux (That should work with minor modifications not only on Debian / Ubuntu / ArchLinux but also on Fedoras, CentOS etc.
If you try it on any of this distributions, please drop a short comment and tell me in few lines how you made embedded midi worked on that distros.


apt-get install –yes timidity mozplugger

Next do restart firefox

Sometimes in order to work you might need to delete /home/[YOUR_USERNAME]/.mozilla/pluginreg.dat and restart firefox again, e.g. make a backup and give it a try:


cp -rpf /home/hipo/.mozilla/pluginreg.dat /home/hipo/.mozilla/pluginreg.dat.bak
rm -f /home/hipo/.mozilla/pluginreg.dat


Another good tip as talking for embedding MIDI support is to embed XPDF to render PDF pages inside the Browser, by default this is done by GNOME's Evince PDF reader but as it is sometimes buggy and might crash it is generally a good idea to switch to xpdf instead, if for some reason PDF is not directly displaying in browser or suddenly stopped working after some distro uipgrade, you might want to do below as well:
 

apt-get install xpdf

vim /etc/mozpluggerrc

Fin d and Comment out the line starting with:

It should look like this afterwards:

 Repeat Swallow ….
 

text/x-pdf: pdf: PDF file
#      repeat swallow(documentShell) fill: acroread -geometry +9000+9000 +useFrontEndProgram "$file"
        repeat noisy swallow(Xpdf) fill: xpdf -g +9000+9000 "$file"
        repeat noisy swallow(gv) fill: gv –safer –quiet –antialias -geometry +9000+9000 "$file"


3. Play Midi music in Linux text console / terminal


There is a console tool that historically has been like the Linux standard for playing midis over the years as I remember, its called timidity


To install timidity on .Deb based Linux:
 

linux-desktop:~$ su root
Password:
linux-desktop:~# apt-get install –yes timidity

Необходимо е да се изтеглят 0 B/580 kB архиви.
След тази операция ще бъде използвано 0 B допълнително дисково пространство.
(Reading database … 382981 files and directories currently installed.)
Preparing to unpack …/timidity_2.13.2-40.5_amd64.deb …
Unpacking timidity (2.13.2-40.5) over (2.13.2-40.5) …
Processing triggers for menu (2.1.47+b1) …
Processing triggers for man-db (2.7.6.1-2) …
Setting up timidity (2.13.2-40.5) …
Processing triggers for menu (2.1.47+b1) …


To test your new MIDI Synthesizer tool and make the enjoyment full you can download Doom 2 extracted MIDI Soundtrack from here
 

Once you have downloaded above Metal MIDI DOOM old school arcade soundtrack and untarred it into your home directory be it ~/doom-midis

A remark to make here is timidity is quite CPU intensive, but on modern Dual and Quad-Core PC Notebooks, the CPU load is not of a big concern.

To test and play with timidity:
 

linux-desktop~$ timidity ~/mp3/midis/*
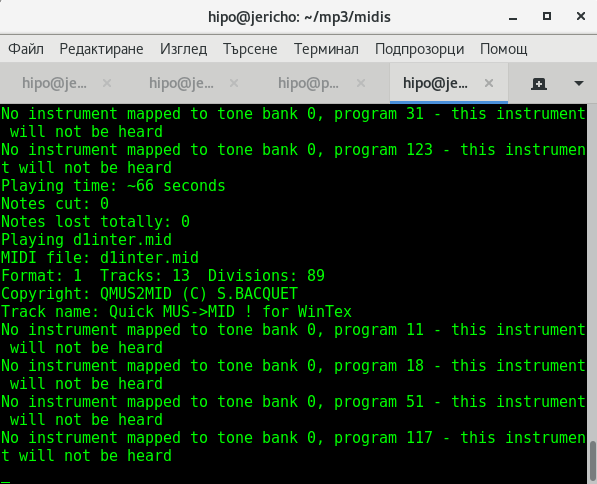

timidity-playing-doom-midi-bunny-song-on-debian-stretch-gnome-terminal-screenshot
 

hipo@jericho:~/mp3/midis$ aplaymidi -l
 Port    Client name                      Port name
 14:0    Midi Through                     Midi Through Port-0
128:0    TiMidity                         TiMidity port 0
128:1    TiMidity                         TiMidity port 1
128:2    TiMidity                         TiMidity port 2
128:3    TiMidity                         TiMidity port 3


We have also the playmidi  (simple midi text console terminal player), which historically was working quite decent and I use it to in the past on my RedHat 6.0 and RedHat 7.0 to listen to my .MID format files but unfortunately as of time of writting something is wrong with it, so when I try to play MIDIs with it instead of timidity I get this erro:


$ playmidi *.mid
Playmidi 2.4 Copyright (C) 1994-1997 Nathan I. Laredo, AWE32 by Takashi Iwai
This is free software with ABSOLUTELY NO WARRANTY.
For details please see the file COPYING.
open /dev/sequencer: No such file or directory

Even though I tried hard to resolve that error by loading various midi related MIDI modules and following a lot of the suggestions online on how to  make /dev/sequencer work again it was all no luck.
 

Some people back in the distant year 2005, reported the problem was solved by simply loading snd-seq

But as of time of writting:


# modprobe snd-seq


Some people said in archlinux's Forum

/dev/sequencer sequencer: No such file or directory


is solved by loading snd-seq-oss kernel module, but on my Debian Linux 9.1 Stretch, this ain't work as well :


root@jericho:/home/hipo/mp3/midis# modprobe snd-seq-oss
modprobe: FATAL: Module snd-seq-oss not found in directory /lib/modules/4.9.0-3-amd64
root@jericho:/home/hipo/mp3/midis# uname -a;
Linux jericho 4.9.0-3-amd64 #1 SMP Debian 4.9.30-2+deb9u5 (2017-09-19) x86_64 GNU/Linux


Another invention of mine was to try to also link /dev/snd/seq to /dev/sequencer but this produced no positive result either:


# ln -sf /dev/snd/seq /dev/sequencer
# ls -al /dev/sequencer
lrwxrwxrwx 1 root root 12 окт  4 16:48 /dev/sequencer -> /dev/snd/seq


Note that after lining in that way I got following error with my attempt to play MIDIs with playmidi

# playmidi *.mid
Playmidi 2.4 Copyright (C) 1994-1997 Nathan I. Laredo, AWE32 by Takashi Iwai
This is free software with ABSOLUTELY NO WARRANTY.
For details please see the file COPYING.
there is no soundcard


Anyhow on some other Linux distributions (especially with Older Kernel versions), some of the above 3 suggested Fix might work perfectly fine so if you have some time give it a try please and drop me  a comment on how it went, you will help the GNU / Linux community out there that way.

Well never mind the bollocks, so

Now back to where I started timidity even though it will play fine it will not give any indication on the lenght of the midi song (precious information such as how much time is left until the end is over).

Hence if you prefer a player that gives you an indicator on how much is left towards the end length of each of the played MIDI file you can give a try to wildmidi:


linux-desktop:~$ apt-cache show wildmidi|grep -i description -A 2

Description-en: software MIDI player
 Minimal MIDI player implementation based on the wildmidi library that
 can either dump to WAV or playback over ALSA. It is intended to

Description-md5: b4b34070ae88e73e3289b751230cfc89
Homepage: http://www.mindwerks.net/projects/wildmidi/
Tag: implemented-in::c, role::program, sound::midi, sound::player,

Description: software MIDI player
Description-md5: 4673a7051f104675c73eb344bb045607
Homepage: http://wildmidi.sourceforge.net/
Bugs: https://bugs.launchpad.net/ubuntu/+filebug


If yet not installed install it after becoming admin user:


linux-desktop:~$ su root
Password:

linux-desktop:~# apt-get install –yes wildmidi


wildmidi is much less CPU intensive (it uses gstreamer to play (Gstreamer – open source multimedia framework)

And next give it a try by running:


linux-desktop:~$ wildmidi ~/mp3/midis/*
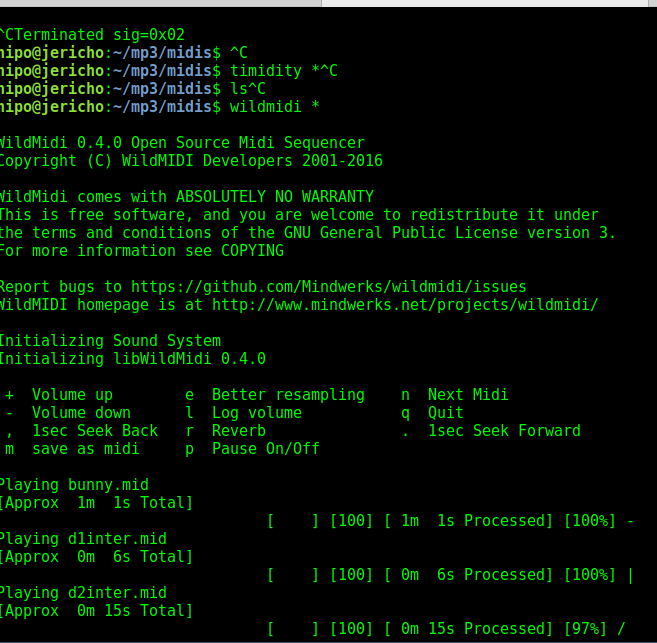
 

wildmidi-midi-lenght-status-text-console-player-for-linux-ubuntu-debian-fedora-suse


4. Editting MIDI files with Free Software and Proprietary MIDI Editor Programs


If you want a professional software that can play Midi in a fuzzy interactive GUI way and have some extra possibilities to edit MIDIs and other format give a try to Muse Sequencer:


linux-desktop:~$ sudo apt-get install –yes muse

The following NEW packages will be installed:
  muse
0 upgraded, 1 newly installed, 0 to remove and 38 not upgraded.
Need to get 5814 kB of archives.
After this operation, 21.0 MB of additional disk space will be used.
Get:1 http://deb.debian.org/debian stretch/main amd64 muse amd64 2.1.2-3+b1 [5814 kB]
Fetched 5814 kB in 2s (2205 kB/s)                             
    are supported and installed on your system.
Preconfiguring packages …
Selecting previously unselected package muse.
(Reading database … 382981 files and directories currently installed.)
Preparing to unpack …/muse_2.1.2-3+b1_amd64.deb …
Unpacking muse (2.1.2-3+b1) …
Processing triggers for mime-support (3.60) …
Processing triggers for desktop-file-utils (0.23-1) …
Processing triggers for doc-base (0.10.7) …
Processing 1 added doc-base file…
Registering documents with scrollkeeper…
Processing triggers for man-db (2.7.6.1-2) …
Processing triggers for shared-mime-info (1.8-1) …
Unknown media type in type 'all/all'
Unknown media type in type 'all/allfiles'
Processing triggers for gnome-menus (3.13.3-9) …
Setting up muse (2.1.2-3+b1) …
Processing triggers for hicolor-icon-theme (0.15-1) …


Below is short description what Muse can do for you:


MusE is a MIDI/audio sequencer with recording and editing capabilities.
 Some Highlights:
 

  * Standard midifile (smf) import-/export.
  * Organizes songs in tracks and parts which you can arrange with
    the part editor.
  * MIDI editors: pianoroll, drum, list, controller.
  * Score editor with high quality postscript printer output.
  * Realtime: editing while playing.
  * Unlimited number of open editors.
  * Unlimited undo/redo.
  * Realtime and step-recording.
  * Multiple MIDI devices.
  * Unlimited number of tracks.
  * Sync to external devices: MTC/MMC, Midi Clock, Master/Slave.
  * Audio tracks, LADSPA host for master effects.
  * Multithreaded.
  * Uses raw MIDI devices.
  * XML project file.
  * Project file contains complete app state (session data).
  * Application spanning Cut/Paste Drag/Drop.


linux-desktop~:$ muse
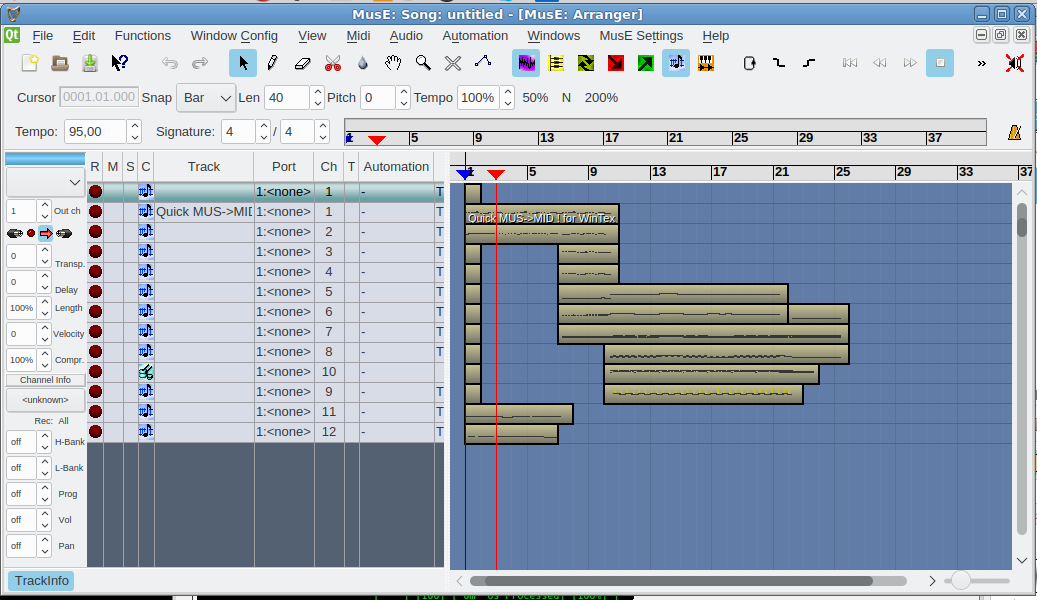
muse-advanced-midi-editor-free-software-for-linux


Below is another non-free program that you might, try if MusE doesn't fit your needs (is not rich enough for editting capabilities is bitwig (though I don't recommend since it is not free software)
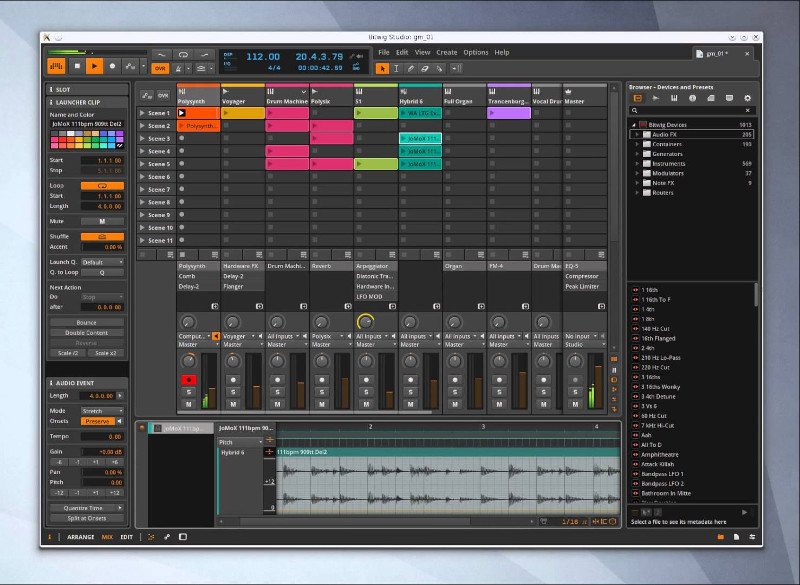
bitwig – Bitwig Studio is a multi-platform music-creation system for production, performance and DJing, with a focus on flexible editing tools and a super-fast workflow.


bitwig-midi-and-audio-non-free-software-advanced-useful-sound-editor-for-linx


5. Some examples for Text editing and MIDI Conversion to CSV and ABC file formats There is pretty much more

For the MIDI Extremists who or people that create MIDIs and want to learn how a MIDI is made (the content of it etc.), I suggest you take a look at these 3 command line MIDI editing / conversion tools
 

  • midi2abc – A little tool to create MIDI formats to ABC format
  • midi2csv – Conver tour Favourite MIDI files to CSV for educational purposes so see what Channels, Tracks and Time Intervals is a MIDI song mad
  • midicopy – Copy selected, track, channel, time interval of MIDI file to another MIDI file3


Well, that's all folks now enjoy your MIDIs and don't forget to donate, as I'm jobless at the moment and the only profit I make is just a few bucks out of advertisement on this blog.
 

Fix “Approaching the limit on PV entries, consider increasing either the vm.pmap.shpgperproc or the vm.pmap.pv_entry_max tunable.” in FreeBSD

Monday, May 21st, 2012

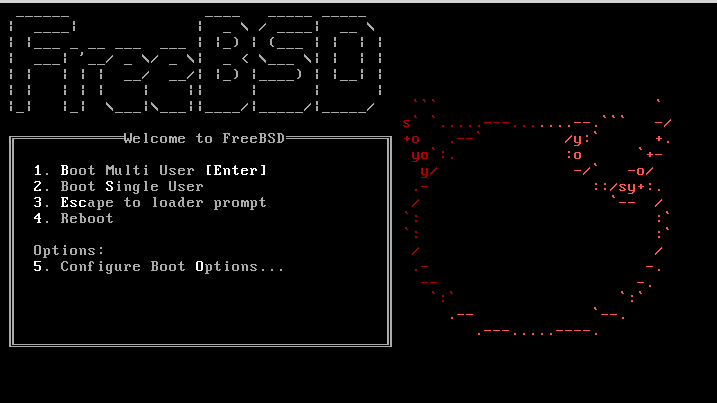
bsdinstall-newboot-loader-menu-pv_entries_consider_increasing_vm_pmap_shpgrepproc

I'm running FreeBSD with Apache and PHP on it and I got in dmesg (kernel log), following error:

freebsd# dmesg|grep -i vm.pmap.shpgperproc
Approaching the limit on PV entries, consider increasing either the vm.pmap.shpgperproc or the vm.pmap.pv_entry_max tunable.

The exact FreeBSD, Apache and php versions I have installed are:
 

freebsd# uname -a ; httpd -V ; php –version
FreeBSD pcfreak 7.2-RELEASE-p4 FreeBSD 7.2-RELEASE-p4 #0: Fri Oct 2 12:21:39 UTC 2009 root@i386-builder.daemonology.net:/usr/obj/usr/src/sys/GENERIC i386
Server version: Apache/2.0.64
Server built: Mar 13 2011 23:36:25Server's Module Magic Number: 20050127:14
Server loaded: APR 0.9.19, APR-UTIL 0.9.19
Compiled using: APR 0.9.19, APR-UTIL 0.9.19
Architecture: 32-bit
Server compiled with….
-D APACHE_MPM_DIR="server/mpm/prefork"
-D APR_HAS_SENDFILE
-D APR_HAS_MMAP
-D APR_HAVE_IPV6 (IPv4-mapped addresses enabled)
-D APR_USE_FLOCK_SERIALIZE
-D APR_USE_PTHREAD_SERIALIZE
-D SINGLE_LISTEN_UNSERIALIZED_ACCEPT
-D APR_HAS_OTHER_CHILD
-D AP_HAVE_RELIABLE_PIPED_LOGS
-D HTTPD_ROOT="/usr/local"
-D SUEXEC_BIN="/usr/local/bin/suexec"
-D DEFAULT_PIDLOG="/var/run/httpd.pid"
-D DEFAULT_SCOREBOARD="logs/apache_runtime_status"
-D DEFAULT_LOCKFILE="/var/run/accept.lock"
-D DEFAULT_ERRORLOG="logs/error_log"
-D AP_TYPES_CONFIG_FILE="etc/apache2/mime.types"
-D SERVER_CONFIG_FILE="etc/apache2/httpd.conf"
PHP 5.3.5 with Suhosin-Patch (cli) (built: Mar 14 2011 00:29:17)
Copyright (c) 1997-2009 The PHP Group
Zend Engine v2.3.0, Copyright (c) 1998-2010 Zend Technologies
with eAccelerator v0.9.6.1, Copyright (c) 2004-2010 eAccelerator, by eAccelerator

After a bunch of research a FreeBSD forums thread , I've found the fix suggested by a guy.

The solution suggested in the forum is to raise up vm.pmap.pv_entry_ma to vm.pmap.pv_entry_max=1743504, however I've noticed this value is read only and cannot be changed on the BSD running kernel;

freebsd# sysctl vm.pmap.pv_entry_max=1743504
sysctl: oid 'vm.pmap.pv_entry_max' is read only

Instead to solve the;

Approaching the limit on PV entries, consider increasing either the vm.pmap.shpgperproc or the vm.pmap.pv_entry_max tunable.
, I had to add in /boot/loader.conf

vm.pmap.pde.mappings=68
vm.pmap.shpgperproc=500
vm.pmap.pv_entry_max=1743504

Adding this values through /boot/loader.conf set them on kernel boot time. I've seen also in the threads the consider increasing either the vm.pmap.shpgperproc is also encountered on FreeBSD hosts running Squid, Dansguardion and other web proxy softwares on busy hosts.

This problems are not likely to happen for people who are running latest FreeBSD releases (>8.3, 9.x), I've read in same above post in newer BSD kernels the vm.pmap is no longer existing in newer kernels.

12 must have Joomla extension plugins / Essential modules for new Joomla CMS install

Thursday, June 16th, 2011

Joomla bundle of must have extensions picture

These days very often I have to install, plain new Joomla based websites. I’ve realized that since there is no structured guide to follow describing the most essential plugins that every new fresh new joomla installation is required to have.
Thus I took the time and wrote this post, as it will be useful to myself in my future new joomla based websites establishment, I also believe these guide will be useful to other Joomla enthusiasts or administrators in their daily work.

Below I will describe in short the installation, configuration and oddities I’ve faced during installment of the above described bundle of plugins on a plan Joomla 1.5 install.These article will walk through 12 joomla essential plugins that I believe every fresh Joomla installation should be equipped with.
Hope this guide will be helpful to you. Now let’s start it up:

1. JoomlaXplorer – A sophisticated web file explorer for Joomla

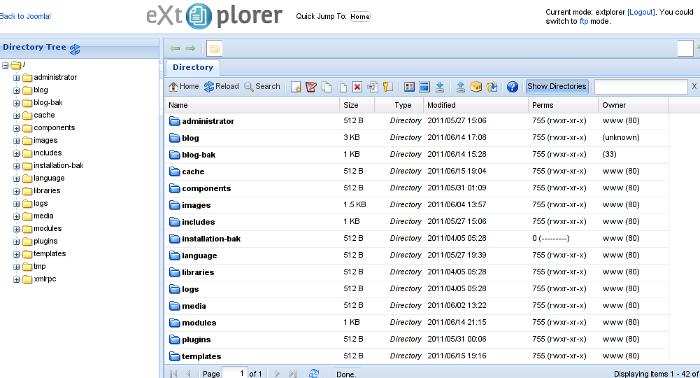
One of the basic modules, beneficial with a new joomla CMS install is Joomla Xptplorer . This module enables the joomla admin to browse files in a web file explorer, on the server where the joomla CMS is installed. Below you see how handy the joomla web explorer provided by the plugin is:

Joomla file explorer extplorer module

Installing and using the plugin is a piece of cake. To install the plugin:

a. download Joomla file Xplorer from here or from the official plugin website.

b. Install the plugin through the admin joomla menu:

Extensions -> Install/Uninstall

c. Start using the newly installed plugin by following to menus:

Components -> eXtplorer

2. JCrawler Generate easily sitemap.xml to aim the overall Joomla website SEO optimization

JCrawler logo plugin joomla

I have previously written a very through tutorial on how to install configure and generate website sitemap with Jcrawler module, You can read my article titled: How to build website sitemap.xml in Joomla here

3. sh404SEF – Make your Joomla links and content more user friendly

sh404sef Joomla Search Engine Optimization plugin

sh404SEF is a great Joomla plugin, which will seriously improve SEO and could contribute well for a website to be better indexed with major search engines.

I have previously written an article describing thoroughfully the install and use procedures for the module.
You can read the article Making your Joomla URLS Google friendly with sh404sef plugin / Simple Joomla link SEO here

4. Akeeba Backup Joomla solution

Akeeba backup Joomla Module

Installing a joomla backup solution is very essential if you does take care about your data, it often happens that server hard disk got crashes or a RAID massives got corrupted or some kind of other unexpected disaster hits the server. In these terrible times, having a website backup will save you nerves and data recovery funds, not to mention that in many cases data recovery is impossible.

Joomla has a very easy to use software for creating full website backup called Akeeba Backup

To start using the software one must:

a. Download Akeeba Backup and install it via:

Extensions -> Install/Uninstall

After the Akeeba Backup installation is over, to create your first backup, one needs to navigate to:

Components -> Akeeba Backup -> Backup Now

Each Akeeba backup (a version of the website’s files data and sql info) will be created in an archive file with the extension .jpa
The backup files are created under joomla’s website (main) root directory in directory location administrator/components/com_akeeba/backup

The Akeeba plugin also has capabilities to recover a (.jpa) backup restore point easily.
To recover a backup with the Akeeba plugin one needs to do it once again, via the plugin joomla web interface.
5. Google Analytics (place easy tracking code) in Joomla

Google Analytics Tracking Module for Joomla

a. Download the Google Analytics Tracking Module
The module is available from Joomla Extensions on joomla.org

At the current time of writting you need to download the analytics_tracking15,zip file

b. Install the Google Analytics Tracking Module;
Login as joomla admin and navigate to;

Extensions -> Install

Place the analytics_tracking15.zip url to the Install URL: field.
Again as of time of writting you need to place https://www.pc-freak.net/files/analytics_tracking15.zip;

c. Open the Module Manager

Extensions -> Module Manager

d. Click over Google Analytics Tracking Module
On the right pane you will notice in the Module Parameters the Analytics_uacct_code field. In the uacct_code field you need to paste your UA obtained from your created google-analytics account.
This code is usually something like UA-2101595-10
Now place your code their and press the save green button located near the right top of the screen. You should see the text in blue Item Saved which would indicate your UA code is stored already in the Google Analytics Tracking Module, now press the Cancel button located again on the right top.
As a last step before the Google analytics is set-up on the Joomla you need to enable the plugin to do you need to press over the tick left sided from the text reading Google Analytics Tracking Module in the Module Manager
e. Click over the Enabled button in Module Manager;
Google Analytics Tracking Module -> Enabled

6. Itprism (Facebook, Twitter etc.) Social Network share buttons Joomla plugin

ITPShare Large Social Buttons Joomla

a. to add the itpsocialbuttons to joomla Download the Itpsocialbuttons latest module files from http://itprism.com/free-joomla-extensions/social-buttons-plugin or use my mirrored module files below:

Download mod_itpsocialbuttons .zip file
Download plg_itpsocialbuttons .zip

After having the two files necessery to be installed to make the ITPSocialButtons appear on website, installation is done like with any other installation:

Extensions -> Install/Uninstall -> Upload Package File (Choose File)

Next its necessery to configure the plugin to do so, follow to menus:

Extensions -> Module Manager -> Share

You will notice the Share dialog in the list of Module Name column in Module Manager

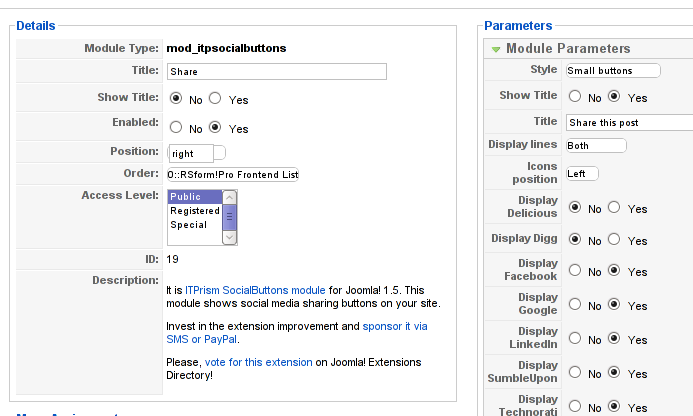
Here is a screenshot on how the settings options for ITpsocialbuttons will look like:

Mod ITpSocialButtons settings screen

The options which I personally changed was:

Show Title – I set this one to No as I wanted to omit the plugin title text to appear on my website.
Further on I’ve set the Enabled option to Yes to enable the plugin and choose the buttons Style option to be of a Small buttons type.
I’ve also found that the most suitable position for the Social Share buttons were to be of a right – Position .

Here is how the social network itprism share buttons looks like:

ITprism Joomla Social Share Plugin various button types

The plugin supports sharing of joomla pages to the following list of social networks:
 

  • Delicios.com
  • Digg.com
  • Facebook
  • Google Bookmarks
  • StumbleUpon
  • Technorati
  • Twitter
  • LinkedIn

The module configuration, also allows the user to configure the type of social network buttons, one wants to display on the website.

7. Joomla JCE Content Editor

This content editor is really awesome compared to the default editor TinyMCE. If you want to have an options rich content editor for Joomla, then this is the one for you 🙂
download JCE Content Editor here

After installing the JCE Joomla content editor in order to enable it as a default editor you need to go to the following location:

Site -> Global Configuration -> Default WYSIWYG Editor

There place on Editor TinyMCE and change it with Editor – JCE

Now go to edit some article, and you will see the difference in the editor 🙂

8. Add gallery Joomla capabilities with sigplus (Image Gallery Plus) and Very Simple Image Gallery

Image Gallery Plus sigplus Joomla Screenshot

Image Gallery Plus plugin (sigplus) gallery review screenshot

sigplus Image Gallery Plus is a straightforward way to add image or photo galleries to a Joomla article with a simple syntax. It takes a matter of minutes to set up a gallery but those who are looking for a powerful gallery solution will not be disappointed either: sigplus is suitable for both beginner and advanced users.

Download Sigplus Joomla Image Gallery plugin here
Using sigllus is quite easy all one has to do is use Joomla Media Manager from links:

Site -> Media Manager

Create new folder in the stories folder, let’s say New Pictures and further on use Media Manager to upload all desired pictures to be later displayed.

Being done with uploading the images you want to display, go to Article Manager :

Content -> Article Manager

From there choose your article where new uploaded pictures you want to display and type in the article:

{gallery}New Pictures{/gallery}.

Note that New Pictures is the directory just recently created as stated below, it’s important that there is no spacing between {gallery}and New Pictures, if one tries {gallery} New Pictures {/gallery} instead of {gallery}New Pictures{/gallery} an error will occur instead of the pictures being displayed in a scrolled gallery.

Sigplus Image Gallery has also a number of configuration options, which might make it look a bit more decent.
I have to say in my view the default way sigplus displays pictures is awful!

Another alternative if you don’t like Sigplus ‘s way of creating new galleries is to use Very Simple Image Gallery

Very Simple Image Gallery joomla screenshot

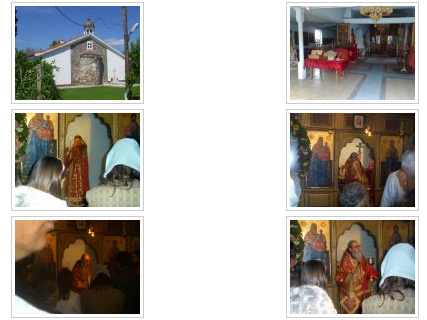
Here is a screenshot on a sample gallery created with Very Simple Image Gallery Joomla Plugin

You can download Very simple image gallery here

After installing the plugin. It’s use is analogous to the Sigplus . To use it likewise sigplus create new directory through Media Manager and in stories and upload your files in let’s say New Pictures1 . Later on in your article place, the code

{vsig}New Pictures1{/vsig}

Gallery will be generated automatically by the plugin. I think Simple Image Gallery is a bit more advanced and gives a better outlook to Galleries, though it’s configuration settings are much less than with SigPlus image gallery.

To add pictures comments e.g. img link alt=” and title=” tib you need to place a code within the Article manager similar to:

{vsig_c}0|Picture_1.JPG|Some sample text|Some other text{/vsig_c}
{vsig_c}0|Picture_2.JPG|Some example text|Some text{/vsig_c}
etc. ..

Note that the 0 in above example specifies the gallery number if you for instance are using a couple of galleries with Simple Image Gallery , the first one you used would be call 0 . The text specified as comments to the picture will also appear after you preview the gallery right below the picture when clicked on as a picture description in a really nice way.
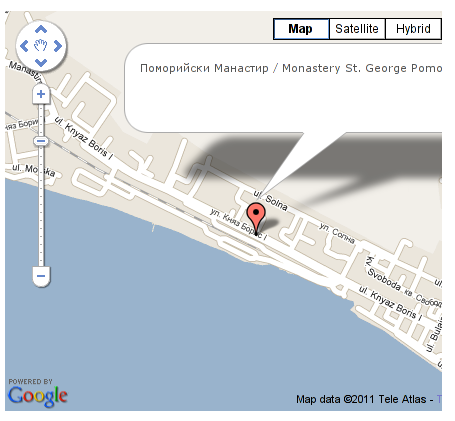
9. Install Google maps plugin for Joomla

Google Maps plugin for Joomla screenshot

It’s a wise idea that every website has a location map on it’s website, for that reason Google maps is just great.
To install Google maps capability to joomla one can use a plugin called Google Maps .

You can straighly download Joomla’s Googlemap plugin from here

Afterwards use Extension Manager to install the plugin e.g. follow:

Extensions -&gr; Install/Uninstall (Choose File)

and click on Upload File & Install button.

To further enable and configure the Joomla Googlemap plugin you will have to go to the location:

Extensions -> Plugin Manager

Therein you will have to find and enable the Google Maps plugin which is to be found in the column named Plugin Manager
On my Joomla installation the plugin was located in the second page with modules, so if you don’t find the module on the listing with modules on the first page, make sure you scroll to the bottom of the page and click on Next button.

Therein in the list you will most likely notice Google Maps use the Enable button to enable it.

Next step is to configure the plugin, to do so press on the plugin name Google Maps
All configuration necessery here is to place Googlemaps API Key in the respective field (you will see it among config options).

Issuing a new Google Maps api key takes just few seconds, if you already have a gmail account just go to http://code.google.com/apis/maps/signup.html and take few seconds to issue the key.

You will get the key right on your gmail account after being issued (to repeat myself issuing takes few seconds so no worrier here).

One moreOnce having the key place it in the Googlemaps API Key field and configuring Address (which is one of the list of many options the plugin provides) you will be done with configuration.

To display a google map the location you just configured go to the Article Manager , select the article where you want the google maps location picture of your address to appear and type in the Article:

{mosmap|text='Exact street address location'|zoom='15'|zoomType='Large'|zoomNew='0'}

After you save the article a very nice Google map showing you the location’s streets will appear.
You can further conifgure a number of things related to the google map to appear, one thing you might want to play with is the zoom option which as you see in below’s code is equal to 15, e.g. zoom=’15’
Set it to another one if you want to regulate your googlemaps zoom level. For more thoroughful options take a look at the extensive plugin documentation.

10. Joomla Xmap (generating static HTML sitemap) Download Xmap from here , install it the usual plugin way.

Right after installation on the plugin succesful install screen you will notice the link component menu .
Clicking on the component menu you will be leaded to a page showing you few links Sitemap’s URL :
 

  • XML Sitemap:
  • HTML Sitemap:
  • News Sitemap:
  • Images Sitemap:

11. Add Joomla donate Paypal capabilities with Joomla PAYPAL DONATION MODULE

Paypal Donation Module Joomla Screenshot

Just recently I’ve written a a post on how to add a paypal donation capabilities to joomla, you can read my previous post here

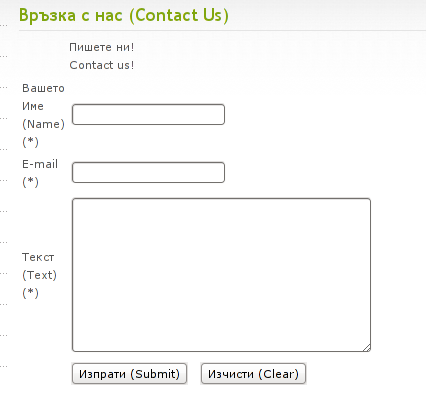
12. Install Joomla RSForms Module (Advanced Joomla Forms Support)

Simple Joomla RsForm contact form

If you’re planning to add a complicated form support for Joomla, there are plenty of plugins, however one that was suggested by a friend of mine which is deep in Joomla world and moreover works good on my joomla installations is RSForms

Joomla – RSForms! is free to download and has great and easy interface to create new joomla forms.

At the time of writting I use these three RSForms components on new Joomla installations:

RSform Pro 1.1.0 com
Mod RsForm for Joomla 1.5
Mod Rsform list for Joomla

For latest release of RSForms! use the link http://www.rsjoomla.com/joomla-components/rsform.html

Installation is like any other module and is done through Extensions -> Install/Uninstall menu.

After installation, setting up a new form is available from the Joomla Menus:

Components -> RSform!Pro -> Manage Forms

I would not enter in details on how to edit the default RSForms or create a new RSForm. Just take some time and learn it by trying 😉

After the rsform is ready, to enable the new form, navigate to Joomla menus:

Menus -> Main Menu

Press the New button located in the buttons bar nearby the page header in the list of options in Select Menu item Type you will notice the RSForm!Pro as an option, press on it to establish the new form in the menus.

A follow up window will appear where one can set a Title: and Alias: for the new form as well as few other options.
After finalizing the settings press on Apply button to save the settings and the new form should appear in Joomla.

Probably there are many more handy plugins, which I’m missing here thus I’ll be glad if readers suggest some more helpful essential (must have plugins) for Joomla.
Feedback on this tutorial is very welcome!
Looking forward to hear for your opinions if my article was helpful to you 😉

How to disable IPv6 on Debian / Ubuntu / CentOS and RHEL Linux

Friday, December 9th, 2011

I have few servers, which have automatically enabled IPv6 protocols (IPv6 gets automatically enabled on Debian), as well as on most latest Linux distribituions nowdays.

Disabling IPv6 network protocol on Linux if not used has 2 reasons:

1. Security (It’s well known security practice to disable anything not used on a server)
Besides that IPv6 has been known for few criticil security vulnerabilities, which has historically affected the Linux kernel.
2. Performance (Sometimes disabling IPv6 could have positive impact on IPv4 especially on heavy traffic network servers).
I’ve red people claiming disabling IPv6 improves the DNS performance, however since this is not rumors and did not check it personally I cannot positively confirm this.

Disabling IPv6 on all GNU / Linuces can be achieved by changing the kernel sysctl settings net.ipv6.conf.all.disable_ipv6 by default net.ipv6.conf.all.disable_ipv6 equals 1 which means IPv6 is enabled, hence to disable IPv6 I issued:

server:~# sysctl net.ipv6.conf.all.disable_ipv6=0

To set it permanently on system boot I put the setting also in /etc/sysctl.conf :

server:~# echo 'net.ipv6.conf.all.disable = 1 >> /etc/sysctl.conf

The aforedescribed methods should be working on most Linux kernels version > 2.6.27 in that number it should work 100% on recent versions of Fedora, CentOS, Debian and Ubuntu.

To disable IPv6 protocol on Debian Lenny its necessery to blackist the ipv6 module in /etc/modprobe.d/blacklist by issuing:

echo 'blacklist ipv6' >> /etc/modprobe.d/blacklist

On Fedora / CentOS there is a another universal “Redhat” way disable IPv6.

On them disabling IPv6 is done by editting /etc/sysconfig/network and adding:

NETWORKING_IPV6=no
IPV6INIT=no

I would be happy to hear how people achieved disabling the IPv6, since on earlier and (various by distro) Linuxes the way to disable the IPv6 is probably different.
 

Alto to stop Iptables IPV6 on CentOS / Fedora and RHEL issue:

# service ip6tables stop

# service ip6tables off

How to add visitor/visitors counter in Joomla based website using the VINAORA joomla plugin

Wednesday, December 29th, 2010

One of the websites based on Joomla, that I’m managing, had to have the option to show a Visitors Counter on the page bottom.

I did some research online to check for some Joomla plugins that are capable of aiming my Joomla installation with the Visitor Counter feature.

There are a couple of plugins available out there that are able to provide a Joomla installation with a Web Counter, however I’ll just mention the few which I have tested myself.
The ones I’ve tested myself are;

1. VCNT
2. Count your Visitors
3. Cool Hits Counter
and finally the one that I really liked the most:

4. VINAORA

All the prior 3 aforementioned VCNT, Count your Visitors and Cool Hits Counter, are actually working right after installation. I haven’t had the time to test them thoroughfully but from a first look they appear to be counting the visitors.

The Count your visitors – joomla plugin’s download main page was in German with no option to revert to English, so that wasn’t nice.

Though the plugin seems to work fine after just downloaded and installed and configured from

Extensions -> Module Manager

The configuration options for Count your visitors are quite obscure but if you’re a looking for a really simple way to count your Joomla based website visitors it might be a good choice. The plugin is based on the initial Joomla module called Statistics.

By the way I’ve read some reports online that actually Joomla 1.5 also includes some kind of minimal integrated web counter embedded in itself throughout the Joomla Statistics module .
However I personally couldn’t really follow the methods describe to take advantage of the Joomla install integrated Statistics module, however if somebody has already succeeded in using the Statistics default joomla module I’ll be glad, if he shares with me.

I’ve found the VCNT visitor statistics plugin a handy one, but this module had this major problem that the VCNT 1.5 text which was appearing as a heading before the statistics was hard to wipe out of my web page, so eventually I got pissed of and thought and tested the Cool Hits Counter.

The Cool Hits Counter is actually a simplistic module which presents a counter about visitors on the web site in numeric digit numbers.
These module uses the integrated Joomla 1.5 module mod_stats the only difference is the support for numeric digit numbers.

As I’ve said none of the above modules wasn’t flexible enough and therefore wasn’t what I was looking for, thus I decided to use my installed VINAORA Joomla web(users) counter plugin.

The VINAORA is actually quite straight foward to configure, right after installation to start with the configuration I had to navigate to:

Extension -> Module Manager -> Vinaora Visitors Counter -> Module Parameters

Since I wanted just a simple counter without any external statistics I personally prefered using Vinaora’s counter with the optionsDisplay Mode: Simple as well as the Zero-Statistics turned on to (Yes)

Some of the other options I found to be best matching my desires for the Visitors Counter was:

Show Title: No and Position: Left

Now I had this shiny visitors statistics in my Joomla installation but there was the annoying Link in my Visitors Counter appearing on the page, thus in order to remove the default link Visitors Counter which was pointing to the VINAORA’s web page, I had to edit the file:
modules/mod_vvisit_counter/tmpl/default.php located in my Joomla Document Root directory.

First I’ve edited the code on line 21 where I’ve removed out the Vinaora string since I didn’t wanted any reference to Vinaora to occur in my Joomla HTML code.

In line 162 in the code:

$html .= ….

By removing it I’ve completed scraped out the annoying references to VINAORA and their link to http://vinaora.com website and thus made the Visitors counter a look a bit more professional.

Now the counter is working with a graphical numeric digits and everything is just fine with my Web counter Joomla counter thanks to VINAORA 🙂
 

Knowing Not! :]

Monday, January 22nd, 2007

Today I have Marketing exam. Ofcourse as usual when I have exams I haven’t studied enough, and again I’m in the situation realizing I don’t know anything. I depend 100% on God’s grace to take that exam. Why I’m so dumb never study when

I have what I have. I can’t change my self I can’t study something I’m not interested into. Marketing is a subject which is simple but for Jerks IMHO :]. The logic of marketing is too abstract.

And yes what’s happening with me the last days. Well I’m feeling good now Praise the Lord. I’ve no idea what I should do with my life. I have 2 re-exams for now or maybe 3 ( I don’t know the results from the Research & Statistics Exam ).

The last few days I ran FreeDOS and Windows 2000 Pro SP4 under FreeBSD 6.2 with qemu. FreeDOS’s performance is very nice despite the fact it is emulated. The Windows is running a little laggish although I ran it with kqemu ( Experimental Module for qemu which enhances the typical qemu speed ). Yesterday we drink a dark beer with Nomen into the “Happy Person” Pub. My passion for computers is starting to come back again.

How to change from default main menu text to another text in Joomla

Tuesday, December 21st, 2010

To change the Main Menu link menu entry in Joomla, from Joomla administ rator I tried to:

Menus -> Main Menu -> Menus

I’ve changed the title but the change didn’t appeared in my Joomla based website .

I tried to change it directly in the source code of the website by looking for ‘Main Menu’ string with:

debian:/home/mysite/www# grep -rli 'Main Menu' *

but it appeared too complicated and after trying few string changes in few files I decided to drop this kind of approach.

A bit of investigation online led me to how to achieve what I was trying to dire ctly from Joomla.

Here is how. In Joomla administrator move to:

Extensions -> Module Manager

In the list you will the Module Manager appear under the list Module Name , therein you have to click over Main Menu text and change it to whatever you like to.

The new text you entered will appear on the joomla website immediately, enjoy.

How to add multi-lingual (multi language) support in Joomla 1.5

Friday, June 3rd, 2011

Joomfish MultiLanguage Support enable plugin

If you are facing the task to build a multi-language enabled Joomla website like me then I think my experience on building a multi-language website with Joomla CMS might be beneficial to you.

In order to build a multi-language website in Joomla you will have to use Joom!Fish multilanguage Joomla support plugin.

The plugin is a bit buggy, but in overall it will allow you to build a multi language website and consequently add the page different languate translations.

To install the plugin on your 1.5 Joomla based install;

1. Download the JoomFish plugin

Install it the usual joomla way joomla plugins are installed, via;

Extensions -> Install/Uninstall

2. Enable the Joom!Fish plugin

To do so navigate to;

Extensions -> Module Manager

Enable the module by ticking under the Enabled column on the line where you read Language Selection

3. Install Language packs for all languages which should be supported by JoomFish

Now as the JoomFish Language selection module is enabled, one needs to install the necessery Joomla Language Packs for all the languages which the Joomla based website is planned to support.

In my case I neede a three lingual website, which will support only the Languages:
 

  • Bulgarian
  • Russian
  • and

  • English

Thus I went on Joomla! Extensions Directory – extensions.joomla.org and downloaded the the three language packs I needed (English, Russian and Bulgarian).

Again the Installation of the language packs is trivial and is done through the Joomla’s:

Extensions -> Install/Uninstall

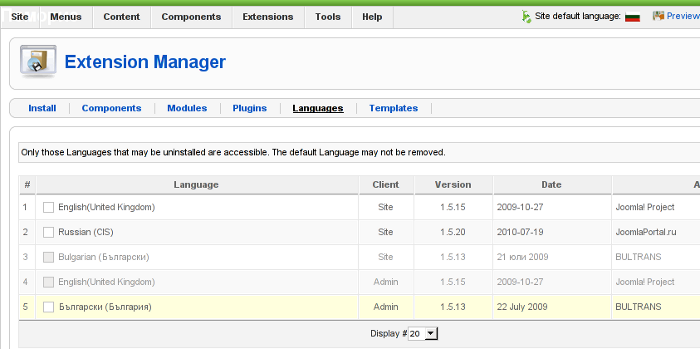
After installation to find out all the languages your Joomla installation will support you can navigate inside Joomla admin to:

Extensions -> Install/Uninstall -> Languages

Screenshot of my installed list of Joomla Language packs Screenshot of my installed list of Joomla Language Packs (Multi-Language setup)
Another way to check the list of enabled installed languages supported in your Joomla is via the menu:

Site -> Control Panel -> Language Manager

Something important here is to a default language is set in the Language Manager

4. Create translations from default installed language to the rest of the installed ones

Go to the JoomFish component through the menus:

Components -> Joom!Fish -> Control Panel

If all your language packs are correctly installed and enabled so far you should notice them listed while clicking on Content Languages

If all the Joomla Languages which your website is supposed to support are not there, this means something is generally wrong with installed lanaguage packs and you need to go back few steps and check what might be wrong, hopefully that’s not the case 😉

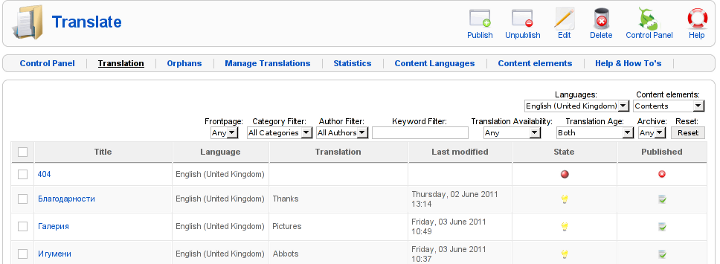
To immediately start translating your Joomla website to another from one language to another one, use the control menus:

Components -> Joom!Fish -> Translation

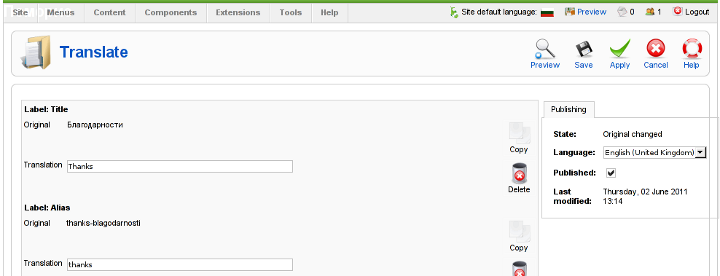
Here is screenshot on how this menu would look like:

Joomla JoomFish Plugin Translate Menu Screenshot

Notice in the above screenshot the Languages: and Content Elements dropdown menus, this ones are actually the two menus used for all language translations.

One needs to select under Languages: menu the Language to which will be translated to, while in Content Elements: has to be choseen the exact site elements which are about to be translated.

The Content Elements: necessery to be translated in most of the cases would be just Menus and Contents

Translating that will have your website user frontend be completely translated info the foreign language choosen in the Languages: dialog.

After finalizing the translations of all Articles available in Menus and Contents make sure the translation is Published, by selecting the Published tick, below I show you an example language translation edit of an article, on the left side you see the Published tick which need to be enabled, for translation to appear officially in Joomla.

Joomla Joomfish published tick enabled screenshot

After completing all the translations of elements offered by the translation window, save the translation by pressing the Apply buttonFurther on you can check the website in a new tab, if everything is okay with translations, on the down left corner of the website footer you should notice the flags of enabled languages to appear.
Clicking on each of the languages should show you the website in the language choosen (if you have previously done the translation to the respective menus).

5. Solving a minor bug in JoomlaFish which prevents translated language text to display on webpages

During translation of my website from Bulgarian to English, I have noticed a bug of JoomFish, even though I did the translation of all my Menus and website Content elements and saved the translations, refreshing the website in a new tab and choosing the desired translation was constantly displaying the error message:

“There are no translations available”

I was not able to find a good explanation on the Internet on why exactly and how this bug occurs, but by some experiments I come up with a workaround.

If you get the “There are no translations available” after properly configuring Joom!Fish Multilang support, in order to solve the error you will have to select temporary a different default website language from the one currently specified by your website.

(E.g.) go to jooma admin panel location:

Site -> Control Panel -> Language Manager

and trigger the default language configured to some of the other available ones. After reverting back in a couple of seconds this setting to your desired default language the annoying: “There are no translations available” message will disappear and your translated content will appear on the website.

6. Changing the location of language flags (language links) in Joomla’s JoomFish

I have seen plenty of people online looking for a solution on how they can change the default image flags location, which by default is placed a place which is not that intuitive and visible by the user.

Maybe I did not searched enough but from my quick research it appears there is no information available on how the placement of language flags switching menu can be changed.

Even though I couldn’t find a solution to change the langage flags in JoomFish , after a bunch of experiments I find a way to do it! 🙂

The placement of Language selector buttons can be easily adjusted through following the Joomla Admin menu:

Extensions -> Module Mamager -> Language Selection

After opening the Language Selection , you will notice the Position: dropdown menu setting. The setting has a bunch of optionsand allows you to choose the best preferred placement of the language selector flag buttons, just take few minutes to experiment which settingfits you best and choose the one most suitable to you and you’re done! 😉

Honestly I never imagined that building a multi-lingual website with Joomla will be such a piece of cake.

The only drawback with JoomFish, is the way language translation is implemented as it is not enough user friendly, anyways having the option to build multi language website for free using open source CMS solution is great. Ain’t it? 🙂

How to fix “Fatal error: Call to undefined function: curl_init()” on FreeBSD and Debian

Saturday, June 18th, 2011

After installing the Tweet Old Post wordpress plugin and giving it, I’ve been returned an error of my PHP code interpreter:

Call to undefined function: curl_init()

As I’ve consulted with uncle Google’s indexed forums 😉 discussing the issues, I’ve found out the whole issues are caused by a missing php curl module

My current PHP installation is installed from the port tree on FreeBSD 7.2. Thus in order to include support for php curl it was necessery to install the port /usr/ports/ftp/php5-curl :

freebsd# cd /usr/ports/ftp/php5-curl
freebsd# make install clean

(note that I’m using the php5 port and it’s surrounding modules).

Fixing the Call to undefined function: curl_init() on Linux hosts I suppose should follow the same logic, e.g. one will have to install php5-curl to resolve the issue.
Fixing the missing curl_init() function support on Debian for example will be as easy as using apt to install the php5-curl package, like so:

debian:~# apt-get install php5-curl
...

Now my tweet-old-post curl requirement is matched and the error is gone, hooray 😉