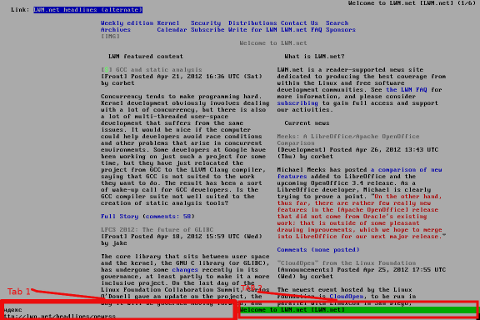
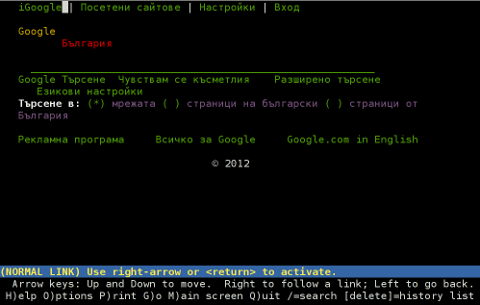
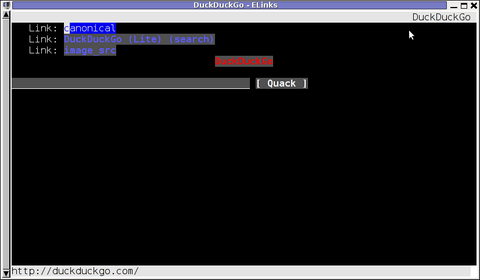
I'm used to making picture screenshots in GNOME desktop environment. As I've said in my prior posts, I'm starting to return to my old habits of using console ttys for regular daily jobs in order to increase my work efficiency. In that manner of thoughts sometimes I need to take a screenshot of what I'm seeing in my physical (TTY consoles) to be able to later reuse this. I did some experimenting and this is how this article got born.
In this post, I will shortly explain how a picture of a command running in console or terminal in GNU / Linux can be made
Before proceeding to the core of the article, I will say few words on ttys as I believe they might be helpful someone.
The abbreviation of tty comes after TeleTYpewritter phrase and is dating back somewhere near the 1960s. The TTY was invented to help people with impaired eyesight or hearing to use a telephone like typing interface.
In Unix / Linux / BSD ttys are the physical consoles, where one logs in (typing in his user/password). There are physical ttys and virtual vtys in today *nixes. Today ttys, are used everywhere in a modern Unixes or Unix like operating system with or without graphical environments.
Various Linux distributions have different number of physical consoles (TTYs) (terminals connected to standard output) and this depends mostly on the distro major contributors, developers or surrounding OS community philosophy.
Most modern Linux distributions have at least 5 to 7 physical ttys. Some Linux distributions like Debian for instance as of time of writting this, had 7 active by default physical consoles.
Adding 3 more ttys in Debian / Ubuntu Linux is done by adding the following lines in /etc/inittab:
7:23:respawn:/sbin/getty 38400 tty7
8:23:respawn:/sbin/getty 38400 tty8
9:23:respawn:/sbin/getty 38400 tty9
On some Linux distributions like Fedora version 9 and newer ones, new ttys can no longer be added via /etc/inittab,as the RedHat guys changed it for some weird reason, but I guess this is too broad issue to discuss ….
In graphical environments ttys are called methaphorically "virtual". For instance in gnome-terminal or while connecting to a remote SSH server, a common tty naming would be /dev/pts/8 etc.
tty command in Linux and BSDs can be used to learn which tty, one is operating in.
Here is output from my tty command, issued on 3rd TTY (ALT+F3) on my notebook:
noah:~# tty
/dev/tty3
A tty cmd output from mlterm GUI terminal is like so:
hipo@noah:~$ tty/dev/pts/9
Now as mentioned few basic things on ttys I will proceed further to explain how I managed to:
a) Take screenshot of a plain text tty screen into .txt file format
b) take a (picture) JPG / PNG screenshot of my Linux TTY consoles content
1. Take screenshot of plain text tty screen into a plain (ASCII) .txt file:
To take a screenshot of tty1, tty2 and tty3 text consoles in a txt plain text format, cat + a standard UNIX redirect is all necessery:
noah:~# cat /dev/vcs1 > /home/hipo/tty1_text_screenshot.txt
noah:~# cat /dev/vcs2 > /home/hipo/tty2_text_screenshot.txt
noah:~# cat /dev/vcs3 > /home/hipo/tty3_text_screenshot.txt
This will dump the text content of the console into the respective files, if however you try to dump an ncurses library like text interactive interfaces you will end up with a bunch of unreadable mess.
In order to read the produced text 'shots' onwards less command can be used …
noah:~# less /home/hipo/tty1_text_screenshot.txt
noah:~# less /home/hipo/tty2_text_screenshot.txt
noah:~# less /home/hipo/tty3_text_screenshot.txt
2. Take picture JPG / PNG snapshot of Linux TTY console content
To take a screenshot of my notebook tty consoles I had to first install a "third party program" snapscreenshot . There is no deb / rpm package available as of time of writting this post for the 4 major desktop linux distributions Ubuntu, Debian, Fedora and Slackware.
Hence to install snapscreenshot,I had to manually download the latest program tar ball source and compile e.g.:
noah:~# cd /usr/local/src
noah:/usr/local/src# wget -q http://bisqwit.iki.fi/src/arch/snapscreenshot-1.0.14.3.tar.bz2
noah:/usr/local/src# tar -jxvvvf snapscreenshot-1.0.14.3.tar.bz2
…
noah:/usr/local/src# cd snapscreenshot-1.0.14.3
noah:/usr/local/src/snapscreenshot-1.0.14# ./configure && make && make install
Configuring…
Fine. Done. make.
make: Nothing to be done for `all'.
if [ ! "/usr/local/bin" = "" ]; then mkdir –parents /usr/local/bin 2>/dev/null; mkdir /usr/local/bin 2>/dev/null; \
for s in snapscreenshot ""; do if [ ! "$s" = "" ]; then \
install -c -s -o bin -g bin -m 755 "$s" /usr/local/bin/"$s";fi;\
done; \
fi; \
if [ ! "/usr/local/man" = "" ]; then mkdir –parents /usr/local/man 2>/dev/null; mkdir /usr/local/man 2>/dev/null; \
for s in snapscreenshot.1 ""; do if [ ! "$s" = "" ]; then \
install -m 644 "$s" /usr/local/man/man"`echo "$s"|sed 's/.*\.//'`"/"$s";fi;\
done; \
fi
By default snapscreenshot command is made to take screenshot in a tga image format, this format is readable by most picture viewing programs available today, however it is not too common and not so standartized for the web as the JPEG and PNG.
Therefore to make the text console tty snapshot taken in PNG or JPEG one needs to use ImageMagick's convert tool. The convert example is also shown in snapscreenshot manual page Example section.
To take a .png image format screenshot of lets say Midnight Commander interactive console file manager running in console tty1, I used the command:
noah:/home/hipo# snapscreenshot -c1 -x1 > ~/console-screenshot.tga && convert ~/console-screenshot.tga console-screenshot.png
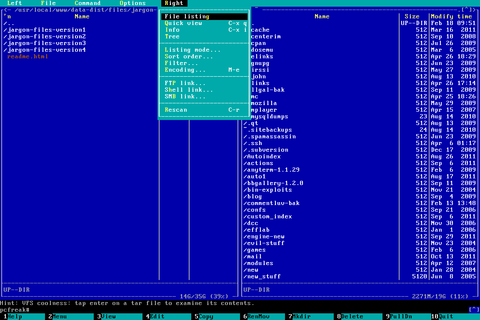
Note that you need to have read/write permissions to the /dev/vcs* otherwise the snapscreenshot will be unable to read the tty and produce an error:
hipo@noah:~/Desktop$ snapscreenshot -c2 -x1 > snap.tga && convert snap.tga snap.pngGeometry will be: 1x2Reading font…/dev/console: Permission denied
To take simultaneous picture screenshot of everything contained in all text consoles, ranging from tty1 to tty5, issue:
noah:/home/hipo# snapscreenshot -c5 -x1 > ~/console-screenshot.tga && convert ~/console-screenshot.tga console-screenshot.png
Here is a resized 480×320 pixels version of the original screenshot the command produces:

Storing a picture shot of the text (console) screen in JPEG (JPG) format is done analogously just the convert command output extension has to be changed to jpeg i.e.:
noah:/home/hipo# snapscreenshot -c5 -x1 > ~/console-screenshot.tga && convert ~/console-screenshot.tga console-screenshot.jpeg
I've also written a tiny wrapper shell script, to facilitate myself picture picture taking as I didn't like to type each time I want to take a screenshot of a tty the above long line.
Here is the wrapper script I wrote:
#!/bin/sh
### Config
# .tga produced file name
output_f_name='console-screenshot.tga';
# gets current date
cur_date=$(date +%d_%m_%Y|sed -e 's/^ *//');
# png output f name
png_f_name="console-screenshot-$cur_date.png";
### END Config
snapscreenshot -c$arg1 -x1 > $output_f_name && convert $output_f_name $png_f_name;
echo "Output png screenshot from tty1 console produced in";
echo "$PWD/$png_f_name";
/bin/rm -f $output_f_name;
You can also download my console-screenshot.sh snapscreenshot wrapper script here
The script is quite simplistic to use, it takes just one argument which is the number of the tty you would like to screenshot.
To use my script download it in /usr/local/bin and set it executable flag:
noah:~# cd /usr/local/bin
noah:/usr/local/bin# wget -q https://www.pc-freak.net/~bshscr/console-screenshot.sh
noah:/usr/local/bin# chmod +x console-screenshot.sh
Onwards to use the script to snapshot console terminal (tty1) type:
noan:~# console-screenshot.sh
I've made also mirror of latest version of snapscreenshot-1.0.14.3.tar.bz2 here just in case this nice little program disappears from the net in future times.
