1. Intro to Redhat RPM based distro /etc/sysconfig/network-scripts/* config vars shortly explained
On RPM based Linux distributions configuring network has a very specific structure. As a sysadmin just recently I had a task to configure Networking on 2 Machines to be used as Hypervisors so the servers could communicate normally to other Networks via some different intelligent switches that are connected to each of the interfaces of the server. The idea is the 2 redhat 8.3 machines to be used as Hypervisor (HV) and each of the 2 HVs to each be hosting 2 Virtual guest Machines with preinstalled another set of Redhat 8.3 Ootpa. I've recently blogged on how to automate a bit installing the KVM Virtual machines with using predefined kickstart.cfg file.
The next step after install was setting up the network. Redhat has a very specific network configuration well known under /etc/sysconfig/network-scripts/ifcfg-eno*# or if you have configured the Redhats to fix the changing LAN card naming ens, eno, em1 to legacy eth0, eth1, eth2 on CentOS Linux – e.g. to be named as /etc/sysconfig/network-scripts/{ifcfg-eth0,1,2,3}.
The first step to configure the network from that point is to come up with some network infrastrcture that will be ready on the HV nodes server-node1 server-node2 for the Virtual Machines to be used by server-vm1, server-vm2.
Thus for the sake of myself and some others I decide to give here the most important recognized variables that can be placed inside each of the ifcfg-eth0,ifcfg-eth1,ifcfg-eth2 …
A standard ifcfg-eth0 confing would look something this:
[root@redhat1 :~ ]# cat /etc/sysconfig/network-scripts/ifcfg-eth0
TYPE=Ethernet
BOOTPROTO=none
DEFROUTE=yes
IPV4_FAILURE_FATAL=no
IPV6INIT=yes
IPV6_AUTOCONF=yes
IPV6_DEFROUTE=yes
IPV4_FAILURE_FATAL=no
NAME=eth0
UUID=…
ONBOOT=yes
HWADDR=0e:a4:1a:b6:fc:86
IPADDR0=10.31.24.10
PREFIX0=23
GATEWAY0=10.31.24.1
DNS1=192.168.50.3
DNS2=10.215.105.3
DOMAIN=example.com
IPV6_PEERDNS=yes
IPV6_PEERROUTES=yes
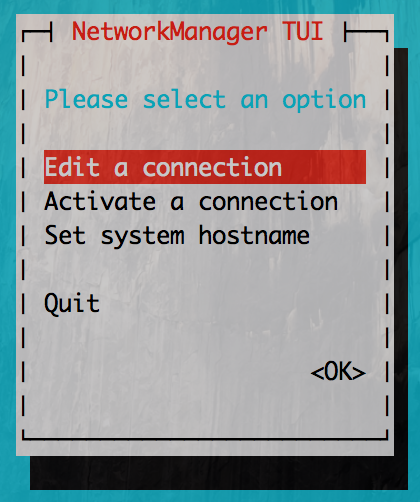
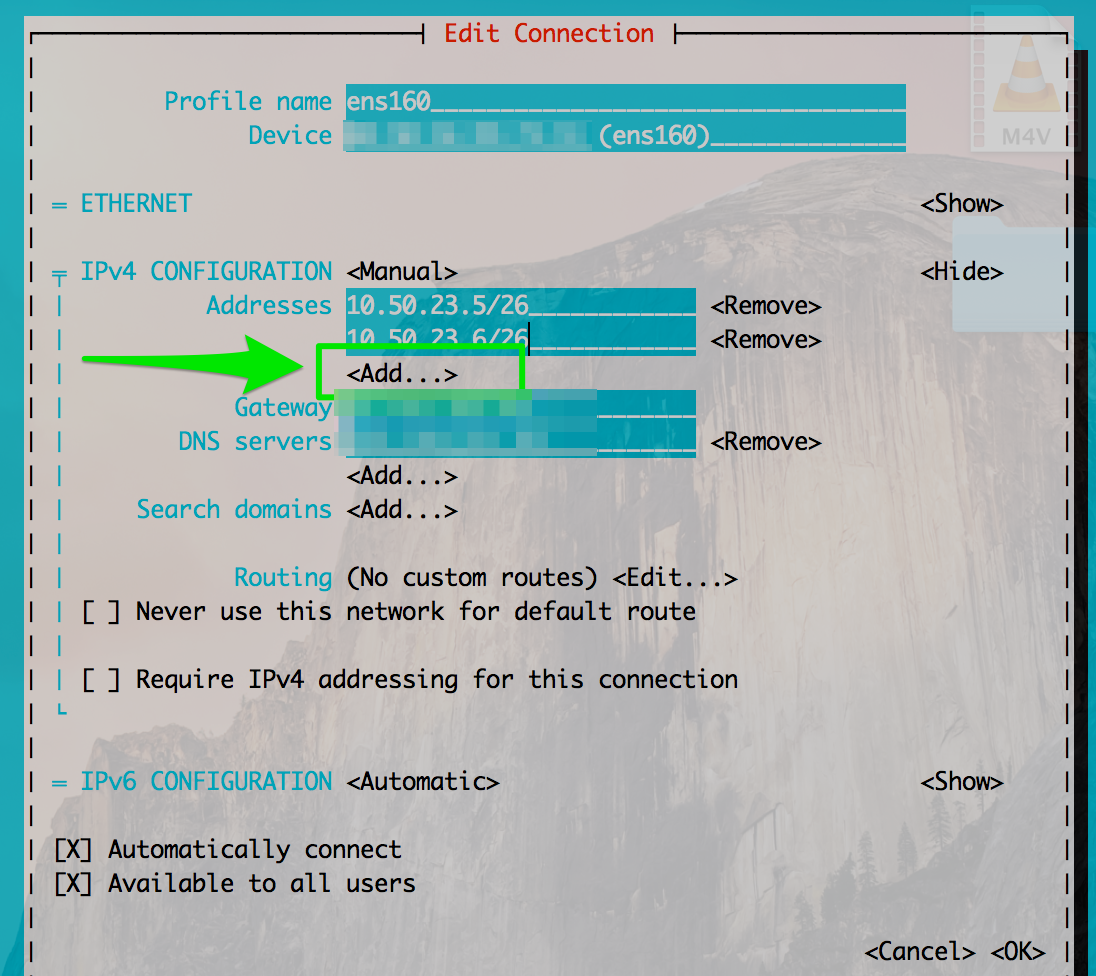
Lets say few words to each of the variables to make it more clear to people who never configured Newtork on redhat without the help of some of the console ncurses graphical like tools such as nmtui or want to completely stop the Network-Manager to manage the network and thus cannot take the advantage of using nmcli (a command-line tool for controlling NetworkManager).
Here is a short description of each of above configuration parameters:
TYPE=device_type: The type of network interface device
BOOTPROTO=protocol: Where protocol is one of the following:
- none: No boot-time protocol is used.
- bootp: Use BOOTP (bootstrap protocol).
- dhcp: Use DHCP (Dynamic Host Configuration Protocol).
- static: if configuring static IP
EFROUTE|IPV6_DEFROUTE=answer:
- yes: This interface is set as the default route for IPv4|IPv6 traffic.
- no: This interface is not set as the default route.
Usually most people still don't use IPV6 so better to disable that
IPV6INIT=answer: Where answer is one of the following:
- yes: Enable IPv6 on this interface. If IPV6INIT=yes, the following parameters could also be set in this file:
IPV6ADDR=IPv6 address
IPV6_DEFAULTGW=The default route through the specified gateway
- no: Disable IPv6 on this interface.
IPV4_FAILURE_FATAL|IPV6_FAILURE_FATAL=answer: Where answer is one of the following:
- yes: This interface is disabled if IPv4 or IPv6 configuration fails.
- no: This interface is not disabled if configuration fails.
ONBOOT=answer: Where answer is one of the following:
- yes: This interface is activated at boot time.
- no: This interface is not activated at boot time.
HWADDR=MAC-address: The hardware address of the Ethernet device
IPADDRN=address: The IPv4 address assigned to the interface
PREFIXN=N: Length of the IPv4 netmask value
GATEWAYN=address: The IPv4 gateway address assigned to the interface. Because an interface can be associated with several combinations of IP address, network mask prefix length, and gateway address, these are numbered starting from 0.
DNSN=address: The address of the Domain Name Servers (DNS)
DOMAIN=DNS_search_domain: The DNS search domain (this is the search Domain-name.com you usually find in /etc/resolv.conf)
Other interesting file that affects how routing is handled on a Redhat Linux is
/etc/sysconfig/network
[root@redhat1 :~ ]# cat /etc/sysconfig/network
# Created by anaconda
GATEWAY=10.215.105.
Having this gateway defined does add a default gateway
This file specifies global network settings. For example, you can specify the default gateway, if you want to apply some network settings such as routings, Alias IPs etc, that will be valid for all configured and active configuration red by systemctl start network scripts or the (the network-manager if such is used), just place it in that file.
Other files of intesresting to control how resolving is being handled on the server worthy to check are
/etc/nsswitch.conf
and
/etc/hosts
If you want to set a preference of /etc/hosts being red before /etc/resolv.conf and DNS resolving for example you need to have inside it, below is default behavior of it.
root@redhat1 :~ ]# grep -i hosts /etc/nsswitch.conf
# hosts: files dns
# hosts: files dns # from user file
# Valid databases are: aliases, ethers, group, gshadow, hosts,
hosts: files dns myhostname
As you can see the default order is to read first files (meaning /etc/hosts) and then the dns (/etc/resolv.conf)
hosts: files dns
…
Now with this short intro description on basic values accepted by Redhat's /etc/sysconfig/network-scripts/ifcfg* prepared configurations.
I will give a practical example of configuring a bond0 interface with 2 members which were prepared based on Redhat's Official documentation found in above URLs:
https://access.redhat.com/documentation/en-us/red_hat_enterprise_linux/8/html/configuring_and_managing_networking/configuring-network-bonding_configuring-and-managing-networking
# Bonding on RHEL 7 documentation
https://access.redhat.com/documentation/en-us/red_hat_enterprise_linux/7/html/networking_guide/sec-network_bonding_using_the_command_line_interface
https://access.redhat.com/documentation/en-us/red_hat_enterprise_linux/7/html/networking_guide/sec-verifying_network_configuration_bonding_for_redundancy
https://access.redhat.com/documentation/en-us/red_hat_enterprise_linux/6/html/deployment_guide/s2-networkscripts-interfaces_network-bridge
# Network Bridge with Bond documentation
https://access.redhat.com/documentation/en-us/red_hat_enterprise_linux/6/html/deployment_guide/sec-Configuring_a_VLAN_over_a_Bond
https://docs.fedoraproject.org/en-US/Fedora/24/html/Networking_Guide/sec-Network_Bridge_with_Bond.html
2. Configuring a single bond connection on eth0 / eth2 and setting 3 bridge interfaces bond -> br0, br1 -> eth1, br2 -> eth2
The task on my machines was to set up from 4 lan cards one bonded interface as active-backup type of bond with bonded lines on eth0, eth2 and 3 other 2 eth1, eth2 which will be used for private communication network that is connected via a special dedicated Switches and Separate VLAN 50, 51 over a tagged dedicated gigabit ports.
As said the 2 Servers had each 4 Broadcom Network CARD interfaces each 2 of which are paired (into a single card) and 2 of which are a solid Broadcom NetXtreme Dual Port 10GbE SFP+ and Dell Broadcom 5720 Dual Port 1Gigabit Network.
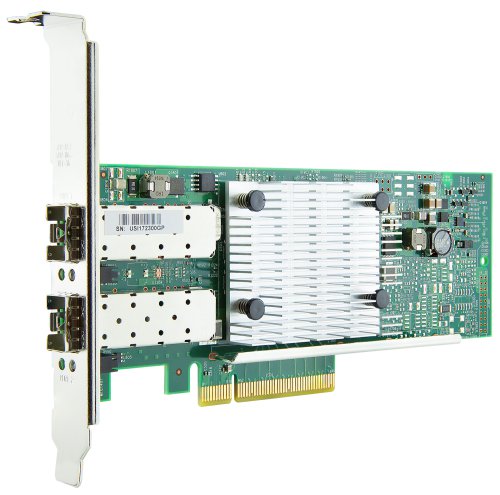
On each of server-node1 and server-node2 we had 4 Ethernet Adapters properly detected on the Redhat
root@redhat1 :~ ]# lspci |grep -i net
01:00.0 Ethernet controller: Broadcom Inc. and subsidiaries NetXtreme BCM5720 2-port Gigabit Ethernet PCIe
01:00.1 Ethernet controller: Broadcom Inc. and subsidiaries NetXtreme BCM5720 2-port Gigabit Ethernet PCIe
19:00.0 Ethernet controller: Broadcom Inc. and subsidiaries BCM57412 NetXtreme-E 10Gb RDMA Ethernet Controller (rev 01)
19:00.1 Ethernet controller: Broadcom Inc. and subsidiaries BCM57412 NetXtreme-E 10Gb RDMA Ethernet Controller (rev 01)
I've already configured as prerogative net.ifnames=0 to /etc/grub2/boot.cfg and Network-Manager service disabled on the host (hence to not use Network Manager you'll see in below configuration NM_CONTROLLED="no" is telling the Redhat servers is not to be trying NetworkManager for more on that check my previous article Disable NetworkManager automatic Ethernet Interface Management on Redhat Linux , CentOS 6 / 7 / 8.
3. Types of Network Bonding
mode=0 (balance-rr)
This mode is based on Round-robin policy and it is the default mode. This mode offers fault tolerance and load balancing features. It transmits the packets in Round robin fashion that is from the first available slave through the last.
mode-1 (active-backup)
This mode is based on Active-backup policy. Only one slave is active in this band, and another one will act only when the other fails. The MAC address of this bond is available only on the network adapter part to avoid confusing the switch. This mode also provides fault tolerance.
mode=2 (balance-xor)
This mode sets an XOR (exclusive or) mode that is the source MAC address is XOR’d with destination MAC address for providing load balancing and fault tolerance. Each destination MAC address the same slave is selected.
mode=3 (broadcast)
This method is based on broadcast policy that is it transmitted everything on all slave interfaces. It provides fault tolerance. This can be used only for specific purposes.
mode=4 (802.3ad)
This mode is known as a Dynamic Link Aggregation mode that has it created aggregation groups having same speed. It requires a switch that supports IEEE 802.3ad dynamic link. The slave selection for outgoing traffic is done based on a transmit hashing method. This may be changed from the XOR method via the xmit_hash_policy option.
mode=5 (balance-tlb)
This mode is called Adaptive transmit load balancing. The outgoing traffic is distributed based on the current load on each slave and the incoming traffic is received by the current slave. If the incoming traffic fails, the failed receiving slave is replaced by the MAC address of another slave. This mode does not require any special switch support.
mode=6 (balance-alb)
This mode is called adaptive load balancing. This mode does not require any special switch support.
Lets create the necessery configuration for the bond and bridges
[root@redhat1 :~ ]# cat ifcfg-bond0
DEVICE=bond0
NAME=bond0
TYPE=Bond
BONDING_MASTER=yes
#IPADDR=10.50.21.16
#PREFIX=26
#GATEWAY=10.50.0.1
#DNS1=172.20.88.2
ONBOOT=yes
BOOTPROTO=none
BONDING_OPTS="mode=1 miimon=100 primary=eth0"
NM_CONTROLLED="no"
BRIDGE=br0
[root@redhat1 :~ ]# cat ifcfg-bond0.10
DEVICE=bond0.10
BOOTPROTO=none
ONPARENT=yes
#IPADDR=10.50.21.17
#NETMASK=255.255.255.0
VLAN=yes
[root@redhat1 :~ ]# cat ifcfg-br0
STP=yes
BRIDGING_OPTS=priority=32768
TYPE=Bridge
PROXY_METHOD=none
BROWSER_ONLY=no
BOOTPROTO=none
DEFROUTE=yes
IPV4_FAILURE_FATAL=no
#IPV6INIT=yes
#IPV6_AUTOCONF=yes
#IPV6_DEFROUTE=yes
#IPV6_FAILURE_FATAL=no
#IPV6_ADDR_GEN_MODE=stable-privacy
IPV6_AUTOCONF=no
IPV6_DEFROUTE=no
IPV6_FAILURE_FATAL=no
IPV6_ADDR_GEN_MODE=stable-privacy
NAME=br0
UUID=4451286d-e40c-4d8c-915f-7fc12a16d595
DEVICE=br0
ONBOOT=yes
IPADDR=10.50.50.16
PREFIX=26
GATEWAY=10.50.0.1
DNS1=172.20.0.2
NM_CONTROLLED=no
[root@redhat1 :~ ]# cat ifcfg-br1
STP=yes
BRIDGING_OPTS=priority=32768
TYPE=Bridge
PROXY_METHOD=none
BROWSER_ONLY=no
BOOTPROTO=none
DEFROUTE=no
IPV4_FAILURE_FATAL=no
#IPV6INIT=yes
#IPV6_AUTOCONF=yes
#IPV6_DEFROUTE=yes
#IPV6_FAILURE_FATAL=no
#IPV6_ADDR_GEN_MODE=stable-privacy
IPV6INIT=no
IPV6_AUTOCONF=no
IPV6_DEFROUTE=no
IPV6_FAILURE_FATAL=no
IPV6_ADDR_GEN_MODE=stable-privacy
NAME=br1
UUID=40360c3c-47f5-44ac-bbeb-77f203390d29
DEVICE=br1
ONBOOT=yes
##IPADDR=10.50.51.241
PREFIX=28
##GATEWAY=10.50.0.1
##DNS1=172.20.0.2
NM_CONTROLLED=no
[root@redhat1 :~ ]# cat ifcfg-br2
STP=yes
BRIDGING_OPTS=priority=32768
TYPE=Bridge
PROXY_METHOD=none
BROWSER_ONLY=no
BOOTPROTO=none
DEFROUTE=no
IPV4_FAILURE_FATAL=no
#IPV6INIT=yes
#IPV6_AUTOCONF=yes
#IPV6_DEFROUTE=yes
#IPV6_FAILURE_FATAL=no
#IPV6_ADDR_GEN_MODE=stable-privacy
IPV6INIT=no
IPV6_AUTOCONF=no
IPV6_DEFROUTE=no
IPV6_FAILURE_FATAL=no
IPV6_ADDR_GEN_MODE=stable-privacy
NAME=br2
UUID=fbd5c257-2f66-4f2b-9372-881b783276e0
DEVICE=br2
ONBOOT=yes
##IPADDR=10.50.51.243
PREFIX=28
##GATEWAY=10.50.0.1
##DNS1=172.20.10.1
NM_CONTROLLED=no
NM_CONTROLLED=no
BRIDGE=br0
[root@redhat1 :~ ]# cat ifcfg-eth0
TYPE=Ethernet
NAME=bond0-slaveeth0
BOOTPROTO=none
#UUID=61065574-2a9d-4f16-b16e-00f495e2ee2b
DEVICE=eth0
ONBOOT=yes
MASTER=bond0
SLAVE=yes
NM_CONTROLLED=no
[root@redhat1 :~ ]# cat ifcfg-eth1
TYPE=Ethernet
NAME=eth1
UUID=b4c359ae-7a13-436b-a904-beafb4edee94
DEVICE=eth1
ONBOOT=yes
BRIDGE=br1
NM_CONTROLLED=no
[root@redhat1 :~ ]# cat ifcfg-eth2
TYPE=Ethernet
NAME=bond0-slaveeth2
BOOTPROTO=none
#UUID=821d711d-47b9-490a-afe7-190811578ef7
DEVICE=eth2
ONBOOT=yes
MASTER=bond0
SLAVE=yes
NM_CONTROLLED=no
[root@redhat1 :~ ]# cat ifcfg-eth3
TYPE=Ethernet
PROXY_METHOD=none
BROWSER_ONLY=no
#BOOTPROTO=dhcp
BOOTPROTO=none
DEFROUTE=no
IPV4_FAILURE_FATAL=no
#IPV6INIT=yes
#IPV6_AUTOCONF=yes
#IPV6_DEFROUTE=yes
#IPV6_FAILURE_FATAL=no
#IPV6_ADDR_GEN_MODE=stable-privacy
IPV6INIT=no
IPV6_AUTOCONF=no
IPV6_DEFROUTE=no
IPV6_FAILURE_FATAL=no
IPV6_ADDR_GEN_MODE=stable-privacy
BRIDGE=br2
NAME=eth3
UUID=61065574-2a9d-4f16-b16e-00f495e2ee2b
DEVICE=eth3
ONBOOT=yes
NM_CONTROLLED=no
[root@redhat2 :~ ]# cat ifcfg-bond0
DEVICE=bond0
NAME=bond0
TYPE=Bond
BONDING_MASTER=yes
#IPADDR=10.50.21.16
#PREFIX=26
#GATEWAY=10.50.21.1
#DNS1=172.20.88.2
ONBOOT=yes
BOOTPROTO=none
BONDING_OPTS="mode=1 miimon=100 primary=eth0"
NM_CONTROLLED="no"
BRIDGE=br0
# cat ifcfg-bond0.10
DEVICE=bond0.10
BOOTPROTO=none
ONPARENT=yes
#IPADDR=10.50.21.17
#NETMASK=255.255.255.0
VLAN=yes
NM_CONTROLLED=no
BRIDGE=br0
[root@redhat2 :~ ]# cat ifcfg-br0
STP=yes
BRIDGING_OPTS=priority=32768
TYPE=Bridge
PROXY_METHOD=none
BROWSER_ONLY=no
BOOTPROTO=none
DEFROUTE=yes
IPV4_FAILURE_FATAL=no
#IPV6INIT=yes
#IPV6_AUTOCONF=yes
#IPV6_DEFROUTE=yes
#IPV6_FAILURE_FATAL=no
#IPV6_ADDR_GEN_MODE=stable-privacy
IPV6_AUTOCONF=no
IPV6_DEFROUTE=no
IPV6_FAILURE_FATAL=no
IPV6_ADDR_GEN_MODE=stable-privacy
NAME=br0
#UUID=f87e55a8-0fb4-4197-8ccc-0d8a671f30d0
UUID=4451286d-e40c-4d8c-915f-7fc12a16d595
DEVICE=br0
ONBOOT=yes
IPADDR=10.50.21.17
PREFIX=26
GATEWAY=10.50.21.1
DNS1=172.20.88.2
NM_CONTROLLED=no
[root@redhat2 :~ ]# cat ifcfg-br1
STP=yes
BRIDGING_OPTS=priority=32768
TYPE=Bridge
PROXY_METHOD=none
BROWSER_ONLY=no
BOOTPROTO=none
DEFROUTE=no
IPV4_FAILURE_FATAL=no
#IPV6INIT=no
#IPV6_AUTOCONF=no
#IPV6_DEFROUTE=no
#IPV6_FAILURE_FATAL=no
#IPV6_ADDR_GEN_MODE=stable-privacy
IPV6INIT=no
IPV6_AUTOCONF=no
IPV6_DEFROUTE=no
IPV6_FAILURE_FATAL=no
IPV6_ADDR_GEN_MODE=stable-privacy
NAME=br1
UUID=40360c3c-47f5-44ac-bbeb-77f203390d29
DEVICE=br1
ONBOOT=yes
##IPADDR=10.50.21.242
PREFIX=28
##GATEWAY=10.50.21.1
##DNS1=172.20.88.2
NM_CONTROLLED=no
[root@redhat2 :~ ]# cat ifcfg-br2
STP=yes
BRIDGING_OPTS=priority=32768
TYPE=Bridge
PROXY_METHOD=none
BROWSER_ONLY=no
BOOTPROTO=none
DEFROUTE=no
IPV4_FAILURE_FATAL=no
#IPV6INIT=no
#IPV6_AUTOCONF=no
#IPV6_DEFROUTE=no
#IPV6_FAILURE_FATAL=no
#IPV6_ADDR_GEN_MODE=stable-privacy
IPV6INIT=no
IPV6_AUTOCONF=no
IPV6_DEFROUTE=no
IPV6_FAILURE_FATAL=no
IPV6_ADDR_GEN_MODE=stable-privacy
NAME=br2
UUID=fbd5c257-2f66-4f2b-9372-881b783276e0
DEVICE=br2
ONBOOT=yes
##IPADDR=10.50.21.244
PREFIX=28
##GATEWAY=10.50.21.1
##DNS1=172.20.88.2
NM_CONTROLLED=no
[root@redhat2 :~ ]# cat ifcfg-eth0
TYPE=Ethernet
NAME=bond0-slaveeth0
BOOTPROTO=none
#UUID=ee950c07-7eb2-463b-be6e-f97e7ad9d476
DEVICE=eth0
ONBOOT=yes
MASTER=bond0
SLAVE=yes
NM_CONTROLLED=no
[root@redhat2 :~ ]# cat ifcfg-eth1
TYPE=Ethernet
NAME=eth1
UUID=ffec8039-58f0-494a-b335-7a423207c7e6
DEVICE=eth1
ONBOOT=yes
BRIDGE=br1
NM_CONTROLLED=no
[root@redhat2 :~ ]# cat ifcfg-eth2
TYPE=Ethernet
NAME=bond0-slaveeth2
BOOTPROTO=none
#UUID=2c097475-4bef-47c3-b241-f5e7f02b3395
DEVICE=eth2
ONBOOT=yes
MASTER=bond0
SLAVE=yes
NM_CONTROLLED=no
Notice that the bond0 configuration does not have an IP assigned this is done on purpose as we're using the interface channel bonding together with attached bridge for the VM. Usual bonding on a normal physical hardware hosts where no virtualization use is planned is perhaps a better choice. If you however try to set up an IP address in that specific configuration shown here and you try to reboot the machine, you will end up with inacessible machine over the network like I did and you will need to resolve configuration via some kind of ILO / IDRAC interface.
4. Generating UUID for ethernet devices bridges and bonds
One thing to note is the command uuidgen you might need that to generate UID identificators to fit in the new network config files.
Example:
[root@redhat2 :~ ]#uuidgen br2
e7995e15-7f23-4ea2-80d6-411add78d703
[root@redhat2 :~ ]# uuidgen br1
05e0c339-5998-414b-b720-7adf91a90103
[root@redhat2 :~ ]# uuidgen br0
e6d7ff74-4c15-4d93-a150-ff01b7ced5fb
5. How to make KVM Virtual Machines see configured Network bridges (modify VM XML)
To make the Virtual machines installed see the bridges I had to
[root@redhat1 :~ ]#virsh edit VM_name1
[root@redhat1 :~ ]#virsh edit VM_name2
[root@redhat2 :~ ]#virsh edit VM_name1
[root@redhat2 :~ ]#virsh edit VM_name2
Find the interface network configuration and change it to something like:
<interface type='bridge'>
<mac address='22:53:00:56:5d:ac'/>
<source bridge='br0'/>
<model type='virtio'/>
<address type='pci' domain='0x0000' bus='0x01' slot='0x00' function='0x0'/>
</interface>
<interface type='bridge'>
<mac address='22:53:00:2a:5f:01'/>
<source bridge='br1'/>
<model type='virtio'/>
<address type='pci' domain='0x0000' bus='0x07' slot='0x00' function='0x0'/>
</interface>
<interface type='bridge'>
<mac address='22:34:00:4a:1b:6c'/>
<source bridge='br2'/>
<model type='virtio'/>
<address type='pci' domain='0x0000' bus='0x08' slot='0x00' function='0x0'/>
</interface>
6. Testing the bond is up and works fine
# ip addr show bond0
The result is the following:
4: bond0: <BROADCAST,MULTICAST,MASTER,UP,LOWER_UP> mtu 1500 qdisc noqueue state UP group default qlen 1000
link/ether 52:54:00:cb:25:82 brd ff:ff:ff:ff:ff:ff
The bond should be visible in the normal network interfaces with ip address show or /sbin/ifconfig
# cat /proc/net/bonding/bond0
Ethernet Channel Bonding Driver: v3.7.1 (April 27, 2011)
Bonding Mode: fault-tolerance (active-backup)
Primary Slave: None
Currently Active Slave: eth0
MII Status: up
MII Polling Interval (ms): 100
Up Delay (ms): 0
Down Delay (ms): 0
Slave Interface: eth2
MII Status: up
Speed: 10000 Mbps
Duplex: full
Link Failure Count: 0
Permanent HW addr: 00:0c:29:ab:2a:fa
Slave queue ID: 0
According to the output eth0 is the active slave.
The active slaves device files (eth0 in this case) is found in virtual file system /sys/
# find /sys -name *eth0
/sys/devices/pci0000:00/0000:00:15.0/0000:03:00.0/net/eth0
/sys/devices/virtual/net/bond0/lower_eth0
/sys/class/net/eth0
You can remove a bond member say eth0 by
cd to the pci* directory
Example: /sys/devices/pci000:00/000:00:15.0
# echo 1 > remove
At this point the eth0 device directory structure that was previously located under /sys/devices/pci000:00/000:00:15.0 is no longer there. It was removed and the device no longer exists as seen by the OS.
You can verify this is the case with a simple ifconfig which will no longer list the eth0 device.
You can also repeat the cat /proc/net/bonding/bond0 command from Step 1 to see that eth0 is no longer listed as active or available.
You can also see the change in the messages file. It might look something like this:
2021-02-12T14:13:23.363414-06:00 redhat1 device eth0: device has been deleted
2021-02-12T14:13:23.368745-06:00 redhat1 kernel: [81594.846099] bonding: bond0: releasing active interface eth0
2021-02-12T14:13:23.368763-06:00 redhat1 kernel: [81594.846105] bonding: bond0: Warning: the permanent HWaddr of eth0 – 00:0c:29:ab:2a:f0 – is still in use by bond0. Set the HWaddr of eth0 to a different address to avoid conflicts.
2021-02-12T14:13:23.368765-06:00 redhat1 kernel: [81594.846132] bonding: bond0: making interface eth1 the new active one.
Another way to test the bonding is correctly switching between LAN cards on case of ethernet hardware failure is to bring down one of the 2 or more bonded interfaces, lets say you want to switch from active-backup from eth1 to eth2, do:
# ip link set dev eth0 down
That concludes the test for fail over on active slave failure.
7. Bringing bond updown (rescan) bond with no need for server reboot
You know bonding is a tedious stuff that sometimes breaks up badly so only way to fix the broken bond seems to be a init 6 (reboot) cmd but no actually that is not so.
You can also get the deleted device back with a simple pci rescan command:
# echo 1 > /sys/bus/pci/rescan
The eth0 interface should now be back
You can see that it is back with an ifconfig command, and you can verify that the bond sees it with this command:
# cat /proc/net/bonding/bond0
That concludes the test of the bond code seeing the device when it comes back again.
The same steps can be repeated only this time using the eth1 device and file structure to fail the active slave in the bond back over to eth0.
8. Testing the bond with ifenslave command (ifenslave command examples)
Below is a set of useful information to test the bonding works as expected with ifenslave command comes from "iputils-20071127" package
– To show information of all the inerfaces
# ifenslave -a
# ifenslave –all-interfaces
– To change the active slave
# ifenslave -c bond0 eth1
# ifenslave –change-active bond0 eth1
– To remove the slave interface from the bonding device
# ifenslave -d eth1
# ifenslave –detach bond0 eth1
– To show master interface info
# ifenslave bond0
– To set the bond device down and automatically release all the slaves
# ifenslave bond1 down
– To get the usage info
# ifenslave -u
# ifenslave –usage
– To set to verbose mode
# ifenslave -v
# ifenslave –verbose
9. Testing the bridge works fine
Historically over the years all kind of bridges are being handled with the brctl part of bridge-utils .deb / .rpm installable package.
The classical way to check a bridge is working is to do
# brctl show
# brctl show br0; brctl show br1; brctl show br2
# brctl showmacs br0
etc.
Unfortunately with redhat 8 this command is no longer available so to get information about configured bridges you need to use instead:
# bridge link show
3:eth0: <BROADCAST,MULTICAST,UP,LOWER_UP> mtu 1500 master bridge0 state forwarding priority 32 cost 100
4:eth2: <BROADCAST,MULTICAST,UP,LOWER_UP> mtu 1500 master bridge0 state listening priority 32 cost 100
…
10. Troubleshooting network connectivity issues on bond bridges and LAN cards
Testing the bond connection and bridges can route proper traffic sometimes is a real hassle so here comes at help the good old tcpdump
If you end up with issues with some of the ethernet interfaces between HV1 and HV2 to be unable to talk to each other and you have some suspiciousness that some colleague from the network team has messed up a copper (UTP) cable or there is a connectivity fiber optics issues. To check the VLAN tagged traffic headers on the switch you can listen to each and every bond0 and br0, br1, br2 eth0, eth1, eth2, eth3 configured on the server like so:
# tcpdump -i bond0 -nn -e vlan
Some further investigation on where does a normal ICMP traffic flows once everything is setup is a normal thing to do, hence just try to route a normal ping via the different server interfaces:
# ping -I bond0 DSTADDR
…
# ping -i eth0 DSTADDR
…
# ping -i eth1 DSTADDR
…
# ping -i eth2 DSTADDR
After conducting the ping do the normal for network testing big ICMP packages (64k) ping to make sure there are no packet losses etc., e.g:
# ping -I eth3 -s 64536 DSTADDR
…
If for 10 – 20 seconds the ping does not return package losses then you should be good.
