Posts Tagged ‘option’

How to shutdown Windows after 1, 2, 3, 4 etc. X hours with a batch script – Shutdown / Reboot / Logoff Windows with a quick command

Wednesday, August 17th, 2016

https://www.pc-freak.net/images/windows-pc-server-shutdown-after-3-5-hours-howto-shutdown-windows-with-command-batch

I recently wondered how it is possible to shutdown Windows in some prior set time lets say in 30 minutes, 1 hour, 3 hours or 8 hours.

That's handy especially on servers that are being still in preparation install time and you have left some large files copy job (if you're migration files) from Old server environment to a new one
or if you just need to let your home WIndows PC shutdown to save electricity after some time (a very useful example is if you're downloading some 200GB of data which are being estimated to complete in 3 hours but you need to get out and be back home in 2 or 4 days and you don't want to bother connecting remotely to your PC with VNC or teamviewer then just scheduling the PC / server to shutdown in 3 hours with a simple is perfect solution to the task, here is how:

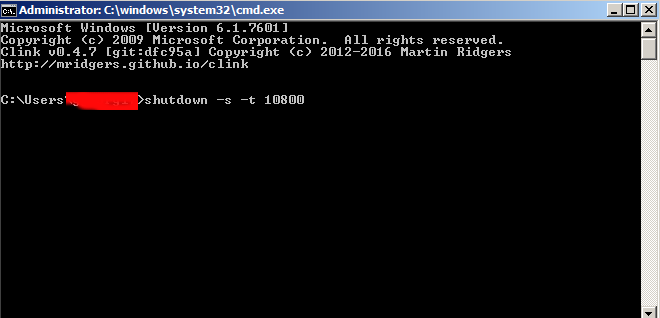
1. Open Command Prompt (E.g. Start menu -> Run and type CMD.EXE)

2. Type in command prompt


shutdown -s -t 10800


If you by mistake has typed it to shutdown earlier and suddenly you find out your PC needs to be running for a short more time in order to cancel the scheduled Shutdown type:


shutdown -a


Shutdown Windows command -s flag has also a possibiltiy to not shutdown but just logoff or if you just need to have the system rebooted a reboot option:


options    effect
-l         to log off
-r         to reboot

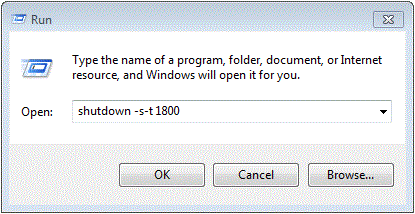
If you need to shutdown the PC after half an hour use instead the command:


shutdown -s -t 1800


shutdown-windows-pc-with-command-in-half-an-hour-screenshot.gif


Half an hour is 1800 seconds for one hour delayed shutdown use 3600 for 3 hours, that would be 3*3600 10800, for 5 hours 5*3600 = 18000 seconds and so on


An alternative way to do it with a short VBscript, here is an example:

Set objShell = CreateObject("WScript.Shell")

Dim Input
Input = "10:00"

'Input = InputBox("Enter the shutdown time here.","", "10:00")

For i = 1 to 2

CurrentTime = Time & VbCrLf

If Left(CurrentTime,5) = Input Then

objShell.Run "shutdown -s -t 00", 0
WScript.Quit 1

Else

WScript.Sleep 1000

End If

i=i-1

Next

Enjoy

Change Skype for Business UI to Lync – Skype for Business Lync Theme / Remove Skype for Business coloroful UI and Switch to Lync simple interface

Wednesday, February 17th, 2016

Revert-skype-for-business-Lync-User-Interface-change-skype-for-business-theme-skin

If you are working in a large corporation such as (HP or HPE – Hewlett Packard Enterprise (HPE is the new splitted company brand name for the Software and Servers division of ex-HP) / IBM / Dell or any other company with the size of top fortune companies and you Computer Domain admistrator has forced your work PC to already use Skype for Business instead of the good tested Lync Client along with the goodies and PROS of having the newer Skype for Business (S4B) as usual for old fashened users like me and the avarage employee the New S4B interface will turn into nightmare with all this circled names and more buttons and the annoying Skype Blue Theme.

For anyone who has even basic idea of design and aesthetics, I believe the default Theme of Skype For Business  will be evaluated as a serious "interface downgrade" compared to the simple looking Interface and White Skin of Lync Client.

With this said it will be logical for the end user like me to desire to customize a bit default S4B Skin to make it more elegant looking like Lync 2013 client but guess what there is a Surprise if you google around, Skype For Business just like the regular Skype client doesn't have integrated support for Skins / Themes.
To make the horror complete, many big corporations are choosing to migrate their Email infrastructure from the classical and well tested Windows Domain with Exchange Server to  Microsoft Office 365 (Cloud services),
which makes the dependency on M$ products even bigger and in the long run control and spying on people's email and information (people's data security even worsers) as you know how hackable Windows prooved to be over the years.


Well for those who remember the good old times of IRC (Internet Relay Chat) and ICQ (I seek you) 🙂 and even Jabber when chatting emerged and boomed into popularity all the chat clients nomatter whether it was a free software under GPL / BSD license or it was a Proprietary licensed software, there was always alternative on the Interface Outlook of the Chat clients and on practically all popular Chat / Audio / Video communication Standards / Protocols, there used to be some option for the users to use either a different client or to customize the outook of the program.

Well now the big surprise with Skype Protocol which was purchased by Microsoft some years ago back is this terrible already M$ program doesn't have any option for changing the Theme and even basic customization besides the ones provided by default by Microsoft. For my surprise such a trivial and everybody used program like Skype with perhaps already 1.5 or 2 Billion or even more users doesn't have even basic support for customization !!!
To make the Skype program use horror story even worser Microsoft does upgrade the Skype client agressively and for the last 3 or 4 years Skype is owned by Microsoft the interface gets changing slightly or even completely with every next release.

Now with latest Skype versions since a 1.5 year or so the agressiveness of the program even increased further as it wants you to automatically upgrade, every time you run Skype.
With this in mind and the fact, I have to spend about 8 to 10 years on the PC with Skype for Business switched on on my notebook with no option to use Lync for communication because of the Domain Exchange forcing the changes to all of the users within our EMEA.

So after some serious digging on the Internet, the only work around to change the Skype For Business Theme available by a couple of sources is to Revert Back the Skype User Interface to Lync 2013 Client by changing a value to the Windows registry and get back the good old elegant Lync interface instead of S4B.

The Windows registry value that needs to be changed is:

[HKEY_CURRENT_USER\Software\Microsoft\Office\Lync]


The default value there is:
 

Windows Registry Editor Version 5.00
[HKEY_CURRENT_USER\Software\Microsoft\Office\Lync]
"CanSharePptInCollab"=dword:00000001
"CanAppShareInCollab"=dword:00000001
"CanShareOneNoteInCollab"=dword:00000001
"EnableSkypeUI"=hex:01,00,00,00


The value has to be changed to:

Windows Registry Editor Version 5.00
[HKEY_CURRENT_USER\Software\Microsoft\Office\Lync]
"CanSharePptInCollab"=dword:00000001
"CanAppShareInCollab"=dword:00000001
"CanShareOneNoteInCollab"=dword:00000001
"EnableSkypeUI"=hex:00,00,00,00


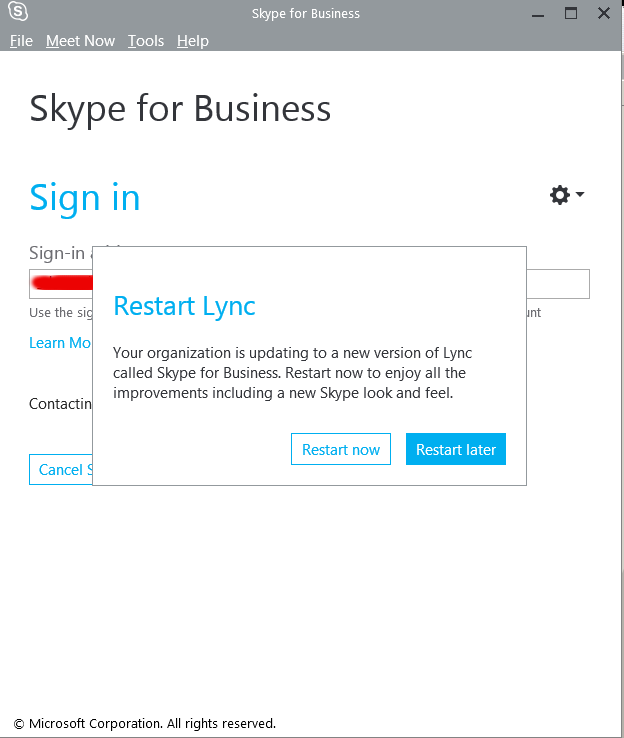
restart_lync_screenshot-ms-windows

The value "EnableSkypeUI"=hex:01,00,00,00 – instructs so Skype for Business UI is used:
"EnableSkypeUI"=hex:00,00,00,00 – instructs S4B to revert back to Old Lync interface

For a little bit more on the value check out also articles – Alternate Between The Microsoft Lync and Skype for Business
and Managing the Skype Client UI in Skype for Business.

To modify about registry setting you will either have to manually run regedit from Start -> Run ->  cmd.exe or use Windows button + R and type inside run box:
 

regedit


Or even better just use and Run (Click over twice) on this skype.reg (download) sciprt which will modify registry

Because the Domain administrator has forced a policy to automatically offer Change of Lync Interface to Skype for Business on every notebook boot to disable EnableSkypeUI registry value and make Skype appear in the good old Lync UI, I've created also a tiny Batch script lync_ui.bat with following content:
 

cd \
cd \Users\georgi\scripts
 regedit /s skype.reg
exit


You can download lync_ui.bat from here

Note that both skype.reg and lync_ui.bat should be existing in my case in C:\Users\georgi\scipts , change this path to whatever your username is and create scripts folder in your User Home dir.
If unsure about the home directory name you can check it from command prompt with:
 

C:\Users\georgi> echo %HOMEPATH%
\Users\georgi


To make the lync_ui.bat (script invoking skype.reg)  be executed on every PC boot, you need to add it to:

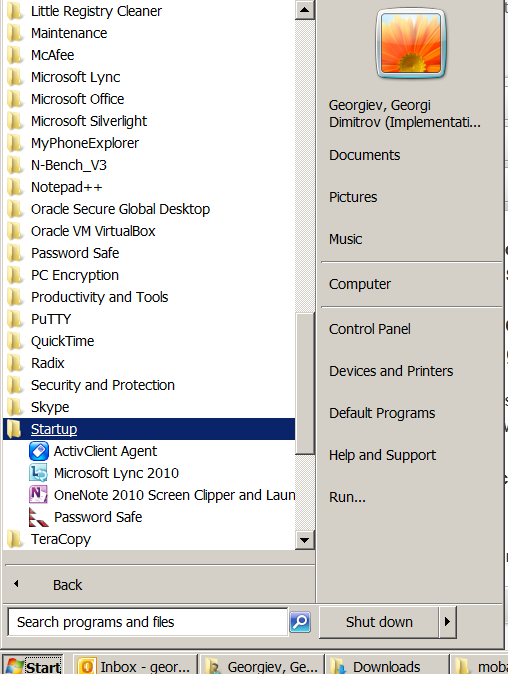
Start -> All Programs -> StartUp

https://www.pc-freak.net/images/how-to-add-script-to-windows-startup-screenshto-microsoft-windows-7

Well this is it now you will have back the Lync UI, Enjoy! 🙂


How to renew self signed QMAIL toaster and QMAIL rocks expired SSL pem certificate

Friday, September 2nd, 2011

qmail_toaster_logo-fix-qmail-rocks-expired-ssl-pem-certificate

One of the QMAIL server installs, I have installed very long time ago. I've been notified by clients, that the certificate of the mail server has expired and therefore I had to quickly renew the certificate.

This qmail installation, SSL certificates were located in /var/qmail/control under the names servercert.key and cervercert.pem

Renewing the certificates with a new self signed ones is pretty straight forward, to renew them I had to issue the following commands:

1. Generate servercert encoded key with 1024 bit encoding

debian:~# cd /var/qmail/control
debian:/var/qmail/control# openssl genrsa -des3 -out servercert.key.enc 1024
Generating RSA private key, 1024 bit long modulus
...........++++++
.........++++++
e is 65537 (0x10001)
Enter pass phrase for servercert.key.enc:
Verifying - Enter pass phrase for servercert.key.enc:

In the Enter pass phrase for servercert.key.enc I typed twice my encoded key password, any password is good, here though using a stronger one is better.

2. Generate the servercert.key file

debian:/var/qmail/control# openssl rsa -in servercert.key.enc -out servercert.key
Enter pass phrase for servercert.key.enc:
writing RSA key

3. Generate the certificate request

debian:/var/qmail/control# openssl req -new -key servercert.key -out servercert.csr
debian:/var/qmail/control# openssl rsa -in servercert.key.enc -out servercert.key
Enter pass phrase for servercert.key.enc:writing RSA key
root@soccerfame:/var/qmail/control# openssl req -new -key servercert.key -out servercert.csr
You are about to be asked to enter information that will be incorporated
into your certificate request.
What you are about to enter is what is called a Distinguished Name or a DN.
There are quite a few fields but you can leave some blank
For some fields there will be a default value,
If you enter '.', the field will be left blank.
-----
Country Name (2 letter code) [AU]:UK
State or Province Name (full name) [Some-State]:London
Locality Name (eg, city) []:London
Organization Name (eg, company) [Internet Widgits Pty Ltd]:My Company
Organizational Unit Name (eg, section) []:My Org
Common Name (eg, YOUR name) []:
Email Address []:admin@adminmail.com

Please enter the following 'extra' attributes
to be sent with your certificate request
A challenge password []:
An optional company name []:

In the above prompts its necessery to fill in the company name and location, as each of the prompts clearly states.

4. Sign the just generated certificate request

debian:/var/qmail/control# openssl x509 -req -days 9999 -in servercert.csr -signkey servercert.key -out servercert.crt

Notice the option -days 9999 this option instructs the newly generated self signed certificate to be valid for 9999 days which is quite a long time, the reason why the previous generated self signed certificate expired was that it was built for only 365 days

5. Fix the newly generated servercert.pem permissions debian:~# cd /var/qmail/control
debian:/var/qmail/control# chmod 640 servercert.pem
debian:/var/qmail/control# chown vpopmail:vchkpw servercert.pem
debian:/var/qmail/control# cp -f servercert.pem clientcert.pem
debian:/var/qmail/control# chown root:qmail clientcert.pem
debian:/var/qmail/control# chmod 640 clientcert.pem

Finally to load the new certificate, restart of qmail is required:

6. Restart qmail server

debian:/var/qmail/control# qmailctl restart
Restarting qmail:
* Stopping qmail-smtpd.
* Sending qmail-send SIGTERM and restarting.
* Restarting qmail-smtpd.

Test the newly installed certificate

To test the newly installed SSL certificate use the following commands:

debian:~# openssl s_client -crlf -connect localhost:465 -quiet
depth=0 /C=UK/ST=London/L=London/O=My Org/OU=My Company/emailAddress=admin@adminmail.com
verify error:num=18:self signed certificate
verify return:1
...
debian:~# openssl s_client -starttls smtp -crlf -connect localhost:25 -quiet
depth=0 /C=UK/ST=London/L=London/O=My Org/OU=My Company/emailAddress=admin@adminmail.com
verify error:num=18:self signed certificate
verify return:1
250 AUTH LOGIN PLAIN CRAM-MD5
...

If an error is returned like 32943:error:140770FC:SSL routines:SSL23_GET_SERVER_HELLO:unknown protocol:s23_clnt.c:607: this means that SSL variable in the qmail-smtpdssl/run script is set to 0.

To solve this error, change SSL=0 to SSL=1 in /var/qmail/supervise/qmail-smtpdssl/run and do qmailctl restart

The error verify return:1 displayed is perfectly fine and it's more of a warning than an error as it just reports the certificate is self signed.

Resolving “nf_conntrack: table full, dropping packet.” flood message in dmesg Linux kernel log

Wednesday, March 28th, 2012

nf_conntrack_table_full_dropping_packet
On many busy servers, you might encounter in /var/log/syslog or dmesg kernel log messages like

nf_conntrack: table full, dropping packet

to appear repeatingly:

[1737157.057528] nf_conntrack: table full, dropping packet.
[1737157.160357] nf_conntrack: table full, dropping packet.
[1737157.260534] nf_conntrack: table full, dropping packet.
[1737157.361837] nf_conntrack: table full, dropping packet.
[1737157.462305] nf_conntrack: table full, dropping packet.
[1737157.564270] nf_conntrack: table full, dropping packet.
[1737157.666836] nf_conntrack: table full, dropping packet.
[1737157.767348] nf_conntrack: table full, dropping packet.
[1737157.868338] nf_conntrack: table full, dropping packet.
[1737157.969828] nf_conntrack: table full, dropping packet.
[1737157.969928] nf_conntrack: table full, dropping packet
[1737157.989828] nf_conntrack: table full, dropping packet
[1737162.214084] __ratelimit: 83 callbacks suppressed

There are two type of servers, I've encountered this message on:

1. Xen OpenVZ / VPS (Virtual Private Servers)
2. ISPs – Internet Providers with heavy traffic NAT network routers
 

I. What is the meaning of nf_conntrack: table full dropping packet error message

In short, this message is received because the nf_conntrack kernel maximum number assigned value gets reached.
The common reason for that is a heavy traffic passing by the server or very often a DoS or DDoS (Distributed Denial of Service) attack. Sometimes encountering the err is a result of a bad server planning (incorrect data about expected traffic load by a company/companeis) or simply a sys admin error…

– Checking the current maximum nf_conntrack value assigned on host:

linux:~# cat /proc/sys/net/ipv4/netfilter/ip_conntrack_max
65536

– Alternative way to check the current kernel values for nf_conntrack is through:

linux:~# /sbin/sysctl -a|grep -i nf_conntrack_max
error: permission denied on key 'net.ipv4.route.flush'
net.netfilter.nf_conntrack_max = 65536
error: permission denied on key 'net.ipv6.route.flush'
net.nf_conntrack_max = 65536

– Check the current sysctl nf_conntrack active connections

To check present connection tracking opened on a system:

:

linux:~# /sbin/sysctl net.netfilter.nf_conntrack_count
net.netfilter.nf_conntrack_count = 12742

The shown connections are assigned dynamicly on each new succesful TCP / IP NAT-ted connection. Btw, on a systems that work normally without the dmesg log being flooded with the message, the output of lsmod is:

linux:~# /sbin/lsmod | egrep 'ip_tables|conntrack'
ip_tables 9899 1 iptable_filter
x_tables 14175 1 ip_tables

On servers which are encountering nf_conntrack: table full, dropping packet error, you can see, when issuing lsmod, extra modules related to nf_conntrack are shown as loaded:

linux:~# /sbin/lsmod | egrep 'ip_tables|conntrack'
nf_conntrack_ipv4 10346 3 iptable_nat,nf_nat
nf_conntrack 60975 4 ipt_MASQUERADE,iptable_nat,nf_nat,nf_conntrack_ipv4
nf_defrag_ipv4 1073 1 nf_conntrack_ipv4
ip_tables 9899 2 iptable_nat,iptable_filter
x_tables 14175 3 ipt_MASQUERADE,iptable_nat,ip_tables


II. Remove completely nf_conntrack support if it is not really necessery

It is a good practice to limit or try to omit completely use of any iptables NAT rules to prevent yourself from ending with flooding your kernel log with the messages and respectively stop your system from dropping connections.

Another option is to completely remove any modules related to nf_conntrack, iptables_nat and nf_nat.
To remove nf_conntrack support from the Linux kernel, if for instance the system is not used for Network Address Translation use:

/sbin/rmmod iptable_nat
/sbin/rmmod ipt_MASQUERADE
/sbin/rmmod rmmod nf_nat
/sbin/rmmod rmmod nf_conntrack_ipv4
/sbin/rmmod nf_conntrack
/sbin/rmmod nf_defrag_ipv4

Once the modules are removed, be sure to not use iptables -t nat .. rules. Even attempt to list, if there are any NAT related rules with iptables -t nat -L -n will force the kernel to load the nf_conntrack modules again.

Btw nf_conntrack: table full, dropping packet. message is observable across all GNU / Linux distributions, so this is not some kind of local distribution bug or Linux kernel (distro) customization.
 

III. Fixing the nf_conntrack … dropping packets error

– One temporary, fix if you need to keep your iptables NAT rules is:

linux:~# sysctl -w net.netfilter.nf_conntrack_max=131072

I say temporary, because raising the nf_conntrack_max doesn't guarantee, things will get smoothly from now on.
However on many not so heavily traffic loaded servers just raising the net.netfilter.nf_conntrack_max=131072 to a high enough value will be enough to resolve the hassle.

– Increasing the size of nf_conntrack hash-table

The Hash table hashsize value, which stores lists of conntrack-entries should be increased propertionally, whenever net.netfilter.nf_conntrack_max is raised.

linux:~# echo 32768 > /sys/module/nf_conntrack/parameters/hashsize
The rule to calculate the right value to set is:
hashsize = nf_conntrack_max / 4

– To permanently store the made changes ;a) put into /etc/sysctl.conf:

linux:~# echo 'net.netfilter.nf_conntrack_count = 131072' >> /etc/sysctl.conf
linux:~# /sbin/sysct -p

b) put in /etc/rc.local (before the exit 0 line):

echo 32768 > /sys/module/nf_conntrack/parameters/hashsize

Note: Be careful with this variable, according to my experience raising it to too high value (especially on XEN patched kernels) could freeze the system.
Also raising the value to a too high number can freeze a regular Linux server running on old hardware.

– For the diagnosis of nf_conntrack stuff there is ;

/proc/sys/net/netfilter kernel memory stored directory. There you can find some values dynamically stored which gives info concerning nf_conntrack operations in "real time":

linux:~# cd /proc/sys/net/netfilter
linux:/proc/sys/net/netfilter# ls -al nf_log/

total 0
dr-xr-xr-x 0 root root 0 Mar 23 23:02 ./
dr-xr-xr-x 0 root root 0 Mar 23 23:02 ../
-rw-r--r-- 1 root root 0 Mar 23 23:02 0
-rw-r--r-- 1 root root 0 Mar 23 23:02 1
-rw-r--r-- 1 root root 0 Mar 23 23:02 10
-rw-r--r-- 1 root root 0 Mar 23 23:02 11
-rw-r--r-- 1 root root 0 Mar 23 23:02 12
-rw-r--r-- 1 root root 0 Mar 23 23:02 2
-rw-r--r-- 1 root root 0 Mar 23 23:02 3
-rw-r--r-- 1 root root 0 Mar 23 23:02 4
-rw-r--r-- 1 root root 0 Mar 23 23:02 5
-rw-r--r-- 1 root root 0 Mar 23 23:02 6
-rw-r--r-- 1 root root 0 Mar 23 23:02 7
-rw-r--r-- 1 root root 0 Mar 23 23:02 8
-rw-r--r-- 1 root root 0 Mar 23 23:02 9


IV. Decreasing other nf_conntrack NAT time-out values to prevent server against DoS attacks

Generally, the default value for nf_conntrack_* time-outs are (unnecessery) large.
Therefore, for large flows of traffic even if you increase nf_conntrack_max, still shorty you can get a nf_conntrack overflow table resulting in dropping server connections. To make this not happen, check and decrease the other nf_conntrack timeout connection tracking values:

linux:~# sysctl -a | grep conntrack | grep timeout
net.netfilter.nf_conntrack_generic_timeout = 600
net.netfilter.nf_conntrack_tcp_timeout_syn_sent = 120
net.netfilter.nf_conntrack_tcp_timeout_syn_recv = 60
net.netfilter.nf_conntrack_tcp_timeout_established = 432000
net.netfilter.nf_conntrack_tcp_timeout_fin_wait = 120
net.netfilter.nf_conntrack_tcp_timeout_close_wait = 60
net.netfilter.nf_conntrack_tcp_timeout_last_ack = 30
net.netfilter.nf_conntrack_tcp_timeout_time_wait = 120
net.netfilter.nf_conntrack_tcp_timeout_close = 10
net.netfilter.nf_conntrack_tcp_timeout_max_retrans = 300
net.netfilter.nf_conntrack_tcp_timeout_unacknowledged = 300
net.netfilter.nf_conntrack_udp_timeout = 30
net.netfilter.nf_conntrack_udp_timeout_stream = 180
net.netfilter.nf_conntrack_icmp_timeout = 30
net.netfilter.nf_conntrack_events_retry_timeout = 15
net.ipv4.netfilter.ip_conntrack_generic_timeout = 600
net.ipv4.netfilter.ip_conntrack_tcp_timeout_syn_sent = 120
net.ipv4.netfilter.ip_conntrack_tcp_timeout_syn_sent2 = 120
net.ipv4.netfilter.ip_conntrack_tcp_timeout_syn_recv = 60
net.ipv4.netfilter.ip_conntrack_tcp_timeout_established = 432000
net.ipv4.netfilter.ip_conntrack_tcp_timeout_fin_wait = 120
net.ipv4.netfilter.ip_conntrack_tcp_timeout_close_wait = 60
net.ipv4.netfilter.ip_conntrack_tcp_timeout_last_ack = 30
net.ipv4.netfilter.ip_conntrack_tcp_timeout_time_wait = 120
net.ipv4.netfilter.ip_conntrack_tcp_timeout_close = 10
net.ipv4.netfilter.ip_conntrack_tcp_timeout_max_retrans = 300
net.ipv4.netfilter.ip_conntrack_udp_timeout = 30
net.ipv4.netfilter.ip_conntrack_udp_timeout_stream = 180
net.ipv4.netfilter.ip_conntrack_icmp_timeout = 30

All the timeouts are in seconds. net.netfilter.nf_conntrack_generic_timeout as you see is quite high – 600 secs = (10 minutes).
This kind of value means any NAT-ted connection not responding can stay hanging for 10 minutes!

The value net.netfilter.nf_conntrack_tcp_timeout_established = 432000 is quite high too (5 days!)
If this values, are not lowered the server will be an easy target for anyone who would like to flood it with excessive connections, once this happens the server will quick reach even the raised up value for net.nf_conntrack_max and the initial connection dropping will re-occur again …

With all said, to prevent the server from malicious users, situated behind the NAT plaguing you with Denial of Service attacks:

Lower net.ipv4.netfilter.ip_conntrack_generic_timeout to 60 – 120 seconds and net.ipv4.netfilter.ip_conntrack_tcp_timeout_established to stmh. like 54000

linux:~# sysctl -w net.ipv4.netfilter.ip_conntrack_generic_timeout = 120
linux:~# sysctl -w net.ipv4.netfilter.ip_conntrack_tcp_timeout_established = 54000

This timeout should work fine on the router without creating interruptions for regular NAT users. After changing the values and monitoring for at least few days make the changes permanent by adding them to /etc/sysctl.conf

linux:~# echo 'net.ipv4.netfilter.ip_conntrack_generic_timeout = 120' >> /etc/sysctl.conf
linux:~# echo 'net.ipv4.netfilter.ip_conntrack_tcp_timeout_established = 54000' >> /etc/sysctl.conf

How to make a mirror of website on GNU / Linux with wget / Few tips on wget site mirroring

Wednesday, February 22nd, 2012

how-to-make-mirror-of-website-on-linux-wget

Everyone who used Linux is probably familiar with wget or has used this handy download console tools at least thousand of times. Not so many Desktop GNU / Linux users like Ubuntu and Fedora Linux users had tried using wget to do something more than single files download.
Actually wget is not so popular as it used to be in earlier linux days. I've noticed the tendency for newer Linux users to prefer using curl (I don't know why).

With all said I'm sure there is plenty of Linux users curious on how a website mirror can be made through wget.
This article will briefly suggest few ways to do website mirroring on linux / bsd as wget is both available on those two free operating systems.

1. Most Simple exact mirror copy of website

The most basic use of wget's mirror capabilities is by using wget's -mirror argument:

# wget -m http://website-to-mirror.com/sub-directory/

Creating a mirror like this is not a very good practice, as the links of the mirrored pages will still link to external URLs. In other words link URL will not pointing to your local copy and therefore if you're not connected to the internet and try to browse random links of the webpage you will end up with many links which are not opening because you don't have internet connection.

2. Mirroring with rewritting links to point to localhost and in between download page delay

Making mirror with wget can put an heavy load on the remote server as it fetches the files as quick as the bandwidth allows it. On heavy servers rapid downloads with wget can significantly reduce the download server responce time. Even on a some high-loaded servers it can cause the server to hang completely.
Hence mirroring pages with wget without explicity setting delay in between each page download, could be considered by remote server as a kind of DoS – (denial of service) attack. Even some site administrators have already set firewall rules or web server modules configured like Apache mod_security which filter requests to IPs which are doing too frequent HTTP GET /POST requests to the web server.
To make wget delay with a 10 seconds download between mirrored pages use:

# wget -mk -w 10 -np --random-wait http://website-to-mirror.com/sub-directory/

The -mk stands for -m/-mirror and -k / shortcut argument for –convert-links (make links point locally), –random-wait tells wget to make random waits between o and 10 seconds between each page download request.

3. Mirror / retrieve website sub directory ignoring robots.txt "mirror restrictions"

Some websites has a robots.txt which restricts content download with clients like wget, curl or even prohibits, crawlers to download their website pages completely.

/robots.txt restrictions are not a problem as wget has an option to disable robots.txt checking when downloading.
Getting around the robots.txt restrictions with wget is possible through -e robots=off option.
For instance if you want to make a local mirror copy of the whole sub-directory with all links and do it with a delay of 10 seconds between each consequential page request without reading at all the robots.txt allow/forbid rules:

# wget -mk -w 10 -np -e robots=off --random-wait http://website-to-mirror.com/sub-directory/

4. Mirror website which is prohibiting Download managers like flashget, getright, go!zilla etc.

Sometimes when try to use wget to make a mirror copy of an entire site domain subdirectory or the root site domain, you get an error similar to:

Sorry, but the download manager you are using to view this site is not supported.
We do not support use of such download managers as flashget, go!zilla, or getright

This message is produced by the site dynamic generation language PHP / ASP / JSP etc. used, as the website code is written to check on the browser UserAgent sent.
wget's default sent UserAgent to the remote webserver is:
Wget/1.11.4

As this is not a common desktop browser useragent many webmasters configure their websites to only accept well known established desktop browser useragents sent by client browsers.
Here are few typical user agents which identify a desktop browser:
 

  • Mozilla/5.0 (Windows NT 6.1; rv:6.0) Gecko/20110814 Firefox/6.0
  • Mozilla/5.0 (X11; Linux i686; rv:6.0) Gecko/20100101 Firefox/6.0
  • Mozilla/6.0 (Macintosh; I; Intel Mac OS X 11_7_9; de-LI; rv:1.9b4) Gecko/2012010317 Firefox/10.0a4
  • Mozilla/5.0 (Windows NT 6.1; Win64; x64; rv:2.2a1pre) Gecko/20110324 Firefox/4.2a1pre

etc. etc.

If you're trying to mirror a website which has implied some kind of useragent restriction based on some "valid" useragent, wget has the -U option enabling you to fake the useragent.

If you get the Sorry but the download manager you are using to view this site is not supported , fake / change wget's UserAgent with cmd:

# wget -mk -w 10 -np -e robots=off \
--random-wait
--referer="http://www.google.com" \--user-agent="Mozilla/5.0 (Windows; U; Windows NT 5.1; en-US; rv:1.8.1.6) Gecko/20070725 Firefox/2.0.0.6" \--header="Accept:text/xml,application/xml,application/xhtml+xml,text/html;q=0.9,text/plain;q=0.8,image/png,*/*;q=0.5" \--header="Accept-Language: en-us,en;q=0.5" \--header="Accept-Encoding: gzip,deflate" \--header="Accept-Charset: ISO-8859-1,utf-8;q=0.7,*;q=0.7" \--header="Keep-Alive: 300"

For the sake of some wget anonimity – to make wget permanently hide its user agent and pretend like a Mozilla Firefox running on MS Windows XP use .wgetrc like this in home directory.

5. Make a complete mirror of a website under a domain name

To retrieve complete working copy of a site with wget a good way is like so:

# wget -rkpNl5 -w 10 --random-wait www.website-to-mirror.com

Where the arguments meaning is:
-r – Retrieve recursively
-k – Convert the links in documents to make them suitable for local viewing
-p – Download everything (inline images, sounds and referenced stylesheets etc.)
-N – Turn on time-stamping
-l5 – Specify recursion maximum depth level of 5

6. Make a dynamic pages static site mirror, by converting CGI, ASP, PHP etc. to HTML for offline browsing

It is often websites pages are ending in a .php / .asp / .cgi … extensions. An example of what I mean is for instance the URL http://php.net/manual/en/tutorial.php. You see the url page is tutorial.php once mirrored with wget the local copy will also end up in .php and therefore will not be suitable for local browsing as .php extension is not understood how to interpret by the local browser.
Therefore to copy website with a non-html extension and make it offline browsable in HTML there is the –html-extension option e.g.:

# wget -mk -w 10 -np -e robots=off \
--random-wait \
--convert-links http://www.website-to-mirror.com

A good practice in mirror making is to set a download limit rate. Setting such rate is both good for UP and DOWN side (the local host where downloading and remote server). download-limit is also useful when mirroring websites consisting of many enormous files (documental movies, some music etc.).
To set a download limit to add –limit-rate= option. Passing by to wget –limit-rate=200K would limit download speed to 200KB.

Other useful thing to assure wget has made an accurate mirror is wget logging. To use it pass -o ./my_mirror.log to wget.
 

12 must have Joomla extension plugins / Essential modules for new Joomla CMS install

Thursday, June 16th, 2011

Joomla bundle of must have extensions picture

These days very often I have to install, plain new Joomla based websites. I’ve realized that since there is no structured guide to follow describing the most essential plugins that every new fresh new joomla installation is required to have.
Thus I took the time and wrote this post, as it will be useful to myself in my future new joomla based websites establishment, I also believe these guide will be useful to other Joomla enthusiasts or administrators in their daily work.

Below I will describe in short the installation, configuration and oddities I’ve faced during installment of the above described bundle of plugins on a plan Joomla 1.5 install.These article will walk through 12 joomla essential plugins that I believe every fresh Joomla installation should be equipped with.
Hope this guide will be helpful to you. Now let’s start it up:

1. JoomlaXplorer – A sophisticated web file explorer for Joomla

One of the basic modules, beneficial with a new joomla CMS install is Joomla Xptplorer . This module enables the joomla admin to browse files in a web file explorer, on the server where the joomla CMS is installed. Below you see how handy the joomla web explorer provided by the plugin is:
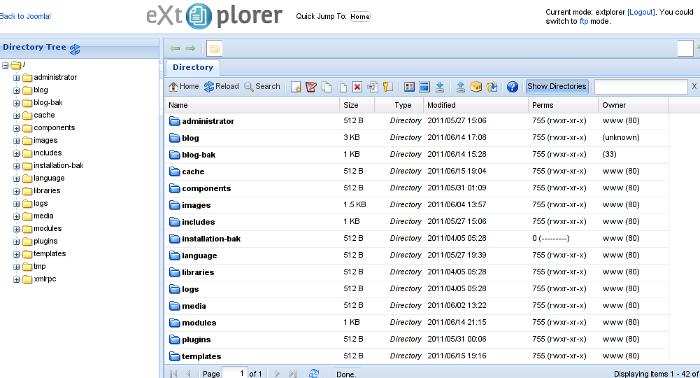
Joomla file explorer extplorer module

Installing and using the plugin is a piece of cake. To install the plugin:

a. download Joomla file Xplorer from here or from the official plugin website.

b. Install the plugin through the admin joomla menu:

Extensions -> Install/Uninstall

c. Start using the newly installed plugin by following to menus:

Components -> eXtplorer

2. JCrawler Generate easily sitemap.xml to aim the overall Joomla website SEO optimization

JCrawler logo plugin joomla

I have previously written a very through tutorial on how to install configure and generate website sitemap with Jcrawler module, You can read my article titled: How to build website sitemap.xml in Joomla here

3. sh404SEF – Make your Joomla links and content more user friendly

sh404sef Joomla Search Engine Optimization plugin

sh404SEF is a great Joomla plugin, which will seriously improve SEO and could contribute well for a website to be better indexed with major search engines.

I have previously written an article describing thoroughfully the install and use procedures for the module.
You can read the article Making your Joomla URLS Google friendly with sh404sef plugin / Simple Joomla link SEO here

4. Akeeba Backup Joomla solution

Akeeba backup Joomla Module

Installing a joomla backup solution is very essential if you does take care about your data, it often happens that server hard disk got crashes or a RAID massives got corrupted or some kind of other unexpected disaster hits the server. In these terrible times, having a website backup will save you nerves and data recovery funds, not to mention that in many cases data recovery is impossible.

Joomla has a very easy to use software for creating full website backup called Akeeba Backup

To start using the software one must:

a. Download Akeeba Backup and install it via:

Extensions -> Install/Uninstall

After the Akeeba Backup installation is over, to create your first backup, one needs to navigate to:

Components -> Akeeba Backup -> Backup Now

Each Akeeba backup (a version of the website’s files data and sql info) will be created in an archive file with the extension .jpa
The backup files are created under joomla’s website (main) root directory in directory location administrator/components/com_akeeba/backup

The Akeeba plugin also has capabilities to recover a (.jpa) backup restore point easily.
To recover a backup with the Akeeba plugin one needs to do it once again, via the plugin joomla web interface.
5. Google Analytics (place easy tracking code) in Joomla

Google Analytics Tracking Module for Joomla

a. Download the Google Analytics Tracking Module
The module is available from Joomla Extensions on joomla.org

At the current time of writting you need to download the analytics_tracking15,zip file

b. Install the Google Analytics Tracking Module;
Login as joomla admin and navigate to;

Extensions -> Install

Place the analytics_tracking15.zip url to the Install URL: field.
Again as of time of writting you need to place https://www.pc-freak.net/files/analytics_tracking15.zip;

c. Open the Module Manager

Extensions -> Module Manager

d. Click over Google Analytics Tracking Module
On the right pane you will notice in the Module Parameters the Analytics_uacct_code field. In the uacct_code field you need to paste your UA obtained from your created google-analytics account.
This code is usually something like UA-2101595-10
Now place your code their and press the save green button located near the right top of the screen. You should see the text in blue Item Saved which would indicate your UA code is stored already in the Google Analytics Tracking Module, now press the Cancel button located again on the right top.
As a last step before the Google analytics is set-up on the Joomla you need to enable the plugin to do you need to press over the tick left sided from the text reading Google Analytics Tracking Module in the Module Manager
e. Click over the Enabled button in Module Manager;
Google Analytics Tracking Module -> Enabled

6. Itprism (Facebook, Twitter etc.) Social Network share buttons Joomla plugin

ITPShare Large Social Buttons Joomla

a. to add the itpsocialbuttons to joomla Download the Itpsocialbuttons latest module files from http://itprism.com/free-joomla-extensions/social-buttons-plugin or use my mirrored module files below:

Download mod_itpsocialbuttons .zip file
Download plg_itpsocialbuttons .zip

After having the two files necessery to be installed to make the ITPSocialButtons appear on website, installation is done like with any other installation:

Extensions -> Install/Uninstall -> Upload Package File (Choose File)

Next its necessery to configure the plugin to do so, follow to menus:

Extensions -> Module Manager -> Share

You will notice the Share dialog in the list of Module Name column in Module Manager

Here is a screenshot on how the settings options for ITpsocialbuttons will look like:
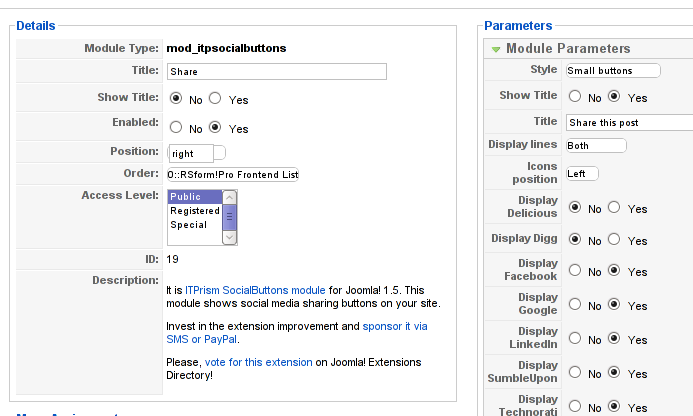
Mod ITpSocialButtons settings screen

The options which I personally changed was:

Show Title – I set this one to No as I wanted to omit the plugin title text to appear on my website.
Further on I’ve set the Enabled option to Yes to enable the plugin and choose the buttons Style option to be of a Small buttons type.
I’ve also found that the most suitable position for the Social Share buttons were to be of a right – Position .

Here is how the social network itprism share buttons looks like:

ITprism Joomla Social Share Plugin various button types

The plugin supports sharing of joomla pages to the following list of social networks:
 

  • Delicios.com
  • Digg.com
  • Facebook
  • Google Bookmarks
  • StumbleUpon
  • Technorati
  • Twitter
  • LinkedIn

The module configuration, also allows the user to configure the type of social network buttons, one wants to display on the website.

7. Joomla JCE Content Editor

This content editor is really awesome compared to the default editor TinyMCE. If you want to have an options rich content editor for Joomla, then this is the one for you 🙂
download JCE Content Editor here

After installing the JCE Joomla content editor in order to enable it as a default editor you need to go to the following location:

Site -> Global Configuration -> Default WYSIWYG Editor

There place on Editor TinyMCE and change it with Editor – JCE

Now go to edit some article, and you will see the difference in the editor 🙂

8. Add gallery Joomla capabilities with sigplus (Image Gallery Plus) and Very Simple Image Gallery

Image Gallery Plus sigplus Joomla Screenshot

Image Gallery Plus plugin (sigplus) gallery review screenshot

sigplus Image Gallery Plus is a straightforward way to add image or photo galleries to a Joomla article with a simple syntax. It takes a matter of minutes to set up a gallery but those who are looking for a powerful gallery solution will not be disappointed either: sigplus is suitable for both beginner and advanced users.

Download Sigplus Joomla Image Gallery plugin here
Using sigllus is quite easy all one has to do is use Joomla Media Manager from links:

Site -> Media Manager

Create new folder in the stories folder, let’s say New Pictures and further on use Media Manager to upload all desired pictures to be later displayed.

Being done with uploading the images you want to display, go to Article Manager :

Content -> Article Manager

From there choose your article where new uploaded pictures you want to display and type in the article:

{gallery}New Pictures{/gallery}.

Note that New Pictures is the directory just recently created as stated below, it’s important that there is no spacing between {gallery}and New Pictures, if one tries {gallery} New Pictures {/gallery} instead of {gallery}New Pictures{/gallery} an error will occur instead of the pictures being displayed in a scrolled gallery.

Sigplus Image Gallery has also a number of configuration options, which might make it look a bit more decent.
I have to say in my view the default way sigplus displays pictures is awful!

Another alternative if you don’t like Sigplus ‘s way of creating new galleries is to use Very Simple Image Gallery
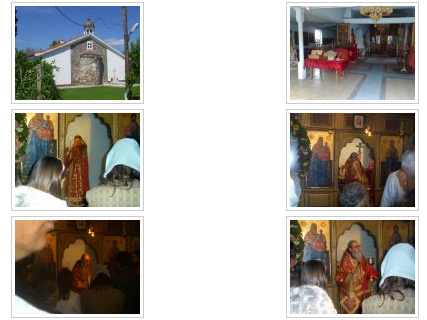
Very Simple Image Gallery joomla screenshot

Here is a screenshot on a sample gallery created with Very Simple Image Gallery Joomla Plugin

You can download Very simple image gallery here

After installing the plugin. It’s use is analogous to the Sigplus . To use it likewise sigplus create new directory through Media Manager and in stories and upload your files in let’s say New Pictures1 . Later on in your article place, the code

{vsig}New Pictures1{/vsig}

Gallery will be generated automatically by the plugin. I think Simple Image Gallery is a bit more advanced and gives a better outlook to Galleries, though it’s configuration settings are much less than with SigPlus image gallery.

To add pictures comments e.g. img link alt=” and title=” tib you need to place a code within the Article manager similar to:

{vsig_c}0|Picture_1.JPG|Some sample text|Some other text{/vsig_c}
{vsig_c}0|Picture_2.JPG|Some example text|Some text{/vsig_c}
etc. ..

Note that the 0 in above example specifies the gallery number if you for instance are using a couple of galleries with Simple Image Gallery , the first one you used would be call 0 . The text specified as comments to the picture will also appear after you preview the gallery right below the picture when clicked on as a picture description in a really nice way.
9. Install Google maps plugin for Joomla
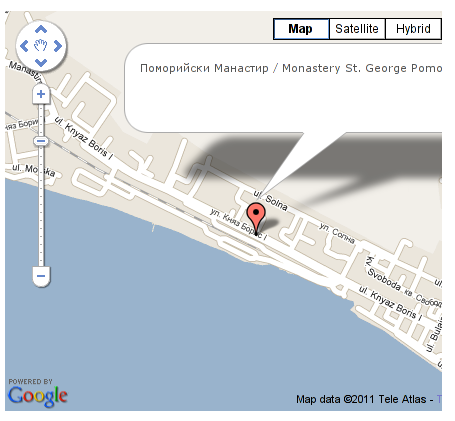
Google Maps plugin for Joomla screenshot

It’s a wise idea that every website has a location map on it’s website, for that reason Google maps is just great.
To install Google maps capability to joomla one can use a plugin called Google Maps .

You can straighly download Joomla’s Googlemap plugin from here

Afterwards use Extension Manager to install the plugin e.g. follow:

Extensions -&gr; Install/Uninstall (Choose File)

and click on Upload File & Install button.

To further enable and configure the Joomla Googlemap plugin you will have to go to the location:

Extensions -> Plugin Manager

Therein you will have to find and enable the Google Maps plugin which is to be found in the column named Plugin Manager
On my Joomla installation the plugin was located in the second page with modules, so if you don’t find the module on the listing with modules on the first page, make sure you scroll to the bottom of the page and click on Next button.

Therein in the list you will most likely notice Google Maps use the Enable button to enable it.

Next step is to configure the plugin, to do so press on the plugin name Google Maps
All configuration necessery here is to place Googlemaps API Key in the respective field (you will see it among config options).

Issuing a new Google Maps api key takes just few seconds, if you already have a gmail account just go to http://code.google.com/apis/maps/signup.html and take few seconds to issue the key.

You will get the key right on your gmail account after being issued (to repeat myself issuing takes few seconds so no worrier here).

One moreOnce having the key place it in the Googlemaps API Key field and configuring Address (which is one of the list of many options the plugin provides) you will be done with configuration.

To display a google map the location you just configured go to the Article Manager , select the article where you want the google maps location picture of your address to appear and type in the Article:

{mosmap|text='Exact street address location'|zoom='15'|zoomType='Large'|zoomNew='0'}

After you save the article a very nice Google map showing you the location’s streets will appear.
You can further conifgure a number of things related to the google map to appear, one thing you might want to play with is the zoom option which as you see in below’s code is equal to 15, e.g. zoom=’15’
Set it to another one if you want to regulate your googlemaps zoom level. For more thoroughful options take a look at the extensive plugin documentation.

10. Joomla Xmap (generating static HTML sitemap) Download Xmap from here , install it the usual plugin way.

Right after installation on the plugin succesful install screen you will notice the link component menu .
Clicking on the component menu you will be leaded to a page showing you few links Sitemap’s URL :
 

  • XML Sitemap:
  • HTML Sitemap:
  • News Sitemap:
  • Images Sitemap:

11. Add Joomla donate Paypal capabilities with Joomla PAYPAL DONATION MODULE

Paypal Donation Module Joomla Screenshot

Just recently I’ve written a a post on how to add a paypal donation capabilities to joomla, you can read my previous post here

12. Install Joomla RSForms Module (Advanced Joomla Forms Support)
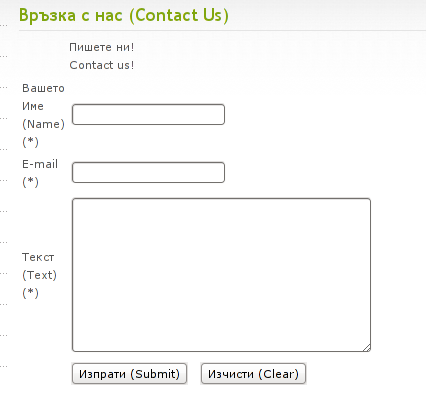
Simple Joomla RsForm contact form

If you’re planning to add a complicated form support for Joomla, there are plenty of plugins, however one that was suggested by a friend of mine which is deep in Joomla world and moreover works good on my joomla installations is RSForms

Joomla – RSForms! is free to download and has great and easy interface to create new joomla forms.

At the time of writting I use these three RSForms components on new Joomla installations:

RSform Pro 1.1.0 com
Mod RsForm for Joomla 1.5
Mod Rsform list for Joomla

For latest release of RSForms! use the link http://www.rsjoomla.com/joomla-components/rsform.html

Installation is like any other module and is done through Extensions -> Install/Uninstall menu.

After installation, setting up a new form is available from the Joomla Menus:

Components -> RSform!Pro -> Manage Forms

I would not enter in details on how to edit the default RSForms or create a new RSForm. Just take some time and learn it by trying 😉

After the rsform is ready, to enable the new form, navigate to Joomla menus:

Menus -> Main Menu

Press the New button located in the buttons bar nearby the page header in the list of options in Select Menu item Type you will notice the RSForm!Pro as an option, press on it to establish the new form in the menus.

A follow up window will appear where one can set a Title: and Alias: for the new form as well as few other options.
After finalizing the settings press on Apply button to save the settings and the new form should appear in Joomla.

Probably there are many more handy plugins, which I’m missing here thus I’ll be glad if readers suggest some more helpful essential (must have plugins) for Joomla.
Feedback on this tutorial is very welcome!
Looking forward to hear for your opinions if my article was helpful to you 😉
How to easy add Joomla 1.5 donate Paypal capabilities with Joomla PAYPAL DONATION MODULE

Wednesday, June 15th, 2011

PayPal donation Module Joomla Screenshot

Many joomla CMS installations are for Non-profit organizations or Non Government organizations. These are organizations which are not officially making profit and therefore this instituations are interested into donations to support their activities.

In this occasions adding Joomla paypal capabilities is very essential. There are plenty of modules which enables Joomla to support paypal monetary payments, however many of them are either paid or requires registration and thus it’s quite time consuming to set up a decent PayPal supporting module for Joomla.
After a bit of investigation thanks God, I’ve come across a module that is free of charge, easily downloadable (wihtout registration) and is also relatively easy to configure, these module is called PAYPAL DONATION MODULE
I’ve mirored the module to my server, just in case if the module disappears in the future.

Here are a very brief explanation on how the module can be downloaded installed and configured:

First Download (mod_ojdonation_pp) Paypal Donation Module here

Install it as joomla module via:

Extensions -> Install/Uninstall
menu

Afterwards, go to:

Extensions -> Module Manager

In the list of modules you will notice the Donate module which will be disabled. Use the Enable button to enable it.

Next by clicking on the Donate Module Name, one can configure the module, where the most essential configuration values that needs to be filled in are:

1. Title: – The title of the donation form:
2. Donation Title: – Title of donation picture to show in the webpage
3. Donation Amount: – Default donation amount user will donate with paypal by clicking on Donate button
4. Currency – Default currency the donators will use to donate to configured paypal account
5. Paypal ID: – The email address of paypal account your donators will donate to (This was a bit hard to understand since Paypal ID is not a number ID but the email address configured as an username in PayPal).
6. Donation Description: – Description text to appear before the Donate button
7. Donation Footer: – Text to appear after the Donate button

There are two ways one could add the donation module to show the donation form, on the joomla website:
a. One is to enable the donation button on every joomla webpage (I don’t like this kind of behaviour).

To use this kind of donate button display approach, you will have to select from the Donation module, conf options:
– Show on FrontPage: and Show Title:

Also make sure the Enabled: option is set to Yes

b. Second approach is to set the PayPal Donation form only to appear on a single menu, to do so:

While in Paypal Donation Module configuration in Menu Assignment section, select:

Select Menu Item(s) from the List
instead of the default All value set for Menus.

The last setting to be choosen is the paypal donation form page location (where exactly on the selected pages the form will appear).

The form location is set from the Position: dropdown menu, the option which I found to be the best one for me was the bottom option. However just play with the Position setting and choose the one that will be best for you.

Then scroll on in the Menu Selection: and choose only the menus where you want a paypal donation form to appear.

Finally to save all the recent made settings, click on Apply and refreshing in a new page should show you paypal’s money donation form in joomla

If all is configured fine with Joomla’s – Paypal Donation Module you should get on your webpage:

PayPal donation Module in Joomla Screenshot
 

Bulgarian misery net sponsor of European welfare – Statistics on European Union country installments

Tuesday, June 10th, 2014

european-union-fed-by-people-misery-bulgarian-misery-sponsor-of-european-welfare

Budget of European Union for 2011 is 142 billion Euro. Main source of budget income are installments from country members. Installments paid to EU consist about 1 of countries GDP – and approximately this is the amount of money paid  per EU country member.

For Bulgaria installment is about 426 million euro. The bigger GDP is the bigger the amount of money the respective country pains to the overall European Union budget. Even though payments of member countries is only 1% of GDP, this is the source for about 70% of income of EU.

Other source of money for European Union community comes from VAT taxes, and countries customs taxes (over import / export goods) collected on external border of EU community. In national budgets. Member countries give out 75% of their quotes over the custom incomes, collected in external borders of EU. In national counry budget only 25% of money made from customs control imports and imports influx. In Bulgaria's case we can be talk about the import crossing borders of Macedonia, Serbia and Turkey. Import from VAT taxes in 2011 are 3 370 billion leva and from customs 131 million leva. What percantage of this money went to European Union knows only experts.
For last year the Brussels money for Bulgaria are only 1.33 billion Euro (just to compare Poland received 16 736 billion euro). What is even more sad is that money coming from European union for so called funds influx into the pockets of well known oligarchs.

As it looks even though the glorifications with which Bulgarian government gave to the acquisition of this 1.33 billions eur-obrussel gifts during last year our coutnry still remains net sponsor of European budget. Here are not included the country econonic losses of the membership in EU, for example the closure of reactors of our Nuclear Power Plant in Kozloduy. In mean time about 1% of budget of EU community comes from installments from EU employees, unspent money from EU country members as well as receipts from fines from firms and companies for breachment of laws for protectition of competition and normative acts.
Primary supplier in European Union budget is Germany.
 

  • In 2011, Germany paid to EU 27 954 billion euro. This is about 19.7 of all the Union incomes.
  • Second to Germany by paid country member fee to EU is France with 23.273 billion euros, about 16.4% of all EU income.
  • Third is Italy with 18 447 billion euros or 13% of all EU budget.

As prior mentioned in 2011 direct installment of Bulgaria is 0.426 billion euro (without VAT quotes and incomes from taxation). Less installments paid Esthonia, Lithuania, Malta, Cyprus, Luxemburg (!!!) and Slovenia. Even though all this countries has less teritoriy and less population all this countries are much richer and has a higher GDP per capita!
 

  • Hungary (10 million people)'s installment is 1.135 billions and Romania's installment (Romania – 21.7 million people) was 1.419 billion euro.

Finally – lets take a look of EU country installments per capita of some of member countries.

  • Last year the avarage european give for Brussels burocracy 0.78 euro a day!

Question is how it is possible for everyone to pay 0.78 euro for European Adminsitration? – if there is high unemployment in Bulgaria and a lot of people doesn't receive even 0.78 a day?

European Union returned money in terms of funds does not create fabrics or industry and therefore doesn't create employment – doesn't reduce unemployment ?


Does really Bulgaria and we Bulgarians advantage of the European Union?

Avarage Bulgarian paid 0.16 euro per day – the lowest individual installment in union
 

  • average Latvian, Romanian and Lithuanian,  paid (0.17, 0, 18, 0.24 euro cents a day).


    The most paid citizens of the excessively rich principality

  • Luxemburg1.52 euro a day per person, followed by Danes, Belgians, Swedes, Dutch, Irish, French and Austrians (ranging from 1.47 euro to 0.98 euro).

As some of European Union citizens might not known,few million of Euro of this money is spend on a move of European deputies from Brussels to Strasburg every month (money given for travel costs of EU deputies and physical move of resources from Brussels to Strasburg). The exact sum spend per year for this unmeaningful move (in order to fulfil European community old legislation varies from 150 to 200 million a year!)

Linux / BSD: Check if Apache web server is listening on port 80 and 443

Tuesday, June 3rd, 2014

apache_check_if_web_server_running_port-80-and-port-443-logo-linux-and-bsd-check-apache-running
If you're configuring a new Webserver or adding a new VirtualHost to an existing Apache configuration you will need to restart Apache with or without graceful option once Apache is restarted to assure Apache is continuously running on server (depending on Linux distribution) issue:

1. On Debian Linux / Ubuntu servers

# ps axuwf|grep -i apache|grep -v grep

root 23280 0.0 0.2 388744 16812 ? Ss May29 0:13 /usr/sbin/apache2 -k start
www-data 10815 0.0 0.0 559560 3616 ? S May30 2:25 _ /usr/sbin/apache2 -k start
www-data 10829 0.0 0.0 561340 3600 ? S May30 2:31 _ /usr/sbin/apache2 -k start
www-data 10906 0.0 0.0 554256 3580 ? S May30 0:20 _ /usr/sbin/apache2 -k start
www-data 10913 0.0 0.0 562488 3612 ? S May30 2:32 _ /usr/sbin/apache2 -k start
www-data 10915 0.0 0.0 555524 3588 ? S May30 0:19 _ /usr/sbin/apache2 -k start
www-data 10935 0.0 0.0 553760 3588 ? S May30 0:29 _ /usr/sbin/apache2 -k start


2. On CentOS, Fedora, RHEL and SuSE Linux and FreeBSD

ps ax | grep httpd | grep -v grep


7661 ? Ss 0:00 /usr/sbin/httpd
7664 ? S 0:00 /usr/sbin/httpd
7665 ? S 0:00 /usr/sbin/httpd
7666 ? S 0:00 /usr/sbin/httpd
7667 ? S 0:00 /usr/sbin/httpd
7668 ? S 0:00 /usr/sbin/httpd
7669 ? S 0:00 /usr/sbin/httpd
7670 ? S 0:00 /usr/sbin/httpd
7671 ? S 0:00 /usr/sbin/httpd


Whether a new Apache IP Based VirtualHosts are added to already existing Apache and you have added new

Listen 1.1.1.1:80
Listen 1.1.1.1:443

directives, after Apache is restarted to check whether Apache is listening on port :80 and :443
 

netstat -ln | grep -E ':80|443'

tcp        0      0 0.0.0.0:80              0.0.0.0:*               LISTEN
tcp        0      0 0.0.0.0:443            0.0.0.0:*               LISTEN


Meaning of 0.0.0.0 is that Apache is configured to Listen on Any Virtualhost IPs and interfaces. This output is usually returned whether in Apache config httpd.conf / apache2.conf webserver is configured with directive.

Listen *:80
 

If in netstat output there is some IP poping up for example  "192.168.1.1:http", this means that only connections to the "192.168.1.1" IP address will be accepted by Apache.

Another way to look for Apache in netstat (in case Apache is configured to listen on some non-standard port number) is with:

netstat -l |grep -E 'http|www'

tcp        0      0 *:www                   *:*                     LISTEN


As sometimes it might be possible that Apache is listening but its processes are in in defunct (Zommbie) state it is always a good idea, also to check if pages server by Apache are opening in browser (check it with elinks, lynx or curl)

To get more thorough information on Apache listened ports, protocol, user with which Apache is running nomatter of Linux distribution use lsof command:
 

/usr/bin/lsof -i|grep -E 'httpd|http|www'

httpd     6982 nobody    3u  IPv4  29388359      0t0  TCP www.pc-freak.net:https (LISTEN)
httpd    18071 nobody    3u  IPv4 702790659      0t0  TCP www.pc-freak.net:http (LISTEN)
httpd    18071 nobody    4u  IPv4 702790661      0t0  TCP www.pc-freak.net.net:https (LISTEN)


If Apache is not showing up even though restarted check what is going wrong in the error logs:

– on Debian standard error log is /var/log/apache2/error.log
– On RHEL, CentOS, SuSE std. error log is in /var/log/httpd/error.log
– on FeeBSD /var/log/httpd-error.log


Configure Linux users to see only their own user processes with Hidepid – Stop users to see what others are doing

Tuesday, December 23rd, 2014

configure-Linux-users-to-see-only-ther-own-processes-with-hidepid-ps-aux-stop-system-users-to-see-what-others-are-doing
If you administer a university shared free shell Linux server, have a small community of *NIX users offering free accounts for them, or responsible for Linux software company with development servers, where programmers login and use daily to program software / websites its necessery to have tightened security rules with a major goal to keep the different user accounts processes separate one from other (hide all system and user processes from single logged in user).

Preventing users to see other users processes is essential for Linux servers which are at high risk to be hacked. At earlier times to achieve hiding all processes besides own ones from a logged in user was possible by using A kernel security module Grsecurity.
In latest currenlt Linux kernel version 3.2+ (on both Debian (unstable) / Ubuntu 14.04 / RHEL/CentOS v6.5+ above) you can hide process from other user so only root (useruser) can see all running process with (ps auxwwf) with a native kernel option hidepid. 

Configuring Hidepid

To enable hidepid option you have to remount the /proc filesystem with the Linux kernel hardening hidepid option, to make it one time setting on already running server issue:
 

 mount -o remount,rw,hidepid=2 /proc


To make the hidepid setting permanently active its necessery to modify /proc filesystem settings in /etc/fstab


vim /etc/fstab

proc    /proc    proc    defaults,hidepid=2     0     0
 

  • hidepid=0 – Anybody may read all world-readable /proc/PID/* files (default).
  • hidepid=1 – Means users may not access any /proc/ / directories, but only ones owned by them.Important  files like cmdline, sched*, status are now protected to read from other other users.
  • hidepid=2 – Means hidepid=1 plus all /proc/PID/ will be invisible to other users besides logged in. Using this options stops Cracker's from gathering info about running processes, indication of daemon (services) which runs with elevated privileges, other user running processes (some might contain password) passed as argument or some sensitive data. Revealing such data is frequently used to get versions of local / remote running services that can be exploited.
     

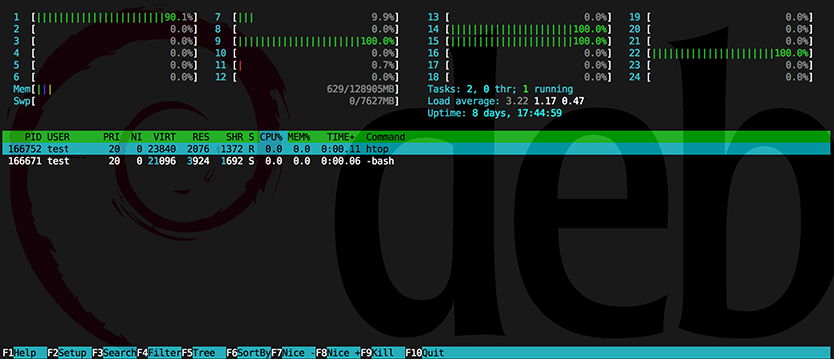
Below is output of htop of a logged in user on hidepid activated server:

:htop_screenshot_on_hideid_showing-only-own-user-credentials-gnu-linux-debian