Posts Tagged ‘owncloud’

Configure own Media streaming minidlna Linux server to access data from your Smart TV

Friday, February 18th, 2022

dlna-media-minidlna-server-linux-logo

If you happen to buy or already own or just have to install a Smart TV to be connected with a LAN Network to a Linux based custom built NAS (Network Attached Storage) server. You might benefit of the smart TV to Share and Watching the Disk Storage Pictures, Music, Video files from the NAS  to the Smart TV using the Media Server protocol.

You have certainly already faced the Media Server at your life on many locations in stores and Mall Buildings, because virtually any reoccuring advertisements, movies projected on the TVs, Kids entertainment or Floor and Buildings Room location schedules or timeline promition schedules are streamed using the Media Server protocol, for many years now. Thus having a brief idea about Media Server proto existence is foundamental stuff to be aware of for sysadmins and programmers.

Shortly about DLNA UPnP Media Streaming Protocol

Assuming that your Smart TV has been already connected to your Wireless Router 2.4Ghz or 5Ghz Wifi, one would think that the easiest way to share the files with the SmartTV is via something like a simple SAMBA Linux server via smb:// cifs:// protocols or via the good old NFS Server, however most of Samsung Smart TV and many other in year 2022 does not have embedded support for Samba SMB / CIFS Protocol but instead have support for the DLNA (Digital Living Network Alliance) streaming support. DLNA is part of the UPnP (Universal Plug and Play) Protocols, UPnP is also known to those using and familiar with Windows Operating Systems realm simply as UPnP AV Media server or Windows Media server.
Windows Media server for those who never heard it or used it 
 allows you to build a Playlists with Media files Video and Audio data files, that can be then later played remotely via a Local LAN or even long distance over TCP / IP remote side connected Internet network.
 

1. Set up and Stream data via Media server on  Windows PC / notebook with integrated Windows Media server 

Windows Media server configuration on Windows 7, 10 and 11 is a relatively easy to configure via:

Network and Sharing Center -> Media Streaming Options -> Turn on Media Streaming 


Then you have to define the name of the Media Library, configure whether Media server should show
on the Local Netework
for other conected devices and Allow or Block access from the other network present devices.


 2. Using a more advanced Media Server to get rid about the limitation of DLNA set of supported file codecs.
 

The Windows default embedded DLNA server is the easiest and fastest one to set up, but it’s not necessarily the best option.
Due to the way DLNA works, you can only stream certain types of media codecs supported by the server. If you have other types of media not defaultly supported and defined by DLNA win server, it just won’t work.

Thus thanksfully it was developed other DLNA servers improve this by offering real-time transcoding.
If you try to play an unsupported file, they’ll transcode it on-the-fly, streaming the video in a supported format to your DLNA device.
Just to name few of the DLNA Media Streaming servers that have supported for larger MPG Video, MP3 / MP4 and other Audio formats encodings,
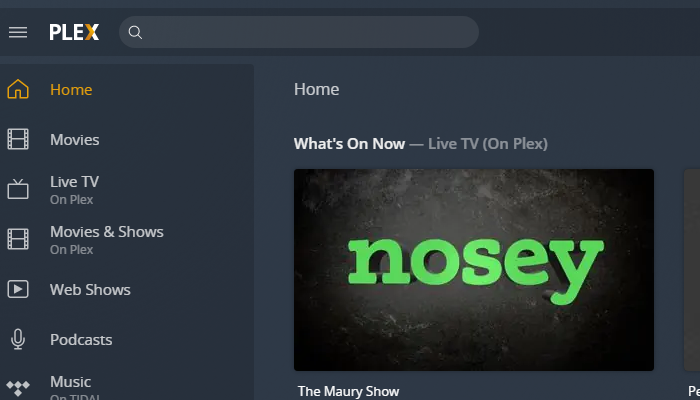
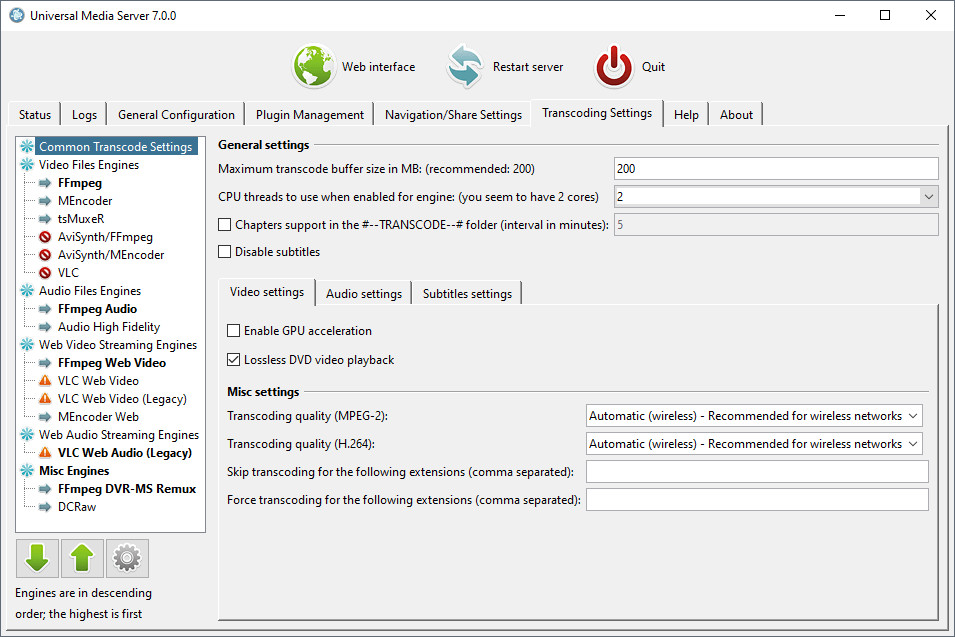
you can try Plex or the Universal Media Server both of which are free to use under freeware license and have versions for Linux and Mac OS.


Universal_media_server-windows-screenshot-stream-media-data-on-network


3. Setting up a free as in freedom DLNA server MiniDLNA (ReadyMedia) on GNU / Linux


ReadyMedia (formerly known as MiniDLNA) is a simple media server software, with the aim of being fully compliant with DLNA/UPnP-AV clients. It was originally developed by a NETGEAR employee for the ReadyNAS product line.

MiniDNLA daemon serves media files (music, pictures, and video) to clients on a network. Linux Media servers clients you can use to test or scan your network for existent Media servers are multiple perhaps the most famous ones are applications such as totem (for QT users) and Kodi (for KDE).
The devices that can be used with minidlna are devices such as portable media players (iPod), Smartphones, Televisions, Tablets, and gaming systems (such as PS3 and Xbox 360) etc.
 

ReadyMedia is a simple, lightweight, the downside of it is It does not have a web interface for administration and must be configured by editing a text file. But for a simple Video streaming in most cases does a great job.


3.1 Install the minidlna software package 

Minidlna is available out of the box on most linux distributions (Fedora / CentOS / Debian / Ubuntu etc.) as of year 2022.

  • Install on Debian Linux (Deb based distro)

media-server:~# apt install minidlna –yes

  • Install on Fedora / CentOS (other RPM based distro)

media-server:~# yum install -y minidlna


3.2 Configure minidlna

– /etc/minidlna.conf – main config file
Open with text editor and set user= ,  media_dir= ,  port=, friendly_name= ,  network_interface= variables as minimum.
To be add minidlnad support symlinks to external file locations, set also wide_links=yes

media-server:~# vim /etc/minidlna.conf

#user=minidlna
user=root
media_dir=/var/www/owncloud/data
network_interface=eth0,eth1

# Port number for HTTP traffic (descriptions, SOAP, media transfer).
# This option is mandatory (or it must be specified on the command-line using
# "-p").
port=8200
# Name that the DLNA server presents to clients.
# Defaults to "hostname: username".
#friendly_name=
friendly_name=DLNAServer Linux
# set this to yes to allow symlinks that point outside user-defined media_dirs.
wide_links=yes
# Automatic discovery of new files in the media_dir directory.
#inotify=yes

Keep in mind that it is supported to provide separete media_dir and provide different USB / External Hard Drive or SD Card sources separated only by content be it Video, Audio or Pictures short named in config as (A,V,P).

media_dir=P,/media/usb/photos
media_dir=V,/media/external-disk/videos
media_dir=A,/media/sd-card/music

You might want to diasble / ineable the inotify depending on your liking, if you don't plan to place new files automated to the NAS and don't care to get indexed and streamed from the Media server you can disable it with inotify=no otherwise keep that on.

– /etc/default/minidlna – additional startup config to set minidlnad (daemon) options such as setup to run with admin superuser root:root 
(usually it is safe to leave it empty and set the user=root, whether needed straight from /etc/minidlna.conf
That's all now go on and launch the minidlna and enable it to automatically boot on Linux boot.

media-server:~# systemctl start minidlna
media-server:~# systemctl enable minidlna
media-server:~# systemctl status minidlna


3.3 Rebuilt minidlna database with data indexed files

If you need to re- generate minidlna's database.
To do so stop the minidlna server with the
 

media-server:~# systemctop stop minidlna


 command, then issue the following command (both commands should be run as root):

media-server:~# minidlna -R

Since this command might kept in the background and keep the minidlna server running with incorrect flags, after a minute or two kill minidlna process and relaunch the server via sysctl.

media-server:~#  killall -9 minidlna
media-server:~#  systemctl start minidlna


3.4 Permission Issues / Scanning issues

If you plan to place files in /home directory. You better have a seperate partition or folder *outside* your "home" directory devoted to your media. Default user with which minidlna runs is minidlna, this could prevent some files with root or other users being red. So either run minidlna daemon as root or as other user with whom all media files should be accessible.
If service runs as root:root, and still getting some scanning issues, check permissions on your files and remove special characters from file names.
 

media-server:~# tail -10 /var/log/minidlna/minidlna.log 
[2022/02/17 22:51:36] scanner.c:489: warn: Unsuccessful getting details for /var/www/owncloud/data/Videos/Family-Videos/FILE006.MPG
[2022/02/17 22:52:08] scanner.c:819: warn: Scanning /var/www/owncloud/data finished (10637 files)!
[2022/02/17 22:52:08] playlist.c:135: warn: Parsing playlists…
[2022/02/17 22:52:08] playlist.c:269: warn: Finished parsing playlists.
minidlna.c:1126: warn: Starting MiniDLNA version 1.3.0.
minidlna.c:1186: warn: HTTP listening on port 8200
scanner.c:489: warn: Unsuccessful getting details for /var/www/owncloud/data/admin/files/origin/External SD card/media/Viber Images/IMG-4477de7b1eee273d5e6ae25236c5c223-V.jpg
scanner.c:489: warn: Unsuccessful getting details for /var/www/owncloud/data/Videos/Family-Video/FILE006.MPG
playlist.c:135: warn: Parsing playlists…
playlist.c:269: warn: Finished parsing playlists.


3.5. Fix minidlna Inotify errors

In /etc/sysctl.conf 

Add:

fs.inotify.max_user_watches=65536

in a blank line at end of file and do 

media-server:~# sysctl -p

Debugging minidlna problems, index errors, warnings etc

minidlna does write by default to /var/log/minidlna/minidlna.log inspect the log closely and you should get most of the time what is wrong with it.
Note that some files might not get indexed because minidlna won't support the strange file codecs such as SWF encoding, if you have some important files to stream that are not indexed by minidlna, then install and try one of the more sophisticated free software Media Servers for Linux:

plex-media-streaming-server-screenshot

Note that most Linux users from my quick research shows, MediaTomb is the preferred advanced features Open Source Linux Media Server of choice for most of the guys.
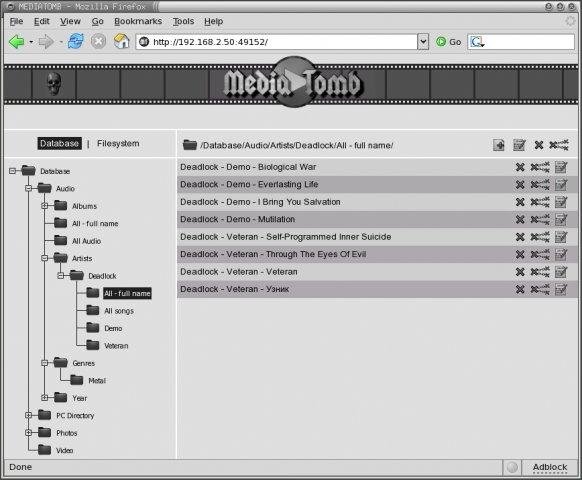
mediatomb-linux-media-streaming-server-picture.jpg.webp


4. Test minidlna Linux servers works, getting information of other DLNA Servers on the network

media-server:~# lynx -dump  http://127.0.0.1:8200
MiniDLNA status

  Media library

   Audio files 0
   Video files 455
   Image files 10182

  Connected clients

   ID Type                   IP Address    HW Address        Connections
   0  Samsung Series [CDEFJ] 192.168.1.11  7C:0A:3D:88:A6:FA 0
   1  Generic DLNA 1.5       192.168.0.241 00:16:4E:1D:48:05 0
   2  Generic DLNA 1.5       192.168.1.18  00:16:3F:0D:45:05 0
   3  Unknown                127.0.0.1     FF:FF:FF:FF:FF:FF 0

   -1 connections currently open
 

Note that there is -1 connections (no active connections) currently to the server. 
The 2 Generic DLNA 1.5 IPs are another DLNA servers provided by a OpenXEN hosted Windows 7 Virtual machines, that are also broadcasting their existence in the network. The Samsung Series [CDEFJ] is the DLNA client on the Samsung TV found, used to detect and stream data from the just configured Linux dlna server.

The DLNA Protocol enabled devices on a network as you can see are quite easy to access, querying localhost on the 8200 server dumps, what minidlna knows, the rest of IPs connecting should not be able to receive this info. But anyways since the minidlna does not have a special layers of security to access it, but the only way to restrict is filtering the 8200 port, it is a very good idea to put a good iptables firewall on the machine to allow only the devices that should have access to the data.

Further more if you happen to need to access the Media files on Linux from GUI you might use some client as upmentioned totem, VLC or if you need something more feature rich Java eezUPnP .
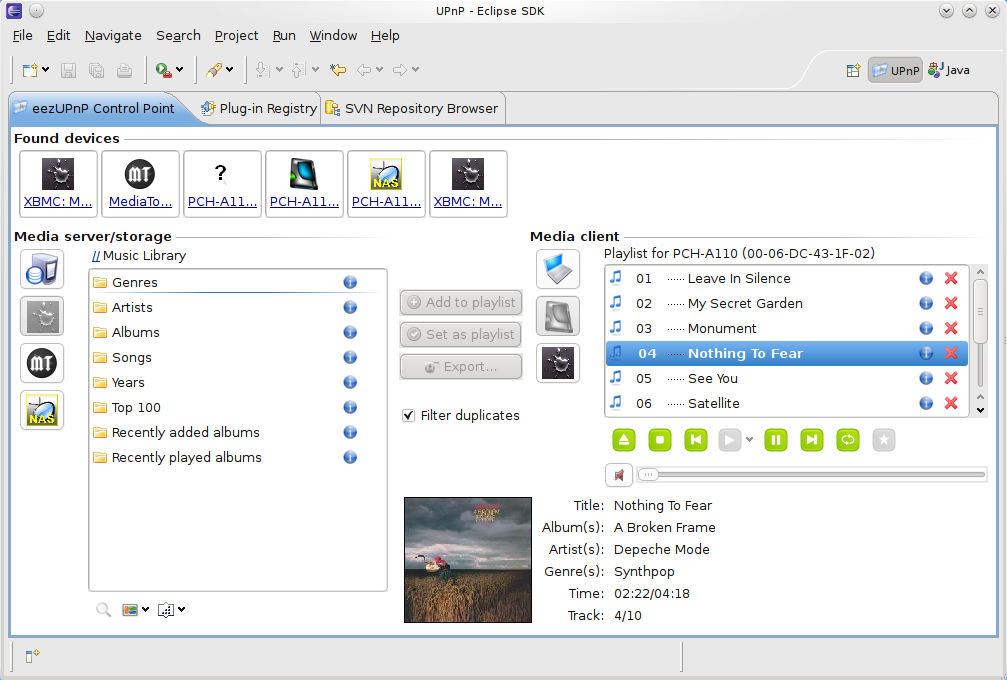
eeZUPnP-screenshot-java-client-for-media-server

That's all folks !
Enjoy your media on the TV 🙂
Linux: Howto Fix “N: Repository ‘http://deb.debian.org/debian buster InRelease’ changed its ‘Version’ value from ‘10.9’ to ‘10.10’” error to resolve apt-get release update issue

Friday, August 13th, 2021

Linux's surprises and disorganization is continuously growing day by day and I start to realize it is becoming mostly impossible to support easily this piece of hackware bundled together.
Usually so far during the last 5 – 7 years, I rarely had any general issues with using:

 apt-get update && apt-get upgrade && apt-get dist-upgrade 

to raise a server's working stable Debian Linux version packages e.g. version X.Y to verzion X.Z (for example up the release from Debian Jessie from 8.1 to 8.2). 

Today I just tried to follow this well known and established procedure that, of course nowdays is better to be done with the newer "apt" command instead with the legacy "apt-get"
And the set of 


# apt-get update && apt-get upgrade && apt-get dist-upgrade


has triggered below shitty error:
 

root@zabbix:~# apt-get update && apt-get upgrade
Get:1 http://security.debian.org buster/updates InRelease [65.4 kB]
Get:2 http://deb.debian.org/debian buster InRelease [122 kB]
Get:3 http://security.debian.org buster/updates/non-free Sources [688 B]
Get:4 http://repo.zabbix.com/zabbix/5.0/debian buster InRelease [7096 B]
Get:5 http://security.debian.org buster/updates/main Sources [198 kB]
Get:6 http://security.debian.org buster/updates/main amd64 Packages [300 kB]
Get:7 http://security.debian.org buster/updates/main Translation-en [157 kB]
Get:8 http://security.debian.org buster/updates/non-free amd64 Packages [556 B]
Get:9 http://deb.debian.org/debian buster/main Sources [7836 kB]
Get:10 http://repo.zabbix.com/zabbix/5.0/debian buster/main Sources [1192 B]
Get:11 http://repo.zabbix.com/zabbix/5.0/debian buster/main amd64 Packages [4785 B]
Get:12 http://deb.debian.org/debian buster/non-free Sources [85.7 kB]
Get:13 http://deb.debian.org/debian buster/contrib Sources [42.5 kB]
Get:14 http://deb.debian.org/debian buster/main amd64 Packages [7907 kB]
Get:15 http://deb.debian.org/debian buster/main Translation-en [5968 kB]
Get:16 http://deb.debian.org/debian buster/main amd64 Contents (deb) [37.3 MB]
Get:17 http://deb.debian.org/debian buster/contrib amd64 Packages [50.1 kB]
Get:18 http://deb.debian.org/debian buster/non-free amd64 Packages [87.7 kB]
Get:19 http://deb.debian.org/debian buster/non-free Translation-en [88.9 kB]
Get:20 http://deb.debian.org/debian buster/non-free amd64 Contents (deb) [861 kB]
Fetched 61.1 MB in 22s (2774 kB/s)
Reading package lists… Done
N: Repository 'http://deb.debian.org/debian buster InRelease' changed its 'Version' value from '10.9' to '10.10'


As I used to realize nowdays, as Linux started originally as 'Hackers' operating system, its legacy is just one big hack and everything from simple maintenance up to the higher and more sophisticated things requires a workaround 'hack''.


This time the hack to resolve error:
 

N: Repository 'http://deb.debian.org/debian buster InRelease' changed its 'Version' value from '10.9' to '10.10'


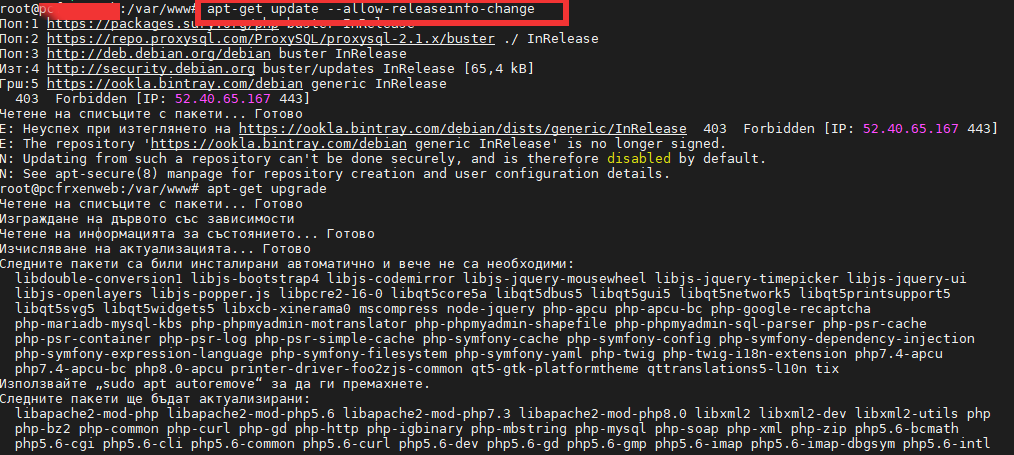
is up to running cmd:
 

debian-server:~# apt-get update –allow-releaseinfo-change
Поп:1 http://ftp.de.debian.org/debian buster-backports InRelease
Поп:2 http://ftp.debian.org/debian stable InRelease
Поп:3 http://security.debian.org stable/updates InRelease
Изт:5 https://packages.sury.org/php buster InRelease [6837 B]
Изт:6 https://download.docker.com/linux/debian stretch InRelease [44,8 kB]
Изт:7 https://packages.sury.org/php buster/main amd64 Packages [317 kB]
Игн:4 https://attic.owncloud.org/download/repositories/production/Debian_10  InRelease
Изт:8 https://download.owncloud.org/download/repositories/production/Debian_10  Release [964 B]
Изт:9 https://packages.sury.org/php buster/main i386 Packages [314 kB]
Изт:10 https://download.owncloud.org/download/repositories/production/Debian_10  Release.gpg [481 B]
Грш:10 https://download.owncloud.org/download/repositories/production/Debian_10  Release.gpg
  Следните подписи са невалидни: DDA2C105C4B73A6649AD2BBD47AE7F72479BC94B
Грш:11 https://ookla.bintray.com/debian generic InRelease
  403  Forbidden [IP: 52.39.193.126 443]
Четене на списъците с пакети… Готово
N: Repository 'https://packages.sury.org/php buster InRelease' changed its 'Suite' value from '' to 'buster'
W: An error occurred during the signature verification. The repository is not updated and the previous index files will be used. GPG error: https://download.owncloud.org/download/repositories/production/Debian_10  Release: 

apt-get-update-allow-releaseinfo-change-debian-linux-screenshot

Onwards to upgrade the system up to the latest .deb packages, as usual run:

# apt-get -y update && apt-get upgrade -y


and updates should be applied as usual with some prompts on whether you prefer to keep or replace existing service configuration and some information on some general changes that might affect your installed services. In a few minutes and few prompts hopefully your Debian OS should be up to the latest stable.

Install and use personal Own Cloud on Debian Linux for better shared data security – OwnCloud a Free Software replacement for Google Drive

Thursday, August 23rd, 2018

owncloud-self-hosted-cloud-file-sharing-and-storage-service-for-gnu-linux-howto-install-on-debian

Basicly I am against the use of any Cloud type of service but as nowadays Cloud usage is almost inevitable and most of the times you need some kind of service to store and access remotely your Data from multiple devices such as DropBox, Google Drive, iCloud etc. and using some kind of infrastructure to execute high-performance computing is invitable just like the Private Cloud paid services online are booming nowdays, I decided to give a to research and test what is available as a free software in the field of Clouding (your data) 🙂

Undoubfully, it is really nice fact that there are Free Software / Open Source alternatives to run your Own personal Cloud to store your data from multiple locations on a single point.

The most popular and leading Cloud Collaboration service (which is OpenSource but unfortunately not under GPLv2 / GPV3 – e.g. not fully free software) is OwnCloud.

ownCloud is a flexible self-hosted PHP and Javascript based web application used for data synchronization and file sharing (where its remote file access capabilites are realized by Sabre/Dav an open source WebDav server.
OwnCloud allows end user to easily Store / Manage files, Calendars, Contacts, To-Do lists (user and group administration via OpenID and LDAP), public URLs can be easily, created, the users can interact with browser-based ODF (Open Document Format) word processor , there is a Bookmarking, URL Shortening service integrated, Gallery RSS Feed and Document Viewer tools such as PDF viewer etc. which makes it a great alternative to the popular Google Drive, iCloud, DropBox etc.

The main advantage of using a self-hosted Cloud is that Your data is hosted and managed by you (on your server and your hard drives) and not by some God knows who third party provider such as the upmentioned.
In other words by using OwnCloud you manage your own data and you don't share it ot on demand with the Security Agencies with CIA, MI6, Mussad … (as it is very likely most of publicly offered Cloud storage services keeps track on the data stored on them).

The other disadvantage of Cloud Computing is that the stored data on such is usually stored on multiple servers and you can never know for sure where your data is physically located, which in my opinion is way worse than the option with Self Hosted Cloud where you know where your data belongs and you can do whatever you want with your data keep it secret / delete it or share it on your demand.

OwnCloud has its clients for most popular Mobile (Smart Phone) platforms – an Android client is available in Google Play Store as well as in Apple iTunes besides the clients available for FreeBSD OS, the GNOME desktop integration package and Raspberry Pi.

For those who are looking for additional advanced features an Enterprise version of OwnCloud is also available aiming business use and included software support.

Assuming you have a homebrew server or have hired a dedidacted or VPS server (such as the Ones we provide) ,Installing OwnCloud on GNU / Linux is a relatively easy
task and it will take no more than 15 minutes to 2 hours of your life.
In that article I am going to give you a specific instructions on how to install on Debian GNU / Linux 9 but installing on RPM based distros is similar and straightfoward process.
 

1. Install MySQL / MariaDB database server backend
 

By default OwnCloud does use SQLite as a backend data storage but as SQLite stores its data in a file and is becoming quickly slow, is generally speaking slowre than relational databases such as MariaDB server (or the now almost becoming obsolete MySQL Community server).
Hence in this article I will explain how to install OwnCloud with MariaDB as a backend.

If you don't have it installed already, e.g. it is a new dedicated server install MariaDB with:
 

server:~# apt-get install –yes mariadb-server


Assuming you're install on a (brand new fresh Linux install – you might want to install also the following set of tools / services).


server:~# systemctl start mariadb
server:~# systemctl enable mariadb
server:~# mysql_secure_installation


mysql_secure_installation – is to finalize and secure MariaDB installation and set the root password.
 

2. Create necessery database and users for OwnCloud to the database server
 

linux:~# mysql -u root -p
MariaDB [(none)]> CREATE DATABASE owncloud CHARACTER SET utf8;
MariaDB [(none)]> GRANT ALL PRIVILEGES ON owncloud.* TO 'owncloud'@'localhost' IDENTIFIED BY 'owncloud_passwd';
MariaDB [(none)]> FLUSH PRIVILEGES;
MariaDB [(none)]> \q


3. Install Apache + PHP necessery deb packages
 

As of time of writting the article on Debian 9.0 the required packages for a working Apache + PHP install for OwnCloud are as follows.


server:~# apt-get install –yes apache2 mariadb-server libapache2-mod-php7.0 \
openssl php-imagick php7.0-common php7.0-curl php7.0-gd \
php7.0-imap php7.0-intl php7.0-json php7.0-ldap php7.0-mbstring \
php7.0-mcrypt php7.0-mysql php7.0-pgsql php-smbclient php-ssh2 \
php7.0-sqlite3 php7.0-xml php7.0-zip php-redis php-apcu


4. Install Redis to use as a Memory Cache for accelerated / better performance ownCloud service


Redis is an in-memory kept key-value database that is similar to Memcached so OwnCloud could use it to cache stored data files. To install latest redis-server on Debian 9:
 

server:~# apt-get install –yes redis-server

5. Install ownCloud software packages on the server

Unfortunately, default package repositories on Debian 9 does not provide owncloud server packages but only some owncloud-client packages are provided, that's perhaps the packages issued by owncloud does not match debian packages.

As of time of writting this article, the latest available OwnCloud server  version package for Debian is OC 10.

a) Add necessery GPG keys

The repositories to use are provided by owncloud.org, to use them we need to first add the necessery gpg key to verify the binaries have a legit checksum.
 

server:~# wget -qO- https://download.owncloud.org/download/repositories/stable/Debian_9.0/Release.key | sudo apt-key add –


b) Add owncloud.org repositories in separete sources.list file


server:~# echo 'deb https://download.owncloud.org/download/repositories/stable/Debian_9.0/ /' | sudo tee /etc/apt/sources.list.d/owncloud.list


c) Enable https transports for the apt install tool


server:~# apt-get –yes install apt-transport-https


d) Update Debian apt cache list files and install the pack


server:~# apt-get update


server:~# apt-get install –yes owncloud-files


By default owncloud store file location is /var/www/owncloud but on many servers that location is not really appropriate because /var/www might be situated on a hard drive partition whose size is not big enough, if that's the case just move the folder to another partition and create a symbolic link in /var/www/owncloud pointing to it …


6. Create necessery Apache configurations to make your new self-hosted cloud accessible
 

a) Create Apache config file


server:~# vim /etc/apache2/sites-available/owncloud.conf


Alias /owncloud "/var/www/owncloud/"

<Directory /var/www/owncloud/>
Options +FollowSymlinks
AllowOverride All

<IfModule mod_dav.c>
Dav off
</IfModule>

SetEnv HOME /var/www/owncloud
SetEnv HTTP_HOME /var/www/owncloud

</Directory>

b) Enable Mod_Dav (WebDAV) if it is not enabled yet


server:~# ln -sf ../mods-available/dav_fs.conf
server:~# ln -sf ../mods-available/dav_fs.load
server:~# ln -sf ../mods-available/dav.load
server:~# ln -sf ../mods-available/dav_lock.load

c) Set proper permissions for /var/www/owncloud to make upload work properly


chown -R www-data: /var/www/owncloud/


d) Restart Apache WebServer (to make new configuration affective)


server:~# /etc/init.d/apache2 restart


7. Finalize  OwnCloud Install
 

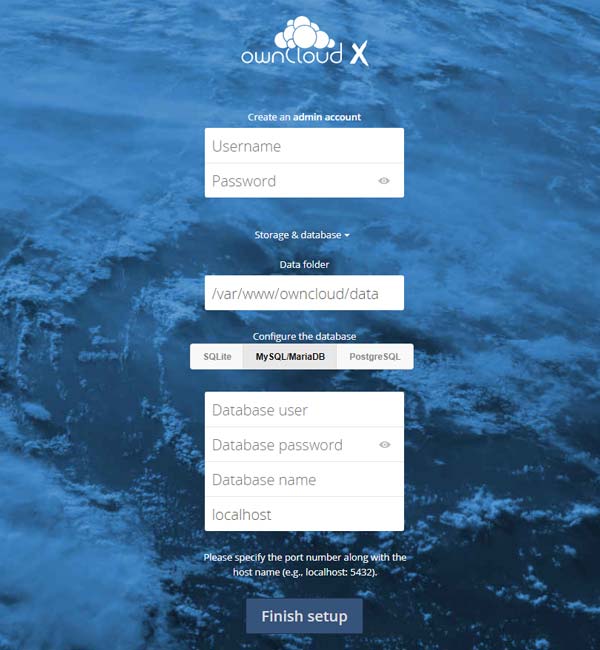
Access OwnCloud Web Interface to finish the database creation and set the administrator password for the New Self-Hosted cloud
 

http://Your_server_ip_address/owncloud/

By default the Web interface is accessible in unencrypted (insecure) http:// it is a recommended practice (if you already don't have an HTTPS SSL certificate install for the IP or the domain to install one either a self-signed certificate or even better to use LetsEncrypt CertBot to easily create a valid SSL for free for your domain


installing-OwnCloud-Web-Config-User-Pass-interface-Owncloud-10-on-Debian-9-Linux-howto

Just fill in in your desired user / pass and pass on the database user / password / db name (if required you can set also a different location for the data directory from the default one /var/www/owncloud/data.

Click Finish Setup and That's all folks!

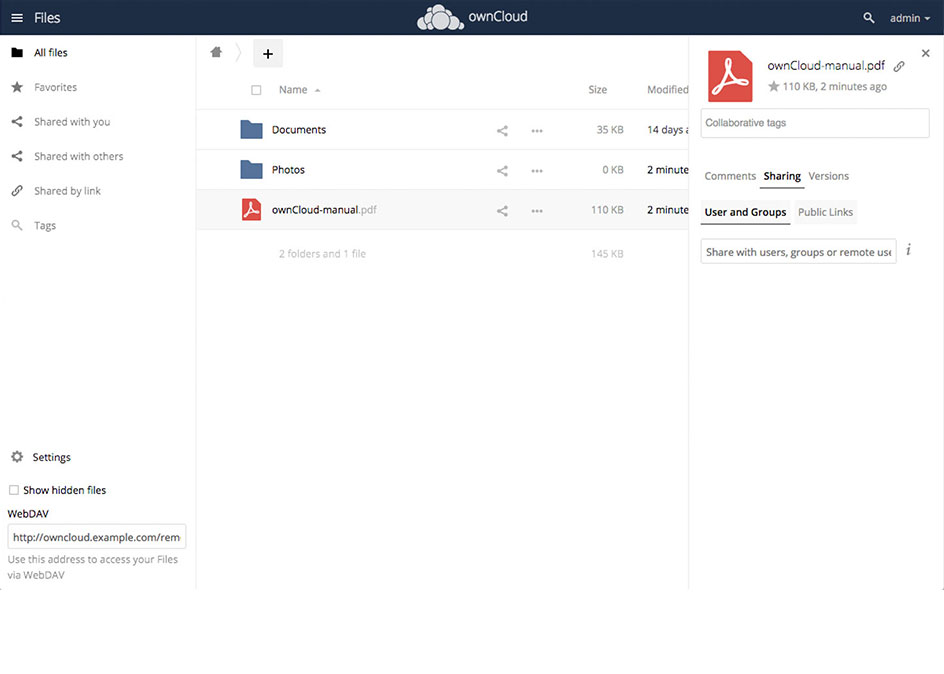
owncloud-server-web-ui-interface

OwnCloud is successfully installed on the server, you can now go and download a Mobile App or Desktop application for whatever OS you're using and start using it as a Dropbox replacement. In a certain moment you might want to consult also the official UserManual documentation as you would probably need further information on how to manage your owncloud.

Enjoy !