Posts Tagged ‘pci’

Install and configure rkhunter for improved security on a PCI DSS Linux / BSD servers with no access to Internet

Wednesday, November 10th, 2021

install-and-configure-rkhunter-with-tightened-security-variables-rkhunter-logo

rkhunter or Rootkit Hunter scans systems for known and unknown rootkits. The tool is not new and most system administrators that has to mantain some good security servers perhaps already use it in their daily sysadmin tasks.

It does this by comparing SHA-1 Hashes of important files with known good ones in online databases, searching for default directories (of rootkits), wrong permissions, hidden files, suspicious strings in kernel modules, commmon backdoors, sniffers and exploits as well as other special tests mostly for Linux and FreeBSD though a ports for other UNIX operating systems like Solaris etc. are perhaps available. rkhunter is notable due to its inclusion in popular mainstream FOSS operating systems (CentOS, Fedora,Debian, Ubuntu etc.).

Even though rkhunter is not rapidly improved over the last 3 years (its last Official version release was on 20th of Febuary 2018), it is a good tool that helps to strengthen even further security and it is often a requirement for Unix servers systems that should follow the PCI DSS Standards (Payment Card Industry Data Security Standards).

Configuring rkhunter is a pretty straight forward if you don't have too much requirements but I decided to write this article for the reason there are fwe interesting options that you might want to adopt in configuration to whitelist any files that are reported as Warnings, as well as how to set a configuration that sets a stricter security checks than the installation defaults. 

1. Install rkhunter .deb / .rpm package depending on the Linux distro or BSD

  • If you have to place it on a Redhat based distro CentOS / Redhat / Fedora

[root@Centos ~]# yum install -y rkhunter


  • On Debian distros the package name is equevallent to install there exec usual:

root@debian:~# apt install –yes rkhunter

  • On FreeBSD / NetBSD or other BSD forks you can install it from the BSD "World" ports system or install it from a precompiled binary.

freebsd# pkg install rkhunter

One important note to make here is to have a fully functional Alarming from rkhunter, you will have to have a fully functional configured postfix / exim / qmail whatever mail server to relay via official SMTP so you the Warning Alarm emails be able to reach your preferred Alarm email address. If you haven't installed postfix for example and configure it you might do.

– On Deb based distros 

[root@Centos ~]#yum install postfix


– On RPM based distros

root@debian:~# apt-get install –yes postfix


and as minimum, further on configure some functional Email Relay server within /etc/postfix/main.cf
 

# vi /etc/postfix/main.cf
relayhost = [relay.smtp-server.com]

2. Prepare rkhunter.conf initial configuration


Depending on what kind of files are present on the filesystem it could be for some reasons some standard package binaries has to be excluded for verification, because they possess unusual permissions because of manual sys admin monification this is done with the rkhunter variable PKGMGR_NO_VRFY.

If remote logging is configured on the system via something like rsyslog you will want to specificly tell it to rkhunter so this check as a possible security issue is skipped via ALLOW_SYSLOG_REMOTE_LOGGING=1. 

In case if remote root login via SSH protocol is disabled via /etc/ssh/sshd_config
PermitRootLogin no variable, the variable to include is ALLOW_SSH_ROOT_USER=no

It is useful to also increase the hashing check algorithm for security default one SHA256 you might want to change to SHA512, this is done via rkhunter.conf var HASH_CMD=SHA512

Triggering new email Warnings has to be configured so you receive, new mails at a preconfigured mailbox of your choice via variable
MAIL-ON-WARNING=SetMailAddress


# vi /etc/rkhunter.conf

PKGMGR_NO_VRFY=/usr/bin/su

PKGMGR_NO_VRFY=/usr/bin/passwd

ALLOW_SYSLOG_REMOTE_LOGGING=1

# Needed for corosync/pacemaker since update 19.11.2020

ALLOWDEVFILE=/dev/shm/qb-*/qb-*

# enabled ssh root access skip

ALLOW_SSH_ROOT_USER=no

HASH_CMD=SHA512

# Email address to sent alert in case of Warnings

MAIL-ON-WARNING=Your-Customer@Your-Email-Server-Destination-Address.com

MAIL-ON-WARNING=Your-Second-Peronsl-Email-Address@SMTP-Server.com

DISABLE_TESTS=os_specific


Optionally if you're using something specific such as corosync / pacemaker High Availability cluster or some specific software that is creating /dev/ files identified as potential Risks you might want to add more rkhunter.conf options like:
 

# Allow PCS/Pacemaker/Corosync
ALLOWDEVFILE=/dev/shm/qb-attrd-*
ALLOWDEVFILE=/dev/shm/qb-cfg-*
ALLOWDEVFILE=/dev/shm/qb-cib_rw-*
ALLOWDEVFILE=/dev/shm/qb-cib_shm-*
ALLOWDEVFILE=/dev/shm/qb-corosync-*
ALLOWDEVFILE=/dev/shm/qb-cpg-*
ALLOWDEVFILE=/dev/shm/qb-lrmd-*
ALLOWDEVFILE=/dev/shm/qb-pengine-*
ALLOWDEVFILE=/dev/shm/qb-quorum-*
ALLOWDEVFILE=/dev/shm/qb-stonith-*
ALLOWDEVFILE=/dev/shm/pulse-shm-*
ALLOWDEVFILE=/dev/md/md-device-map
# Needed for corosync/pacemaker since update 19.11.2020
ALLOWDEVFILE=/dev/shm/qb-*/qb-*

# tomboy creates this one
ALLOWDEVFILE="/dev/shm/mono.*"
# created by libv4l
ALLOWDEVFILE="/dev/shm/libv4l-*"
# created by spice video
ALLOWDEVFILE="/dev/shm/spice.*"
# created by mdadm
ALLOWDEVFILE="/dev/md/autorebuild.pid"
# 389 Directory Server
ALLOWDEVFILE=/dev/shm/sem.slapd-*.stats
# squid proxy
ALLOWDEVFILE=/dev/shm/squid-cf*
# squid ssl cache
ALLOWDEVFILE=/dev/shm/squid-ssl_session_cache.shm
# Allow podman
ALLOWDEVFILE=/dev/shm/libpod*lock*


3. Set the proper mirror database URL location to internal network repository


Usually  file /var/lib/rkhunter/db/mirrors.dat does contain Internet server address where latest version of mirrors.dat could be fetched, below is how it looks by default on Debian 10 Linux.

root@debian:/var/lib/rkhunter/db# cat mirrors.dat 
Version:2007060601
mirror=http://rkhunter.sourceforge.net

As you can guess a machine that doesn't have access to the Internet neither directly, neither via some kind of secure proxy because it is in a Paranoic Demilitarized Zone (DMZ) Network with many firewalls. What you can do then is setup another Mirror server (Apache / Nginx) within the local PCI secured LAN that gets regularly the database from official database on http://rkhunter.sourceforge.net/ (by installing and running rkhunter –update command on the Mirror WebServer and copying data under some directory structure on the remote local LAN accessible server, to keep the DB uptodate you might want to setup a cron to periodically copy latest available rkhunter database towards the http://mirror-url/path-folder/)

# vi /var/lib/rkhunter/db/mirrors.dat

local=http://rkhunter-url-mirror-server-url.com/rkhunter/1.4/


A mirror copy of entire db files from Debian 10.8 ( Buster ) ready for download are here.

Update entire file property db and check for rkhunter db updates


# rkhunter –update && rkhunter –propupdate

[ Rootkit Hunter version 1.4.6 ]

Checking rkhunter data files…
  Checking file mirrors.dat                                  [ Skipped ]
  Checking file programs_bad.dat                             [ No update ]
  Checking file backdoorports.dat                            [ No update ]
  Checking file suspscan.dat                                 [ No update ]
  Checking file i18n/cn                                      [ No update ]
  Checking file i18n/de                                      [ No update ]
  Checking file i18n/en                                      [ No update ]
  Checking file i18n/tr                                      [ No update ]
  Checking file i18n/tr.utf8                                 [ No update ]
  Checking file i18n/zh                                      [ No update ]
  Checking file i18n/zh.utf8                                 [ No update ]
  Checking file i18n/ja                                      [ No update ]


rkhunter-update-propupdate-screenshot-centos-linux


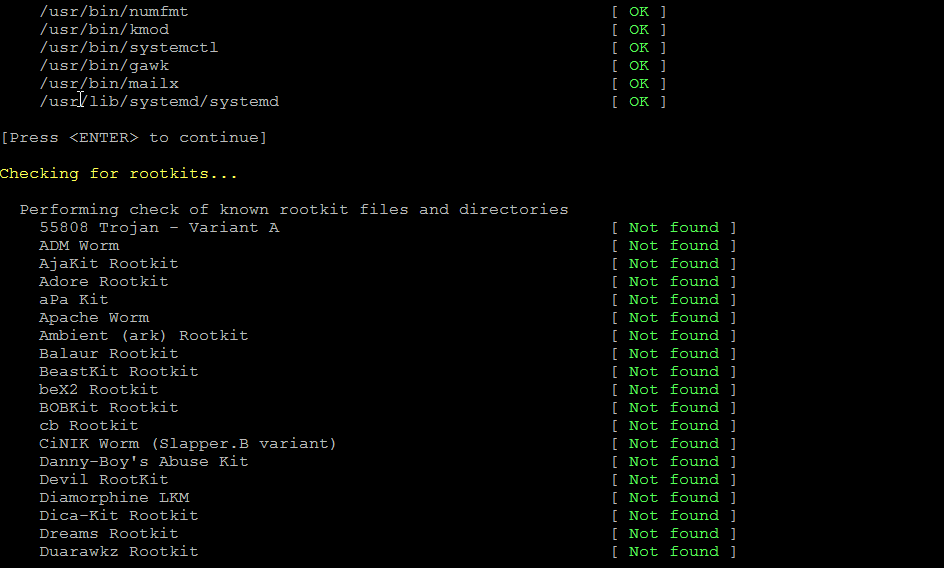
4. Initiate a first time check and see whether something is not triggering Warnings

# rkhunter –check
rkhunter-checking-for-rootkits-linux-screenshot

As you might have to run the rkhunter multiple times, there is annoying Press Enter prompt, between checks. The idea of it is that you're able to inspect what went on but since usually, inspecting /var/log/rkhunter/rkhunter.log is much more easier, I prefer to skip this with –skip-keypress option.

# rkhunter –check  –skip-keypress


5. Whitelist additional files and dev triggering false warnings alerts


You have to keep in mind many files which are considered to not be officially PCI compatible and potentially dangerous such as lynx browser curl, telnet etc. might trigger Warning, after checking them thoroughfully with some AntiVirus software such as Clamav and checking the MD5 checksum compared to a clean installed .deb / .rpm package on another RootKit, Virus, Spyware etc. Clean system (be it virtual machine or a Testing / Staging) machine you might want to simply whitelist the files which are incorrectly detected as dangerous for the system security.

Again this can be achieved with

PKGMGR_NO_VRFY=

Some Cluster softwares that are preparing their own /dev/ temporary files such as Pacemaker / Corosync might also trigger alarms, so you might want to suppress this as well with ALLOWDEVFILE

ALLOWDEVFILE=/dev/shm/qb-*/qb-*


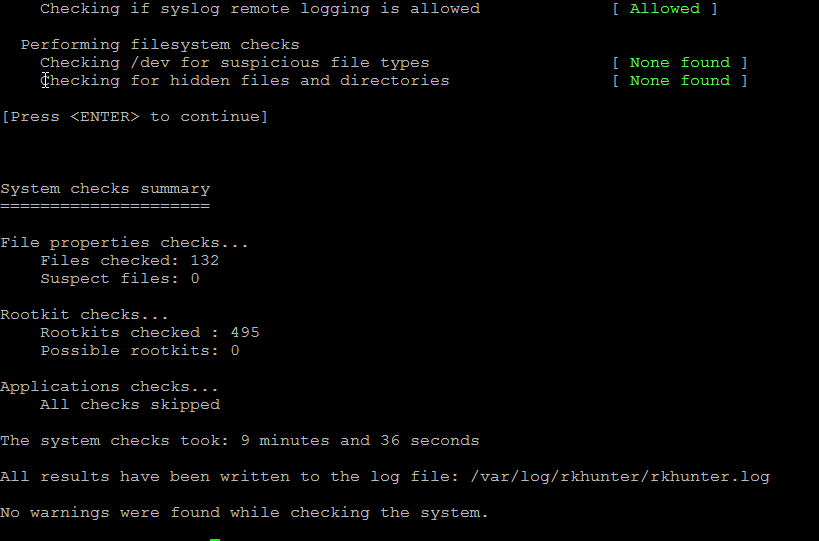
If Warnings are found check what is the issue and if necessery white list files due to incorrect permissions in /etc/rkhunter.conf .

rkhunter-warnings-found-screenshot

Re-run the check until all appears clean as in below screenshot.
rkhunter-clean-report-linux-screenshot

Fixing Checking for a system logging configuration file [ Warning ]

If you happen to get some message like, message appears when rkhunter -C is done on legacy CentOS release 6.10 (Final) servers:

[13:45:29] Checking for a system logging configuration file [ Warning ]
[13:45:29] Warning: The 'systemd-journald' daemon is running, but no configuration file can be found.
[13:45:29] Checking if syslog remote logging is allowed [ Allowed ]

To fix it, you will have to disable SYSLOG_CONFIG_FILE at all.
 

SYSLOG_CONFIG_FILE=NONE

Hack: Using ssh / curl or wget to test TCP port connection state to remote SSH, DNS, SMTP, MySQL or any other listening service in PCI environment servers

Wednesday, December 30th, 2020

using-curl-ssh-wget-to-test-tcp-port-opened-or-closed-for-web-mysql-smtp-or-any-other-linstener-in-pci-linux-logo

If you work on PCI high security environment servers in isolated local networks where each package installed on the Linux / Unix system is of importance it is pretty common that some basic stuff are not there in most cases it is considered a security hole to even have a simple telnet installed on the system. I do have experience with such environments myself and thus it is pretty daunting stuff so in best case you can use something like a simple ssh client if you're lucky and the CentOS / Redhat / Suse Linux whatever distro has openssh-client package installed.
If you're lucky to have the ssh onboard you can use telnet in same manner as netcat or the swiss army knife (nmap) network mapper tool to test whether remote service TCP / port is opened or not. As often this is useful, if you don't have access to the CISCO / Juniper or other (networ) / firewall equipment which is setting the boundaries and security port restrictions between networks and servers.

Below is example on how to use ssh client to test port connectivity to lets say the Internet, i.e.  Google / Yahoo search engines.
 

[root@pciserver: /home ]# ssh -oConnectTimeout=3 -v google.com -p 23
OpenSSH_7.9p1 Debian-10+deb10u2, OpenSSL 1.1.1g  21 Apr 2020
debug1: Connecting to google.com [172.217.169.206] port 23.
debug1: connect to address 172.217.169.206 port 23: Connection timed out
debug1: Connecting to google.com [2a00:1450:4017:80b::200e] port 23.
debug1: connect to address 2a00:1450:4017:80b::200e port 23: Cannot assign requested address
ssh: connect to host google.com port 23: Cannot assign requested address
root@pcfreak:/var/www/images# ssh -oConnectTimeout=3 -v google.com -p 80
OpenSSH_7.9p1 Debian-10+deb10u2, OpenSSL 1.1.1g  21 Apr 2020
debug1: Connecting to google.com [172.217.169.206] port 80.
debug1: connect to address 172.217.169.206 port 80: Connection timed out
debug1: Connecting to google.com [2a00:1450:4017:807::200e] port 80.
debug1: connect to address 2a00:1450:4017:807::200e port 80: Cannot assign requested address
ssh: connect to host google.com port 80: Cannot assign requested address
root@pcfreak:/var/www/images# ssh google.com -p 80
ssh_exchange_identification: Connection closed by remote host
root@pcfreak:/var/www/images# ssh google.com -p 80 -v -oConnectTimeout=3
OpenSSH_7.9p1 Debian-10+deb10u2, OpenSSL 1.1.1g  21 Apr 2020
debug1: Connecting to google.com [172.217.169.206] port 80.
debug1: connect to address 172.217.169.206 port 80: Connection timed out
debug1: Connecting to google.com [2a00:1450:4017:80b::200e] port 80.
debug1: connect to address 2a00:1450:4017:80b::200e port 80: Cannot assign requested address
ssh: connect to host google.com port 80: Cannot assign requested address
root@pcfreak:/var/www/images# ssh google.com -p 80 -v -oConnectTimeout=5
OpenSSH_7.9p1 Debian-10+deb10u2, OpenSSL 1.1.1g  21 Apr 2020
debug1: Connecting to google.com [142.250.184.142] port 80.
debug1: connect to address 142.250.184.142 port 80: Connection timed out
debug1: Connecting to google.com [2a00:1450:4017:80c::200e] port 80.
debug1: connect to address 2a00:1450:4017:80c::200e port 80: Cannot assign requested address
ssh: connect to host google.com port 80: Cannot assign requested address
root@pcfreak:/var/www/images# ssh google.com -p 80 -v
OpenSSH_7.9p1 Debian-10+deb10u2, OpenSSL 1.1.1g  21 Apr 2020
debug1: Connecting to google.com [172.217.169.206] port 80.
debug1: Connection established.
debug1: identity file /root/.ssh/id_rsa type 0
debug1: identity file /root/.ssh/id_rsa-cert type -1
debug1: identity file /root/.ssh/id_dsa type -1
debug1: identity file /root/.ssh/id_dsa-cert type -1
debug1: identity file /root/.ssh/id_ecdsa type -1
debug1: identity file /root/.ssh/id_ecdsa-cert type -1
debug1: identity file /root/.ssh/id_ed25519 type -1
debug1: identity file /root/.ssh/id_ed25519-cert type -1
debug1: identity file /root/.ssh/id_xmss type -1
debug1: identity file /root/.ssh/id_xmss-cert type -1
debug1: Local version string SSH-2.0-OpenSSH_7.9p1 Debian-10+deb10u2
debug1: ssh_exchange_identification: HTTP/1.0 400 Bad Request


debug1: ssh_exchange_identification: Content-Type: text/html; charset=UTF-8


debug1: ssh_exchange_identification: Referrer-Policy: no-referrer


debug1: ssh_exchange_identification: Content-Length: 1555


debug1: ssh_exchange_identification: Date: Wed, 30 Dec 2020 14:13:25 GMT


debug1: ssh_exchange_identification:


debug1: ssh_exchange_identification: <!DOCTYPE html>

debug1: ssh_exchange_identification: <html lang=en>

debug1: ssh_exchange_identification:   <meta charset=utf-8>

debug1: ssh_exchange_identification:   <meta name=viewport content="initial-scale=1, minimum-scale=1, width=device-width">

debug1: ssh_exchange_identification:   <title>Error 400 (Bad Request)!!1</title>

debug1: ssh_exchange_identification:   <style>

debug1: ssh_exchange_identification:     *{margin:0;padding:0}html,code{font:15px/22px arial,sans-serif}html{background:#fff;color:#222;padding:15px}body{margin:7% auto 0;max-width:390px;min-height:180px;padding:30px 0 15px}* > body{background:url(//www.google.com/images/errors/robot.png) 10
debug1: ssh_exchange_identification: 0% 5px no-repeat;padding-right:205px}p{margin:11px 0 22px;overflow:hidden}ins{color:#777;text-decoration:none}a img{border:0}@media screen and (max-width:772px){body{background:none;margin-top:0;max-width:none;padding-right:0}}#logo{background:url(//www.g
debug1: ssh_exchange_identification: oogle.com/images/branding/googlelogo/1x/googlelogo_color_150x54dp.png) no-repeat;margin-left:-5px}@media only screen and (min-resolution:192dpi){#logo{background:url(//www.google.com/images/branding/googlelogo/2x/googlelogo_color_150x54dp.png) no-repeat 0
debug1: ssh_exchange_identification: % 0%/100% 100%;-moz-border-image:url(//www.google.com/images/branding/googlelogo/2x/googlelogo_color_150x54dp.png) 0}}@media only screen and (-webkit-min-device-pixel-ratio:2){#logo{background:url(//www.google.com/images/branding/googlelogo/2x/googlelogo_
debug1: ssh_exchange_identification: color_150x54dp.png) no-repeat;-webkit-background-size:100% 100%}}#logo{display:inline-block;height:54px;width:150px}

debug1: ssh_exchange_identification:   </style>

debug1: ssh_exchange_identification:   <a href=//www.google.com/><span id=logo aria-label=Google></span></a>

debug1: ssh_exchange_identification:   <p><b>400.</b> <ins>That\342\200\231s an error.</ins>

debug1: ssh_exchange_identification:   <p>Your client has issued a malformed or illegal request.  <ins>That\342\200\231s all we know.</ins>

ssh_exchange_identification: Connection closed by remote host


Here is another example on how to test remote host whether a certain service such as DNS (bind) or telnetd is enabled and listening on remote local network  IP with ssh

[root@pciserver: /home ]# ssh 192.168.1.200 -p 53 -v -oConnectTimeout=5
OpenSSH_7.9p1 Debian-10+deb10u2, OpenSSL 1.1.1g  21 Apr 2020
debug1: Connecting to 192.168.1.200 [192.168.1.200] port 53.
debug1: connect to address 192.168.1.200 port 53: Connection timed out
ssh: connect to host 192.168.1.200 port 53: Connection timed out

[root@server: /home ]# ssh 192.168.1.200 -p 23 -v -oConnectTimeout=5
OpenSSH_7.9p1 Debian-10+deb10u2, OpenSSL 1.1.1g  21 Apr 2020
debug1: Connecting to 192.168.1.200 [192.168.1.200] port 23.
debug1: connect to address 192.168.1.200 port 23: Connection timed out
ssh: connect to host 192.168.1.200 port 23: Connection timed out


But what if Linux server you have tow work on is so paranoid that you even the ssh client is absent? Well you can use anything else that is capable of doing a connectivity to remote port such as wget or curl. Some web servers or application servers usually have wget or curl as it is integral part for some local shell scripts doing various operation needed for proper services functioning or simply to test locally a local or remote listener services, if that's the case we can use curl to connect and get output of a remote service simulating a normal telnet connection like this:

host:~# curl -vv 'telnet://remote-server-host5:22'
* About to connect() to remote-server-host5 port 22 (#0)
*   Trying 10.52.67.21… connected
* Connected to aflpvz625 (10.52.67.21) port 22 (#0)
SSH-2.0-OpenSSH_5.3

Now lets test whether we can connect remotely to a local net remote IP's Qmail mail server with curls telnet simulation mode:

host:~#  curl -vv 'telnet://192.168.0.200:25'
* Expire in 0 ms for 6 (transfer 0x56066e5ab900)
*   Trying 192.168.0.200…
* TCP_NODELAY set
* Expire in 200 ms for 4 (transfer 0x56066e5ab900)
* Connected to 192.168.0.200 (192.168.0.200) port 25 (#0)
220 This is Mail Pc-Freak.NET ESMTP

Fine it works, lets now test whether a remote server who has MySQL listener service on standard MySQL port TCP 3306 is reachable with curl

host:~#  curl -vv 'telnet://192.168.0.200:3306'
* Expire in 0 ms for 6 (transfer 0x5601fafae900)
*   Trying 192.168.0.200…
* TCP_NODELAY set
* Expire in 200 ms for 4 (transfer 0x5601fafae900)
* Connected to 192.168.0.200 (192.168.0.200) port 3306 (#0)
Warning: Binary output can mess up your terminal. Use "–output -" to tell
Warning: curl to output it to your terminal anyway, or consider "–output
Warning: <FILE>" to save to a file.
* Failed writing body (0 != 107)
* Closing connection 0
root@pcfreak:/var/www/images#  curl -vv 'telnet://192.168.0.200:3306'
* Expire in 0 ms for 6 (transfer 0x5598ad008900)
*   Trying 192.168.0.200…
* TCP_NODELAY set
* Expire in 200 ms for 4 (transfer 0x5598ad008900)
* Connected to 192.168.0.200 (192.168.0.200) port 3306 (#0)
Warning: Binary output can mess up your terminal. Use "–output -" to tell
Warning: curl to output it to your terminal anyway, or consider "–output
Warning: <FILE>" to save to a file.
* Failed writing body (0 != 107)
* Closing connection 0

As you can see the remote connection is returning binary data which is unknown to a standard telnet terminal thus to get the output received we need to pass curl suggested arguments.

host:~#  curl -vv 'telnet://192.168.0.200:3306' –output –
* Expire in 0 ms for 6 (transfer 0x55b205c02900)
*   Trying 192.168.0.200…
* TCP_NODELAY set
* Expire in 200 ms for 4 (transfer 0x55b205c02900)
* Connected to 192.168.0.200 (192.168.0.200) port 3306 (#0)
g


The curl trick used to troubleshoot remote port to remote host from a Windows OS host which does not have telnet installed by default but have curl instead.

Also When troubleshooting vSphere Replication, it is often necessary to troubleshoot port connectivity as common Windows utilities are not available.
As Curl is available in the VMware vCenter Server Appliance command line interface.

On servers where curl is not there but you have wget is installed you can use it also to test a remote port


# wget -vv -O /dev/null http://google.com:554 –timeout=5
–2020-12-30 16:54:22–  http://google.com:554/
Resolving google.com (google.com)… 172.217.169.206, 2a00:1450:4017:80b::200e
Connecting to google.com (google.com)|172.217.169.206|:554… failed: Connection timed out.
Connecting to google.com (google.com)|2a00:1450:4017:80b::200e|:554… failed: Cannot assign requested address.
Retrying.

–2020-12-30 16:54:28–  (try: 2)  http://google.com:554/
Connecting to google.com (google.com)|172.217.169.206|:554… ^C

As evident from output the port 554 is filtered in google which is pretty normal.

If curl or wget is not there either as a final alternative you can either install some perl, ruby, python or bash script etc. that can opens a remote socket to the remote IP.

Monitoring Linux hardware Hard Drives / Temperature and Disk with lm_sensors / smartd / hddtemp and Zabbix Userparameter lm_sensors report script

Thursday, April 30th, 2020

monitoring-linux-hardware-with-software-temperature-disk-cpu-health-zabbix-userparameter-script

I'm part of a  SysAdmin Team that is partially doing some minor Zabbix imrovements on a custom corporate installed Zabbix in an ongoing project to substitute the previous HP OpenView monitoring for a bunch of Legacy Linux hosts.
As one of the necessery checks to have is regarding system Hardware, the task was to invent some simplistic way to monitor hardware with the Zabbix Monitoring tool.  Monitoring Bare Metal servers hardware of HP / Dell / Fujituse etc. servers  in Linux usually is done with a third party software provided by the Hardware vendor. But as this requires an additional services to run and sometimes is not desired. It was interesting to find out some alternative Linux native ways to do the System hardware monitoring.
Monitoring statistics from the system hardware components can be obtained directly from the server components with ipmi / ipmitool (for more info on it check my previous article Reset and Manage intelligent  Platform Management remote board article).
With ipmi
 hardware health info could be received straight from the ILO / IDRAC / HPMI of the server. However as often the Admin-Lan of the server is in a seperate DMZ secured network and available via only a certain set of routed IPs, ipmitool can't be used.

So what are the other options to use to implement Linux Server Hardware Monitoring?

The tools to use are perhaps many but I know of two which gives you most of the information you ever need to have a prelimitary hardware damage warning system before the crash, these are:
 

1. smartmontools (smartd)

Smartd is part of smartmontools package which contains two utility programs (smartctl and smartd) to control and monitor storage systems using the Self-Monitoring, Analysis and Reporting Technology system (SMART) built into most modern ATA/SATA, SCSI/SAS and NVMe disks

Disk monitoring is handled by a special service the package provides called smartd that does query the Hard Drives periodically aiming to find a warning signs of hardware failures.
The downside of smartd use is that it implies a little bit of extra load on Hard Drive read / writes and if misconfigured could reduce the the Hard disk life time.


linux:~#  /usr/sbin/smartctl -a /dev/sdb2
smartctl 6.6 2017-11-05 r4594 [x86_64-linux-4.19.0-5-amd64] (local build)
Copyright (C) 2002-17, Bruce Allen, Christian Franke, www.smartmontools.org

=== START OF INFORMATION SECTION ===
Device Model:     KINGSTON SA400S37240G
Serial Number:    50026B768340AA31
LU WWN Device Id: 5 0026b7 68340aa31
Firmware Version: S1Z40102
User Capacity:    240,057,409,536 bytes [240 GB]
Sector Size:      512 bytes logical/physical
Rotation Rate:    Solid State Device
Device is:        Not in smartctl database [for details use: -P showall]
ATA Version is:   ACS-3 T13/2161-D revision 4
SATA Version is:  SATA 3.2, 6.0 Gb/s (current: 3.0 Gb/s)
Local Time is:    Thu Apr 30 14:05:01 2020 EEST
SMART support is: Available – device has SMART capability.
SMART support is: Enabled

=== START OF READ SMART DATA SECTION ===
SMART overall-health self-assessment test result: PASSED

General SMART Values:
Offline data collection status:  (0x00) Offline data collection activity
                                        was never started.
                                        Auto Offline Data Collection: Disabled.
Self-test execution status:      (   0) The previous self-test routine completed
                                        without error or no self-test has ever
                                        been run.
Total time to complete Offline
data collection:                (  120) seconds.
Offline data collection
capabilities:                    (0x11) SMART execute Offline immediate.
                                        No Auto Offline data collection support.
                                        Suspend Offline collection upon new
                                        command.
                                        No Offline surface scan supported.
                                        Self-test supported.
                                        No Conveyance Self-test supported.
                                        No Selective Self-test supported.
SMART capabilities:            (0x0002) Does not save SMART data before
                                        entering power-saving mode.
                                        Supports SMART auto save timer.
Error logging capability:        (0x01) Error logging supported.
                                        General Purpose Logging supported.
Short self-test routine
recommended polling time:        (   2) minutes.
Extended self-test routine
recommended polling time:        (  10) minutes.

SMART Attributes Data Structure revision number: 1
Vendor Specific SMART Attributes with Thresholds:
ID# ATTRIBUTE_NAME          FLAG     VALUE WORST THRESH TYPE      UPDATED  WHEN_FAILED RAW_VALUE
  1 Raw_Read_Error_Rate     0x0032   100   100   000    Old_age   Always       –       100
  9 Power_On_Hours          0x0032   100   100   000    Old_age   Always       –       2820
 12 Power_Cycle_Count       0x0032   100   100   000    Old_age   Always       –       21
148 Unknown_Attribute       0x0000   100   100   000    Old_age   Offline      –       0
149 Unknown_Attribute       0x0000   100   100   000    Old_age   Offline      –       0
167 Unknown_Attribute       0x0000   100   100   000    Old_age   Offline      –       0
168 Unknown_Attribute       0x0012   100   100   000    Old_age   Always       –       0
169 Unknown_Attribute       0x0000   100   100   000    Old_age   Offline      –       0
170 Unknown_Attribute       0x0000   100   100   010    Old_age   Offline      –       0
172 Unknown_Attribute       0x0032   100   100   000    Old_age   Always       –       0
173 Unknown_Attribute       0x0000   100   100   000    Old_age   Offline      –       0
181 Program_Fail_Cnt_Total  0x0032   100   100   000    Old_age   Always       –       0
182 Erase_Fail_Count_Total  0x0000   100   100   000    Old_age   Offline      –       0
187 Reported_Uncorrect      0x0032   100   100   000    Old_age   Always       –       0
192 Power-Off_Retract_Count 0x0012   100   100   000    Old_age   Always       –       16
194 Temperature_Celsius     0x0022   034   052   000    Old_age   Always       –       34 (Min/Max 19/52)
196 Reallocated_Event_Count 0x0032   100   100   000    Old_age   Always       –       0
199 UDMA_CRC_Error_Count    0x0032   100   100   000    Old_age   Always       –       0
218 Unknown_Attribute       0x0032   100   100   000    Old_age   Always       –       0
231 Temperature_Celsius     0x0000   097   097   000    Old_age   Offline      –       97
233 Media_Wearout_Indicator 0x0032   100   100   000    Old_age   Always       –       2104
241 Total_LBAs_Written      0x0032   100   100   000    Old_age   Always       –       1857
242 Total_LBAs_Read         0x0032   100   100   000    Old_age   Always       –       1141
244 Unknown_Attribute       0x0000   100   100   000    Old_age   Offline      –       32
245 Unknown_Attribute       0x0000   100   100   000    Old_age   Offline      –       107
246 Unknown_Attribute       0x0000   100   100   000    Old_age   Offline      –       15940

SMART Error Log Version: 1
No Errors Logged

SMART Self-test log structure revision number 1
No self-tests have been logged.  [To run self-tests, use: smartctl -t]

Selective Self-tests/Logging not supported


2. hddtemp


Usually if smartd is used it is useful to also use hddtemp which relies on smartd data.
 The hddtemp program monitors and reports the temperature of PATA, SATA
 or SCSI hard drives by reading Self-Monitoring Analysis and Reporting
 Technology (S.M.A.R.T.)
information on drives that support this feature.
 

linux:~# /usr/sbin/hddtemp /dev/sda1
/dev/sda1: Hitachi HDS721050CLA360: 31°C
linux:~# /usr/sbin/hddtemp /dev/sdc6
/dev/sdc6: KINGSTON SV300S37A120G: 25°C
linux:~# /usr/sbin/hddtemp /dev/sdb2
/dev/sdb2: KINGSTON SA400S37240G: 34°C
linux:~# /usr/sbin/hddtemp /dev/sdd1
/dev/sdd1: WD Elements 10B8: S.M.A.R.T. not available


3. lm-sensors / i2c-tools 

 Lm-sensors is a hardware health monitoring package for Linux. It allows you
 to access information from temperature, voltage, and fan speed sensors.
i2c-tools
was historically bundled in the same package as lm_sensors but has been seperated cause not all hardware monitoring chips are I2C devices, and not all I2C devices are hardware monitoring chips.

The most basic use of lm-sensors is with the sensors command


linux:~# sensors
i350bb-pci-0600
Adapter: PCI adapter
loc1:         +55.0 C  (high = +120.0 C, crit = +110.0 C)


coretemp-isa-0000
Adapter: ISA adapter
Physical id 0:  +28.0 C  (high = +78.0 C, crit = +88.0 C)
Core 0:         +26.0 C  (high = +78.0 C, crit = +88.0 C)
Core 1:         +28.0 C  (high = +78.0 C, crit = +88.0 C)
Core 2:         +28.0 C  (high = +78.0 C, crit = +88.0 C)
Core 3:         +28.0 C  (high = +78.0 C, crit = +88.0 C)


On CentOS Linux useful tool is also  lm_sensors-sensord.x86_64 – A Daemon that periodically logs sensor readings to syslog or a round-robin database, and warns of sensor alarms.

In Debian Linux there is also the psensors-server (an HTTP server providing JSON Web service which can be used by GTK+ Application to remotely monitor sensors) useful for developers
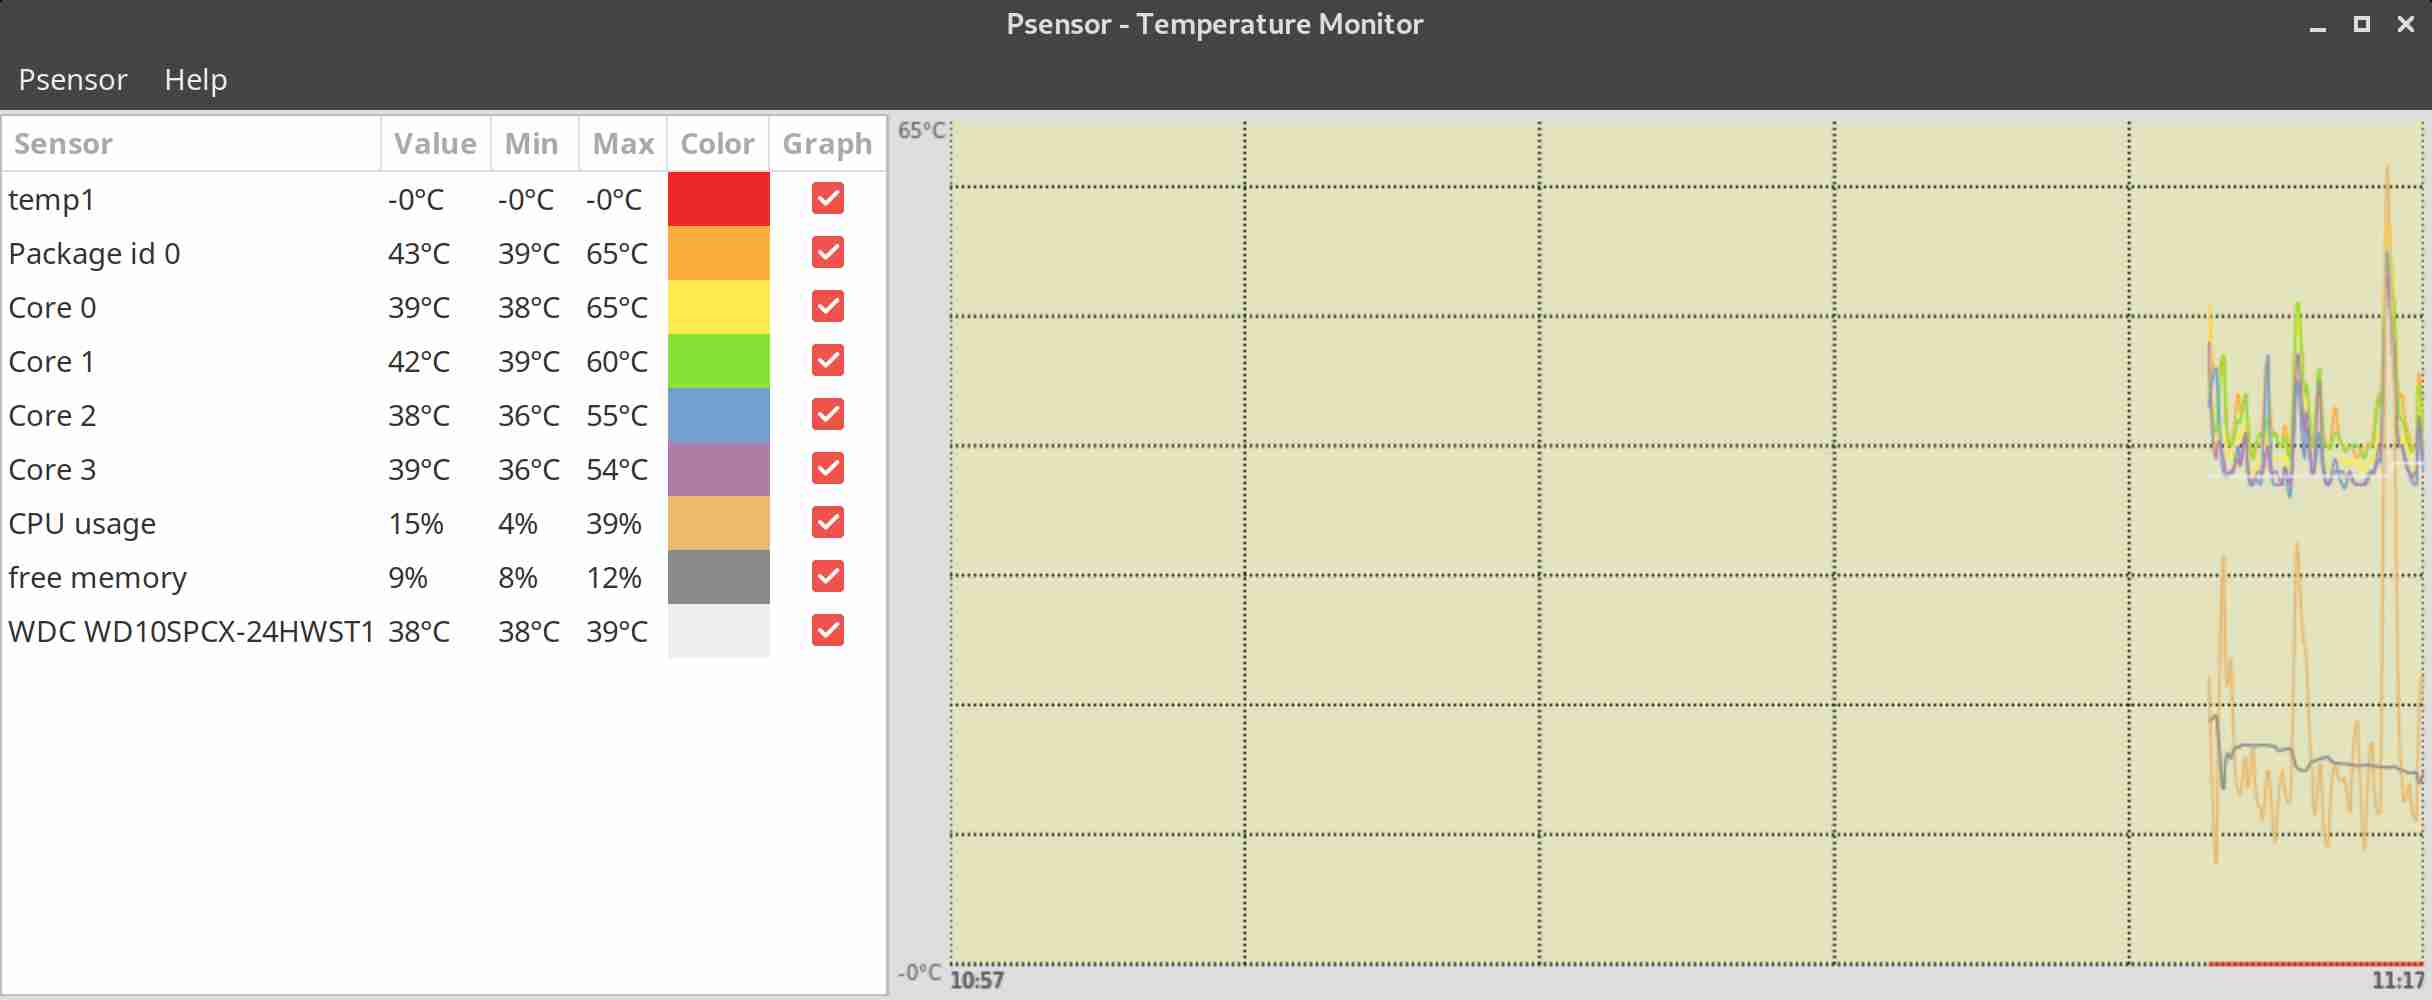
psesors-server

psensor-linux-graphical-tool-to-check-cpu-hard-disk-temperature-unix

If you have a Xserver installed on the Server accessed with Xclient or via VNC though quite rare,
You can use xsensors or Psensora GTK+ (Widget Toolkit for creating Graphical User Interface) application software.

With this 3 tools it is pretty easy to script one liners and use the Zabbix UserParameters functionality to send hardware report data to a Company's Zabbix Sserver, though Zabbix has already some templates to do so in my case, I couldn't import this templates cause I don't have Zabbix Super-Admin credentials, thus to work around that a sample work around is use script to monitor for higher and critical considered temperature.
Here is a tiny sample script I came up in 1 min time it can be used to used as 1 liner UserParameter and built upon something more complex.

SENSORS_HIGH=`sensors | awk '{ print $6 }'| grep '^+' | uniq`;
SENSORS_CRIT=`sensors | awk '{ print $9 }'| grep '^+' | uniq`; ;SENSORS_STAT=`sensors|grep -E 'Core\s' | awk '{ print $1" "$2" "$3 }' | grep "$SENSORS_HIGH|$SENSORS_CRIT"`;
if [ ! -z $SENSORS_STAT ]; then
echo 'Temperature HIGH';
else 
echo 'Sensors OK';
fi 

Of course there is much more sophisticated stuff to use for monitoring out there


Below script can be easily adapted and use on other Monitoring Platforms such as Nagios / Munin / Cacti / Icinga and there are plenty of paid solutions, but for anyone that wants to develop something from scratch just like me I hope this
article will be a good short introduction.
If you know some other Linux hardware monitoring tools, please share.

Graphic tool to get Hardware Information on Linux / How to view Hardware Information easy in Linux

Tuesday, October 3rd, 2017


howto-get-graphically-system-hardware-info-linux-gui-program-for-hardware-recognition-linu


IS THERE A GRAPHIC ( GUI ) TOOL TO VIEW HARDWARE INFORMATION ON LINUX?


If you are a console maniac like myself, perhaps you never think that you might need anything graphical besides to view hardware information on Linux, but as we're growing older sometimes it becomes much less easier to just use a graphical tool that can show us all the information we need regarding a Notebook / Desktop PC with Linux or even Server machine with enabled Graphical Environment with a brand new installed GNU / Linux whatever version (I hope you don't own server with running Xorg / Gnome / Mate / Xfce etc. as that's pretty much a waste of hardware resource and opens a dozen of other security risks for the server running services ).


 There are at least 2 ways to quickly check hardware on both PC WorkStation or Server, the easiest and quickest for PC / Notebook Linux users if you have installed GTK libraries or Gnome Desktop Environment is with;
 

LSHW-GTK


LSHW-GTK is simply a GTK frontend over the command line tool for hardware information gathering LSHW
 

HardiInfo


HardInfo – is a small application that displays information about your hardware and operating system. Currently it knows about PCI, ISA PnP, USB, IDE, SCSI, Serial and parallel port devices.


1. Howto Install LSHW-GTK / HardInfo on Debian / Ubuntu / Mint GNU / Linux to easy view hardware information


To install both of them on Debian / Ubuntu GNU / Linux, run:
 

apt-get install –yes lshw lshw-gtk hardinfo


2. Howto install LSHW-GTK on Fedora, CentOS and OpenSuSE Linux to view easy hardware information

On RedHat RPM based Linux distributions, the package to install is called lshw-gui

Install with yum RPM package manager:
 

yum install –yes lshw lshw-gui  hardinfo


3. Run lshw-gtk / hardinfo

Again, find them and run from GUI environment menus or run manually like in below example:

$ lshw-gtk


graphic-program-to-view-computer-hardware-on-linux-lshw-gtk-on-debian-linux-screenshot-view-hardware-easy-linux1


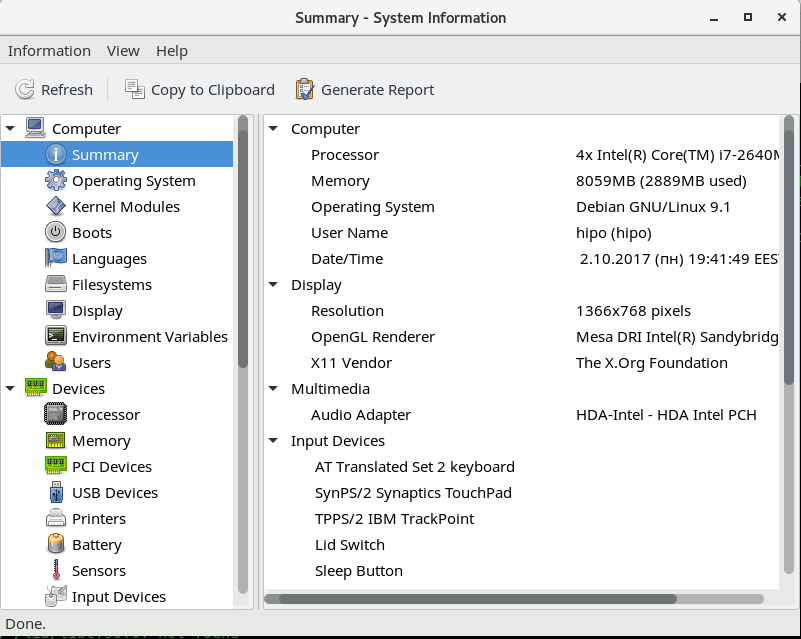
$ hardinfo


hardinfo-a-gui-program-to-view-computer-hardware-info-on-linux-and-freebsd

As you see hardinfo is really interactive and it gives you pretty much all the information, you might need, the only information that was missing at my case and I guess, that would happen to others is information about the SSD Hard Disk, which   180GB

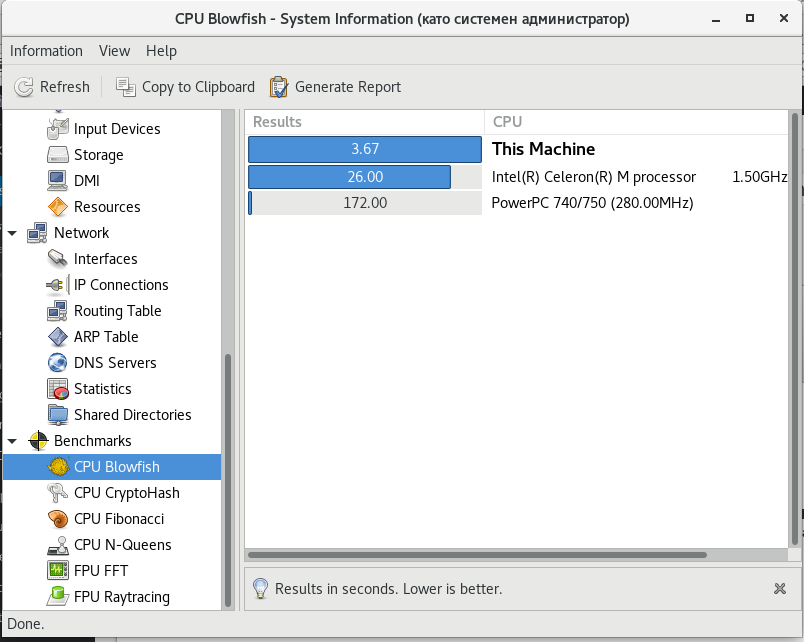
HardInfo is really amazing program as it even includes various common Benchmark Tests and comparison with other Computers:

hardinfo-get-hardware-information-easily-on-linux-and-freebsd-benchmark-info-screenshot-debian-stretch

True that the tests, are pretty simple but still could be useful.

Now run it either from GNOME / Cinnamon (The default graphical environment of Debian Linux) or PLASMA (The new name for the second most popular Linux Graphical Environment – KDE desktop environment)


$ lshw


Here is few more screenshots from hardware info reported from my ThinkPad T410 Laptop Running Debian 9 Stretch at the moment.


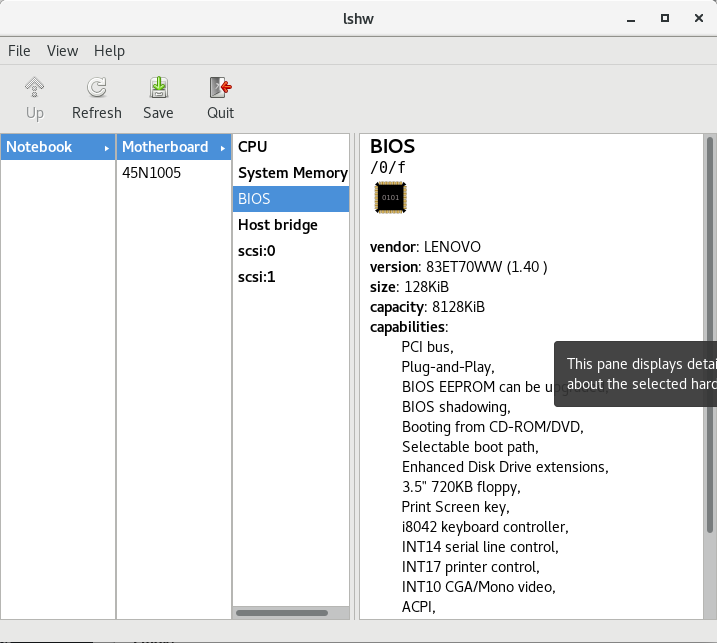
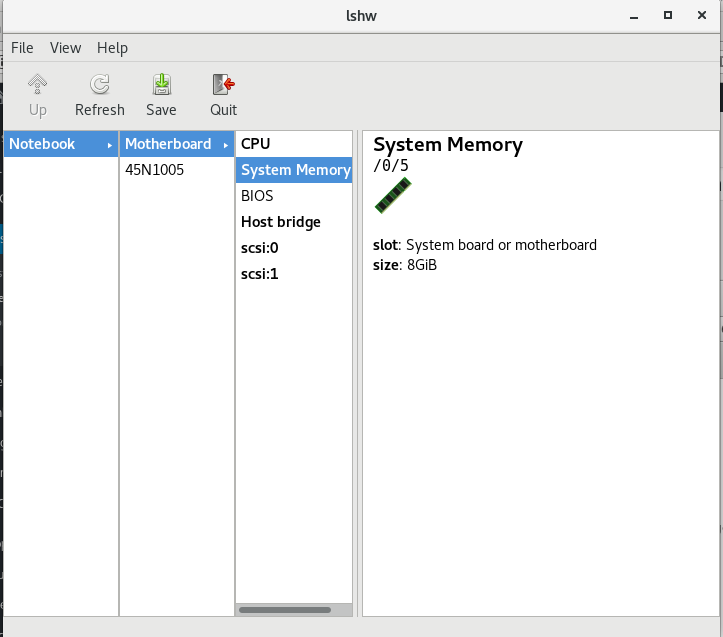
MotherBoard -> BIOS Information

(thatnks God this old but gold Thinkpad T420 business notebook does not run UEFI substitute for BIOS 🙂

graphic-program-to-view-computer-hardware-on-linux-lshw-gtk-on-debian-linux-screenshot-view-hardware-easy-linux2

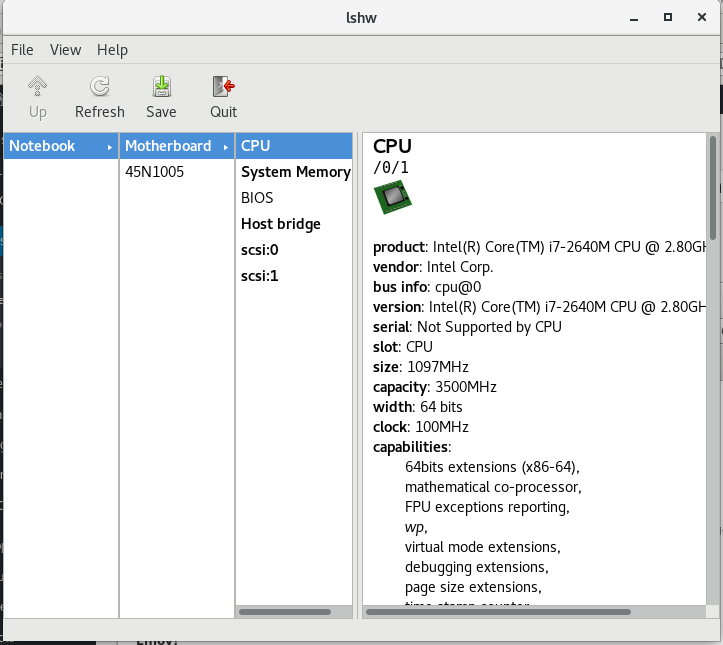
CPU Information (with all the supported CPU capabilities (extensions)

graphic-program-to-view-computer-hardware-on-linux-lshw-gtk-on-debian-linux-screenshot-view-hardware-easy-linux3

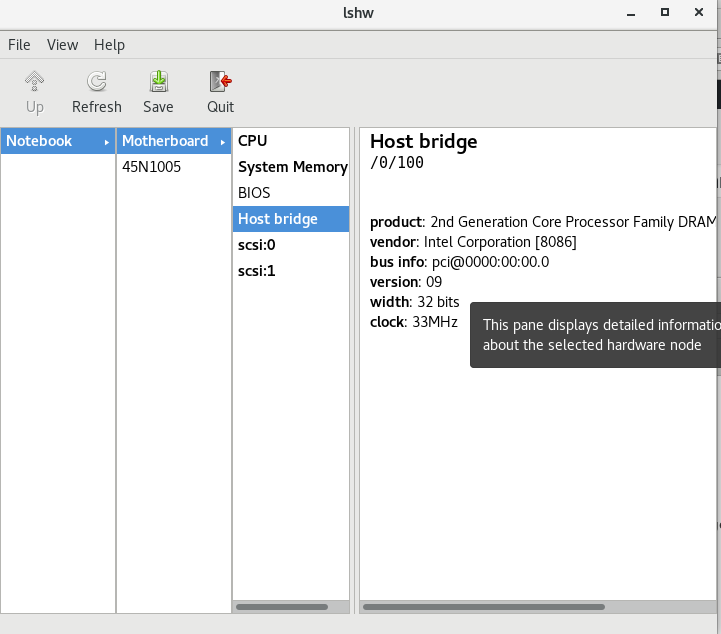
Host Bridge Info

graphic-program-to-view-computer-hardware-on-linux-lshw-gtk-on-debian-linux-screenshot-view-hardware-easy-linux4

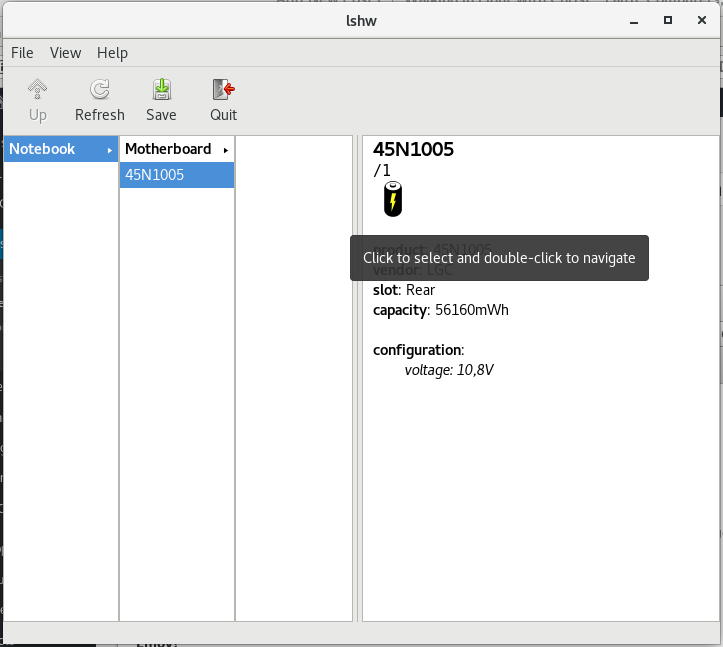
Thinkpad BATTERY (45N1005) Info

graphic-program-to-view-computer-hardware-on-linux-lshw-gtk-on-debian-linux-screenshot-view-hardware-easy-linux5

By the way another Way to GUI View your Computer is to just generate HTML from lshw command line tool (as it supports export to HTML), here is how:


$ lshw -html > ~/hardware-specs.html


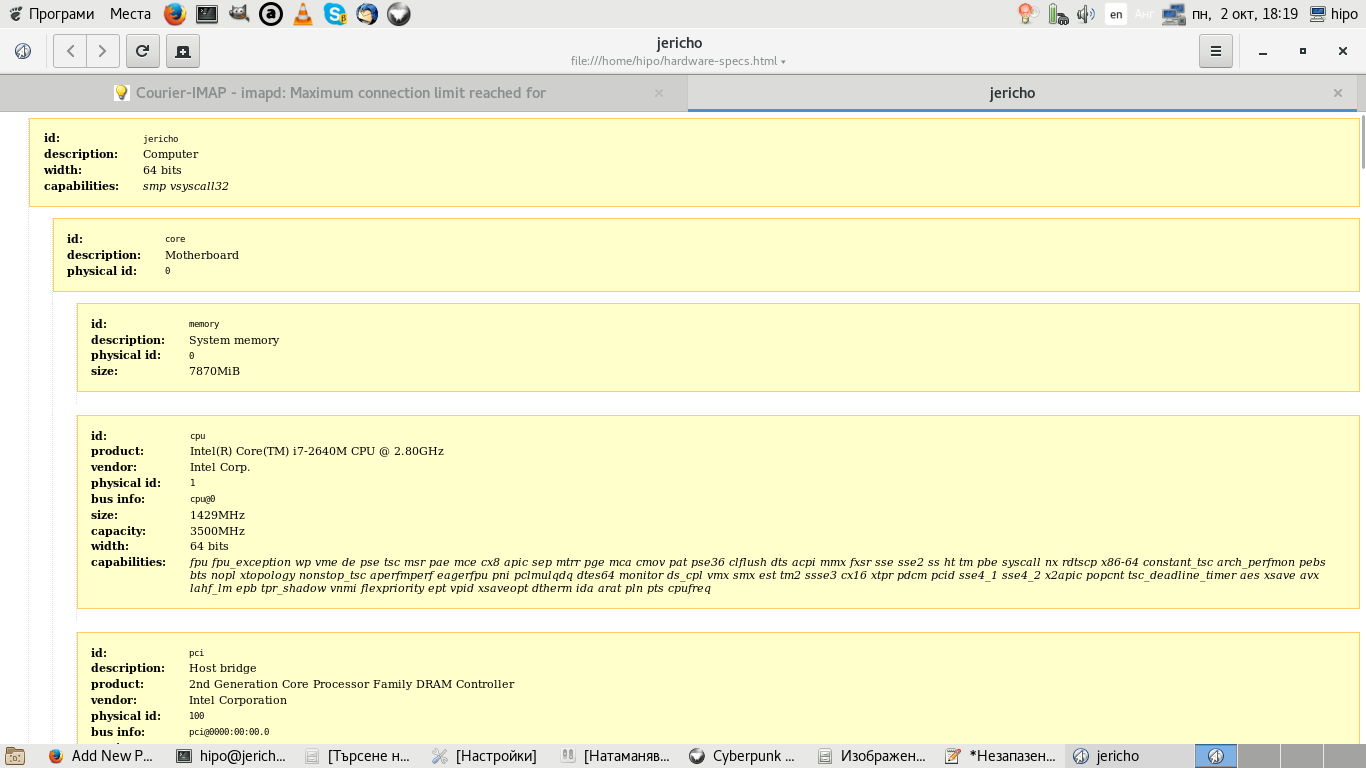
Then just open it with Browser, for example I like GNOME Epiphany browser, so I'll read HTML with it:


$ epiphany ~/hardware-specs.html


graphical-software-to-view-hardware-on-linux-lshw-command-to-generate-html-and-view-it-graphically-in-browser-on-home-pc-or-server


The great thing about generating HTML report for hardware is that on Staging / Production / Development servers which you inherited from some other administrator who for some reason (laziness 🙂 ) didn't left necessery documentation, you can easily map the machine hardware and even if it is a group of machines, you can automate report generation for all of them write a short script that parses the data on each of the HTML reports and finally creates a merged document with main important information about hardware of a cluster of computers etc.

If you still want to stick to console run the console version of lshw or use dmidecode or lshw:


$ lshw

hipo@jericho:~$ lshw
WARNING: you should run this program as super-user.
jericho                     
    description: Computer
    width: 64 bits
    capabilities: smp vsyscall32
  *-core
       description: Motherboard
       physical id: 0
     *-memory
          description: System memory
          physical id: 0
          size: 7870MiB
     *-cpu
          product: Intel(R) Core(TM) i7-2640M CPU @ 2.80GHz
          vendor: Intel Corp.
          physical id: 1
          bus info: cpu@0
          size: 891MHz
          capacity: 3500MHz
          width: 64 bits
          capabilities: fpu fpu_exception wp vme de pse tsc msr pae mce cx8 apic sep mtrr pge mca cmov pat pse36 clflush dts acpi mmx fxsr sse sse2 ss ht tm pbe syscall nx rdtscp x86-64 constant_tsc arch_perfmon pebs bts nopl xtopology nonstop_tsc aperfmperf eagerfpu pni pclmulqdq dtes64 monitor ds_cpl vmx smx est tm2 ssse3 cx16 xtpr pdcm pcid sse4_1 sse4_2 x2apic popcnt tsc_deadline_timer aes xsave avx lahf_lm epb tpr_shadow vnmi flexpriority ept vpid xsaveopt dtherm ida arat pln pts cpufreq
     *-pci
          description: Host bridge
          product: 2nd Generation Core Processor Family DRAM Controller
          vendor: Intel Corporation
          physical id: 100
          bus info: pci@0000:00:00.0
          version: 09
          width: 32 bits
          clock: 33MHz
        *-pci:0
             description: PCI bridge
             product: Xeon E3-1200/2nd Generation Core Processor Family PCI Express Root Port
             vendor: Intel Corporation
             physical id: 1
             bus info: pci@0000:00:01.0
             version: 09
             width: 32 bits
             clock: 33MHz
             capabilities: pci normal_decode bus_master cap_list
             configuration: driver=pcieport
             resources: irq:24 ioport:5000(size=4096) memory:f0000000-f10fffff ioport:c0000000(size=301989888)
           *-generic UNCLAIMED
                description: Unassigned class
                product: Illegal Vendor ID
                vendor: Illegal Vendor ID
                physical id: 0
                bus info: pci@0000:01:00.0
                version: ff
                width: 32 bits
                clock: 66MHz
                capabilities: bus_master vga_palette cap_list
                configuration: latency=255 maxlatency=255 mingnt=255
                resources: memory:f0000000-f0ffffff memory:c0000000-cfffffff memory:d0000000-d1ffffff ioport:5000(size=128) memory:f1000000-f107ffff
        *-display
             description: VGA compatible controller
             product: 2nd Generation Core Processor Family Integrated Graphics Controller
             vendor: Intel Corporation
             physical id: 2
             bus info: pci@0000:00:02.0
             version: 09
             width: 64 bits
             clock: 33MHz
             capabilities: vga_controller bus_master cap_list rom
             configuration: driver=i915 latency=0
             resources: irq:30 memory:f1400000-f17fffff memory:e0000000-efffffff ioport:6000(size=64) memory:c0000-dffff
        *-communication:0
             description: Communication controller
             product: 6 Series/C200 Series Chipset Family MEI Controller #1
             vendor: Intel Corporation
             physical id: 16
             bus info: pci@0000:00:16.0
             version: 04
             width: 64 bits
             clock: 33MHz
             capabilities: bus_master cap_list
             configuration: driver=mei_me latency=0
             resources: irq:27 memory:f3925000-f392500f
        *-communication:1
             description: Serial controller
             product: 6 Series/C200 Series Chipset Family KT Controller
             vendor: Intel Corporation
             physical id: 16.3
             bus info: pci@0000:00:16.3
             version: 04
             width: 32 bits
             clock: 66MHz
             capabilities: 16550 bus_master cap_list
             configuration: driver=serial latency=0
             resources: irq:19 ioport:60b0(size=8) memory:f392c000-f392cfff
        *-network
             description: Ethernet interface
             product: 82579LM Gigabit Network Connection
             vendor: Intel Corporation
             physical id: 19
             bus info: pci@0000:00:19.0
             logical name: enp0s25
             version: 04
             serial: 00:21:cc:cc:b2:27
             capacity: 1Gbit/s
             width: 32 bits
             clock: 33MHz
             capabilities: bus_master cap_list ethernet physical tp 10bt 10bt-fd 100bt 100bt-fd 1000bt-fd autonegotiation
             configuration: autonegotiation=on broadcast=yes driver=e1000e driverversion=3.2.6-k firmware=0.13-3 latency=0 link=no multicast=yes port=twisted pair
             resources: irq:25 memory:f3900000-f391ffff memory:f392b000-f392bfff ioport:6080(size=32)
        *-usb:0
             description: USB controller
             product: 6 Series/C200 Series Chipset Family USB Enhanced Host Controller #2
             vendor: Intel Corporation
             physical id: 1a
             bus info: pci@0000:00:1a.0
             version: 04
             width: 32 bits
             clock: 33MHz
             capabilities: ehci bus_master cap_list
             configuration: driver=ehci-pci latency=0
             resources: irq:16 memory:f392a000-f392a3ff
        *-multimedia
             description: Audio device
             product: 6 Series/C200 Series Chipset Family High Definition Audio Controller
             vendor: Intel Corporation
             physical id: 1b
             bus info: pci@0000:00:1b.0
             version: 04
             width: 64 bits
             clock: 33MHz
             capabilities: bus_master cap_list
             configuration: driver=snd_hda_intel latency=0
             resources: irq:29 memory:f3920000-f3923fff
        *-pci:1
             description: PCI bridge
             product: 6 Series/C200 Series Chipset Family PCI Express Root Port 1
             vendor: Intel Corporation
             physical id: 1c
             bus info: pci@0000:00:1c.0
             version: b4
             width: 32 bits
             clock: 33MHz
             capabilities: pci normal_decode cap_list
             configuration: driver=pcieport
             resources: irq:16
        *-pci:2
             description: PCI bridge
             product: 6 Series/C200 Series Chipset Family PCI Express Root Port 2
             vendor: Intel Corporation
             physical id: 1c.1
             bus info: pci@0000:00:1c.1
             version: b4
             width: 32 bits
             clock: 33MHz
             capabilities: pci normal_decode bus_master cap_list
             configuration: driver=pcieport
             resources: irq:17 memory:f3800000-f38fffff
           *-network
                description: Wireless interface
                product: Centrino Advanced-N 6205 [Taylor Peak]
                vendor: Intel Corporation
                physical id: 0
                bus info: pci@0000:03:00.0
                logical name: wlp3s0
                version: 34
                serial: 26:ad:26:50:f1:db
                width: 64 bits
                clock: 33MHz
                capabilities: bus_master cap_list ethernet physical wireless
                configuration: broadcast=yes driver=iwlwifi driverversion=4.9.0-3-amd64 firmware=18.168.6.1 ip=192.168.0.102 latency=0 link=yes multicast=yes wireless=IEEE 802.11
                resources: irq:28 memory:f3800000-f3801fff
        *-pci:3
             description: PCI bridge
             product: 6 Series/C200 Series Chipset Family PCI Express Root Port 4
             vendor: Intel Corporation
             physical id: 1c.3
             bus info: pci@0000:00:1c.3
             version: b4
             width: 32 bits
             clock: 33MHz
             capabilities: pci normal_decode bus_master cap_list
             configuration: driver=pcieport
             resources: irq:19 ioport:4000(size=4096) memory:f3000000-f37fffff ioport:f1800000(size=8388608)
        *-pci:4
             description: PCI bridge
             product: 6 Series/C200 Series Chipset Family PCI Express Root Port 5
             vendor: Intel Corporation
             physical id: 1c.4
             bus info: pci@0000:00:1c.4
             version: b4
             width: 32 bits
             clock: 33MHz
             capabilities: pci normal_decode bus_master cap_list
             configuration: driver=pcieport
             resources: irq:16 ioport:3000(size=4096) memory:f2800000-f2ffffff ioport:f2000000(size=8388608)
           *-generic
                description: System peripheral
                product: MMC/SD Host Controller
                vendor: Ricoh Co Ltd
                physical id: 0
                bus info: pci@0000:0d:00.0
                version: 08
                width: 32 bits
                clock: 33MHz
                capabilities: bus_master cap_list
                configuration: driver=sdhci-pci latency=0
                resources: irq:16 memory:f2800000-f28000ff
        *-usb:1
             description: USB controller
             product: 6 Series/C200 Series Chipset Family USB Enhanced Host Controller #1
             vendor: Intel Corporation
             physical id: 1d
             bus info: pci@0000:00:1d.0
             version: 04
             width: 32 bits
             clock: 33MHz
             capabilities: ehci bus_master cap_list
             configuration: driver=ehci-pci latency=0
             resources: irq:23 memory:f3929000-f39293ff
        *-isa
             description: ISA bridge
             product: QM67 Express Chipset Family LPC Controller
             vendor: Intel Corporation
             physical id: 1f
             bus info: pci@0000:00:1f.0
             version: 04
             width: 32 bits
             clock: 33MHz
             capabilities: isa bus_master cap_list
             configuration: driver=lpc_ich latency=0
             resources: irq:0
        *-storage
             description: SATA controller
             product: 6 Series/C200 Series Chipset Family 6 port SATA AHCI Controller
             vendor: Intel Corporation
             physical id: 1f.2
             bus info: pci@0000:00:1f.2
             version: 04
             width: 32 bits
             clock: 66MHz
             capabilities: storage ahci_1.0 bus_master cap_list
             configuration: driver=ahci latency=0
             resources: irq:26 ioport:60a8(size=8) ioport:60bc(size=4) ioport:60a0(size=8) ioport:60b8(size=4) ioport:6060(size=32) memory:f3928000-f39287ff
        *-serial
             description: SMBus
             product: 6 Series/C200 Series Chipset Family SMBus Controller
             vendor: Intel Corporation
             physical id: 1f.3
             bus info: pci@0000:00:1f.3
             version: 04
             width: 64 bits
             clock: 33MHz
             configuration: driver=i801_smbus latency=0
             resources: irq:18 memory:f3924000-f39240ff ioport:efa0(size=32)
     *-scsi
          physical id: 2
          logical name: scsi1
          capabilities: emulated
        *-cdrom
             description: DVD-RAM writer
             product: DVDRAM GT50N
             vendor: HL-DT-ST
             physical id: 0.0.0
             bus info: scsi@1:0.0.0
             logical name: /dev/cdrom
             logical name: /dev/cdrw
             logical name: /dev/dvd
             logical name: /dev/dvdrw
             logical name: /dev/sr0
             version: LT20
             capabilities: removable audio cd-r cd-rw dvd dvd-r dvd-ram
             configuration: ansiversion=5 status=nodisc
WARNING: output may be incomplete or inaccurate, you should run this program as super-user.


Enjoy Life ! 🙂

HasciiCAM supposed to stream ASCII video over the network on GNU / Linux

Tuesday, May 22nd, 2012

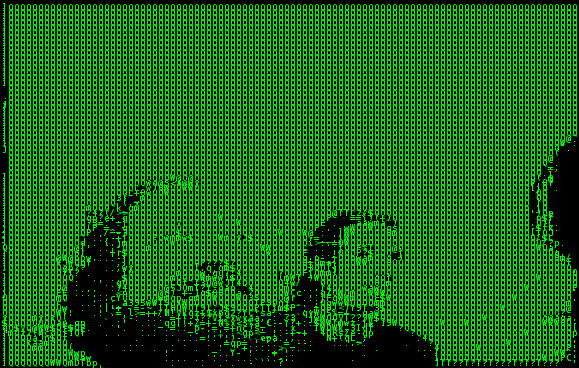
Richard M. Stallman (RMS) Face portrait rendered in ASCII art from a video with hasciicam
To continue with my lately ASCII centered articles I found hasciicam
hasciicam is a program to stream ASCII video over the network on Linux and probably can be easily made working on FreeBSDtoo.

The project concept is interesting in a matter of fun (play) point of view, however not too usable as we all know ASCII character looking faces doesn't look too pretty.

Below is the Debian (Squeeze) package description:

noah:~# apt-cache show hasciicam|grep -i description -A 7
Description: (h)ascii for the masses: live video as text
Hasciicam makes it possible to have live ASCII video on the web. It
captures video from a tv card and renders it into ascii, formatting the
output into an html page with a refresh tag or in a live ASCII window or
in a simple text file as well, giving the possibility to anybody that has a
bttv card, a Linux box and a cheap modem line to show a live ASCII video
feed that can be browsable without any need for plugin, java etc.
Homepage: http://ascii.dyne.org/

On hasciicam Project webpage is it is stated as a hardware you need to have:
 

"As hardware you need to have a webcam or a videocard supported by "video 4 linux", most of the gear you can buy around should work well."

To install and test it I run:

noah:~# apt-get --yes install hasciicam

Though it is stated on the project website supposed to work display video fine with most 'linux ready' webcams, it didn't with this very standard one.

Here is the exact WebCamera model as identified to the kernel:

noah:~# dmesg|grep -i camera
[ 1.433661] usb 2-2: Product: USB2.0 Camera
[ 10.107840] uvcvideo: Found UVC 1.00 device USB2.0 Camera (1e4e:0102)
[ 10.110660] input: USB2.0 Camera as /devices/pci0000:00/0000:00:1d.7/usb2/2-2/2-2:1.0/input/input11

By the way, I use the very same CAM daily on for Skype video calls as well as the Camera is working with no problems to save video or pictures inside Cheese

Here is the exact WebCamera model as identified to the kernel:

noah:~# dmesg|grep -i camera
[ 1.433661] usb 2-2: Product: USB2.0 Camera
[ 10.107840] uvcvideo: Found UVC 1.00 device USB2.0 Camera (1e4e:0102)
[ 10.110660] input: USB2.0 Camera as /devices/pci0000:00/0000:00:1d.7/usb2/2-2/2-2:1.0/input/input11

The just installed deb has one binary file only /usr/bin/hasciicam. To test it with the camera I issued:

noah:~# hasciicam -d /dev/video0
HasciiCam 1.0 - (h)ascii 4 the masses! - http://ascii.dyne.org
(c)2000-2006 Denis Roio < jaromil @ dyne.org >
watch out for the (h)ASCII ROOTS

Device detected is /dev/video0
USB2.0 Camera
1 channels detected
max size w[640] h[480] - min size w[48] h[32]
Video capabilities:
VID_TYPE_CAPTURE can capture to memory
!! error in ioctl VIDIOCGMBUF: : Invalid argument

Unfortunately as you see from the output, it failed to detect the web camera model.
The exact camera besides its kernel detection naminf is a cheap external USB 2.0 (fake brand / nonanem) "universal" Web PC Camera (SUPER .3mega pixel)

For those who have a further interest in building and installing hasciicam on other Linux platforms than Debian and Ubuntu or whoever wants to look in the code check check Project webpage is. For those who are less of programmers (like me) the project is written in C programming language and uses aa-lib in order to render the video to ASCII.

On the site you will notice two totally schizophrenic looking pictures of presumably the project head developer …

hasciiart video streamed ASCII screenshot of some crazy looking guy smoking marijuanna or smth

As I read in man hasciicam manual page it's said to be able to generate ascii plain text and html files as well as directly to write the output to console, which later probably can be streamed via the network.
Pitily as it didn't detect my camera I couldn't make some testing of its network capabilities.

A Streaming of ASCII couuld be done through pushing the .html output to a webserver and setting a php or javascript to loop through and refresh the browser over the uploaded files every sec or so.

Also I assume the ASCII video output saved in plain console could be streamed via netcat or some tiny scripted perl or bash script and directly observed via a telnet or ssh connection.
One playful way I can think of checking a stored video without the use of FTP is to login via ssh and do:

$ ssh someuser@somehost
$ watch -n 1 "cat video-ascii.html"

🙂

Well something disturbing about hasciicam from a (purely Christian point of view) is it was developed by some kind of non profit organization called RastaSoft on the project website, some of its authors has written JAH BLESS.

As I didn't succeeded seeing it working, I'll be interested to hear if someone who red this article and give it a try can report the web camera model used.

How to test if USB Camera is working with Cheese on GNU / Linux

Friday, December 23rd, 2011

I just bought an USB Camera (my notebook doesn't include an embedded camera). The camera is some infamous brand chineese name Eilondo
and on the camera all that is written is SUPER USB2.0 1.3 mega pixel

I bought exactly this camera because I was said by the shop reseller that the camera works without any driver installations on Windows XP and Windows Vista

On my Debian Squeeze GNU / Linux it was detected in dmesg without any troubles, here is how the camera got detected in my kernel log :

debian:~# dmesg |tail -n 10
[25385.734932] usb 2-1: USB disconnect, address 4
[25388.905049] usb 2-1: new high speed USB device using ehci_hcd and address 5
[25389.050753] usb 2-1: New USB device found, idVendor=1e4e, idProduct=0102
[25389.050757] usb 2-1: New USB device strings: Mfr=1, Product=2, SerialNumber=0
[25389.050760] usb 2-1: Product: USB2.0 Camera
[25389.050762] usb 2-1: Manufacturer: Etron Technology, Inc.
[25389.050936] usb 2-1: configuration #1 chosen from 1 choice
[25389.056056] uvcvideo: Found UVC 1.00 device USB2.0 Camera (1e4e:0102)
[25389.058242] uvcvideo: UVC non compliance - GET_DEF(PROBE) not supported. Enabling workaround.
[25389.059113] input: USB2.0 Camera as /devices/pci0000:00/0000:00:1d.7/usb2/2-1/2-1:1.0/input/input26

I was troubled by the message uvcvideo: UVC non compliance – GET_DEF(PROBE) not supported. Enabling workaround. , and hence looked for an application to test if the camera can recored properly.

While checking in packages available in Software Center , I found a plenty of programs under the search keyword Camera
I however decided to test it using just one application Cheese A tool to take pictures and videos from your webcam which I've seen to be quite popular among Liunx users.
Cheese is part of GNOME Desktop, so that was another reason I decided to give it a try. I was pleasently surprised about how good these tiny but functional proggie is.

To run Cheese in GNOME I nagivated to the menus:

Applications -> Sound & Video -> Cheese Webcam Booth

Just in case if Cheese is not installed, installing it with apt:

debian:~# apt-get install cheese

Cheese has capabilities to take pictures, a consequential photos take up, as well as create Video movies.

Cheese take camera testing tool Debian GNU Linux

The program has support to apply 12 Effects / (Masks) to add some fun to the pictures or video snapshots.

Test Video Camera on Debian Linux Cheese Effects

Probably the best thing about Cheese is its simplistic interface, which for me personally is a main criterion to evaluate a program quality ;).