Updating a version of Ubuntu version 9.04 to the latest stable release is actually very simple and BORING.
It takes some long time and a lot of clicking, however eventually, the upgrade to the latest Ubuntu will be at hand.
The whole upgrade philosophy to Upgrade an outdated Ubuntu distribution to the newest supported stable Ubuntu release is in a consequentual number of release to release upgrades.
Let’s say you’re running Ubuntu 9.04 (Jaunty Jackalope and) you want to upgrade to Ubuntu 11.10 TLS
then you will have to to the following step by step upgrades;
Upgrade Ubuntu from;
- Ubuntu 9.04 to Ubuntu 9.10
- Ubuntu 9.10 to Ubuntu 10.04
- Ubuntu 10.04 to Ubuntu 10.10
- Ubuntu 10.10 to Ubuntu 11.04
- Ubuntu 11.04 to Ubuntu 11.11
Now let’s start upgrading …
1. Upgrade Ubuntu 9.04 to Ubuntu 9.10
Press Alt+F2 and type:
update-manager -d
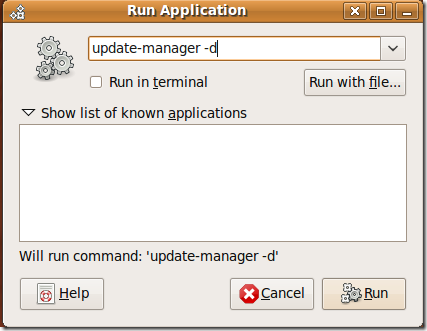
Press the Run Button afterwards to launch the command.
You will be prompted for your Linux administrator password, so type it in.
Next the command will launch the Update Manager . The update manager will show you all the available updates.
The Update Manager will show you the update options, it should say something like:
New distribution release ‘9.10’ is available
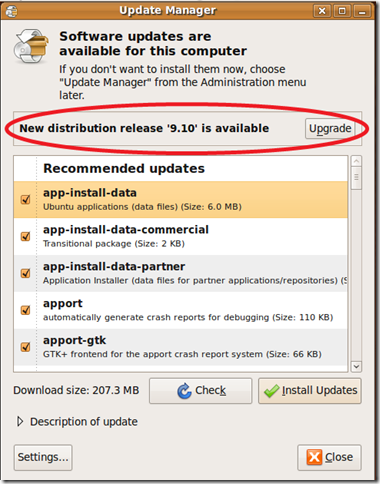
Click Over the Update button and wait.
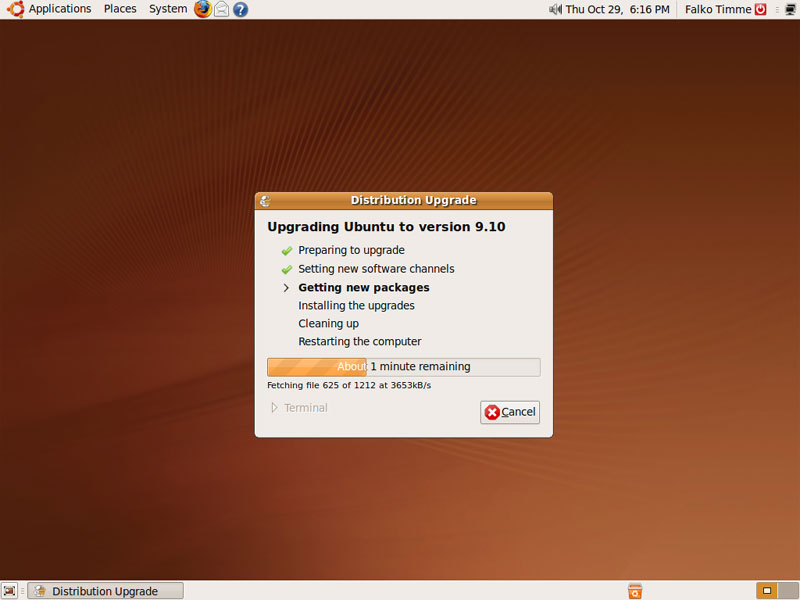
The Ubuntu update will went by by few steps:
1. Preparing Updates
2. Setting new software channels
3. Getting new packages
4. Installing the updates
5. Cleaning up
6. Restarting the computer
You will see further on a screen reading “Support for some applications ended”, on that screen simply press the Close button.
Further on you will be prompted with a windows reading:
Do you want to start the upgrade? You have to click over Start Upgrade button to finally begin with the upgrade process.
Now a prompt window will appearing asking you to reboot the system, when the prompt appears click over:
Restart Now
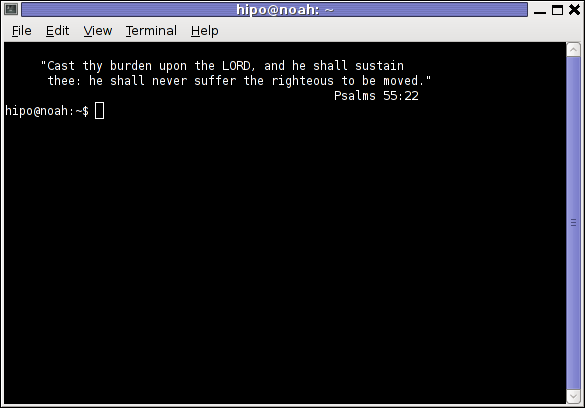
After the upgrade the new release of Ubuntu 9.10 will start booting up, and you will see a screen similar to the picture below:

Now as you have updated from Ubuntu 9.04 next step is to upgrade to Ubuntu 10.04
Now guess what you will have to upgrade the trivial quick update procedures once again.
Once again launch the Ubuntu Update Manager
System -> Administration -> Update Manager
Now as you have updated from Ubuntu 9.04 next step is to upgrade to Ubuntu 10.04 (LTS – Lucid Lynx)
Now guess what you will have to upgrade the trivial quick update procedures once again.
Once again launch the Ubuntu Update Manager
System -> Administration -> Update Manager
Now follow the above described procedure with update-manager -d
After repeating the few trivial steps you will have Ubuntu 10.04 LTS on your Desktop
Further on complete the trivial update steps with the update-manager to update to Ubuntu release 10.10 (Maverick Meerkat).
After having succesfully upgraded to version 10.10, now repeat the boring update procedures described in the beginning of the article to update to Ubuntu 11.04
Now as you should be with Ubuntu 11.04, upgrade once again with update-manager to Ubuntu 11.04 (Natty Narwhal).
And ast a last, once again with the update-manager -d update following the instructions to Ubuntu 11.10.
I’m pretty sure this is one of my most boring articles ever …
It’s interesting fact that I learn once from a friend of mine about the Ubuntu distribution. The Ubuntu distribution has it’s versioning based on months and year whether a version is out for instance Ubuntu 9.04 means this Ubuntu release is released on (Month 04 (April), year 2009)), Ubuntu 11.10 Means this distribution is released in (year 2011, month 10 (October)).


How to enable Ctrl+Alt+Backspace in Ubuntu 11.10 (Oneiric Ocelot) Linux
Monday, January 16th, 2012My sister, experience some programs running with wine (Windows Emulator) to crash on her Ubuntu 11.10.
As she is quite new with Linux, she has no idea about the existence of CTRL ALT BACKSPACE key combination to restart a hanged GNOME, KDE by directly killing the Xorg server.
I felt obliged to explain her it is better to use CTRL ALT BACKSPACE X kill switch instead of restarting the whole Linux kernel (which basiclly is working) and that it is just the display keeping blacnk.
Pressing the would kill Xorg and therefore all applicatins previously running on top of it will die. In Ubuntu Xorg is configured to run via gdm, so once killed it will automatically reload the GDM (Gnome Display Manager).
I was about to explain her that its better she use CTRL+ALT+BACKSPACE instead of restarting the whole system but suddenly I realized this is not working.
In UBUNTU 11.10 and I guess in all UBUNTU's after 9.04 CTRL ALT BACKSPACE is substituted with the key switch combination ALT PRINTSCREEN K, I've explained her about that.
This change is actually a change implied by most Linux distributions nowdas and is some kind of change in Xorg newer versions…
To enable back the CTRL + ALT + BACKSPACE , I've issued cmd:
stanimira@ubuntu~:$ echo' setxkbmap -option terminate:ctrl_alt_bksp' >> ~/.xinitrc
An alternative way to set setxkbmap -option terminate:ctrl_alt_bksp to run on Ubuntu user login is by setting it as a startup application using;
stanimira@ubuntu:~$ gnome-session-properties
Press the Add button and type in the box to appear;
Name: setxkbmap

Command: setxkbmap -option terminate:ctrl_alt_bksp

Comment: setxkbmap
Reverting the Xserver kill switch back to the classical Ctrl+Alt+Backspace should also be running fine on older Ubuntu Linuces – 11.04, 10.10, 10.04 etc.
Tags: add button, Alt, Auto, backspace, Button, change, Comment, Ctrl, Display, Draft, existence, GDM, Gnome, kde, key switch, kill, kill switch, Linux, linux kernel, login, most linux distributions, ocelot, option, Press, printscreen, Reverting, session properties, setxkbmapCommand, startup, startup application, switch combination, type, Ubuntu, wine, wine windows, xinitrcAn, Xorg, xserver
Posted in Linux, Linux and FreeBSD Desktop | No Comments »