Posts Tagged ‘proxy server’

Windows 10 install local Proxy server to Save bandwidth on a slow and limited Mobile Phone HotSpot network Shared connections

Wednesday, August 20th, 2025

https://pc-freak.net/images/how-to-use-local-proxy-to-speed-up-internet-speed-connectivity-on-windows-os-with-squid-and-privoxy

If you're running on Internet ISP that is providing via a Internet / Wifi Router device with a 3G / 4G / 5G etc. but your receiving point location is situated somewhere very far in a places like High mountains lets say Rila Mountain or  Alps on a very distant places where Internet coverate of Inetner Service Provider is low or very low but you need still to Work / Play / Entertain on the Net frequently.
Hence you will cenrtainly be looking for a ways to Speed Up / Optimize the Internet connectivity somehow.
You cannot do miracles but certainly the daily operations and a pack up of repeating traffic can be achieved by using installing and using simple local proxy server.

The advantages of using a proxy are even more besides the speed up of Internet connection lines, here is the Pros you get by using the proxy:
 

  • Using Caches frequently accessed content (e.g., images, scripts, web pages).
  • Blocks ads and trackers (reduces bandwidth).
  • Compresses data (if needed)
  • Can serve multiple local devices if needed.
     

To save bandwidth on a slow and limited connectivity Internet router or mobile phone hotspot using Windows 10, you can install a local proxy server that:

Here’s a step-by-step guide to set this up:
 

Install a local caching proxy server on Windows 10 to reduce bandwidth usage over a mobile hotspot.


1. Install Squid (Caching Proxy Server)

Squid is a powerful and widely used open-source caching proxy.

Download Squid for Windows

Download Squid for Windows from:

https://squid.acmeconsulting.it/download (Unofficial, stable build)

or compile it manually (if you're having an own Linux or BSD router that is passing on the traffic)

2. Install Squid Proxy sever on Windows


2.1. Extract or install the downloaded Squid package.


2.2. Install it as a Windows Service

Open Command Prompt (Admin) and run:

C:\\Users\\hipo\\Downloads> squid -i

Initialize cache directories:
 

C:\\Users\\hipo\\Downloads> squid -z


3. Configure Squid Proxy via squid.conf


3.1. Open squid.conf

usually in

C:\\Squid\\etc\\squid\\squid.conf
 

3.2. Edit key lines:  

http_port 3128
cache_dir ufs c:/squid/var/cache 100 16 256
access_log c:/squid/var/logs/access.log
cache_log c:/squid/var/logs/cache.log
maximum_object_size 4096 KB
cache_mem 64 MB


3.3. Allow local access:


acl localnet src 192.168.0.0/16
http_access allow localnet

(Adjust IP ranges according to your network.)


Here's a ready-to-use Squid configuration file optimized for Running on Windows 10:

  • Caching web content to save bandwidth
  • Blocking ads and trackers
  • Allowing local device connections


Location for the squid Config File
 

The Windows squid installer should have setup the Squid proxy by default inside C:\Squid so the full path to squid.conf should be:
Place this as

squid.conf

in:

C:\\Squid\\etc\\squid\\squid.conf


# BASIC CONFIGURATION
http_port 3128
visible_hostname localhost

# CACHE SETTINGS
cache_mem 128 MB
maximum_object_size 4096 KB
maximum_object_size_in_memory 512 KB
cache_dir ufs c:/squid/var/cache 100 16 256
cache_log c:/squid/var/logs/cache.log
access_log c:/squid/var/logs/access.log

# DNS
dns_nameservers 8.8.8.8 1.1.1.1

# ACLs (Access Control Lists)
acl localhost src 127.0.0.1/32
acl localnet src 192.168.0.0/16
acl Safe_ports port 80      # HTTP
acl Safe_ports port 443     # HTTPS
acl Safe_ports port 21      # FTP
acl CONNECT method CONNECT

# BLOCKED DOMAINS (Ad/Tracking)
acl ads dstdomain .doubleclick.net .googlesyndication.com .googleadservices.com
acl ads dstdomain .ads.yahoo.com .adnxs.com .track.adform.net
http_access deny ads

# SECURITY & ACCESS CONTROL
http_access allow localhost
http_access allow localnet
http_access deny !Safe_ports
http_access deny CONNECT !SSL_ports
http_access deny all

# REFRESH PATTERNS (Cache aggressively)
refresh_pattern ^ftp:           1440    20%     10080
refresh_pattern ^gopher:        1440    0%      1440
refresh_pattern -i \.jpg$       10080   90%     43200
refresh_pattern -i \.png$       10080   90%     43200
refresh_pattern -i \.gif$       10080   90%     43200
refresh_pattern -i \.css$       10080   90%     43200
refresh_pattern -i \.js$        10080   90%     43200
refresh_pattern -i \.html$      1440    90%     10080
refresh_pattern .               0       20%     4320

# LOGGING
logfile_rotate 10


4. Start the Squid Win Service from Admin command prompt

C:\Users\hipo> net start squid


5. Test the Proxy


Set the proxy server in your Windows proxy settings:
 

  • Go to Settings > Network & Internet > Proxy
     
  • Enable Manual proxy setup:

Address: 127.0.0.1

Port: 3128

Browse the web — Squid will now cache content locally.

Make sure

C:\Squid\var\cache

and

C:\Squid\var\logs

exist.

You can expand the ad block list by importing public blocklists. Let me know if you want help with that.

To share this proxy with other local devices, ensure they’re on the same network and allowed via ACL.
 

6. Block Ads and Save More Bandwidth with the Proxy

You can modify Squid to:

Block ad domains (using

acl

rules or a blacklist)

Limit download sizes

Restrict background updates or telemetry

Example rule to block a domain:

acl ads dstdomain .doubleclick.net .ads.google.com http_access deny ads


7. Use Aternative lightweight Proxy Privoxy (Lightweight filtering proxy) 

What is Privoxy?

Privoxy is a lightweight, highly customizable proxy server focused on privacy protection, content filtering, and web page optimization.

Unlike caching proxies (like Squid), Privoxy doesn’t store data locally—but it filters and blocks unnecessary traffic before it even reaches your browser.

7.1. Why Use Privoxy to Speed Up Internet?

Here's how Privoxy helps:

Feature Benefit
 Blocks Ads & Banners Reduces page load size and clutter
 Stops Trackers Prevents background data requests
Filters Pop-ups Improves usability and safety
Speeds Up Web Browsing By stripping unwanted content
Low Resource Usage Works on older or low-spec systems


Privoxy is easier to set up than Squid and usually much more simple and fits well if you want something simpler and more light weight and is also great for ad/tracker blocking.
To install and use it it comes to 4 simple steps

  1. Download from: https://www.privoxy.org/

  2. Install and run it.

  3. Configure browser/system to use proxy lets say on:

    127.0.0.1:8118

  4. Customize

    config.txt

    to add block rules.

7.2. Configure Your Web Browser or System Proxy

Set your browser/system to use the local Privoxy proxy:

Proxy address:

127.0.0.1

Port:

8118

On Windows:

Go to Settings > Network & Internet > Proxy

Enable Manual Proxy Setup

Enter:

Address:

127.0.0.1

Port:

8118

Save

7.3: Enable Privoxy Filtering and Blocking Rules

Privoxy comes with built-in rules for:

  • Ad blocking
  • Tracker blocking
  • Cookie management
  • Script filtering

You can customize filters in the configuration files via following configs:

Main config:

C:\\Program Files (x86)\\Privoxy\\config


Action files:

C:\\Program Files (x86)\\Privoxy\\default.action


Filter files:

C:\\Program Files (x86)\\Privoxy\\default.filter


7.4. Example to Block All Ads with Privoxy

Look in

default.action

and ensure these are uncommented:


{ +block }


Or add specific ad server domains:

{ +block{Ad Servers} }
.com.doubleclick.net
.ads.google.com
.adnxs.com


You can further use community-maintained blocklists for stronger Ads filtering.


Privoxy does not compress traffic, so to speed up even further with privoxy you might Compress traffic to do so use ziproxy (the http traffic compressor).

Now all your HTTP traffic is routed through Privoxy and you will notice search engines and repeatingly accessed websites pictures and Internet resources such as css / javscript / htmls etc. will give a boost !

How to do a port redirect to localhost service with socat or ncat commands to open temporary access to service not seen on the network

Friday, February 23rd, 2024

socat-simple-redirect-tcp-port-on-linux-bsd-logo

You know sometimes it is necessery to easily and temporary redirect network TCP ports to be able to be accessible from Internal DMZ-ed Network via some Local Network IP connection or if the computer system is Internet based and has an external "'real" Internet Class A / B address to be reachable directly from the internet via lets say a modern Internet browser such as Mozilla Firefox / Google Chrome Browser etc.

Such things are easy to be done with iptables if you need to do the IP redirect permanent with Firewall rule changes on Linux router with iptables.
One way to create a TCP port redirect using firewall would include few iptable rules  like for example:

1. Redirect port traffic from external TCP port source to internal one

# iptables -t nat -I PREROUTING -p tcp –dport 10000 -j REDIRECT –to-ports 80
# iptables -t nat -I OUTPUT -p tcp -o lo –dport 10000 -j REDIRECT –to-ports 80
# iptables -t nat -A OUTPUT -o lo -d 127.0.0.1 -p tcp –dport 80 -j DNAT  –to-destination 192.168.0.50:10000
# iptables -t nat -I OUTPUT –source 0/0 –destination 0/0 -p tcp –dport 80 -j REDIRECT –to-ports 10000


Then you will have 192.168.00.50:10000 listener (assuming that the IP is already configured on some of the host network interface, plugged in to the network).

 But as messing up with the firewall is not the best thing to do especially, if you need to just temporary redirect external listener port to a service configured on the server to only run on TCP port on loopback address 127.0.0.1, you can do it instead with another script or command for simplicy.

One simple way to do a port redirect on the fly on GNU / Linux or FreeBSD / OpenBSD is with socat command.

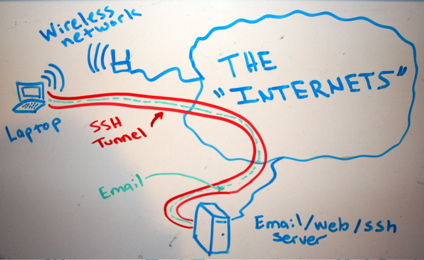
Lets say you have a running statistics of a web server Apache / Nginx / Haproxy frontend / backend statistics or whatever kind of web TCP service on port 80 on your server and this interface is on purpose configured to be reachable only on localhost interface port 80, so you can either access it by creating an ssh tunnel towards the service on 127.0.0.1 or by accessing it by redirecting the traffic towards another external TCP port, lets say 10000.

Here is how you can achieve

2. Redirect Local network accessible IP on all configured Server network interfaces port 10000 to 127.0.0.1 TCP 80 with socat

# socat tcp-l:10000,fork,reuseaddr tcp:127.0.0.1:80

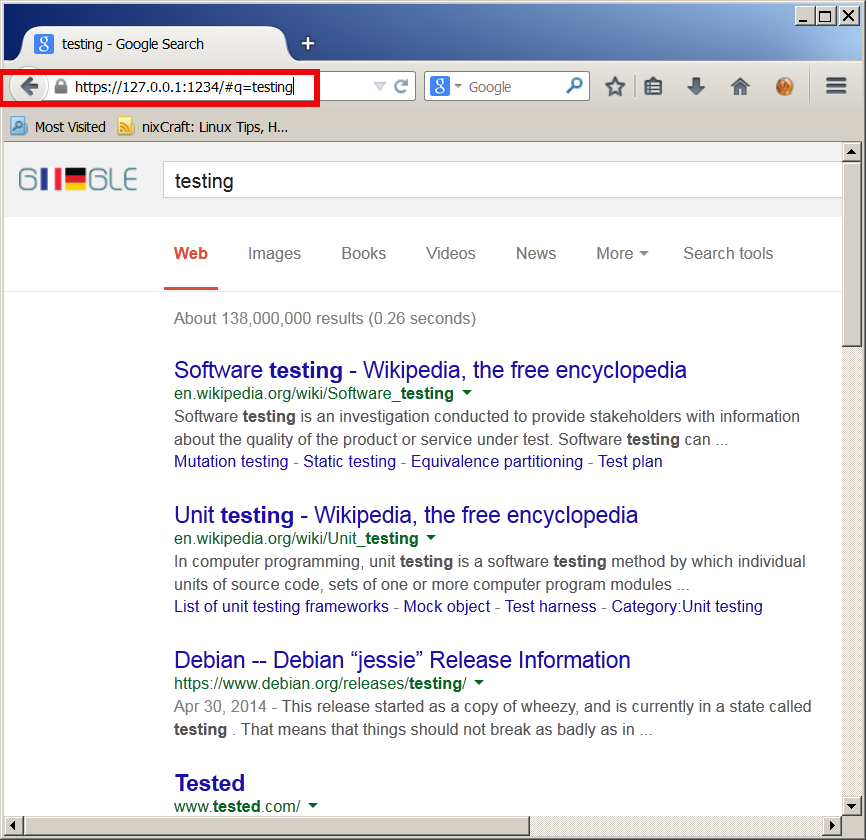
If you need to access later the redirected port in a Browser, pick up the machine first configured IP and open it in a browser (assuming there is no firewall filter prohibiting access to redirected port).

root@pcfreak:~# ifconfig eth0
eth0: flags=4163<UP,BROADCAST,RUNNING,MULTICAST>  mtu 1500
        inet 109.104.212.130  netmask 255.255.255.0  broadcast 109.104.212.255
        ether 91:f8:51:03:75:e5  txqueuelen 1000  (Ethernet)
        RX packets 652945510  bytes 598369753019 (557.2 GiB)
        RX errors 0  dropped 10541  overruns 0  frame 0
        TX packets 619726615  bytes 630209829226 (586.9 GiB)
        TX errors 0  dropped 0 overruns 0  carrier 0  collisions 0

Then in a browser open http://102.104.212.130 or https://102.104.212.130 (depending on if remote service has SSL encryption enabled or not) and you're done, the configured listener Server service should pop-up on the screen.

3. Redirect IP Traffic from External IP to Localhost loopback interface with netcat ( ncat ) swiss army knife hackers and sysadmins tool

If you need to redirect lets say TCP / IP port 8000 to Port a server local binded service on TCP 80 with ncat, instead of socat (if lets say socat is not pre-installed on the machine), you can do it by simply running those two commands:

[root@server ~]# mkfifo svr1_to_svr2
[root@server ~]# ncat -vk -l 8000 < svr1_to_svr2 | ncat 127.0.0.1 80 > svr1_to_svr2
Ncat: Version 7.92 ( https://nmap.org/ncat )
Ncat: Listening on 0.0.0.0:10000
Ncat: Connection from 10.10.258.39.
Ncat: Connection from 10.10.258.39:51813.
Ncat: Connection from 10.10.258.39.
Ncat: Connection from 10.10.258.39:23179.


I you don't care to log what is going on the background of connection and you simply want to background the process with a one liner command you can achive that with:


[root@server /tmp]# cd tmp; mkfifo svr1_to_svr2; (ncat -vk -l 8000 < svr1_to_svr2 | ncat 127.0.0.1 80 > svr1_to_svr2 &)
 

Then you can open the Internal Machine Port 80 TCP service on 8000 in a browser as usual.

For those who want a bit of more sophisticated proxy like script I would suggest you take a look at using netcat and a few lines of shell script loop, that can simulate a raw and very primitive proxy with netcat this is exampled in my previous article Create simple proxy server with netcat ( nc ) based utility.

Hope this article is helpful to anyone, there is plenty of other ways to do a port redirect with lets say perl, python and perhaps other micro tools. If you know of one liners or small scripts, that do it please share in comments, so we can learn from each other ! 

Enjoy ! 🙂
 

Create simple proxy http server with netcat ( nc ) based tiny shell script

Tuesday, January 26th, 2021

use-Netcat_proxy-picture

The need of proxy server is inevitable nowadays especially if you have servers located in a paranoid security environments. Where virtually all is being passed through some kind of a proxy server. In my work we have recently started a  CentOS Linux release 7.9.2009 on HP Proliant DL360e Gen8 (host named rhel-testing).

HP DL360e are quite old nowadays but since we have spare servers and we can refurnish them to use as a local testing internal server Hypervisor it is okay for us. The machine is attached to a Rack that is connected to a Secured Deimilitarized Zone LAN (DMZ Network) which is so much filtered that even simple access to the local company homebrew RPM repository is not accessible from the machine.
Thus to set and remove software from the machine we needed a way to make yum repositories be available, and it seems the only way was to use a proxy server (situated on another accessible server which we use as a jump host to access the testing machine).

Since opening additional firewall request was a time consuming non-sense and the machine is just for testing purposes, we had to come with a solution where we can somehow access a Local repository RPM storage server http://rpm-package-server-repo.com/ for which we have a separate /etc/yum.repos.d/custom-rpms.repo definition file created.

This is why we needed a simplistic way to run a proxy but as we did not have the easy way to install privoxy / squid / haproxy or apache webserver configured as a proxy (to install one of those of relatively giant piece of software need to copy many rpm packages and manually satisfy dependencies), we looked for a simplistic way to run a proxy server on jump-host machine host A.

A note to make here is jump-host that was about to serve as a proxy  had already HTTP access towards the RPM repositories http://rpm-package-server-repo.com and could normally fetch packages with curl or wget via it …

For to create a simple proxy server out of nothing, I've googled a bit thinking that it should be possible either with BASH's TCP/IP capabilities or some other small C written tool compiled as a static binary, just to find out that netcat swiss army knife as a proxy server bash script is capable of doing the trick.

Jump host machine which was about to be used as a proxy server for http traffic did not have enabled access to tcp/port 8888 (port's firewall policies were prohibiting access to it).Since 8888 was the port targetted to run the proxy to allow TCP/IP port 8888 accessibility from the testing RHEL machine towards jump host, we had to issue first on jump host:

[root@jump-host: ~ ]# firewall-cmd –permanent –zone=public –add-port=8888/tcp

To run the script once placed under /root/tcp-proxy.sh on jump-host we had to run a never ending loop in a GNU screen session to make sure it runs forever:

Original tcp-proxy.sh script used taken from above article is:
 

#!/bin/sh -e


if [ $# != 3 ]
then
    echo "usage: $0 <src-port> <dst-host> <dst-port>"
    exit 0
fi

TMP=`mktemp -d`
BACK=$TMP/pipe.back
SENT=$TMP/pipe.sent
RCVD=$TMP/pipe.rcvd
trap 'rm -rf "$TMP"' EXIT
mkfifo -m 0600 "$BACK" "$SENT" "$RCVD"
sed 's/^/ => /' <"$SENT" &
sed 's/^/<=  /' <"$RCVD" &
nc -l -p "$1" <"$BACK" | tee "$SENT" | nc "$2" "$3" | tee "$RCVD" >"$BACK"


Above tcp-proxy.sh script you can download here.

I've tested the script one time and it worked, the script syntax is:

 [root@jump-host: ~ ]#  sh tcp-proxy.sh
usage: tcp-proxy.sh <src-port> <dst-host> <dst-port>


To make it work for one time connection I've run it as so:


 [root@jump-host: ~ ]# sh tcp-proxy.sh 8888 rpm-package-server-repo.com 80


To make the script work all the time I had to use one small one liner infinite bash loop which goes like this:

[root@jump-host: ~ ]#  while [ 1 ]; do sh tcp-proxy.sh 8888 rpm-package-server-repo.com 80; done​

On rhel-testing we had to configure for yum and all applications to use a proxy temporary via
 

[root@rhel-tresting: ~ ]# export http_proxy=jump-host_machine_accessibleIP:8888


And then use the normal yum check-update && yum update to apply to rhel-testing machine latest RPM package security updates.

The nice stuff about the tcp-proxy.sh with netcat in a inifite loop is you will see the binary copy of traffic flowing on the script which will make you feel like in those notorious Hackers movies ! 🙂

The stupid stuff is that sometimes some connections and RPM database updates or RPMs could be cancelled due to some kind of network issues.

To make the connection issues that are occuring to the improvised proxy server go away we finally used a slightly modified version from the original netcat script, which read like this.
 

#!/bin/sh -e


if [ $# != 3 ]
then
    echo "usage: $0 <src-port> <dst-host> <dst-port>"
        exit 0
        fi

        TMP=`mktemp -d`
        BACK=$TMP/pipe.back
        SENT=$TMP/pipe.sent
        RCVD=$TMP/pipe.rcvd
        trap 'rm -rf "$TMP"' EXIT
        mkfifo -m 0600 "$BACK" "$SENT" "$RCVD"
        sed 's/^/ => /' <"$SENT" &
        sed 's/^/<=  /' <"$RCVD" &
        nc –proxy-type http -l -p "$1" <"$BACK" | tee "$SENT" | nc "$2" "$3" | tee "$RCVD" >"$BACK"


Modified version tcp-proxy1.sh with –proxy-type http argument passed to netcat script u can download here.

With –proxy-type http yum check-update works normal just like with any normal fully functional http_proxy configured.

Next step wasto make the configuration permanent you can either add to /root/.bashrc or /etc/bashrc (if you need the setting to be system wide for every user that logged in to Linux system).

[root@rhel-tresting: ~ ]#  echo "http_proxy=http://jump-host_machine_accessibleIP:8888/" > /etc/environment


If you need to set the new built netcat TCP proxy only for yum package update tool include proxy only in /etc/yum.conf:

[root@rhel-tresting: ~ ]# vi /etc/yum.conf
proxy=http_proxy=http://jump-host_machine_accessibleIP:8888/


That's all now you have a proxy out of nothing with just a simple netcat enjoy.

How to use wget and curl via HTTP Proxy server / How to set a HTTPS proxy server on a bash shell on Linux

Wednesday, January 27th, 2016

linux-ssl-proxy-configuration-from-command-line-with-wget-and-curl-howto

I've been working a bit on a client's automation, the task is to automate process of installations of Apaches / Tomcats / JBoss and Java servers, so me and colleagues don't waste too
much time in trivial things. To complete that I've created a small repository on a Apache with a WebDav server with major versions of each general branch of Application servers and Javas.
In order to access the remote URL where the .tar.gz binaries archives reside, I had to use a proxy serve as the client runs all his network in a DMZ and all Web Port 80 and 443 HTTPS traffic inside the client network
has to pass by the network proxy.

Thus to make the downloads possible via the shell script, writting I needed to set the script to use the HTTPS proxy server. I've been using proxy earlier and I was pretty aware of the http_proxy bash shell
variable thus I tried to use this one for the Secured HTTPS proxy, however the connection was failing and thanks to colleague Anatoliy I realized the whole problem is I'm trying to use http_proxy shell variable
which has to only be used for unencrypted Proxy servers and in this case the proxy server is over SSL encrypted HTTPS protocol so instead the right variable to use is:
 

https_proxy


The https_proxy var syntax, goes like this:

proxy_url='http-proxy-url.net:8080';
export https_proxy="$proxy_url"

how-to-set-https_proxy_url-on-linux-freebsd-openbsd-bsd-and-unix-from-terminal-console

Once the https_proxy variable is set  UNIX's wget non interactive download tool starts using the proxy_url variable set proxy and the downloads in my script works.

Hence to make the different version application archives download work out, I've used wget like so:
 

 wget –no-check-certificate –timeout=5 https://full-path-to-url.net/file.rar


For other BSD / HP-UX / SunOS UNIX Servers where  shells are different from Bourne Again (Bash) Shell, the http_proxy and  https_proxy variable might not be working.
In such cases if you have curl (command line tool) is available instead of wget to script downloads you can use something like:
 

 curl -O -1 -k –proxy http-proxy-url.net:8080 https://full-path-to-url.net/file.rar

The http_proxy and https_proxy variables works perfect also on Mac OS X, default bash shell, so Mac users enjoy.
For some bash users in some kind of firewall hardened environments like in my case, its handy to permanently set a proxy to all shell activities via auto login Linux / *unix scripts .bashrc or .bash_profile that saves the inconvenience to always
set the proxy so lynx and links, elinks text console browsers does work also anytime you login to shell.

Well that's it, my script enjoys proxying traffic 🙂
 

Creating Dynamic SSH Tunnel on Windows with Plink – Scriptable SSH Tunnels on Windows

Friday, July 4th, 2014

creating-ssh-tunnel-on-windows-with-plink-ssh-tunnel-diagram-tunnel-email-traffic

In my earlier articles I've explained about Creating SSH Tunnels on Linux and BSD and how to create SSH Tunnels with Putty Terminal client on Windows.

Creating SSH Tunnels is a precious knowledge every advanced computer user, a system administrator or security expert should be well aware of.

Probably still there are plenty of people for which the SSH Tunnelling is something never heard of or even if heard it is a mythical term covered by ancient shadows 🙂

So What is an SSH Tunnel? – SSH Tunnels shortly explained.

A SSH tunnel consists of an encrypted tunnel created through a SSH protocol
connection
.

An SSH tunnel can be used to transfer unencrypted traffic over a
network through an encrypted channel
between two hosts (host A and Host B) usually using remote and local port.

Requirements for SSH tunnel

Where Host B has to be running a version of OpenSSH server on some reachable port from Host B, (lets say 22).
Host B OpenSSH server has to be with (enabled X11Forwarding X11Forwarding yes in /etc/ssh/sshd_config) and Host A needs to have some SSH client supporting port forwarding (ssh command on Linux – part of (openssh-client package) and on Windows – Putty / Plink or any other of the many available ssh tunneling clients).

Probably most common SSH Tunnel use is to bypass firewalls that prohibits or filter certain internet services.
In other words SSH Tunnels can be used to get around firewall filtering. If you never heard of Bypassing firewalls with port forwarding I recommend to check this article

We can use a ssh tunnel to securely transfer files between a FTP server and a client even though the FTP
protocol itself is not encrypted
, Tnnel traffic to an SQL server, Tunnel traffic from your Desktop PC to a Proxy
SSH tunnels can be used to tunnel outbound E-mail traffic back to your work PC to avoid having to change SMTP servers etc.

A very common SSH Tunnel use is by office workers who don't want their Custom Web browsing habbits and Web history be tracked,

For people who has to travel a lot tunneling SSH traffic from notebook to your home based SMTP is mandatory, otherwise your e-mail passwords, might end up captured by someone who manages the Free WI-FI used by you somewhere on the road or cafeteria. Another good case use of SSH Tunnel is to tunnel VNC traffic.

SSH Tunneling was historically very famous in days where IRC (Internet Relay Chat) and used to be common way (for people who want to prevent their real IP address from publicly visible) on the Internet.
SSH Tunneling is great way to maintain high communication security, however because it requires some basic technical knowledge most people neglect it or never heard of it, so I hope this article will give at least basic ideas to people new to tunneling.

How to create SSH Tunnels on Microsoft Windows

SSH Tunneling has been originally invented on UNIX / Linux platform, luckily nowdays it is easily possible to create SSH tunnels on almost any moden OS (including Mac OS X and M$ Windows).

Using Plink it is possible to create easily (batch) scriptable SSH tunnels on Windows

Generally here is example of basic plink use syntax:
 

plink.exe {remote-host} -P 22 -C -D 10080 -l username -pw password
 

To make a Tunnel with Plink to remote SSH Server (remote-ssh-server.com) listening for connections on port 22 on localhost 10022

"C:Program Files (x86)PuTTYplink.exe" -ssh remote-username@tunnel-to-ssh-server-host.com -pw PASSWORD123 -C -T -D 127.0.0.1:10022 -N

-D – option instructs Plink to make "Dynamic SOCKS-based port forwarding"
Dynamic Socks-based port forwarding will make your ssh client a simple socks server which listen to port 10022 for incoming connections.
-Ttells plink not to open interactive shell on remote server (disable pty allocation)
-Cenables traffic compression

Using the -D option you can prepare tunnel to traffic all your outgoing server traffic via the SSH tunneling host.

E. g. -D allows you to use the remote ssh server as a proxy server with no need for remote server to run anything except SSH service and have Internet connection.

-N – stands for "don't start shell/command SSH-2 only"

On success of SSH Tunnel establishing you will get a pop-up window similar to below screenshot (note that some of the messages in cmd line are from a batch script – if no batch script is used you wil only get a window with "Using Username":

plink_establishing_ssh_tunnel-on-microsoft-windows-screenshot

Note: That if you're about to be using Plink command frequently add it to your Windows SYSTEM PATH (check my previous article – how to add Putty to System PATH) to enable it invokable without writting the full command path location.

Once this Window is open if you still have doubt, where the tunnel is established, the quickest way to test whether tunnel is working is to open telnet to localhost port 10022.

In Windows command prompt type:
 

C:> telnet localhost 10022


You will get a remote server SSH version printed, like on below shot:

windows-testing-whether-ssh-tunnel-is-working-with-telnet-screenshot-black-screen

Now lets say now you would like to access the internet via just created SSH tunnel.
You can do it by simply setting Socks Proxy in your Firefox / Opera (or whatever browser you use).

Whether you want to run the SSH Tunnel permanent and periodically check whether tunnel is allve and respawn it in case plink quit, you can use a very simple batch script like one below:
 

@ECHO OFF
tasklist /FI "IMAGENAME eq plink.exe" 2>NUL | find /I /N "plink.exe">NUL

if "%ERRORLEVEL%"=="0"  ( echo Programm is running exiting
exit
)
echo "Not Running"
start /b "C:Program Files (x86)PuTTYplink.exe" -ssh remote-username@tunnel-to-ssh-server-host.com -pw Password123 -T -C -D 127.0.0.1:10022 -N"


If you're a Linux guy and you don't want to mess around with Plink but still want to create your SSH tunnels following SSH client UNIX command line syntax, setup the Cygwin port of OpenSSH for Windows.

Or if you're unsure whether remote server is always reachable (you're moving with your notebook from (Country) network to network), you can use also portqry – windows port scanner to check whether remote ssh server port is opened:
 

@ECHO OFF
tasklist /FI "IMAGENAME eq plink.exe" 2>NUL | find /I /N "plink.exe">NUL
if "%ERRORLEVEL%"=="0"  ( echo Programm is running exiting
pause
exit
)
portqry -n tunnel-to-ssh-server-host.com -p tcp -e 22
if %ERRORLEVEL%==0 echo tunnel-to-ssh-server-host.com Reachable Connecting ..
if NOT %ERRORLEVEL%==0 (echo tunnel-to-ssh-server-host.com.com Unreachable
exit)
echo "Not Running. Starting"
"C:Program Files (x86)PuTTYplink.exe" -ssh remote-username@tunnel-to-ssh-server-host.com -pw Password123 -T -C -D 127.0.0.1:10080 –N


Here is another sample use of Plink to create tunnel via SSH host tunnel-to-ssh-server-host.com  to listen for connections on localhost port 1234 and forward all incoming traffic to squid proxy server on 192.168.1.5 on port 3128.
 

C:Usersgeorgi>plink.exe -v -x -a -T -C -noagent -ssh -L 127.0.0.1:1234:192.168.1.5:3128 remote-username@tunnel-to-ssh-server-host.com

Setting then 127.0.0.1:1234 in  Firefox Proxy browser settings will make all traffic from your browser to flow securily to your own proxy server (letting you hide your "custom traffic" from company Web sniffers (Proxying) and Web filtering.
A remark to make here is 192.168.1.5 is (a internal server with Squid Proxy, configured to pass traffic to the internet ).

Here is a way to make tunnel between your remote SSH server and local Desktop PC to make Google queries without being logged by your ISP or company where you're working:

plink.exe "-v -x -a -T -C -noagent -ssh -L 127.
0.0.1:1234:95.158.130.242:443 -pw SecretPassword123 -l hipo www.pc-freak.net"

95.158.130.242 – is one of the IPs www.google.com resolves to
www.pc-freak.net – is name of my home router.

To make tunneled queries to Google then open in browser https://127.0.0.1:1234

using_localhost_ssh_tunnel_to_anonymously-search-in-google-plink-tunnel-for-security


If you're a lazy windows user and don't want to bother to make your tunnels from command line and you want need nice gui way to manage multiple tunnels – check out putty-tunnel-manager.

I myself am not a SSH Tunnel expert and thus Iwould be happy to learn further from people for some interesting cases and custom ways to do  SSH Tunnels. If you know of better advantageous ways to tunnel traffic, please share.

Happy tunneling ! 🙂

How to harden Linux Security and imprpove network efficiency on Kernel sysctl Level to Stop SYN flood

Friday, July 8th, 2011

Power up Linux and protect against DDoS with sysctl var optimization

Some long time ago I’ve written an article Optimizing Linux tcp/ip networking

In the article I’ve examined a number of Linux kernel sysctl variables, which significantly improve the way TCP/IP networking is handled by a non router Linux based servers.

As the time progresses I’ve been continuing to read materials on blogs and internet sites on various tips and anti Denial of Service rules which one could apply on newly installed hosting (Apache/MySql/Qmail/Proxy) server to improve webserver responce times and tighten the overall security level.

In my quest for sysctl 😉 I found a few more handy sysctl variables apart from the old ones I incorporate on every Linux server I adminstrate.
The sysctl variables improves the overall network handling efficiency and protects about common SYN/ACK Denial of service attacks.

Here are the extra sysctl variables I started incorporating just recently:

############ IPv4 Sysctl Settings ################
#Enable ExecShield protection (randomize virtual assigned space to protect against many exploits)
kernel.randomize_va_space = 1
#Increase the number of PIDs processes could assign this is very needed especially on more powerful servers
kernel.pid_max = 65536
# Prevent against the common 'syn flood attack'
net.ipv4.tcp_syncookies = 1
# Controls the use of TCP syncookies two is generally a better idea, though you might experiment
#net.ipv4.tcp_syncookies = 1
net.ipv4.tcp_synack_retries = 2
##################################################
#
############## IPv6 Sysctl Settings ################
# Number of Router Solicitations to send until assuming no routers are present.
net.ipv6.conf.default.router_solicitations = 0
# Accept Router Preference in RA? Again not necessery if the server is not a router
net.ipv6.conf.default.accept_ra_rtr_pref = 0
# Learn Prefix Information in Router Advertisement (Unnecessery) for non-routers
net.ipv6.conf.default.accept_ra_pinfo = 0
# disable accept of hop limit settings from other routers (could be used for DoS)
net.ipv6.conf.default.accept_ra_defrtr = 0
# disable ipv6 global unicasts server assignments
net.ipv6.conf.default.autoconf = 0
# neighbor solicitations to send out per address (better if disabled)
net.ipv6.conf.default.dad_transmits = 0
# disable assigning more than 1 address per network interface
net.ipv6.conf.default.max_addresses = 1
#####################################################


To use this settings paste the above sysctl variables in /etc/sysctl.conf and ask sysctl command to read and apply the newly added conf settings:

server:~# sysctl -p
...

Hopefully you should not get errors while applying the sysctl settings, if you get some errors, it’s possible some of the variable is differently named (depending on the Linux kernel version) or the Linux distribution on which sysctl’s are implemented.

For some convenience I’ve created unified sysctl variables /etc/sysct.conf containing the newly variables I started implementing to servers with the ones I already exlpained in my previous post Optimizing Linux TCP/IP Networking

Here is the optimized / hardened sysctl.conf file for download

I use this exact sysctl.conf these days on both Linux hosting / VPS / Mail servers etc. as well as on my personal notebook 😉

Here is also the the complete content of above’s sysctl.conf file, just in case if somebody wants to directly copy/paste it in his /etc/sysctl.conf

# Sysctl kernel variables to improve network performance and protect against common Denial of Service attacks
# It's possible that not all of the variables are working on all Linux distributions, test to make sure
# Some of the variables might need a slight modification to match server hardware, however in most cases it should be fine
# variables list compiled by hip0
### https://www.pc-freak.net
#### date 08.07.2011
############ IPv4 Sysctl Kernel Settings ################
net.ipv4.ip_forward = 0
# ( Turn off IP Forwarding )
net.ipv4.conf.default.rp_filter = 1
# ( Control Source route verification )
net.ipv4.conf.default.accept_redirects = 0
# ( Disable ICMP redirects )
net.ipv4.conf.all.accept_redirects = 0
# ( same as above )
net.ipv4.conf.default.accept_source_route = 0
# ( Disable IP source routing )
net.ipv4.conf.all.accept_source_route = 0
# ( - || - )net.ipv4.tcp_fin_timeout = 40
# ( Decrease FIN timeout ) - Useful on busy/high load server
net.ipv4.tcp_keepalive_time = 4000
# ( keepalive tcp timeout )
net.core.rmem_default = 786426
# Receive memory stack size ( a good idea to increase it if your server receives big files )
##net.ipv4.tcp_rmem = "4096 87380 4194304"
net.core.wmem_default = 8388608
#( Reserved Memory per connection )
net.core.wmem_max = 8388608
net.core.optmem_max = 40960
# ( maximum amount of option memory buffers )
# tcp reordering, increase max buckets, increase the amount of backlost
net.ipv4.tcp_max_tw_buckets = 360000
net.ipv4.tcp_reordering = 5
##net.core.hot_list_length = 256
net.core.netdev_max_backlog = 1024
#Enable ExecShield protection (randomize virtual assigned space to protect against many exploits)
kernel.randomize_va_space = 1
#Increase the number of PIDs processes could assign this is very needed especially on more powerful servers
kernel.pid_max = 65536
# Prevent against the common 'syn flood attack'net.ipv4.tcp_syncookies = 1
# Controls the use of TCP syncookies two is generally a better idea, though you might experiment
#net.ipv4.tcp_syncookies = 1
net.ipv4.tcp_synack_retries = 2
###################################################
############## IPv6 Sysctl Settings ################
# Number of Router Solicitations to send until assuming no routers are present.
net.ipv6.conf.default.router_solicitations = 0
# Accept Router Preference in RA? Again not necessery if the server is not a router
net.ipv6.conf.default.accept_ra_rtr_pref = 0
# Learn Prefix Information in Router Advertisement (Unnecessery) for non-routersnet.
ipv6.conf.default.accept_ra_pinfo = 0
# disable accept of hop limit settings from other routers (could be used for DoS)
net.ipv6.conf.default.accept_ra_defrtr = 0
# disable ipv6 global unicasts server assignmentsnet.
ipv6.conf.default.autoconf = 0
# neighbor solicitations to send out per address (better if disabled)
net.ipv6.conf.default.dad_transmits = 0
# disable assigning more than 1 address per network interfacenet.
ipv6.conf.default.max_addresses = 1
#####################################################
# Reboot if kernel panic
kernel.panic = 20

These sysctl settings will tweaken the Linux kernel default network settings performance and you will notice the improvements in website responsiveness immediately in some cases implementing this kernel level goodies will make the server perform better and the system load might decrease even 😉

This optimizations on a kernel level are not only handy for servers, their implementation on Linux Desktop should also have a positive influence on the way the network behaves and could improve significantly the responce times of opening pages in Firefox/Opera/Epiphany Torrent downloads etc.

Hope this kernel tweakenings are helpful to someone.
Cheers 😉

How to disable / block sites with Squid Proxy ACL rules on Debian GNU / Linux – Setup Transparent Proxy

Wednesday, October 16th, 2013

Squid transparant proxy disabling blocking websites with Squid proxy

Often when configuring new Firewall router for a network its necessary to keep log on HTTP (Web) traffic passing by the router. The best way to do this in Linux is by using Proxy server. There are plenty of different Proxy (Caching) servers for GNU / Linux. However the most popular one is Squid (WWW Proxy Cache). Besides this its often a requirement in local office networks that Proxy server is transparent (invisible for users) but checking each and every request originating from the network. This scenario is so common in middle sized and small sized organizations that its a must that every Linux admin is ready to easily configure it. In most of my experience so far I used Debian Linux, so in this post I will explain how to configure Transparent Squid Proxy with configured ACL block rules for employee's time wasting services like facebook / youtube / vimeo etc.

Here is diagram I found on a skullbox.net showing graphically below Squid setup:

Squid as transparent proxy behind nat firewall diagram

1. Install Squid Proxy Server

Squid is available as Debian package since a long time, so on Deb Linux installing Squid is a piece of cake.

debian-server:~# apt-get install --yes squid
...


2. Create /var/cache/proxy directory and set proper permissions necessary for custom config

debian-server:~# mkdir /var/cache/proxy
debian-server:~# chown -R proxy:proxy /var/cache/proxy

3. Configure Squid Caching Server

By default debian package extract script does include default squid.conf which should be substituted with my custom squid.conf. A Minor user changes has to be done in config, download my squid.conf from here and overwrite default squid.conf in /etc/squid/squid.conf. Quickest way to do it is through:

debian-server:~# cd /etc/squid
debian-server:/etc/squid# mv /etc/squid/squid.conf /etc/squid/squid.conf.orig
debian-server:/etc/squid# wget -q https://www.pc-freak.net/files/squid.conf
debian-server:/etc/squid# chown -R root:root squid.conf

Now open squid.conf and edit lines:

http_port 192.168.0.1:3128

Change 192.168.0.1 which is IP assigned to eth1 (internal NAT-ted interface) with whatever IP of local (internal network) is. Some admins prefer to use 10.10.10.1 local net addressing.
Below in configuration, there are some IPs from 192.168.0.1-255 network configured through Squid ACLs to have access to all websites on the Internet. To tune such IPs you will have to edit lines after (1395) after comment

# allow access to filtered sites to specific ips


4. Disabling sites that pass through the proxy server

Create file /etc/disabled-sites i.e.:

debian-server:~# touch /etc/disabled-sites

and place inside all siles that would like to be inaccessible for local office network either through text editor (vim / pico etc.) or by issuing:

debian-server:~# echo 'facebook.com' >> /etc/disabled-sites
debian-server:~# echo ''youtube.com' >> /etc/disabled-sites
debian-server:~# echo 'ask.com' >> /etc/disabled-sites

5. Restart Squid to load configs

debian-server:~# /etc/init.d/squid restart
[ ok ] Restarting Squid HTTP proxy: squid.

6. Making Squid Proxy to serve as Transparent proxy through iptables firewall Rules

Copy paste below shell script to lets say /etc/init.d/squid-transparent-fw.sh
 

#!/bin/bash
IPT=/sbin/iptables;

IN=INPUT;
OUT=OUTPUT;
FORW=FORWARD;

AC=ACCEPT;
REJ=REJECT;
DRP=DROP;
RED=REDIRECT;
MASQ=MASQUERADE;
POSTR=POSTROUTING;
PRER=PREROUTING;
OUT_IFACE=eth2;
OUT_B_IFACE=eth0;
IN_IFACE=eth1;
MNG=mangle;

ALL_NWORKS='0/0';
LOCALHOST='127.0.0.1';

# forward to squid.
$IPT -t nat -I $PRER -p tcp -s 192.168.0.0/24 -d ! 192.168.0.1 –dport www -j $RED –to 3128
$IPT -t nat -I $PRER -p tcp -s 192.168.0.0/24 -d ! 192.168.0.1 –dport 3128 -j $RED –to 3128

# Reject connections to squid from the untrusted world.
# rules for order.
$IPT -A $IN -p tcp -s 83.228.93.76 -d $ALL_NWORKS –dport 65221 -j $AC

$IPT -A $IN -p tcp -s $ALL_NWORKS –dport 65221 -j $REJ
$IPT -A $IN -i $OUT_B_IFACE -p tcp -s $ALL_NWORKS –dport 3128 -j $REJ

Easiest way to set up squid-transparent-fw.sh firewall rules is with:

debian-server:~# cd /etc/init.d/
debian-server:/etc/init.d# wget -q https://www.pc-freak.net/files/squid-transparent-fw.sh
debian-server:/etc/init.d# chmod +x squid-transparent-fw.sh
debian-server:/etc/init.d/# bash squid-transparent-fw.sh
Then place line /etc/init.d/squid-transparent-fw.sh into /etc/rc.local before exit 0
 

That's all now Squid Transparent Proxy will be up and running and the number of sites listed in disabled-sites will be filtered for Office employees returning a status of Access Denied.

Access Denied msg

Gets logged in /var/log/squid/access.log example of Denied access for Employee with IP 192.168.0.155 is below:

192.168.0.155 - - [16/Oct/2013:16:50:48 +0300] "GET http://youtube.com/ HTTP/1.1" 403 1528 TCP_DENIED:NONE

Various other useful information on what is cached is also available via /var/log/squid/cache.log and /var/log/squid/store.log

Another useful thing of using Transparent Squid Proxy is that you can always keep track on exact websites opened by Employees in Office so you can easily catch people trying to surf p0rn websites or some obscenity.

Hope this post helps some admin out there 🙂 Enjoy

How to generate user password for digest_pw_auth SQUID digest authentication

Wednesday, July 6th, 2011

Squid Proxy pass prompt / real squid fun picture

I needed to generate new password for proxy user configured on SQUID proxy server configured with digest user authentication.
My dear colleague was kind to provide me with the below script, which generates the one line string which needs to go to the squid user password file:

#!/bin/sh
user="$1";
realm="$2";
pass="$3";
if [ -z "$1" -o -z "$2" -o -z "$3" ] ; then
echo "Usage: $0 user password 'realm'";
exit 1
fi
ha1=$(echo -n "$user:$realm:$pass"|md5sum |cut -f1 -d' ')
echo "$user:$realm:$ha1"

You can alternatively download the squid_generate_pass.sh script here

The script accepts three arguments;
proxy-server:~# ./squid_generate_pass.sh
Usage: ./squid_generate_pass.sh user password 'realm'

Thus to generate a new user and password and insert it immediately into let’s say a squid configured user/pass file in /etc/squid3/users execute command:

proxy-server:~# ./squid_generate_pass.sh admin_user MySecretPassword 'Squid_Configured_Realm'
>> /etc/squid3/users

Where Squid_Configured_Realm depends on the realm name configured in squid.conf, for example if squid.conf includes some auth configuration similar to:

auth_param digest program /usr/lib/squid3/digest_pw_auth -c /etc/squid3/users
auth_param digest children 2
auth_param digest realm My_Proxy_Realm
acl localusers proxy_auth REQUIRED

The realm script argument should be My_Proxy_realm . If squid_generate_pass does completes without errors, it should add a line to /etc/squid3/users file similar to:

proxy-server:~# cat /etc/squid3/users
admin_user:My_Proxy_realm:3bbcb35e505c52a0024ef2e3ab1910b0

Cheers 😉