Posts Tagged ‘Start’

How to install and configure AIDE ( Advanced Intrusion Detection Environment ) on Debian GNU / Linux 11 to monitor files for changes

Thursday, March 9th, 2023

aide-logo-linux

How to install and configure AIDE ( Advanced Intrusion Detection Environment ) on Debian GNU / Linux 11 to monitor files for changes

Having a intrusion detection system is essential to keeping a server security to good level and being compliant with PCI (Payment Card Industry) DSS Standards. It is a great thing for the sake to protect oneself from hackers assaults. 

There is plenty of Intrusion Detection systems available all around since many years, in the past one of main ones for Linux as older system administrators should remember was Tripwire – integrity tool for monitoring and alerting on specific file change(s) on a range of systems

Tripwire is still used today but many today prefer to use AIDE that is a free software replacement for Tripwire under GPL (General Public License), that is starting to become like a "standard"  for many Unix-like systems as an inexpensive baseline control and rootkit detection system.

In this article I'll explain shortly how to Install / Configure and Use AIDE to monitor, changes with files on the system.

But before proceeding it is worthy to mention on some of the alternatives companies and businesses choose to as an IDS (Intrusion Detection Systems), that is useful to give a brief idea of the sysadmins that has to deal with Security, on what is some of the main Intrusion Detection Systems adopted on UNIX OSes today:
 

  • Samhain

    An integrity checker and host intrusion detection system that can be used on single hosts as well as large, UNIX-based networks. It supports central monitoring as well as powerful (and new) stealth features to run undetected in memory, using steganography. Samhain is an open-source multiplatform application for POSIX systems (Unix, Linux, Cygwin/Windows).

  • OSSEC 
    OSSEC uses a centralized, cross-platform architecture allowing multiple systems to be monitored and managed.
     
  • Snort
    IDS which has the capabilities to prevent attacks. By taking a particular action based on traffic patterns, it can become an intrusion prevention system (IPS). – written in Pure C.
     
  • Zeek (Bro)
    Zeek helps to perform security monitoring by looking into the network's activity. It can find suspicious data streams. Based on the data, it alert, react, and integrate with other tools – written in C++.
  • Maltrail (Maltrail monitors for traffic on the network that might indicate system compromise or other bad behavior. It is great for intrusion detection and monitoring. – written in Python).

1. Install aide deb package

# apt -y install aide

root@haproxy2:~# aide -v
Aide 0.17.3

Compiled with the following options:

WITH_MMAP
WITH_PCRE
WITH_POSIX_ACL
WITH_SELINUX
WITH_XATTR
WITH_CAPABILITIES
WITH_E2FSATTRS
WITH_ZLIB
WITH_MHASH
WITH_AUDIT

Default config values:
config file: <none>
database_in: <none>
database_out: <none>

Available hashsum groups:
md5: yes
sha1: yes
sha256: yes
sha512: yes
rmd160: yes
tiger: yes
crc32: yes
crc32b: yes
haval: yes
whirlpool: yes
gost: yes
stribog256: no
stribog512: no

Default compound groups:
R: l+p+u+g+s+c+m+i+n+md5+acl+selinux+xattrs+ftype+e2fsattrs+caps
L: l+p+u+g+i+n+acl+selinux+xattrs+ftype+e2fsattrs+caps
>: l+p+u+g+i+n+acl+S+selinux+xattrs+ftype+e2fsattrs+caps
H: md5+sha1+rmd160+tiger+crc32+haval+gost+crc32b+sha256+sha512+whirlpool
X: acl+selinux+xattrs+e2fsattrs+caps

2. Prepare AIDE configuration and geenrate (initialize) database

Either you can use the default AIDE configuration which already has a preset rules for various files and directories to be monitored,
or you might add up additional ones.
 

  • For details on configuration of aide.conf accepted options "man aide.conf"

The rules and other configurations resides lays under  /etc/aide/ directory
 

The AIDE database is located under /var/lib/aide

root@server:~# ls -al /var/lib/aide/
общо 33008
drwxr-xr-x  2 root root     4096  9 мар 12:38 ./
drwxr-xr-x 27 root root     4096  9 мар 12:01 ../
-rw——-  1 root root 16895467  9 мар 16:03 aide.db
-rw——-  1 root root 16895467  9 мар 18:49 aide.db.new


Also, details about major setting rules config regarding how AIDE will run via cronjob as with most debian services are into /etc/default/aide

Default aide.conf config is in /etc/aide/aide.conf if you need custom stuff to do with it simply edit it.

Here is an Example:
Lets say you want to omit some directory to not be monitored by aide, which would otherwise do, i.e.
omit /var/log/* from monitoring

# At the end of file /etc/aide/aide.conf

add:

!/var/log
!/home/
!/var/lib
!/proc

  • Initialize the aide database first time

Run aideinit command, aideinit will create a new baseline database –  /var/lib/aide/aide.db.new (a baseline)
Note that, /var/lib/aide/aide.db is the old database that aide uses to check against for any changes of files / directories on the configured monitored filesystem objects.

root@server:~# aideinit
Running aide –init…

debug1: client_input_channel_req: channel 0 rtype keepalive@openssh.com reply 1
Start timestamp: 2023-03-09 12:06:16 +0200 (AIDE 0.17.3)
AIDE initialized database at /var/lib/aide/aide.db.new

Number of entries:      66971

—————————————————
The attributes of the (uncompressed) database(s):
—————————————————

/var/lib/aide/aide.db.new
 SHA256    : nVrYljiBFM/KaKCTjbaJtR2w6N8vc8qN
             DPObbo2UMVo=
 SHA512    : S1ZNB0DCqb4UTmuqaalTgiQ3UAltTOzO
             YNfEQJldp32q5ahplBo4/65uwgtGusMy
             rJC8nvxvYmh+mq+16kfrKA==
 RMD160    : xaUnfW1+/DJV/6FEm/nn1k1UKOU=
 TIGER     : nGYEbX281tsQ6T21VPx1Hr/FwBdwF4cK
 CRC32     : fzf7cg==
 HAVAL     : yYQw/87KUmRiRLSu5JcEIvBUVfsW/G9H
             tVvs6WqL/0I=
 WHIRLPOOL : 6b5y42axPjpUxWFipUs1PtbgP2q0KJWK
             FwFvAGxHXjZeCBPEYZCNkj8mt8MkXBTJ
             g83ZELK9GQBPLea7UF3tng==
 GOST      : sHAzx7hkr5H3q8TCSGCKjndEiZgcvCEL
             E45qcRb25tM=


End timestamp: 2023-03-09 12:38:30 +0200 (run time: 32m 14s)


Be patient now, go grab a coffee / tea or snack as the command might take up to few minutes for the aide to walk through the whole monitored filesystems and built its database.

root@server:~# echo cp /var/lib/aide/aide.db{.new,}
cp /var/lib/aide/aide.db.new /var/lib/aide/aide.db


root@server:~# cp /var/lib/aide/aide.db{.new,}

root@server:~# aide –check –config /etc/aide/aide.conf

Start timestamp: 2023-03-09 13:01:32 +0200 (AIDE 0.17.3)
AIDE found differences between database and filesystem!!

Summary:
  Total number of entries:      66972
  Added entries:                1
  Removed entries:              0
  Changed entries:              7

—————————————————
Added entries:
—————————————————

f+++++++++++++++++: /var/lib/aide/aide.db

—————————————————
Changed entries:
—————————————————

d =…. mc.. .. . : /etc/aide
d =…. mc.. .. . : /root
f <…. mci.H.. . : /root/.viminfo
f =…. mc..H.. . : /var/lib/fail2ban/fail2ban.sqlite3
d =…. mc.. .. . : /var/lib/vnstat
f =…. mc..H.. . : /var/lib/vnstat/vnstat.db
f >b… mc..H.. . : /var/log/sysstat/sa09

—————————————————
Detailed information about changes:
—————————————————

Directory: /etc/aide
 Mtime     : 2023-03-09 12:04:03 +0200        | 2023-03-09 12:51:11 +0200
 Ctime     : 2023-03-09 12:04:03 +0200        | 2023-03-09 12:51:11 +0200

Directory: /root
 Mtime     : 2023-03-09 12:06:13 +0200        | 2023-03-09 12:51:11 +0200
 Ctime     : 2023-03-09 12:06:13 +0200        | 2023-03-09 12:51:11 +0200

File: /root/.viminfo
 Size      : 18688                            | 17764
 Mtime     : 2023-03-09 12:06:13 +0200        | 2023-03-09 12:51:11 +0200
 Ctime     : 2023-03-09 12:06:13 +0200        | 2023-03-09 12:51:11 +0200
 Inode     : 133828                           | 133827
 SHA256    : aV54gi33aA/z/FuBj2ZioU2cTa9H16TT | dnFdLVQ/kx3UlTah09IgEMrJ/aYgczHe
             TzkLSxBDSB4=                     | DdxDAmPOSAM=

3. Test aide detects file changes

Create a new file and append some text and rerun the aide check


root@server:~# touch /root/test.txt
root@server:~# echo aaa > /root/test.txt
root@server:~# aide –check –config /etc/aide/aide.conf


Start timestamp: 2023-03-09 13:07:21 +0200 (AIDE 0.17.3)
AIDE found differences between database and filesystem!!

Summary:
  Total number of entries:      66973
  Added entries:                2
  Removed entries:              0
  Changed entries:              7

—————————————————
Added entries:
—————————————————

f+++++++++++++++++: /root/test.txt
f+++++++++++++++++: /var/lib/aide/aide.db

—————————————————
Changed entries:
—————————————————

d =…. mc.. .. . : /etc/aide
d =…. mc.. .. . : /root
f <…. mci.H.. . : /root/.viminfo
f =…. mc..H.. . : /var/lib/fail2ban/fail2ban.sqlite3
d =…. mc.. .. . : /var/lib/vnstat
f =…. mc..H.. . : /var/lib/vnstat/vnstat.db
f >b… mc..H.. . : /var/log/sysstat/sa09

….


The same command can be shortened for the lazy typist:

root@server:~# aide -c /etc/aide/aide.conf -C

The command will basically try to check the deviation between the AIDE database and the filesystem.

4. Limiting AIDES Integrity Checks to Specific Files / Directories

In order to limit the integrity checks to a specific entries for example /etc, pass the –limit REGEX option to AIDE check command where REGEX is the entry to check.

For example, check and update the database entries matching /etc, you would run aide command as shown below;
 

root@server:~# aide -c /etc/aide/aide.conf –limit /etc –check


AIDE found differences between database and filesystem!!
Limit: /etc

Summary:
  Total number of entries:      66791
  Added entries:                0
  Removed entries:              0
  Changed entries:              2

—————————————————
Changed entries:
—————————————————

d =…. mc.. .. . : /etc/aide
d =…. mc.. .. . : /etc/default

—————————————————
Detailed information about changes:
—————————————————

Directory: /etc/aide
 Mtime     : 2023-03-09 15:59:53 +0200        | 2023-03-09 16:43:03 +0200
 Ctime     : 2023-03-09 15:59:53 +0200        | 2023-03-09 16:43:03 +0200

Directory: /etc/default
 Mtime     : 2023-03-09 12:06:13 +0200        | 2023-03-09 18:42:12 +0200
 Ctime     : 2023-03-09 12:06:13 +0200        | 2023-03-09 18:42:12 +0200


—————————————————
The attributes of the (uncompressed) database(s):
—————————————————

/var/lib/aide/aide.db
 SHA256    : sjCxyIkr0nC/gTkNmn7DNqAQWttreDF6
             vSUV4jBoFY4=
 SHA512    : vNMpb54qxrbOk6S1Z+m9r0UwGvRarkWY
             0m50TfMvGElfZWR1I3SSaeTdORAZ4rQe
             17Oapo5+Sc0E2E+STO93tA==
 RMD160    : anhm5E6UlKmPYYJ4WYnWXk/LT3A=
 TIGER     : 5e1wycoF35/ABrRf7FNypZ45169VTuV4
 CRC32     : EAJlFg==
 HAVAL     : R5imONWRYgNGEfhBTc096K+ABnMFkMmh
             Hsqe9xt20NU=
 WHIRLPOOL : c6zySLliXNgnOA2DkHUdLTCG2d/T18gE
             4rdAuKaC+s7gqAGyA4p2bnDHhdd0v06I
             xEGY7YXCOXiwx8BM8xHAvQ==
 GOST      : F5zO2Ovtvf+f7Lw0Ef++ign1znZAQMHM
             AApQOiB9CqA=


End timestamp: 2023-03-09 20:02:18 +0200 (run time: 1m 32s)

5. Add the modified /root/test.txt to AIDE list of known modified files database
 

root@server:~# aide –update –config /etc/aide/aide.
  ERROR: cannot open config file '/etc/aide/aide.': No such file or directory


root@server:~# ​ aide –update –config /etc/aide/aide.conf
 

Start timestamp: 2023-03-09 18:45:17 +0200 (AIDE 0.17.3)
AIDE found differences between database and filesystem!!
New AIDE database written to /var/lib/aide/aide.db.new

Summary:
  Total number of entries:      66791
  Added entries:                0
  Removed entries:              0
  Changed entries:              8

—————————————————
Changed entries:
—————————————————

d =…. mc.. .. . : /etc/aide
d =…. mc.. .. . : /etc/default
d =…. mc.. .. . : /root
f >…. mci.H.. . : /root/.viminfo
f >…. mci.H.. . : /root/test.txt
f =…. mc..H.. . : /var/lib/fail2ban/fail2ban.sqlite3
d =…. mc.. .. . : /var/lib/vnstat
f =…. mc..H.. . : /var/lib/vnstat/vnstat.db

—————————————————
Detailed information about changes:
—————————————————

Directory: /etc/aide
 Mtime     : 2023-03-09 15:59:53 +0200        | 2023-03-09 16:43:03 +0200
 Ctime     : 2023-03-09 15:59:53 +0200        | 2023-03-09 16:43:03 +0200

Directory: /etc/default
 Mtime     : 2023-03-09 12:06:13 +0200        | 2023-03-09 18:42:12 +0200
 Ctime     : 2023-03-09 12:06:13 +0200        | 2023-03-09 18:42:12 +0200

Directory: /root
 Mtime     : 2023-03-09 15:59:53 +0200        | 2023-03-09 18:44:34 +0200
 Ctime     : 2023-03-09 15:59:53 +0200        | 2023-03-09 18:44:34 +0200

File: /root/.viminfo
 Size      : 16706                            | 16933
 Mtime     : 2023-03-09 15:59:53 +0200        | 2023-03-09 18:44:34 +0200
 Ctime     : 2023-03-09 15:59:53 +0200        | 2023-03-09 18:44:34 +0200
 Inode     : 136749                           | 133828
 SHA256    : KMHGoMVJo10BtafVrWIOLt3Ht9gK8bc+ | rrp8S3VftzZzvjBP1JC+PBpODv9wPKGw
             9uHh/z7iJWA=                     | TA+hyhTiY+U=
 SHA512    : ieDHy7ObSTfYm5d8DtYcHKxHya13CS65 | PDAJjyZ39uU3kKFo2lHBduTqxMDq4i01
             ObMYIRAre6IgvLslEs0ZodQFyrczMyRt | 1Kvm/h6xzFhHtFgjidtcemG8wDcjtfNF
             +d6SrW0gn3skKn2B7G09eQ==         | Z7LO230fgGeO7UepqtxZjQ==
 RMD160    : nUgg/G4zsVGKzVmmrqltuYUDvtg=     | jj61KAFONK92mj+u66RDJmxFhmI=
 TIGER     : 3vPSOrla5k+k2br1E2ES4eNiSZ2novFX | mn4kNCzd8SQr2ID2VSe4f4l0ta7pO/xo
 CRC32     : NDnMgw==                         | AyzVUQ==
 HAVAL     : Q9/KozxRiPbLEkaIfnBUZdEWftaF52Mw | 6jADKV6jg7ZVr/A/oMhR4NXc8TO1AOGW
             7tiR7DXhl0o=                     | NrYe+j6UcO0=
 WHIRLPOOL : vB/ZMCul4hN0aYd39gBu+HmZT/peRUI8 | mg6c1lYYVNZcy4mVzGojwraim8e3X2/R
             KDkaslNb8+YleoFWx0mbhAbkGurc0+jh | urVvEmbsgTuUCJOuf9+OrEACiF0fbe/x
             YPBviZIKcxUbTc2nGthTWw==         | t+BXnSQWk08OL9EI6gMGqA==
 GOST      : owVGTgU9BH3b0If569wQygw3FAbZIZde | ffx29GV2jaCB7XzuNjdiRzziIiZYnbi3
             eAfQfzlRPGY=                     | Ar7jyNMUutk=

File: /root/test.txt
 Size      : 4                                | 8
 Mtime     : 2023-03-09 13:07:12 +0200        | 2023-03-09 18:44:34 +0200
 Ctime     : 2023-03-09 13:07:12 +0200        | 2023-03-09 18:44:34 +0200
 Inode     : 133828                           | 136751
 SHA256    : F+aC8GC1+OR+oExcSFWQiwpa1hICImD+ | jUIZMGfiMdAlWFHu8mmmlml4qAGNQNL5
             UOEeywzAq3Y=                     | 6NhzJ1sYFZE=
 SHA512    : d+UmFKFBzvGadt5hk+nIRbjP//7PSXNl | ixn20lcEMDEtsJo3hO90Ea/wHWLCHcrz
             Pl16XRIUUPq2FCiQ4PeUcVciukJX7ijL | seBWunbBysY0z3BWcfgnN2vH05WfRfvA
             D045ZvGOEcnmL6a6vwp0jw==         | QiNtQS1tStuEdB3Voq54zQ==
 RMD160    : I6waxKN3rMx4WTz4VCUQXoNoxUg=     | urTh1j1t3UHchnJGnBG4lUZnjI4=
 TIGER     : cwUYgfKHcJnWXcA0pr/OKuxuoxh+b9lA | prstKqCfMXL39aVGFPA0kX4Q9x7a+hUn
 CRC32     : UD78Dw==                         | zoYiEA==
 HAVAL     : bdbKR9LvPgsYClViKiHx48fFixfIL/jA | ZdpdeMhw4MvKBgWsM4EeyUgerO86Rt82
             F3tjdc2Gm8Y=                     | W94fJFRWbrM=
 WHIRLPOOL : OLP0Y4oKcqW2yEvme8z419N1KE4TB9GJ | Xk8Ujo3IU2SzSqbJFegq7p1ockmrnxJF
             biHn/9XgrBz4fQiDJ8eHpx+0exA9hXmY | R3Rfstd1jWSwLFNTEwfbRRw+TARtRK50
             EbbakMJJdzLt1ipKWiV9gg==         | iWJeHLsD5dZ+CzV0tf4sUg==
 GOST      : ystISzoeH/ZznYrrXmxe4rwmybWMpGuE | GhMWNxg7Is0svJ+5LP+DVWbgt+CDQO+3
             0PzRnVEqnR8=                     | 08dwBuVAwB8=

File: /var/lib/fail2ban/fail2ban.sqlite3
 Mtime     : 2023-03-09 15:55:01 +0200        | 2023-03-09 18:45:01 +0200
 Ctime     : 2023-03-09 15:55:01 +0200        | 2023-03-09 18:45:01 +0200
 SHA256    : lLilXNleqSgHIP1y4o7c+oG5XyUPGzgi | NCJJ2H6xgCw/NYys1LMA7hOWwoOoxI8Y
             RHYH+zvlAL4=                     | 4SJygfqEioE=
 SHA512    : iQj2pNT4NES4fBcujzdlEEGZhDnkhKgc | ClQZ5HMOSayUNb//++eZc813fiMJcXnj
             QDlGFSAn6vi+RXesFCjCABT7/00eEm5/ | vTGs/2tANojoe6cqpsT/LaJ3QZXpmrfh
             ILcaqlQtBSLJgHjMQehzdg==         | syVak1I4n9yg8cDKEkZUvw==
 RMD160    : Xg4YU8YI935L+DLvkRsDanS4DGo=     | SYrQ27n+/1fvIZ7v+Sar/wQHulI=
 TIGER     : 2WhhPq9kuyeNJkOicDTDeOeJB8HR8zZe | o1LDZtRclri2KfZBe5J3D4YhM05UaP4E
 CRC32     : NQmi4A==                         | tzIsqg==
 HAVAL     : t1ET+84+8WgfwqlLy4R1Qk9qGZQRUbJI | MwVnjtM3dad/RuN2BfgsySX2DpfYq4qi
             z2J0ROGduXc=                     | H1pq6RYsA6o=
 WHIRLPOOL : xKSn71gFIVhk5rWJIBaYQASl0V+pGn+3 | m5LEXfhBbhWFg/d8CFJhklOurmRSkDSG
             N85R0tiCKsTZ2+LRkxDrzcVQdss2k8+z | LC/vICnbEWzLwrCuMwBi1/e5wDNIY8gK
             oqExhoXtPsMaREjpCugd3Q==         | mvGn40x+G4cCYNZ6lGT9Zg==
 GOST      : WptpUlfooIlUjzDHU8XGuOU2waRud5SR | i6K4COXU0nyZ1mL3ZBuGUPz/ZXTj8KKQ
             E/tnoBqk+q0=                     | L6VNyS8/X2Y=

Directory: /var/lib/vnstat
 Mtime     : 2023-03-09 16:00:00 +0200        | 2023-03-09 18:45:01 +0200
 Ctime     : 2023-03-09 16:00:00 +0200        | 2023-03-09 18:45:01 +0200

File: /var/lib/vnstat/vnstat.db
 Mtime     : 2023-03-09 16:00:00 +0200        | 2023-03-09 18:45:00 +0200
 Ctime     : 2023-03-09 16:00:00 +0200        | 2023-03-09 18:45:00 +0200
 SHA256    : X/lnJuuSo4jX4HRzxMBodnKHAjQFvugi | oqtY3HTNds/qDNFCRAEsfN5SuO0U5LRg
             2sh2c0u69x8=                     | otc5z1y+eGY=
 SHA512    : U/g8O6G8cuhsqCUCbrElxgiy+naJKPkI | y+sw4LX8mlDWkRJMX38TsYSo1DQzxPOS
             hG7vdH9rBINjakL87UWajT0s6WSy0pvt | 068otnzw2FSSlM5X5j5EtyJiY6Hd5P+A
             ALaTcDFKHBAmmFrl8df2nQ==         | jFiWStMbx+dQidXYZ4XFAw==
 RMD160    : F6YEjIIQu2J3ru7IaTvSemA9e34=     | bmVSaRKN2qU7qpEWkzfXFoH4ZK4=
 TIGER     : UEwLoeR6Qlf2oOI58pUCEDaWk0pHDkcY | 0Qb4nUqe3cKh/g5CQUnOXGfjZwJHjeWa
 CRC32     : Bv3/6A==                         | jvW6mg==
 HAVAL     : VD7tjHb8o8KTUo5xUH7eJEmTWgB9zjft | rumfiWJvy/sTK/09uj7XlmV3f7vj6KBM
             kOkzKxFWqqU=                     | qeOuKvu0Zjc=
 WHIRLPOOL : wR0qt8u4N8aQn8VQ+bmfrxB7CyCWVwHi | FVWDRE3uY6qHxLlJQLU9i9QggLW+neMj
             ADHpMTUxBEKOpOBlHTWXIk13qYZiD+o/ | Wt+Dj9Rz92BG9EomgLUgUkxfiVFO8cMq
             XtzTB4rMbxS4Z5PAdC/07A==         | WaR/KKq3Z7R8f/50tc9GMQ==
 GOST      : l3ibqMkHMSPpQ+9ok51/xBthET9+JQMd | qn0GyyCg67KRGP13At52tnviZfZDgyAm
             OZtiFGYXmgU=                     | c82NXSzeyV0=


—————————————————
The attributes of the (uncompressed) database(s):
—————————————————

/var/lib/aide/aide.db
 SHA256    : sjCxyIkr0nC/gTkNmn7DNqAQWttreDF6
             vSUV4jBoFY4=
 SHA512    : vNMpb54qxrbOk6S1Z+m9r0UwGvRarkWY
             0m50TfMvGElfZWR1I3SSaeTdORAZ4rQe
             17Oapo5+Sc0E2E+STO93tA==
 RMD160    : anhm5E6UlKmPYYJ4WYnWXk/LT3A=
 TIGER     : 5e1wycoF35/ABrRf7FNypZ45169VTuV4
 CRC32     : EAJlFg==
 HAVAL     : R5imONWRYgNGEfhBTc096K+ABnMFkMmh
             Hsqe9xt20NU=
 WHIRLPOOL : c6zySLliXNgnOA2DkHUdLTCG2d/T18gE
             4rdAuKaC+s7gqAGyA4p2bnDHhdd0v06I
             xEGY7YXCOXiwx8BM8xHAvQ==
 GOST      : F5zO2Ovtvf+f7Lw0Ef++ign1znZAQMHM
             AApQOiB9CqA=

/var/lib/aide/aide.db.new
 SHA256    : QRwubXnz8md/08n28Ek6DOsSQKGkLvuc
             gSZRsw6gRw8=
 SHA512    : 238RmI1PHhd9pXhzcHqM4+VjNzR0es+3
             6eiGNrXHAdDTz7GlAQQ4WfKeQJH9LdyT
             1r5ho/oXRgzfa2BfhKvTHg==
 RMD160    : GJWuX/nIPY05gz62YXxk4tWiH5I=
 TIGER     : l0aOjXlM4/HjyN9bhgBOvvCYeqoQyjpw
 CRC32     : KFz6GA==
 HAVAL     : a//4jwVxF22URf2BRNA612WOOvOrScy7
             OmI44KrNbBM=
 WHIRLPOOL : MBf+NeXElUvscJ2khIuAp+NDu1dm4h1f
             5tBQ0XrQ6dQPNA2HZfOShCBOPzEl/zrl
             +Px3QFV4FqD0jggr5sHK2g==
 GOST      : EQnPh6jQLVUqaAK9B4/U4V89tanTI55N
             K7XqZR9eMG4=


End timestamp: 2023-03-09 18:49:51 +0200 (run time: 4m 34s)
 

6. Substitute old aide database with the new that includes the modified files

As you see AIDE detected the changes in /root/test.txt

To apply the changes be known by AIDE for next time (e.g. this file was authorized and supposed to be written there) simply move the new generated database
to current aide database.

# copy generated DB to master DB
root@dlp:~# cp -p /var/lib/aide/aide.db.new /var/lib/aide/aide.db

7. Check once again to make sure recently modified files are no longer seen as changed by AIDE

Recheck again the database to make sure the files you wanted to omit are no longer mentioned as changed

root@server:~# aide –check –config /etc/aide/aide.conf
Start timestamp: 2023-03-09 16:23:05 +0200 (AIDE 0.17.3)
AIDE found differences between database and filesystem!!

Summary:
  Total number of entries:      66791
  Added entries:                0
  Removed entries:              0
  Changed entries:              3

—————————————————
Changed entries:
—————————————————

f =…. mc..H.. . : /var/lib/fail2ban/fail2ban.sqlite3
d =…. mc.. .. . : /var/lib/vnstat
f =…. mc..H.. . : /var/lib/vnstat/vnstat.db

—————————————————
Detailed information about changes:
—————————————————

File: /var/lib/fail2ban/fail2ban.sqlite3
 Mtime     : 2023-03-09 15:55:01 +0200        | 2023-03-09 16:25:02 +0200
 Ctime     : 2023-03-09 15:55:01 +0200        | 2023-03-09 16:25:02 +0200
 SHA256    : lLilXNleqSgHIP1y4o7c+oG5XyUPGzgi | MnWXC2rBMf7DNJ91kXtHXpM2c2xxF60X
             RHYH+zvlAL4=                     | DfLUQLHiSiY=
 SHA512    : iQj2pNT4NES4fBcujzdlEEGZhDnkhKgc | gxHVBxhGTKi0TjRE8/sn6/gtWsRw7Mfy
             QDlGFSAn6vi+RXesFCjCABT7/00eEm5/ | /wCfPlDK0dkRZEbr8IE2BNUhBgwwocCq
             ILcaqlQtBSLJgHjMQehzdg==         | zuazTy4N4x6X8bwOzRmY0w==
 RMD160    : Xg4YU8YI935L+DLvkRsDanS4DGo=     | +ksl9kjDoSU9aL4tR7FFFOK3mqw=
 TIGER     : 2WhhPq9kuyeNJkOicDTDeOeJB8HR8zZe | 9cvXZNbU+cp5dA5PLiX6sGncXd1Ff5QO
 CRC32     : NQmi4A==                         | y6Oixg==
 HAVAL     : t1ET+84+8WgfwqlLy4R1Qk9qGZQRUbJI | aPnCrHfmZAUm7QjROGEl6rd3776wO+Ep
             z2J0ROGduXc=                     | s/TQn7tH1tY=
 WHIRLPOOL : xKSn71gFIVhk5rWJIBaYQASl0V+pGn+3 | 9Hu6NBhz+puja7uandb21Nt6cEW6zEpm
             N85R0tiCKsTZ2+LRkxDrzcVQdss2k8+z | bTsq4xYA09ekhDHMQJHj2WpKpzZbA+t0
             oqExhoXtPsMaREjpCugd3Q==         | cttMDX8J8M/UadqfL8KZkQ==
 GOST      : WptpUlfooIlUjzDHU8XGuOU2waRud5SR | WUQfAMtye4wADUepBvblvgO+vBodS0Ej
             E/tnoBqk+q0=                     | cIbXy4vpPYc=

Directory: /var/lib/vnstat
 Mtime     : 2023-03-09 16:00:00 +0200        | 2023-03-09 16:25:01 +0200
 Ctime     : 2023-03-09 16:00:00 +0200        | 2023-03-09 16:25:01 +0200

File: /var/lib/vnstat/vnstat.db
 Mtime     : 2023-03-09 16:00:00 +0200        | 2023-03-09 16:25:01 +0200
 Ctime     : 2023-03-09 16:00:00 +0200        | 2023-03-09 16:25:01 +0200
 SHA256    : X/lnJuuSo4jX4HRzxMBodnKHAjQFvugi | N1lzhV3+tkDBud3AVlmIpDkU1c3Rqhnt
             2sh2c0u69x8=                     | YqE8naDicoM=
 SHA512    : U/g8O6G8cuhsqCUCbrElxgiy+naJKPkI | +8B9HvHhOp1C/XdlOORjyd3J2RtTbRBF
             hG7vdH9rBINjakL87UWajT0s6WSy0pvt | b0Moo2Gj+cIxaMCu5wOkgreMp6FloqJR
             ALaTcDFKHBAmmFrl8df2nQ==         | UH4cNES/bAWtonmbj4W7Vw==
 RMD160    : F6YEjIIQu2J3ru7IaTvSemA9e34=     | 8M6TIOHt0NWgR5Mo47DxU28cp+4=
 TIGER     : UEwLoeR6Qlf2oOI58pUCEDaWk0pHDkcY | Du9Ue0JA2URO2tiij31B/+663OaWKefR
 CRC32     : Bv3/6A==                         | v0Ai4w==
 HAVAL     : VD7tjHb8o8KTUo5xUH7eJEmTWgB9zjft | XA+vRnMNdVGFrO+IZtEA0icunWqBGaCf
             kOkzKxFWqqU=                     | leR27LN4ejc=
 WHIRLPOOL : wR0qt8u4N8aQn8VQ+bmfrxB7CyCWVwHi | HG31dNEEcak2zZGR24W7FDJx8mh24MaJ
             ADHpMTUxBEKOpOBlHTWXIk13qYZiD+o/ | BQNhqkuS6R/bmlhx+P+eQ/JimwPAPOaM
             XtzTB4rMbxS4Z5PAdC/07A==         | xWG7cMETIXdT9sUOUal8Sw==
 GOST      : l3ibqMkHMSPpQ+9ok51/xBthET9+JQMd | y6Ek/TyAMGV5egkfCu92Y4qqk1Xge8c0
             OZtiFGYXmgU=                     | 3ONXRveOlr0=


—————————————————
The attributes of the (uncompressed) database(s):
—————————————————

/var/lib/aide/aide.db
 SHA256    : sjCxyIkr0nC/gTkNmn7DNqAQWttreDF6
             vSUV4jBoFY4=
 SHA512    : vNMpb54qxrbOk6S1Z+m9r0UwGvRarkWY
             0m50TfMvGElfZWR1I3SSaeTdORAZ4rQe
             17Oapo5+Sc0E2E+STO93tA==
 RMD160    : anhm5E6UlKmPYYJ4WYnWXk/LT3A=
 TIGER     : 5e1wycoF35/ABrRf7FNypZ45169VTuV4
 CRC32     : EAJlFg==
 HAVAL     : R5imONWRYgNGEfhBTc096K+ABnMFkMmh
             Hsqe9xt20NU=
 WHIRLPOOL : c6zySLliXNgnOA2DkHUdLTCG2d/T18gE
             4rdAuKaC+s7gqAGyA4p2bnDHhdd0v06I
             xEGY7YXCOXiwx8BM8xHAvQ==
 GOST      : F5zO2Ovtvf+f7Lw0Ef++ign1znZAQMHM
             AApQOiB9CqA=


End timestamp: 2023-03-09 16:27:33 +0200 (run time: 4m 28s)

As you can see there are no new added entries for /root/test.txt and some other changed records for vnstat service as well as fail2ban ones, so the Intrusion detection system works just as we expected it.

8. Configure Email AIDE changed files alerting Email recipient address

From here on aide package has set its own cron job which is automatically doing the check operation every day and any new file modifications will be captured and alerts sent to local root@localhost mailbox account, so you can check it out later with mail command.

If you want to sent the Email alert for any files modifications occured to another email, assuming that you have a locally running SMTP server with a mail relay to send to external mails, you can do it via /etc/default/aide via:

MAILTO=root


For example change it to a FQDN email address

MAILTO=external_mail@your-mail.com

9.Force AIDE to run AIDE at specitic more frequent time intervals

You can as well install a cron job to execute AIDE at specific time intervals, as of your choice

Lets say you want to run a custom prepared set of files to monitor in /etc/aide/aide_custom_config.conf configure a new cronjob like below:

root@server:~# crontab -u root -e
*/5 * * * * aide -c /etc/aide/aide_custom_config.conf -u && cp /var/lib/custom-aide/aide.db{.new,}


This will execute AIDE system check every 5 minutse and email the report to ealier configured email username@whatever-your-smtp.com via /etc/default/aide

10. Check the output of AIDE for changes – useful for getting a files changes from aide from scripts

Check the command exit status.

root@server:~# echo $?

According to AIDE man pages, the AIDE’s exit status is normally 0 if no errors occurred. Except when the –check, –compare or –update command was requested, in which case the exit status is defined as:

   1 * (new files detected?)     +

   2 * (removed files detected?) +

   4 * (changed files detected?)


   Since  those three cases can occur together, the respective error codes are added. For example, if there are new files and removed files detected, the exit status will be 1 + 2 = 3.

   Additionally, the following exit codes are defined for generic error conditions in aide help manual:

   14 Error writing error

   15 Invalid argument error

   16 Unimplemented function error

   17 Invalid configureline error

   18 IO error

   19 Version mismatch error

PLEASE CONSIDER

  • That AIDE checks might be resource intensive
    and could cause a peak in CPU use and have a negative effect on lets very loaded application server machines,
    thus causing a performance issuea during integrity checks !
     
  • If you are scanning file system wide and you do it frequent, be sure to provide “enough” resources or schedule the scan at a times that the Linux host will be less used !
     
  • Whenever you made any AIDE configuration changes, remember to initialize the database to create a baseline !

Howto convert KVM QCOW2 format Virtual Machine to Vmdk to migrate to VMware ESXi

Thursday, November 17th, 2022

qcow2-to-vmdkvk-convert-to-complete-linux-kvm-to-vmware-esxi-migration

Why you would want to convert qcow2 to vmdk?

When managing the heterogeneous virtual environment or changing the virtualization solutions that become so common nowadays, you might need to migrate qcow2 from a Linux based KVM virtualization solution to VMWare's proprietary  vmdk – the file format in which a VMWare does keep stored it's VMs, especially if you have a small business or work in a small start-up company where you cannot afford to buy something professional as VMware vCenter Converter Standalone or Microsoft virtual machine converter (MVMC)- usually used to to migrate VMware hosts to Hyper-V hosts, but also capable to migrate .qcow2 to .vmdk. The reason is that your old datacenter based on Linux OS custom KVM virtual machines might be moved to VMWare ESX to guarantee better and more systemized management (which though is very questionable, since most of my experiences with VMWare was that though the software was a great one, the people who manage it was not very much specialists in managing it).

Another common reason is that running a separate Linux virtual machine, costs you more than a well organized VMWare farm because you need more qualified Linux specialists to manage the KVMs thus KVM to VMWare management as in most big corporations nowadays’s main target is to cut the costs.
Even with successful migrations like that, though you might often expect a drop in the quality of the service when your VM ends in the VMWare farm.

Nomatter what’s the reason to migrate qcow2 to VMDK So lets proceed with how the .QCOW2 to .VMDK can be easily done.


1. Get information about the VM you would like to migrate to VMDK

In QEMU-KVM environment, the popular image format is qcow2, which outperforms the first generation of qcow format and raw format. You can find the files of virtual disks by checking the information of virtual machine by virsh command:

[root@hypervisor-machine ~]# virsh dominfo virtual-machine-name

INFO
ID: {e59ae416-9314-4e4b-af07-21c31d91b3fb}
EnvID: 1704649750
Name: CentOS7minimal
Description:
Type: VM
State: stopped
OS: centos7
Template: no
Uptime: 00:00:00 (since 2019-04-25 13:04:11)
Home: /vz/vmprivate/e39ae416-9314-4e4b-af05-21c31d91b3fb/
Owner: root@.
GuestTools: state=not_installed
GuestTools autoupdate: on
Autostart: off
Autostop: shutdown
Autocompact: off
Boot order: hdd0 cdrom0
EFI boot: off
Allow select boot device: off
External boot device:
On guest crash: restart
Remote display: mode=manual port=6903 address=0.0.0.0
Remote display state: stopped
Hardware:
  cpu sockets=1 cpus=2 cores=2 VT-x accl=high mode=64 ioprio=4 iolimit='0'
  memory 2048Mb
  video 32Mb 3d acceleration=off vertical sync=yes
  memory_guarantee auto
  hdd0 (+) scsi:0 image='/vz/vmprivate/e59ae415-9314-4e4b-af05-21c31d91b3fb/harddisk.hdd' type='expanded' 5120Mb subtype=virtio-scsi
  cdrom0 (+) scsi:1 image='/home/CentOS-7-x86_64-Minimal-1611.iso' state=disconnected subtype=virtio-scsi
  usb (+)
  net0 (+) dev='vme42bef5f3' network='Bridged' mac=001C42BEF5F3 card=virtio ips='10.50.50.27/255.255.255.192 ' gw='10.50.50.1'
SmartMount: (-)
Disabled Windows logo: on
Nested virtualization: off
Offline management: (-)
Hostname: kvmhost.fqdn.com


2. Convert the harddrive to VMDK

[root@hypervisor-machine e59ae415-9314-4e4b-af05-21c31d91b3fb]# ls -lsah

1.3G -rw-r—– 1 root root 1.3G Apr 25 14:43 harddisk.hdd

a. Converstion with qemu:

You can use qemu-img tool that is installable via cmds:

yum install quemu-img / apt install qemu-img / zipper install qemu-img (depending on the distribution RedHat / Debian / SuSE Linux)

-f: format of the source image

-O: format of the target image

[root@hypervisor-machine ~]# qemu-img convert -f qcow2 -O vmdk \-o adapter_type=lsilogic,subformat=streamOptimized,compat6 harddisk.hdd harddisklsilogic.vmdk


[root@ hypervisor-machine e59ae415-9314-4e4b-af05-21c31d91b3fb]# ls -lsah

1.3G -rw-r—– 1 root root 1.3G Apr 25 14:43 harddisk.hdd

536M -rw-r–r– 1 root root 536M Apr 26 14:52 harddisklsilogic.vmdk

3. Upload the new harddrive to the ESXi Hypervisor and adapt it to ESX

This vmdk might not be able to used on ESXi, but you can use it on VMware Workstation. To let it work on ESXi, you need to use vmkfstools to convert it again.


a. Adapt the filesystem to ESXi

[root@hypervisor-machine ~]# vmkfstools -i harddisklsilogic.vmdk  -d thin harddisk.vmdk


4. Create a VM and add the converted harddrive to the machine. 

Futher

Recreate the initramfs

But of course this won’t work directly as it often happens with Linux 🙂 !!. 
We need to make adjustments to the virtual machine as well with few manual interventions:

1. Start the machine from the VMWare interface

2. Grub CentOS Linux rescue will appear from the prompt

3. Run command

dracut –regenerate-all –force


to Recreate the initramfs.
 

Note that You might also have to edit your network configuration since your network device usually get’s a different name.
 

Finally reboot the host:

[root@hypervisor-machine ~]# reboot


And voila you’re ready to play the VM inside the ESX after some testing, you might switch off the KVM Hypervisor hosted VM and reroute the network to point to the ESX Cluster.


Install Zabbix Agent client on CentOS 9 Stream Linux, Disable Selinux and Firewalld on CentOS9 to make zabbix-agentd send data to server

Thursday, April 14th, 2022

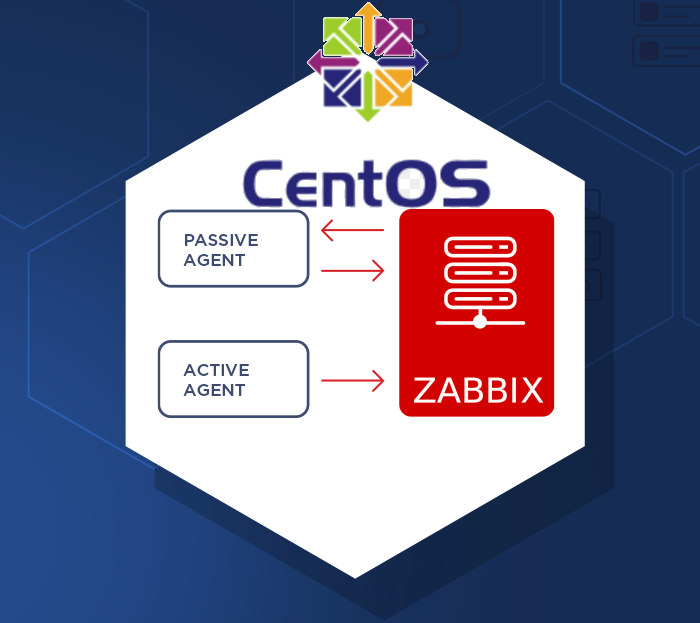
https://pc-freak.net/images/zabbix_agent_active_passive-zabbix-agent-centos-9-install-howto

Installing Zabbix is usually a trivial stuff, you either use the embedded distribution built packages if such are available this is for example defetch the right zabbix release repository  that configures the Zabbix official repo in the system, configure the Zabbix server or Proxy if such is used inside /etc/zabbix/zabbix_agentd.conf and start the client, i.e. I expected that it will be a simple and straight forward also on the freshly installed CentOS 9 Linux cause placing a zabbix-agent monitroing is a trivial stuff however installing came to error:

Key import failed (code 2). Failing package is: zabbix-agent-6.0.3-1.el8.x86_64


This is what I've done

1. Download and install zabbix-release-6.0-1.el8.noarch.rpm directly from zabbix

I've followed the official documentation from zabbix.com and ran:
 

[root@centos9 /root ]# rpm -Uvh https://repo.zabbix.com/zabbix/6.0/rhel/8/x86_64/zabbix-release-6.0-1.el8.noarch.rpm


2. Install  the zabbix-agent RPM package from the repositry

[root@centos9 rpm-gpg]# yum install zabbix-agent -y
Last metadata expiration check: 0:02:46 ago on Tue 12 Apr 2022 08:49:34 AM EDT.
Dependencies resolved.
=============================================
 Package                               Architecture                Version                              Repository                      Size
=============================================
Installing:
 zabbix-agent                          x86_64                      6.0.3-1.el8                          zabbix                         526 k
Installing dependencies:
 compat-openssl11                      x86_64                      1:1.1.1k-3.el9                       appstream                      1.5 M
 openldap-compat                       x86_64                      2.4.59-4.el9                         baseos                          14 k

Transaction Summary
==============================================
Install  3 PackagesTotal size: 2.0 M
Installed size: 6.1 M
Downloading Packages:
[SKIPPED] openldap-compat-2.4.59-4.el9.x86_64.rpm: Already downloaded
[SKIPPED] compat-openssl11-1.1.1k-3.el9.x86_64.rpm: Already downloaded
[SKIPPED] zabbix-agent-6.0.3-1.el8.x86_64.rpm: Already downloaded
Zabbix Official Repository – x86_64                                                                          1.6 MB/s | 1.7 kB     00:00
Importing GPG key 0xA14FE591:
 Userid     : "Zabbix LLC <packager@zabbix.com>"
 Fingerprint: A184 8F53 52D0 22B9 471D 83D0 082A B56B A14F E591
 From       : /etc/pki/rpm-gpg/RPM-GPG-KEY-ZABBIX-A14FE591
Key import failed (code 2). Failing package is: zabbix-agent-6.0.3-1.el8.x86_64
 GPG Keys are configured as: file:///etc/pki/rpm-gpg/RPM-GPG-KEY-ZABBIX-A14FE591
The downloaded packages were saved in cache until the next successful transaction.
You can remove cached packages by e
xecuting 'yum clean packages'.
Error: GPG check FAILED


3. Work around to skip GPG to install zabbix-agent 6 on CentOS 9

With Linux everything becomes more and more of a hack …
The logical thing to was to first,  check and it assure that the missing RPM GPG key is at place

[root@centos9 rpm-gpg]# ls -al  /etc/pki/rpm-gpg/RPM-GPG-KEY-ZABBIX-A14FE591
-rw-r–r– 1 root root 1719 Feb 11 16:29 /etc/pki/rpm-gpg/RPM-GPG-KEY-ZABBIX-A14FE591

Strangely the key was in place.

Hence to have the key loaded I've tried to import the gpg key manually with gpg command:

[root@centos9 rpm-gpg]# gpg –import /etc/pki/rpm-gpg/RPM-GPG-KEY-ZABBIX-A14FE591


And attempted install again zabbix-agent once again:
 

[root@centos9 rpm-gpg]# yum install zabbix-agent -y
Last metadata expiration check: 0:02:46 ago on Tue 12 Apr 2022 08:49:34 AM EDT.
Dependencies resolved.
==============================================
 Package                               Architecture                Version                              Repository                      Size
==============================================
Installing:
 zabbix-agent                          x86_64                      6.0.3-1.el8                          zabbix                         526 k
Installing dependencies:
 compat-openssl11                      x86_64                      1:1.1.1k-3.el9                       appstream                      1.5 M
 openldap-compat                       x86_64                      2.4.59-4.el9                         baseos                          14 k

Transaction Summary
==============================================
Install  3 Packages

Total size: 2.0 M
Installed size: 6.1 M
Downloading Packages:
[SKIPPED] openldap-compat-2.4.59-4.el9.x86_64.rpm: Already downloaded
[SKIPPED] compat-openssl11-1.1.1k-3.el9.x86_64.rpm: Already downloaded
[SKIPPED] zabbix-agent-6.0.3-1.el8.x86_64.rpm: Already downloaded
Zabbix Official Repository – x86_64                                                                          1.6 MB/s | 1.7 kB     00:00
Importing GPG key 0xA14FE591:
 Userid     : "Zabbix LLC <packager@zabbix.com>"
 Fingerprint: A184 8F53 52D0 22B9 471D 83D0 082A B56B A14F E591
 From       : /etc/pki/rpm-gpg/RPM-GPG-KEY-ZABBIX-A14FE591
Key import failed (code 2). Failing package is: zabbix-agent-6.0.3-1.el8.x86_64
 GPG Keys are configured as: file:///etc/pki/rpm-gpg/RPM-GPG-KEY-ZABBIX-A14FE591
The downloaded packages were saved in cache until the next successful transaction.
You can remove cached packages by executing 'yum clean packages'.
Error: GPG check FAILED


Unfortunately that was not a go, so totally pissed off I've disabled the gpgcheck for packages completely as a very raw bad and unrecommended work-around to eventually install the zabbix-agentd like that.

Usually the RPM gpg key failures check on RPM packages could be could be workaround with in dnf, so I've tried that one without success.

[root@centos9 rpm-gpg]# dnf update –nogpgcheck
Total                                                                                                        181 kB/s | 526 kB     00:02
Zabbix Official Repository – x86_64                                                                          1.6 MB/s | 1.7 kB     00:00
Importing GPG key 0xA14FE591:
 Userid     : "Zabbix LLC <packager@zabbix.com>"
 Fingerprint: A184 8F53 52D0 22B9 471D 83D0 082A B56B A14F E591
 From       : /etc/pki/rpm-gpg/RPM-GPG-KEY-ZABBIX-A14FE591
Is this ok [y/N]: y
Key import failed (code 2). Failing package is: zabbix-agent-6.0.3-1.el8.x86_64
 GPG Keys are configured as: file:///etc/pki/rpm-gpg/RPM-GPG-KEY-ZABBIX-A14FE591
The downloaded packages were saved in cache until the next successful transaction.
You can remove cached packages by executing 'dnf clean packages'.
Error: GPG check FAILED

Further tried to use the –nogpgpcheck 
which according to its man page:


–nogpgpcheck 
Skip checking GPG signatures on packages (if RPM policy allows).


In yum the nogpgcheck option according to its man yum does exactly the same thing


[root@centos9 rpm-gpg]# yum install zabbix-agent –nogpgcheck -y
 

Dependencies resolved.
===============================================
 Package                             Architecture                  Version                               Repository                     Size
===============================================
Installing:
 zabbix-agent                        x86_64                        6.0.3-1.el8                           zabbix                        526 k

Transaction Summary
===============================================

Total size: 526 k
Installed size: 2.3 M
Is this ok [y/N]: y
Downloading Packages:

Running transaction check
Transaction check succeeded.
Running transaction test
Transaction test succeeded.
Running transaction
  Preparing        :                                                                                                                     1/1
  Running scriptlet: zabbix-agent-6.0.3-1.el8.x86_64                                                                                     1/2
  Reinstalling     : zabbix-agent-6.0.3-1.el8.x86_64                                                                                     1/2
  Running scriptlet: zabbix-agent-6.0.3-1.el8.x86_64                                                                                     1/2
  Running scriptlet: zabbix-agent-6.0.3-1.el8.x86_64                                                                                     2/2
  Cleanup          : zabbix-agent-6.0.3-1.el8.x86_64                                                                                     2/2
  Running scriptlet: zabbix-agent-6.0.3-1.el8.x86_64                                                                                     2/2
  Verifying        : zabbix-agent-6.0.3-1.el8.x86_64                                                                                     1/2
  Verifying        : zabbix-agent-6.0.3-1.el8.x86_64                                                                                     2/2

Installed:
  zabbix-agent-6.0.3-1.el8.x86_64

Complete!
[root@centos9 ~]#

Voila! zabbix-agentd on CentOS 9 Install succeeded!

Yes I know disabling a GPG check is not really secure and seems to be an ugly solution but since I'm cut of time in the moment and it is just for experimental install of zabbix-agent on CentOS
plus we already trusted the zabbix package repository anyways, I guess it doesn't much matter.

4. Configure Zabbix-agent on the machine

Once you choose how the zabbix-agent should sent the data to the zabbix-server (e.g. Active or Passive) mode the The minimum set of configuration you should
have at place should be something like mine:

[root@centos9 ~]# grep -v '\#' /etc/zabbix/zabbix_agentd.conf | sed /^$/d
PidFile=/var/run/zabbix/zabbix_agentd.pid
LogFile=/var/log/zabbix/zabbix_agentd.log
LogFileSize=0
Server=192.168.1.70,127.0.0.1
ServerActive=192.168.1.70,127.0.0.1
Hostname=centos9
Include=/etc/zabbix/zabbix_agentd.d/*.conf

5. Start and Enable zabbix-agent client

To have it up and running

[root@centos9 ~]# systemct start zabbix-agent
[root@centos9 ~]# systemctl enable zabbix-agent

6. Disable SELinux to prevent it interfere with zabbix-agentd 

Other amazement was that even though I've now had configured Active check and a Server and correct configuration the Zabbix-Server could not reach the zabbix-agent for some weird reason.
I thought that it might be selinux and checked it and seems by default in the fresh installed CentOS 9 Linux selinux is already automatically set to enabled.

After stopping it i made sure, SeLinux would block for security reasons client connectivity to the zabbix-server until you either allow zabbix exception in SeLinux or until completely disable it.
 

[root@centos9 ~]# sestatus

SELinux status:                 enabled
SELinuxfs mount:                /sys/fs/selinux
SELinux root directory:         /etc/selinux
Loaded policy name:             targeted
Current mode:                   enforcing
Mode from config file:          enforcing
Policy MLS status:              enabled
Policy deny_unknown status:     allowed
Memory protection checking:     actual (secure)
Max kernel policy version:      31

To temporarily change the mode from its default targeted to permissive mode 

[root@centos9 ~]# setenforce 0

[root@centos9 ~]# sestatus

SELinux status:                 enabled
SELinuxfs mount:                /sys/fs/selinux
SELinux root directory:         /etc/selinux
Loaded policy name:             targeted
Current mode:                   permissive
Mode from config file:          permissive
Policy MLS status:              enabled
Policy deny_unknown status:     allowed
Memory protection checking:     actual (secure)
Max kernel policy version:      31


That would work for current session but won't take affect on next reboot, thus it is much better to disable selinux on next boot:

[root@centos9 ~]# cat /etc/selinux/config
# This file controls the state of SELinux on the system.
# SELINUX= can take one of these three values:
#     enforcing – SELinux security policy is enforced.
#     permissive – SELinux prints warnings instead of enforcing.
#     disabled – No SELinux policy is loaded.
SELINUX=permissive
# SELINUXTYPE= can take one of these three values:
#     targeted – Targeted processes are protected,
#     minimum – Modification of targeted policy. Only selected processes are protected. 
#     mls – Multi Level Security protection.
SELINUXTYPE=targeted


To disable selinux change:

SELINUXTYPE=disabled

[root@centos9 ~]# grep -v \# /etc/selinux/config

SELINUX=disabled
SELINUXTYPE=targeted


To make the OS disable selinux and test it is disabled you will have to reboot 

[root@centos9 ~]# reboot


Check its status again, it should be:

[root@centos9 ~]# sestatus
SELinux status:                 disabled


7. Enable zabbix-agent through firewall or disable firewalld service completely

By default CentOS 9 has the firewalld also enabled and either you have to enable zabbix to communicate to the remote server host.

To enable access for from and to zabbix-agentd in both Active / Passive mode:

#firewall settings:
[root@centos9 rpm-gpg]# firewall-cmd –permanent –add-port=10050/tcp
[root@centos9 rpm-gpg]# firewall-cmd –permanent –add-port=10051/tcp
[root@centos9 rpm-gpg]# firewall-cmd –reload
[root@centos9 rpm-gpg]# systemctl restart firewalld
[root@centos9 rpm-gpg]# systemctl restart zabbix-agent


If the machine is in a local DMZ-ed network with tightly configured firewall router in front of it, you could completely disable firewalld.

[root@centos9 rpm-gpg]# systemctl stop firewalld
[root@centos9 rpm-gpg]# systemctl disable firewalld
Removed /etc/systemd/system/multi-user.target.wants/firewalld.service.
Removed /etc/systemd/system/dbus-org.fedoraproject.FirewallD1.service.


Next login to Zabbix-server web interface with administrator and from Configuration -> Hosts -> Create the centos9 hostname and add it a template of choice. The data from the added machine should shortly appear after another zabbix restart:

[root@centos9 rpm-gpg]#  systemctl restart zabbix-agentd


8. Tracking other oddities with the zabbix-agent through log

If anyways still zabbix have issues connectin to remote node, increase the debug log level section
 

[root@centos9 rpm-gpg]# vim /etc/zabbix/zabbix_agentd.conf
DebugLevel 5

### Option: DebugLevel
#       Specifies debug level:
#       0 – basic information about starting and stopping of Zabbix processes
#       1 – critical information
#       2 – error information
#       3 – warnings
#       4 – for debugging (produces lots of information)
#       5 – extended debugging (produces even more information)
#
# Mandatory: no
# Range: 0-5
# Default:
# DebugLevel=3

[root@centos9 rpm-gpg]# systemctl restart zabbix-agent

Keep in mind that debugging will be too verbose, so once you make the machine being seen in zabbix, don't forget to comment out the line and restart agent to turn it off.

9. Testing zabbix-agent, How to send an alert to specific item key

Usually when writting userparameter scripts, data collected from scripts is being sent to zabbix serveria via Item keys.
Thus one way to check the zabbix-agent -> zabbix server data send works fine is to send some simultaneous data via a key
Once zabbix-agent is configured on the machine 

In this case we will use something like ApplicationSupport-Item as an item.
 

[root@centos9 rpm-gpg]# /usr/bin/zabbix_sender -c "/etc/zabbix/zabbix_agentd.conf" -k "ApplicationSupport-Item" -o "here is the message"

Assuming you have created the newly prepared zabbix-agent host into Zabbix Server, you should be shortly able to see the data come in Latest data.

Exaltation of the Holy Cross day in the Bulgarian Orthodox Church / Veneration of the Holy cross church feast

Saturday, April 3rd, 2021

Exaltation of the Holy Christ Cross icon, day in the Bulgarian Orthodox ChurchThe Universal Exaltation of the precious and life-giving Cross XVII century – icon from village of Belovo Trqvna region

he Universal Exaltation of the Precious and Life-Giving Cross (Elevation of the Cross)'s day is feted on 14th of September each year in accordance to the new calendar order, according to old church calendar, the Church celebrated it on 27th of September.

The day is marked by a strong fasting, for short we refer in Bulgarian to this big Church feast as (The day of the Cross / Krystov den).
The Holy Orthodox Christian Church does worship the cross 4 times a year on:

  • Third Sunday after the start of the Great Lent
  • Holy Friday (Good Friday)
  • 1st of August
  • and

  • 14th of September – The Exaltation of the Holy life giving Cross

On this day, we the orthodox christians go to the Church and admirationally bow and kiss the Holy Cross on which our Saviour Jesus Christ suffered for our salvation.Through his cross suffering our Lord has granted to all of us the Christians an unbeatable "weapon" against evil and sin.
Through cross Christ has been victorious over sin and death.

According to old Church tradition, on the day Christian people were asking for the priest to go to their homes and do vodosvet (sprinkle their houses with a blessed holy water).Vodosvet is one of the Orthodox Church mystics, there is a specific prayers begging God for forgiveness of sins, asking for good health and blessing. The prayers are being red over a vessel containing clean water. Finally he blesses the vessel with Water with the life Giving cross 3 times (as a symbol of the Holy Trinity). Then the priest uses a the cross and a tiny piece of twig to sprinkle all the people and objects in the house.

On the holy exaltation of the holy cross feast we also celebrate also the following 3 events:

1. The miraculous appearance of the Holy Cross to emper st. Constantine
2. The finding in Jerusalem of the Holy life-giving cross in Golgotha
3. The return of the Life-giving cross from persian captivity
On 14th of September, according to Church tradition saint John of John Chrysostom has give away his spirit and joined the assembly of saints of God, however because of the Exaltation great significance, the church holy fathers decided that this is celebrated on 13th of September.

The Antiphon for the Exaltation of the Cross feast is singed and translated from Slavonic its meaning goes like this:

Troparion-Vyzdvizhenie-na-Svetiq-Kryst-Gospoden-Exalation-of-the-Cross-Church-slavonic


Troparion of the Exaltation of the Holy Cross voice 1 / Тропар на светия Кръст, глас 1

Спаси, Господи, люди Твоя и благослови достояние Твое, победы на сопротивныя даруя, и Твое сохраняя Крестом Твоим жительство.

Troparion voice 1

Save Oh Lord, your people and bless possession, grant us oh Lord a victory over our enemies and save your inheritance with your Cross

Troparion voice 2

You've been lifted willingly on the cross, grant you mercies to your inheritance oh Christ our Lord,
stregthen the spirits of the pious king and to your people,
grant us victory against our enemies,
Surround us with peace and with peace give us unbeatable victory

In the Glorification part of the Holy Liturgy feast service its singed:

We magnify you, oh Christ life giver,
and your Holy cross, because you have saved us from the enemy.

What does the Church tradition says about the finding of the holy cross of Christs sufferings?

After the Church crucifixion of Christ, according to the tradition of that times, the weapon for punishment from this kinds – the cross tree was buried in the ground on the same place, where the punishment was executed.
Following the tradition on Gologthas where Christ was crucified was buried the cross used for crucifixion.
In later times, emperor Adrian in his attempt to destroy christianity and the place of pilgrimage of Golgotha has issued an order to built a pagan shrine on the same place.
Later under the reign of Emperor st. Constantine the cross appeared in the sky in a miraculous way and again under his reign the Golgotha place which means literally translated( the place of the Skulls) was discovered.

Third Sunday after start of the Great Lent – Sunday of the Veneration of the Holy Cross

Today 03.04.2021 we the orthodox are in the blessed period of the Great Lent. It is no coincidence the Church has set this feast on exactly this date. It is set on 3rd week of the 43 days (7 Weeks) that lasts the fasting period on the Eastern Orthodox Christian church because this is a little bit less than the half of the lent period. We know by the experience of spiritual fathers that once we start the job the hardest periods are nearby in 40% once the work is done and in that times it is a desire of the person to leave and quit the job but if he perseveres suddenly when the set goal is progressing this is overcome but then again in the end of the period of the goal to complete we start desiring to quit the started job and loose all energy put together, as a plan of the evil which wants us to always loose energy (both spiritual and physical) and never gain anything. Thus the Church set the feast of the Exaltation of the Cross to give us a way to attain new energy for the cross to be able to goodly continue in the deed of the lent. By the cross and his glorious power hence the spirit of despondency is crashed down and we're strenghtened and rejoice for the great glory our God has given us.
The_Exaltation-of-the-Holy-Cross-of-Christ-bishop-Polikarp-Bulgarian-Orthodox-Church
 

The exaltation of the cross is also a feast of everyone celebrating his own cross. The victory over death and everything was once fulfilled by Christ on the Cross. The humanity is saved already but it is up to everyone's free will to accept this salvation or not. The path is set it is the path of the Cross of Christ, meaning acceptance (humility) of all the unpleasant life events and situations, accepting everydays unexpected changes believing that this is God's providence and cross for each one of us, accepting the pain and suffering that is part of the personal cross we hold, accepting that one day our beloved and friends will pass away from this life, accepting the fact we age and the aging guarantees sufferings of the body but the spirit is refreshed by the grace of God, accepting all and enduring everyhing for the sake of the cross … 

Sunday-of-the-Veneration-of-the-Holy-Cross-Bulgarian_Orthodox-Church

The cross is a holder of the Universe and there is no power that will ever overwhelm it as it is said in the Church singings The Cross is the Holder (binds together) the whole universe. It is by the Cross all the evil has been conquered and life eternal has been giving. The path of the cross is the suffering, this is hard for the modern man to accept as we have been set to believe the only measure for success is prosperity, personal well being, physical health, posessing things. On the contrary the Christian says the most blessed and best thing one can have is the cross meaning personal suffering for and with Christ. By the suffering of the Cross Christ has glorified the bodily flesh he was possessing while being on earth in the body. By the Cross Christ has become the one begotten of all the sons of God. By the cross saints has conquered all evils and has sanctified, by the cross we still continue to progress in the goodness. 
Let with the Holy miracle making power of our Saviour's cross by the prayers of all the Saints and our Theotokos (Holy Virgin Merry) God grant to all of us christians victory of our enemies! Amen


Howto Upgrade IBM Spectrum Protect Backup Client TSM 7.X to 8.1.8, Update Tivoli 8.1.8 to 8.1.11 on CentOS and Redhat Linux

Thursday, December 3rd, 2020


IBM-spectrum-protect-backup-logo-tivoli-tsm-logo

Having another day of a system administrator boredom, we had a task to upgrade some Tivoli TSM Backup clients running on a 20+ machines powered by CentOS and RHEL Linux to prepare the systems to be on the latest patched IBM Spectrum Backup client version available from IBM. For the task of patching I've used a central server where, I've initially downloaded the provided TSM client binaries archives. From this machine, we have copied TivSM*.tar to each and every system that needs to be patched and then patched. The task is not too complex as the running TSM in the machines are all at the same version and all running a recent patched version of Linux. Hence to make sure all works as expected we have tested TSM is upgraded from 7.X.X to 8.X.X on one machine and then test 8.1.8 to 8.1.11 upgrade on another one. Once having confirmed that Backups works as expected after upgrade. We have proceeded to do it massively on each of the rest 20+ hosts.
Below article's goal is to help some lazy sysadmin with the task to prepare an TSM Backup upgrade procedure to standartize TSM Upgrade, which as many of the IBM's softwares is very specific and its upgrade requires, a bit of manual work and extra cautious as there seems to be no easy way (or at least I don't know it), to do the upgrade by simply adding an RPM repository and doing, something like yum install tivsm*.


0. Check if there is at least 2G free of space

According to documentation the minimum space you need to a functional install without having it half installed or filling up your filesystem is 2 Gigabytes of Free Memory on a filesystem where the .tar and rpms will be living.

Thus check what is the situation with your filesystem where you wills store the .tar archice and extract .RPM files / install the RPM files.

# df -h

1. Download the correct tarball with 8.1 Client

On one central machine you would need to download the Tivoli you can do that via wget / curl / lynx whatever is at hand on the Linux server.

As of time of writting this article TSM's 8.1.11 location is at
URL:

http://public.dhe.ibm.com/storage/tivoli-storage-management/maintenance/client/v8r1/Linux/LinuxX86/BA/v8111/

I've made a local download mirror of Tivoli TSM 8.1.11 here.
In case you need to install IBM Spectrum Backup Client to a PCI secured environment to a DMZ-ed LAN network from a work PC you can Download it first from your local PC and via Citrix client upload program or WinSCP upload it to a central replication host from where you will later copy to each of the other server nodes that needs to be upgraded.

Lets Copy archive to all Server hosts where you want it later installed, using a small hack

Assuming you already have an Excel document or a Plain text document with all the IPs of the affected hosts where you will need to get TSM upgraded. Extract this data and from it create a plain text file /home/user/hosts.txt containing all the machine IPs lined up separated with carriage return separations (\n), so you can loop over each one and use scp to send the files.

– Replicate Tivoli tar to all machine hosts where you want to get IBM Spectrum installed or upgraded.
Do it with a loop like this:

# for i in $(cat hosts.txt); do scp 8.1.11.0-TIV-TSMBAC-LinuxX86.tar user@$i:/home/user/; done

 Copy to a Copy buffer temporary your server password assuming all your passwords to each machine are identical and paste your login user pass for each host to initiate transfer
 

2. SSH to each of the Machine hosts IPs

Once you login to the host you want to upgrade
Go to your user $HOME /home/user and create files where we'll temporary store Tivoli archive files and extract RPMs

[root@linux-server user]# mkdir -p ~/tsm/TSM_BCK/
[root@linux-server user]# mv 8.1.11.0-TIV-TSMBAC-LinuxX86.tar ~/tsm
[root@linux-server user]# cd tsm
[root@linux-server user]# tar -xvvf 8.1.11.0-TIV-TSMBAC-LinuxX86.tar
gskcrypt64-8.0.55.17.linux.x86_64.rpm
GSKit.pub.pgp
gskssl64-8.0.55.17.linux.x86_64.rpm
README_api.htm
README.htm
RPM-GPG-KEY-ibmpkg
TIVsm-API64.x86_64.rpm
TIVsm-APIcit.x86_64.rpm
TIVsm-BAcit.x86_64.rpm
TIVsm-BAhdw.x86_64.rpm
TIVsm-BA.x86_64.rpm
TIVsm-filepath-source.tar.gz
TIVsm-JBB.x86_64.rpm
TIVsm-WEBGUI.x86_64.rpm
update.txt

3. Create backup of old backup files

It is always a good idea to keep old backup files

[root@linux-server tsm]# cp -av /opt/tivoli/tsm/client/ba/bin/dsm.opt ~/tsm/TSM_BCK/dsm.opt_bak_$(date +'%Y_%M_%H')
[root@linux-server tsm]# cp -av /opt/tivoli/tsm/client/ba/bin/dsm.sys ~/tsm/TSM_BCK/dsm.sys_bak_$(date +'%Y_%M_%H')

[root@linux-server tsm]# [[ -f /etc/adsm/TSM.PWD ]] && cp -av /etc/adsm/TSM.PWD ~/TSM_BCK/ || echo 'file doesnt exist'

/etc/adsm/TSM.PWD this file is only there as legacy for TSM it contained encrypted passwords inver 7 for updates. In TSM v.8 encryption file is not there as new mechanism for sensitive data was introduced.
Be aware that from Tivoli 8.X it will return error
exist'

!! Note – if dsm.opt , dsm.sys files are on different locations – please use correct full path locations !!

4. Stop  dsmcad – TSM Service daemon

[root@linux-server tsm]# systemctl stop dsmcad

5. Locate and deinstall all old Clients

Depending on the version to upgrade if you're upgrading from TSM version 7 to 8, you will get output like.

[root@linux-server tsm]# rpm -qa | grep 'TIVsm-'
TIVsm-BA-7.1.6-2.x86_64
TIVsm-API64-7.1.6-2.x86_64

If you're one of this paranoid admins you can remove TIVsm packs  one by one.

[root@linux-server tsm]# rpm -e TIVsm-BA-7.1.6-2.x86_64
[root@linux-server tsm]# rpm -e TIVsm-API64-7.1.6-2.x86_64

Instead if upgrading from version 8.1.8 to 8.1.11 due to the Security CVE advisory recently published by IBM e.g. (IBM Runtime Vulnerability affects IBM Spectrum Backup archive Client) and  vulnerability in Apache Commons Log4J affecting IBM Spectrum Protect Backup Archive Client.

[root@linux-server tsm]# rpm -qa | grep 'TIVsm-'
TIVsm-API64-8.1.8-0.x86_64
TIVsm-BA-8.1.8-0.x86_64

Assuming you're not scared of a bit automation you can straight do it with below one liner too 🙂

# rpm -e $(rpm -qa | grep TIVsm)

[root@linux-server tsm]# rpm -qa | grep gsk
[root@linux-server tsm]# rpm -e gskcrypt64 gskssl64

6. Check uninstallation success:

[root@linux-server tsm]# rpm -qa | grep TIVsm
[root@linux-server tsm]# rpm -qa | grep gsk

Here you should an Empty output, if packages are not on the system, e.g. Empty output is good output ! 🙂

7. Install new client IBM Spectrum Client (Tivoli Storage Manager) and lib dependencies

[root@linux-server tsm]# rpm -ivh gskcrypt64-8.0.55.4.linux.x86_64.rpm
[root@linux-server tsm]# rpm -ivh gskssl64-8.0.55.4.linux.x86_64.rpm

 If you're lazy to type you can do as well

[root@linux-server tsm]# rpm -Uvh gsk*

Next step is to install main Tivoli SM components the the API files and BA (The Backup Archive Client)

[root@linux-server tsm]# rpm -ivh TIVsm-API64.x86_64.rpm
[root@linux-server tsm]# rpm -ivh TIVsm-BA.x86_64.rpm

If you have to do it on multiple servers and you do it manually following a guide like this, you might instead want to install them with one liner.

[root@linux-server tsm]# rpm -ivh TIVsm-API64.x86_64.rpm TIVsm-BA.x86_64.rpm

There are some Not mandatory "Common Inventory Technology" components (at some cases if you're using the API install it we did not need that), just for the sake if you need them on your servers due to backup architecture, install also below commented rpm files.

## rpm -ivh TIVsm-APIcit.x86_64.rpm

## rpm -ivh TIVsm-BAcit.x86_64.rpm

These packages not needed only for operation WebGUI TSM GUI management, (JBB) Journal Based Backup, BAhdw (the ONTAP library)


— TIVsm-WEBGUI.x86_64.rpm
— TIVsm-JBB.x86_64.rpm
— TIVsm-BAhdw.x86_64.rpm

8. Start and enable dsmcad service

[root@linux-server tsm]# systemctl stop dsmcad

You will get

##Warning: dsmcad.service changed on disk. Run 'systemctl daemon-reload' to reload units.

[root@linux-server tsm]# systemctl daemon-reload

[root@linux-server tsm]# systemctl start dsmcad


## enable dsmcad – it is disabled by default after install

[root@linux-server ~]# systemctl enable dsmcad

[root@linux-server tsm]# systemctl status dsmcad

9. Check dmscad service is really running

Once enabled IBM TSM will spawn a process in the bacground dmscad if it started properly you should have the process backgrounded.

[root@linux-server tsm]# ps -ef|grep -i dsm|grep -v grep
root      2881     1  0 18:05 ?        00:00:01 /usr/bin/dsmcad

If process is not there there might be some library or something not at place preventing the process to start …

10. Check DSMCAD /var/tsm logs for errors

After having dsmcad process enabled and running in background

[root@linux-server tsm]# grep -i Version /var/tsm/sched.log|tail -1
12/03/2020 18:06:29   Server Version 8, Release 1, Level 10.000


[root@linux-server tsm]# cat /var/tsm/dsmerror.log

To see the current TSM configuration files we can  grep out comments *

[root@linux-server tsm]# grep -v '*' /opt/tivoli/tsm/client/ba/bin/dsm.sys

Example Configuration of the agent:
—————————————————-
   *TSM SERVER NODE Location
   Servername           tsm_server
   COMMmethod           TCPip
   TCPPort              1400
   TCPServeraddress     tsmserver2.backuphost.com
   NodeName             NODE.SERVER-TO-BACKUP-HOSTNAME.COM
   Passwordaccess       generate
   SCHEDLOGNAME         /var/tsm/sched.log
   SCHEDLOGRETENTION    21 D
   SCHEDMODE            POLLING
   MANAGEDServices      schedule
   ERRORLOGNAME         /var/tsm/dsmerror.log
   ERRORLOGRETENTION    30 D
   INCLEXCL             /opt/tivoli/tsm/client/ba/bin/inclexcl.tsm

11. Remove tsm install directory tar ball and rpms to save space on system

The current version of Tivoli service manager is 586 Megabytes.

[root@linux-server tsm]# du -hsc 8.1.11.0-TIV-TSMBAC-LinuxX86.tar
586M    8.1.11.0-TIV-TSMBAC-LinuxX86.tar

Some systems are on purpose configured to have less space under their /home directory,
hence it is a good idea to clear up unnecessery files after completion.

Lets get rid of all the IBM Spectrum archive source files and the rest of RPMs used for installation.

[root@linux-server tsm]# rm -rf ~/tsm/{*.tar,*.rpm,*.gpg,*.htm,*.txt}

12. Check backups are really created on the configured remote Central backup server

To make sure after the upgrade the backups are continuously created and properly stored on the IBM Tivoly remote central backup server, either manually initiate a backup or wait for lets say a day and run dsmc client to show all created backups from previous day. To make sure you'll not get empty output you can on purpose modify some file by simply opening it and writting over without chaning anything e.g. modify your ~/.bashrc or ~/.bash_profile

## List all backups for '/' root directory from -fromdate='DD/MM/YY'

[root@linux-server tsm]# dsmc
Protect>
IBM Spectrum Protect
Command Line Backup-Archive Client Interface
  Client Version 8, Release 1, Level 11.0
  Client date/time: 12/03/2020 18:14:03
(c) Copyright by IBM Corporation and other(s) 1990, 2020. All Rights Reserved.

Node Name: NODE.SERVER-TO-BACKUP-HOSTNAME.COM
Session established with server TSM2_SERVER: AIX
  Server Version 8, Release 1, Level 10.000
  Server date/time: 12/03/2020 18:14:04  Last access: 12/03/2020 18:06:29
 
Protect> query backup -subdir=yes "/" -fromdate=12/3/2020
           Size        Backup Date                Mgmt Class           A/I File
           —-        ———–                ———-           — —-
         6,776  B  12/03/2020 01:26:53             DEFAULT              A  /etc/freshclam.conf
         6,685  B  12/03/2020 01:26:53             DEFAULT              A  /etc/freshclam.conf-2020-12-02
         5,602  B  12/03/2020 01:26:53             DEFAULT              A  /etc/hosts
         5,506  B  12/03/2020 01:26:53             DEFAULT              A  /etc/hosts-2020-12-02
           398  B  12/03/2020 01:26:53             DEFAULT              A  /opt/tivoli/tsm/client/ba/bin/tsmstats.ini
       114,328  B  12/03/2020 01:26:53             DEFAULT              A  /root/.bash_history
           403  B  12/03/2020 01:26:53             DEFAULT              A  /root/.lesshst

Windows 7 fix menu messed up cyrillic – How to fix cyrillic text in Windows

Friday, July 22nd, 2016

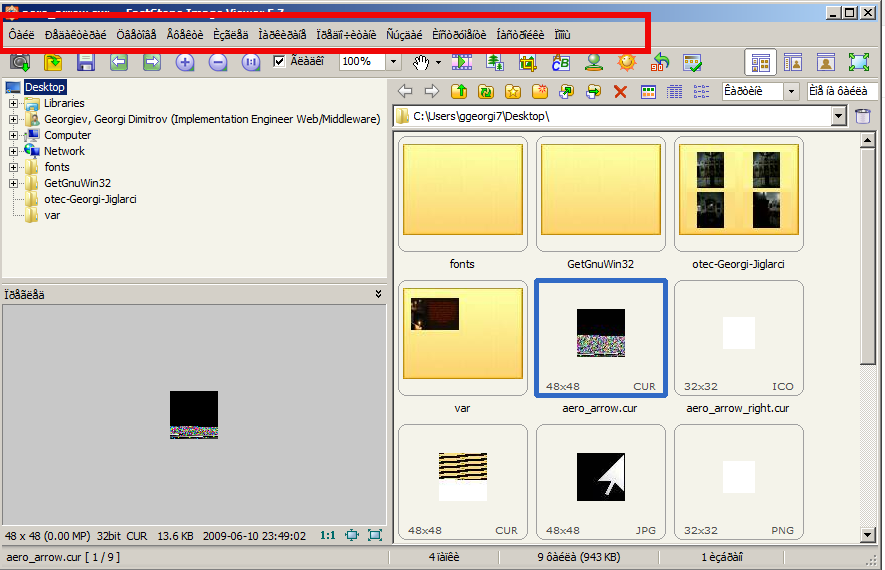
faststone-viewer-messed-up-menu-cyrillic-windows-7-screenshot

How to fix Cyrillic text on Windows 7

I've reinstalled my HP provided company work notebook with Windows 7 Enterprise x86 and had troubles with seeing Cyrillic written text, letters and fonts.
The result after installing some programs and selecting as a default language Bulgarian during installation setup prompt let me to see in some programs and in some of my old written text file names and Cyrillic WIN CP1251 content to be showing a cryptic letters like in above screenshot.

If you're being curious what is causing the broken encoding cyrillic text, it is the fact that in past a lot of cyrillic default encoding was written in KOI-8R and WIN-CP1251 encoding which is not unicode e.g. not compatible with the newer standard encoding for cyrillic UTF-8. Of course the authors of some old programs and documents are not really responsbie for the messed up cyrillic as noone expected that every Cyrillic text will be in UTF-8 in newer times.

Thanksfully there is a way to fix the unreadable / broken encoding cyrillic text by:

Going too menus:

Start menu -> Control Panel -> Change display language -> Clock, Language and Religion

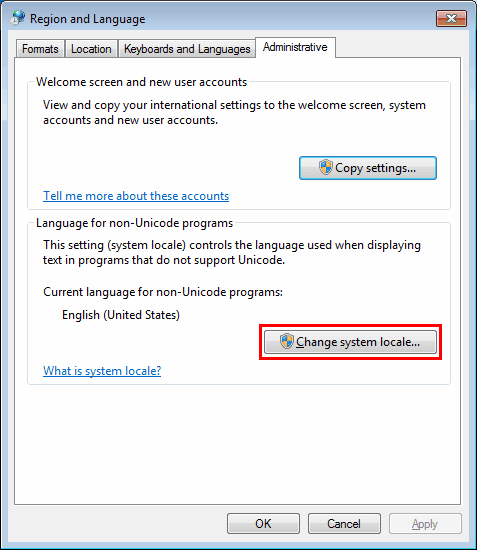
Once there click the Administratibe tab

and choose

Change system locale.

windows-7_administrative_tab_change-system-locale

Here if you're not logged in with administrator user you will be prompted for administrative privileges.

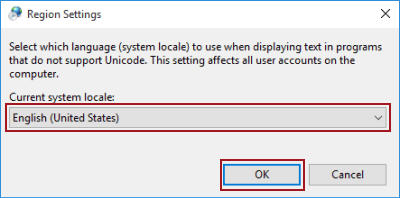
select-system-locale-choose-bulgarian-and-hit-ok-windows-7

Being there choose your language (country) to be:

Bulgarian (Bulgaria) – if you're like me a Bulgarian or Russian (if you're Russian / Belarusian / Ukrainian) or someone from the countries of ex-USSR.
Click OK

And reboot (restart) your computer in order to make the new settings active.
 

This should be it from now on all cyrillic letters in all programs / documents and file names on your PC should visualize fine just as it was intended more or less by the cyrillic assumed creator Saint Climent Ohridski who was a  who reformed Cyrillic from Glagolic alphabet.

How to change / reset lost or forgot TightVNC administrator password

Tuesday, May 24th, 2011

how-to-change-reset-lost-TightVNC-administrator-password

I have installed TightVNC to a Windows host just a few weeks ago in order to be able to manage remotely a Windows host and forgot to write down the administrator password 🙂 (stoopid!)

I had to explain to a friend remotely how to change the TightVNC admin password and it was a complete nightmare!

Shortly here is the exact menus one who wants to reset the password of a TigthVNC server after forgotten:

Start -> All Programs -> TightVNC
-> TightVNC Server (Service Mode) ->
TightVNC Service - Offline Configuration.

In the configuration dialog to popup there are the Server and Administration tabs through which a new password can be set.

After the password is change either a restart of the TightVNC server is necessery or a restart of the Windows PC.

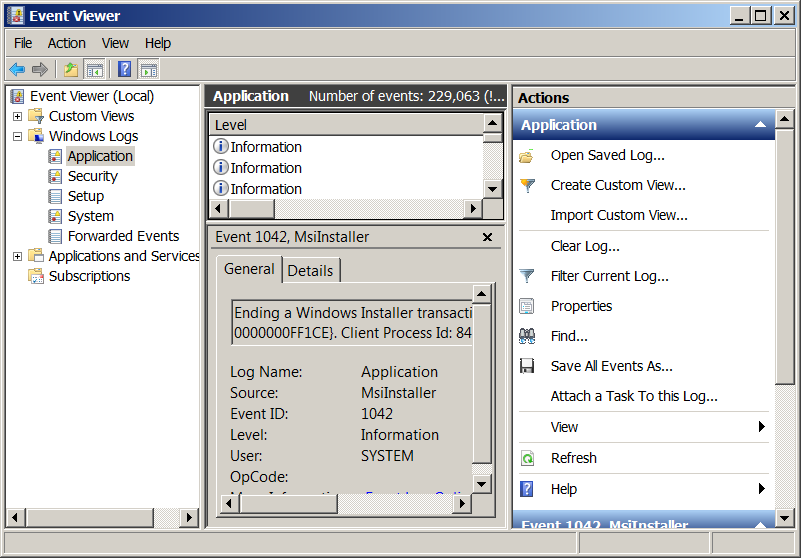
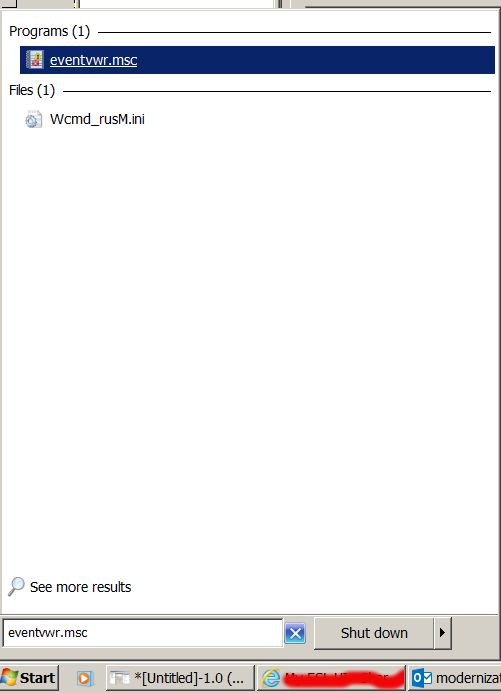
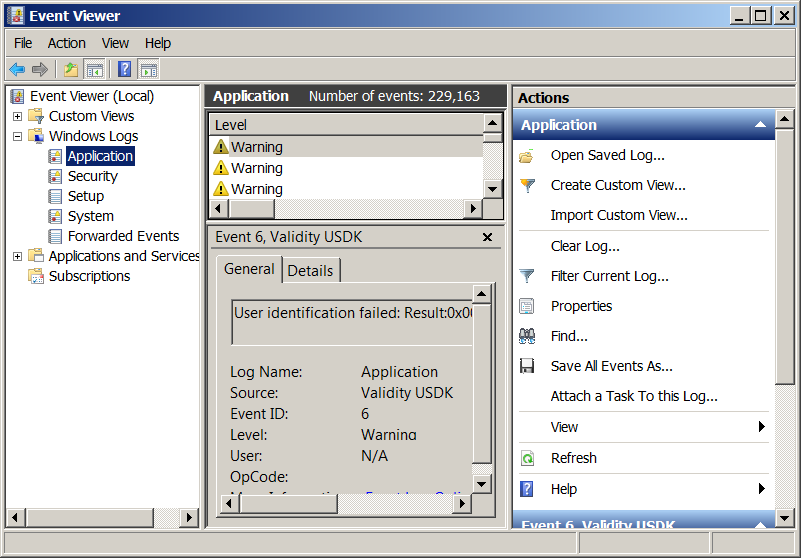
Start Event Viewer from Command Line (Prompt) – eventvwr.msc to Debug Windows server issues

Friday, November 6th, 2015

eventvwrmsc-event-viewer-windows-7-screenshot-view-windows-log-and-dianose-errors

If you’re a sysadmin which needs to deal with Microsoft Windows servers locally or remotely via Remote Desktop RDP client (MSTSC.EXE) or inside a Windows Domain Controller, you will have to frequently debug Windows isseus or Application caused errors by reviewing debug information stored in Event Logs.

Event Viewer is a precious tool to debug often errors with missing libraries or failing programs on Windows boot and thus on M$ Windows it is the Swiss Army knife of sysadmin.
However as staring Event Viewer using the GUI menus, takes a lot of step and looses you time, e.g., you have to navigate to menus:

1. Start button Picture of the Start button
2. clicking Control Panel
3. clicking System and Security
4. clicking Administrative Tools
5.then double-clicking Event Viewer.‌
6. Granting Administrator permission required If you’re prompted for an administrator password or confirmation

It is much handier to just start it with a shortcut:

Press Windows (Button) + R
– To invoke run prompt

and type:

eventvwr.msc

In case if you’re running eventvwr.msc to connect to remote Windows Server run from command prompt (cmd.exe):

eventvwr-run-from-command-prompt-with-a-smart-shortcut-to-save-time-when-administrating-windows-servers

eventvwr.msc /computer=OTHER_Computer_Name

event-viewer-log-reader-and-debug-tool-for-windows-PC-and-windows-servers-adminsitration

How to install nginx webserver from source on Debian Linux / Install Latest Nginx on Debian

Wednesday, March 23rd, 2011

Nginx install server logo
If you're running a large website consisting of a mixture of php scripts, images and html. You probably have noticed that using just one Apache server to serve all the content is not that efficient

Each Apache child (I assume you're using Apache mpm prefork consumes approximately (20MB), this means that each client connection would consume 20 mb of your server memory.
This as you can imagine is truly a suicide in terms of memory. Each request for a picture, css or simple html file would ask Apache to fork another process and will consume (20mb of extra memory form your server mem capacity)!.

Taking in consideration all this notes and the need for some efficiency here, the administrator should normally think about dividing the processing of the so called static content from the dynamic content served on the server.

Apache is really a nice webserver software but with all the loaded modules to serve dynamic content, for instance php, cgi, python etc., it's becoming not the best solution for handling a (css, javascript, html, flv, avi, mov etc. files).

Even a plain Apache server installation without (libphp, mod_rewrite mod deflate etc.) is still not dealing efficiently enough with the aforementioned static files content

Here comes the question if Apache is not that quick and efficient in serving static files, what then? The answer is caching webserver! By caching the regular static content files, your website visitors will benefit by experiencing shorter webserver responce files in downloading static contents and therefore will generally hasten your website and improve the end user's experience.

There are plenty of caching servers out there, some are a proprietary software and some are free software.

However the three most popular servers out there for static file content serving are:

  • Squid,
  • Varnish
  • Nginx

In this article as you should have already found out by the article title I'll discuss Nginx

You might ask why exactly Nginx and not some of the other twos, well simply cause Squid is too complicated to configure and on the other hand does provide lower performance than Nginx. On the other hand Varnish is also a good solution for static file webserver, but I believe it is not tested enough. However I should mention that my experience with testing varnish on my own home router is quite good by so far.

If you're further interested into varhisn cache I would suggest you checkout www.varhisn-cache.org .

Now as I have said a few words about squid and varhisn let's proceed to the essence of the article and say few words about nginx

Here is a quote describing nginx in a short and good manner directly extracted from nginx.com

nginx [engine x] is a HTTP and reverse proxy server, as well as a mail proxy server written by Igor Sysoev. It has been running for more than five years on many heavily loaded Russian sites including Rambler (RamblerMedia.com). According to Netcraft nginx served or proxied 4.70% busiest sites in April 2010. Here are some of success stories: FastMail.FM, WordPress.com.

By default nginx is available ready to be installed in Debian via apt-get, however sadly enough the version available for install is pretty much outdated as of time of writting the nginx debian version in lenny's deb package repositories is 0.6.32-3+lenny3

This version was release about 2 years ago and is currently completely outdated, therefore I found it is not a good idea to use this old and probably slower release of nginx and I jumped further to install my nginx from source:
Nginx source installation actually is very simple on Linux platforms.

1. As a first step in order to be able to succeed with the install from source make sure your system you have installed the packages:

debian:~# apt-get install libpcre3 libpcre3-dev libpcrecpp0 libssl-dev zlib1g-dev build-essential

2. Secondly download latest nginx source code tarball

Check out on http://nginx.com/download the latest stable release of nginx and further issue the commands below:

debian:~# cd /usr/local/src
debian:/usr/local/src# wget http://nginx.org/download/nginx-0.9.6.tar.gz

3.Unarchive nginx source code

debian:/usr/local/src#tar -zxvvf nginx-0.9.6.tar.gz
...

The nginx server requirements for me wasn't any special so I proceeded and used the nginx ./configure script which is found in nginx-0.9.6

4. Compline nginx server

debian:/usr/local/src# cd nginx-0.9.6
debian:/usr/local/src/nginx-0.9.6# ./configure && make && make install
+ Linux 2.6.26-2-amd64 x86_64
checking for C compiler ... found
+ using GNU C compiler
+ gcc version: 4.3.2 (Debian 4.3.2-1.1)
checking for gcc -pipe switch ... found
...
...

The last lines printed by the nginx configure script are actually the major interesting ones for administration purposes the default complation options in my case were:

Configuration summary
+ using system PCRE library
+ OpenSSL library is not used
+ md5: using system crypto library
+ sha1 library is not used
+ using system zlib library

nginx path prefix: "/usr/local/nginx"
nginx binary file: "/usr/local/nginx/sbin/nginx"
nginx configuration prefix: "/usr/local/nginx/conf"
nginx configuration file: "/usr/local/nginx/conf/nginx.conf"
nginx pid file: "/usr/local/nginx/logs/nginx.pid"
nginx error log file: "/usr/local/nginx/logs/error.log"
nginx http access log file: "/usr/local/nginx/logs/access.log"
nginx http client request body temporary files: "client_body_temp"
nginx http proxy temporary files: "proxy_temp"
nginx http fastcgi temporary files: "fastcgi_temp"
nginx http uwsgi temporary files: "uwsgi_temp"
nginx http scgi temporary files: "scgi_temp"

If you want to setup nginx server to support ssl (https) and for instance install nginx to a different server path you can use some ./configure configuration options, for instance:

./configure –sbin-path=/usr/local/sbin –with-http_ssl_module

Now before you can start the nginx server, you should also set up the nginx init script;

5. Download and set a ready to use script with cmd:

debian:~# cd /etc/init.d
debian:/etc/init.d# wget https://www.pc-freak.net/files/nginx-init-script
debian:/etc/init.d# mv nginx-init-script nginx
debian:/etc/init.d# chmod +x nginx

6. Configure Nginx

Nginx is a really easy and simple server, just like the Russians, Simple but good!
By the way it's interesting to mention nginx has been coded by a Russian, so it's robust and hard as a rock as all the other Russian creations 🙂
Nginx configuration files in a default install as the one in my case are to be found in /usr/local/nginx/conf

In the nginx/conf directory you're about to find the following list of files which concern nginx server configurations:

deiban:/usr/local/nginx:~# ls -1
fastcgi.conf
fastcgi.conf.default
fastcgi_params
fastcgi_params.default
koi-utf
koi-win
mime.types
mime.types.default
nginx.conf
nginx.conf.default
scgi_params
scgi_params.default
uwsgi_params
uwsgi_params.default
win-utf

The .default files are just a copy of the ones without the .default extension and contain the default respective file directives.

In my case I'm not using fastcgi to serve perl or php scripts via nginx so I don't need to configure the fastcgi.conf and fastcgi_params files, the scgi_params and uwsgi_params conf files are actually files which contain nginx configuration directives concerning the use of nginx to process SSI (Server Side Include) scripts and therefore I skip configuring the SSI conf files.
koi-utf and koi-win are two files which usually you don't need to configure and aims the nginx server to support the UTF-8 character encoding and the mime.types conf is a file which has a number of mime types the nginx server will know how to handle.

Therefore after all being said the only file which needs to configured is nginx.conf

7. Edit /usr/local/nginx/conf/nginx.conf

debian:/usr/local/nginx:# vim /usr/local/nginx/conf/nginx.conf

Therein you will find the following default configuration:

#gzip on;

server {
listen 80;
server_name localhost;

#charset koi8-r;

#access_log logs/host.access.log main;

location / {
root html;
index index.html index.htm;
}
#error_page 404 /404.html;

# redirect server error pages to the static page /50x.html
#
error_page 500 502 503 504 /50x.html;
location = /50x.html {
root html;
}

In the default configuration above you need to modify only the above block of code as follows:

server {
listen 80;
server_name yoursitedomain.com;

#charset koi8-r;

#access_log logs/access.log main;

location / {
root /var/www/yoursitedomain.com/html;
index index.html index.htm;
}

Change the yoursitedomain.com and /var/www/yoursitedomain.com/html with your directory and website destinations.

8. Start nginx server with nginx init script

debian:/usr/local/nginx:# /etc/init.d/nginx start
Starting nginx:

This should bring up the nginx server, if something is miss configured you will notice also some error messages, as you can see in my case in above init script output, thanksfully there are no error messages.
Note that you can also start nginx directly via invoking /usr/local/nginx/sbin/nginx binary

To check if the nginx server has properly started from the command line type:

debian:/usr/local/nginx:~# ps ax|grep -i nginx|grep -v grep
9424 ? Ss 0:00 nginx: master process /usr/local/nginx/sbin/nginx
9425 ? S 0:00 nginx: worker process

Another way to check if the web browser is ready to serve your website file conten,t you can directly access your website by pointing your browser to with http://yoursitedomain.com/, you should get your either your custom index.html file or the default nginx greeting Welcome to nginx

9. Add nginx server to start up during system boot up

debian:/usr/local/nginx:# /usr/sbin/update-rc.d -f nginx defaults

That's all now you have up and running nginx and your static file serving will require you much less system resources, than with Apache.
Hope this article was helpful to somebody, feedback on it is very welcome!

Play Dune2 on Debian Linux with dosbox – Dune 2 Mother of all Real Time Strategy games

Saturday, March 1st, 2014

medium_1809-dune-ii-the-building-of-a-dynasty_one_of_best_games_ever_linux_windows.gif

Dune II: The Building of a Dynasty (known also as Dune II: Battle for Arrakis in Europe is a game that my generation will never forget. Dune 2 is the "first" computer Real Time Strategy (RTE) game of the genre of the Warcraft I and Warcraft II / III and later Command and Conquer – Red Aleart, Age of Empires I / II and Starcraft …

dune2-unit-destroyed

I've grown up with Dune2 and the little computer geek community in my school was absolutely crazy about playing it. Though not historically being the first Real Time Strategy game, this Lucas Inc. 
game give standards that for the whole RTE genre for years and will stay in history of Computer Games as one of best games of all times.

I've spend big part of my teenager years with my best friends playing Dune2 and the possibility nowadays to resurrect the memories of these young careless years is a blessing.  Younger computer enthusiasts and gamers probably never heard of Dune 2 and this is why I decided to place a little post here about this legendary game.

dune-2-tank-vehicle - one of best games computer games ever

Its worthy out of curiosity or for fun to play Dune 2 on modern OS be it Windows or Linux. Since Dune is DOS game, it is necessary to play it via DOS emulator i.e. – (DosBox). 
Here is how I run dune2 on my Debian Linux:

1. Install dosbox DOS emulator

apt-get install --yes dosbox

2. Download Dune2 game executable

You can download my mirror of dune2 here

Note that you will need unzip to uanrchive it, if you don't have it installed do so:

apt-get install --yes unzip

cd ~/Downloads/
wget https://www.pc-freak.net/files/dune-2.zip

3.  Unzip archive and create directory to mount it emulating 'C:\' drive

mkdir -p ~/.dos/Dune2
cd ~/.dos/Dune2

unzip ~/Downloads/dune-2.zip
 

4. Start dosbox and create permanent config for C: drive auto mount


dosbox

To make C:\ virtual drive automatically mounted you have to write a dosbox config from inside dbox console

config -writeconf /home/hipo/.dosbox.conf

My home dir is in /home/hipo, change this with your username /home/username

Then exit dosbox console with 'exit' command

To make dune2 game automatically mapped on Virtual C: drive:

echo "mount c /home/hipo/.dos" >> ~/.dosbox.conf

Further to make dosbox start each time with ~/.dosbox.conf add alias to your ~/.bashrc 

vim ~/.bashrc
echo "alias dosbox='dosbox -conf /home/hipo/.dosbox.conf'" >> ~/.bashrc
source ~/.bashrc

Then to run DUNE2 launch dosbox:

dosbox

and inside console type:

c:
cd Dune2
Dune2.exe

dune2-first-real-time-strategy-game-harkonen-screenshot

For the lazy ones who would like to test dune you can play dune 2 online on this website