Posts Tagged ‘status’

Haproxy Enable / Disable Application backend server configured to roundrobin in emergency case via haproxy socket command

Thursday, May 2nd, 2024

haproxy-stats-socket

Haproxy LB backend BACKEND_ROUNDROBIN are configured to roundrobin with check health check port  (check port 33333).
For example letsa say haproxy server is running with a haproxy_roundrobin.cfg like this one.

Under some circumstances however if check port TCP 33333 is UP, but behind 1 or more of Application that is providing the resources to customers misbehaves ,
(app-server1, app-server2, app-server3, app-server4) members , Load Balancer cannot know this, because traffic routing decision is made based on Echo port.

One example scenario when this can happen is if Application server has issue with connectivity towards Database hosts:
(db-host1, db-host2, db-host3, db-host4)

If this happens 25% of traffic might still get balanced to broken Application server. If such scenario happens during OnCall and this is identified as problem,
work around would be to temporary disable the misbehaving App servers member from the 4 configured roundrobin pairs in haproxyproduction.cfg :

For example if app-server3 App node is identified as failing and 25% via LB is lost, to resolve it until broken Application server node is fixed, you will have to temporary exclude it from the ring of roundrobin backend hosts.

1.  Check the status of haproxy backends

echo "show stat" | socat stdio /var/lib/haproxy/stats

As you can see the backend is disabled.

Another way to do it which will make your sessions to the server not directly cut but kept for some time is to put the server you want to exclude from haproxy roundrobin to "maintenace mode".

echo "set server bk_BACKEND_ROUNDROBIN/app-server3 state maint" | socat unix-connect:/var/lib/haproxy/stats stdio

Actually, there is even better and more advanced way to disable backend from a configured rounrobin pair of hosts, with putting the available connections in a long waiting queue in the proxy, and if the App host is inavailable for not too short, haproxy will just ask the remote client to keep the connection for longer and continue the session interaction to remote side and wait for the App server connectivity to go out of maintenance, this is done via "drain" option.

echo "set server bk_BACKEND_ROUNDROBIN/app-server3 state drain" | socat unix-connect:/var/lib/haproxy/stats stdio


  • This sets the backend in DRAIN mode. No new connections are accepted and existing connections are drained.

To get a better idea on what is drain state, here is excerpt from haproxy official documentation:

Force a server's administrative state to a new state. This can be useful to
disable load balancing and/or any traffic to a server. Setting the state to
"ready" puts the server in normal mode, and the command is the equivalent of
the "enable server" command. Setting the state to "maint" disables any traffic
to the server as well as any health checks. This is the equivalent of the
"disable server" command. Setting the mode to "drain" only removes the server
from load balancing but still allows it to be checked and to accept new
persistent connections. Changes are propagated to tracking servers if any.


2. Disable backend app-server3 from rounrobin 


echo "disable server BACKEND_ROUNDROBIN/app-server3" | socat unix-connect:/var/lib/haproxy/stats stdio

# pxname,svname,qcur,qmax,scur,smax,slim,stot,bin,bout,dreq,dresp,ereq,econ,eresp,wretr,wredis,status,weight,act,bck,chkfail,chkdown,lastchg,downtime,qlimit,pid,iid,sid,throttle,lbtot,tracked,type,rate,rate_lim,rate_max,check_status,check_code,check_duration,hrsp_1xx,hrsp_2xx,hrsp_3xx,hrsp_4xx,hrsp_5xx,hrsp_other,hanafail,req_rate,req_rate_max,req_tot,cli_abrt,srv_abrt,comp_in,comp_out,comp_byp,comp_rsp,lastsess,last_chk,last_agt,qtime,ctime,rtime,ttime,
stats,FRONTEND,,,0,0,3000,0,0,0,0,0,0,,,,,OPEN,,,,,,,,,1,2,0,,,,0,0,0,0,,,,0,0,0,0,0,0,,0,0,0,,,0,0,0,0,,,,,,,,
stats,BACKEND,0,0,0,0,300,0,0,0,0,0,,0,0,0,0,UP,0,0,0,,0,282917,0,,1,2,0,,0,,1,0,,0,,,,0,0,0,0,0,0,,,,,0,0,0,0,0,0,-1,,,0,0,0,0,
Frontend_Name,FRONTEND,,,0,0,3000,0,0,0,0,0,0,,,,,OPEN,,,,,,,,,1,3,0,,,,0,0,0,0,,,,,,,,,,,0,0,0,,,0,0,0,0,,,,,,,,
Backend_Name,app-server4,0,0,0,0,,0,0,0,,0,,0,0,0,0,UP,1,1,0,1,0,282917,0,,1,4,1,,0,,2,0,,0,L4OK,,12,,,,,,,0,,,,0,0,,,,,-1,,,0,0,0,0,
Backend_Name,app-server3,0,0,0,0,,0,0,0,,0,,0,0,0,0,MAINT,1,0,1,1,2,2,23,,1,4,2,,0,,2,0,,0,L4OK,,11,,,,,,,0,,,,0,0,,,,,-1,,,0,0,0,0,
Backend_Name,BACKEND,0,0,0,0,300,0,0,0,0,0,,0,0,0,0,UP,1,1,0,,0,282917,0,,1,4,0,,0,,1,0,,0,,,,,,,,,,,,,,0,0,0,0,0,0,-1,,,0,0,0,0,

Once it is confirmed from Application supprt colleagues, that machine is out of maintenance node and working properly again to reenable it:

3. Enable backend app-server3

echo "enable server bk_BACKEND_ROUNDROBIN/app-server3" | socat unix-connect:/var/lib/haproxy/stats stdio

4. Check backend situation again

echo "show stat" | socat stdio /var/lib/haproxy/stats
# pxname,svname,qcur,qmax,scur,smax,slim,stot,bin,bout,dreq,dresp,ereq,econ,eresp,wretr,wredis,status,weight,act,bck,chkfail,chkdown,lastchg,downtime,qlimit,pid,iid,sid,throttle,lbtot,tracked,type,rate,rate_lim,rate_max,check_status,check_code,check_duration,hrsp_1xx,hrsp_2xx,hrsp_3xx,hrsp_4xx,hrsp_5xx,hrsp_other,hanafail,req_rate,req_rate_max,req_tot,cli_abrt,srv_abrt,comp_in,comp_out,comp_byp,comp_rsp,lastsess,last_chk,last_agt,qtime,ctime,rtime,ttime,
stats,FRONTEND,,,0,0,3000,0,0,0,0,0,0,,,,,OPEN,,,,,,,,,1,2,0,,,,0,0,0,0,,,,0,0,0,0,0,0,,0,0,0,,,0,0,0,0,,,,,,,,
stats,BACKEND,0,0,0,0,300,0,0,0,0,0,,0,0,0,0,UP,0,0,0,,0,282955,0,,1,2,0,,0,,1,0,,0,,,,0,0,0,0,0,0,,,,,0,0,0,0,0,0,-1,,,0,0,0,0,
Frontend_Name,FRONTEND,,,0,0,3000,0,0,0,0,0,0,,,,,OPEN,,,,,,,,,1,3,0,,,,0,0,0,0,,,,,,,,,,,0,0,0,,,0,0,0,0,,,,,,,,
Backend_Name,app-server4,0,0,0,0,,0,0,0,,0,,0,0,0,0,UP,1,1,0,1,0,282955,0,,1,4,1,,0,,2,0,,0,L4OK,,12,,,,,,,0,,,,0,0,,,,,-1,,,0,0,0,0,
Backend_Name,app-server3,0,0,0,0,,0,0,0,,0,,0,0,0,0,UP,1,0,1,1,2,3,58,,1,4,2,,0,,2,0,,0,L4OK,,11,,,,,,,0,,,,0,0,,,,,-1,,,0,0,0,0,
Backend_Name,BACKEND,0,0,0,0,300,0,0,0,0,0,,0,0,0,0,UP,1,1,1,,0,282955,0,,1,4,0,,0,,1,0,,0,,,,,,,,,,,,,,0,0,0,0,0,0,-1,,,0,0,0,0,


You should see the backend enabled again.

NOTE:
If you happen to get some "permission denied" errors when you try to send haproxy commands via the configured haproxy status this might be related to the fact you have enabled the socket in read only mode, if that is so it means the haproxy cannot be written to and therefore you can only read info from it with status commands, but not send any write operations to haproxy via unix socket.

One example haproxy configuration that enables haproxy socket in read only looks like this in haproxy.cfg:
 

 stats socket /var/lib/haproxy/stats


To make the haproxy socket read / write mode, for root superuser and some other users belonging to admin group 'adm', you should set the haproxy.cfg to something like:

stats socket /var/lib/haproxy/stats-qa mode 0660 group adm level admin

or if no special users with a set admin group needed to have access to socket, use instead config like:

stats socket /var/lib/haproxy/stats-qa.sock mode 0600 level admin

How to Recover deleted /var/lib/dpkg directory on Debian / Ubuntu Linux server

Wednesday, October 6th, 2021

how-to-recover-accidently-deleted-var-lib-dpkg-directory-on-debian-gnu-linux

Sometimes you might do something stupid, in the hurry like running the wrong rm  command and ending up deleting /var/lib/dpkg on your Debian / Ubuntu system.

by either wrongly issuing the rm to a directory or mistyping rm -r /var/lib/dpkg.
I know this is pretty dumb but sometimes we're all dumb, if you do so and you try to do the regular

root@debian:/ # apt update && apt upgrade

or try to install some random package onwards you will end up with error message:

E: Could not open lock file /var/lib/dpkg/lock – open (2: No such file or directory)

Ending up with this error, does totally blocks your further system administration activities with both apt / aptitude / apt-get as well as with dpkg package management tool.


1. The /var/backups recovery directory

Thankfully, by Gods mercy some of Debian Linux system architects has foreseen such issues might occur and have integrated into it the automatic periodic creation of some important files into directory /var/backups/

Hence the next step is to check what kind of backups are available, there:

root@debian:/ # ls -al /var/backups/
total 19892
drwxr-xr-x  7 root root      4096 Sep 24 06:25 ./
drwxr-xr-x 22 root root      4096 Dec 21  2020 ../
-rw-r–r–  1 root root    245760 Aug 20 06:25 alternatives.tar.0
-rw-r–r–  1 root root     15910 Aug 14 06:25 alternatives.tar.1.gz
-rw-r–r–  1 root root     15914 May 29 06:25 alternatives.tar.2.gz
-rw-r–r–  1 root root     15783 Jan 29  2021 alternatives.tar.3.gz
-rw-r–r–  1 root root     15825 Nov 20  2020 alternatives.tar.4.gz
-rw-r–r–  1 root root     15778 Jul 16  2020 alternatives.tar.5.gz
-rw-r–r–  1 root root     15799 Jul  4  2020 alternatives.tar.6.gz
-rw-r–r–  1 root root     80417 Aug 19 14:48 apt.extended_states.0
-rw-r–r–  1 root root      8693 Apr 27 22:40 apt.extended_states.1.gz
-rw-r–r–  1 root root      8658 Apr 17 19:45 apt.extended_states.2.gz
-rw-r–r–  1 root root      8601 Apr 15 00:52 apt.extended_states.3.gz
-rw-r–r–  1 root root      8599 Apr  9 00:26 apt.extended_states.4.gz
-rw-r–r–  1 root root      8542 Mar 18  2021 apt.extended_states.5.gz
-rw-r–r–  1 root root      8549 Mar 18  2021 apt.extended_states.6.gz
-rw-r–r–  1 root root   9030483 Jul  4  2020 aptitude.pkgstates.0
-rw-r–r–  1 root root    628958 May  7  2019 aptitude.pkgstates.1.gz
-rw-r–r–  1 root root    534758 Oct 21  2017 aptitude.pkgstates.2.gz
-rw-r–r–  1 root root    503877 Oct 19  2017 aptitude.pkgstates.3.gz
-rw-r–r–  1 root root    423277 Oct 15  2017 aptitude.pkgstates.4.gz
-rw-r–r–  1 root root    420899 Oct 14  2017 aptitude.pkgstates.5.gz
-rw-r–r–  1 root root    229508 May  5  2015 aptitude.pkgstates.6.gz
-rw-r–r–  1 root root        11 Oct 14  2017 dpkg.arch.0
-rw-r–r–  1 root root        43 Oct 14  2017 dpkg.arch.1.gz
-rw-r–r–  1 root root        43 Oct 14  2017 dpkg.arch.2.gz
-rw-r–r–  1 root root        43 Oct 14  2017 dpkg.arch.3.gz
-rw-r–r–  1 root root        43 Oct 14  2017 dpkg.arch.4.gz
-rw-r–r–  1 root root        43 Oct 14  2017 dpkg.arch.5.gz
-rw-r–r–  1 root root        43 Oct 14  2017 dpkg.arch.6.gz
-rw-r–r–  1 root root      1319 Apr 27 22:28 dpkg.diversions.0
-rw-r–r–  1 root root       387 Apr 27 22:28 dpkg.diversions.1.gz
-rw-r–r–  1 root root       387 Apr 27 22:28 dpkg.diversions.2.gz
-rw-r–r–  1 root root       387 Apr 27 22:28 dpkg.diversions.3.gz
-rw-r–r–  1 root root       387 Apr 27 22:28 dpkg.diversions.4.gz
-rw-r–r–  1 root root       387 Apr 27 22:28 dpkg.diversions.5.gz
-rw-r–r–  1 root root       387 Apr 27 22:28 dpkg.diversions.6.gz
-rw-r–r–  1 root root       375 Aug 23  2018 dpkg.statoverride.0
-rw-r–r–  1 root root       247 Aug 23  2018 dpkg.statoverride.1.gz
-rw-r–r–  1 root root       247 Aug 23  2018 dpkg.statoverride.2.gz
-rw-r–r–  1 root root       247 Aug 23  2018 dpkg.statoverride.3.gz
-rw-r–r–  1 root root       247 Aug 23  2018 dpkg.statoverride.4.gz
-rw-r–r–  1 root root       247 Aug 23  2018 dpkg.statoverride.5.gz
-rw-r–r–  1 root root       247 Aug 23  2018 dpkg.statoverride.6.gz
-rw-r–r–  1 root root   3363749 Sep 23 14:32 dpkg.status.0
-rw-r–r–  1 root root    763524 Aug 19 14:48 dpkg.status.1.gz
-rw-r–r–  1 root root    760198 Aug 17 19:41 dpkg.status.2.gz
-rw-r–r–  1 root root    760176 Aug 13 12:48 dpkg.status.3.gz
-rw-r–r–  1 root root    760105 Jul 16 15:25 dpkg.status.4.gz
-rw-r–r–  1 root root    759807 Jun 28 15:18 dpkg.status.5.gz
-rw-r–r–  1 root root    759554 May 28 16:22 dpkg.status.6.gz

drwx——  2 root root      4096 Oct 15  2017 ejabberd-2017-10-15T00:22:30.p1e5J8/
drwx——  2 root root      4096 Oct 15  2017 ejabberd-2017-10-15T00:24:02.dAUgDs/
drwx——  2 root root      4096 Oct 15  2017 ejabberd-2017-10-15T12:29:51.FX27WJ/
drwx——  2 root root      4096 Oct 15  2017 ejabberd-2017-10-15T21:18:26.bPQWlW/
drwx——  2 root root      4096 Jul 16  2019 ejabberd-2019-07-16T00:49:52.Gy3sus/
-rw——-  1 root root      2512 Oct 20  2020 group.bak
-rw——-  1 root shadow    1415 Oct 20  2020 gshadow.bak
-rw——-  1 root root      7395 May 11 22:56 passwd.bak
-rw——-  1 root shadow    7476 May 11 22:56 shadow.bak

Considering the situation the important files for us that could, help us restore our previous list of packages, we had installed on the Debian are files under /var/backups/dpkg.status*

Luckily debian based systems keeps backups of its important files that can be used later on for system recovery activities.
Below is a common structure of /var/lib/dpkg on a deb based system.

hipo@debian:/home/hipo$ ls -l /var/lib/dpkg/
total 11504
drwxr-xr-x 2 root root    4096 Aug 19 14:33 alternatives/
-rw-r–r– 1 root root      11 Oct 14  2017 arch
-rw-r–r– 1 root root 2199402 Oct 19  2017 available
-rw-r–r– 1 root root 2197483 Oct 19  2017 available-old
-rw-r–r– 1 root root       8 Sep  6  2012 cmethopt
-rw-r–r– 1 root root    1319 Apr 27 22:28 diversions
-rw-r–r– 1 root root    1266 Nov 18  2020 diversions-old
drwxr-xr-x 2 root root  606208 Sep 23 14:32 info/
-rw-r—– 1 root root       0 Sep 23 14:32 lock
-rw-r—– 1 root root       0 Mar 18  2021 lock-frontend
drwxr-xr-x 2 root root    4096 Sep 17  2012 parts/
-rw-r–r– 1 root root     375 Aug 23  2018 statoverride
-rw-r–r– 1 root root     337 Aug 13  2018 statoverride-old
-rw-r–r– 1 root root 3363749 Sep 23 14:32 status
-rw-r–r– 1 root root 3363788 Sep 23 14:32 status-old
drwxr-xr-x 2 root root    4096 Aug 19 14:48 triggers/
drwxr-xr-x 2 root root    4096 Sep 23 14:32 updates/


2. Recreate basic /var/lib/dpkg directory and files structures

As you can see, there are 5 directories and the status file and some other files. 
Hence the first step is to restore the lost directory structure.

hipo@debian: ~$ sudo mkdir -p /var/lib/dpkg/{alternatives,info,parts,triggers,updates}


3. Recover /var/lib/dpkg/status file

Further on recover the dpkg status file from backup

hipo@debian: ~$  sudo cp /var/backups/dpkg.status.0 /var/lib/dpkg/status


4. Check dpkg package installation works again and reinstall base-files

Next check if dpkg – debian package manager is now working, by simply trying to download dpkg*.deb reinstalling it.

root@debian:/root # apt-get download dpkg
# sudo dpkg -i dpkg*.deb

If you get no errors next step is to reinstall base-files which is important package on which dpkg depends.

root@debian:/root # apt-get download base-files

root@debian:/root # sudo dpkg -i base-files*.deb


5. Update deb system package list and db consistency

Onwards try to update system package list and check dpkg / apt database consistency.

root@debian:/root # dpkg –audit

root@debian:/root # sudo apt-get update

root@debian:/root # sudo apt-get check


The result should be more of the files in /var/lib/dpkg should appear, thus list the directory again and compare to the earlier given list of it, they should be similar.

root@debian:/root # ls -l /var/lib/dpkg

6. Reinstall completely from source code dpkg, if nothing else works
 

If some files are missing they should get created with a normal daily sysadmin package management tasks so no worries.

In case if after attempting to upgrade the system or install a package with apt, you get some nasty error like:
 

'/usr/local/var/lib/dpkg/status' for reading: No such file or directory


Then the next and final thing to try as a recovery is to download compile from a new and reinstall dpkg from source code!


root@debian:/ # wget https://launchpad.net/ubuntu/+archive/primary/+files/dpkg_1.16.1.2ubuntu7.2.tar.bz2
root@debian:/ # tar -xvf dpkg_1.16*

root@debian:/ # cd dpkg-1.16*

root@debian:/ # ./configure

root@debian:/ # make

root@debian:/ # make install


Hopefully you'll have gcc and development tools provided by build-essential .deb package otherwise you have to download and compile this ones as well 🙂
If this doesn't bring you back the installed packages you had priorly (hopefully not), then waste no more time and do a backup of the main things on the server, and reinstall it completely.

The moral out of this incident is always to implement always to your system a good back up system and regularly create backups of /var/lib/dpkg , /etc/ , /usr/local* and other important files on a remote backup server, to be able to easily recover if you do by mistake something whacky.
 

Hope that helped anyone. Cheers 🙂

Linux: How to set KVM Virtual Machine to autostart on system boot

Thursday, July 15th, 2021

linux-kvm-set-vm-to-automatically-boot-on-linux-system-boot

Recently I've written a short article on how to make auto boot OpenVZ container Virtual Machine if system gets rebooted as I had the task to do so in daily job as sysadmin.
Few days ago after some power outage in one of Frankfurt based Data Centers, some Rack tech equipment has been temporary powered of and once the electricity was up again, some Linux servers  running Kernel Based Virtualization ( KVM ) some of the virtual machines did not managed to automatically start up and we had to manually start them one by one.
To manually start each of the machines that did not start up had to do the trivial:

[root@hypervisor ~]# virsh list
 Id    Name                           State
—————————————————-
 3     VM500                   running

[root@hypervisor ~]# virsh dominfo VM500
Id:             3
Name:           VM500
UUID:           82075903-a4ce-5ec0-a3d8-9ee83d85fc75
OS Type:        hvm
State:          running
CPU(s):         2
CPU time:       247407.9s
Max memory:     2097152 KiB
Used memory:    2097152 KiB
Persistent:     yes
Autostart:      disable
Managed save:   no
Security model: selinux
Security DOI:   0
Security label: system_u:system_r:svirt_t:s0:c447,c723 (permissive)

[root@hypervisor ~]# virsh start VM_domain_Name

Of course logcally to prevent future issues in case if Linux server gets suddenly rebooted due to whatever reason, we had to configure the machines in questions to automatically boot on OS system boot.

In some rare cases if above start command does not help you might want to check what is the status of libvirtd and investigate the logs in /var/log/libvirt/ i.e. /var/log/libvirt/libvirt.log

An alternative but more complicated way to set virtual machine to automatically start on boot is by using default location for automatic VM start just like OpenXEn has its /etc/xen/auto/ dirtory from where each soft symlinked VM configuration from /etc/xen/VM_name.cfg is started in KVM Hypervisor hosts to auto boot a certain vm you have to link /etc/libvirt/qemu/VM-to-autoboot-name.xml to /etc/libvirt/qemu/autostart/VM-to-autoboot-name.xml

[root@hypervisor ~]# systemctl status libvirtd
● libvirtd.service – Virtualization daemon
   Loaded: loaded (/usr/lib/systemd/system/libvirtd.service; enabled; vendor preset: enabled)
   Active: active (running) since Tue 2021-06-29 10:21:30 CEST; 2 weeks 2 days ago
     Docs: man:libvirtd(8)
           https://libvirt.org
 Main PID: 1809 (libvirtd)
    Tasks: 22 (limit: 32768)
   CGroup: /system.slice/libvirtd.service
           ├─1809 /usr/sbin/libvirtd
           ├─2335 /usr/sbin/dnsmasq –conf-file=/var/lib/libvirt/dnsmasq/default.conf –leasefile-ro –dhcp-script=/us…
           ├─2336 /usr/sbin/dnsmasq –conf-file=/var/lib/libvirt/dnsmasq/default.conf –leasefile-ro –dhcp-script=/us…
           ├─2386 /usr/sbin/dnsmasq –conf-file=/var/lib/libvirt/dnsmasq/Host-Only.conf –leasefile-ro –dhcp-script=/…
           └─2387 /usr/sbin/dnsmasq –conf-file=/var/lib/libvirt/dnsmasq/Host-Only.conf –leasefile-ro –dhcp-script=/…

If for some reason libvirtd is not running or disabled state you will have to enable it with:

[root@hypervisor ~]# systemctl enable libvirtd

If the virtualization is running on some RPM based distribtuion OpenSuse whatever and libvirtd is controlled via chkconfig (redhat runlevel alternative system), you will have to :

[root@hypervisor ~]# chkconfig libvirtd on

Disabling KVM Virtual Machine from auto start on server boot

[root@hypervisor ~]# virsh autostart Debian10 –disable
Domain Debian10 unmarked as autostarted

Set all logs to log to to physical console /dev/tty12 (tty12) on Linux

Wednesday, August 12th, 2020

tty linux-logo how to log everything to last console terminal tty12

Those who administer servers from the days of birth of Linux and who used actively GNU / Linux over the years or any other UNIX knows how practical could be to configure logging of all running services / kernel messages / errors and warnings on a physical console.

Traditionally from the days I was learning Linux basics I was shown how to do this on an old Debian Sarge 3.0 Linux without systemd and on all Linux distributions Redhat 9.0 / Calderas and Mandrakes I've used either as a home systems or for servers. I've always configured output of all messages to go to the last easy to access console /dev/tty12 (for those who never use it console switching under Linux plain text console mode is done with key combination of CTRL + ALT + F1 .. F12.

In recent times however with the introduction of systemd pretty much things changed as messages to console are not handled by /etc/inittab which was used to add and refresh physical consoles tty1, tty2 … tty7 (the default added one on Linux were usually 7), but I had to manually include more respawn lines for each console in /etc/inittab.
Nowadays as of year 2020 Linux distros /etc/inittab is no longer there being obsoleted and console print out of INPUT / OUTPUT messages are handled by systemd.
 

1. Enable Physical TTYs from TTY8 till TTY12 etc.


The number of default consoles existing in most Linux distributions I've seen is still from tty1 to tty7. Hence to add more tty consoles and be ready to be able to switch out  not only towards tty7 but towards tty12 once you're connected to the server via a remote ILO (Integrated Lights Out) / IdRAC (Dell Remote Access Controller) / IPMI / IMM (Imtegrated Management Module), you have to do it by telling systemd issuing below systemctl commands:


 # systemctl enable getty@tty8.service Created symlink /etc/systemd/system/getty.target.wants/getty@tty8.service -> /lib/systemd/system/getty@.service.

systemctl enable getty@tty9.service

Created symlink /etc/systemd/system/getty.target.wants/getty@tty9.service -> /lib/systemd/system/getty@.service.

systemctl enable getty@tty10.service

Created symlink /etc/systemd/system/getty.target.wants/getty@tty10.service -> /lib/systemd/system/getty@.service.

systemctl enable getty@tty11.service

Created symlink /etc/systemd/system/getty.target.wants/getty@tty11.service -> /lib/systemd/system/getty@.service.

systemctl enable getty@tty12.service

Created symlink /etc/systemd/system/getty.target.wants/getty@tty12.service -> /lib/systemd/system/getty@.service.


Once the TTYS tty7 to tty12 are enabled you will be able to switch to this consoles either if you have a physical LCD / CRT monitor or KVM switch connected to the machine mounted on the Rack shelf once you're in the Data Center or will be able to see it once connected remotely via the Management IP Interface (ILO) remote console.
 

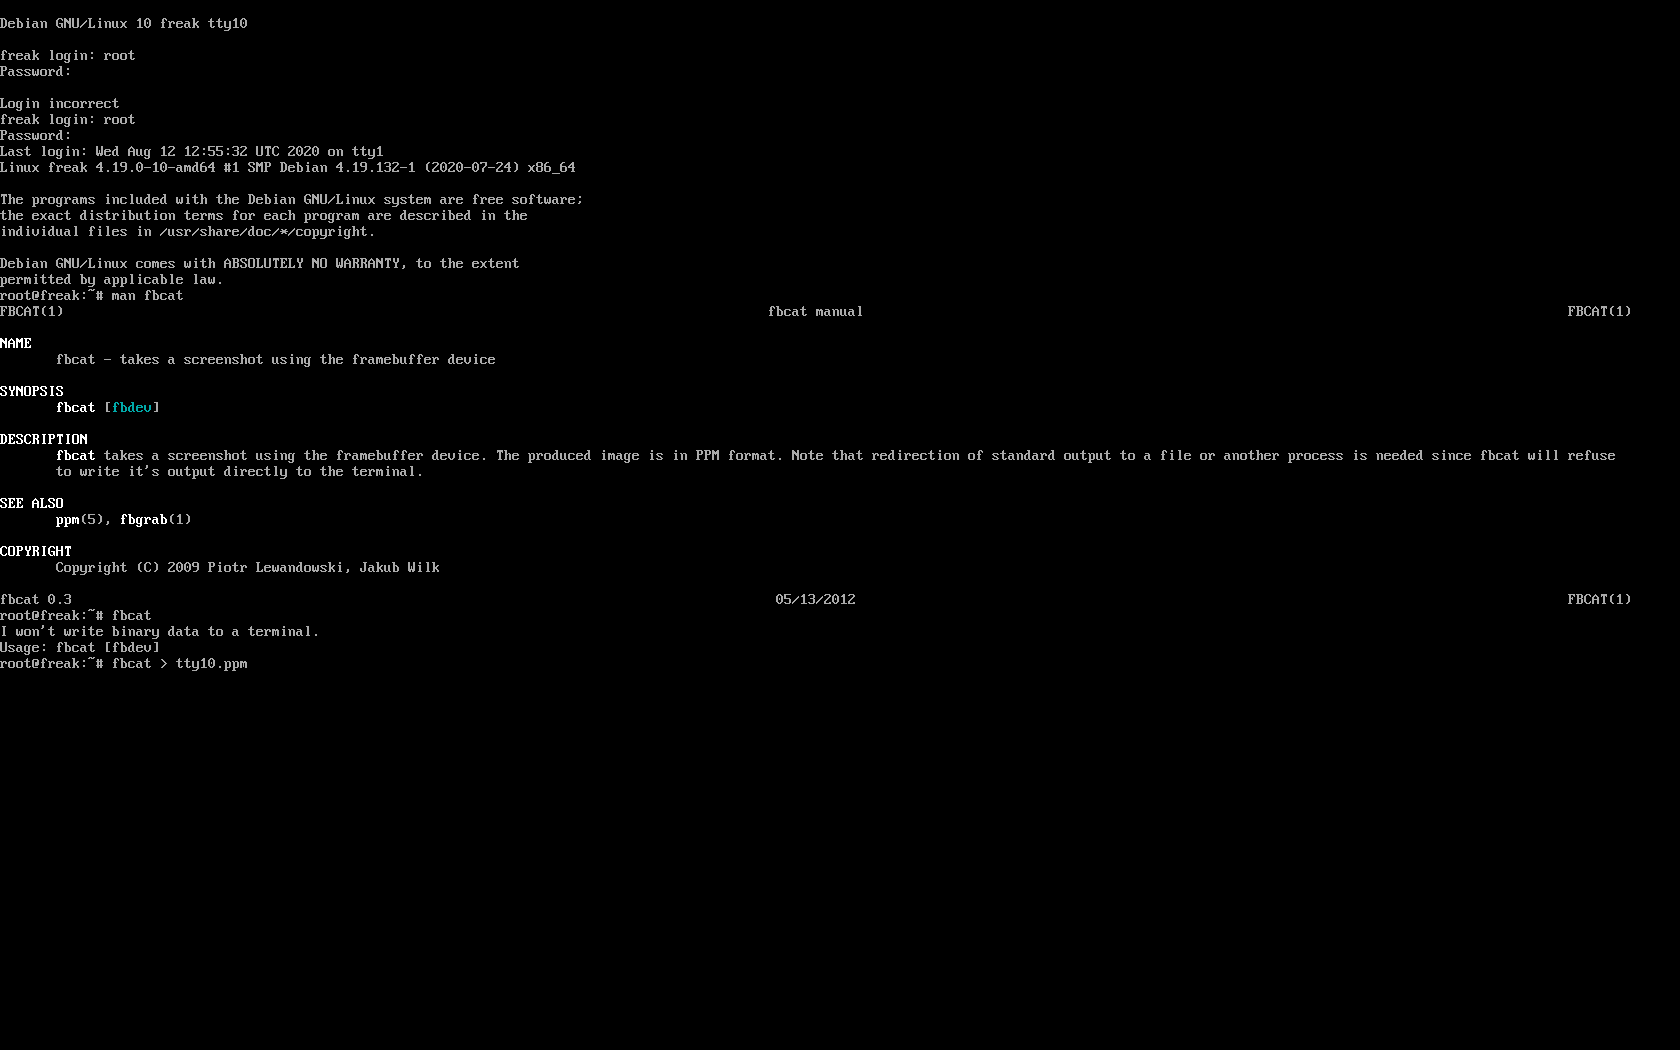
2. Taking screenshot of the physical console TTY with fbcat


For example below is a screenshot of the 10th enabled tty10:

tty10-linux-screenshot-fbcat-how-to-screenshot-console

As you can in the screenshot I've used the nice tool fbcat that can be used to make a screenshot of remote console. This is very useful especially if remote access via a SSH client such as PuTTY / MobaXterm is not there but you have only a physical attached monitor access on a DCs that are under a heavy firewall that is preventing anyone to get to the system remotely. For example screenshotting the physical console in case if there is a major hardware failure occurs and you need to dump a hardware error message to a flash drive that will be used to later be handled to technicians to analyize it and exchange the broken server hardware part.

Screenshots of the CLI with fbcat is possible across most Linux distributions where as usual.

In Debian you have to first instal the tool via :
 

# apt install –yes fbcat


and on RedHats / CentOS / Fedoras

# yum install -y fbcat


Taking screenshot once tool is on the server of whatever you have printed on console is as easy as

# fbcat > tty_name.ppm


Note that you might want to convert the .ppm created picture to png with any converter such as imagemagick's convert command or if you have a GUI perhaps with GNU Image Manipulation Tool (GIMP).

3. Enabling every rsyslog handled message to log to Physical TTY12


To make everything such as errors, notices, debug, warning messages  become instantly logging towards above added new /dev/tty12.

Open /etc/rsyslog.conf and to the end of the file append below line :
 

daemon,mail.*;\
   news.=crit;news.=err;news.=notice;\
   *.=debug;*.=info;\
   *.=notice;*.=warn   /dev/tty12


To make rsyslog load its new config restart it:


# systemctl status rsyslog


rsyslog.service – System Logging Service
   Loaded: loaded (/lib/systemd/system/rsyslog.service; enabled; vendor preset: enabled)
   Active: active (running) since Mon 2020-08-10 04:09:36 EEST; 2 days ago
     Docs: man:rsyslogd(8)
           https://www.rsyslog.com/doc/
 Main PID: 671 (rsyslogd)
    Tasks: 4 (limit: 4915)
   Memory: 12.5M
   CGroup: /system.slice/rsyslog.service
           └─671 /usr/sbin/rsyslogd -n -iNONE


авг 12 00:00:05 pcfreak rsyslogd[671]:  [origin software="rsyslogd" swVersion="8.1901.0" x-pid="671" x-info="https://www.rsyslo
Warning: Journal has been rotated since unit was started. Log output is incomplete or unavailable.


systemctl restart rsyslog


That's all folks navigate by pressing simultaneously CTRL + ALT + F12 to get to TTY12 or use ALT + LEFT / ALT + RIGHT ARROW (console switch commands) till you get to the console where everything should be now logged.

Enjoy and if you like this article share to tell your sysadmin friends about this nice hack  ! 🙂


How to debug failing service in systemctl and add a new IP network alias in CentOS Linux

Wednesday, January 15th, 2020

linux-debug-failing-systemctl-systemd-service--add-new-IP-alias-network-cable

If you get some error with some service that is start / stopped via systemctl you might be pondering how to debug further why the service is not up then then you'll be in the situation I was today.
While on one configured server with 8 eth0 configured ethernet network interfaces the network service was reporting errors, when atempted to restart the RedHat way via:
 

service network restart


to further debug what the issue was as it was necessery I had to find a way how to debug systemctl so here is how:


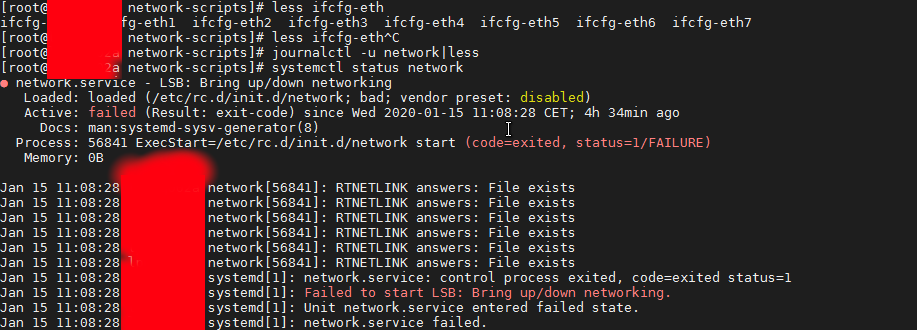
How to do a verbose messages status for sysctlct?


linux:~# systemctl status network

linux:~# systemctl status network


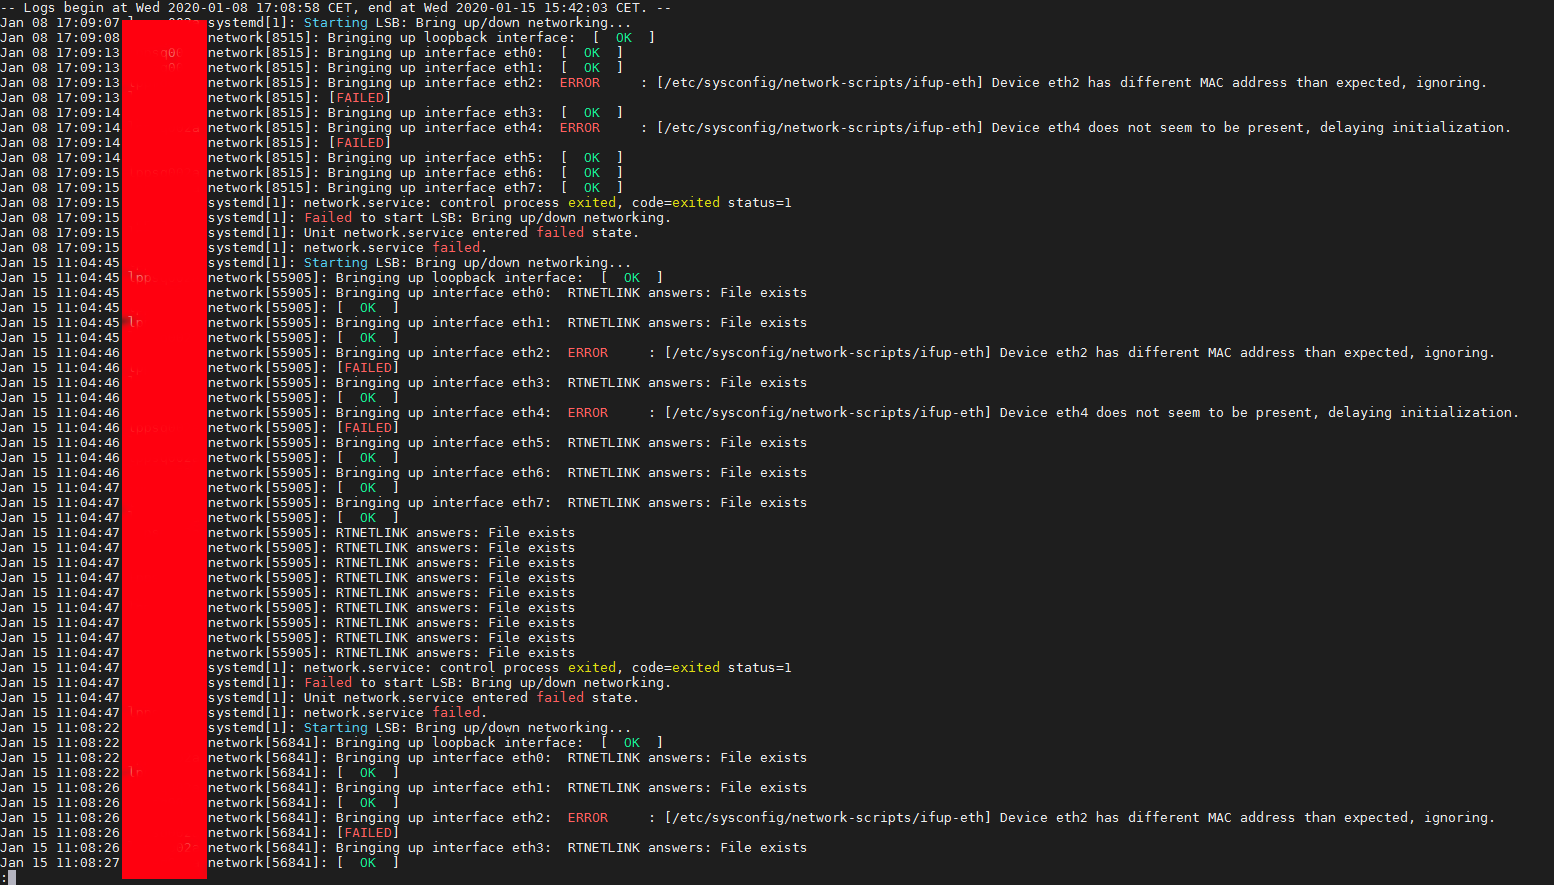
Another useful hint is to print out only log messages for the current boot, you can that with:

# journalctl -u service-name.service -b


if you don't want to have the less command like page separation ( paging ) use the –no-pager argument.


# journalctl -u network –no-pager

Jan 08 17:09:14 lppsq002a network[8515]: Bringing up interface eth5:  [  OK  ]

    Jan 08 17:09:15 lppsq002a network[8515]: Bringing up interface eth6:  [  OK  ]
    Jan 08 17:09:15 lppsq002a network[8515]: Bringing up interface eth7:  [  OK  ]
    Jan 08 17:09:15 lppsq002a systemd[1]: network.service: control process exited, code=exited status=1
    Jan 08 17:09:15 lppsq002a systemd[1]: Failed to start LSB: Bring up/down networking.
    Jan 08 17:09:15 lppsq002a systemd[1]: Unit network.service entered failed state.
    Jan 08 17:09:15 lppsq002a systemd[1]: network.service failed.
    Jan 15 11:04:45 lppsq002a systemd[1]: Starting LSB: Bring up/down networking…
    Jan 15 11:04:45 lppsq002a network[55905]: Bringing up loopback interface:  [  OK  ]
    Jan 15 11:04:45 lppsq002a network[55905]: Bringing up interface eth0:  RTNETLINK answers: File exists
    Jan 15 11:04:45 lppsq002a network[55905]: [  OK  ]
    Jan 15 11:04:45 lppsq002a network[55905]: Bringing up interface eth1:  RTNETLINK answers: File exists
    Jan 15 11:04:45 lppsq002a network[55905]: [  OK  ]
    Jan 15 11:04:46 lppsq002a network[55905]: Bringing up interface eth2:  ERROR     : [/etc/sysconfig/network-scripts/ifup-eth] Device eth2 has different MAC address than expected, ignoring.
    Jan 15 11:04:46 lppsq002a network[55905]: [FAILED]
    Jan 15 11:04:46 lppsq002a network[55905]: Bringing up interface eth3:  RTNETLINK answers: File exists
    Jan 15 11:04:46 lppsq002a network[55905]: [  OK  ]
    Jan 15 11:04:46 lppsq002a network[55905]: Bringing up interface eth4:  ERROR     : [/etc/sysconfig/network-scripts/ifup-eth] Device eth4 does not seem to be present, delaying initialization.
    Jan 15 11:04:46 lppsq002a network[55905]: [FAILED]
    Jan 15 11:04:46 lppsq002a network[55905]: Bringing up interface eth5:  RTNETLINK answers: File exists
    Jan 15 11:04:46 lppsq002a network[55905]: [  OK  ]
    Jan 15 11:04:46 lppsq002a network[55905]: Bringing up interface eth6:  RTNETLINK answers: File exists
    Jan 15 11:04:47 lppsq002a network[55905]: [  OK  ]
    Jan 15 11:04:47 lppsq002a network[55905]: Bringing up interface eth7:  RTNETLINK answers: File exists
    Jan 15 11:04:47 lppsq002a network[55905]: [  OK  ]
    Jan 15 11:04:47 lppsq002a network[55905]: RTNETLINK answers: File exists
    Jan 15 11:04:47 lppsq002a network[55905]: RTNETLINK answers: File exists
    Jan 15 11:04:47 lppsq002a network[55905]: RTNETLINK answers: File exists
    Jan 15 11:04:47 lppsq002a network[55905]: RTNETLINK answers: File exists
    Jan 15 11:04:47 lppsq002a network[55905]: RTNETLINK answers: File exists
    Jan 15 11:04:47 lppsq002a network[55905]: RTNETLINK answers: File exists
    Jan 15 11:04:47 lppsq002a network[55905]: RTNETLINK answers: File exists
    Jan 15 11:04:47 lppsq002a network[55905]: RTNETLINK answers: File exists
    Jan 15 11:04:47 lppsq002a network[55905]: RTNETLINK answers: File exists
    Jan 15 11:04:47 lppsq002a systemd[1]: network.service: control process exited, code=exited status=1
    Jan 15 11:04:47 lppsq002a systemd[1]: Failed to start LSB: Bring up/down networking.
    Jan 15 11:04:47 lppsq002a systemd[1]: Unit network.service entered failed state.
    Jan 15 11:04:47 lppsq002a systemd[1]: network.service failed.
    Jan 15 11:08:22 lppsq002a systemd[1]: Starting LSB: Bring up/down networking…
    Jan 15 11:08:22 lppsq002a network[56841]: Bringing up loopback interface:  [  OK  ]
    Jan 15 11:08:22 lppsq002a network[56841]: Bringing up interface eth0:  RTNETLINK answers: File exists
    Jan 15 11:08:22 lppsq002a network[56841]: [  OK  ]
    Jan 15 11:08:26 lppsq002a network[56841]: Bringing up interface eth1:  RTNETLINK answers: File exists
    Jan 15 11:08:26 lppsq002a network[56841]: [  OK  ]
    Jan 15 11:08:26 lppsq002a network[56841]: Bringing up interface eth2:  ERROR     : [/etc/sysconfig/network-scripts/ifup-eth] Device eth2 has different MAC address than expected, ignoring.
    Jan 15 11:08:26 lppsq002a network[56841]: [FAILED]
    Jan 15 11:08:26 lppsq002a network[56841]: Bringing up interface eth3:  RTNETLINK answers: File exists
    Jan 15 11:08:27 lppsq002a network[56841]: [  OK  ]


2020-01-15-15_42_11-root-server


Another useful thing debug arguments is the -xe to do:

# journalctl -xe –no-pager


  • -x (– catalog)
    Augment log lines with explanation texts from the message catalog.
    This will add explanatory help texts to log messages in the output
    where this is available.
  •  -e ( –pager-end )  Immediately jump to the end of the journal inside the implied pager
      tool.

2020-01-15-15_42_32-root-server

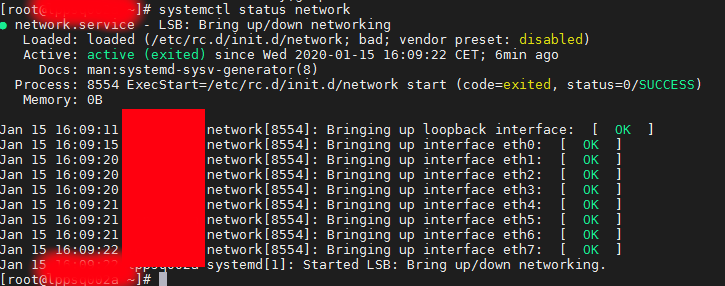
Finally after fixing the /etc/sysconfig/networking-scripts/* IP configuration issues I had all the 8 Ethernet interfaces to work as expected
 

# systemctl status network


2020-01-15-16_15_38-root-server


2. Adding a new IP alias to eth0 interface


Further on I had  to add an IP Alias on the CenOS via its networking configuration, this is done by editing /etc/sysconfig/network-scripts/ifcfg* files.
To create an IP alias for first lan interface eth0, I've had to created a new file named ifcfg-eth0:0
 

linux:~# cd /etc/sysconfig/network-scripts/
linux:~# vim ifcfg-eth0:0


with below content

NAME="eth0:0"
ONBOOT="yes"
BOOTPROTO="none"
IPADDR="10.50.10.5"
NETMASK="255.255.255.0"


Adding this IP address network alias works across all RPM based distributions and should work also on Fedora and Open SuSE as well as Suse Enterprise Linux.
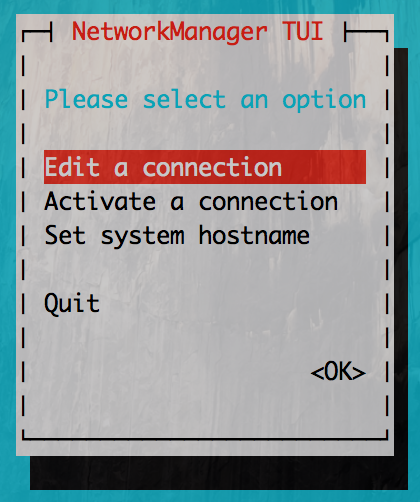
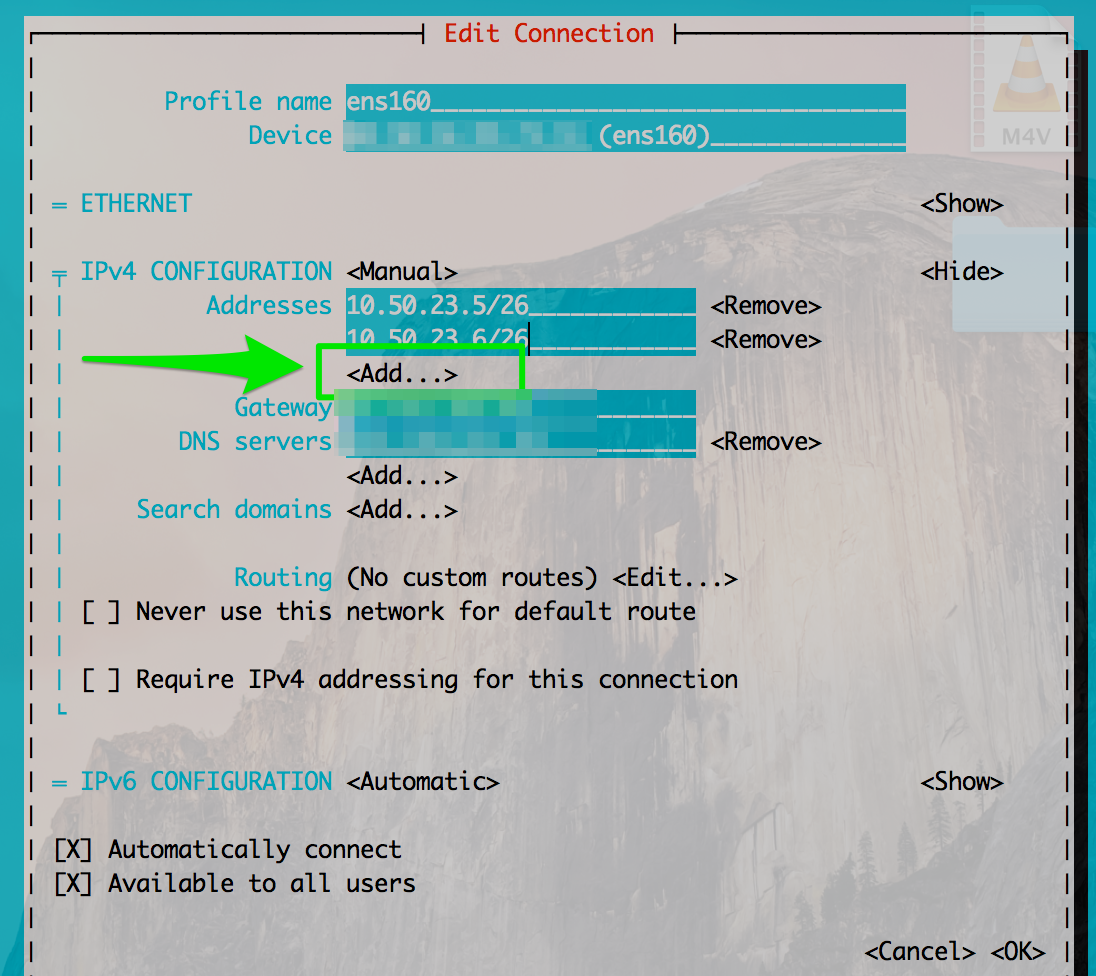
If you however prefer to use a text GUI and do it the CentOS server administration way you can use nmtui (Text User Interface for controlling NetworkManager). tool.
 

linux:~# nmtui


centos7_nmtui-ncurses-network-configuration-sysadmin-tool

nmtui_add_alias_interface-screenshot

Finding top access IPs in Webserver or how to delay connects from Bots (Web Spiders) to your site to prevent connect Denial of Service

Friday, September 15th, 2017

analyze-log-files-most-visited-ips-and-find-and-stopwebsite-hammering-bot-spiders-neo-tux

If you're a sysadmin who has to deal with cracker attemps for DoS (Denial of Service) on single or multiple servers (clustered CDN or standalone) Apache Webservers, nomatter whether working for some web hosting company or just running your private run home brew web server its very useful thing to inspect Web Server log file (in Apache HTTPD case that's access.log).

Sometimes Web Server overloads and the follow up Danial of Service (DoS) affect is not caused by evil crackers (mistkenly often called hackers but by some data indexing Crawler Search Engine bots who are badly configured to aggressively crawl websites and hence causing high webserver loads flooding your servers with bad 404 or 400, 500 or other requests, just to give you an example of such obstructive bots.

1. Dealing with bad Search Indexer Bots (Spiders) with robots.txt

Just as I mentioned hackers word above I feel obliged to expose the badful lies the press and media spreading for years misconcepting in people's mind the word cracker (computer intruder) with a hacker, if you're one of those who mistakenly call security intruders hackers I recommend you read Dr. Richard Stallman's article On Hacking to get the proper understanding that hacker is an cheerful attitude of mind and spirit and a hacker could be anyone who has this kind of curious and playful mind out there. Very often hackers are computer professional, though many times they're skillful programmers, a hacker is tending to do things in a very undstandard and weird ways to make fun out of life but definitelely follow the rule of do no harm to the neighbor.

Well after the short lirical distraction above, let me continue;

Here is a short list of Search Index Crawler bots with very aggressive behaviour towards websites:


# mass download bots / mirroring utilities
1. webzip
2. webmirror
3. webcopy
4. netants
5. getright
6. wget
7. webcapture
8. libwww-perl
9. megaindex.ru
10. megaindex.com
11. Teleport / TeleportPro
12. Zeus
….

Note that some of the listed crawler bots are actually a mirroring clients tools (wget) etc., they're also included in the list of server hammering bots because often  websites are attempted to be mirrored by people who want to mirror content for the sake of good but perhaps these days more often mirror (duplicate) your content for the sake of stealing, this is called in Web language Content Stealing in SEO language.


I've found a very comprehensive list of Bad Bots to block on Mike's tech blog his website provided example of bad robots.txt file is mirrored as plain text file here

Below is the list of Bad Crawler Spiders taken from his site:


# robots.txt to prohibit bad internet search engine spiders to crawl your website
# Begin block Bad-Robots from robots.txt
User-agent: asterias
Disallow:/
User-agent: BackDoorBot/1.0
Disallow:/
User-agent: Black Hole
Disallow:/
User-agent: BlowFish/1.0
Disallow:/
User-agent: BotALot
Disallow:/
User-agent: BuiltBotTough
Disallow:/
User-agent: Bullseye/1.0
Disallow:/
User-agent: BunnySlippers
Disallow:/
User-agent: Cegbfeieh
Disallow:/
User-agent: CheeseBot
Disallow:/
User-agent: CherryPicker
Disallow:/
User-agent: CherryPickerElite/1.0
Disallow:/
User-agent: CherryPickerSE/1.0
Disallow:/
User-agent: CopyRightCheck
Disallow:/
User-agent: cosmos
Disallow:/
User-agent: Crescent
Disallow:/
User-agent: Crescent Internet ToolPak HTTP OLE Control v.1.0
Disallow:/
User-agent: DittoSpyder
Disallow:/
User-agent: EmailCollector
Disallow:/
User-agent: EmailSiphon
Disallow:/
User-agent: EmailWolf
Disallow:/
User-agent: EroCrawler
Disallow:/
User-agent: ExtractorPro
Disallow:/
User-agent: Foobot
Disallow:/
User-agent: Harvest/1.5
Disallow:/
User-agent: hloader
Disallow:/
User-agent: httplib
Disallow:/
User-agent: humanlinks
Disallow:/
User-agent: InfoNaviRobot
Disallow:/
User-agent: JennyBot
Disallow:/
User-agent: Kenjin Spider
Disallow:/
User-agent: Keyword Density/0.9
Disallow:/
User-agent: LexiBot
Disallow:/
User-agent: libWeb/clsHTTP
Disallow:/
User-agent: LinkextractorPro
Disallow:/
User-agent: LinkScan/8.1a Unix
Disallow:/
User-agent: LinkWalker
Disallow:/
User-agent: LNSpiderguy
Disallow:/
User-agent: lwp-trivial
Disallow:/
User-agent: lwp-trivial/1.34
Disallow:/
User-agent: Mata Hari
Disallow:/
User-agent: Microsoft URL Control – 5.01.4511
Disallow:/
User-agent: Microsoft URL Control – 6.00.8169
Disallow:/
User-agent: MIIxpc
Disallow:/
User-agent: MIIxpc/4.2
Disallow:/
User-agent: Mister PiX
Disallow:/
User-agent: moget
Disallow:/
User-agent: moget/2.1
Disallow:/
User-agent: mozilla/4
Disallow:/
User-agent: Mozilla/4.0 (compatible; BullsEye; Windows 95)
Disallow:/
User-agent: Mozilla/4.0 (compatible; MSIE 4.0; Windows 95)
Disallow:/
User-agent: Mozilla/4.0 (compatible; MSIE 4.0; Windows 98)
Disallow:/
User-agent: Mozilla/4.0 (compatible; MSIE 4.0; Windows NT)
Disallow:/
User-agent: Mozilla/4.0 (compatible; MSIE 4.0; Windows XP)
Disallow:/
User-agent: Mozilla/4.0 (compatible; MSIE 4.0; Windows 2000)
Disallow:/
User-agent: Mozilla/4.0 (compatible; MSIE 4.0; Windows ME)
Disallow:/
User-agent: mozilla/5
Disallow:/
User-agent: NetAnts
Disallow:/
User-agent: NICErsPRO
Disallow:/
User-agent: Offline Explorer
Disallow:/
User-agent: Openfind
Disallow:/
User-agent: Openfind data gathere
Disallow:/
User-agent: ProPowerBot/2.14
Disallow:/
User-agent: ProWebWalker
Disallow:/
User-agent: QueryN Metasearch
Disallow:/
User-agent: RepoMonkey
Disallow:/
User-agent: RepoMonkey Bait & Tackle/v1.01
Disallow:/
User-agent: RMA
Disallow:/
User-agent: SiteSnagger
Disallow:/
User-agent: SpankBot
Disallow:/
User-agent: spanner
Disallow:/
User-agent: suzuran
Disallow:/
User-agent: Szukacz/1.4
Disallow:/
User-agent: Teleport
Disallow:/
User-agent: TeleportPro
Disallow:/
User-agent: Telesoft
Disallow:/
User-agent: The Intraformant
Disallow:/
User-agent: TheNomad
Disallow:/
User-agent: TightTwatBot
Disallow:/
User-agent: Titan
Disallow:/
User-agent: toCrawl/UrlDispatcher
Disallow:/
User-agent: True_Robot
Disallow:/
User-agent: True_Robot/1.0
Disallow:/
User-agent: turingos
Disallow:/
User-agent: URLy Warning
Disallow:/
User-agent: VCI
Disallow:/
User-agent: VCI WebViewer VCI WebViewer Win32
Disallow:/
User-agent: Web Image Collector
Disallow:/
User-agent: WebAuto
Disallow:/
User-agent: WebBandit
Disallow:/
User-agent: WebBandit/3.50
Disallow:/
User-agent: WebCopier
Disallow:/
User-agent: WebEnhancer
Disallow:/
User-agent: WebmasterWorldForumBot
Disallow:/
User-agent: WebSauger
Disallow:/
User-agent: Website Quester
Disallow:/
User-agent: Webster Pro
Disallow:/
User-agent: WebStripper
Disallow:/
User-agent: WebZip
Disallow:/
User-agent: WebZip/4.0
Disallow:/
User-agent: Wget
Disallow:/
User-agent: Wget/1.5.3
Disallow:/
User-agent: Wget/1.6
Disallow:/
User-agent: WWW-Collector-E
Disallow:/
User-agent: Xenu’s
Disallow:/
User-agent: Xenu’s Link Sleuth 1.1c
Disallow:/
User-agent: Zeus
Disallow:/
User-agent: Zeus 32297 Webster Pro V2.9 Win32
Disallow:/
Crawl-delay: 20
# Begin Exclusion From Directories from robots.txt
Disallow: /cgi-bin/

Veryimportant variable among the ones passed by above robots.txt is
 

Crawl-Delay: 20


You might want to tune that variable a Crawl-Delay of 20 instructs all IP connects from any Web Spiders that are respecting robots.txt variables to delay crawling with 20 seconds between each and every connect client request, that is really useful for the Webserver as less connects means less CPU and Memory usage and less degraded performance put by aggressive bots crawling your site like crazy, requesting resources 10 times per second or so …

As you can conclude by the naming of some of the bots having them disabled would prevent your domain/s clients from Email harvesting Spiders and other not desired activities.


2. Listing IP addresses Hits / How many connects per IPs used to determine problematic server overloading a huge number of IPs connects

After saying few words about SE bots and I think it it is fair to also  mention here a number of commands, that helps the sysadmin to inspect Apache's access.log files.
Inspecting the log files regularly is really useful as the number of malicious Spider Bots and the Cracker users tends to be
raising with time, so having a good way to track the IPs that are stoning at your webserver and later prohibiting them softly to crawl either via robots.txt (not all of the Bots would respect that) or .htaccess file or as a last resort directly form firewall is really useful to know.
 

– Below command Generate a list of IPs showing how many times of the IPs connected the webserver (bear in mind that commands are designed log fields order as given by most GNU / Linux distribution + Apache default logging configuration;


webhosting-server:~# cd /var/log/apache2 webhosting-server:/var/log/apache2# cat access.log| awk '{print $1}' | sort | uniq -c |sort -n


Below command provides statistics info based on whole access.log file records, sometimes you will need to have analyzed just a chunk of the webserver log, lets say last 12000 IP connects, here is how:
 

webhosting-server:~# cd /var/log/apache2 webhosting-server:/var/log/apache2# tail -n 12000 access.log| awk '{print $1}' | sort | uniq -c |sort -n


You can combine above basic bash shell parser commands with the watch command to have a top like refresh statistics every few updated refreshing IP statistics of most active customers on your websites.

Here is an example:


webhosting-server:~# watch "cat access.log| awk '{print $1}' | sort | uniq -c |sort -n";


Once you have the top connect IPs if you have a some IP connecting with lets say 8000-10000 thousand times in a really short interval of time 20-30 minues or so. Hence it is a good idea to investigate further where is this IP originating from and if it is some malicious Denial of Service, filter it out either in Firewall (with iptables rules) or ask your ISP or webhosting to do you a favour and drop all the incoming traffic from that IP.

Here is how to investigate a bit more about a server stoner IP;
Lets assume that you found IP: 176.9.50.244 to be having too many connects to your webserver:
 

webhosting-server:~# grep -i 176.9.50.244 /var/log/apache2/access.log|tail -n 1
176.9.50.244 – – [12/Sep/2017:07:42:13 +0300] "GET / HTTP/1.1" 403 371 "-" "Mozilla/5.0 (compatible; MegaIndex.ru/2.0; +http://megaindex.com/crawler)"


webhosting-server:~# host 176.9.50.244
244.50.9.176.in-addr.arpa domain name pointer static.244.50.9.176.clients.your-server.de.


webhosting-server:~# whois 176.9.50.244|less


The outout you will get would be something like:

% This is the RIPE Database query service.
% The objects are in RPSL format.
%
% The RIPE Database is subject to Terms and Conditions.
% See http://www.ripe.net/db/support/db-terms-conditions.pdf

% Note: this output has been filtered.
%       To receive output for a database update, use the "-B" flag.

% Information related to '176.9.50.224 – 176.9.50.255'

% Abuse contact for '176.9.50.224 – 176.9.50.255' is 'abuse@hetzner.de'

inetnum:        176.9.50.224 – 176.9.50.255
netname:        HETZNER-RZ15
descr:          Hetzner Online GmbH
descr:          Datacenter 15
country:        DE
admin-c:        HOAC1-RIPE
tech-c:         HOAC1-RIPE
status:         ASSIGNED PA
mnt-by:         HOS-GUN
mnt-lower:      HOS-GUN
mnt-routes:     HOS-GUN
created:        2012-03-12T09:45:54Z
last-modified:  2015-08-10T09:29:53Z
source:         RIPE

role:           Hetzner Online GmbH – Contact Role
address:        Hetzner Online GmbH
address:        Industriestrasse 25
address:        D-91710 Gunzenhausen
address:        Germany
phone:          +49 9831 505-0
fax-no:         +49 9831 505-3
abuse-mailbox:  abuse@hetzner.de
remarks:        *************************************************
remarks:        * For spam/abuse/security issues please contact *
remarks:        * abuse@hetzner.de, not this address. *
remarks:        * The contents of your abuse email will be *
remarks:        * forwarded directly on to our client for *
….


3. Generate list of directories and files that are most called by clients
 

webhosting-server:~# cd /var/log/apache2; webhosting-server:/var/log/apache2# awk '{print $7}' access.log|cut -d? -f1|sort|uniq -c|sort -nk1|tail -n10

( take in consideration that this info is provided only on current records from /var/log/apache2/ and is short term for long term statistics you have to merge all existing gzipped /var/log/apache2/access.log.*.gz )

To merge all the old gzipped files into one single file and later use above shown command to analyize run:


cd /var/log/apache2/
cp -rpf *access.log*.gz apache-gzipped/
cd apache-gzipped
for i in $(ls -1 *access*.log.*.gz); do gzip -d $i; done
rm -f *.log.gz;
for i in $(ls -1 *|grep -v access_log_complete); do cat $i >> access_log_complete; done


Though the accent of above article is Apache Webserver log analyzing, the given command examples can easily be recrafted to work properly on other Web Servers LigHTTPD, Nginx etc.

Above commands are about to put a higher load to your server during execution, so on busy servers it is a better idea, to first go and synchronize the access.log files to another less loaded servers in most small and midsized companies this is being done by a periodic synchronization of the logs to the log server used usually only to store log various files and later used to do various analysis our run analyse software such as Awstats, Webalizer, Piwik, Go Access etc.

Worthy to mention one great text console must have Apache tool that should be mentioned to analyze in real time for the lazy ones to type so much is Apache-top but those script will be not installed on most webhosting servers and VPS-es, so if you don't happen to own a self-hosted dedicated server / have webhosting company etc. – (have root admin access on server), but have an ordinary server account you can use above commands to get an overall picture of abusive webserver IPs.

logstalgia-visual-loganalyzer-in-reali-time-windows-linux-mac
 

If you have a Linux with a desktop GUI environment and have somehow mounted remotely the weblog server partition another really awesome way to visualize in real time the connect requests to  web server Apache / Nginx etc. is with Logstalgia

Well that's all folks, I hope that article learned you something new. Enjoy

Thanks for article neo-tux picture to segarkshtri.com.np)

rc.local missing in Debian 8 Jessie and Debian 9 Stretch and newer Ubuntu 16, Fedora, CentOS Linux – Why is /etc/rc.local not working and how to make it work again

Monday, September 11th, 2017

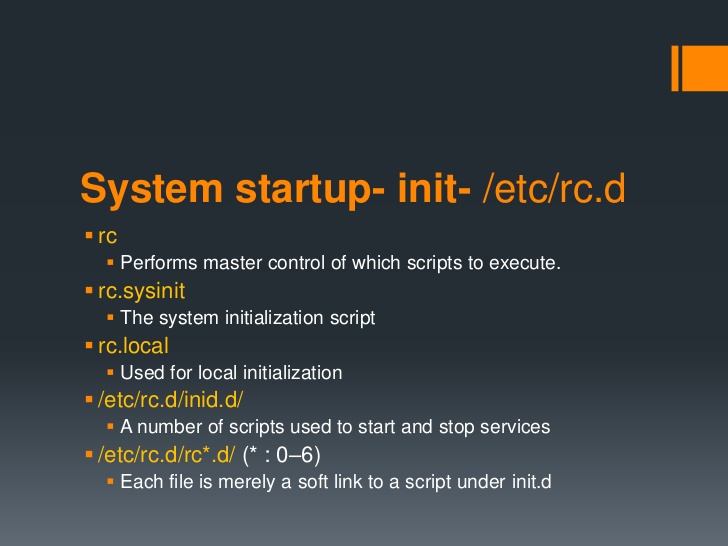
rc.local-not-working-solve-fix-linux-startup-with-rc.local-explained-how-to-make-rc.local-working-again-on-newer-linux-distributions

If you have installed a newer version of Debian GNU / Linux such as Debian Jessie or Debian  9 Stretch or Ubuntu 16 Xenial Xerus either on a server or on a personal Desktop laptop and you want tto execute a number of extra commands next to finalization of system boot just like we GNU / Linux users used to do already for the rest 25+ years you will be surprised that /etc/rc.local is no longer available (file is completely missing!!!).

This kind of behaviour (to avoid use of /etc/rc.local and make the file not present by default right after Linux OS install) was evident across many RedHack (Redhat) distributions such as Fedora and CentOS Linux for the last number of releases and the tendency was to also happen in Debian based distros too as it often does, however there was a possibility on this RPM based distros as well as rest of Linux distros to have the /etc/rc.local manually created to work around the missing file.

But NOoooo, the smart new generation GNU / Linux architects with large brains decided to completely wipe out the execution on Linux boot of /etc/rc.local from finalization stage, SMART isn't it??

For instance If you used to eat certain food for the last 25+ years and they suddenly prohibit you to eat it because they say this is not necessery anymore how would you feel?? Crazy isn't it??

Yes I understand the idea to wipe out /etc/rc.local did have a reason as the developers are striving to constanly improve the boot speed process (and the introduction of systemd (system and service manager) in Debian 8 Jessie over the past years did changed significantly on how Linux boots (earlier used SysV boot and LSB – linux standard based init scripts), but come on guys /etc/rc.local
doesn't stone the boot process with minutes, including it will add just 2, 3 seconds extra to boot runtime, so why on earth did you decided to remove it??

What I really loved about Linux through the years was the high level of consistency and inter-operatibility, most things worked just the same way across distributions and there was some logic upgrade, but lately this kind of behaviour is changing so in many of the new things in both GUI and text mode (console) way to interact with a GNU / Linux PC all becomes messy sadly …

So the smart guys who develop Gnu / Linux distros said its time to depreciate /etc/rc.local to prevent the user to be able to execute his set of finalization commands at the end of each booted multiuser runlevel.

The good news is you can bring back (resurrect) /etc/rc.local really easy:

To so, just execute the following either in Physical /dev/tty Console or in Gnome-Terminal (for GNOME users) or for KDE GUI environment users in KDE's terminal emulator konsole:


cat <<EOF >/etc/rc.local
#!/bin/sh -e
#
# rc.local
#
# This script is executed at the end of each multiuser runlevel.
# Make sure that the script will "exit 0" on success or any other
# value on error.
#
# In order to enable or disable this script just change the execution
# bits.
#
# By default this script does nothing.
exit 0
EOF
chmod +x /etc/rc.local
systemctl start rc-local
systemctl status rc-local


I think above is self-explanatory /etc/rc.local file is being created and then to enable it we run systemctl start rc-local and then to check the just run rc-local service status systemctl status

You will get an output similar to below:


root@jericho:/home/hipo# systemctl start rc-local
root@jericho:/home/hipo# systemctl status rc-local
● rc-local.service – /etc/rc.local Compatibility
   Loaded: loaded (/lib/systemd/system/rc-local.service; static; vendor preset:
  Drop-In: /lib/systemd/system/rc-local.service.d
           └─debian.conf
   Active: active (exited) since Mon 2017-09-11 13:15:35 EEST; 6s ago
  Process: 5008 ExecStart=/etc/rc.local start (code=exited, status=0/SUCCESS)
    Tasks: 0 (limit: 4915)
   CGroup: /system.slice/rc-local.service
sep 11 13:15:35 jericho systemd[1]: Starting /etc/rc.local Compatibility…
setp 11 13:15:35 jericho systemd[1]: Started /etc/rc.local Compatibility.

To test /etc/rc.local is working as expected you can add to print any string on boot, right before exit 0 command in /etc/rc.local

you can add for example:
 

echo "YES, /etc/rc.local IS NOW AGAIN WORKING JUST LIKE IN EARLIER LINUX DISTRIBUTIONS!!! HOORAY !!!!";


On CentOS 7 and Fedora 18 codename (Spherical Cow) or other RPM based Linux distro if /etc/rc.local is missing you can follow very similar procedures to have it enabled, make sure

/etc/rc.d/rc.local

is existing

and /etc/rc.local is properly symlined to /etc/rc.d/rc.local

Also don't forget to check whether /etc/rc.d/rc.local is set to be executable file with ls -al /etc/rc.d/rc.local

If it is not executable, make it be by running cmd:
 

chmod a+x /etc/rc.d/rc.local


If file /etc/rc.d/rc.local happens to be missing just create it with following content:


#!/bin/sh

# Your boot time rc.commands goes somewhere below and above before exit 0

exit 0


That's all folks rc.local not working is solved,
enjoy /etc/rc.local working again 🙂


How to force logrorate process logs / Make logrotate changes take effect immediately

Sunday, April 10th, 2016

how-to-force-logrorate-to-process-logs-make-logrorate-changes-take-effect-immediately-log-rotate-300x299

Dealing with logrorate as admins we need to change or add new log-rorate configurations (on most Linux distributions configs are living uder
/etc/logrotate.d/
 

logrotate uses crontab to work. It's scheduled work, not as daemon, so usually no need to reload its configuration.
When the crontab executes logrotate, it will use your new config file automatically.

Most of the logrotate setups I've seen on various distros runs out of the /etc/cron.daily

$ ls -l /etc/cron.daily/logrotate 
-rwxr-xr-x 1 root root 180 May 18  2014 /etc/cron.daily/logrotate

Here is content of cron job scheduled script:

$ cat /etc/cron.daily/logrorate

#!/bin/sh /usr/sbin/logrotate /etc/logrotate.conf EXITVALUE=$? if [ $EXITVALUE != 0 ]; then /usr/bin/logger -t logrotate "ALERT exited abnormally with [$EXITVALUE]" fi exit 0

Configurations change to lograte configs takes effect on next crontab run,
but what If you need to test your config you can also execute logrotate
on your own with below ommand:


logrotate -vf /etc/logrotate.conf 

If you encounter some issues with just modified or newly added logrorate script to check out the status of last logrorate executing bunch of log-rotate scripts run on Debian  / Ubuntu etc. deb based Linux:

cat /var/lib/logrotate/status

Or on RHEL, Fedora, CentOS Linux


cat /var/lib/logrotate.status

logrotate state -- version 2


"/var/log/syslog" 2016-4-9
"/var/log/dpkg.log" 2016-4-1
"/var/log/unattended-upgrades/unattended-upgrades.log" 2012-9-20
"/var/log/unattended-upgrades/unattended-upgrades-shutdown.log" 2013-5-17
"/var/log/apache2/mailadmin.www.pc-freak.net-access.log" 2012-9-19
"/var/log/snort/portscan.log" 2012-9-12
"/var/log/apt/term.log" 2016-4-1
"/var/log/squid/access.log" 2015-3-21
"/var/log/mysql/mysql-slow.log" 2016-4-9
"/var/log/debug" 2016-4-3
"/var/log/mysql.log" 2016-4-9
"/var/log/squid/store.log" 2015-3-21
"/var/log/apache2/mailadmin.www.pc-freak.net-error.log" 2012-9-19
"/var/log/daemon.log" 2016-4-3
"/var/log/munin/munin-update.log" 2016-4-9
"/var/log/unattended-upgrades/unattended-upgrades*.log" 2013-5-16
"/var/log/razor-agent.log" 2015-2-19
"/var/log/btmp" 2016-4-1
"/var/log/squid/*.log" 2014-11-24
"/var/log/munin/munin-graph.log" 2016-4-9
"/var/log/mysql/mysql.log" 2012-9-12
"/var/log/munin/munin-html.log" 2016-4-9
"/var/log/clamav/freshclam.log" 2016-4-3
"/var/log/munin/munin-node.log" 2016-1-23
"/var/log/mail.info" 2016-4-3
"/var/log/apache2/other_vhosts_access.log" 2016-4-3
"/var/log/exim4/rejectlog" 2012-9-12
"/var/log/squid/cache.log" 2015-3-21
"/var/log/messages" 2016-4-3
"/var/log/stunnel4/stunnel.log" 2012-9-19
"/var/log/apache2/php_error.log" 2012-10-21
"/var/log/ConsoleKit/history" 2016-4-1
"/var/log/rsnapshot.log" 2013-4-15
"/var/log/iptraf/*.log" 2012-9-12
"/var/log/snort/alert" 2012-10-17
"/var/log/privoxy/logfile" 2016-4-3
"/var/log/auth.log" 2016-4-3
"/var/log/postgresql/postgresql-8.4-main.log" 2012-10-21
"/var/log/apt/history.log" 2016-4-1
"/var/log/pm-powersave.log" 2012-11-1
"/var/log/proftpd/proftpd.log" 2016-4-3
"/var/log/proftpd/xferlog" 2016-4-1
"/var/log/zabbix-agent/zabbix_agentd.log" 2016-3-25
"/var/log/alternatives.log" 2016-4-7
"/var/log/mail.log" 2016-4-3
"/var/log/kern.log" 2016-4-3
"/var/log/privoxy/errorfile" 2013-5-28
"/var/log/aptitude" 2015-5-6
"/var/log/apache2/access.log" 2016-4-3
"/var/log/wtmp" 2016-4-1
"/var/log/pm-suspend.log" 2012-9-20
"/var/log/snort/portscan2.log" 2012-9-12
"/var/log/mail.warn" 2016-4-3
"/var/log/bacula/log" 2013-5-1
"/var/log/lpr.log" 2012-12-12
"/var/log/mail.err" 2016-4-3
"/var/log/tor/log" 2016-4-9
"/var/log/fail2ban.log" 2016-4-3
"/var/log/exim4/paniclog" 2012-9-12
"/var/log/tinyproxy/tinyproxy.log" 2015-3-25
"/var/log/munin/munin-limits.log" 2016-4-9
"/var/log/proftpd/controls.log" 2012-9-19
"/var/log/proftpd/xferreport" 2012-9-19
"/var/spool/qscan/qmail-queue.log" 2013-5-15
"/var/log/user.log" 2016-4-3
"/var/log/apache2/error.log" 2016-4-3
"/var/log/exim4/mainlog" 2012-10-16
"/var/log/privoxy/jarfile" 2013-5-28
"/var/log/cron.log" 2016-4-3
"/var/log/clamav/clamav.log" 2016-4-3


The timestamp date next to each of the rotated service log is when the respective log was last rorated

It is also a handy thing to rorate only a certain service log, lets say clamav-server, mysql-server, apache2 and nginx


logrorate /etc/logrorate.d/clamav-server
logrorate /etc/logrorate.d/mysql-server
logrotate /etc/logrotate.d/nginx

How to completely disable Replication in MySQL server 5.1.61 on Debian GNU / Linux

Monday, July 16th, 2012

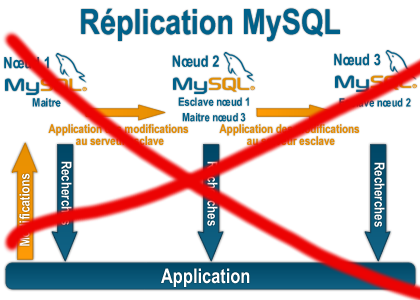
Replication_mysql_disable

Some time ago on one of the Database MySQL servers, I've configured replication as it was required to test somethings. Eventually it turned out replication will be not used (for some reason) it was too slow and not fitting our company needs hence we needed to disable it.

It seemed logical to me that, simply removing any replication related directives from my.cnf and a restart of the SQL server will be enough to turn replication off on the Debian Linux host. Therefore I proceeded removed all replication configs from /etc/my/my.cnf and issued MySQL restart i. e.:

sql-server:~# /etc/init.d/mysql restart
....

This however didn't turned off replication,as I thought and in phpmyadminweb frontend interface, replication was still appearing to be active in the replication tab.

Something was still making the SQL server still act as an Replication Slave Host, so after a bit of pondering and trying to remember, the exact steps I took to make the replication work on the host I remembered that actually I issued:

mysql> START SLAVE;

Onwards I run:

mysql> SHOW SLAVE STATUS;
....

and found in the database the server was still running in Slave Replication mode

Hence to turn off the db host run as a Slave, I had to issue in mysql cli:

mysql> STOP SLAVE;
Query OK, 0 rows affected, 1 warning (0.01 sec)
mysql> RESET SLAVE;
Query OK, 0 rows affected, 1 warning (0.01 sec)

Then after a reload of SQL server in memory, the host finally stopped working as a Slave Replication host, e.g.

sql-server:~# /etc/init.d/mysql restart
....

After the restart, to re-assure myself the SQL server is no more set to run as MySQL replication Slave host:

mysql> SHOW SLAVE STATUS;
Empty set (0.00 sec)

Cheers 😉

StatusNet – Start your own hosted microblogging twitter like social network on Debian GNU / Linux

Monday, July 14th, 2014

build-your-own-microblogging-service-like-twitter-on-debian-linux-Status.net-logo
I like experimenting with free and open source projects providing social networking capabilities like twitter and facebook. Historically I have run my own social network with Elgg – Open Source Social Network Engine. I had a very positive impression from Elgg as a social engine as, there are plenty of plugins and one can use Elgg to run free alternative to very basic equivalent of facebook, problem with Elgg I had however is if is not all the time monitored it quickly fills up with spam and besides that I found it to be still buggy and not easy to update.
The other social network free software I heard of isBuddyPress which I recently installed with Multisite (MuSite) enabled.

Since BuddyPress is WordPress based and it supports all the nice wordpress plugins, my impression is social networking based on wordpress behaves much more stable and since there is Akismet for WordPress, the amount of spammer registrations is much lower than with Elgg.

Recently I started blogging much more actively and I realized everyday I learn and read too much interesting articles and I don't log them anywhere and thought I need a way besides twitter to keep flashy notes of what I'm doing reading, learning in a short notes. I don't want to use Twitter on purpose, because I don't want to improve twitter's site SEO with adding my own stuff on their website but I want to keep my notes on my own local hosted server.

As I didn't wanted to loose time with Complexity of Elgg anymore and wanted to try to something new and I know the open source microblogging social network (Twitter Equivalent) – identi.ca runs StatusNet – Free and Open Source Social software. StatusNet is well known under the motto of "Decentralized Twitter"

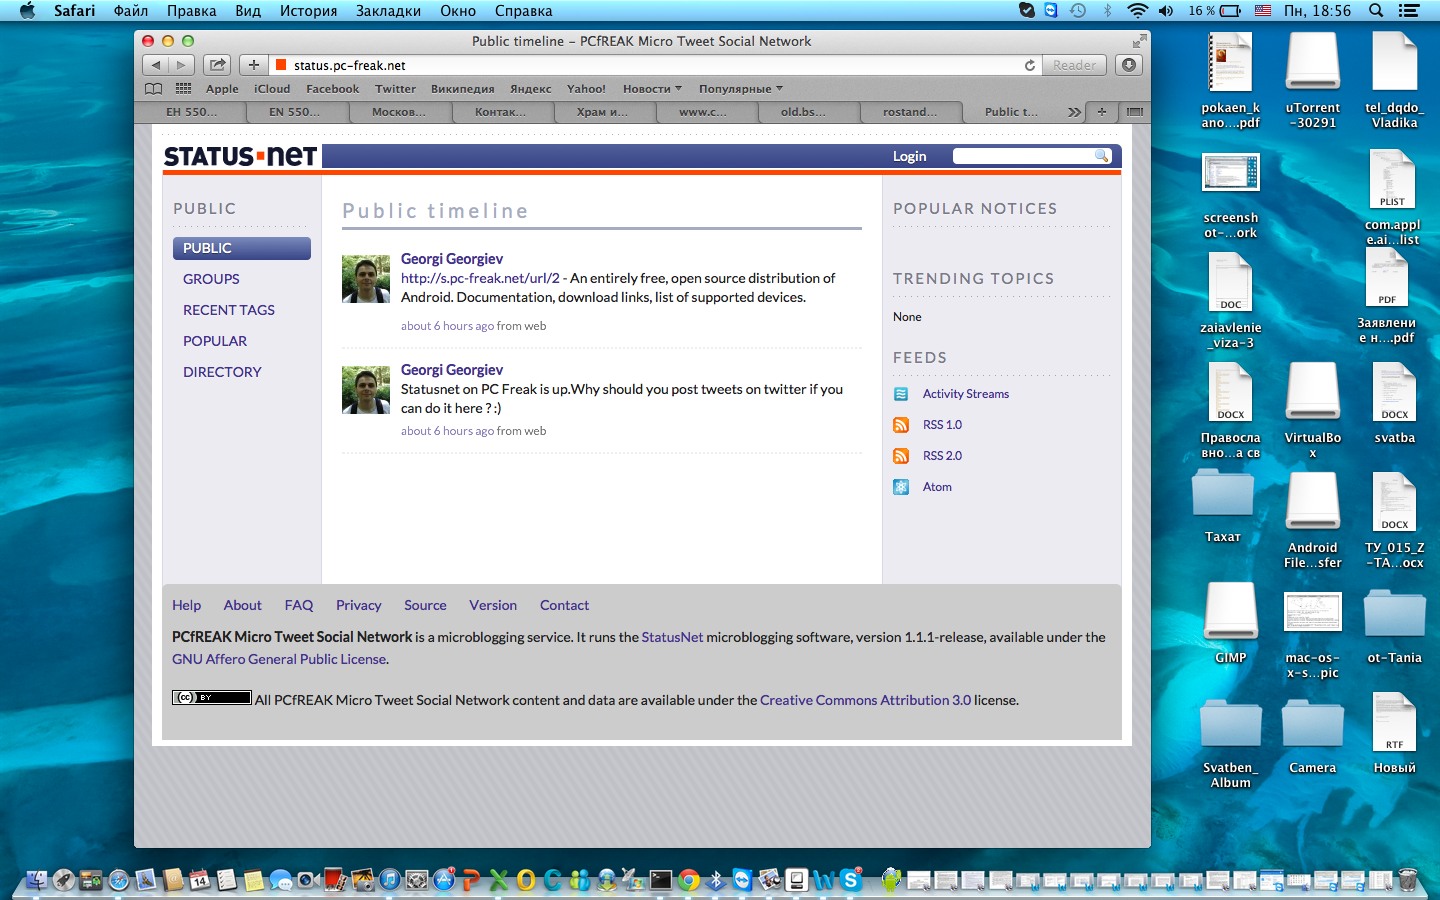
screenshot-status-net-microblogging-twitter-like-free-software-network

I took the time to grab it and install it to my home brew machine www.pc-freak.net. If you haven't seen StatusNet so far – you can check out demo of my installation here – registration is not freely opened because, i don't want spammers to break in, however if you want to give a try drop me a mail or comment below and I will open access for you ..

There is no native statusnet package for Debian Linux (as I'm running Debian) so to install it, I've grabbed statusnet.

To install StatusNet, everything was pretty straight forward and literally following instructionsf rom INSTALL file, i.e.:

# status.example.com maps to /var/www/status/
cd /var/www/status/
wget http://status.net/statusnet-0.9.6.tar.gz
tar -xzf statusnet-0.9.6.tar.gz --strip-components=1
rm statusnet-0.9.6.tar.gz
cd ..
chgrp www-data status/
chmod g+w status/
cd status/
chmod a+w avatar/ background/ file/

mysqladmin -u "root" -p "sql-root-password" create statusnet
mysql -u root -p
GRANT ALL on statusnet.* TO 'statusnetuser'@'localhost' IDENTIFIED BY 'statusnet-secret-password';

To Change default behaviour of URls to be more SEO friendly and not to show .php in URL (e.g. add so called fancy URLs – described in INSTALL):

cp htaccess.sample .htaccess


Then had to configure a VirtualHost under a subdomain http://statusnet.yourdomain.com/install.php or you can alternatively install and access it in browser via http://your-domain.com/status/install.php

An important note to open here is you have to set the URLs via which status.net will be accessed further before proceeding with the install, if you will be using HTTPS here is time to configure it and test it before proceeding with install …  Just be warned that if you don't set the URLs properly now and try to modify them further you will get a lot of issues hard to solve which will cost you a lot of time and nervee ..

If you want to enable twitter bridging in Statusnet you will need to get Twitter consumer and secret keys, to get that you have to create new application on https://dev.twitter.com/apps afterwards you will be taken to a page containing Consumer Key & Consumer Secret string.
StatusNet installation will auto generate config.php, you can further edit it manually with text editor. Content of my current statusnet config.php is here.

Most important options to change are:

$config['daemon']['user'] = 'www-data';
$config['daemon']['group'] = 'www-data';

www-data is user with which Apache is running by default on Debian Linux.

$config['site']['profile'] = 'private';

By default Status.Net will be set to run as private – e.g. it will be fitted for priv. use – messages posted will not publicly be visible. Here the possible options to choose between are:

$config['site']['profile'] = 'private';
$config['site']['profile'] = 'community';
$config['site']['profile'] = 'singleuser';
$config['site']['profile'] = 'public';

singleuser is pretty self explanatory, setting public option will open registration for any user on the internet – probably your network will quickly be filled with spam – so beware with this option. community will make statusnet publicly visible but, registration will only possible via use creation / invitation to join the network from admin.

vi /var/www/status/config.php
$config['site']['fancy'] = true;

Then to enable twitter to statusnet bridge add to config.php

vi /var/www/status/config.php

addPlugin('TwitterBridge');
$config['twitter']['enabled'] = true;
$config['twitterimport']['enabled'] = true;
$config['avatar']['path'] = '/avatar';
$config['twitter']['consumer_key'] = 'XXXXXXXX';
$config['twitter']['consumer_secret'] = 'XXXXXXXX';
# disable sharing location by default
$config['location']['sharedefault'] = 'false';

Notice, I decided to disable statusnet sharedefault folder, because i don't have a lot of free space to provide to users. If you want to let users be allowed to share files (you the space for that), you might want to set a maximum quote of uploaded files (to prevent your webserver from being DoSed – for example by too many huge uploads), here is some reasonable settings:
 

$config['attachments']['file_quota'] = 7000000;
$config['attachments']['thumb_width'] = 400;
$config['attachments']['thumb_height'] = 300;


If you want to get the best out of performance of your new statusnet microblogging service, after each modification of config.php be sure to run:


php scripts/checkschema.php

Running checkschema.php is also useful, to check whether adding new plugins to check whether plugin will not throw an error.

Here is some extra useful config.php plugins to enable:
 

addPlugin('Gravatar', array());
#addPlugin('Textile');
addPlugin('InfiniteScroll');
addPlugin('Realtime');
addPlugin('Blog');
addPlugin('SiteNoticeInSidebar');
addPlugin('WikiHashtags');
addPlugin('SubMirror');
addPlugin('LinkPreview');
addPlugin('Blacklist');


If you expect to have quickly growing base of users it is recommended to also check out whether your MySQL is tuned with mysqltuner and optimize it for performance

Another useful think you would like to do is to increased the number of Statusnet avatars in the 'following' – 'followers' – 'groups' sections on my profile page by editing

lib/groupminilist.php

and

lib/profileminilist.php

line 36 in both files.
To get the full list of possible variables that can be set in config.php run in terminal:

 php scripts/setconfig.php -a

If you happen to encounter some oddities and issues with StatusNet after installation, this is most likely to some PHP hardering on compile time or some PHP.ini functions disabled for security or some missing component to install which is described as a prerequirement in statusnet INSTALL file

to debug the issues enable statusnet logging by adding in config.php

$config['site']['logdebug'] = true;
$config['site']['logfile'] = '/var/log/statusnet.log';

By default logs produced will be quite verbose and there will be plenty of information you will probably not need and will lead to a lot of "noise", to get around this, there is the LogFilter Plugin for some reasonable logging use in config.php:

addPlugin('LogFilter', array( 'priority' => array(LOG_ERR => true,
LOG_INFO => true,
LOG_DEBUG => false),
'regex' => array('/About to push/i' => false,
'/twitter/i' => false,
'/Successfully handled item/i' => false)
));

If you want tokeep log of statusnet it is a good idea to rorate logs periodically to keep them from growing too big, to do this create in /etc/logrotate.d new files /etc/logrotate.d/statusnet with following content:

/var/log/statusnet/*.log {
daily
missingok
rotate 7
compress
delaycompress
notifempty
create 770 www-data www-data
sharedscripts
postrotate
/path/to/statusnet/scripts/stopdaemons.sh > /dev/null
/path/to/statusnet/scripts/startdaemons.sh > /dev/null
endscript
}

You will probably want to to add new Links, next to StatusNet main navigation links for logged in users, this is possible by adding new line to

lib/primarynav.php

and

lib/secondarynav.php

You will have to add a PHP context like:

 $this->action->menuItem('https://www.pc-freak.net/blog/',
                              _m('MENU','Pc-Freak.Net Blog'),
                              _('A pC Freak Blog'),
                              false,
                              'nav_pcfreak');

Once you're done with installation, make sure you change permissions or move install.php from /var/www/status, otherwise someone might overwrite your config.php and mess your installation …

chmod 000 /var/www/status/install.php There is plenty of other things to do with StatusNet (Support for communication with Jabber XMPP protocol, notification via SMS etc. There are also some plugins to add more statusnet functionality.


Enjoy micro blogging ! 🙂