Posts Tagged ‘variables’
Friday, July 8th, 2011 
Some long time ago I’ve written an article Optimizing Linux tcp/ip networking
In the article I’ve examined a number of Linux kernel sysctl variables, which significantly improve the way TCP/IP networking is handled by a non router Linux based servers.
As the time progresses I’ve been continuing to read materials on blogs and internet sites on various tips and anti Denial of Service rules which one could apply on newly installed hosting (Apache/MySql/Qmail/Proxy) server to improve webserver responce times and tighten the overall security level.
In my quest for sysctl 😉 I found a few more handy sysctl variables apart from the old ones I incorporate on every Linux server I adminstrate.
The sysctl variables improves the overall network handling efficiency and protects about common SYN/ACK Denial of service attacks.
Here are the extra sysctl variables I started incorporating just recently:
############ IPv4 Sysctl Settings ################

#Enable ExecShield protection (randomize virtual assigned space to protect against many exploits)

kernel.randomize_va_space = 1

#Increase the number of PIDs processes could assign this is very needed especially on more powerful servers

kernel.pid_max = 65536

# Prevent against the common 'syn flood attack'

net.ipv4.tcp_syncookies = 1

# Controls the use of TCP syncookies two is generally a better idea, though you might experiment

#net.ipv4.tcp_syncookies = 1

net.ipv4.tcp_synack_retries = 2

##################################################

#

############## IPv6 Sysctl Settings ################

# Number of Router Solicitations to send until assuming no routers are present.

net.ipv6.conf.default.router_solicitations = 0

# Accept Router Preference in RA? Again not necessery if the server is not a router

net.ipv6.conf.default.accept_ra_rtr_pref = 0

# Learn Prefix Information in Router Advertisement (Unnecessery) for non-routers

net.ipv6.conf.default.accept_ra_pinfo = 0

# disable accept of hop limit settings from other routers (could be used for DoS)

net.ipv6.conf.default.accept_ra_defrtr = 0

# disable ipv6 global unicasts server assignments

net.ipv6.conf.default.autoconf = 0

# neighbor solicitations to send out per address (better if disabled)

net.ipv6.conf.default.dad_transmits = 0

# disable assigning more than 1 address per network interface

net.ipv6.conf.default.max_addresses = 1

#####################################################
To use this settings paste the above sysctl variables in /etc/sysctl.conf and ask sysctl command to read and apply the newly added conf settings:
server:~# sysctl -p

...
Hopefully you should not get errors while applying the sysctl settings, if you get some errors, it’s possible some of the variable is differently named (depending on the Linux kernel version) or the Linux distribution on which sysctl’s are implemented.
For some convenience I’ve created unified sysctl variables /etc/sysct.conf containing the newly variables I started implementing to servers with the ones I already exlpained in my previous post Optimizing Linux TCP/IP Networking
Here is the optimized / hardened sysctl.conf file for download
I use this exact sysctl.conf these days on both Linux hosting / VPS / Mail servers etc. as well as on my personal notebook 😉
Here is also the the complete content of above’s sysctl.conf file, just in case if somebody wants to directly copy/paste it in his /etc/sysctl.conf
# Sysctl kernel variables to improve network performance and protect against common Denial of Service attacks

# It's possible that not all of the variables are working on all Linux distributions, test to make sure

# Some of the variables might need a slight modification to match server hardware, however in most cases it should be fine

# variables list compiled by hip0

### https://www.pc-freak.net

#### date 08.07.2011

############ IPv4 Sysctl Kernel Settings ################

net.ipv4.ip_forward = 0

# ( Turn off IP Forwarding )

net.ipv4.conf.default.rp_filter = 1

# ( Control Source route verification )

net.ipv4.conf.default.accept_redirects = 0

# ( Disable ICMP redirects )

net.ipv4.conf.all.accept_redirects = 0

# ( same as above )

net.ipv4.conf.default.accept_source_route = 0

# ( Disable IP source routing )

net.ipv4.conf.all.accept_source_route = 0

# ( - || - )net.ipv4.tcp_fin_timeout = 40

# ( Decrease FIN timeout ) - Useful on busy/high load server

net.ipv4.tcp_keepalive_time = 4000

# ( keepalive tcp timeout )

net.core.rmem_default = 786426

# Receive memory stack size ( a good idea to increase it if your server receives big files )

##net.ipv4.tcp_rmem = "4096 87380 4194304"

net.core.wmem_default = 8388608

#( Reserved Memory per connection )

net.core.wmem_max = 8388608

net.core.optmem_max = 40960

# ( maximum amount of option memory buffers )

# tcp reordering, increase max buckets, increase the amount of backlost

net.ipv4.tcp_max_tw_buckets = 360000

net.ipv4.tcp_reordering = 5

##net.core.hot_list_length = 256

net.core.netdev_max_backlog = 1024

#Enable ExecShield protection (randomize virtual assigned space to protect against many exploits)

kernel.randomize_va_space = 1

#Increase the number of PIDs processes could assign this is very needed especially on more powerful servers

kernel.pid_max = 65536

# Prevent against the common 'syn flood attack'net.ipv4.tcp_syncookies = 1

# Controls the use of TCP syncookies two is generally a better idea, though you might experiment

#net.ipv4.tcp_syncookies = 1

net.ipv4.tcp_synack_retries = 2

###################################################

############## IPv6 Sysctl Settings ################

# Number of Router Solicitations to send until assuming no routers are present.

net.ipv6.conf.default.router_solicitations = 0

# Accept Router Preference in RA? Again not necessery if the server is not a router

net.ipv6.conf.default.accept_ra_rtr_pref = 0

# Learn Prefix Information in Router Advertisement (Unnecessery) for non-routersnet.

ipv6.conf.default.accept_ra_pinfo = 0

# disable accept of hop limit settings from other routers (could be used for DoS)

net.ipv6.conf.default.accept_ra_defrtr = 0

# disable ipv6 global unicasts server assignmentsnet.

ipv6.conf.default.autoconf = 0

# neighbor solicitations to send out per address (better if disabled)

net.ipv6.conf.default.dad_transmits = 0

# disable assigning more than 1 address per network interfacenet.

ipv6.conf.default.max_addresses = 1

#####################################################

# Reboot if kernel panic

kernel.panic = 20
These sysctl settings will tweaken the Linux kernel default network settings performance and you will notice the improvements in website responsiveness immediately in some cases implementing this kernel level goodies will make the server perform better and the system load might decrease even 😉
This optimizations on a kernel level are not only handy for servers, their implementation on Linux Desktop should also have a positive influence on the way the network behaves and could improve significantly the responce times of opening pages in Firefox/Opera/Epiphany Torrent downloads etc.
Hope this kernel tweakenings are helpful to someone.
Cheers 😉
Tags: adminstrate, amount, anti, apache mysql, autoconf, default, default network, default router, Denial, denial of service, denial of service attacks, exploits, file, harden, How to, imprpove, internet sites, ip networking, ipv, ipv4, ipv6, kernel, kernel level, level, Linux, Linux Security, linux server, memory, network efficiency, non, number, protection, proxy server, Qmail, quot, ra, randomize, reordering, responce, responce times, router linux, routers, rtr, security, security level, serverskernel, Service, solicitations, Source, SYN, syn flood attack, sysctl, time, variables, wmem
Posted in Computer Security, Linux, Linux and FreeBSD Desktop, System Administration | 4 Comments »
Wednesday, January 15th, 2014 
Recently I've been asked How to make communication to MySQL database encrypted. The question was raised by a fellow developer who works on developing a Desktop standalone application in Delphi Programming Language with DevArt an (SQL Connection Component capable to connect Delphi applications to multiple databases like MySQL, Oracle, PostgreSQL, Interbase, Firebird etc.
Communicating in Secured form to MySQL database is not common task to do, as MySQL usually communicates to applications hosted on same server or applications to communicate to MySQL are in secured DMZ or administrated via phpMyAdmin web interface.
MySQL supports encrypted connections to itself using Secure Socket Layer (SSL) encryption. Setting up MySQL db to be communicated encrypted is a must for standalone Desktop applications which has to extract / insert data via remote SQL.
Configuring SQL to support communicated queries encrpytion is supported by default and easily configured on most standard Linux version distributions (Debian, RHEL, Fedora) with no need to recompile it.
1. Generate SSL Certificates
$ mkdir /etc/mysql-ssl && cd mysql-ssl
# Create CA certificate
$ openssl genrsa 2048 > ca-key.pem
$ openssl req -new -x509 -nodes -days 3600 \
-key ca-key.pem -out ca-cert.pem
Create server certificate, remove passphrase, and sign it
server-cert.pem is public key, server-key.pem is private key
$ openssl req -newkey rsa:2048 -days 3600 \
-nodes -keyout server-key.pem -out server-req.pem
$ openssl rsa -in server-key.pem -out server-key.pem
$ openssl x509 -req -in server-req.pem -days 3600 \
-CA ca-cert.pem -CAkey ca-key.pem -set_serial 01 -out server-cert.pem
Create client certificate, remove passphrase, and sign it
client-cert.pem is public key and client-key.pem is private key
$ openssl req -newkey rsa:2048 -days 3600 \
-nodes -keyout client-key.pem -out client-req.pem
$ openssl rsa -in client-key.pem -out client-key.pem
$ openssl x509 -req -in client-req.pem -days 3600 \
-CA ca-cert.pem -CAkey ca-key.pem -set_serial 01 -out client-cert.pem
After generating the certificates, verify them:
$ openssl verify -CAfile ca-cert.pem server-cert.pem client-cert.pem
2. Add SSL support variables to my.cnf
Once SSL key pair files are generated in order to active SSL encryption support in MySQL server, add to (/etc/my.cnf, /etc/mysql/my.cnf, /usr/local/etc/my.cnf … ) or wherever config is depending on distro …
# SSL

ssl-ca=/etc/mysql-ssl/ca-cert.pem

ssl-cert=/etc/mysql-ssl/server-cert.pem

ssl-key=/etc/mysql-ssl/server-key.pem
3. Restart MySQL server
 /etc/init.d/mysqld restart

...
4. Create SQL user to require SSL login
Create new user with access to database;
GRANT ALL ON Sql_User_DB.* TO Sql_User@localhost;

FLUSH PRIVILEGES;
To create administrator privileges user:
 GRANT ALL PRIVILEGES ON *.* TO ‘ssluser’@'%’ IDENTIFIED BY ‘pass’ REQUIRE SSL;

FLUSH PRIVILEGES;
5. Test SSL Connection with MySQL CLI client or with few lines of PHP
To use mysql cli for testing whether SSL connection works:
$ mysql -u ssluser -p'pass' –ssl-ca /etc/mysql-ssl/client-cert.pem –ssl-cert /etc/mysql-ssl/client-key.pem
Once connected to MySQL to verify SSL connection works fine:
 mysql> SHOW STATUS LIKE 'Ssl_Cipher';

 +---------------+--------------------+

| Variable_name | Value              |

 +---------------+--------------------+

| Ssl_cipher    | DHE-RSA-AES256-SHA |

+---------------+--------------------+
If you get this output this means MySQL SSL Connection is working as should.
Alternative way is to use test-mysqli-ssl.php script to test availability to mysql over SSL.
$conn=mysqli_init();

mysqli_ssl_set($conn, '/etc/mysql-ssl/client-key.pem', '/etc/mysql-ssl/client-cert.pem', NULL, NULL, NULL);

if (!mysqli_real_connect($conn, '127.0.0.1', 'ssluser', 'pass')) { die(); }

$res = mysqli_query($conn, 'SHOW STATUS like "Ssl_cipher"');

print_r(mysqli_fetch_row($res));

mysqli_close($conn);
Note: Change username password according to your user / pass before using the script
That's all now you have mysql communicating queries data over SSL
Tags: administrator, application, change, cnf, common, data, databases, Debian, Delphi Programming Language, Desktop, DMZ, fellow, How to, make, multiple, null, openssl, password, pem, php, queries, rhel, script, setting, SSL, testing, username, variables
Posted in MySQL, System Administration, Web and CMS | No Comments »
Monday, March 29th, 2010 This days I’m playing with MySQL trying out stuff. I decided it could be helpful to somebody to share few things I learned. So there we go:
1. To Rename MySQL existent table name
RENAME TABLE old_table_name to new_table_name;
2. To completely wipe out the content of an existing Table in MySQL
TRUNCATE TABLE table_name; table_name = your table name to truncate
3. To RENAME column name in MySQL to another one
ALTER TABLE your_table_name CHANGE current_column_name new_column_name VARCHAR(100);
Note that in the above example to rename column in MySQL you should always specify the new column variable type e.g. VARCHAR(100) or anything else you like.
4. To get information about a table e.g. variables and there type in a MySQL table
DESCRIBE table_name;
5. To change some Value in a Column to another one based on another value UPDATE table_name column_name SET column_name=’Lecturer’ WHERE other_column_name=’some_value’; Here; column_name = is your column name other_column_name = is some other column_name which you’re going to search in for a certain some_value content
6. To get a thorougful information about MySQL table, it’s variables and the privileges
SHOW FULL COLUMNS from Table;
Here Table should be your table name.
7. To get information about privileges of some mysql user
SHOW GRANTS FOR your_user@host;
8. To create new user and grant certain privileges to some Database
grant CREATE,INSERT,DELETE,UPDATE,SELECT on database_name.* to username@localhost; set password for username@host = password('mysecretpassword');
Where: database_name = is your desired database username = is your user of choice CREATE,INSERT,DELETE,UPDATE,SELECT = is your preferred privileges to the database_name for the selected username In case if you want to grant all possible user privileges that could be assigned to a table use the following code:
GRANT ALL ON database_name.* TO username identified by 'mysecretpassword' with grant option;
9. Another really helpful few commands on daily basis whever you’re responsible for MySQL server are:
SHOW warnings;
Which is always helpful in debugging in MySQL. And:
SHOW status;
SHOW processlist;
That two would inform you about the status of various key variables and could also be a precious debugging tool.
Tags: column name, database name, grants, mysql table, Privileges, table contents, truncate table, variable type, variables
Posted in MySQL, System Administration | 1 Comment »
Tuesday, January 4th, 2011 If you experience problems with making your CentoOS 5.5 work with active ftp connections , e.g. every connection you make to the FTP needs to be in a passive mode or the file transfer or FTP directory listing doesn’t initialize at all, here is how you can solve it:
Edit the file /etc/sysconfig/iptables-config and change their the line:
IPTABLES_MODULES="ip_conntrack_netbios_ns"
to look like:
IPTABLES_MODULES=”ip_conntrack_netbios_ns ip_nat_ftp ip_conntrack_ftp”
Adding the two modules ip_nat_ftp and ip_conntrack_ftp will instruct the CentOS’s /etc/init.d/iptables firewall rules to initialize the kernel modules ip_nat_ftp and ip_conntrack_ftp
This modules solves problems with Active FTP not working caused by a host running behind a firewall router or behind a NAT.
This will hopefully resolve your issues with Active FTP not working on CentOS.
If loading this two kernel modules doesn’t solve the issues and you’re running vsftpd FTP server, then it’s likely that the Active FTP non-working problems are caused by your VSFTPD configuration.
If that’s the case something that might help is setting in /etc/vsftpd/vsftpd.conf the following variables:
pasv_enable=NO

pasv_promiscuous=YES
Of course as a final step you will need to restart the iptables firewall:
[root@centos: ~]# /etc/init.d/iptables restart

Flushing firewall rules: [ OK ]

Setting chains to policy ACCEPT: filter [ OK ]

Unloading iptables modules: [ OK ]

Applying iptables firewall rules: [ OK ]

Loading additional iptables modules: ip_conntrack_netbios_ns

ip_nat_ftp ip_conntrack_ftp [ OK ]
As you can see the two modules ip_nat_ftp and ip_conntrack_ftp are now loaded as additional modules.
Moreover if you have also modified your vsftpd.conf you need to restart the vsftpd via the init script:
[root@centos: ~]# /etc/init.d/vsftpd restart

Shutting down vsftpd: [ OK ]

Starting vsftpd for vsftpd: [ OK ]
If adding this two modules and adding this two extra variables in vsftpd configuration doesn’t help with making your FTP server to work in Active FTP mode , it’s very likely that the whole troubles comes from the firewall configuration, so an edit of /etc/sysconfig/iptables would be necessary;
To find out if the firewall is the source of the FTP not able to enter active mode, stop your firewall for a while by issuing the cmd:
[root@centos:~]# /etc/init.d/iptables stop
If iptables is the source of thepassive ftp troubles, an iptables rules similar to this should make your firewall allow active ftp connections;
*filter :INPUT ACCEPT [0:0]
:FORWARD ACCEPT [0:0]
:OUTPUT ACCEPT
[0:0] -A INPUT -i lo -j ACCEPT -A INPUT -d 127.0.0.0/255.0.0.0 -i ! lo -j REJECT –reject-with icmp-port-unreachable
-A INPUT -m state –state RELATED,ESTABLISHED -j ACCEPT
-A INPUT -p tcp -m tcp –dport 80 -j ACCEPT
-A INPUT -p tcp -m state –state NEW -m tcp –dport 44444 -j ACCEPT
-A INPUT -p tcp -m state –state NEW -m tcp –dport 21 -j ACCEPT -A INPUT -p icmp -m icmp –icmp-type 8 -j ACCEPT
-A INPUT -j REJECT –reject-with icmp-port-unreachable -A FORWARD -j REJECT –reject-with icmp-port-unreachable
-A OUTPUT -j ACCEPT -A OUTPUT -p tcp -m tcp –dport 21 -m state –state ESTABLISHED,RELATED -j ACCEPT
Tags: CentoOS, CentOS, chains, connection, course, directory listing, doesn, dport, Enabling Active FTP connections on CentOS 5.5, ESTABLISHED, file, file transfer, firewall router, firewall rules, Forward, ftp ip, help, ICMP, init script, Initialize, INPUT, ip nat, iptables firewall, kernel modules, nbsp, netbios, passive mode, promiscuous, quot, RELATED, root, something, variables, work, YES
Posted in Linux, System Administration | 1 Comment »
Friday, September 30th, 2011 Its common thing that CMS systems and many developers custom .htaccess cause issues where websites depending on mod_rewrite fails to work properly. Most common issues are broken redirects or mod_rewrite rules, which behave differently among the different mod_rewrite versions which comes with different versions of Apache.
Everytime there are such problems its necessery that mod_rewrite’s RewriteLog functionality is used.
Even though the RewriteLog mod_rewrite config variable is well described on httpd.apache.org , I decided to drop a little post here as I’m pretty sure many novice admins might not know about RewriteLog config var and might benefit of this small article.
Enabling mod_rewrite requests logging of requests to the webserver and process via mod_rewrite rules is being done either via the specific website .htaccess (located in the site’s root directory) or via httpd.conf, apache2.conf etc. depending on the Linux / BSD linux distribution Apache config file naming is used.
To enable RewriteLog near the end of the Apache configuration file its necessery to place the variables in apache conf:
1. Edit RewriteLog and place following variables:
RewriteLogLevel 9

RewriteLog /var/log/rewrite.log
RewriteLogLevel does define the level of logging that should get logged in /var/log/rewrite.log
The higher the RewriteLogLevel number defined the more debugging related to mod_rewrite requests processing gets logged.
RewriteLogLevel 9 is actually the highest loglevel that can be. Setting the RewriteLogLevel to 0 will instruct mod_rewrite to stop logging. In many cases a RewriteLogLevel of 3 is also enough to debug most of the redirect issues, however I prefer to see more, so almost always I use RewriteLogLevel of 9.
2. Create /var/log/rewrite.log and set writtable permissions
a. Create /var/log/rewrite.log
freebsd# touch /var/log/rewrite.log
b. Set writtable permissons
Either chown the file to the user with which the Apache server is running, or chmod it to permissions of 777.
On FreeBSD, chown permissions to allow webserver to write in file, should be:
freebsd# chown www:www /var/log/rewrite.log
On Debian and alike distros:
debian:~# chown www-data:www-data /var/log/rewrite.log
On CentOS, Fedora etc.:
[root@centos ~]# chown httpd:httpd /var/log/rewrite.log
On any other distribution, you don’t want to bother to check the uid:gid, the permissions can be set with chmod 777, e.g.:
linux# chmod 777 /var/log/rewrite.log
Next after RewriteLog is in conf to make configs active the usual webserver restart is required.
To restart Apache On FreeBSD:
freebsd# /usr/local/etc/rc.d/apache2 restart

...
To restart Apache on Debian and derivatives:
debian:~# /etc/init.d/apache2 restart

...
On Fedora and derivive distros:
[root@fedora ~]# /etc/init.d/httpd restart

...
Its common error to forget to set proper permissions to /var/log/rewrite.log this has puzzled me many times, when enabling RewriteLog’s logging.
Another important note is when debugging for mod_rewrite is enabled, one forgets to disable logging and after a while if the /var/log partition is placed on a small partition or is on an old server with less space often the RewriteLog fills in the disk quickly and might create website downtimes. Hence always make sure RewriteLog is disabled after work rewrite debugging is no longer needed.
The way I use to disable it is by commenting it in conf like so:
#RewriteLogLevel 9

#RewriteLog /var/log/rewrite.log
Finally to check, what the mod_rewrite processor is doing on the fly its handy to use the well known tail -f
linux# tail -f /var/log/rewrite.log
A bunch of time in watching the requests, should be enough to point to the exact problem causing broken redirects or general website malfunction.
Cheers 😉
Tags: apache config, apache configuration, benefit, BSD, CentOS, cms systems, config, custom, developers, file, functionality, httpd apache, init, level, Linux, loglevel, logOn, logRewriteLogLevel, mod, necessery, novice, number, partition, permissonsEither, place, processing, root, root directory, Set, small article, Solve, uid, variables
Posted in SEO, System Administration, Web and CMS | 4 Comments »
Saturday, April 9th, 2011 I have noticed that many blogs nowdays offer an email subscription box to simplify the subscription procedure for the blog readers.
My blog was lacking this feature so I took the time to find out how can I add an e-mail subscription box field on my blog.
My research has shown me that the easiest way to add the subscription box is by using Google’s Feedburner RSS service .
I’ve been using Google FeedBurner for quite some time and I’ve already 27 subscriptions with it.
Earlier when I added a FeedBurner subsciption to my blog I’ve blogged about it, so if you’re not acquainted on how to add FeedBurner service to your blog, you might want to read my previous article Adding RSS Feed to WordPress in conjunction with FeedBurner / WordPress add-to-any-subscribe plugin
In this article I will explain in short step by step, how to add the subscrpition email box to your wordpress I assume, that the reader has already enabled and configured registration with Feedburner, if you still haven’t just skip few lines above and check my previous article.
I would hereby skip the explanation of why feedburner as an RSS is so advantageous for every blog owner and readers and skip further to the email subscription procedure step by step instructions:
Step 1: Login to your FeedBurner Account
In my case my feedburner account url is accessed via the URL http://feeds.feedburner.com/WalkingInLightWithChrist-FaithComputingDiary
I have been properly logged in to my feedburner, so to view statistics of my current feeds subscription and to configure various variables of feedburner I had to access the URL address: http://feedburner.google.com/fb/a/myfeeds, a very quick shortcut to my feedburner account settings is also avaialable by simply accessing the URL: http://feedburner.com
Step 2: Click on the link that says My Feeds
If you have configured feeds for your feedburner you will get the list of feedburner feeds, (one could have multiple feeds, let’s say if you have a couple of blogs or sites and you use one feedburner account to podcast your feeds for each of the separated blogs or sites.
Step 3: Click over the feed you want to have the feedburner email subscription box
Below you see the screenshot of my configured feedburner feed:
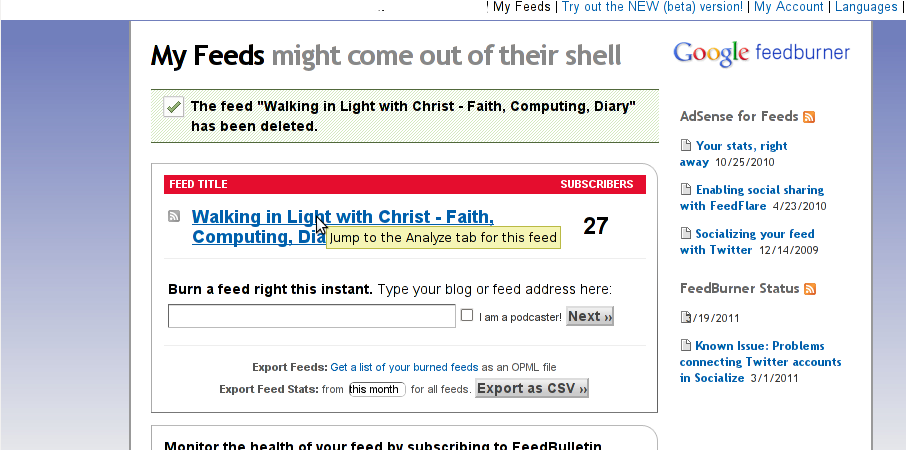
Right after clicking on your configured feed in my case Walking in Light With Christ – Faith, Computing, Diary you will see the screen:

Step 4: Click on Publicize menu
You will see the following two screens while scrolling with your browser:
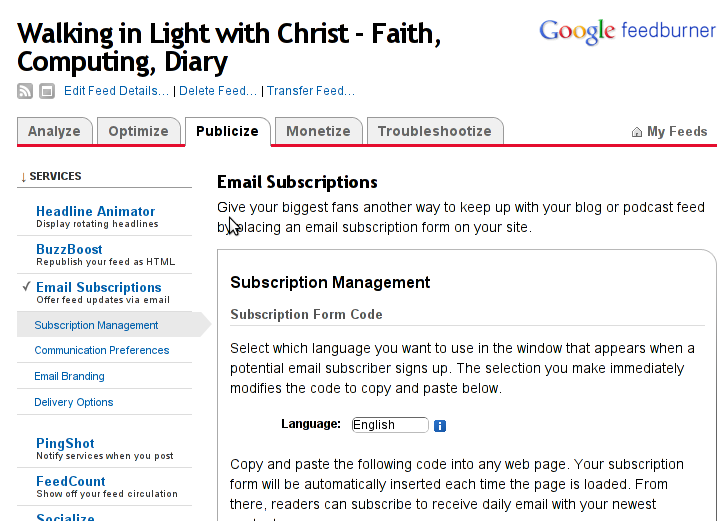
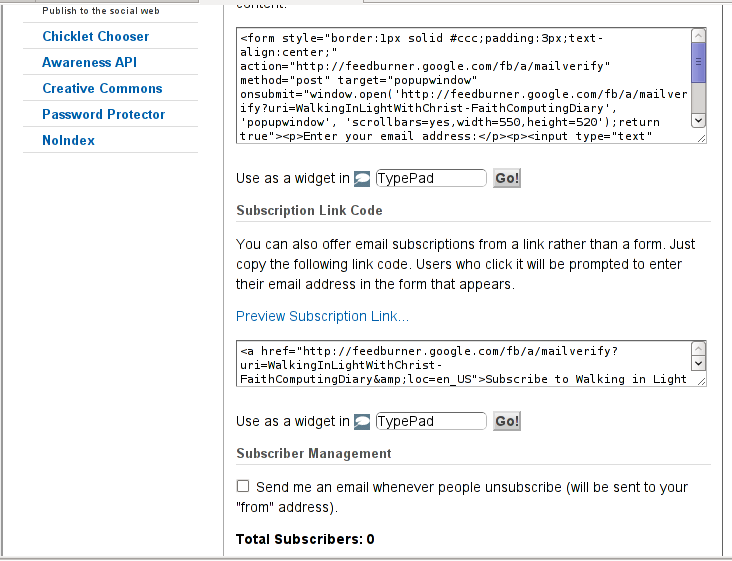
You see in the second screenshot above there is a textbox with a html form code, to set the feedburner subscription to appear on your blog you need to copy/paste this code and put it on your blog.
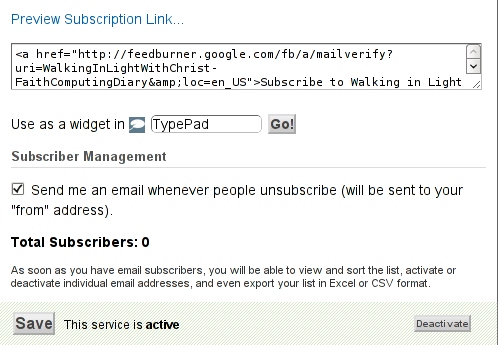
After copy/pasting the code, don’t forget to scroll down in your browser and save the email subscription generated form settings, (NB! if you don’t save it it want be working even if you install it on your blog).
Here is the Save button screenshot:
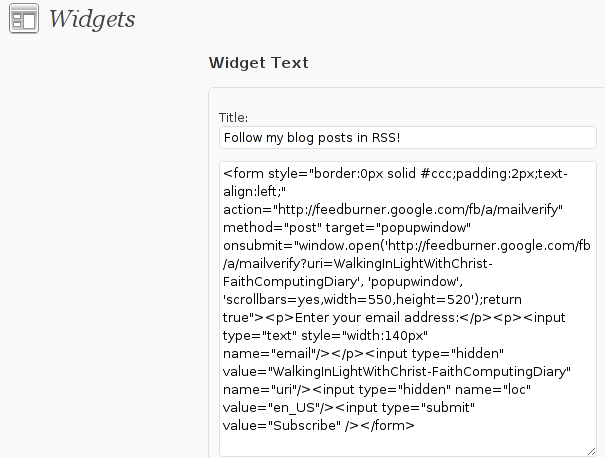
Step 5: Setting up feedburner email textbox to wordpress
In order to set up the just copied html and css form code you need to login to your wordpress blog admin and go to:
Appearance -> Widgets
Scroll over the Available Widgets list, find the Text Widget and press the Add button to include the Text Widget to your blog sidebar.
Further on the same Widgets page, go to the Sidebar menu find the just added Text Widget and click over the Edit link:

Here is my screenshot of the edit screen of the Text Widget:
Step 6. Add the feedburner email subscription box to single posts blog views
This step is not a requirement, but I found it for myself to be vital, as it might rise some more subscribers to my blog, if my blog readers finds individual indexed pages in Google.
This step is also highly dependant on the wordpress theme you use, I use the old wordpress default theme and it’s default behaviour is not to show up the wordpress sidebar, whether an individual wordpress post is clicked over, therefore to enable my feedburner subscription box for individual posts I also need to place the form code obtained from Feedburner.com’s to my templates single.php
If you’re using some kind of theme that doesn’t have the non-sidebar single post behaviour you might skip forward this step, otherwise just continue on reading.
To include the feedburner email form subscription to my single posts I edited blog/wp-content/themes/default/single.php
In the single.php file find the code:
<?php comments_template(); ?>
Immediately after the above code place your feedburner form code, like you see in below screenshot:

Step 7: Modify your form code css and javascript to make your feedburner more accustomed for your needs
Again this step is voluntary and is not necessery I’ve disliked the default way the form is formatted so I played a bit with few of it’s values to customize it to my likings, the things which I have changed a bit in the provided feedburner form code was:
- Remove the Delivered by Feedburner text from the form
-
>To do so in the issued feedburner form code below when you copy the code paste it to some text editor and remove from the code the text:<p>Delivered by <a href=”http://feedburner.google.com” target=”_blank”>FeedBurner</a></p>
- – Change the subsciption box width and height:
-
style=”width:140px”Changed that to:style=”width:120px”also I’ve changed:’scrollbars=yes,width=550,height=520’to:’scrollbars=yes,width=450,height=420’Another point of interest for adjustmnets in the feedburner for are in the form code:
- Remove feedburner subscription form default bordering
-
form style=”border:1px solid #ccc;padding:3px;text-align:center;”I’ve changed that to:form style=”border:0px solid #ccc;padding:2px;text-align:center;”By changing the css values border:1px to border:0px I have instructed the subscription box to show up without borders.
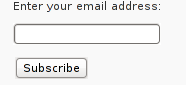
That’s all now refresh in your browser and check if the feedburner email subscription form is showing up properly to your wordpress.
To completely ensure yourself it works correctly try to subscribe yourself to the form and during your next blog post you should receive an email notifying you about the newly written article.
You can see, my blog feedburner subscription form on the blog right sidebar or on the below picture:
Hope that article will help somebody out there.
Tags: account settings, blogs, Button, Click, code, configure, conjunction, e mail, explanation, feature, Feed, Feedburner, form, google, mail subscription, menu, php, plugin, podcast, quite some time, screen, screenshot, scroll, sidebar, statistics, step 1, step 2, subsciption, subscription procedure, subscriptions, subscrpition, time, url, url address, variables, Wordpress
Posted in Various, Web and CMS, Wordpress | 7 Comments »
Friday, February 10th, 2012

On FreeBSD ntpd , ntpdc , ntpdate , ntpq doesn't need to be installed via a specific package like on GNU/Linux as they're part of the FreeBSD world (binary standardly shipped with FreeBSD basis system).
The FreeBSD handbook has a chapter explaining thoroughfully on ntp on FreeBSD ,however for the lazy ones here is a short few steps tutorial on how to install and configure ntpd on bsd :
1. Copy sample ntp.conf file to /etc/
freebsd# cp -rpf /usr/src/etc/ntp.conf /etc/ntp/
No need for any modifications if you don't want to apply some specific restrictions on whom can access the ntpd server. If you update regularly the FreeBSD system with freebsd-update or directly by rebuilding the FreeBSD kernel / world adding restrictions might be not necessery..
If you check /usr/src/etc/ntp.conf you will notice freebsd project people are running their own ntp servers , by default ntpd will use this servers to fetch timing information. The exact server hosts which as of time of writting are used can be seen in ntp.conf and are:
server 0.freebsd.pool.ntp.org iburst maxpoll 9

server 1.freebsd.pool.ntp.org iburst maxpoll 9

server 2.freebsd.pool.ntp.org iburst maxpoll 9
2. Add ntpd daemon to load on system boot via /etc/rc.conf
By default ntpd is disabled on FreeBSD, you can see if it is disabled or enabled by invoking:
freebsd# /etc/rc.d/ntpd rcvar

# ntpd

ntpd_enable=NO
To Enable ntpd to get loaded each time it boots , following 3 lines has to be added in /etc/rc.conf .
ntpdate_enable="YES"

ntpdate_flags="europe.pool.ntp.org"

ntpd_enable="YES"
Quick way to add them is to use echo :
echo 'ntpdate_enable="YES" >> /etc/rc.conf

echo 'ntpdate_flags="europe.pool.ntp.org" >> /etc/rc.conf

echo 'ntpd_enable="YES" >> /etc/rc.conf
Now as the 3 rc.conf vars are set to "YES", the ntpd can be started. Without having this variables in /etc/rc.conf , "/etc/rc.d/ntpd start" will refuse to start ntpd.
3. Start the ntpd service
freebsd# /etc/rc.d/ntpd start

...
One interesting note to make is ntpd can also operate without specifying any config file (/etc/ntp.conf), the only requirement for the server to start is to have a properly set ntpdate server, like lets say (ntpdate_flags="europe.pool.ntp.org")
4. Permit only certain host or localhost to "talk" to the ntpd server
If you want to imply some ntp server restrictions, the configuration directives are same like on Linux:
To allow only a a host inside a local network with IP 192.168.0.2 as well as localhost, to be able to fetch time information via ntpd server put inside /etc/ntp.conf:
restrict 127.0.0.1

restrict 192.168.0.1 mask 255.255.255.0 nomodify notrap
If you want to prohibit ntpd to serve as a Network Time Server, to any other host except localhost, add in /etc/ntp.conf :
restrict default ignore
Allowing and denying certain hosts can be also done on pf (packet filter) or ipfw firewall level, and in my view is easier (and less confusing), than adding restrictions through ntp.conf. Besides that using directly the server firewall to apply restrictions is more secure. If for instance a remote exploit vulnerability is discovered affecting your ntpd server. this will not affect you externally as access to the UDP port 123 will be disabled on a firewall level.
Something good to mention is NTP servers communicate between each other using the UDP source/destination (port 123). Hence if the NTPD server has to be publicly accessible and there is a firewall already implemented, access to source/dest port 123 should be included in the configured firewall …
5. Check if the ntp server is running properly / ntp server query operations
[root@pcfreak /home/hipo]# ps axuww|grep -i ntp
root 15647 0.0 0.2 4672 1848 ?? Ss 2:49PM 0:00.04 /usr/sbin/ntpd -c /etc/ntp.conf -p /var/run/ntpd.pid -f /var/db/ntpd.drift
To query the now running ntpd server as well as set various configuration options "on the fly" (e.g. without need for ntp.conf edits and init script restart), a tool called ntpdc exists. ntpdc tool could be used to connect to localhost running ntpd as well as to connect and manage remotely a ntpd server.
The most basic use of ntpdc is to check (server peers).:
freebsd# ntpdc localhost

ntpdc> peers

remote local st poll reach delay offset disp

===================================================
kgb.comnet.bg 83.228.93.76 2 64 377 0.00282 -0.050575 0.06059

*billing.easy-la 83.228.93.76 2 64 377 0.01068 -0.057400 0.06770

=ns2.novatelbg.n 83.228.93.76 2 64 377 0.01001 -0.055290 0.06058
ntpdc has also a non-interactive interface, handy if there is a need for requests to a ntpd to be scripted. To check ntpd server peers non-interactively:
freebsd# ntpdc -p localhost

===================================================

kgb.comnet.bg 83.228.93.76 2 64 377 0.00284 -0.043157 0.06184

=billing.easy-la 83.228.93.76 2 64 377 0.01059 -0.042648 0.05811

*ns2.novatelbg.n 83.228.93.76 2 64 377 0.00996 -0.041097 0.06094
ntpdc has plenty of other ntpd query options, e.g. :
ntpdc> help

ntpdc commands:

addpeer controlkey fudge keytype quit timeout

addrefclock ctlstats help listpeers readkeys timerstats

addserver debug host loopinfo requestkey traps

addtrap delay hostnames memstats reset trustedkey

authinfo delrestrict ifreload monlist reslist unconfig

broadcast disable ifstats passwd restrict unrestrict

clkbug dmpeers iostats peers showpeer untrustedkey

clockstat enable kerninfo preset sysinfo version

clrtrap exit keyid pstats sysstats
ntpdc is an advanced query tool for ntpd , servers. Another tool exists called ntpq which syntax is almost identical to ntpdc . The main difference between the two is ntpq is a monitoring tool mostly used just for monitoring purposes, where ntpdc can also change plenty of things in the server configuration.
For people who want to learn more on ntpd the man page is a great reading , containing chapters describing thoroughfully exactly how NTPD time servers operate, etc.
Tags: basis, basis system, boots, comnet, configure, daemon, doesn, echo echo, europe, file, flags, freebsd handbook, freebsd kernel, freebsd system, freebsd world, gnu linux, handbook, iburst, information, level, Linux, localhost, maxpoll, nbsp, necessery, need, ntp servers, ntpd, ntpdate, ntpdc, ntpq, package, pool, quot, root, rpf, server clock, server hosts, system boot, time, timing, tool, variables, writting, YES
Posted in FreeBSD, System Administration | 1 Comment »
Thursday, August 25th, 2011 Sysctl is a great way to optimize Linux. sysctl has a dozens of values which could drastically improve server networking and overall performance.
One of the many heplful variables to optimize the way the Linuz kernel works on busy servers is net.ipv4.ip_local_port_range .
The default sysctl setting for net.ipv4.ip_local_port_range on Debian, Ubuntu Fedora, RHEL, CentOS is:
net.ipv4.ip_local_port_range = 32768 65536
This means that the kernel and the corresponding server running services instructing the Linuz kernel open new port sockets can only open local ports in the range of 32768 – 65536 .
On a regular Desktop GNU/Linux machine or a not high iron server this settins is perfectly fine, however on a high scale servers the local port range in the interval of 32768-65536 might be insufficient at times, especially if there are programs which require binding of many local ports.
Therefore on a high load servers, generally it’s a good to raise the port range to be assigned by kernel to 8912 – 65536 , to do so the setting has to be changed like shown below:
linux:~# sysctl -w net.ipv4.ip_local_port_range = 8192 65536

...
If changing this setting on the server doesn’t show any negative impact on performance in few hours time or a day or even better decreases the server average load, it’s a good idea that it be added to sysctl.conf to load up the setting on next kernel boot.
linux:~# echo 'net.ipv4.ip_local_port_range' >> /etc/sysctl.conf
Enjoy 😉
Tags: boot linux, CentOS, conf, confEnjoy, dozens, fedora, gnu linux, good, idea, impact, interval, ip port, ipv, iron, kernel works, Linux, linux machine, negative impact, net, performance, port, ports, range, scale, scale servers, server networking, setting, sockets, sysctl, thoroughput, time, Ubuntu, variables, way
Posted in Linux, Linux and FreeBSD Desktop, System Administration | 1 Comment »
Monday, June 13th, 2011 I needed to check my mail via ssh connection, as my installed squirrelmail is curently broken and I’m away from my own personal computer.
I did some online research on how this can be achieved and thanksfully I finallyfound a way to check my pop3 and imap mailbox with a console client called alpine , better known in unix community under the name pine .
I installed pine on my Debian with apt:
debian:~# apt-get install alpine
Here is my pine configuration file .pinerc used to fetch my mail with pine:
a .pinerc conf file to check my pop3 mail
To use that file I placed it in my home directory ~/ , e.g.:
debian:~# wget https://www.pc-freak.net/files/.pinerc

...
To attune the pop3 server configuration in the sample .pinerc above one needs to change the value of:
inbox-path=
For example to configure pine to fetch mail from the pop3 server mail.www.pc-freak.net and store it locally in my home directory within a file called INBOX
I have configured the inbox-path .pinerc variable to look like so:
inbox-path={mail.www.pc-freak.net/pop3/user=hipo@www.pc-freak.net}INBOX
In above configuration’s inbox-path variable configuration the /pop3/ specifies I want to fetch my mail via the pop3 protocol , if one wants to use imap this has to be substituted with /imap/
The value user=hipo@www.pc-freak.net specifies my vpopmail created user which in my case is obviously hipo@www.pc-freak.net
The other variables which are good to be changed in .pinerc config are:
personal-name=
This variable has to be set to the name of the Email Sender which will be set, if pine is used to send email.
I also changed the user-domain variable as it’s used to set the domain name from which the pine client will send the emails from:
As my domain is www.pc-freak.net I’ve set the domain name variable to be:
user-domain=www.pc-freak.net
Now after launching pine it prompted me for my email password, putting in the pass did fetch all my new unread mails via pop3 protocol.
The only annoying thing was that each time I quit pine and start it up again, I’m now asked to enter the email password.
This behaviour is really shitty, but thanksfully one can easily workaround that by letting pine be constantly running detached in gni screen session.
Tags: alpine, Auto, case, client, community, Computer, conf, config, configuration file, configure, connection, domain pc, Draft, email, email password, email sender, example, file, finallyfound, freak, hipo, home directory, imap, inbox, mail, mailbox, name, online, own personal computer, password, personal name, pine configuration, pinerc, pop, pop3 mail, pop3 protocol, pop3 server, Protocol, screen, server configuration, server mail, session, squirrelmail, ssh, time, unix, unix community, value, variables, vpopmail, way, wget
Posted in Linux, Various | No Comments »


