Posts Tagged ‘xterm’

How to Optimize Debian Linux on old Computers to Get improved overall Speed, Performance and Stability

Tuesday, December 30th, 2025

tuning-debian-linux-to-work-quickly-and-smooth-on-old-pc-laptop-hardware


How to optimize Debian version 12.12 Linux OS to work responsive on Old ThinkPad laptops like from year 2008 Thinkpad R61 with Window Maker, zram, SSD etc.

Old computers aren’t obsolete but most worthy if you dont want to spend on extra hardware.

With the right setup, Debian Linux can run smoothly on hardware that’s more than a decade old. This article walks through a real-world, proven configuration using a classic ThinkPad R61 (Core 2 Duo, 4 GB RAM, SSD), but the principles apply to many older PCs as well.

Why use Debian Linux on old hardware?

Debian Stable is ideal for old hardware because it offers:

  • Low baseline resource usage
  • Long-term stability
  • Minimal background activity
  • Excellent support for lightweight desktops
  • Flexible and well organized and relatively easy to tune

Paired with a minimal window manager, Debian easily outperforms many “lightweight” distros that still ship heavy defaults.

Hardware Baseline PC setup

Test system:

  • Laptop: ThinkPad R61
  • CPU: Intel Core 2 Duo
  • RAM: 4 GB
  • Storage: SATA SSD
  • Graphics: Intel X3100 / NVIDIA NVS 140M
  • Desktop: Window Maker

This is a common configuration for late-2000s business laptops.

1. Desktop Environment: Keep It Simple

Heavy desktop environments is the main factor to slow down an old PC.
Where possible dont use the Desktop environment at all and stick to console.

Recommended:

  • Window Maker (used by myself)
  • Openbox
  • Fluxbox
  • IceWM

Avoid:

  • GNOME
  • KDE Plasma
  • Cinnamon

Window Maker is especially effective: no compositing, no animations, minimal memory usage.

2. Terminal Choice Matters

For console-based applications (games, tools, system utilities), use a terminal that correctly reports its size. Lets say you use xterm:

$ xterm

You can force a usable terminal size like this:

$ xterm -geometry 80×32 &

This avoids common issues with console applications failing due to incorrect terminal dimensions.

Install urxvt (best choice for terminal productivity)

Open a terminal and run:

apt update
# apt install rxvt-unicode

Optional (if you want tabbed terminal use suckless):

# sudo apt install suckless-tools

  • rxvt-unicode-256color → main terminal (n/a in debian) have to install third party  
  • rxvt-unicode-256color-perl → Perl extensions (tabs, URL click, etc.) (n/a in debian, installable via third party)
  • suckless-tools → includes tabbed, can be used as an alternative for tabs

a. Configure .Xresources

Create or edit ~/.Xresources:

$ vim~/.Xresources

Example for beautiful setup with tabs, transparency, and fonts:

! Basic appearance
! URxvt.font: xft:FiraCode Nerd Font Mono:size=12
 URxvt.background: [90]#1c1c1c
 URxvt.foreground: #c0c0c0
! URxvt.cursorColor: #ff5555
! URxvt.saveLines: 10000
! URxvt.scrollBar: false
! URxvt.borderLess: true

! Enable tabs using built-in tabbed extension
URxvt.perl-ext-common: default,tabbed

! Tab colors
URxvt.tabbed.tabbar-fg: 15
URxvt.tabbed.tabbar-bg: 0
URxvt.tabbed.tab-fg: 2
URxvt.tabbed.tab-bg: 8

! Keybindings for tabs
! Ctrl+Shift+N → new tab
URxvt.keysym.Control-Shift-N: perl:tabbed:new_tab
! Ctrl+Shift+W → close tab
URxvt.keysym.Control-Shift-W: perl:tabbed:close_tab
! Ctrl+Tab → next tab
URxvt.keysym.Control-Tab: perl:tabbed:next_tab
! Ctrl+Shift+Tab → previous tab
URxvt.keysym.Control-Shift-Tab: perl:tabbed:prev_tab
! Tabs keybindings
URxvt.keysym.Control-N: perl:tabbed:new_tab
URxvt.keysym.Control-W: perl:tabbed:close_tab


b. Apply .Xresources changes

Run:

$ xrdb ~/.Xresources

Then launch urxvt:

$ rxvt

  • Ctrl+Shift+T → new tab
  • Ctrl+Shift+W → close tab

c. Optional: Make it even cooler

  1. Install powerline fonts or Nerd Fonts (for fancy prompt icons):

# apt install fonts-firacode

  1. Enable URL clicking and clipboard (already enabled above)

  2. Combine with tmux for extra tabs/panes, session management, and more shortcuts.

3. Retain only last 500MB from journald

Retain only the past 500 MB:

# journalctl –vacuum-size=500M

This is exteremely useful as sometimes failing services might generate ton of unnecessery logs and might flood up the old machine hard disk.

4. Reduce journal memory footprint

# vim /etc/systemd/journald.conf

Set Storage=volatile
Set RuntimeMaxUse=50M

# systemctl restart systemd-journald

5. Trim services boot times

# systemd-analyze blame
# systemd-analyze critical-chain

This tells you which services slow down your boot the most.

6. Disable Unnecessary Services

Old systems benefit massively from disabling unused background services.

Check what’s enabled:

# systemctl list-unit-files –state=enabled

Common candidates to disable (if not needed):

# systemctl disable bluetooth
# systemctl disable cups
#systemctl disable avahi-daemon

#systemctl disable ModemManager

Each disabled service saves RAM and CPU cycles.

7. Dirty Page Tuning (Reduces Freezes)

Defaults favor servers, not laptops.

Edit:

vim /etc/sysctl.conf

Add:

vm.dirty_background_ratio=5
vm.dirty_ratio=10

This forces writeback earlier, preventing sudden stalls.

8. Memory Tuning: zram Done Right

Does zram make sense with 4 GB RAM and an SSD?

Yes it could, but only in moderation.

zram compresses memory in RAM and acts as fast swap. On a Core 2 Duo, compression overhead is small and the benefit is smoother multitasking.

Recommended zram configuration

Install zram-tools deb package:

# apt install zram-tools

Edit:

# vim /etc/default/zramswap

Set:

PERCENT=15

This creates ~600 MB of compressed swap — enough to absorb memory spikes without wasting RAM.

9. Keep Disk Swap (But Small)

Even with zram, disk swap is useful as a fallback.

Recommended:

  • 1–2 GB swap on SSD
  • zram should have higher priority than disk swap

Check:

# swapon –show

10. Swappiness and Cache Pressure

Tune the kernel to prefer RAM and zram first:

# vim /etc/sysctl.conf

Add:

vm.swappiness=10
vm.vfs_cache_pressure=50

Apply:

# sysctl -p

This prevents early swapping and keeps the system responsive.

11. CPU Governor: A Hidden Performance Win

Older ThinkPads often run conservative CPU governors.

Install tools:

# apt install cpufrequtils

Set a balanced governor:

# echo 'GOVERNOR="ondemand"' | sudo tee /etc/default/cpufrequtils

# systemctl restart cpufrequtils

This allows the CPU to ramp up quickly when needed.

12. Power and Thermal Management (ThinkPad-Specific)

Install TLP:

# apt install tlp
# systemctl enable tlp
# systemctl start tlp

TLP improves:

  • Battery life
  • Thermal behavior
  • SSD longevity

Defaults are usually perfect – no heavy tuning required.

13. Disable Watchdogs (If You Don’t Debug Kernels)

Watchdogs waste cycles on old CPUs.

Check:

# lsmod | grep watchdog

Disable:

# vim /etc/modprobe.d/blacklist.conf

Add:

blacklist iTCO_wdt
blacklist iTCO_vendor_support

Reboot.

14. Reduce systemd Noise

systemd logs aggressively by default.

Edit:

#vim/etc/systemd/journald.conf

Set:

Storage=volatile
RuntimeMaxUse=50M

Then:

#systemctl restart systemd-journald

Less disk I/O, faster boots.

15. Use tmpfs for caching and Volatile Junk

Put garbage in RAM, not SSD.

Edit:

# vim /etc/fstab

Add:

tmpfs /tmp tmpfs noatime,nosuid,nodev,mode=1777,size=256M 0 0

Optional:

tmpfs /var/tmp tmpfs noatime,nosuid,nodev,size=128M 0 0
# mount -a

16. IRQ Balance: Disable It (might slow down machine)

On single-socket old laptops, irqbalance can hurt.

Disable:

# systemctl disable irqbalance

Test performance; re-enable if needed.

17. Reduce systemd Timeout Delays

Old laptops often wait forever on dead hardware.

Edit:

# vim /etc/systemd/system.conf

Set:

DefaultTimeoutStartSec=10s
DefaultTimeoutStopSec=10s

18. Strip Kernel Modules You Don’t Use

If you don’t use:

  • FireWire
  • Bluetooth
  • Webcam

Blacklist them:

# vim /etc/modprobe.d/blacklist-extra.conf

Example:

blacklist firewire_ohci
blacklist firewire_core
blacklist uvcvideo
blacklist bluetooth


Faster boot, fewer interrupts.

19. X11 Performance Tweaks (Intel Graphics)

Create:

# vim/etc/X11/xorg.conf.d/20-intel.conf

Add:

Section "Device"
Identifier "Intel Graphics"
Driver "intel"
Option "TearFree" "false"
Option "AccelMethod" "sna"
EndSection

20. Disable IPv6 (if not used)

Saves a little RAM and startup time.

Edit:

# vim/etc/sysctl.conf

Add:

net.ipv6.conf.all.disable_ipv6=1
net.ipv6.conf.default.disable_ipv6=1

21.Lower Kernel Log Level verbosity

Stop kernel spam.

# dmesg -n 3

Make permanent:

# vim/etc/sysctl.conf

Add:

kernel.printk=3 4 1 3

22.Scheduler Latency (Advanced)

For desktop interactivity:

# vim/etc/sysctl.conf

Add:

kernel.sched_autogroup_enabled=1

Helps UI responsiveness under load.

23.Kill Browser Bloat (Biggest Win)

For Firefox ESR:

  • Disable telemetry
  • Enable tab unloading

browser.sessionstore.interval = 300000

No kernel tweak beats this.


a. Enable tab unloading (automatic tab discard)

  1. Open Firefox ESR
    Type

  2. about:config

  3. in the address bar.
  4. Accept the warning: “This might void your warranty.”

  5. Search for the following preference:

browser.tabs.unloadOnLowMemory

  • Default: false
  • Set to: true
     

This enables Firefox to unload inactive tabs automatically when memory is low.

b. Optional tuning

Some other preferences you can tweak:

Preference

Description

Suggested value


browser.tabs.maxSuspendedTabs


Maximum number of tabs that can be suspended

10–20


browser.tabs.autoHide


Auto-hide tabs while suspended (older ESR versions)

true


browser.tabs.loadInBackground


Background tabs load in suspended state

true


browser.sessionstore.interval


How often session is saved (ms)

15000

These may vary slightly depending on ESR version.

24. Graphics Considerations

ThinkPad R61 models typically have:

  • Intel X3100 → works well out of the box
  • NVIDIA NVS 140M → use nouveau driver

Recommendations:

  • Avoid proprietary legacy NVIDIA drivers
  • No compositing
  • Simple themes only

25. Extremely for Geeks, Build a Custom Kernel (Optional)

Only if you have plenty of time and you have a developers background and maniacal tendencies 🙂

Benefits:

  • Smaller kernel
  • Faster boot
  • Fewer interrupts

Cost:

  • Maintenance burden

26. Application Choices Matter More Than Tweaks

Keep in mind the application choices matter more than tweeks.
Even the best-tuned system can be ruined by heavy applications.

Recommended software:

  • Browser: Firefox ESR
  • File manager: PCManFM
  • Terminal: xterm, rxvt
  • Editor: nano, geany

Limit browser tabs and disable unnecessary extensions.

27. Things Not to Do

Avoid:

  • Huge zram sizes (50%+)
  • Do not Disable swap entirely
  • Beware of Aggressive kernel “performance hacks”
  • Disable any Heavy desktop effects if choosing to run MATE or alike GUI environment

Stability beats micro-optimizations.

Final Recommended Configuration

For a ThinkPad R61 with 4 GB RAM and SSD perhaps the best Linux configuration would be:

  • Debian Stable
  • Window Maker
  • zram: 15%
  • SSD swap: 1–2 GB
  • swappiness: 10
  • TLP enabled
  • No compositor
     

This setup would deliver:

  • Smooth multitasking
  • No UI lag
  • Minimal CPU overhead
  • Long-term stability

Conclusion

Old PCs don’t need to be fast necessery, but can be made work slightly faster, though the limits if used in a proper way with the right software and without out the eye candy nonse of today, they be still fully functionally used.

With Debian, a lightweight window manager, and sensible memory tuning, even 15-year-old + old hardware remains useful today for common daily tasks, and makes it not only useful but fun and different especially if you are a sysadmin or a developer who needs mostly console and a browser.

It gives you another perspective on how to do your computing in a simplier and more minimalistic way.

Of course do not expect the Old Hardware PC to be the perfect station for youtube maniacs, heavy gamers or complete newbies, who dont honor the old PC limited resources and don't want to have a bit of experimental approach to the PC.

Anyways by implementing before mentioned tweaks, they will reward you with reliability and simplicity  – something modern over complicated OS and Apps often lack.

Enjoy and Happy Christmas 2025 and Happy New Year 2026 soon ! 🙂

How to take multiple screenshots with scrot and ImageMagick import commands in terminal on GNU / Linux and FreeBSD

Friday, January 13th, 2012

scrot and import are two commands, which can be used to take screenshot in terminal on Linux and FreeBSD:

To use scrot cmd to take screenshots on Ubuntu and Debian the scrot package has to be installed:

noah:~# apt-get install scrot
...

scrot should also be available on most other Linux distributions in the main repositories, I'll be glad to hear if someone has used it on Fedora, SUSE etc.

On FreeBSD, there is a port called scrot , to install on FreeBSD:

freebsd# cd /usr/ports/graphics/scrot
freebsd# make install clean
...

Scrot has plenty of nice arguments one can use to make a screenshot. Maybe the most handy one in my view is after a preliminary set delay before screenshot is taken.

To take screenshot with it after lets say 5 seconds delay before the screenshot:

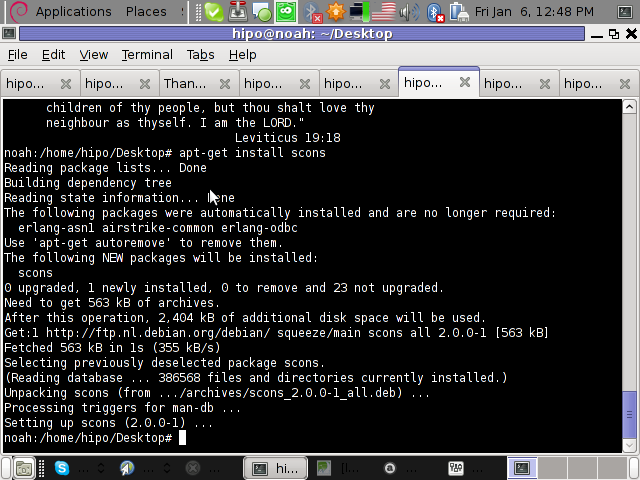
hipo@noah:~/Desktop$ scrot -t 20 -d 5
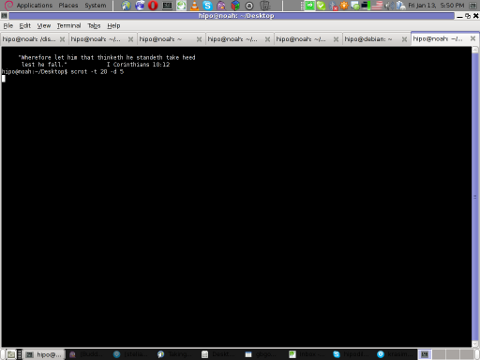
Screenshot scrot my debian Linux gnome-termina

To put an year, month and day and year followed by screen resolution with scrot :

hipo@noah:~$ scrot '%Y-%m-%d_$wx$h.png'

Another way to take a screenshot of screen with command is by using ImageMagick'simport image manipulation package.
To take screenshot of the current screen via terminal using import , type in xterm, gnome-termina or Gnome's Run Application (ALT+F2)

hipo@noah:~$ import -window root ScreenShot.png

To make import command to save the taken screenshot in a format (minute:hour:day:month:year)i :

hipo@noah:~$ import -window root $screenshot_dir/screenshot-$(date +%M_%k_%d_%m_%Y|sed -e 's/^ *//').png

Taking a delayed screenshot is also possible via The GIMP via menus File -> Create -> Screenshot
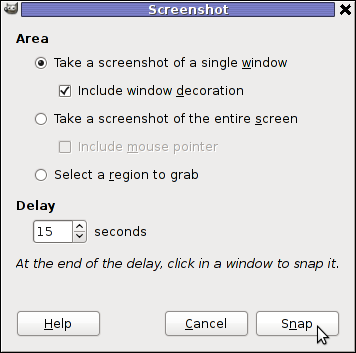
GIMP Screenshot 15 seconds delay GIMP window screenshot

Now here is an interesting question, what if I would like to take periodic screenshots of what I do on my Desktop to take random movie scenes from a movie I watch with totem or vlc??

This task is quite easily achiavable with a little bash shell script, I wrote:

screenshot_dir='Screenshots';
seconds='60';
if [ ! -d "$screenshot_dir" ]; then
mkdir $screenshot_dir;
fi
while [ 1 ]; do
sleep $seconds;
(import -window root $screenshot_dir/screenshot-$(date +%M_%k_%d_%m_%Y|sed -e 's/^ *//').png) &
done

This script will take screenshot automatically to Screenshots/ directory every (1 min – 60 seconds)
You can also my downloads take_screenshot_every_60_secs_import.sh here

To use take_screenshot_every_60_secs_import.sh just issue the script inside xterm or gnome-terminal, after that simply use your computer as you normally would.
The script will take snapshots every minute and store all taken screenshots in Screenshots dir.

If you prefer to use scrot to take automatically the screenshots every lets say 5 minutes, you can use a script like:

screenshot_dir='Screenshots';
# 300 secs (5 mins)seconds='300';
if [ ! -d "$screenshot_dir" ]; then
mkdir $screenshot_dir;
fi
while [ 1 ]; do
sleep $seconds;
(scrot $screenshot_dir/'%Y-%m-%d_$wx$h.png') &
done

You can fetch take_screenshot_every_60_secs_scrot.sh here

The script using scrot is better in terms of efficiency, the system load scrot will put on your machine will be less.
Using some of this scripts will be handy if you need screenshots to Movies, Programs and favourite Free Software games.
Hope this is educative to someone 😉
How to make GNOME 3 Desktop icons to work as in GNOME 2 on Debian GNU / Linux

Saturday, February 4th, 2012

If you're using Debian GNU/Linux wheezy/sid, you have already figured out GNOME3 settings to start GNOME in Classic mode (like in GNOME 2), starts gnome in a mode where the desktop is not showing the usual Computer, Home, Trash etc.

Besides that in that strange back-compitability Classic GNOME mode its impossible to add any program as a link in desktop like in the good old GNOME 2.

Thanksfully this abusive behaviour of the backwards compitability mode is easily fixable by two simple steps, here they are:

1. Install gnome-tweak-tool – (Tool to adjust advanced configuration settings for GNOME

root@debian:~# apt-get install gnome-tweak-tool

2. Start gnome-tweak tool

Press ALT+F2 and run gnome-tweak-tool or run it via xterm / gnome-terminal:

moonman@Moon:~$ gnome-tweak-tool

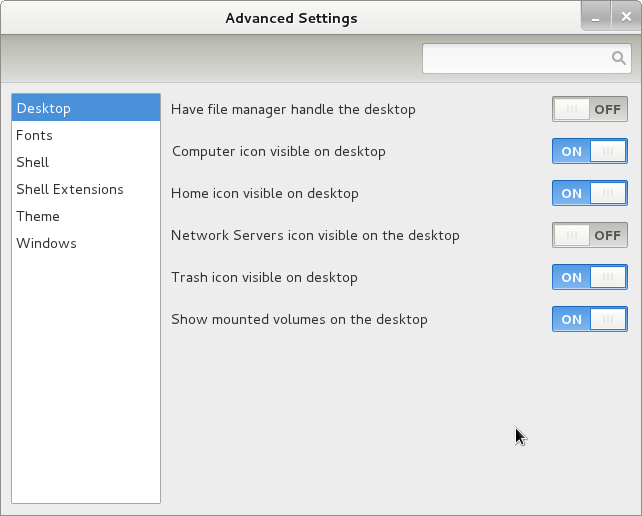
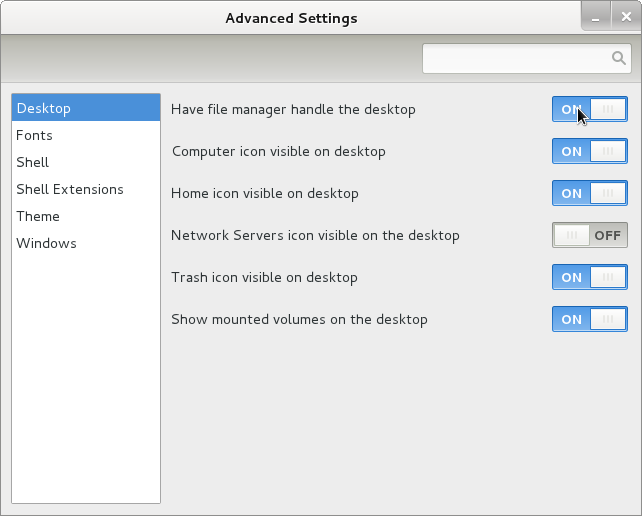
Change in Desktop, Have file manager handle the desktop the settings to ON

gnome-tweek-tool Debian GNU Linux wheezy sid screenshot

gnome-tweak-tool Debian wheezy/Sid GNU Linux screenshot handle desktop on

Once the Screenshot Handle Desktop is set to ON, further drag and dropping any application to the Desktop will be working.
Something really irritating is that launching applications in GNOME 3 does not work properly if you just press ALT+F2 and type in lets say gnome-terminal , to work around this weirdity you will have to install gnome-shell package.

How to change GNOME Resolution with a command using terminal or console on Debian GNU / Linux and FreeBSD

Friday, January 6th, 2012

I'm testing some old school arcade games, available from Debian's package repositories and quitting one of the games ended me up with a GNOME Screen Resolution of 640×480 pixels.

I wanted to revert back to the Classics resolution, so what I would normally do to do that is use >GNOME menus:

System -> Preferences -> Monitors

In that huge screen resolution on my 14 inch lenovo notebook screen, however the System menu cannot fit in 640×480 resolution. You can see the non-screen fitting System on the screenshot below:

Screenshot Debian GNU / Linux Squeeze GNOME Desktop 640x480

Having this situation, I needed a way to change back to my normal daily used 1024x768px screen resolution to continue my daily work by some other way.
One possible solution I thought of was Logging Off Gnome and logging again. Loggig off and log on again would usually restart the initiated GNOME session and therefore will reset the screen resolution to my default 1024×768 / 32 bit color.

Having the unobservable System gnome panel menu on my screen however made using the usual Log off procedure via System -> Log Out myusername impossible…

Another possible way to actually restart my screen and hence revert back to my original resolution is achiavable using the classical restart X server key switch CTRL + ALT + backspace (bckspc) . Though this was a possible approach to the situation, I had a bunch of programs already running on my desktop and I did not wanted to interrupt my desktop session, what I was looking for is simply change the screen resolution size .

With all said I had to look up for alternative way (preferably easy) way, to revert back my screen resolution to my desired 1024×768.

As a console guy, I was interested if there is some kind of possibility to change my GNOME resolution directly using xterm or gnome-terminal , after a bit of check up online, I've found few threads started by people who were looking just like me for a way to change GNOME / KDE screen resolution size on various distributions Linux desktops as well on Free/Net/Open/BSDs. The answer to the question on few places was the command xrandr which I had used some few years ago to initiate remote X server connections via SSH

xrandr is actually a great tool part of the x11-xserver-utils

Actually xrandr is capable of doing a few things besides setting the screen resolution size, just to name a few it supports change the screen orientation, reflection of the output of the screen, adjust brightness, set color gamma etc. etc.

It is good to mention that xrandr changes the resolution not on a GNOME level but on Xorg server level.

Using xrandr to change the screen resolution appeared to be very easy.

1. First I issued xrandr to check all the supported xrandr resolutions by my X server hipo@noah:~/Desktop$ xrandr Screen 0: minimum 320 x 200, current 1024 x 768, maximum 8192 x 8192VGA1 disconnected (normal left inverted right x axis y axis)LVDS1 connected 1024x768+0+0 (normal left inverted right x axis y axis) 304mm x 228mm 1024x768 60.0*+ 50.0 800x600 60.3 56.2 640x480 60.0 59.9 TV1 disconnected (normal left inverted right x axis y axis)hipo@noah:~/Desktop$

From the output you can see I have 3 basic resolutions configured in my Xorg, I can switch between.

2. To switch to my previous default screen resolution

hipo@noah:~/Desktop$ xrandr -s 1024x768

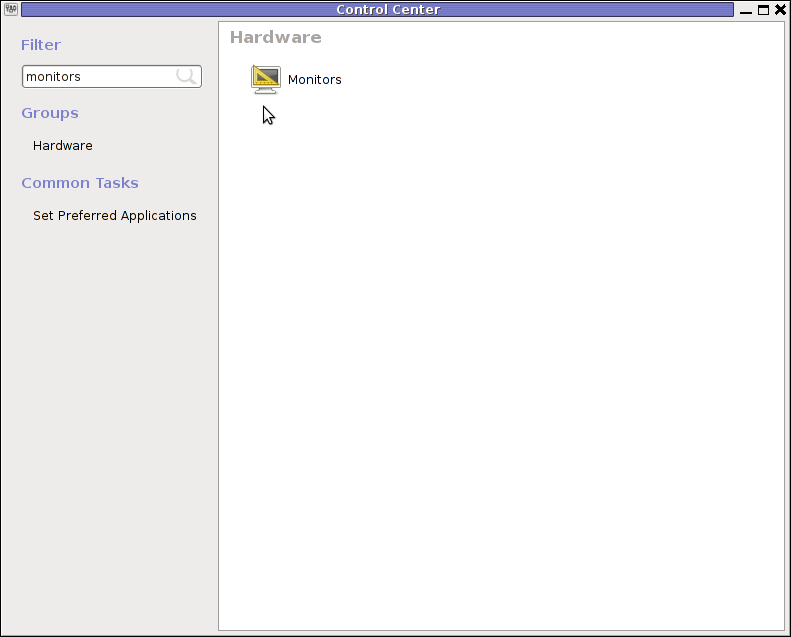
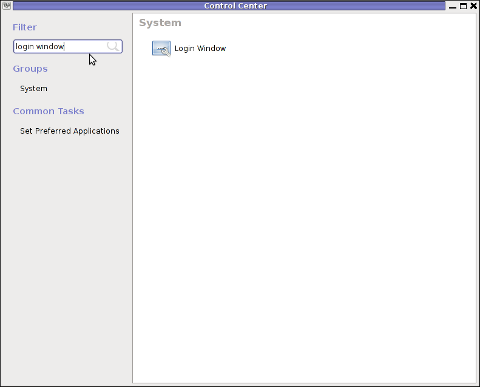
After using xrandr command to revert back to my default screen size, I realized there is two other (partially command line partially gui) way to change to 1024×768 pixels.3. Through launching gnome Control Center and searching for Monitors menu.

If one prefers this way he can;

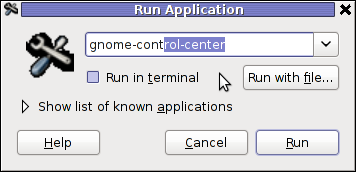
i) press ALT+F2 to invoke Gnome's Run Application dialog

ii) issue gnome-control-center command:

GNOME run application Dialog GNOME Control Center cmd debian GNU / Linux

GNOME Control Center search Monitors menu debian GNU / Linux

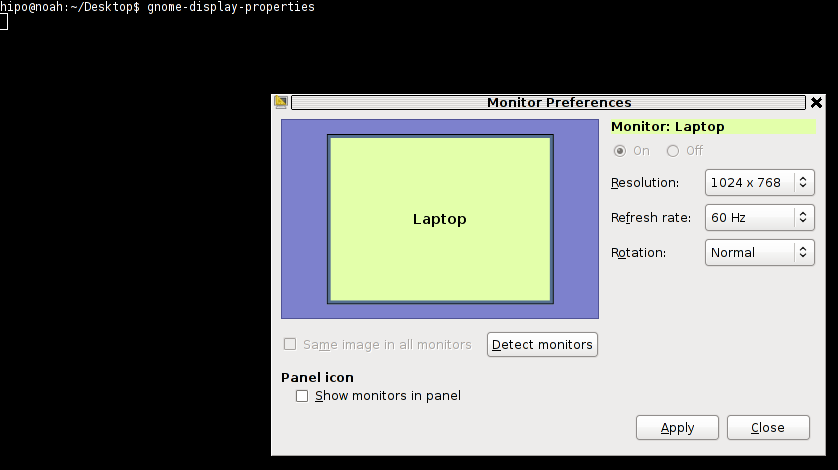
4. By invoking gnome's Control Panel -> Monitors settings window by a command

hipo@noah:~/Desktop$ gnome-display-properties

GNOME display properties command to launch monitors screen resolution settings
 

How to take a screenshot of a game or Full Screen running program inside GNOME or KDE desktop environment on GNU / Linux and FreeBSD

Thursday, December 15th, 2011

Image Magick logo take screenshot of fullscreen running program with import on Linux / FreeBSD

I’m writting some game reviews and movie reviews, every now and then and therefore being able to capture a fullscreen running program like let’s say mplayer or vlc or some full screen running game is something I really need.

The usual PrtScr button which normally works to prepare screenshots in GNOME or KDE, however is not working if the root window handler is being passed to a different program than the Window Manager and pressing it while inside of many older programs or applicationsdoes not produce a print screen of the current screen.

Anyways I found a hack to this using the good old ImageMagickimport command line screenshotting program.

To take a screenshot of a certain program run from gnome-terminal or konsole using import cmd its possible to use a quick one liner which will take a snapshot of the root Window the started program will use.

Let’s say you want to make a screenshot of the entry screen of the FreeDOOM (DooM 3d shooter classical game arcade free Software Alternative).

Launch gnome-terminal or konsole , xterm , depending on the GUI environment you use and issue the commands:

debian:~$ ( sleep 15; import -window root my_desired_screenshot_name.png ) &
debian:~$ freedoom

The first command will launch import after a sleep of 15 secs and therefore will screenshot the active window which will be at focus after 15 seconds, where the & sign will background it and the second one will launch FreeDooM . You will have to wait for a certain secs and switch to the exact screen you will want to screenshot.
If you want to screenshot some game scene that will appear in 20 minutes change above sleep 15 cmd to be to something like sleep 180
That method can be used for screenshotting any other program running on fullscreen, the method is a bit inflexible as you will have to adjust a timing but it works fine 😉