February 2012 Archives
Wed Feb 29 13:07:11 EET 2012
What is the facebook recommended profile picture (logo) size for better SEO Marketing / Few basic Facebook marketing tips
I hate facebook, from the deepness of my guts! However, unfortunately in one of the companies I'm employed, occasionally I have to use it as an advertisement media to improve the Search Engine visibility for their websites (gather them some more likes). As a not big lover of facebook, I'm also not a facebook-pro, anyways with this circumstances, I'm starting to learn basic tips on, making a facebook page / profile more user friendly and hence more attracting to facebook users.
From what, i"ve read there are plenty of factors that can affect on how attractive a facebook page / company profile , anyways some of the factors are more important to tamper than others. Such two factors of top importance are:
- Likes of pages, which are liked by thousands of hundreds or millions of people
-
Belongings to groups / Membering to big groups (consisting of thousands)
which hold similar interest or business activity
- Profile picture logo dimensions
Let me evaluate a bit on each of the three aforementioned fb marketing weight factors.
1. Using Page likes for popularization
Lets say that you would like to make marketing to a company websites which is involved in Financial or Investment market.
Enter with the company created page or profile and facebook and think for and search for as many keywords related to the company business as possible. Check each of the results if the Page / Group is liked by hundred thousands of other people, then just give it a like too.
By doing so for a couple of seconds all this (hundred thousands or millions) of people who has also liked it will see for a second (or less), what hangs on your Facebook profile ;)
The chance someone gets interested into what is your profile saying here is high especially if this pops up to a some 100 000+ of logged people who previously liked a fb page :)
2. Joining groups as a way to drive more visitors to a facebook profile
Joining big groups consisting ot thousands or millions's logic is the same like with the page likes. The only difference is some groups are kept private the so called (Closed Group). Finding a number of similar (Open Groups) to your company activities and joining them will possibly display your company facebook profile to as many profiles as the group has.
Most of the groups are not too active therefore joing groups as a way to drive attention of facebook users to a desired profile is not so efficient as with Page Likes
Adjusting a profile picture logo dimensions to a wide skyscraper
It might seem ridiculous but actually the size of profile picture set to pages or profiles in facebook matters, different profiles dimensions could have impact on Page Likes :)
I've realized this after, I've red few articles online on the same topic along with that I've noticed many big brand pages on Facebook like for instance BMW (Cars) with over 8 000 000 of likes, Adidas and Nike - with over 6 000 000 likes, have set up this wide skyscraper dimensions logos.

Here is a crop taken displaying the wide skyscraper profile picture set by BMW cars.
The profile picture used by BWM (cars) has an image dimensions of: 180x500 heigh x width
Adidas's profile logo has a size of 180x489.
Nike uses a bit of unstandard 390x720 (but while uploaded facebook website automatically crops the image to a size which is fittable for a wide skyscraper) with dimensions like (200x400)
Another franchising company with big likes base, I've seen is McDonald's with 19 900 000+ likes! again with a banner logo consisting of wide scraper with picture dimenions (180x439 - height / width )
There are some comparatively big user base facebook pages, like Ubuntu's non-profit organization with 555 000+ thousands of likes, and their logo has dimensions of 180x181 pixels
Not all of the highly liked (visited) facebook pages however use a wide skyscraper as a profile logo and still has enormous number of likes. One contrac-example which does show that there is no clear relation between facebook profile picture dimensions and page popularity (number of likes) is Metallica (Musician/Band) fan page - (http://www.facebook.com/Metallica), which as of the time of writting this article has the UNIQUE HIGH NUMBER of 23,725,897 LIKES! :)

As far as, I've further red on many blogs, there aretwo general facebook standard banner profile picture recommendations
One is facebook square like profile picture (this is the classics), if you just place a picture that is not too wide automatically facebook upload scripts will tailer the picture to have dimensions like:
180x180 pixels
The other recommended facebook pictures size is the wide widescraper and it should possess an image dimensions size similar to: width x height: 180x500 pixels
This is pretty much, few basics which can easily gather a custom fb company Page Likes, as facebook is really big nowdays facebook marketing has advanced tremendously. I'll be glad to hear some cool tips & tricks you know which can help a facebook page / profile popularity rise up :)
Looking forward to hear for your good or bad facebook experiences :)
Tue Feb 28 16:07:46 EET 2012
How to add extra plugins, effects, brushes and functionality to GIMP on GNU / Linux
The functionality which The GIMP offers in a basic install is quite rich, however by default on most Debian and Ubuntu installations many of the great plugins which easifies the way to edit pictures is missing.
Example for a very valuable functionality which is not present with standard gimp package installed on Debian and Ubuntu are:
- SaveForWeb
- Gimp additional Photo Effects Egger Copyright Text
I will mention here few words on:
- GIMP Fx-Foundry Collection
-A thoroughful collection of GIMP scripts (addon plugins), that automates many of the operations which requires a professional web design skills and gives an easy intiutive interface through which very robust "high level" graphic design can be accomplished. FX-Foundry additional GIMP extensions helps to create very unique design in just few steps. It gives multiple tools for the sake of easy pro design creation and hence I'm glad I found obout of its existence. For anyone looking for quick edit of images with GIMP FX-Foundry is a must have GIMP plugins. The script pack is located on http://gimpfx-foundry.sourceforge.net/
To install FX-Foundry scripts collection on Debian / Ubuntu / Linux Mint and other based Linux distributions:
debian:~# apt-get install --yes gimp-plugin-registry

...
gimp-plugin-registry package name is based on GIMP Plugin registry's website
. Gimp plugin registry contains many helpful design goodies :)
Once installed you will notice GIMP with a new menu on the main menus bar reading FX-Foundry :
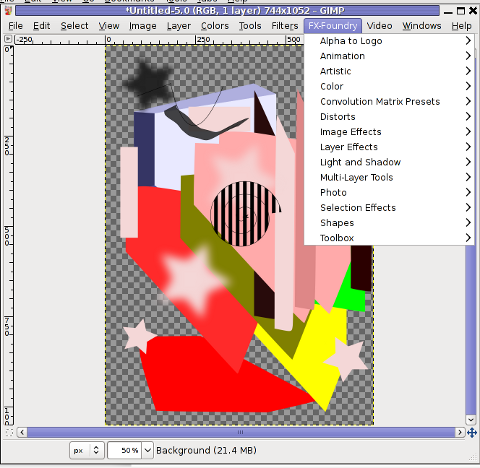
GIMP FX Foundry extensionos package contains 124 scripts for additional graphics manipulation. The collection contains less scripts than the ones provided by gimp-plugin-registry.
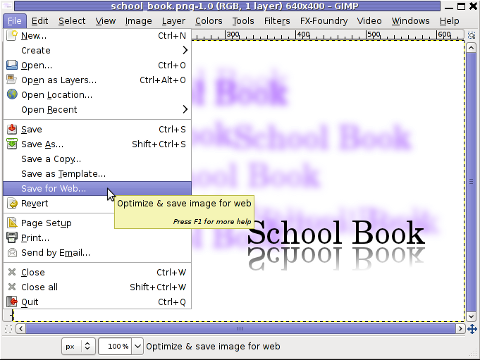
One of the most helpful GIMP addition from the package is the inclusion of Save for Web button under:
File -> Save for Web
Another very helpful .deb package which adds up to GIMP's design possibilities is gimp-data-extras .
gimp-data-extras adds 111 new GIMP Fill in Patterns , which can be used through the Blend Tool to Fill selected areas with color gradients.
To install gimp-data-extras on Debian:
debian:~# apt-get install --yes gimp-data-extras

...
Generally once installed this package will add to GIMP - an extra set of brushes, palettes, and gradients for The GIMP as you can read in the package description.
I was also quite stunned to find out the good old GIMP is capable of basic Video editting!!
On Debian and Ubuntu there is a package called gimp-gap which once installed adds an extra Video menu.

I've not tested the GIMP video editting capabilities yet, however I intend to learn something about it immediately when I have some free time left. You see the enormous list of Video editting possibilities GIMP obtaines with gimp-gap which btw stands for (The GIMP Animation Package).
To install gimp-gap:
debian:~# apt-get install --yes gimp-gap
I've noticed also the following list of others useful GIMP additions (mainly helpful in Web, Brochure and Logo Graphic Design) to install them:
debian:~# apt-get --yes install gimp-gmic gimp-ufraw gtkam-gimp gimp-gluas \
gimp-dimage-color gimp-dds gimp-dcraw gimp-cbmplugs flegita-gimp gimp-texturize \
gimp-resynthesizer gimp-lensfun gimp-gutenprint gtkam-gimp mrwtoppm-gimp
Here is the package description of the packages above command will install:
- gimp-cbmplugs - plugins for The GIMP to import/export Commodore 64 files
- gimp-data-extras - An extra set of brushes, palettes, and gradients for The GIMP
- gimp-dcraw - GIMP plug-in for loading RAW digital photos
- gimp-dds - DDS (DirectDraw Surface) plugin for the gimp
- gimp-dimage-color - GIMP plugin to convert Minolta DiMAGE pictures to sRGB colour space
- gimp-gap - The GIMP Animation Package
- gimp-gluas - Lua environment plug-in for GIMP
- gimp-gmic - GIMP plugin for GREYC's Magic Image Converter
- gimp-gutenprint - print plugin for the GIMP
- gimp-lensfun - Gimp plugin to correct lens distortion using the lensfun library
- gimp-normalmap - Normal map plugin for GIMP
- gimp-plugin-registry - repository of optional extensions for GIMP
- gimp-resynthesizer - Gimp plugin for texture synthesis
- gimp-texturize - generates large textures from a small sample
- gimp-ufraw - gimp importer for raw camera images
- flegita-gimp - Gnome Gimp scan plugin.
- gtkam-gimp - gtkam gimp plugin to open digital camera pictures
- mrwtoppm-gimp - GIMP-plugin to support Minolta DiMAGE 5/7/7i RAW images
Now after installing all this plugins and seeing all GIMP's power, I'm starting to wonder why are still people ranting Adobe PhotoShop is feature rich.
That's all, enjoy the great new GIMP features. Happy picture editting ;)
Mon Feb 27 12:53:43 EET 2012
How to mount MDF images in Debian GNU / Linux - What is the MDF and MDS file
I've recently had to mount an MDF (.mdf) image file on my Debian Linux . I never used .MDF file extension before and therefore I had no clue what is this file extension, so I did a quick research in Google to educate myself what is the MDF file format?
What I found was one article on ehow.com titled What is MDF & MDS and one article in Wikipedia MDF and MDS file pair
In short MDF is a CD9660 like ISO format produced by some CD burning and image creation software like Alcohol 120%
An MDS file accompanies the .MDF file. The .MDS is an optional metadata descriptor file which explains what is contained in the .MDF (iso like file).
MDF is not so standartized format like the usual ISO's we use to snapshot optical CD or DVDs but still is produced by some programs.
The MDF and MDS file pairs are typically created by two famous MS Windows programs:
Both of the softwares are non-free programs, with the little exception - Daemon Tools is at least a freeware.
This is the reason why MDF format is far from popular across GNU / Linux and BSD* users and mostly used across Microsoft Windows platforms.
On Windows there are plenty of program capable of reading and opening .MDF extension files; The two aforementioned programs + MagicISO is few of the many programs which support mounting / (Create virtual drive) for MDF files.
On Free Opearting Systems, (Linux / BSD) there are two GUI programs, that are capable of mounting MDF files;:
I've tried both of them, for the sake of testing. With FuriosIsoMount however mounting the MDF failed. I tried to mount with FuriousIsoMount by launching the program with both non-root and root privileges. The program was capable of detect the .MDF file, I can browse the file and even it appeared like it is mounting the MDF fine when pressing on Mount button, however the mount point directory stays empty.
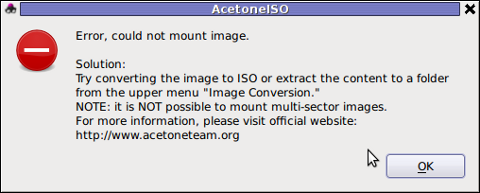
With AcetoneISO program mounting the MDF directly was possible, but only when the program was run with root privileges. With non-root privileges I got the error:
There is also alternative way command way to mount an MDF image by;
On Debian there mdf2iso is avaialable as a deb package.
To install it:
1. Convert MDF to ISO with mdf2iso
To convert the MDF image to ISO with mdf2iso cmd I used:
2. Mount the newly converted ISO file with mount cmd
Now your MDF will be mounted in /mnt/ISO
What I found was one article on ehow.com titled What is MDF & MDS and one article in Wikipedia MDF and MDS file pair
In short MDF is a CD9660 like ISO format produced by some CD burning and image creation software like Alcohol 120%
An MDS file accompanies the .MDF file. The .MDS is an optional metadata descriptor file which explains what is contained in the .MDF (iso like file).
MDF is not so standartized format like the usual ISO's we use to snapshot optical CD or DVDs but still is produced by some programs.
The MDF and MDS file pairs are typically created by two famous MS Windows programs:
- Alcohol 120%
- Daemon Tools
Both of the softwares are non-free programs, with the little exception - Daemon Tools is at least a freeware.
This is the reason why MDF format is far from popular across GNU / Linux and BSD* users and mostly used across Microsoft Windows platforms.
On Windows there are plenty of program capable of reading and opening .MDF extension files; The two aforementioned programs + MagicISO is few of the many programs which support mounting / (Create virtual drive) for MDF files.
On Free Opearting Systems, (Linux / BSD) there are two GUI programs, that are capable of mounting MDF files;:
- Furiusisomount
- AcetoneISO
I've tried both of them, for the sake of testing. With FuriosIsoMount however mounting the MDF failed. I tried to mount with FuriousIsoMount by launching the program with both non-root and root privileges. The program was capable of detect the .MDF file, I can browse the file and even it appeared like it is mounting the MDF fine when pressing on Mount button, however the mount point directory stays empty.
With AcetoneISO program mounting the MDF directly was possible, but only when the program was run with root privileges. With non-root privileges I got the error:
Error, could not mount image.
There is also alternative way command way to mount an MDF image by;
1. Using  mdf2iso  to convert the MDF image file to ISO

2. Use the regular Linux mount command to mount the converted ISO9660  file
On Debian there mdf2iso is avaialable as a deb package.
To install it:
linux:~# apt-get install --yes mdf2iso
1. Convert MDF to ISO with mdf2iso
To convert the MDF image to ISO with mdf2iso cmd I used:
hipo@linux:~/mdf-iso$ mdf2iso my-mdf-iso-file.mdf

mdf2iso v0.3.1 by Salvatore Santagati

Licensed under GPL v2 or later

47% [:           >=========:]
2. Mount the newly converted ISO file with mount cmd
linux:~# mkdir /mnt/ISO

hipo@linux:~/mdf-iso$ mount -t iso9660 -o loop my-mdf-iso-file.iso /mnt/ISO
Now your MDF will be mounted in /mnt/ISO
Sun Feb 26 19:52:49 EET 2012
Convert single PDF pages to multiple SVG files on Debian Linux with pdf2svg
In my last article, I've explained How to create PNG, JPG, GIF pictures from one single PDF document
Convertion of PDF to images is useful, however as PNG and JPEG graphic formats are raster graphics the image quality gets crappy if the picture is zoomed to lets say 300%.
This means convertion to PNG / GIF etc. is not a good practice especially if image quality is targetted.
I myself am not a quality freak but it was interesting to find out it is possible to convert the PDF pages to SVG (Scalable Vector Graphics) graphics format.
Converting PDF to SVG is very easy as for GNU / Linux there is a command line tool called pdf2svg
pdf2svg's official page is here
The traditional source way compile and install is described on the homepage. For Debian users pdf2svg has already existing a deb package.
To install pdf2svg on Debian use:
Once installed usage of pdf2svg to convert PDF to multiple SVG files is analogous to imagemagick's convert .
To convert the 44 pages Projects.pdf to multiple SVG pages - (each PDF page to a separate SVG file) issue:
This little loop tells each page number from the 44 PDF document to be stored in separate SVG vector graphics file:
Now the output SVG files are perfect for editting with Inkscape or Scribus and the picture quality is way superior to old rasterized (JPEG, PNG) images
Convertion of PDF to images is useful, however as PNG and JPEG graphic formats are raster graphics the image quality gets crappy if the picture is zoomed to lets say 300%.
This means convertion to PNG / GIF etc. is not a good practice especially if image quality is targetted.
I myself am not a quality freak but it was interesting to find out it is possible to convert the PDF pages to SVG (Scalable Vector Graphics) graphics format.
Converting PDF to SVG is very easy as for GNU / Linux there is a command line tool called pdf2svg
pdf2svg's official page is here
The traditional source way compile and install is described on the homepage. For Debian users pdf2svg has already existing a deb package.
To install pdf2svg on Debian use:
debian:~# apt-get install --yes pdf2svg

...
Once installed usage of pdf2svg to convert PDF to multiple SVG files is analogous to imagemagick's convert .
To convert the 44 pages Projects.pdf to multiple SVG pages - (each PDF page to a separate SVG file) issue:
debian:~/project-pdf-to-images$ for i in $(seq 1 44); do \

pdf2svg Projects.pdf Projects-$i.SVG $i; \

done
This little loop tells each page number from the 44 PDF document to be stored in separate SVG vector graphics file:
debian:~/project-pdf-to-images$ ls -1 *.svg|wc -l

 44
Now the output SVG files are perfect for editting with Inkscape or Scribus and the picture quality is way superior to old rasterized (JPEG, PNG) images
Sat Feb 25 12:03:25 EET 2012
Create PNG, JPG, GIF pictures / images from PDF on Linux
I've received a PDF file with a plan for development of a bundle of projects, My task was to evaluate this plan and give feeback on the 44 pages PDF document.
Since don't know of program to directly be able edit PDF files on GNU / Linux?, my initial idea was to open and convert the PDF to ODT / DOC with OpenOffice (Libre Office) and then edit the ODT file.
Unfortunately Open Office oowrite program was unable to open / visualize the PDF file. My assumption is OO failure to open the PDF is because the PDF was generated on Microsoft Windows with Adobe illustrator or smth.
The idea that came to my mind as alternative, way to edit the PDF file was to convert it in pictures edit and then convert the pictures to PDF.
In other words to follow these 3 steps:
Some time ago, I've written an article how to create PDF file from many image files in JPEG, PNG or GIF on Linux
. This prior article was exactly describing how to complete Step 3.Therefore all left was to find a way to convert the PDF file to multiple JPEG / PNG / GIF images.
convert command to convert PDF document to multiple pictures which you can take from my earlier article is:
Hence, in order to convert the singe Project.PDF file to multiple PNG images, I just switched convert IN / OUT arguments order.
I've done the PDF to pictures conversion on my notebook running Debian Squeeze (6.0.2) GNU / Linux. Convertion of the PDF file to 44 images, took 25 seconds on my dual core 1.8 Ghz / 2GB RAM Thinkpad r61.
Afterwards, I've had at hand 44 PNG files generated, e.g.:
convert was also smart enough to produce correct file naming. The output file names were:
Project-1.png
Project-2.png
etc.
Nicely each number (-1.png) was corresponding to the respective PDF page. For instance Project-10.png was corresponding to page 10 of the Projects.PDF file
Rather ironically, after convertion of the PDF to pictures, while opening the Project-1.png, I've noticed The GIMP - (The GNU Image Manipulation Program) is capable of directly reading PDF files. GIMP has both the option to open files in layers or separate images ;)
Anyways even if GIMP is used to modify the different PDF pages as layers, once completed GIMP doesn't have the ability to save the file as PDF and therefore once saved the file if merging of layers is done the resulting picture becomes ONE BIG MESS.
Therefore it seems my the 3 steps way e.g.:
is still the only way to "modify PDF" in Linux. I will be glad to hear if someone has come up with a better solution?
Since don't know of program to directly be able edit PDF files on GNU / Linux?, my initial idea was to open and convert the PDF to ODT / DOC with OpenOffice (Libre Office) and then edit the ODT file.
Unfortunately Open Office oowrite program was unable to open / visualize the PDF file. My assumption is OO failure to open the PDF is because the PDF was generated on Microsoft Windows with Adobe illustrator or smth.
The idea that came to my mind as alternative, way to edit the PDF file was to convert it in pictures edit and then convert the pictures to PDF.
In other words to follow these 3 steps:
1. Convert the PDF document to multiple images

2. Edit each of the images with GIMP or Inkscape

3. Convert back all images to a single PDF file
Some time ago, I've written an article how to create PDF file from many image files in JPEG, PNG or GIF on Linux
. This prior article was exactly describing how to complete Step 3.Therefore all left was to find a way to convert the PDF file to multiple JPEG / PNG / GIF images.
convert command to convert PDF document to multiple pictures which you can take from my earlier article is:
$ convert *.jpg outputpdffile.pdf
Actually in Step 1 I was aiming to do the opposite of what I've previously done.Hence, in order to convert the singe Project.PDF file to multiple PNG images, I just switched convert IN / OUT arguments order.
hipo@noah:~/project-pdf-to-images$ convert Project.pdf Project.png

...
I've done the PDF to pictures conversion on my notebook running Debian Squeeze (6.0.2) GNU / Linux. Convertion of the PDF file to 44 images, took 25 seconds on my dual core 1.8 Ghz / 2GB RAM Thinkpad r61.
Afterwards, I've had at hand 44 PNG files generated, e.g.:
hipo@noah:~/project-pdf-to-images$ ls -al Project-*.png |wc -l

44
convert was also smart enough to produce correct file naming. The output file names were:
Project-1.png
Project-2.png
etc.
Nicely each number (-1.png) was corresponding to the respective PDF page. For instance Project-10.png was corresponding to page 10 of the Projects.PDF file
Rather ironically, after convertion of the PDF to pictures, while opening the Project-1.png, I've noticed The GIMP - (The GNU Image Manipulation Program) is capable of directly reading PDF files. GIMP has both the option to open files in layers or separate images ;)
Anyways even if GIMP is used to modify the different PDF pages as layers, once completed GIMP doesn't have the ability to save the file as PDF and therefore once saved the file if merging of layers is done the resulting picture becomes ONE BIG MESS.
Therefore it seems my the 3 steps way e.g.:
1. convertion PDF to pictures

2. picture edit with GIMP or Inkscape

3. convertion of pictures back to PDF
is still the only way to "modify PDF" in Linux. I will be glad to hear if someone has come up with a better solution?
Fri Feb 24 13:36:05 EET 2012
How to fix clock on Slackware / Slackware and this old incorrect BIOS time troubles
There two main reasons which cause incorrect clock settings on Slackware Linux.
One common reason for incorrectly set time is improper clock and timezone settings during Slackware install.
On install, one of the ncruses install menus asks an ambigious dialog question reading
Some newbie Slackware users make the mistake to choose YES here, resulting in incorrectly set clock.
Second possibility for improper time is incorrect time on BIOS level. This is not so common among laptop and modern desktop PCs. However in the past impoper system BIOS hardware clock was usual.
In any case it is a good practice to check the system PC BIOS clock settings.
To check BIOS battery hardware clock from command line use:
The system clock on Slackware is set via a script called timeconfig. To fix slack's incorrect host time run:


Running timeconfig once should configure a proper timezone to be set on next system reboot, however the system time will probably still be not ok.
To manually set time to right time, use date command. To set manually the system wide time to 12:00:00 with date:
Anyways for time accuracy the ntpdate should be used to feth time from NTP internet time server:
Finally to make the new set right time permanent also for the BIOS battery clock issue:
By the way its curious fact Slackware Linux is the oldest still existent GNU / Linux based distribution. Its up and running since the very day GNU and Linux came to merge at one Free OS ;)
One common reason for incorrectly set time is improper clock and timezone settings during Slackware install.
On install, one of the ncruses install menus asks an ambigious dialog question reading
HARDWARE CLOCK SET TO UTC?

Is the hardware clock set to Coordinated Universal Time (UTC/GMT)?
Some newbie Slackware users make the mistake to choose YES here, resulting in incorrectly set clock.
Second possibility for improper time is incorrect time on BIOS level. This is not so common among laptop and modern desktop PCs. However in the past impoper system BIOS hardware clock was usual.
In any case it is a good practice to check the system PC BIOS clock settings.
To check BIOS battery hardware clock from command line use:
bash-4.1# hwclock --show

Fri 24 Feb 2012 01:24:18 AM EET  -0.469279 seconds
The system clock on Slackware is set via a script called timeconfig. To fix slack's incorrect host time run:
bash-4.1# timeconfig
Running timeconfig once should configure a proper timezone to be set on next system reboot, however the system time will probably still be not ok.
To manually set time to right time, use date command. To set manually the system wide time to 12:00:00 with date:
bash-4.1# date -s "12:00:00"
Anyways for time accuracy the ntpdate should be used to feth time from NTP internet time server:
bash-4.1# ntpdate time.nist.gov

...
Finally to make the new set right time permanent also for the BIOS battery clock issue:
bash-4.1# hwclock --systohc
By the way its curious fact Slackware Linux is the oldest still existent GNU / Linux based distribution. Its up and running since the very day GNU and Linux came to merge at one Free OS ;)
Thu Feb 23 13:02:42 EET 2012
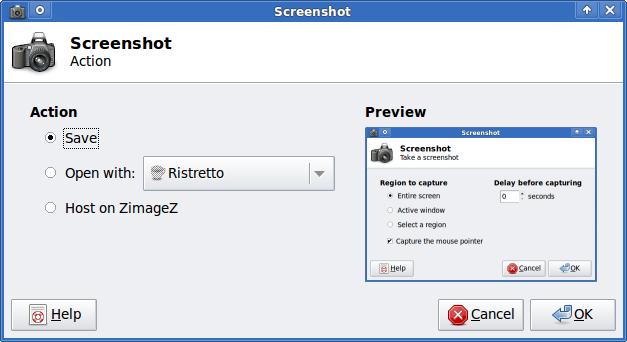
How to make screenshots on Slackware Linux with XFCE graphical environment
1. Install the slackware binary package xfce4-screenshooter.
For the latest Slackware Linux release which as of time of writting is 13.37 xfce4-screenshooter-1.7.9-i486-3sl.txz can be download from here
Install of xfce4-screenshooter-1.7.9-i486-3sl.txz is done with slackware's usual installpkg package manager command:
By the way, I haven't used slackware for a long time so in the mean time since Slackware 13, the default slackware packages format .tgz is now substituted with the newer .txz (better compressed .txz). The old .tgz was simply a tar archive with DEFLATE gzip. The newer .txz packages bundled with newer slackware releases are using the LZMA2 (XZ) chain algorithm for compression. LZMA implies higher compression than even bzip2 and this is the reason why Patrick Volkerding - the one man army man behind Slackware decided to use it.
The reason Vollerding choose using .txz is slackware network distribution will load up less the networks and will take less time for downloading extra slackware packages via the internet. The .txz also reduces slackware main CD size so more packages can be contained in the same 700MB sized slack install CD.
Anyways now back to the installation of xfce-screenshooter.
Once installed to runit use the Xfce menus:
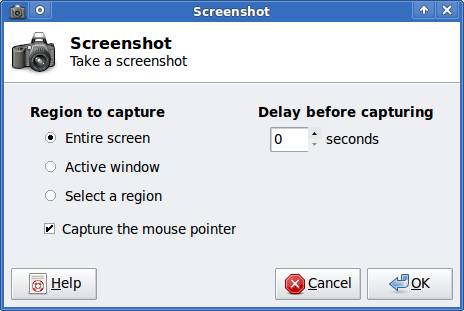
Next you will see the xfce-screenshooter program to pop-up:
To take a snapshot of the screen use:
For the latest Slackware Linux release which as of time of writting is 13.37 xfce4-screenshooter-1.7.9-i486-3sl.txz can be download from here
Install of xfce4-screenshooter-1.7.9-i486-3sl.txz is done with slackware's usual installpkg package manager command:
bash-4.1# /sbin/installpkg xfce4-screenshooter-1.7.9-i486-3sl.txz
By the way, I haven't used slackware for a long time so in the mean time since Slackware 13, the default slackware packages format .tgz is now substituted with the newer .txz (better compressed .txz). The old .tgz was simply a tar archive with DEFLATE gzip. The newer .txz packages bundled with newer slackware releases are using the LZMA2 (XZ) chain algorithm for compression. LZMA implies higher compression than even bzip2 and this is the reason why Patrick Volkerding - the one man army man behind Slackware decided to use it.
The reason Vollerding choose using .txz is slackware network distribution will load up less the networks and will take less time for downloading extra slackware packages via the internet. The .txz also reduces slackware main CD size so more packages can be contained in the same 700MB sized slack install CD.
Anyways now back to the installation of xfce-screenshooter.
Once installed to runit use the Xfce menus:
Xfce Menu -> Accesories -> Screenshot
Next you will see the xfce-screenshooter program to pop-up:
To take a snapshot of the screen use:
Entire Screen -> Save
Wed Feb 22 17:40:37 EET 2012
How to make a mirror of a website in with on GNU / Linux with wget / Find total number of files in folder
Everyone who used Linux or BSD is probably familiar with wget or has used this handy download console tools at least thousand of times. Not so many Desktop GNU / Linux users like Ubuntu and Fedora Linux users had tried using wget to do something more than single files download.
Actually wget is not so popular as it used to be in earlier linux days. I've noticed the tendency for newer Linux users to prefer using curl (I don't know why).
With all said I'm sure there is plenty of Linux users curious on how a website mirror can be made through wget.
This article will briefly suggest few ways to do website mirroring on linux / bsd as wget is both available on those two free operating systems.
1. Most Simple exact mirror copy of website
The most basic use of wget's mirror capabilities is by using wget's -mirror argument:
Creating a mirror like this is not a very good practice, as the links of the mirrored pages will still link to external URLs. In other words link URL will not pointing to your local copy and therefore if you're not connected to the internet and try to browse random links of the webpage you will end up with many links which are not opening because you don't have internet connection.
2. Mirroring with rewritting links to point to localhost and in between download page delay
Making mirror with wget can put an heavy load on the remote server as it fetches the files as quick as the bandwidth allows it. On heavy servers rapid downloads with wget can significantly reduce the download server responce time. Even on a some high-loaded servers it can cause the server to hang completely.
Hence mirroring pages with wget without explicity setting delay in between each page download, could be considered by remote server as a kind of DoS - (denial of service) attack. Even some site administrators have already set firewall rules or web server modules configured like Apache mod_security which filter requests to IPs which are doing too frequent HTTP GET /POST requests to the web server.
To make wget delay with a 10 seconds download between mirrored pages use:
The -mk stands for -m/-mirror and -k / shortcut argument for --convert-links (make links point locally), --random-wait tells wget to make random waits between o and 10 seconds between each page download request.
3. Mirror / retrieve website sub directory ignoring robots.txt "mirror restrictions" Some websites has a robots.txt which restricts content download with clients like wget, curl or even prohibits, crawlers to download their website pages completely.
/robots.txt restrictions are not a problem as wget has an option to disable robots.txt checking when downloading.
Getting around the robots.txt restrictions with wget is possible through -e robots=off option.
For instance if you want to make a local mirror copy of the whole sub-directory with all links and do it with a delay of 10 seconds between each consequential page request without reading at all the robots.txt allow/forbid rules:
4. Mirror website which is prohibiting Download managers like flashget, getright, go!zilla etc.
Sometimes when try to use wget to make a mirror copy of an entire site domain subdirectory or the root site domain, you get an error similar to:
Sorry, but the download manager you are using to view this site is not supported.
We do not support use of such download managers as flashget, go!zilla, or getright
This message is produced by the site dynamic generation language PHP / ASP / JSP etc. used, as the website code is written to check on the browser UserAgent sent.
wget's default sent UserAgent to the remote webserver is:
Wget/1.11.4
As this is not a common desktop browser useragent many webmasters configure their websites to only accept well known established desktop browser useragents sent by client browsers.
Here are few typical user agents which identify a desktop browser:
If you're trying to mirror a website which has implied some kind of useragent restriction based on some "valid" useragent, wget has the -U option enabling you to fake the useragent.
If you get the Sorry but the download manager you are using to view this site is not supported , fake / change wget's UserAgent with cmd:
For the sake of some wget anonimity - to make wget permanently hide its user agent and pretend like a Mozilla Firefox running on MS Windows XP use .wgetrc like this in home directory.
5. Make a complete mirror of a website under a domain name
To retrieve complete working copy of a site with wget a good way is like so:
Where the arguments meaning is:
-r - Retrieve recursively
-k - Convert the links in documents to make them suitable for local viewing
-p - Download everything (inline images, sounds and referenced stylesheets etc.)
-N - Turn on time-stamping
-l5 - Specify recursion maximum depth level of 5
6. Make a dynamic pages static site mirror, by converting CGI, ASP, PHP etc. to HTML for offline browsing
It is often websites pages are ending in a .php / .asp / .cgi ... extensions. An example of what I mean is for instance the URL http://php.net/manual/en/tutorial.php. You see the url page is tutorial.php once mirrored with wget the local copy will also end up in .php and therefore will not be suitable for local browsing as .php extension is not understood how to interpret by the local browser.
Therefore to copy website with a non-html extension and make it offline browsable in HTML there is the --html-extension option e.g.:
A good practice in mirror making is to set a download limit rate. Setting such rate is both good for UP and DOWN side (the local host where downloading and remote server). download-limit is also useful when mirroring websites consisting of many enormous files (documental movies, some music etc.).
To set a download limit to add --limit-rate= option. Passing by to wget --limit-rate=200K would limit download speed to 200KB.
Other useful thing to assure wget has made an accurate mirror is wget logging. To use it pass -o ./my_mirror.log to wget.
Actually wget is not so popular as it used to be in earlier linux days. I've noticed the tendency for newer Linux users to prefer using curl (I don't know why).
With all said I'm sure there is plenty of Linux users curious on how a website mirror can be made through wget.
This article will briefly suggest few ways to do website mirroring on linux / bsd as wget is both available on those two free operating systems.
1. Most Simple exact mirror copy of website
The most basic use of wget's mirror capabilities is by using wget's -mirror argument:
# wget -m http://website-to-mirror.com/sub-directory/
Creating a mirror like this is not a very good practice, as the links of the mirrored pages will still link to external URLs. In other words link URL will not pointing to your local copy and therefore if you're not connected to the internet and try to browse random links of the webpage you will end up with many links which are not opening because you don't have internet connection.
2. Mirroring with rewritting links to point to localhost and in between download page delay
Making mirror with wget can put an heavy load on the remote server as it fetches the files as quick as the bandwidth allows it. On heavy servers rapid downloads with wget can significantly reduce the download server responce time. Even on a some high-loaded servers it can cause the server to hang completely.
Hence mirroring pages with wget without explicity setting delay in between each page download, could be considered by remote server as a kind of DoS - (denial of service) attack. Even some site administrators have already set firewall rules or web server modules configured like Apache mod_security which filter requests to IPs which are doing too frequent HTTP GET /POST requests to the web server.
To make wget delay with a 10 seconds download between mirrored pages use:
# wget -mk -w 10 -np --random-wait http://website-to-mirror.com/sub-directory/
The -mk stands for -m/-mirror and -k / shortcut argument for --convert-links (make links point locally), --random-wait tells wget to make random waits between o and 10 seconds between each page download request.
3. Mirror / retrieve website sub directory ignoring robots.txt "mirror restrictions" Some websites has a robots.txt which restricts content download with clients like wget, curl or even prohibits, crawlers to download their website pages completely.
/robots.txt restrictions are not a problem as wget has an option to disable robots.txt checking when downloading.
Getting around the robots.txt restrictions with wget is possible through -e robots=off option.
For instance if you want to make a local mirror copy of the whole sub-directory with all links and do it with a delay of 10 seconds between each consequential page request without reading at all the robots.txt allow/forbid rules:
# wget -mk -w 10 -np -e robots=off --random-wait http://website-to-mirror.com/sub-directory/
4. Mirror website which is prohibiting Download managers like flashget, getright, go!zilla etc.
Sometimes when try to use wget to make a mirror copy of an entire site domain subdirectory or the root site domain, you get an error similar to:
Sorry, but the download manager you are using to view this site is not supported.
We do not support use of such download managers as flashget, go!zilla, or getright
This message is produced by the site dynamic generation language PHP / ASP / JSP etc. used, as the website code is written to check on the browser UserAgent sent.
wget's default sent UserAgent to the remote webserver is:
Wget/1.11.4
As this is not a common desktop browser useragent many webmasters configure their websites to only accept well known established desktop browser useragents sent by client browsers.
Here are few typical user agents which identify a desktop browser:
-
Mozilla/5.0 (Windows NT 6.1; rv:6.0) Gecko/20110814 Firefox/6.0
-
Mozilla/5.0 (X11; Linux i686; rv:6.0) Gecko/20100101 Firefox/6.0
- Mozilla/6.0 (Macintosh; I; Intel Mac OS X 11_7_9; de-LI; rv:1.9b4) Gecko/2012010317 Firefox/10.0a4
- Mozilla/5.0 (Windows NT 6.1; Win64; x64; rv:2.2a1pre) Gecko/20110324 Firefox/4.2a1pre
If you're trying to mirror a website which has implied some kind of useragent restriction based on some "valid" useragent, wget has the -U option enabling you to fake the useragent.
If you get the Sorry but the download manager you are using to view this site is not supported , fake / change wget's UserAgent with cmd:
wget -mk -w 10 -np -e robots=off \

--random-wait

--referer="http://www.google.com" \
--user-agent="Mozilla/5.0 (Windows; U; Windows NT 5.1; en-US; rv:1.8.1.6) Gecko/20070725 Firefox/2.0.0.6" \
--header="Accept:text/xml,application/xml,application/xhtml+xml,text/html;q=0.9,text/plain;q=0.8,image/png,*/*;q=0.5" \
--header="Accept-Language: en-us,en;q=0.5" \
--header="Accept-Encoding: gzip,deflate" \
--header="Accept-Charset: ISO-8859-1,utf-8;q=0.7,*;q=0.7" \
--header="Keep-Alive: 300"
For the sake of some wget anonimity - to make wget permanently hide its user agent and pretend like a Mozilla Firefox running on MS Windows XP use .wgetrc like this in home directory.
5. Make a complete mirror of a website under a domain name
To retrieve complete working copy of a site with wget a good way is like so:
# wget -rkpNl5 -w 10 --random-wait www.website-to-mirror.com
Where the arguments meaning is:
-r - Retrieve recursively
-k - Convert the links in documents to make them suitable for local viewing
-p - Download everything (inline images, sounds and referenced stylesheets etc.)
-N - Turn on time-stamping
-l5 - Specify recursion maximum depth level of 5
6. Make a dynamic pages static site mirror, by converting CGI, ASP, PHP etc. to HTML for offline browsing
It is often websites pages are ending in a .php / .asp / .cgi ... extensions. An example of what I mean is for instance the URL http://php.net/manual/en/tutorial.php. You see the url page is tutorial.php once mirrored with wget the local copy will also end up in .php and therefore will not be suitable for local browsing as .php extension is not understood how to interpret by the local browser.
Therefore to copy website with a non-html extension and make it offline browsable in HTML there is the --html-extension option e.g.:
wget -mk -w 10 -np -e robots=off \

--random-wait

--convert-links http://www.website-to-mirror.com
A good practice in mirror making is to set a download limit rate. Setting such rate is both good for UP and DOWN side (the local host where downloading and remote server). download-limit is also useful when mirroring websites consisting of many enormous files (documental movies, some music etc.).
To set a download limit to add --limit-rate= option. Passing by to wget --limit-rate=200K would limit download speed to 200KB.
Other useful thing to assure wget has made an accurate mirror is wget logging. To use it pass -o ./my_mirror.log to wget.
Tue Feb 21 13:01:48 EET 2012
How to count how many files are in a directory with find on Linux
Did you ever needed to count, how many files in a directory are there?
Having the concrete number of files in a directory is not a seldom task but still very useful especially for scripts or simply for the sake of learning
The quickest and maybe the easiest way to count all files in a directory in Linux is with a combination of find and wc commands:
Here is how;
This will find and list all matched files in any directory and subdirectories, print them out and count them with wc command.
The -type f argument instructs find to look only for files.
Other helpful variance of finding and listing all files in a directory and subdirectories is to list and count all the files with a certain file extension under a directory. For example, lets list all text files (.txt) contained in a directory and all level sub-directories:
If you need to check the number of files in a directory for multiple directories on a server and you're aiming at doing it efficienly, issung above find .. | wc code will definitely be not a good choice. If used it will generate heavy load for the system and along with that will complete the execution in ages if issued on a large number of files containing dirs.
Thanksfully if efficiency is targetted, there is a command written in C called pstree which is more efficient than find.
To count the number of files in dir but using pstree :
By default pstree prints info for both the number of found files and directories.
To print out only the files matched, awk comes handy, e.g.:
To list only the number of files in a directory without its existing sub-directories ls + wc use is also possible:
This result the above command would produce is +1 more than the real number of files, as it counts the directory ".." as one file (in UNIX / LINUX everything is file).
A short one liner script that can calculate all files correctly by substracting 1 is and hence present correct result on number of files is like so:
ls can be used to calculate the number of 1-st level sub-directories under certain directory for instance:
You see the ascii directory has 25 subdirectories in its 1st level.
To check symlinks under a directory with ls the command would be:
Note above 3 ls | grep ... examples, will not work properly if the directory contains files with SUID or some special properties set.
Hence to get the same 3 results for active files, directories and symbolic links, a one liner similar to the one below can be used instead:
This will show statistics about all files, links and directories for all directory sub-levels.
Just in case if there is need to only count files, links and directories without directory recursion enabled, use:
Anyways the above bash loop will be slow, for directories containing thousands of files. For better performance the equivallent of above bash loop rewritten in perl would be:
In my view using always tree command instead of code "hacks" is smart idea.
In Slackware tree command is part of the base install, on Debian and CentOS Linux, tree cmd is not part of the base system and requires install via apt / yum e.g.:
Happy counting ;)
Having the concrete number of files in a directory is not a seldom task but still very useful especially for scripts or simply for the sake of learning
The quickest and maybe the easiest way to count all files in a directory in Linux is with a combination of find and wc commands:
Here is how;
linux;~# cd ascii

linux:~/ascii# find . -type f -iname '*' -print |wc -l

407
This will find and list all matched files in any directory and subdirectories, print them out and count them with wc command.
The -type f argument instructs find to look only for files.
Other helpful variance of finding and listing all files in a directory and subdirectories is to list and count all the files with a certain file extension under a directory. For example, lets list all text files (.txt) contained in a directory and all level sub-directories:
linux:~/ascii# find . -type f -iname '*.txt' -print |wc -l

401
If you need to check the number of files in a directory for multiple directories on a server and you're aiming at doing it efficienly, issung above find .. | wc code will definitely be not a good choice. If used it will generate heavy load for the system and along with that will complete the execution in ages if issued on a large number of files containing dirs.
Thanksfully if efficiency is targetted, there is a command written in C called pstree which is more efficient than find.
To count the number of files in dir but using pstree :
linux:~# cd ascii

linux:/ascii# tree | tail -n 1

32 directories, 407 files
By default pstree prints info for both the number of found files and directories.
To print out only the files matched, awk comes handy, e.g.:
linux:/ascii# tree |tail -n 1| awk '{ print $3 }'
407
To list only the number of files in a directory without its existing sub-directories ls + wc use is also possible:
linux:~/ascii# ls -l | grep ^- | wc -l
68
This result the above command would produce is +1 more than the real number of files, as it counts the directory ".." as one file (in UNIX / LINUX everything is file).
A short one liner script that can calculate all files correctly by substracting 1 is and hence present correct result on number of files is like so:
linux:~/ascii# var=$(ls -l | grep ^- | wc -l); var=$(($var - 1)); echo $var
ls can be used to calculate the number of 1-st level sub-directories under certain directory for instance:
linux:~/ascii# ls -l |grep ^d|wc -l

25
You see the ascii directory has 25 subdirectories in its 1st level.
To check symlinks under a directory with ls the command would be:
linux:~/ascii# ls -l | grep ^l | wc -l

0
Note above 3 ls | grep ... examples, will not work properly if the directory contains files with SUID or some special properties set.
Hence to get the same 3 results for active files, directories and symbolic links, a one liner similar to the one below can be used instead:
linux:~/ascii# for t in files links directories; do echo `find . -type ${t:0:1} | wc -l` $t; done 2> /dev/null

407 files

0 links

33 directories
This will show statistics about all files, links and directories for all directory sub-levels.
Just in case if there is need to only count files, links and directories without directory recursion enabled, use:
linux:~/ascii# for t in files links directories; do echo `find . -maxdepth 1 -type ${t:0:1} | wc -l` $t; done 2> /dev/null

68 files
0 links
26 directories
Anyways the above bash loop will be slow, for directories containing thousands of files. For better performance the equivallent of above bash loop rewritten in perl would be:
linux:~/ascii# ls -l |perl -e 'while(<>){$h{substr($_,0,1)}+=1;} END {foreach(keys %h) {print "$_ $h{$_}\n";}}'

- 68

d 25

t 1

linux:~/ascii#
In any case the most preferrable and efficient way to count files en directories is by using tree command.In my view using always tree command instead of code "hacks" is smart idea.
In Slackware tree command is part of the base install, on Debian and CentOS Linux, tree cmd is not part of the base system and requires install via apt / yum e.g.:
debian:~# apt-get --yes install pstree

...
[root@centos:~ ]# yum --yes install pstree
Happy counting ;)
Mon Feb 20 16:42:25 EET 2012
Interview with Peter Sunde - The "creator" of ThePirateBay on CeBIT 2011
Many people are using ThePiratebay to get all kind of data and share Movies, Games, Programs etc.)
ThePirateBay has become like a standard media for file sharing and still not many people are aware of who is behind ThePirateBay.
This is why I thought, by posting this article I can "rant" on the existence of the Swedish Pirate Party
The Pirate Party - Is a party fighting on behalf of information sharing freedom (or in other words a party fighting for our freedom as individuals in the digital era).

Pirate Party (Sweden) party official mascot
The Pirate party are swedish political party established in 2006, its members are activists lobbying on freedom of information as well as pointing at threats to our human freedoms imposed by new legislations and anti-freedom agreements like the recent ACTA treaty.
Since there creation in 2006, they have grown from a local Swedish party to an international party, locally existing in 33 countries arount the world. The ideology behind the Swedish PirateParty as well as the rest of existing Pirate Parties international is as I prior said Freedom of Information on the internet. PP is a party phenomenon, as they are neither a left or a right oriented party (on the traditional left-right scale). PP are independent bloc pursuing their political agenda colabborating with all mainstream parties, which stand behind the ideologies the party fights for.
After last European Parliament elections, PP received 7% of all Swedish votes for a country EU representative.
As of today according to Wikipedia , the party holds 2 EU deputee seats in EU parliament.
I've a friend who is taking membership in the Pirate Party and from him I know the PP party are big supporters of Free Software.
One major key figure part of Pirate Party is the swedish Peter Sunde. He is a front person who is behind ThePirateBay project as well as holds a very interesting revolutionary ideas. Many of his ideas are close to "the father of all free software" - Richard Mathew Stallman (RMS). Therefore the PP would be probably of interest to anyone who is interested in Free Software. Here is an interview with Peter Sunde's taken in Cebit 2011:
As long as I know the Pirate Party are along the only few organizations in the whole world, who are trying to fight on behalf of human freedom.I'll be glad to hear if someone know about other ornigazations apart from Pirate Party the Free Software Foundation - (FSF) lobbying on present worsening conditions of invidual human freedom.
Here is few curious facts proving how BIG and important thepiratebay.org is, the text below is again quote from Wikipedia
Currently ThePirateBay.org is ranked as the 80th most visited website in the world and 20th in Sweden by Alexa Internet, has over 5.5 million registered users and, as of February 2012, hosts more than 4 million torrent files.
According to the Los Angeles Times, The Pirate Bay is "one of the world's largest facilitators of illegal downloading" and "the most visible member of a burgeoning international anti-copyright or pro-piracy movement"
Mon Feb 20 13:16:16 EET 2012
How to change users quota to NO QUOTA on Qmail with Vpopmail Mail server install / Qmail mail over quota issue
Already on a couple of mail boxes located on one of the qmail powered mail servers I adminiter, there is an over QUOTA reached problem encountered.
Filling up the mailbox quota is not nice as mails starts get bounced back to the sender with a message QUOTA FULL or EXCEEDED MESSAGE, if this is a crucial mail waiting for some important data etc. the data is never received.
Below is a copy of the mail quota waarning notification message:
Delivered-To: email_use@my-mail-domain.net

Date: Wed, 15 Feb 2012 17:40:36 +0000

X-Comment: Rename/Copy this file to ~vpopmail/domains/.quotawarn.msg, and make appropriate changes

X-Comment: See README.quotas for more information

From: Mail Delivery System <Mailer-Daemon@different.bg>

Reply-To: email@pc-freak.net

To: Valued Customer:;

Subject: Mail quota warning

Mime-Version: 1.0

Content-Type: text/plain; charset=iso-8859-1

Content-Transfer-Encoding: 7bit

>

Your mailbox on the server is now more than 90% full. So that you can continue

to receive mail you need to remove some messages from your mailbox.
As you can read from the copy of the mail message above, the message content sent to the mail owner whose quota is getting full is red from /var/vpopmail/domains/.quotawarn.msg
The mail reaching quota problem is very likely to appear in cases like low mailbox quota set, but sometimes also occurs due to bugs in vpopmail quota handling.
Various interesting configuration settings for mail quotas etc. are in /home/vpopmail/etc/vlimits.default file, (assuming vpopmail is installed in /home).
In my specific case the default vpopmail mailbox quota size was set to only 40 Megabytes.
40MB is too low if compared to todays mailbox size standards which in Gmail and Yahoo free mail services are already between 2 and 8 GB.
Hence to get around the quota troubles, I simply removed the quota for the mail.
To remove the quota size in vpopmail set for address (email_user@my-mail-domain.net)used cmd:
qmail-server:~# vmoduser -q NOQUOTA email_user@my-mail-domain.net
To preserve myself from future quota issues, I decided to apply a permanent fix to all those over quota size VPOPMAIL mailbox problems by removing completely quota restriction for all mailboxes in my vpopmail existent mail domain.
To do so, I wrote a quick simple bash loop one-liner script:
qmail-server:~# cd /home/vpopmail/domains

qmail-server:~/vpopmail/domains# cd my-mail-domain.net

qmail-server:~/vpopmail/domains/my-mail-domain.net# for i in *; do \

vmoduser -q NOQUOTA $(echo $i|grep -v vpasswd)@my-mail-domain.net; \

done
This works only on vpopmail installations which are configured to store the mail messages directly on the filesystem. Hence this approach will not work for people who during vpopmail install had configured it to store mailboxes in MySQL or in other kind of SQL db engine.
Anyways for Vpopmail installed to use SQL backend, the script can be changed read directly a list with all the mailboxes obtained from databasae (SQL quaery) and then with loop over each of the mail addresses apply the vmoduser -q NOQUOTA mail@samplemaildomain.net.
Sun Feb 19 21:07:06 EET 2012
Death Metal singing animals :)
Alex, just passed me by few funny videos, where people made videos with "animals singing death metal" :)
Death Metal Singing Rooster
This Rooster, should definitely contact Six Feet Under (SFU) 's vocalist - Chris Barnes for a solo album ;)
I guess this Camel should start innovative metal music fork to Grind Core or Noise Core metal genre sub-division :)
I'm sure you never imagined the donkey could be an awesome Metal singer :)
This dog is quite experienced in Death Metal vocalist stage manners ;)
There is plenty of other Metal singing animals in Youtube, Enjoy :)
Sat Feb 18 14:48:51 EET 2012
BSD (Berkley Software Distribituion) use by distribution type (FreeBSD, NetBSD, OpenBSD, DrangflyBSD) use percantage charts
I've hit an interesting article in Wikipedia called Comparison of BSD operating systems
The article explains basic difference between different BSD (Berkley Software Distributions) and what is the primary accent of each of the BSD (free software OS) distributions. It also reveals basic details about the history and how each of the BSD's came to existence. I recommend to anyone interested in free software as it is just a great reading for everybody interested in FOSS.
The most interesting part of the wiki thread is a bar chart, provided by BSD Certification Group research conducted in September 2005.
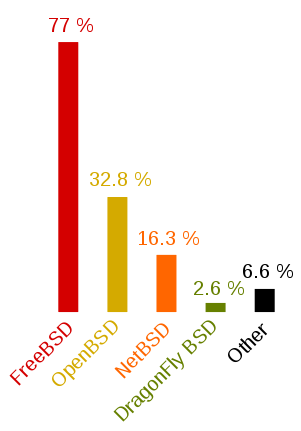
The above diagram is showing the proportion of users of each BSD variant from the BSD usage survey prior conducted
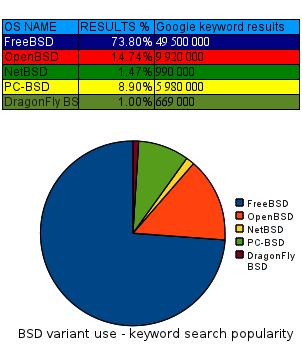
The research is already 6 years old, and unfortunately as of time of writting seems to be the only publicly available. Though being outdated, I believe generally the bar charts distributions along different BSD variants would be mostly true. The only big difference will be probably in PC-BSD which is not even on the diagram should have outbeaten DragonflyBSD's use. Since there is no public data available for 2012 and the years 2005 - 2012 for the use percantage of each of the BSD distributions, I've thought about a pseudo way to get some general statistics on each of the BSD distributions popularity. The methodology to gather the required statistics comes to simply, type in Google each of the BSD variant "code names" (e.g. freebsd, netbsd, openbsd etc.) and look at the number of results returned. It seems logical the more results distribution keyword searched returns, the bigger the probability of more users to be involved in developing or using the respective BSD variant.
Below you see the results, I've gathered in my quick "google research":
As you can see in the above data FreeBSD is still probably leading the BSD use, the public interest to OpenBSD - BSD focused on security has significantly grow since the last 6 years. Next it is seen the PC-BSD users base has probably tremendously increased and according to the Google results returned it is probably on a 3rd place by users interest (use?) followed by NetBSD with only 1.47% of all the BSD users. Lastly with only 0.99%, orders Dragonfly BSD which no longer is so popular as a Desktop BSD based OS as it used to be back in 2005.
Again the presented diagram results are based on only on the factor of Google BSD variant popularity and hence shouldn't be consired too trustworthy, still I'm sure it gives a general idea on how used is each of the BSD variants as of Jan 2012.
The article explains basic difference between different BSD (Berkley Software Distributions) and what is the primary accent of each of the BSD (free software OS) distributions. It also reveals basic details about the history and how each of the BSD's came to existence. I recommend to anyone interested in free software as it is just a great reading for everybody interested in FOSS.
The most interesting part of the wiki thread is a bar chart, provided by BSD Certification Group research conducted in September 2005.
The above diagram is showing the proportion of users of each BSD variant from the BSD usage survey prior conducted
The research is already 6 years old, and unfortunately as of time of writting seems to be the only publicly available. Though being outdated, I believe generally the bar charts distributions along different BSD variants would be mostly true. The only big difference will be probably in PC-BSD which is not even on the diagram should have outbeaten DragonflyBSD's use. Since there is no public data available for 2012 and the years 2005 - 2012 for the use percantage of each of the BSD distributions, I've thought about a pseudo way to get some general statistics on each of the BSD distributions popularity. The methodology to gather the required statistics comes to simply, type in Google each of the BSD variant "code names" (e.g. freebsd, netbsd, openbsd etc.) and look at the number of results returned. It seems logical the more results distribution keyword searched returns, the bigger the probability of more users to be involved in developing or using the respective BSD variant.
Below you see the results, I've gathered in my quick "google research":
As you can see in the above data FreeBSD is still probably leading the BSD use, the public interest to OpenBSD - BSD focused on security has significantly grow since the last 6 years. Next it is seen the PC-BSD users base has probably tremendously increased and according to the Google results returned it is probably on a 3rd place by users interest (use?) followed by NetBSD with only 1.47% of all the BSD users. Lastly with only 0.99%, orders Dragonfly BSD which no longer is so popular as a Desktop BSD based OS as it used to be back in 2005.
Again the presented diagram results are based on only on the factor of Google BSD variant popularity and hence shouldn't be consired too trustworthy, still I'm sure it gives a general idea on how used is each of the BSD variants as of Jan 2012.
Fri Feb 17 16:05:48 EET 2012
What is the development costs of Debian GNU / Linux / How much costs the development of a Free Software projects
Free Software (FS) is free as in freedom as well as free as in price. Free and Open Source Software is developed by geek hobbyist which voluntarily put their time and effort in writting, testing and sharing with anyone for free million of lines of programming code. This doesn't mean however the price of free software costs is 0 (zero). Though the "end product" the Free Software developed is FREE, "real" software costs as with any other product costs huge money.
I've recently read on Jeb's blog an estimation on how much is the cost of one of the major Free Software project efforts - Debian GNU / Linux
According to James E. Bromberger - the whole Debian project was estimated to be at the shocking price of $19 billion - $19 000, 000, 000 !!!
Here is how JEB got the $19 billions, a quote taken from his blog:
"By using David A Wheeler’s sloccount tool and average wage of a developer of US$72,533 (using median estimates from Salary.com and PayScale.com for 2011) I summed the individual results to find a total of 419,776,604 source lines of code for the ‘pristine’ upstream sources, in 31 programming languages — including 429 lines of Cobol and 1933 lines of Modula3!
In my analysis the projected cost of producing Debian Wheezy in February 2012 is US$19,070,177,727 (AU$17.7B, EUR€14.4B, GBP£12.11B), making each package’s upstream source code worth an average of US$1,112,547.56 (AU$837K) to produce. Impressively, this is all free (of cost).
James has done incredible job with this great research and he deserves applause.
However I believe the numbers proposed by his research are slightly different if we speak about realistic cost of Debian GNU / Linux.
The real costs of the working software ready to install on a user PC are way higher, as according to Jeb's research only the software cost basaed on code line count is considered.
Hence James software estimation calculates only the programming costs and miss many, many factors that constitute the software end cost. Some of the many, many REAL COST / expenses for developing a huge Free Software project like Debian GNU / Linux which should also be consired while talking about the project costs are:
- the developers use of their own computers (hardware depreciation)
- electricity bill of the volunteer (developer) working on the program or project
- electricity bills for servers where free software is stored and available for download
- volunteer developer IT skills and tech knowledge (KNOW HOW)
- Internet, network, dial up bandwidth cost a) bandwidth costs for hosting free software (on the server side)
- personal time put in FS development (programming, design, creativity etc.)! here the sub costs are long: :
- Costs for Project Management Leaders / Project Coordination
- The complexity of each of the projects constituting Debian
- ANSI C with 168,536,758 - (40% of all projects source code)
- C++ at 83,187,329 - (20% of all projects source)
- Java 34,698,990 - (lines of code 8% of sources)
- Lisp - (7% of all projects source code)
b) bandwidth cost for developers or FS users downloading the software
a) Time spend to spread the word of the great added value of Debian and bundled software (Mouth by Mouth Marketing)
b) Time spend to advertise Debian and its free software components on blogs, social networks (identi.ca, facebook, twitter) etc.
(Voluntary online Marketing, SEO etc.)
c) Time spend on generating ideas on future program versions and reporting them to Debian FS community
d) Time on evaluation and feedback on software
e) Time spend on managing free software repository (download) servers voluntarily (by system administrators)
f) Time spend by users on Bug Tracking & Bug Reporting
g) Time spend on research and self-actulization by software developer
h) Time spend on software Quality Assurance
This are most of the multiple factors which should, influence the cost of any non-free (proprietary software) project. No matter this costs apply for non-free software, it perfectly applies for free software as well.
With all said if if we assume the non-programming costs are equal to the programming costs of $ 19 000 000 000 (suggested by Jeb). This means the real cost of Debian will presumably be $32 000 000 000. Where even putting $ 19 billion for all this long list of weighweight costs (besides pure source) factors is probably very under-scored number.
A very interesting figure from Jeb's research is the Programming Languages break down by source code figure:
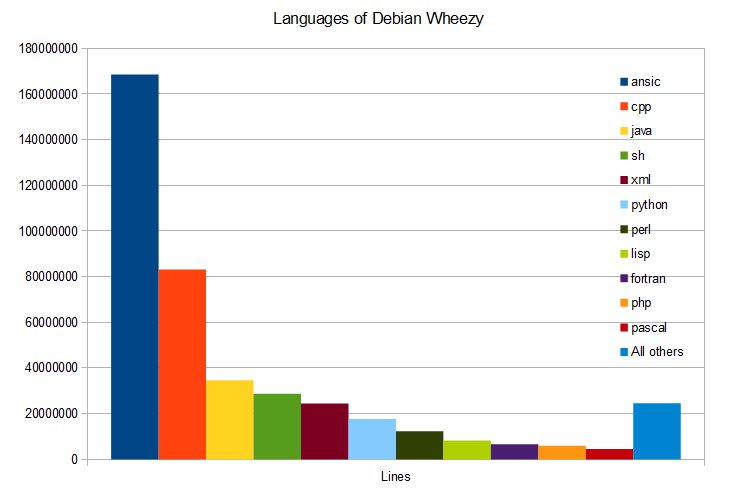
The research reveals on the 4 major programming languages used in the 17000+ software projects (part of Debian GNU / Linux):
The research also provides a general idea on how much the source code of some of the major FOSS projects costs. Here is a copy of his figures
Individual Projects
Other highlights by project included:
| Project | Version | Thousands of SLOC |
Projected cost at US$72,533/developer/year |
|---|---|---|---|
| Samba | 3.6.1 | 2,000 | US$101 (AU$93M) |
| Apache | 2.2.9 | 693 | US$33.5M (AU$31M) |
| MySQL | 5.5.17 | 1,200 | US$64.2M (AU$59.7M) |
| Perl | 5.14.2 | 669 | US$32.3M (AU$30M) |
| PHP | 5.3.9 | 693 | US$33.5M (AU$31.1M) |
| Bind | 9.7.3 | 319 | US$14.8M (AU$13.8M) |
| Moodle | 1.9.9 | 396 | US$18.6M (AU$17.3M) |
| Dasher | 4.11 | 109 | US$4.8M (AU$4.4M) |
| DVSwitch | 0.8.3.6 | 6 | US$250K (AU$232K) |
Thu Feb 16 12:20:43 EET 2012
Creator of Linux kernel Linus Torvalds with a biblical name

Linus's name is encountered once in the Scriptures (The Holy Bible) in the second book
I really like King James English version of the bible, here is the text extracted from there, mentioning Linus's name:
2 Timothy 4:21

Doe thy diligence to come before winter. Eubulus greeteth thee,

and Pudens, and Linus, and Claudia, and all the brethren. (From KJV 1611 Translation)
Here is a modernized version of the same verse taken from the New American Standard Bible Version (1995):
Make every effort to come before winter. Eubulus greets you,

also Pudens and Linus and Claudia and all the brethren.

- New American Standard Version (1995)
Other curious fact maybe, even uknown to Linus Torvalds himself is Saint Linus used to be the first bishop of Rome, after the Apostles bishopship.
This makes Saint Linus the second in place Roman Catholic Pope after Saint Peter in early Western Church. There are some early sources which says Pope Clement I was the second pope of Rome, however probably this sources are erroneous, since some very important early written sources like the Apostolic Constitutions states Linus was the first bishop of Rome and was ordained by St. Paul. The same documents says Pope Linus was succeeded by Pope Clement - ordained by saint Peter.
Below's paste is taken directly from BibleGateway.com cofirming about Pope Linus being the sacond Roman Catholic Pope:
Linus

(a net), a Christian at Rome, known to St. Paul and to

Timothy, (2 Timothy 4:21) who was the first bishop of Rome after the apostles. (A.D. 64.)
Something Pope Linus is known with is, to have issued a church decree that woman should cover their heads in church.This ancient church tradition is still observed more or less in the Orthodox Church. It is not known much about how Saint Pope ruled the early Western Church but since the western and eastern Church used to be in communion in these early days, this means the nowdays Roman Catholic saint Linus is probably a saint in the Eastern Orthodox Church as well.
According to some unprovable written sources Pope Linus later suffered martyrdom and was buried in Vatican Hill next to saint apostle Peter.
St. Linus according to Church tradition passed away in the 1st securury A.D.
Below's paste is taken directly from BibleGateway.com a multilingual website location for reading the bible
Linus

(a net), a Christian at Rome, known to St. Paul and to

Timothy, (2 Timothy 4:21) who was the first bishop of Rome after the apostles. (A.D. 64.)
I've merged a picture of how saint Linus used to look with one of the pictures of Linus Torvalds. It's rather funny they actually look alike
 :)
:)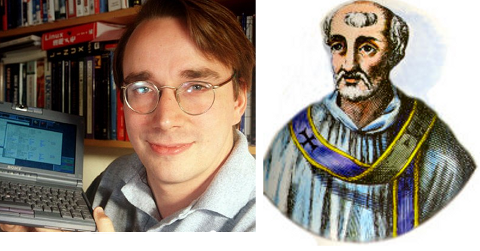
The creator of GNU/Linux kernel Linus Torvalds might not be a saint in Christian sense, but his deed is definitely saintly as he initiated the creation of the Linux kernel and decided to share its source and publish it under GPL (General Public License).
The phenomenon of GNU / Linux Free Operating System existent today and specific type of development is definitely a miracle. The general philosophy of sharing with neighbor your software is also very close to the Christian philosophy of sharing. Actually too many of the ideas of the free software and "open source" movements resemble purely Christian ideas.
The software sharing philosophy has become a reality thanks to Richard Stallman and his GNU Project, however the existence of GNU / Linux as a complete operating system become reality thanks to the Linus torvalds kernel efforts which is known under the code name Linux. Talking about names, maybe not much will know, that Linux kernel used to have a different name in the early stage of its development, its first code name was FreaX
Wed Feb 15 18:38:49 EET 2012
Play Terminal Velocity (Terminal Reality) 3D shooter DOS game on Debian Squeeze GNU / Linux
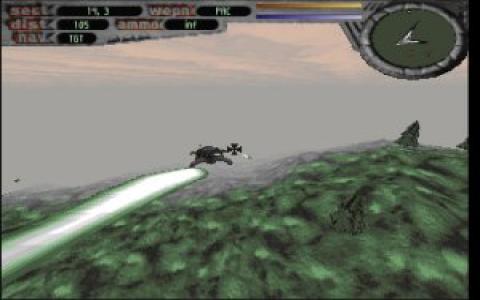
Some of the computer DOS geeks certainly should remember Terminal Velocity / (Terminal Reality Inc. - TRI) DOS 3D Realms (ex Apogee company) game. For those who are younger or for any reason miss to play TV here is a short review. Terminal Velocity is an addictive fast pace 3D Flight Simulator game.
The ship one navigates has a mean to accelerate or down-accelerate flying speed. There is also an AFTER BURNER mode which accelerates the ship movement speed drastically while in use. TRI's AFTER BURNER game feature create unique feeling whilst in game, raising gamers adrenaline and giving feeling of great dynamics ;)
The game graphics are a bit low, the game can be switched between VGA and SVGA from within the internal game menus, anyways for the year 1995 the game graphics looks fine.
TV supports network games of up to 8 Network Players and for 1995 is among the few 3D games supporting so high number of network players simultaneously. As most of the games of its time TRI supports modem network game play. I don't know about you, but for me Modem Network game DooM peered plays brings up some nice memories :)
Every now and then in the levels, there are holes (Tunnels) you can enter, the tunnels is one of the most exciting part of the game as it reminds me tracking mods music culture, Future Crew's Second Reality graphics demo and the rest of the old glorious Assembly Demos - if not familiar with the aforementioned be sure to check the link cause you've missed a lot!
The ability to enter Tunnels while in the midst of the game makes TV unique and sets it apart from the rest of the games which were bombarding the 3D game flight simulator market in '95s.
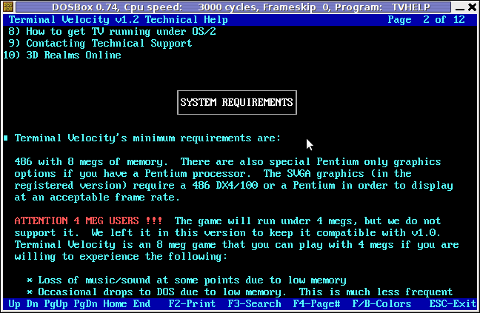
Terminal Velocity MINIMUM HARDWARE REQUIREMENTS are:
486 with 8 megs of memory.

For SVGA graphics (provided only by registered game version) require 486 DX4/100 or Pentium to display at acceptable frame rate.
This requirements are nothing and even looks funny while compared to today's available hardware. Nowdays an Android ver. 2.2 OS running (PriVileg) mobile "smart" phone runs at at least 400 Mhz CPU and has a giga of memory.
Its quite interesting to see (from historic point of view) how thoroughful the TV Help manual is, and how well organized software documentation used to be in these old DOS days. If you want to take a look at it launch TVHELP.EXE (you will notice it along with other game .EXE files after extracting)
The game soundtrack is amazingly cool and is one of the main things that add to the great gaming experience.
It took me a while to find Terminal Velocity, as the game download link provided on 3drealms.com/downloads is broken and most of the websites with mirror of 3dtv12.zip file was no longer active.
After about half an hour of search!, I've finally found and managed to download 3dtv12.zip.
In order to preserve Terminal Violocity game from disappearing I've made a mirror of 3dtv12.zip you can download from here
Thanks to dosbox DOS Emulator ,
I did not have the time to check if the game runs fine on other operating system architectures besides mine - a Debian GNU / Linux codename (Squeeze). On my aptop Thinkpad R61 with hardware configuration (Dual core x 1.8 Ghz with 2 GB of Memory), the game runs smoothly with both good playable graphics frame rate and properly timed sound/music.
For all those who want to play the game in the Linux realm, you will have to have earlier installed dosbox dos emulator. Once dosbox is there you can further proceed download / unzip / run and enjoy Terminal Velocity on your Linux Desktop:
1. Download and unzip 3dtv12.zip
hipo@linux:~$ mkdir TV

hipo@linux:~$ cd TV

hipo@linux:~/TV$ wget http://pc-freak.net/files/3dtv12.zip

hipo@linux:~/TV$ unzip 3dtv12.zip

Archive:  3dtv12.zip

        �      �  ������ �   � ����� ������ �  ������ �����

        �      �  �      �   �   �   �    � �  �    �

        ��     �� ��  �� �����   ��  ��   � �� ��   � ��  �

        ��     �� ��   � ��  �   ��  ��   � �� ��   � ��

        ������ �� ������ ��  �   ��  ��   � �� ��   � �����
   Running VADV 2.10   ����  ����  ������

                       �   � �   � �          VirtualNet 1801001

    4 Telnet nodes     ����� ����� ������     FidoNet    1:311/2

   VADV-PHP Website    ��  � ��  �     ��     BattleNet  169:1/120

                       ����� ����� �����
                Telnet/web: lightningbbs.com

                Alt:  lightning-bbs.darktech.org
Full access on the first call.  Simple, short and to the point newuser

questionaire.  Over 50 door games online, all of them are registered.
Fun RPG games like LORD, Usurper, TEOS, Trade Wars, Clans, and Quest for Nora.
Strategic war games like BRE, FE, Global Wars, ISA, and Colonies.
Adult door games like Strip Poker, Bordello, Studs and Studette.

...
After unzip is complete you will have the following list of files and directories:
hipo@linux:~/TV$ ls -1

FILE_ID.DIZ

INSTALL.EXE

LICENSE.TXT

TV/

TV12S.SHR
As you can read in the unzip notice the .zip file was taken from Telnet/web: lightningbbs.com
I was happy to find out that lightningbbs.com BBS is still up and running in both web and telnet mode! I took the time to telnet to lightningbbs.com and it was charming. lightningbbs.com is a real place of "living computer history"! For people who have never experienced the days of BBS use, I warmly recommend you do telnet lightningbbs.com and check it out. Issue in console/terminal:
hipo@linux:~/TV$ telnet lightningbbs.com

��VADV32 v4.4.110325 - (c) 2004-2011 Aspect Technologies - www.vadvbbs.com

o NetFoss - Revision 5 FOSSIL - Com Eng v1.03 - (c) 2001-2010 pcmicro.com
Connected @ 11520 to Lightning BBS on line 3
Virtual Advanced 2.10 for DOS
Multi-User Multi-Network Graphical Bulletin Board System
Serial #99608791
...
...
2. Run and enjoy Terminal Velocity ;)
The game itself is extracted automatically in TV sub directory. To launch it directly enter TV/ and run GAME.EXE , e.g.
hipo@linux:~/TV$ cd TV/
hipo@linux:~/TV/TV$ dosbox GAME.EXE
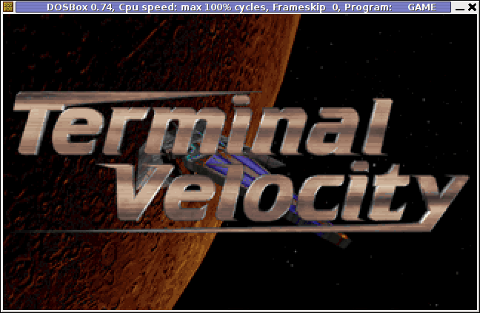
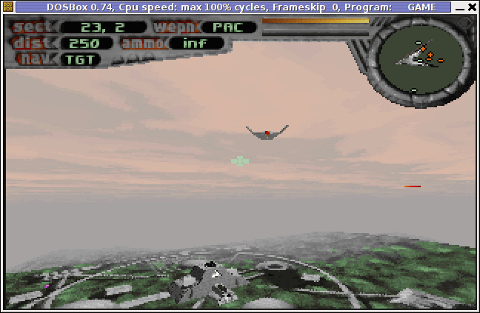
Running the game through the game launcher TV.EXE or GAME.EXE worked but the game sound was missing music and sound FX :|
The no-music and sound issues were however pretty normal and expected. Back in the DOS era setting your exact Sound Card device type was required before the first game launch.
Configuring the exact screen resolution (EGA / VGA / SVGA) and Sound Blaster or PC Speaker type (Sound Blaster 16 / Sound Blaster Pro) in TV is done through running SETUP.EXE .
Actually SETUP.EXE used to be like a standard for almost all DOS games I've encountered.
To make Terminal Velocity sound work I had to choose from SETUP.EXE main menu:
Sound Setup -> Sound Blaster 16
or
Sound Setup -> Sound Blaster Pro
Choosing any of the two SBs produces the same sound / music effects. I guess this is the case becase dosbox emulates a number of sound cards compatible with soudn blaster.
After choosing the SB you should select Save and Launch TV to run the game with sound.
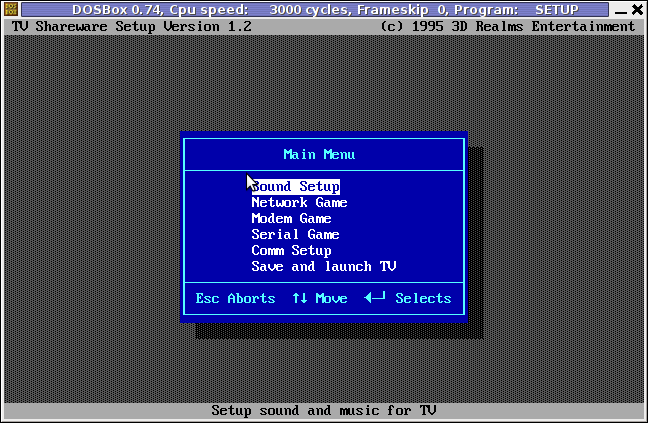
If you quit the game and try to relaunch it with dosbox GAME.EXE unfortunately runs the game without sound fx and music again. Hence the only way to make TRI run properly with music is to everytime configure sound blaster type with SETUP.EXE .
An interesting fact which is not related to the game is Terminal Velocity is a physics term, here is a quite from Wikipedia:
"In fluid dynamics an object is moving at its terminal velocity if its speed is constant due to the restraining force exerted by the fluid through which it is moving."
On 3drealms.com, I've found also a collection of Terminal velocity mod music - tvmods.zip. For the sake of preservation tvmods.zip from disappearance I've made a mirror of tvmods.zip on here
I've made also a quick research if someone in the Open Source / Free Software realm is not busy working on a fork of TV, but as of time of writting it seems there is no effort to make an "open source" Terminal Veolocity game. As TV is starting to disappear from the scene and 3DRealms are not existing for so many years now, it would be nice/wise if the company publish some of their prior games source. If they don't, so many great games (like TV)'s source code will be probably lost in max 10 / 15 years time.
We know 3DRealms release some of their source code for Duke Nukem 3D, I think it is now time to release source of TRI and the other old forgotten games.
Wed Feb 15 13:31:53 EET 2012
How to show country flag and web browser type and Operating System in Wordpress Comments
I've come across a nice Wordpress plugin that displays country flag, operating system and web browser used in each of posted comments blog comments.
Its really nice plugin, since it adds some transperancy and colorfulness to each of blog comments ;)
here is a screenshot of my blog with Comments Info Detector "in action":
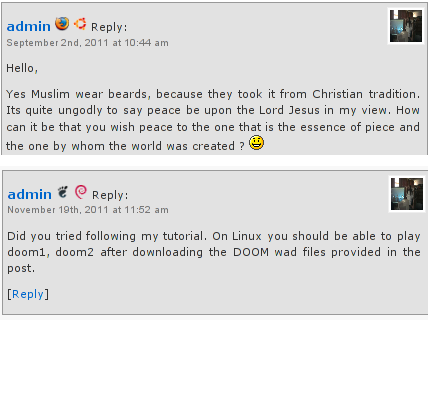
Comments Info Detector as of time of writting is at stable ver 1.0.5.
The plugin installation and configuration is very easy as with most other WP plugins. To install the plugin;
1. Download and unzip Comments Info Detector
2. Activate Comment-Info-Detector
To enable the plugin Navigate to;
After having enabled the plugin as a last 3rd step it has to be configured.
3. Configure comment-info-detector wp plugin
By default the plugin is disabled. To change it to enabled (configure it) by navigating to:
Next a a page will appear with variout fields and web forms, where stuff can be changed. Here almost all of it should be left as it is the only change should be in the drop down menus near the end of the page:
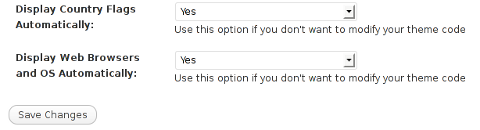
After the two menus are set to "Yes" and pressing on Save Changes the plugin is enabled and will immediately start showing information inside each comment the GeoIP country location flag of the person who commented as well as OS type and Web Browser :)
Its really nice plugin, since it adds some transperancy and colorfulness to each of blog comments ;)
here is a screenshot of my blog with Comments Info Detector "in action":
Comments Info Detector as of time of writting is at stable ver 1.0.5.
The plugin installation and configuration is very easy as with most other WP plugins. To install the plugin;
1. Download and unzip Comments Info Detector
linux:/var/www/blog:# cd wp-content/plugins

linux:/var/www/blog/wp-content/plugins:# wget http://downloads.wordpress.org/plugin/comment-info-detector.zip

...

linux:/var/www/blog/wp-content/plugins:# unzip comment-info-detector.zip

...
2. Activate Comment-Info-Detector
To enable the plugin Navigate to;
Plugins -> Inactive -> Comment Info Detector (Activate)
After having enabled the plugin as a last 3rd step it has to be configured.
3. Configure comment-info-detector wp plugin
By default the plugin is disabled. To change it to enabled (configure it) by navigating to:
Settings -> Comments Info Detector
Next a a page will appear with variout fields and web forms, where stuff can be changed. Here almost all of it should be left as it is the only change should be in the drop down menus near the end of the page:
Display Country Flags Automatically (Change No to Yes)

Display Web Browsers and OS Automatically  (Change No to Yes
After the two menus are set to "Yes" and pressing on Save Changes the plugin is enabled and will immediately start showing information inside each comment the GeoIP country location flag of the person who commented as well as OS type and Web Browser :)
Tue Feb 14 18:09:23 EET 2012
How to set up Qmail auto reply (Out of the Office), vacation message manually using .qmail message processing file
I had to setup a QMAIL auto reply (Out of the Office) message on 5 email addresses and since I haven't done it for a long time it took me a couple 20 minutes to consult Qmail (Life With Qmail http://lifewithqmail.org (great website!) documentation and read a couple of online forum threads until I finally remembered, how I used to be setting up a vacation message manually via qmail's .qmail file.
Of course Setting qmail auto reply can always be done via QmailAdmin or VQadmin .. - Qmail Vpopmail web frontends however on many Qmail mail servers Qmailadmin or/and VQadmin is absent due to some reason or even on a big mail servers the server doesn't run Apache at all. Hence it is good to know how to set qmail vacation message directly via plain SSH terminal connection and this is why how this article got born.
So here is how I enable qmail auto reply "manually", through .qmail for my email address info@my-email-domain.com:
1. Set a /var/vpopmail/domains/my-email-domain.com/info/.qmail file with the following content:
| /usr/bin/autorespond 86400 3 /home/vpopmail/domains/my-email-domain.com/info/vacation/message /home/vpopmail/domains/my-email-domain.com/info/vacation
2. Create /home/vpopmail/domains/my-email-domain.com/info/vacation directory
linux:~# mkdir -p /home/vpopmail/domains/my-email-domain.com/info/vacation/
3. Create /home/vpopmail/domains/my-email-domain.com/info/vacation/message file with auto reply message
First create the message file with touch command:
linux:~# touch /home/vpopmail/domains/my-email-domain.com/info/vacation/message
Then put with vim or mcedit etc. an auto-reply vacation message similar to the sample below:
From: info@cadiainsurance.com
Subject: We have received your message. Thank you!
 Dear Customer, we thank you for the interest in our services.

 A member of our team will reply promptly to your enquiry shortly.
4. Set proper permissions for vacation/message and .qmail files
/home/vpopmail/domains/my-email-domain.com/info/vacation/message and /home/vpopmail/domains/my-email-domain.com/info/.qmail files has to be owned by user/group vpopmail:vchkpw, e.g.:
linux:~# chown -R vpopmail:vchkpw /home/vpopmail/domains/my-email-domain.com/info/vacation

linux:~# chown vpopmail:vchkpw /home/vpopmail/domains/my-email-domain.com/info/.qmail
If you are a qmail administration with the requirement to create auto reply message for employees going on a holiday often (in a middle sized company office), setting up the out of the office auto reply manually one by one is a time consuming, annoying task and "crazy" task. Therefore some time ago while still I was employed in a Bulgarian mid-sized company called Design.BG, I've written a tiny shell script which creates qmail email users vacation messages by passing few arguments.
Here is my create_vpopmail_vacation.sh shell script
Note that this script might have a lot of bugs and is not much tested, so read it carefully and test it before you put it for daily use ;)
Happy Hacking! ;)
Tue Feb 14 11:11:52 EET 2012
How to add OpenID functionality to Wordpress Comments
I've recently decided to add Comment as OpenID functionality to my wordpress blog. The reasons to do that is that I myself have today created an OpenID account. Already million of people have OpenID account without even knowing. Most major search engines and social websites like Google, Yahoo, Live Journal, Hyves, Blogger, Flicker, MySpace automatically creates an OpenID account for newly registered users.
It is up to the user to check with each of the aforementioned providers what is the URL of their OpenID account.
Even though OpenID popularity is steadly rising, I'm sure there are still plenty of users who did not heard, used or noticed OpenID yet.
So What the heck is OpenID?
For all those who still haven't heard about it, OpenID is a universal web site login system With just one "unified" OpenID account the user can login to multiple websites with no need to create multiple accounts across each and every different website on the internet.
The only requirement for the user to be able to use OpenID is that the website in question to have (support) for OpenID credential and the user to have existing OpenID account.
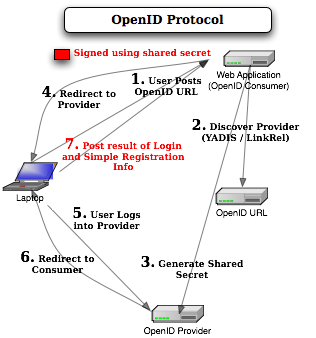
Therefore using one single OpenID you can sign in as a certain user to multiple websites on the internet with no need for annoying registration process to each and every new website you encounter. Another benefit OpenID gives to the user is that you don't have to memorize or keep notes of a tens or thousands of different login accounts across the many different websites on the net.
Using OpenID also saves the user from troubles with forgotten password or username as just one OpenID login is used to login you everywhere.
For Wordpress blogging platform the Russian Igor Korolev, has written a wordpress plugin - comments-to-wordpress . This plugin adds support for OpenID authentication in Wordpress comments.
Here is how to OpenID to Wordpress:
1. Download the comments-with-wordpress plugin and unzip As of writting of this article latest comments-to-wordpress plugin is ver. 1.4.
Download the plugin to blog path directory lets say, /var/www/blog/wp-content/plugins/ and unzip:
# cd /var/www/blog/wp-content/plugins

# wget http://downloads.wordpress.org/plugin/comments-with-openid.zip

...

# unzip comments-with-openid.zip

...
I've also done a mirror for download of comments-with-openid 1.4 here
2. Enable Comments with OpenID wp plugin
Next the plugin has to be Enabled, just like any other wordpress plugin via admin menus:
Plugins -> Inactive -> Comments with OpenID (enable)
Once the plugin is enaabled it is necessery to add some code with a text editor in file /var/www/blog/wp-content/themes/default/comments.php
Small noet to make here: If you're not using the default Wordpress theme (like I do), you will have to edit the /themes/your-theme-name/comments.php instead.
Inside the file look for the form input fields:
<p> <input type="text" name="author" ....

...

<p> <input type="text" name="email" id="email" ....

...

<p> <input type="text" name="url" id="url" ....

...
Before the html tags code:
Paste the following code:
<?php comments_with_openid(); ?>
Save the comments.php file and you Identification for new comments with OpenID will appear in your wordpress Comments form.
The OpenID plugin will add a number of service OpenIDs to choose between like you can see in my blog's plugin section or the screenshot below:
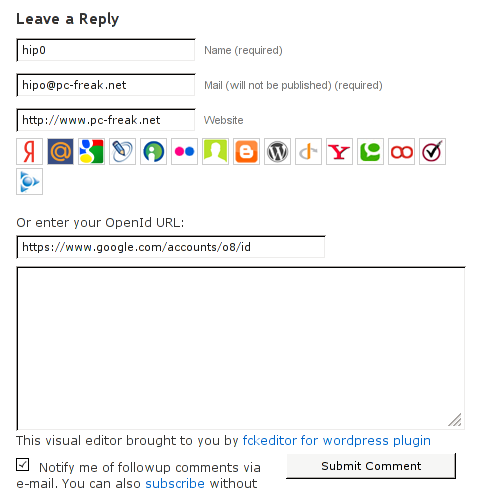
The URL https://www.google.com/accounts/o8/id is just a sample and showed because I clicked on the Google icon. If you have a Google profile you can check the exact ID and use it as URL there. Simply if your browser is logged in Gmail and you have Google profile. OpenID should work. As you can see the plugin supports a number of services which already support OpenID auth, the list of services can be easily extended by adding minor changes in .../plugins/comments-with-openid/comments-with-openid.php
There is also another wordpress plugin with the openid name - http://wordpress.org/extend/plugins/openid/
Downloading and enabling the other openid plugin also adds support for OpenID login in your http://your-url.com/wp-admin/ login page.
Installing the OpenID plugin is needed especially if you're a blogger blogging on 5 or 10 different topic oriented blogs, once downloading and installing the OpenID plugin will allow you to login across the blog ring without loosing time or bothering to remember different passwords across all the blogs. Here is a screenshot of the /wp-admin wordpress login page with the OpenID wp plugin enabled:
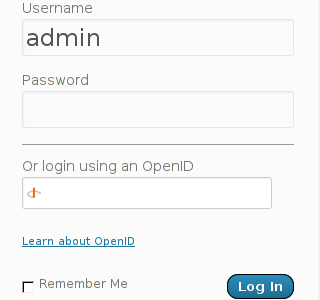
As of time of writting according to http://openid.net/get-an-openid/what-is-openid/'s website there are over 50000 major websites on the net already accepting OpenID login.
Of course as every technlogy OpenID is not perfect and along with its convenience in some cases it could impose security hole. OpenID opponents claim under some circumstances OpenID is prone to forgery, XSS (cross site scripting) and XSFR attacks. Everyone who is about to use OpenID should be also aware of the great security risk it impose if one OpenID account gets stolen through sniffing, this could mean multiple websites can be accesses with the one single OpenID by the malicious user and a lot of confidential data owned by the user can be revealed or deleted ...
With this said I think OpenID is not a recommended login technology for Windows users, as windows is famous for being vulnerable to so many Viruses and Spyware/Malware etc..
With non-free software OSes like MS Windows, the user never cannot for sure if the system is infected, hence using OpenID to transfer credentials over the internet or store an OpenID SSL/(TLS) certificate to identify in websites is TOO DANGEROUS!
Hope this article was helpful. Cya
Mon Feb 13 11:05:26 EET 2012
How to fix upside-down / inverted web camera laptop Asus K51AC issue on Ubuntu Linux and Debian GNU / Linux
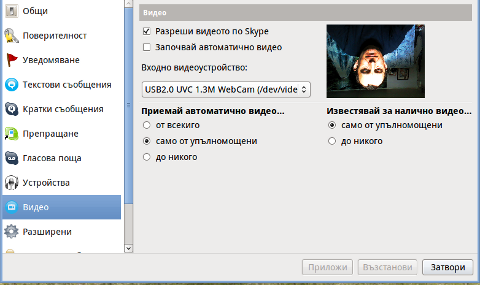
Does your camera show video correctly in cheese but shows captured video upside-down (inverted) in skype ?
This is an issue a friend of mine experienced on his Asus K51AC-SX037D laptop on both Ubuntu and Debian Linux.
As you can see in the picture above it is funny as with this bug the person looks like a batman ;)
As the webcam upside-down issue was present on both latest Ubuntu 11.10 and latest stable Debian Squeeze 6.02, my guess was other GNU / Linux rpm based distro like Fedora might have applied a fix to this weird Skype inverted video (bat human like) issue.
Unfortunately testing the webcam with Skype on latest both Fedora 16 and Linux Mint 12 appeared to produce the same webcam bug.
A bit of research for the issue online and try outs of a number of suggested methods to resolve the issue led finally to a work around, thanks to this post
Here is few steps to follow to make the webcam show video like it should:
1. Install libv4l-0 package
root@linux:~# apt-get --yes install libv4-0

...
Onwards to start skype directly from terminal and test the camera type:
hipo@linux:~$ LD_PRELOAD=/usr/lib/libv4l/v4l1compat.so skype
This is the work around for 32 bit Linux install, most people however will probably have installed 64 bit Linux, for 64bit Linux installs the above command should be little different:
hipo@linux:~$ LD_PRELOAD=/usr/lib32/libv4l/v4l1compat.so skype
Once skype is launched test the camera and see if the camera capture is now uninverted, through menus:
S -> Options -> Video Devices -> Test
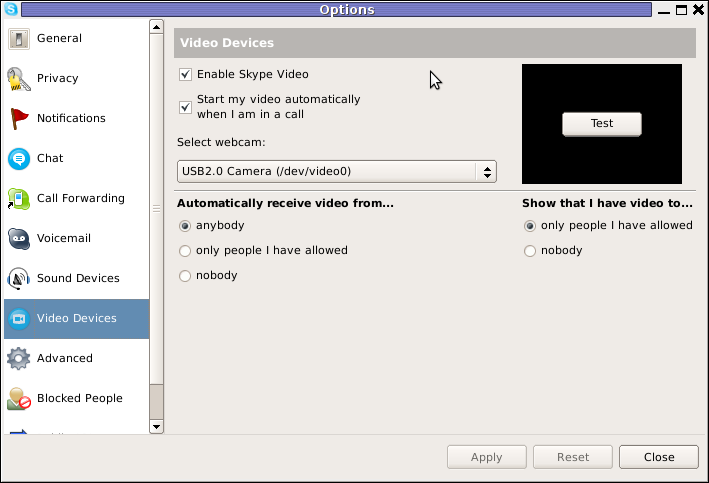
2. Create a skype Wrapper script Launcher
To make skype launch everytime with exported shell variable:
LD_PRELOAD=/usr/lib32/libv4l/v4l1compat.so
A new skype wrapper bash shell script should be created in /usr/local/bin/skype , the file should contain:
#!/bin/sh

LD_PRELOAD=/usr/lib32/libv4l/v4l1compat.so

/usr/bin/skype
To create the script with echo in a root terminal issue;
root@linux:~# echo '#!/bin/sh' >> /usr/local/bin/skype

root@linux:~# echo 'LD_PRELOAD=/usr/lib32/libv4l/v4l1compat.so' >> /usr/local/bin/skype

root@linux:~# echo '/usr/bin/skype' >> /usr/local/bin/skype

root@linux:~# chmod +x /usr/local/bin/skype
3. Edit the Skype gnome menu to substitute /usr/bin/skype Skype Launcher with /usr/local/bin/skype
Gnome 2 has a handy menu launcher, allowing to edit and add new menus and submenus (menus and items) to the Application menu, to launch the editor one has to click over Applications with last mouse button (right button) and choose Edit Menus
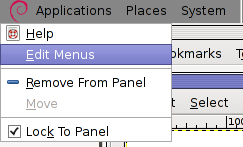
The menu editor like the one in the below screenshot will appear:
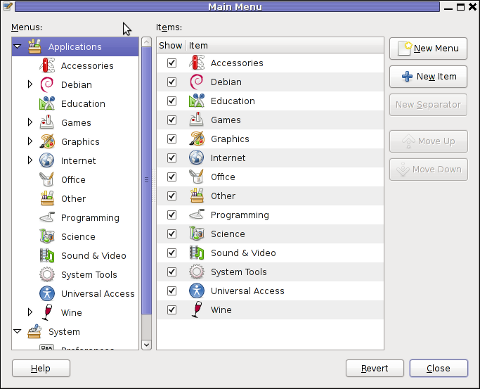
In the preceeding Launcher properties window, Command: skype has to be substituted with:
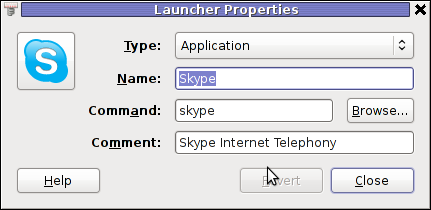
Command: /usr/local/bin/skype
For console freaks who doesn't want to bother in editting Skype Launcher via GUI /usr/share/applications/skype.desktop file can be editted in terminal. Inside skype.desktop substitute:
Exec=skype
with
Exec=/usr/local/bin/skype
As one can imagine the upside-down video image in Skype is not a problem because of Linux, but rather another bug in Skype (non-free) software program.
By the way everyone, who is using his computer with Free Software operating system FreeBSD, Linux etc. knows pretty well by experience, that Skype is a very problematic software; It is often a cause for system unexpected increased system loads, problems with (microphone not capturing), camera issues, issues with pulseaudio, problem with audio playbacks ... Besides the long list of bugs there are unexpected display bugs in skype tray icon, bugs in skype messanger windows and at some rare occasions the program completely hangs and had to be killed with kill command and re-launched again.
Another worrying fact is Skype's versions available for GNU / Linux and BSD is completely out of date with its "competitor" operating systems MS Windows, MacOS X etc.
For people like me and my friend who want to use free operating system the latest available skype version is not even stable ... current version fod download from skype's website is (Skype 2.2Beta)!
On FreeBSD the skype situation is even worser, freebsd have only option to run Skype ver 1.3 or v. 2.0 at best, as far as I know skype 2.2 and 2.2beta is not there.
Just as matter of comparison the latest Skype version on Windows is 5.x. Windows release is ages ahead its Linux and BSD ver. From a functional point of view the difference between Linux's 2.x and Windows 5.x is not that much different, what makes difference is is the amount of bugs which Linux and BSD skype versions contain...
Skype was about 6 months ago bought by Microsoft, therefore the prognosis for Skype Linux support in future is probably even darker. Microsoft will not probably bother to release new version of Skype for their competitor free as in freedom OSes.
I would like to thank my friend and brother in Christ Stelian for supplying me with the Skype screenshots, as well as for being kind to share how he fixed his camera with me.
Sun Feb 12 20:37:16 EET 2012
How to install OpenNTPD NTP server to synchronize system clock on FreeBSD for better security
Lately I've been researching on ntpd and wrote a two articles on how to install ntpd on CentOS, Fedora and how to install ntpd on FreeBSD and during my research on ntpd, I've come across OpenNTPD and decided to give it a go on my FreeBSD home router.
OpenBSD project is well known for it is high security standards and historically has passed the test of time for being a extraordinary secure UNIX like free operating system.
OpenBSD is developed in parallel with FreeBSD, however the development model of the two free operating systems are way different.
As a part of the OpenBSD to be independant in its basis of software from other free operating systems like GNU / Linux and FreeBSD. They develop the all around free software realm known OpenSSH. Along with OpenSSH, one interesting project developed for the main purpose of OpenBSD is OpenNTPD.
Here is how openntpd.org describes OpenNTPD:
"a FREE, easy to use implementation of the Network Time Protocol. It provides the ability to sync the local clock to remote NTP servers and can act as NTP server itself, redistributing the local clock."
OpenNTPD's accent just like OpenBSD's accent is security and hence for FreeBSD installs which targets security openntpd might be a good choice. Besides that the so popular classical ntpd has been well known for being historically "insecure", remote exploits for it has been released already at numerous times.
Another reason for someone to choose run openntpd instead of ntpd is its great simplicity. openntpd configuration is super simple.
Here are the steps I followed to have openntpd time server synchronize clock on my system using other public accessible openntpd servers on the internet.
1. Install openntpd through pkg_add -vr openntpd or via ports tree
a) For binar install with pkg_add issue:
freebsd# pkg_add -vr openntpd

...
b) if you prefer to compile it from source
freebsd# cd /usr/ports/net/openntpd

freebsd# make install clean

...
2. Enable OpenNTPD to start on system boot:
freebsd# echo 'openntpd_enable="YES"' >> /etc/rc.conf
3. Create openntpd ntpd.conf configuration file
There is a default sample ntpd.conf configuration which can be straight use as a conf basis:
freebsd# cp -rpf /usr/local/share/examples/openntpd/ntpd.conf /usr/local/etc/ntpd.conf
Default ntpd.conf works just fine without any modifications, if however there is a requirement the openntpd server to listen and accept time synchronization requests from only certain hosts add to conf something like:
listen on 192.168.1.2

listen on 192.168.1.3

listen on 2607:f0d0:3001:0009:0000:0000:0000:0001

listen on 127.0.0.1
This configuration will enable only 192.168.1.2 and 192.168.1.3 IPv4 addresses as well as the IPv6 2607:f0d0:3001:0009:0000:0000:0000:0001 IP to communicate with openntpd.
4. Start OpenNTPD service
freebsd# /usr/local/etc/rc.d/openntpd
5. Verify if openntpd is up and running
freebsd# ps axuww|grep -i ntp

 root        31695  0.0  0.1  3188  1060  ??  Ss   11:26PM   0:00.00 ntpd: [priv] (ntpd)

 _ntp        31696  0.0  0.1  3188  1140  ??  S    11:26PM   0:00.00 ntpd: ntp engine (ntpd)

 _ntp        31697  0.0  0.1  3188  1088  ??  S    11:26PM   0:00.00 ntpd: dns engine (ntpd)

 root        31700  0.0  0.1  3336  1192  p2  S+   11:26PM   0:00.00 grep -i ntp
Its also good idea to check if openntpd has succesfully established connection with its peer remote openntpd time servers. This is necessery to make sure pf / ipfw firewall rules are not preventing connection to remote 123 UDP port:
freebsd# sockstat -4 -p 123

 USER     COMMAND    PID   FD PROTO  LOCAL ADDRESS         FOREIGN ADDRESS

 _ntp     ntpd       31696 4  udp4   83.228.93.76:54555    212.70.148.15:123

 _ntp     ntpd       31696 6  udp4   83.228.93.76:56666    195.69.120.36:123

 _ntp     ntpd       31696 8  udp4   83.228.93.76:49976    217.75.140.188:123
By default openntpd is also listening to IPv6 if IPv6 support is enabled in freebsd kernel.
6. Resolve openntpd firewall filtering issues
If there is a pf firewall blocking UDP requests to in/out port 123 within /etc/pf.conf rule like:
block in log on $EXT_NIC proto udp all
Before the blocking rule you will have to add pf rules:
# Ipv4 Open outgoing port TCP 123 (NTP)

pass out on $EXT_NIC proto tcp to any port ntp

# Ipv6 Open outgoing port TCP 123 (NTP)

pass out on $EXT_NIC inet6 proto tcp to any port ntp

# Ipv4 Open outgoing port UDP 123 (NTP)

pass out on $EXT_NIC proto udp to any port ntp

# Ipv6 Open outgoing port UDP 123 (NTP)

pass out on $EXT_NIC inet6 proto udp to any port ntp
where $EXT_NIC is defined to be equal to the external lan NIC interface, for example:
EXT_NIC="ml0"
Afterwards to load the new pf.conf rules firewall has to be flushed and reloaded:
freebsd# /sbin/pfctl -f /etc/pf.conf -d

...

freebsd# /sbin/pfctl -f /etc/pf.conf -e

...
In conclusion openntpd should be more secure than regular ntpd and in many cases is probably a better choice.
Anyhow bear in mind on FreeBSD openntpd is not part of the freebsd world and therefore security updates will not be issued directly by the freebsd dev team, but you will have to regularly update with the latest version provided from the bsd ports to make sure openntpd is 100% secure.
For anyone looking for more precise system clock synchronization and not so focused on security ntpd might be still a better choice. The OpenNTPD's official page states it is designed to reach reasonable time accuracy, but is not after the last microseconds.
Sat Feb 11 14:45:30 EET 2012
Reasons Why People Who Work with Computers seem to have a lot of spare time
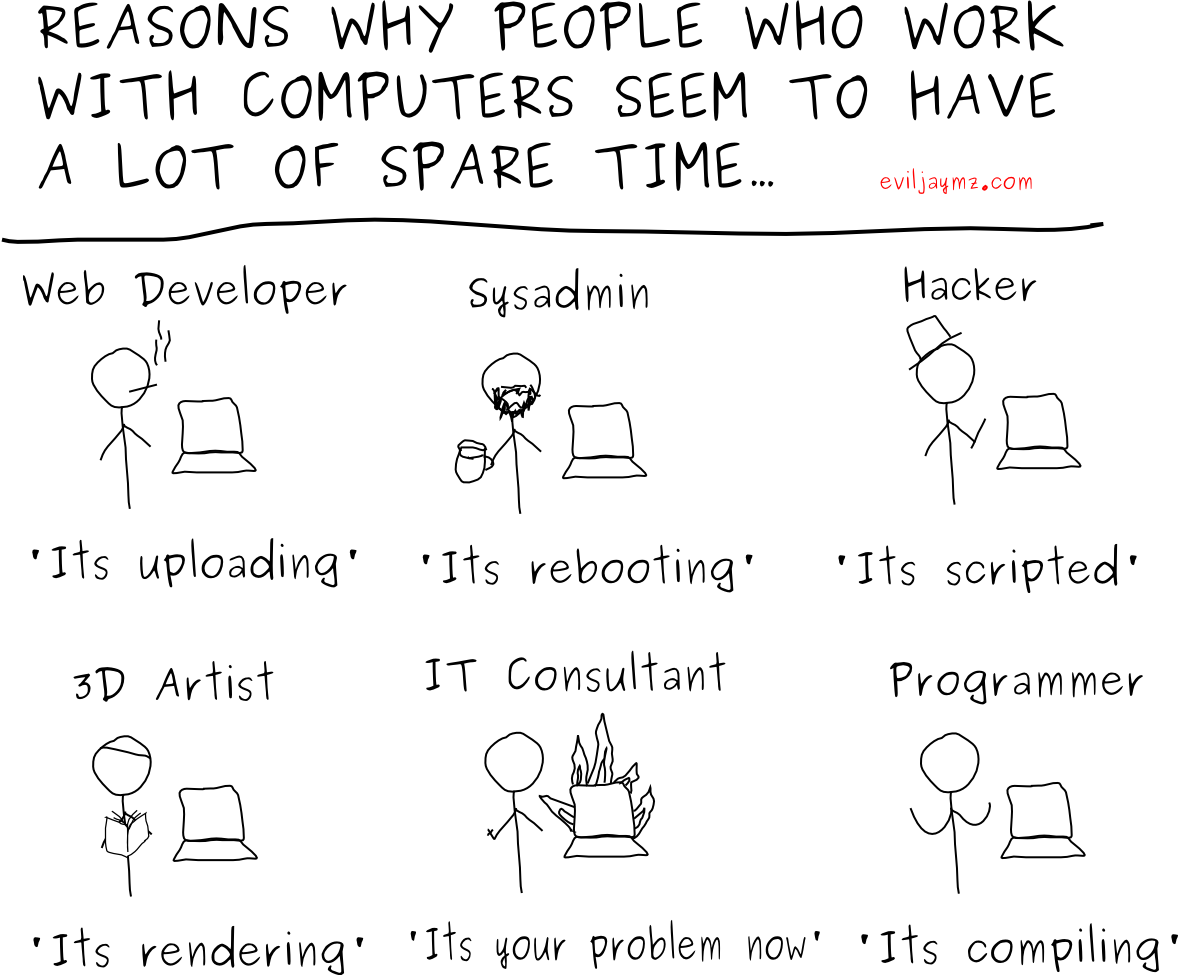
While I was digging through some of my old data, I've found this funny caricature. Enjoy ;)
Fri Feb 10 16:04:04 EET 2012
How to configure NTP server (ntpd) to synchronize server clock over the Internet on FreeBSD
On FreeBSD ntpd , ntpdc , ntpdate , ntpq doesn't need to be installed via a specific package like on GNU/Linux as they're part of the FreeBSD world (binary standardly shipped with FreeBSD basis system).
The FreeBSD handbook has a chapter explaining thoroughfully on ntp on FreeBSD ,however for the lazy ones here is a short few steps tutorial on how to install and configure ntpd on bsd :
1. Copy sample ntp.conf file to /etc/
No need for any modifications if you don't want to apply some specific restrictions on whom can access the ntpd server. If you update regularly the FreeBSD system with freebsd-update or directly by rebuilding the FreeBSD kernel / world adding restrictions might be not necessery..
If you check /usr/src/etc/ntp.conf you will notice freebsd project people are running their own ntp servers , by default ntpd will use this servers to fetch timing information. The exact server hosts which as of time of writting are used can be seen in ntp.conf and are:
2. Add ntpd daemon to load on system boot via /etc/rc.conf
By default ntpd is disabled on FreeBSD, you can see if it is disabled or enabled by invoking:
To Enable ntpd to get loaded each time it boots , following 3 lines has to be added in /etc/rc.conf .
Quick way to add them is to use echo :
Now as the 3 rc.conf vars are set to "YES", the ntpd can be started. Without having this variables in /etc/rc.conf , "/etc/rc.d/ntpd start" will refuse to start ntpd.
3. Start the ntpd service
One interesting note to make is ntpd can also operate without specifying any config file (/etc/ntp.conf), the only requirement for the server to start is to have a properly set ntpdate server, like lets say (ntpdate_flags="europe.pool.ntp.org")
4. Permit only certain host or localhost to "talk" to the ntpd server
If you want to imply some ntp server restrictions, the configuration directives are same like on Linux:
To allow only a a host inside a local network with IP 192.168.0.2 as well as localhost, to be able to fetch time information via ntpd server put inside /etc/ntp.conf:
If you want to prohibit ntpd to serve as a Network Time Server, to any other host except localhost, add in /etc/ntp.conf :
Allowing and denying certain hosts can be also done on pf (packet filter) or ipfw firewall level, and in my view is easier (and less confusing), than adding restrictions through ntp.conf. Besides that using directly the server firewall to apply restrictions is more secure. If for instance a remote exploit vulnerability is discovered affecting your ntpd server. this will not affect you externally as access to the UDP port 123 will be disabled on a firewall level.
Something good to mention is NTP servers communicate between each other using the UDP source/destination (port 123). Hence if the NTPD server has to be publicly accessible and there is a firewall already implemented, access to source/dest port 123 should be included in the configured firewall ...
5. Check if the ntp server is running properly / ntp server query operations
To query the now running ntpd server as well as set various configuration options "on the fly" (e.g. without need for ntp.conf edits and init script restart), a tool called ntpdc exists. ntpdc tool could be used to connect to localhost running ntpd as well as to connect and manage remotely a ntpd server.
The most basic use of ntpdc is to check (server peers).:
ntpdc has also a non-interactive interface, handy if there is a need for requests to a ntpd to be scripted. To check ntpd server peers non-interactively:
ntpdc has plenty of other ntpd query options, e.g. :
ntpdc is an advanced query tool for ntpd , servers. Another tool exists called ntpq which syntax is almost identical to ntpdc . The main difference between the two is ntpq is a monitoring tool mostly used just for monitoring purposes, where ntpdc can also change plenty of things in the server configuration.
For people who want to learn more on ntpd the man page is a great reading , containing chapters describing thoroughfully exactly how NTPD time servers operate, etc.
The FreeBSD handbook has a chapter explaining thoroughfully on ntp on FreeBSD ,however for the lazy ones here is a short few steps tutorial on how to install and configure ntpd on bsd :
1. Copy sample ntp.conf file to /etc/
freebsd# cp -rpf /usr/src/etc/ntp.conf /etc/ntp/
No need for any modifications if you don't want to apply some specific restrictions on whom can access the ntpd server. If you update regularly the FreeBSD system with freebsd-update or directly by rebuilding the FreeBSD kernel / world adding restrictions might be not necessery..
If you check /usr/src/etc/ntp.conf you will notice freebsd project people are running their own ntp servers , by default ntpd will use this servers to fetch timing information. The exact server hosts which as of time of writting are used can be seen in ntp.conf and are:
server 0.freebsd.pool.ntp.org iburst maxpoll 9

server 1.freebsd.pool.ntp.org iburst maxpoll 9

server 2.freebsd.pool.ntp.org iburst maxpoll 9
2. Add ntpd daemon to load on system boot via /etc/rc.conf
By default ntpd is disabled on FreeBSD, you can see if it is disabled or enabled by invoking:
freebsd# /etc/rc.d/ntpd rcvar

# ntpd

ntpd_enable=NO
To Enable ntpd to get loaded each time it boots , following 3 lines has to be added in /etc/rc.conf .
ntpdate_enable="YES"

ntpdate_flags="europe.pool.ntp.org"

ntpd_enable="YES"
Quick way to add them is to use echo :
echo 'ntpdate_enable="YES" >> /etc/rc.conf

echo 'ntpdate_flags="europe.pool.ntp.org" >> /etc/rc.conf

echo 'ntpd_enable="YES" >> /etc/rc.conf
Now as the 3 rc.conf vars are set to "YES", the ntpd can be started. Without having this variables in /etc/rc.conf , "/etc/rc.d/ntpd start" will refuse to start ntpd.
3. Start the ntpd service
freebsd# /etc/rc.d/ntpd start

...
One interesting note to make is ntpd can also operate without specifying any config file (/etc/ntp.conf), the only requirement for the server to start is to have a properly set ntpdate server, like lets say (ntpdate_flags="europe.pool.ntp.org")
4. Permit only certain host or localhost to "talk" to the ntpd server
If you want to imply some ntp server restrictions, the configuration directives are same like on Linux:
To allow only a a host inside a local network with IP 192.168.0.2 as well as localhost, to be able to fetch time information via ntpd server put inside /etc/ntp.conf:
restrict 127.0.0.1

restrict 192.168.0.1 mask 255.255.255.0 nomodify notrap
If you want to prohibit ntpd to serve as a Network Time Server, to any other host except localhost, add in /etc/ntp.conf :
restrict default ignore
Allowing and denying certain hosts can be also done on pf (packet filter) or ipfw firewall level, and in my view is easier (and less confusing), than adding restrictions through ntp.conf. Besides that using directly the server firewall to apply restrictions is more secure. If for instance a remote exploit vulnerability is discovered affecting your ntpd server. this will not affect you externally as access to the UDP port 123 will be disabled on a firewall level.
Something good to mention is NTP servers communicate between each other using the UDP source/destination (port 123). Hence if the NTPD server has to be publicly accessible and there is a firewall already implemented, access to source/dest port 123 should be included in the configured firewall ...
5. Check if the ntp server is running properly / ntp server query operations
[root@pcfreak /home/hipo]# ps axuww|grep -i ntp
root 15647 0.0 0.2 4672 1848 ?? Ss 2:49PM 0:00.04 /usr/sbin/ntpd -c /etc/ntp.conf -p /var/run/ntpd.pid -f /var/db/ntpd.driftTo query the now running ntpd server as well as set various configuration options "on the fly" (e.g. without need for ntp.conf edits and init script restart), a tool called ntpdc exists. ntpdc tool could be used to connect to localhost running ntpd as well as to connect and manage remotely a ntpd server.
The most basic use of ntpdc is to check (server peers).:
freebsd# ntpdc localhost

ntpdc> peers

remote           local      st poll reach  delay   offset    disp

 =======================================================================

 =kgb.comnet.bg   83.228.93.76     2   64  377 0.00282 -0.050575 0.06059

 *billing.easy-la 83.228.93.76     2   64  377 0.01068 -0.057400 0.06770

 =ns2.novatelbg.n 83.228.93.76     2   64  377 0.01001 -0.055290 0.06058
ntpdc has also a non-interactive interface, handy if there is a need for requests to a ntpd to be scripted. To check ntpd server peers non-interactively:
freebsd# ntpdc -p localhost

=======================================================================

=kgb.comnet.bg   83.228.93.76     2   64  377 0.00284 -0.043157 0.06184

=billing.easy-la 83.228.93.76     2   64  377 0.01059 -0.042648 0.05811

*ns2.novatelbg.n 83.228.93.76     2   64  377 0.00996 -0.041097 0.06094
ntpdc has plenty of other ntpd query options, e.g. :
ntpdc> help

ntpdc commands:

addpeer      controlkey   fudge        keytype      quit         timeout

addrefclock  ctlstats     help         listpeers    readkeys     timerstats

addserver    debug        host         loopinfo     requestkey   traps

addtrap      delay        hostnames    memstats     reset        trustedkey

authinfo     delrestrict  ifreload     monlist      reslist      unconfig

broadcast    disable      ifstats      passwd       restrict     unrestrict

clkbug       dmpeers      iostats      peers        showpeer     untrustedkey

clockstat    enable       kerninfo     preset       sysinfo      version

clrtrap      exit         keyid        pstats       sysstats
ntpdc is an advanced query tool for ntpd , servers. Another tool exists called ntpq which syntax is almost identical to ntpdc . The main difference between the two is ntpq is a monitoring tool mostly used just for monitoring purposes, where ntpdc can also change plenty of things in the server configuration.
For people who want to learn more on ntpd the man page is a great reading , containing chapters describing thoroughfully exactly how NTPD time servers operate, etc.
Thu Feb 9 10:54:00 EET 2012
How to install and configure NTP Server (ntpd) to synchronize Linux server clock over the Internet on CentOS, RHEL, Fedora
Every now and then I have to work on servers running CentOS or Fedora Linux. Very typical problem that I observe on many servers which I have to inherit is the previous administrator did not know about the existence of NTP (Network Time Protocol) or forgot to install the ntpd server. As a consequence the many installed server services did not have a correct clock and at some specific cases this caused issues for web applications running on the server or any CMS installed etc.
The NTP Daemon is existing in GNU / linux since the early days of Linux and it served quite well so far. The NTP protocol has been used since the early days of the internet and for centuries is a standard protocol for BSD UNIX.
ntp is available in I believe all Linux distributions directly as a precompiled binary and can be installed on Fedora, CentOS with:
ntpd synchronizes the server clock with one of the /etc/ntp.conf defined RedHat NTP list
To Synchronize manually the server system clock the ntp CentOS rpm package contains a tool called ntpdate :
Hence its a good practice to use ntpdate to synchronize the local server time with a internet server, the way I prefer to do this is via a government owned ntp server time.nist.gov, e.g.
Alternatively if you prefer to use one of the redhat servers use:
Now as the system time is set to a correct time via the ntp server, the ntp server is to be launched:
To permanently enable the ntpd service to start up in boot time issue also:
Using chkconfig and /etc/init.d/ntpd cmds, makes the ntp server to run permanently via the ntpd daemon:
If you prefer to synchronize periodically the system clock instead of running permanently a network server listening (for increased security), you should omit the above chkconfig ntpd on and /etc/init.d/ntpd start commands and instead set in root crontab the time to get synchronize lets say every 30 minutes, like so:
The time synchronization via crontab can be also done using the ntpdate cmd. For example if you want to synchronize the server system clock with a network server every 5 minutes:
And paste inside:
ntp package is equipped with ntpq - Standard NTP Query Program. To get very basic stats for the running ntpd daemon use:
The remote field shows the servers to which currently the ntpd service is connected. This IPs are the servers which ntp uses to synchronize the local system server clock. when field shows when last the system was synchronized by the remote time server and the rest is statistical info about connection quality etc.
If the ntp server is to be run in daemon mode (ntpd to be running in the background). Its a good idea to allow ntp connections from the local network and filter incoming connections to port num 123 in /etc/sysconfig/iptables :
Restrictions on which IPs can be connected to the ntp server can also be implied on a ntpd level through /etc/ntp.conf. For example if you would like to add the local network IPs range 192.168.0.1/24 to access ntpd, in ntpd.conf should be added policy:
To deny all access to any machine to the ntpd server add in /etc/ntp.conf:
After making any changes to ntp.conf , a server restart is required to load the new config settings, e.g.:
In most cases I think it is better to imply restrictions on a iptables (firewall) level instead of bothering change the default ntp.conf
Once ntpd is running as daemon, the server listens for UDP connections on udp port 123, to see it use:
The NTP Daemon is existing in GNU / linux since the early days of Linux and it served quite well so far. The NTP protocol has been used since the early days of the internet and for centuries is a standard protocol for BSD UNIX.
ntp is available in I believe all Linux distributions directly as a precompiled binary and can be installed on Fedora, CentOS with:
[root@centos ~]# yum install ntp
ntpd synchronizes the server clock with one of the /etc/ntp.conf defined RedHat NTP list
server 0.rhel.pool.ntp.org

server 1.rhel.pool.ntp.org

server 2.rhel.pool.ntp.org
To Synchronize manually the server system clock the ntp CentOS rpm package contains a tool called ntpdate :
Hence its a good practice to use ntpdate to synchronize the local server time with a internet server, the way I prefer to do this is via a government owned ntp server time.nist.gov, e.g.
[root@centos ~]# ntpdate time.nist.gov

8 Feb 14:21:03 ntpdate[9855]: adjust time server 192.43.244.18 offset -0.003770 sec
Alternatively if you prefer to use one of the redhat servers use:
[root@centos ~]# ntpdate 0.rhel.pool.ntp.org

8 Feb 14:20:41 ntpdate[9841]: adjust time server 72.26.198.240 offset 0.005671 sec
Now as the system time is set to a correct time via the ntp server, the ntp server is to be launched:
[root@centos ~]# /etc/init.d/ntpd start

...
To permanently enable the ntpd service to start up in boot time issue also:
[root@centos ~]# chkconfig ntpd on
Using chkconfig and /etc/init.d/ntpd cmds, makes the ntp server to run permanently via the ntpd daemon:
[root@centos ~]# ps ax |grep -i ntp
29861 ?        SLs    0:00 ntpd -u ntp:ntp -p /var/run/ntpd.pid -g
If you prefer to synchronize periodically the system clock instead of running permanently a network server listening (for increased security), you should omit the above chkconfig ntpd on and /etc/init.d/ntpd start commands and instead set in root crontab the time to get synchronize lets say every 30 minutes, like so:
[root@centos ~]# echo '30 * * * * root /sbin/ntpd -q -u ntp:ntp' > /etc/cron.d/ntpd
The time synchronization via crontab can be also done using the ntpdate cmd. For example if you want to synchronize the server system clock with a network server every 5 minutes:
[root@centos ~]# crontab -u root -e
And paste inside:
*/5 * * * * /sbin/ntpdate time.nist.gov 2>1 > /dev/null
ntp package is equipped with ntpq - Standard NTP Query Program. To get very basic stats for the running ntpd daemon use:
[root@centos ~]# ntpq -p

 remote           refid      st t when poll reach   delay   offset  jitter

 ==============================================================================

 B1-66ER.matrix. 192.43.244.18    2 u   47   64   17  149.280   41.455  11.297

 *ponderosa.piney 209.51.161.238   2 u   27   64   37  126.933   32.149   8.382

 www2.bitvector. 132.163.4.103    2 u    1   64   37  202.433   12.994  13.999

 LOCAL(0)        .LOCL.          10 l   24   64   37    0.000    0.000   0.001
The remote field shows the servers to which currently the ntpd service is connected. This IPs are the servers which ntp uses to synchronize the local system server clock. when field shows when last the system was synchronized by the remote time server and the rest is statistical info about connection quality etc.
If the ntp server is to be run in daemon mode (ntpd to be running in the background). Its a good idea to allow ntp connections from the local network and filter incoming connections to port num 123 in /etc/sysconfig/iptables :
-A INPUT -s 192.168.1.0/24 -m state --state NEW -p udp --dport 123 -j ACCEPT

-A INPUT -s 127.0.0.1 -m state --state NEW -p udp --dport 123 -j ACCEPT

-A INPUT -s 0.0.0.0 -m state --state NEW -p udp --dport 123 -j DROP
Restrictions on which IPs can be connected to the ntp server can also be implied on a ntpd level through /etc/ntp.conf. For example if you would like to add the local network IPs range 192.168.0.1/24 to access ntpd, in ntpd.conf should be added policy:
# Hosts on local network are less restricted.

restrict 192.168.0.1 mask 255.255.255.0 nomodify notrap
To deny all access to any machine to the ntpd server add in /etc/ntp.conf:
restrict default ignore
After making any changes to ntp.conf , a server restart is required to load the new config settings, e.g.:
[root@centos ~]# /sbin/service ntpd restart
In most cases I think it is better to imply restrictions on a iptables (firewall) level instead of bothering change the default ntp.conf
Once ntpd is running as daemon, the server listens for UDP connections on udp port 123, to see it use:
[root@centos ~]# netstat -tulpn|grep -i ntp

 udp        0      0 10.10.10.123:123            0.0.0.0:*                               29861/ntpd

 udp        0      0 80.95.28.179:123            0.0.0.0:*                               29861/ntpd

 udp        0      0 127.0.0.1:123               0.0.0.0:*                               29861/ntpd

 udp        0      0 0.0.0.0:123                 0.0.0.0:*                               29861/ntpd
Wed Feb 8 13:22:02 EET 2012
What width / height pixel size should be Facebook and Twitter Avatar logos
I had to create a number of Facebook and Twitter accounts for one of the companies where I am employed. As I had to put Avatars to each and every new account. I therefore had to resize the company logos to fit the to the avatar dimensions..
It took me a bit of research until I found the proper picture dimensions. Here are the dimensions:
For facebook page Avatar the good picture width / height dimensions is a square like:
151x151 pixels
If however you prefer to have a sky scraper picture in Facebook, this is possible as thumbnail pictures up to 180x540 w/h pixels are showing up in FB.
At most cases FaceBook automatically resizes the uploaded picture and generates a thumbnail which in most pictures looks okay, however in some odd picture dimensions the picture preview might be messy, so its better to ship the profile pic in standard square size like 151x151/i>, 256x256, 313x313 etc.
For Twitter page Avatar the fixed picture width / height dimensions is:
73x73 pixels
In Twitter again the avatar picture should be a square like, to have twitter during upload automatically resize and make a good looking pic thumbnail. If some picture with a non square dimensions is uploaded as an Avatar for twitter account usually, twitter's pic auto resize server side program chops parts of the picture. This is not a bug but expected behaviour. In Twitter another requirement is that the uploaded avatar image does not exceed 700kb, trying to puload a picture over 700k fails.
In both Facebook and Twitter the uploaded Avatar logo should be in format JPEG, GIF or PNG .
To resize the company logo pictures for FB and Twitter, I used GIMP 's:
Image -> Scale Image
menus.
I've red some people claiming the size of the Avatar logo in Facebook could have some impact in terms of e-marketing, but I'm not sure if this is a fact or some false rumour. Anyways it is sure that a wide sky scraper like picture allows you to show more even from the profile and maybe through the picture have larger influence over the audience.
Tue Feb 7 13:13:04 EET 2012
How to print simple text pages on Linux in console with old LPR parallel port attached printer

Many younger people, might not know lpr command, historically it was heavily used for printing in the early GNU / Linux days.
lpr ships the text to be printed to the printer which is physically attached on LPT (Line Print Terminal) parallel port . Those who lived the DOS era surely know in those "ancient" days, everyone who wanted to print has to use the LPT parallel port
Present time, everyone knows there is almost no modern printer that is attached to the PC via LPT port but rather the USB port is used for communication between the printer the computer.
Nevertheless The USB printers on Linux are managed by CUPS, the lpr command is still functional shipping the text to be printed via CUPS (cups-lpd daemon).
Before cups-lpd was introduced the service managing the print jobs was lpd
Hence lpr is still functional.
To print a plain text file of one page with lpr on Linux:
linux:~# cat text-file-to-print.txt | lpr
For multiple printers to switch between multiple printers there is the PRINTER shell variable:
linux:~# export PRINTER=printer-Name-and-Type
To print a really long text file (a book in TXT) the pr command comes handy. As you can read in the cmd manual pr - converts text files for printing
Lets say you would like to have a 60 lines of text per printed page, the cmd to issue is:
linux:~# pr -l60 text-file-to-print.txt | lrp
All queued printing jobs can be reviewed with the lpq, if you have a printer attached try:
linux:~# lpq

lp is ready and printing

Rank   Owner      Job  Files                            Total Size

active hipo        1   text-file-to-print.txt                       62045 bytes
Since some years it is pretty rare for people to use lpq, since most of the parallel printing is managed by CUPS server, what most people use nowdays to check the printer queue is lpstat : e.g.
linux:~# lpstat

...
Printing status and all things related to queued jobs for printing gets logged in /var/log/lpr.log
There is even more simplistic way to print directly to the printer (if the printer is attached via a LPT port) through the kernel /dev/lp, for example:
linux:~# cat text-file-to-print.txt >> /dev/lp
For more than one printer attached the naming of /dev/lp, might probably be /dev/lp0, /dev/lp1 etc.
The lprm command also exists in case if you would like to cancel a printjob in the queue. Lets say I want to cancel a job in the queue with Job ID 5:
linux:~# lrpm 5

...
To cancel a current running job in the middle the /usr/bin/cancel command exists.
Its also interesting to be tried for Linux novices and be known just as a matter of history.
An interesting historic fact is that nowdays opening lpr, lpq or any of the other tools for simple text mode printing one sees on top of the page Apple Inc.
Lets clear this up CUPS (Common Unix Printing System) (open source) printing platform is not owned by Apple, since it is licensed under GPL2 and LGPL. The reason why the Apple Inc. shows up in man pages is because in year 2007, the founder of CUPS printing server Michael Sweet hired him to work for Apple Inc. "purchasing" the CUPS source. However as we know they did not really purchased the code, because the code was already belonging to the community (licensed under GPL2). Apple however as a marketing trick used the fact that Sweet worked for them and as probably as a matter of marketing asked him to place the Apple Inc. in the copyright source and manual areas. Obviously this is not true, since Apple Inc. does not hold copyright for CUPS as CUPS can be copied by anyone (its open source) ;)
Most of the people will never print using this commands, since printing is now ages ahead, anyways for simple people who just need to print a text with no special fonts or graphics text printing is just great.
Text printing is also a good learning experience for Linux novices and is good to be known just as a piece of UNIX history.
Mon Feb 6 15:46:45 EET 2012
The Edukators 2004 - Die fetten Jahre sind vorbei (The Fat Year are Over) movie short review

I'm in Sofia for a couple of days being a guest to a friend (thx Nomen), after my stay for a week in Bodesće (a little village nearby Bled located in Slovenia).
Yesterday on my way to sleep I wanted to see a movie and asked Nomen to recommend me a movie. His recommendation was a German-Australian movie from 2004 called The Edukators - The Fat years are Over. I had absolutely no idea what it will be like so I didn't expected much but it seems the movie plot took my attention.
The movie plot revolves around 3 avarage German persons who live in Berlin. The three youngsters has just passed the 20s, Peter and Daniel (two close friends who hold some serious anti-capitalist views and does organize house break-ups without stealing.) Peter and Daniel's rich villas break-ups aim is idealistic, they don't steal but just change the order of furniture and leave messages to make rich people aware that money doesn't make them invincible...
Jule a girlfriend of Peter, becomes friend with Daniel and they fall in love, while Peter is away for a vacation. During Peters sojourn abroad Daniel tells Jule the secret (Peter and Daniel) are the Edukators whose break-ins has just recently become known via the local Berlin newspapers.
The Edukators group leave messages to every of the "victim" homes saying - "die fetten Jahre sind vorbei" - "The fat years are over", a sentence well known from the Holy Bible's story of Joseph in Egypt.
Jule works as a waitress in a luxurious restaurant but her payment is only good to cover her very basic needs as well as pay her debt (as she is already indebted as many youngsters in Germany).
Jule is more indebted compared to many of the young germans, since by accident she hit a rich businessman's car which costs 100 000 eur. Since more than a year she is working for paying the monthly bills to cover richman's car and she succeeded to pay only €55000 ...
The Jule's "injustice" is just a part of the many injustices that are in society, but as the youngsters hold anarchistic and anti democratic views, this whole Mercedes crash accelerates as Jule and Daniel break up in the Luxurious Villa of the rich man whose car Jule is still paying.

Just like the other break ups Jule and Daniel change completely the order of the furniture and leave the threatening message die fetten Jahre sind vorbei , this time however they do even more as they decide to drop the sofa in the pool. These time Daniel and Jule's planning is more like an venture than just a well planned Edukators break-in. Suddenly the watchdogs in the yard start barking and the two youngesters has to move quickly to prevent being taken by the police patrol.
On the next day Peter is back from his vacation and Jule realizes her mobile phone is missing (probably fallen in the pool or somewhere in the richman's mansion)... On the next night Jule and Daniel, enter the house again in hope to find and cover-up the tracks they left last night and hopefully find, Jule's missing mobile.
They don't know however the richman would arrive his villa to stay for the night. As he enter his house, the businessman encounters Jule and immediately recognizes her.
Daniel being in the other floor comes down and hits the richman from behind and he enters unconscioness. As the two are panicked they call Peter and tell him about "the villa accident". Daniel arrives immediately and the three "revolutionaries" decide to take the wealthy man who as a hostage bringing him in Jule's uncle mountain hut.
The 3 anti-current system democrats and the representative of the wealthy class has to spend few weeks together in a small house each one exposing his stand point and philosophy. Little by little the 4 people become friends and a dramma between Daniel and Peter emerges as Jule is now in love with Daniel and Peter finds out ...
Hardenberg (the 3 youngesters hostage) happens to be an ex-leader of a Socialist German Student Union some 35 years go ... and tells a story how he and his union members hostiged a VIP german person in their youth days and how funny is that he is in the same situation like the person they hostiged so long time ago...
The movie is interesting as it really shows the sad reality and the falling democratic system which we have established and follow. It exposes the injustice of the system but it doesn't really offer a solution to the society and economic problems and injustices.
Sat Feb 4 11:43:33 EET 2012
How to make GNOME 3 Desktop icons to work as in GNOME 2 on Debian GNU / Linux
If you're using Debian GNU/Linux wheezy/sid, you have already figured out GNOME3 settings to start GNOME in Classic mode (like in GNOME 2), starts gnome in a mode where the desktop is not showing the usual Computer, Home, Trash etc.
Besides that in that strange back-compitability Classic GNOME mode its impossible to add any program as a link in desktop like in the good old GNOME 2.
Thanksfully this abusive behaviour of the backwards compitability mode is easily fixable by two simple steps, here they are:
1. Install gnome-tweak-tool - (Tool to adjust advanced configuration settings for GNOME
2. Start gnome-tweak tool
Press ALT+F2 and run gnome-tweak-tool or run it via xterm / gnome-terminal:
Change in Desktop, Have file manager handle the desktop the settings to ON

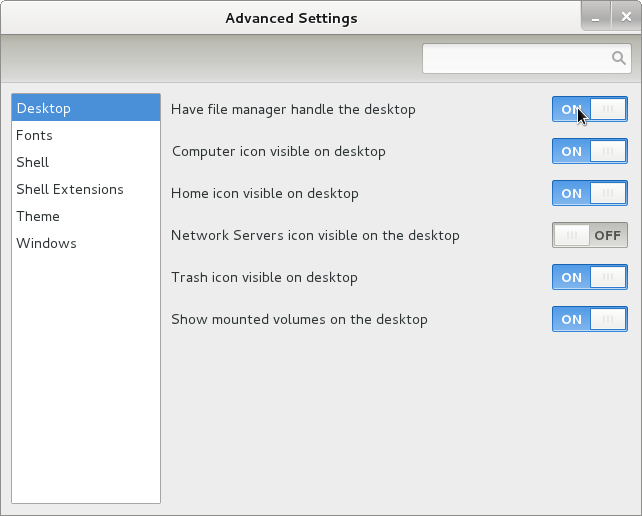
Once the Screenshot Handle Desktop is set to ON, further drag and dropping any application to the Desktop will be working.
Something really irritating is that launching applications in GNOME 3 does not work properly if you just press ALT+F2 and type in lets say gnome-terminal , to work around this weirdity you will have to install gnome-shell package.
Besides that in that strange back-compitability Classic GNOME mode its impossible to add any program as a link in desktop like in the good old GNOME 2.
Thanksfully this abusive behaviour of the backwards compitability mode is easily fixable by two simple steps, here they are:
1. Install gnome-tweak-tool - (Tool to adjust advanced configuration settings for GNOME
root@debian:~# apt-get install gnome-tweak-tool
2. Start gnome-tweak tool
Press ALT+F2 and run gnome-tweak-tool or run it via xterm / gnome-terminal:
moonman@Moon:~$ gnome-tweak-tool
Change in Desktop, Have file manager handle the desktop the settings to ON
Once the Screenshot Handle Desktop is set to ON, further drag and dropping any application to the Desktop will be working.
Something really irritating is that launching applications in GNOME 3 does not work properly if you just press ALT+F2 and type in lets say gnome-terminal , to work around this weirdity you will have to install gnome-shell package.
Fri Feb 3 13:03:01 EET 2012
TalkonAut Free Program to use Jabber protocol on Apple IPad (IBad)
I've installed Jabber as a platform for internal company communication for a company. It was a requirement for this jabber server to be accessed from a different type of computers / devices different in size, hardware and OS e.g. (Mac OS X, Windows, Linux, Ipad, mobile phones etc.)
Happily there is plenty of free software programs which allows access to jabber for free. On the major operating systems GNU / Linux, Mac OS X and Windows the client jabber accounts are working fine with the wonderful free software Pidgin - The Universal Chat Client
One of the jabber clients, however was primary had to be used on Apple's proprietary IPad / IBad as Richard Stallman likes to call it ;)
The person who had to have the Jabber protocol working on IPad program was not a proficient user and therefore I had the task to find a program to be able to talk to the Jabber protocol for him.
A quick search in Google for jabber ipad client led me to few programs said to support Jabber on Ipad :
- BeejiveIM for IPad
- Jabba
Jabba was looking quite, nice but unfortunately costs $1.99 and should be purchased in Apple's App Store and it was preferrable not to spend money on a trivial thing as a Jabber client.
I gave BeejiveIM a try but it required some very complex registration, as well as again required to be purchased (if I remember correctly), so it wasn't an option either.
Then thanksfully, I found TalknOut which is free and it is a perfect jabber client for Apple Ipad
Talkonaut is a program also supporting both Jabber (XMPP) and GTalk2VoIP, hence supporting Google Talk and MSN/Live Messanger.
It is written Java and therefore works on any device that has Java installed. Talkonaut supports the following mobile architectures:
- Apple's IPhone and Ipad
- Google Android Phones
- Many of the Nokia Symbian's S60 3rd and 5th edition "smart" phones
- Windows Mobile 5.x and 6.x
- Java J2ME based phones
Installing TalkonAut is a piece of cake from Ipod's Safari you click on the Install link and it gets installed. I will not get into details on how it is configured as this also is pretty easy.
Here is how it looks like on Ipad after configured and the user is logged in Jabber:
Something really unique and nice for the program is the way the chat dialogs gets ordered, the idea to place one person's sending on the left side and the replying one on right is innovative and something I've not seen in another chat client ;)
 Talkonaut should also support VoIP (voice conversations), between mobile users, I'm curious if somebody used the program for VoIP and can share feedback?
Thu Feb 2 18:32:37 EET 2012
Bulgaria silently signs for ACTA / Why ACTA, SOPA and PIPA are bad for our freedom
r freedom
Yesterday silently with zero publicity, Bulgarian representatives ratified the ACTA (Trade agreement for fighting counterfeit.)
The name sounds really good, but it has not much to do with what ACTA is about, when applied to digital medias and data sharing.
The ACTA legislation has been ratified in Tokyo last week, where 22 of the European Union membership countries signed in favour of these "malicious" treaty.
The basic idea of ACTA looks tempting as it gives more freedoms to copyright holders, however if you look closely you will understand actually this copyright infringement clauses are not so in favour of us the users but mostly in favour of multinational corporations.
For all those who have not heard about ACTA and SOPA in short this is anti freedom of speech treaty, which if put in action could lead to serious filtering of the internet.
The ACTA 's controversial treaty has already raised an outcry from dozens of computer literated individuals who daily use the internet. Unfortunately, ACTA is less known among non-tech guys ... and hence most people on the internet have no about its existence.
If ACTA is ratified and set to be valid as a legislation to Bulgaria, this could lead to total Internet censorship in BG (more or less like it is in china now).
ACTA legislation will make sharing files via torrents and other P2P community file sharing networks a criminal activity.
Another effect of ACTA is that practically free software which reads a proprietary formats like DVD becomes illegal in Europe (like it is currently in America) and I will become guilty for just reading the non-free format..
As a result of ACTA our ISP (Internet Service Providers) will be forced to log and keep all traffic flowing through their (Routering servers). Filters on a local ISP level that will be censoring free speech could also become totally lawful...
Already there are plenty of ANTI-ACTA and ANTI-SOPA propaganda website which are trying to bring some more awareness to the public for the issue... Once an individual is suspected, to fraudulent activity or anything that breaks what is in ACTA is he is presumed to be guilty of crome ...
Just watch the two videos below and you will see how terrible the consequence could be if this legislation is integrated with todays Bulgarian government laws. If you're hearing for ACTA for a first time and you live in a country which has still not rafitied ACTA as a local country legislation, make sure you spread the word and let all your friends about the bad impact of this anti-human legislation. We have to really stand up and protest to retain our digital freedom !
The Internet can be censored if Protect IP ACT (PIPA) and Stop Online Piracy Act (SOPA) are put in action !
ANTI-ACTA - Hmmm But What can you do??