April 2012 Archives
Mon Apr 30 13:16:32 EEST 2012
How to make screenshot in /dev/tty console on GNU / Linux - Taking picture JPEG / PNG snapshot of text console in systems without graphical environment
I'm used to making picture screenshots in GNOME desktop environment. As I've said in my prior posts, I'm starting to return to my old habits of using console ttys for regular daily jobs in order to increase my work efficiency. In that manner of thoughts sometimes I need to take a screenshot of what I'm seeing in my physical (TTY consoles) to be able to later reuse this. I did some experimenting and this is how this article got born.
In this post, I will shortly explain how a picture of a command running in console or terminal in GNU / Linux can be made
Before proceeding to the core of the article, I will say few words on ttys as I believe they might be helpful someone.
The abbreviation of tty comes after TeleTYpewritter phrase and is dating back somewhere near the 1960s. The TTY was invented to help people with impaired eyesight or hearing to use a telephone like typing interface.
In Unix / Linux / BSD ttys are the physical consoles, where one logs in (typing in his user/password). There are physical ttys and virtual vtys in today *nixes. Today ttys, are used everywhere in a modern Unixes or Unix like operating system with or without graphical environments.
Various Linux distributions have different number of physical consoles (TTYs) (terminals connected to standard output) and this depends mostly on the distro major contributors, developers or surrounding OS community philosophy.
Most modern Linux distributions have at least 5 to 7 physical ttys. Some Linux distributions like Debian for instance as of time of writting this, had 7 active by default physical consoles.
Adding 3 more ttys in Debian / Ubuntu Linux is done by adding the following lines in /etc/inittab:
7:23:respawn:/sbin/getty 38400 tty7
8:23:respawn:/sbin/getty 38400 tty8
9:23:respawn:/sbin/getty 38400 tty9
On some Linux distributions like Fedora version 9 and newer ones, new ttys can no longer be added via /etc/inittab,as the RedHat guys changed it for some weird reason, but I guess this is too broad issue to discuss ....
In graphical environments ttys are called methaphorically "virtual". For instance in gnome-terminal or while connecting to a remote SSH server, a common tty naming would be /dev/pts/8 etc.
tty command in Linux and BSDs can be used to learn which tty, one is operating in.
Here is output from my tty command, issued on 3rd TTY (ALT+F3) on my notebook:
noah:~# tty
/dev/tty3
A tty cmd output from mlterm GUI terminal is like so:
hipo@noah:~$ tty /dev/pts/9
Now as mentioned few basic things on ttys I will proceed further to explain how I managed to:
a) Take screenshot of a plain text tty screen into .txt file format
b) take a (picture) JPG / PNG screenshot of my Linux TTY consoles content
1. Take screenshot of plain text tty screen into a plain (ASCII) .txt file:
To take a screenshot of tty1, tty2 and tty3 text consoles in a txt plain text format, cat + a standard UNIX redirect is all necessery:
noah:~# cat /dev/vcs1 > /home/hipo/tty1_text_screenshot.txt
noah:~# cat /dev/vcs2 > /home/hipo/tty2_text_screenshot.txt
noah:~# cat /dev/vcs3 > /home/hipo/tty3_text_screenshot.txt
This will dump the text content of the console into the respective files, if however you try to dump an ncurses library like text interactive interfaces you will end up with a bunch of unreadable mess.
In order to read the produced text 'shots' onwards less command can be used ...
noah:~# less /home/hipo/tty1_text_screenshot.txt
noah:~# less /home/hipo/tty2_text_screenshot.txt
noah:~# less /home/hipo/tty3_text_screenshot.txt
2. Take picture JPG / PNG snapshot of Linux TTY console content
To take a screenshot of my notebook tty consoles I had to first install a "third party program" snapscreenshot . There is no deb / rpm package available as of time of writting this post for the 4 major desktop linux distributions Ubuntu, Debian, Fedora and Slackware.
Hence to install snapscreenshot,I had to manually download the latest program tar ball source and compile e.g.:
noah:~# cd /usr/local/src
noah:/usr/local/src# wget -q http://bisqwit.iki.fi/src/arch/snapscreenshot-1.0.14.3.tar.bz2
noah:/usr/local/src# tar -jxvvvf snapscreenshot-1.0.14.3.tar.bz2
...
noah:/usr/local/src# cd snapscreenshot-1.0.14.3
noah:/usr/local/src/snapscreenshot-1.0.14# ./configure && make && make install
Configuring...
Fine. Done. make.
make: Nothing to be done for `all'.
if [ ! "/usr/local/bin" = "" ]; then mkdir --parents /usr/local/bin 2>/dev/null; mkdir /usr/local/bin 2>/dev/null; \
for s in snapscreenshot ""; do if [ ! "$s" = "" ]; then \
install -c -s -o bin -g bin -m 755 "$s" /usr/local/bin/"$s";fi;\
done; \
fi; \
if [ ! "/usr/local/man" = "" ]; then mkdir --parents /usr/local/man 2>/dev/null; mkdir /usr/local/man 2>/dev/null; \
for s in snapscreenshot.1 ""; do if [ ! "$s" = "" ]; then \
install -m 644 "$s" /usr/local/man/man"`echo "$s"|sed 's/.*\.//'`"/"$s";fi;\
done; \
fi
By default snapscreenshot command is made to take screenshot in a tga image format, this format is readable by most picture viewing programs available today, however it is not too common and not so standartized for the web as the JPEG and PNG.
Therefore to make the text console tty snapshot taken in PNG or JPEG one needs to use ImageMagick's convert tool. The convert example is also shown in snapscreenshot manual page Example section.
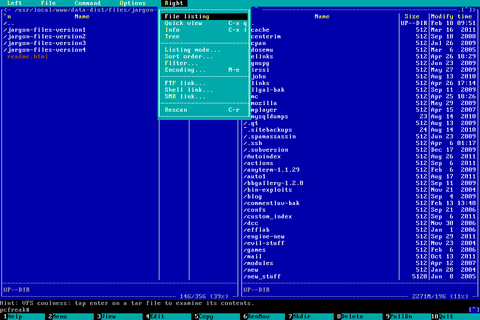
To take a .png image format screenshot of lets say Midnight Commander interactive console file manager running in console tty1, I used the command:
noah:/home/hipo# snapscreenshot -c1 -x1 > ~/console-screenshot.tga && convert ~/console-screenshot.tga console-screenshot.png
Note that you need to have read/write permissions to the /dev/vcs* otherwise the snapscreenshot will be unable to read the tty and produ ce an error:
hipo@noah:~/Desktop$ snapscreenshot -c2 -x1 > snap.tga && convert snap.tga snap.png Geometry will be: 1x2 Reading font... /dev/console: Permission denied
To take simultaneous picture screenshot of everything contained in all text consoles, ranging from tty1 to tty5, issue:
noah:/home/hipo# snapscreenshot -c5 -x1 > ~/console-screenshot.tga && convert ~/console-screenshot.tga console-screenshot.png
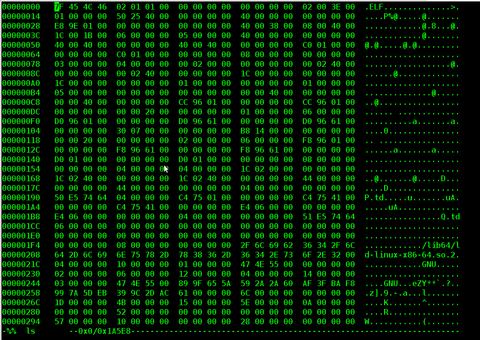
Here is a resized 480x320 pixels version of the original screenshot the command produces:
Storing a picture shot of the text (console) screen in JPEG (JPG) format is done analogously just the convert command output extension has to be changed to jpeg i.e.:
noah:/home/hipo# snapscreenshot -c5 -x1 > ~/console-screenshot.tga && convert ~/console-screenshot.tga console-screenshot.jpeg
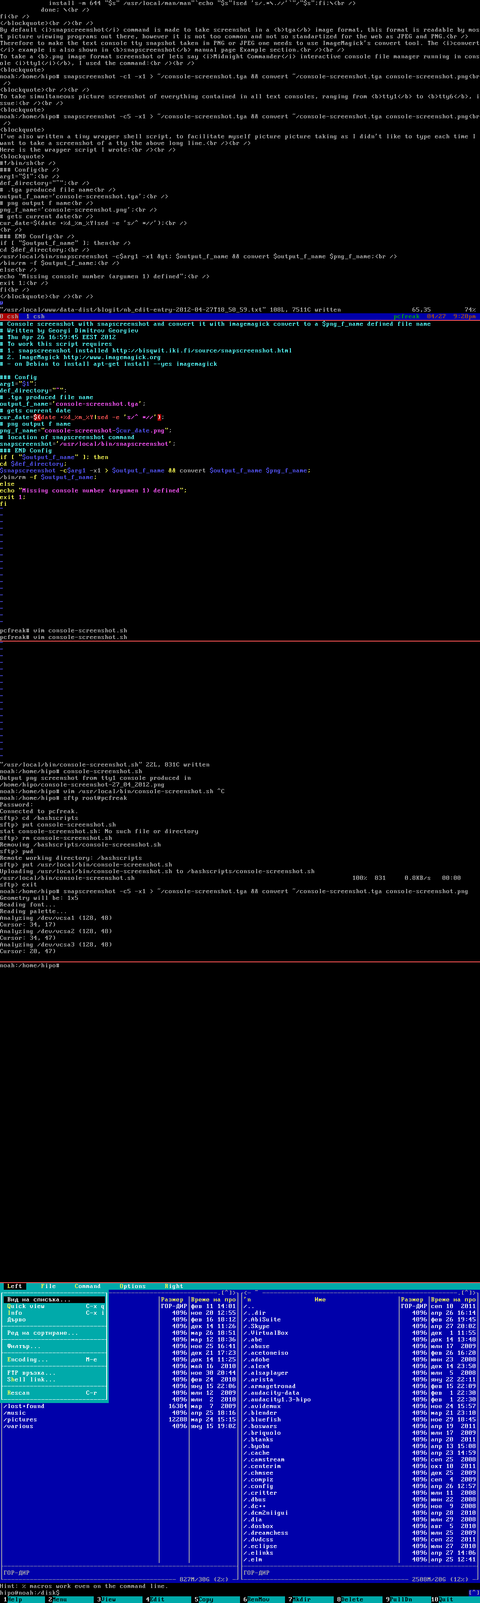
I've also written a tiny wrapper shell script, to facilitate myself picture picture taking as I didn't like to type each time I want to take a screenshot of a tty the above long line.
Here is the wrapper script I wrote:
#!/bin/sh
### Config
# .tga produced file name
output_f_name='console-screenshot.tga';
# gets current date
cur_date=$(date +%d_%m_%Y|sed -e 's/^ *//');
# png output f name
png_f_name="console-screenshot-$cur_date.png";
### END Config
snapscreenshot -c$arg1 -x1 > $output_f_name && convert $output_f_name $png_f_name;
echo "Output png screenshot from tty1 console produced in";
echo "$PWD/$png_f_name";
/bin/rm -f $output_f_name;
You can also download my console-screenshot.sh snapscreenshot wrapper script here
The script is quite simplistic to use, it takes just one argument which is the number of the tty you would like to screenshot.
To use my script download it in /usr/local/bin and set it executable flag:
noah:~# cd /usr/local/bin
noah:/usr/local/bin# wget -q http://pc-freak.net/~bshscr/console-screenshot.sh
noah:/usr/local/bin# chmod +x console-screenshot.sh
Onwards to use the script to snapshot console terminal (tty1) type:
noan:~# console-screenshot.sh
I've made also mirror of latest version of snapscreenshot-1.0.14.3.tar.bz2 here just in case this nice little program disappears from the net in future times.
Sat Apr 28 13:33:56 EEST 2012
How to solve "Incorrect key file for table '/tmp/#sql_9315.MYI'; try to repair it" mysql start up error
When a server hard disk scape gets filled its common that Apache returns empty (no content) pages...
This just happened in one server I administer. To restore the normal server operation I freed some space by deleting old obsolete backups.
Actually the whole reasons for this mess was an enormous backup files, which on the last monthly backup overfilled the disk empty space.
Though, I freed about 400GB of space on the the root filesystem and on a first glimpse the system had plenty of free hard drive space, still restarting the MySQL server refused to start up properly and spit error:
Besides that there have been corrupted (crashed) tables, which reported next to above error.
Checking in /tmp/#sql_9315.MYI, I couldn't see any MYI - (MyISAM) format file. A quick google look up revealed that this error is caused by not enough disk space. This was puzzling as I can see both /var and / partitions had plenty of space so this shouldn't be a problem. Also manally creating the file /tmp/#sql_9315.MYI with:
Didn't help it, though the file created fine. Anyways a bit of a closer examination I've noticed a /tmp filesystem mounted besides with the other file system mounts ????
You can guess my great amazement to find this 1 Megabyte only /tmp filesystem hanging on the server mounted on the server.
I didn't mounted this 1 Megabyte filesystem, so it was either an intruder or some kind of "weird" bug...
I digged in Googling to see, if I can find more on the error and found actually the whole mess with this 1 mb mounted /tmp partition is caused by, just recently introduced Debian init script /etc/init.d/mountoverflowtmp.
It seems this script was introduced in Debian newer releases. mountoverflowtmp is some kind of emergency script, which is triggered in case if the root filesystem/ space gets filled.
The script has only two options:
Once started what it does it remounts the /tmp to be 1 megabyte in size and stops its execution like it never run. Well maybe, the developers had something in mind with introducing this script I will not argue. What I should complain though is the script design is completely broken. Once the script gets "activated" and does its job. This 1MB mount stays like this, even if hard disk space is freed on the root partition - / ....
Hence to cope with this unhandy situation, once I had freed disk space on the root partition for some reason mountoverflowtmp stop option was not working,
So I had to initiate "hard" unmount:
Also as I had a bunch of crashed tables I had to also issue on each of the broken tables reported on /etc/init.d/mysql start start-up.
Then to finally solve the stupid Incorrect key file for table '/tmp/#sql_XXYYZZ33444.MYI'; try to repair it error, I had to restart once again the SQL server:
Tadadadadam!, SQL now loads and works back as before!
This just happened in one server I administer. To restore the normal server operation I freed some space by deleting old obsolete backups.
Actually the whole reasons for this mess was an enormous backup files, which on the last monthly backup overfilled the disk empty space.
Though, I freed about 400GB of space on the the root filesystem and on a first glimpse the system had plenty of free hard drive space, still restarting the MySQL server refused to start up properly and spit error:
Incorrect key file for table '/tmp/#sql_9315.MYI'; try to repair it" mysql start up error
Besides that there have been corrupted (crashed) tables, which reported next to above error.
Checking in /tmp/#sql_9315.MYI, I couldn't see any MYI - (MyISAM) format file. A quick google look up revealed that this error is caused by not enough disk space. This was puzzling as I can see both /var and / partitions had plenty of space so this shouldn't be a problem. Also manally creating the file /tmp/#sql_9315.MYI with:
server:~# touch /tmp/#sql_9315.MYI
Didn't help it, though the file created fine. Anyways a bit of a closer examination I've noticed a /tmp filesystem mounted besides with the other file system mounts ????
You can guess my great amazement to find this 1 Megabyte only /tmp filesystem hanging on the server mounted on the server.
I didn't mounted this 1 Megabyte filesystem, so it was either an intruder or some kind of "weird" bug...
I digged in Googling to see, if I can find more on the error and found actually the whole mess with this 1 mb mounted /tmp partition is caused by, just recently introduced Debian init script /etc/init.d/mountoverflowtmp.
It seems this script was introduced in Debian newer releases. mountoverflowtmp is some kind of emergency script, which is triggered in case if the root filesystem/ space gets filled.
The script has only two options:
# /etc/init.d/mountoverflowtmp

 Usage: mountoverflowtmp [start|stop]
Once started what it does it remounts the /tmp to be 1 megabyte in size and stops its execution like it never run. Well maybe, the developers had something in mind with introducing this script I will not argue. What I should complain though is the script design is completely broken. Once the script gets "activated" and does its job. This 1MB mount stays like this, even if hard disk space is freed on the root partition - / ....
Hence to cope with this unhandy situation, once I had freed disk space on the root partition for some reason mountoverflowtmp stop option was not working,
So I had to initiate "hard" unmount:
server:~# mount -l /tmp
Also as I had a bunch of crashed tables I had to also issue on each of the broken tables reported on /etc/init.d/mysql start start-up.
server:~# mysql -u root -p

mysql> use Database_Name;

mysql> repair table Table_Name extended;

....
Then to finally solve the stupid Incorrect key file for table '/tmp/#sql_XXYYZZ33444.MYI'; try to repair it error, I had to restart once again the SQL server:
Stopping MySQL database server: mysqld.

Starting MySQL database server: mysqld.

Checking for corrupt, not cleanly closed and upgrade needing tables..

root@server:/etc/init.d#
Tadadadadam!, SQL now loads and works back as before!
Sat Apr 28 12:31:09 EEST 2012
How to search text strings only in hidden files dot (.) files within a directory on Linux and FreeBSD
If there is necessity to look for a string in all hidden files with all sub-level subdirectories (be aware this will be time consuming and CPU stressing) use:
hipo@noah:~$ grep -rli 'PATH' .*
./.gftp/gftprc
./.gftp/cache/cache.OOqZVP
....
Sometimes its necessery to only grep for variables within the first-level directories (lets say you would like to grep a 'PATH' variable set, string within the $HOME directory, the command is:
hipo@noah:~$ grep PATH .[!.]* .profile:PATH=/bin:/usr/bin/:${PATH} .profile:export PATH .profile:# set PATH so it includes user's private bin if it exists .profile: PATH="$HOME/bin:$PATH" .profile.language-env-bak:# set PATH so it includes user's private bin if it exists .profile.language-env-bak: PATH="$HOME/bin:$PATH" .viminfo:?/PATH .xcyrillic: XNLSPATH=/usr/X11R6/lib/X11/nls .xcyrillic: export XNLSPATH
The regular expression .[!.]*, means exclude any file or directory name starting with '..', e.g. match only .* files
Note that to use the grep PATH .[!.]* on FreeBSD you will have to use this regular expression in bash shell, the default BSD csh or tsch shells will not recognize the regular expression, e.g.:
grep PATH '.[!.]*'
grep: .[!.]*: No such file or directory
Hence on BSD, if you need to look up for a string within the home directory, hidden files: .profile .bashrc .bash_profile .cshrc run it under bash shell:
freebsd# /usr/local/bin/bash [root@freebsd:/home/hipo]# grep PATH .[!.]* .bash_profile:# set PATH so it includes user's private bin if it exists .bash_profile:# PATH=~/bin:"${PATH}" .bash_profile:# do the same with MANPATH .bash_profile:# MANPATH=~/man:"${MANPATH}" .bash_profile.bulgarian-env-bak:# set PATH so it includes user's private bin if it exists .bash_profile.bulgarian-env-bak:# PATH=~/bin:"${PATH}" .bash_profile.bulgarian-env-bak:# do the same with MANPATH .bash_profile.bulgarian-env-bak:# MANPATH=~/man:"${MANPATH}" .profile:PATH=/sbin:/bin:/usr/sbin:/usr/bin:/usr/games:/usr/local/sbin:/usr/local/bin:$HOME/bin; export PATH .shrc:# CDPATH=.:$HOME .xcyrillic:PATH=/usr/local/bin/../bin/../bin:${PATH} .xcyrillic:export PATH .xcyrillic: { XNLSPATH=/usr/X11R6/lib/X11/nls; export XNLSPATH; } .zcompdump:'-value-,*PATH,-default-' '_dir_list' .zcompdump:'-value-,RUBY(LIB|OPT|PATH),-default-' '_ruby' .zshrc:export MANPATH
Another easier to remember, alternative grep cmd is:
hipo@noah:~$ grep PATH .*
.profile:PATH=/bin:/usr/bin/:${PATH}
.profile:export PATH
.profile:# set PATH so it includes user's private bin if it exists
.profile: PATH="$HOME/bin:$PATH"
....
Note that grep 'string' .* is a bit different in meaning, as it will not prevent grep to match filenames with names ..filename1, ..filename2 etc.
Though grep 'string' .* will work note that it will sometimes output some unwanted matches if filenames with double dot in the beginning of file name are there ...
That's all folks :)
Fri Apr 27 12:43:25 EEST 2012
Text mode (console) browsing with tabs with elinks text browsers - (lynx, elinks, links and w3m) useful HTTP debugging browsers for Linux and FreeBSD servers
The last days, I'm starting to think the GUI use is making me brainless so I'm getting back to my old habits of using console.
I still remember with a grain of nostalgy how much more efficient I used to be when the way to interact with my computer was primary in text mode console.
Actually, I'm starting to get this idea the more new a software is the more inefficient it makes your use of computer, not to mention the hardware resources required by newer software is constantly increasing.
With this said, I started occasionally browsing again like in the old days by using links text browser.
In the old days I mostly used lynx and its more advanced "brother" text browser links.
The main difference between lynx and links is that lynx does not have any support for the terrible "javascript", whether links supports most of the Javascript ver 2.
Also links and has a midnight commander like pull down menus on the screen top, - handy for people who prefer some more interactivity.
In the past I remember I used also to browse graphically in normal consoles (ttys) with a hacked version of links calledTThere is also a variation of links - xlinks suitable for people who would like to have graphical browser in console (ttys).
I used xlinks quite heavily in the past, when I have slower computer P166Mhz with 64MB of memory 2.5 GB HDD (What a times boy what a times) .
Maybe when I have time I will install it on my PC and start using it again like in the old days to boost my computer use efficiency...
I remember the only major xlinks downside was it doesn't included support for Adobe flash (though this is due to the bad non-free software nature of Adobe lack of proper support for free software and not a failure of xlinks developers. Anyways for me this wasn't a big trouble since, ex Macromedia (Adobe) Flash support is not something essential for most of my work...
links2 is actually the naming of links version 2. elinks emerged later (if I remember correctly, as fork project of links).
elinks difference with links constitutes in this it supports tabbed browsing as well as colors (links browser displays results monochrome).
Having a tabbed browsing support in tty console is a great thing...
I personally belive text browsing if properly used can in many ways outbeat, graphic browsing in terms of performance and time spend to obtain data. I'm convinced text browsing is superior for two reasons:
1. with text there is way less elements to obstruct your attention.
- No graphical annoying flash banners, no annoying taking the attention pictures
2. Navigating in web pages using the keyboard is more efficient than mouse
- Using keyboard shorcuts is always quicker than mouse, generally keboard has always been a quicker way to access computer commands.
Another reason to use text browsing is, it is mostly the text part of a page that matters, most of the pages that provide images to better explain a topic are bloated (this is my personal view though, i'm sure designer guys will argue me :D).
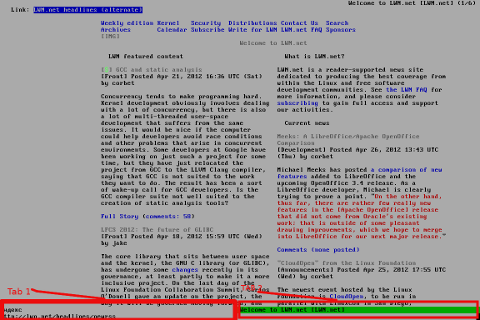
Here is a screenshot of a my links text browser in action, I'm sorry the image is a bit unreadable, but after taking a screenshot of the console and resizing it with GIMP this is what I got ...
For all those new to Linux who didn't tried text browsing yet and for those interested in computer history, I suggest you install and give a try to following text browsers:
By the way having the 4 text browsers is very useful for debugging purposes for system administrators too, so in any case I think this 4 web browsers are absoutely required software for newly installed GNU / Linux or BSD* based servers.
For Debian and the derivatives Linux distributions, the 4 browsers are available as deb packages, so install them with following apt 1 liner:
FreeBSD users can install the browsers using, cmd:
In links using the tabs functionality appeared, somewhere near the 2001 or 2000 (at least that was the first time I saw links with tabbed browsing enabled). My first time to saw links support opening multiple pages within the same screen under tabs was on Redhat Linux 9
Opening multiple pages in tabs in the text browser is done by pressing the t key and typing in the desired URL to open isnide.
For more than 2 tabs, again t has to be pressed and same procedure goes on and on.
It was pretty hard for me to figure out how I can do a text browsing with tabs, though I found a way to open new tabs it took me some 10 minutes in pondering how to switch between the new opened links browser tabs.
Hence, I thought it would be helpful to mention here how tabs can be switched in links text browser. Actually it turned it is pretty easy to Switch tabs tabs back and foward.
1 tab to move backwards is done with < (key), wheter switching one tab forward is done with the > key.
On UK and US qwerty keyboards alignment the movement a tab backward and forward is done with holding shift and pressing < onwards holding both keys simultaneously and analogously with pressing shift + >
I still remember with a grain of nostalgy how much more efficient I used to be when the way to interact with my computer was primary in text mode console.
Actually, I'm starting to get this idea the more new a software is the more inefficient it makes your use of computer, not to mention the hardware resources required by newer software is constantly increasing.
With this said, I started occasionally browsing again like in the old days by using links text browser.
In the old days I mostly used lynx and its more advanced "brother" text browser links.
The main difference between lynx and links is that lynx does not have any support for the terrible "javascript", whether links supports most of the Javascript ver 2.
Also links and has a midnight commander like pull down menus on the screen top, - handy for people who prefer some more interactivity.
In the past I remember I used also to browse graphically in normal consoles (ttys) with a hacked version of links calledTThere is also a variation of links - xlinks suitable for people who would like to have graphical browser in console (ttys).
I used xlinks quite heavily in the past, when I have slower computer P166Mhz with 64MB of memory 2.5 GB HDD (What a times boy what a times) .
Maybe when I have time I will install it on my PC and start using it again like in the old days to boost my computer use efficiency...
I remember the only major xlinks downside was it doesn't included support for Adobe flash (though this is due to the bad non-free software nature of Adobe lack of proper support for free software and not a failure of xlinks developers. Anyways for me this wasn't a big trouble since, ex Macromedia (Adobe) Flash support is not something essential for most of my work...
links2 is actually the naming of links version 2. elinks emerged later (if I remember correctly, as fork project of links).
elinks difference with links constitutes in this it supports tabbed browsing as well as colors (links browser displays results monochrome).
Having a tabbed browsing support in tty console is a great thing...
I personally belive text browsing if properly used can in many ways outbeat, graphic browsing in terms of performance and time spend to obtain data. I'm convinced text browsing is superior for two reasons:
1. with text there is way less elements to obstruct your attention.
- No graphical annoying flash banners, no annoying taking the attention pictures
2. Navigating in web pages using the keyboard is more efficient than mouse
- Using keyboard shorcuts is always quicker than mouse, generally keboard has always been a quicker way to access computer commands.
Another reason to use text browsing is, it is mostly the text part of a page that matters, most of the pages that provide images to better explain a topic are bloated (this is my personal view though, i'm sure designer guys will argue me :D).
Here is a screenshot of a my links text browser in action, I'm sorry the image is a bit unreadable, but after taking a screenshot of the console and resizing it with GIMP this is what I got ...
For all those new to Linux who didn't tried text browsing yet and for those interested in computer history, I suggest you install and give a try to following text browsers:
- lynx
- links
- elinks (Supports colors and tabs)
- w3m
(Supports colorful text console text browsing)


By the way having the 4 text browsers is very useful for debugging purposes for system administrators too, so in any case I think this 4 web browsers are absoutely required software for newly installed GNU / Linux or BSD* based servers.
For Debian and the derivatives Linux distributions, the 4 browsers are available as deb packages, so install them with following apt 1 liner:
debian:~# apt-get --yes install w3m elinks links lynx
....
FreeBSD users can install the browsers using, cmd:
freebsd# cd /usr/ports/www/w3m freebsd# make install clean .... freebsd# cd /usr/ports/www/elinks freebsd# make install clean .... freebsd# cd /usr/ports/www/links freebsd# make install clean .... freebsd# cd /usr/ports/www/lynx freebsd# make install clean ....
In links using the tabs functionality appeared, somewhere near the 2001 or 2000 (at least that was the first time I saw links with tabbed browsing enabled). My first time to saw links support opening multiple pages within the same screen under tabs was on Redhat Linux 9
Opening multiple pages in tabs in the text browser is done by pressing the t key and typing in the desired URL to open isnide.
For more than 2 tabs, again t has to be pressed and same procedure goes on and on.
It was pretty hard for me to figure out how I can do a text browsing with tabs, though I found a way to open new tabs it took me some 10 minutes in pondering how to switch between the new opened links browser tabs.
Hence, I thought it would be helpful to mention here how tabs can be switched in links text browser. Actually it turned it is pretty easy to Switch tabs tabs back and foward.
1 tab to move backwards is done with < (key), wheter switching one tab forward is done with the > key.
On UK and US qwerty keyboards alignment the movement a tab backward and forward is done with holding shift and pressing < onwards holding both keys simultaneously and analogously with pressing shift + >
Thu Apr 26 12:39:55 EEST 2012
Editting binary files in console and GUI on FreeBSD and Linux
I've recently wanted to edit one binary file because there was compiled in the binary a text string with a word I didn't liked and therefore I wanted to delete. I know I can dig in the source of the proggie with grep and directly substitute my "unwatned text" there but I wanted to experiment, and see what kind of hex binary text editors are for Free OSes.
All those who lived the DOS OS computer era should certainly remember the DOS hex editors was very enjoyable. It was not rare case, where in this good old days, one could simply use the hex editor to "hack" the game and add extra player lives or modify some vital game parameter like put himself first in the top scores list. I even remember some DOS programs and games was possible to be cracked with a text editor ... Well it was times, now back to current situation as a Free Software user for the last 12 years it was interesting to see what is the DOS hexeditor like alternatives for FreeBSD and Linux and hence in this article I will present my findings:
A quick search in FreeBSD ports tree and Debian installable packages list, I've found a number of programs allowing one to edit in console and GUI binary files.
Here is a list of the hex editors I will in short review in this article:
1. hexedit on Linux and BSD - basic hex editor
I've used hexedit already on Linux so I've used it some long time ago.
My previou experience in using hexedit is not too pinky, I found it difficult to use on Redhat and Debian Linux back in the day. hexedit is definitely not a choice of people who are not "initiated" with hex editting.
Anyways if you want to give it a try you can install it on FreeBSD with:
On Debian the hexedit, install package is named the same so installation is with apt:
2. Hex editting with chexedit
I've installed chexedit the usual way from ports:
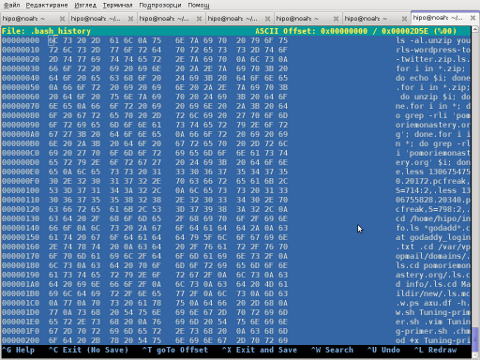
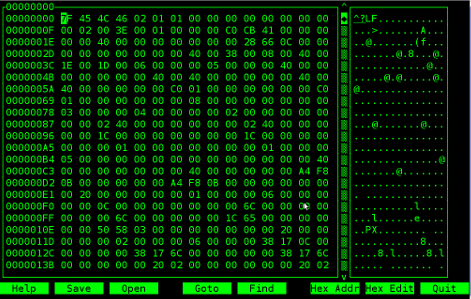
chexedit is using the ncurses text console library, so the interface is very similar to midnight commander (mc) as you see from below's screenshot:
Editting the binary compiled in string was an easy task with chexedit as most of the commands are clearly visible, anyways changing a certain text string contained within the binary file with some other is not easy with chexedit as you need to know the corresponding binary binary value representing each text string character.
I'm not a low level programmer, so I don't know the binary values of each keyboard character and hence my competence came to the point where I can substitute the text string I wanted with some unreadable characters by simply filling all my text string with AA AA AA AA values...
chexedit on Debian is packaged under a deb ncurses-hexedit. Hence to install it on Deb run:
Further on the binary to run chexedit on binary contained within ncurses-hexedit is:
3. Hex Editting on BSD and Linux with hte
Just after trying out chexedit, I've found about the existence of one even more sophisticated hexeditor console program available across both FreeBSD and Linux.
The program is called hte (sounds to me a bit like the Indian word for Elephant "Hatti" :))
hte is installable on Debian with cmd:
On FreeBSD the port name is identical, so to install it I execed:
hte is started on Debian Linux (and presumably other Linux distros) with:
On FreeBSD you need to run it with ht command:
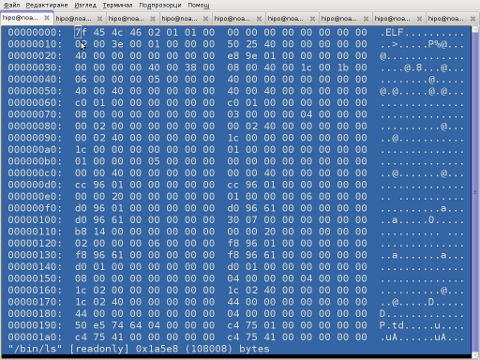
You see how hte looks like in below screenshot:

ht has the look & feel like midnight commander and I found it easier to use than chexedit and hexeditor
4. hexer VI like interface for Linux
As I was looking through the available packages ready to install, I've tried hexer
It was interesting to find out hexer was written by a Bulgarian fellow Petar Penchev :)
(Proud to be Bulgarian)
http://people.freebsd.org/~roam/ - Petar Penchev has his own page on FreeBSD.org
As a vim user I really liked the idea, the only thing I didn't liked is there is no easy way to just substitute a string within the binary with another string.
5. hexcurse another ncurses library based hex editor
On Deb install and run via:
hexcurse is also available on FreeBSD to install it use cmd:
To access the editor functions press CTRL+the first letter of the word in the bottom menu, CTRL+H, CTRL+S etc.
Something I disliked about it is the program search is always in hex, so I cannot look for a text string within the binaries with it.
6. ghex - Editting binary files in graphical environment
If you're running a graphical environment, take a look at ghex. ghex is a gnome (graphical hex) editor. Installing ghex on Debian is with:
To run ghex from terminal type:
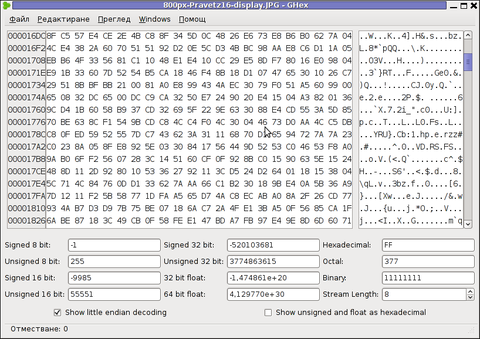
To install ghex on FreeBSD (and I assume other BSDs), install via port:
Gnome hex editor have plenty of tools, useful for developers to debug binary files.
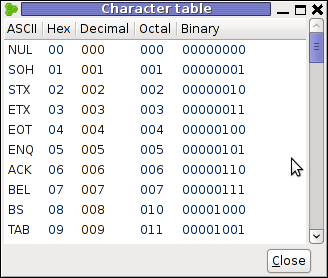
Some nice tools one can find are under the the menus:
This will show a complete list of each keyboard sent character in ASCII, Hex, Decimal, Octal and Binary
Another useful embedded tool in ghex is:
Note that if you want to use the Type Convertion Dialog tool to find the representing binary values of a text string you will have to type in the letters one by one and save the output within a text file and later you can go and use the same editor to edit the text string within the binary file you like.
I'm not a programmer but surely for programmers or people who want to learn some binary counting, this 2 ghex edmebbed tools are surely valuable.
To conclude even though there are plenty of softwares for hex editting in Linux and BSD, none of them is not so easy to use as the old DOS hexdedit tool, maybe it will be a nice idea if someone actually rewrites the DOS tool and they package it for various free operating systems, I'm sure many people will find it helpful to have a 1:1 equivalent to the DOS tool.
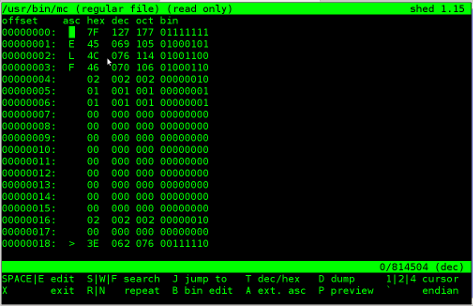
7. Shed pico like interfaced hex editor
For people, who use pico / nano as a default text editor in Linux shed will probably be the editor of choice as it follows the command shortcuts of pico On Deb based distros to install it run:
Shed has no BSD port as of time of writting. 8. Okteta a KDE GUI hex editor
For KDE users, I found a program called okteta. It is available for Deb based Linuxes as deb to install it:
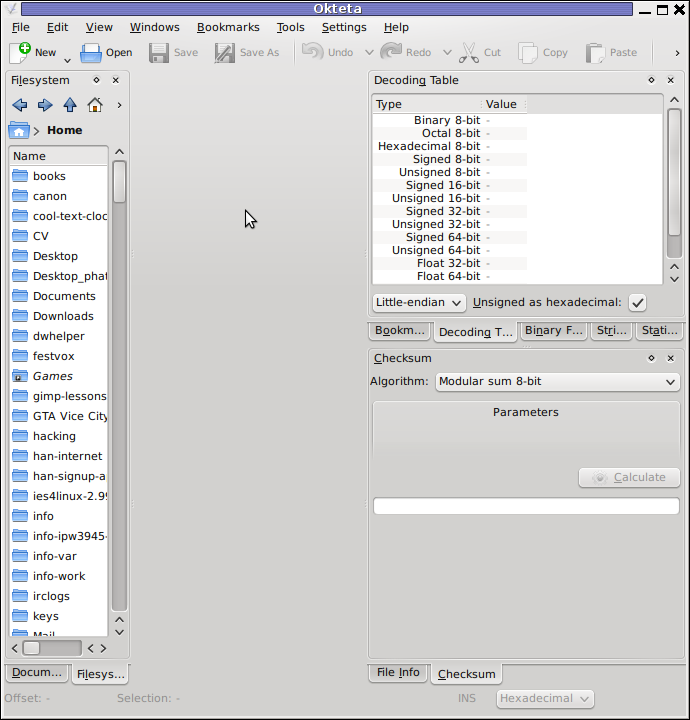
As of time of writting this article there is no okteta port for BSDs.
Okteta has plenty of functions and even has more of a functions than ghexedit. Something distinctive for it is it supports opening multiple files in tabs.
9. lfhex a large file text editor
lfhex is said to be a large (binary) file text editor, I have not tested it myself but just run it to see how it looks like. I don't have a need to edit large binary files too, but I guess there are people with such requirements too :)
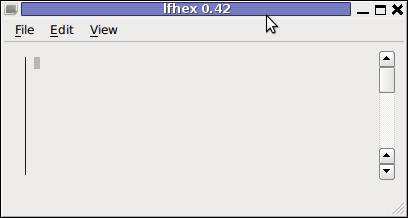
To install lfhex on Debian:
lfhex has also a FreeBSD port installable via:
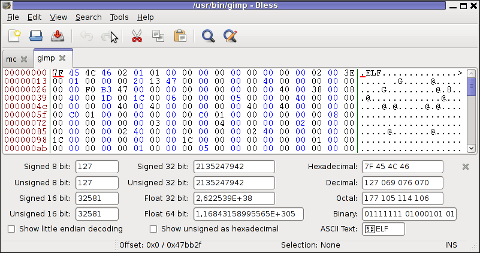
10. Bless a GUI tool for editting large hex (binary) files
Here is the description directly taken from the BSD port /usr/ports/editors/bless
To install and use ot on deb based Linuxes:
On BSD installation is again from port:
Something that makes bless, maybe more desirable choice for GUI users than ghex is its availability of tabs. Opening multiple binaries in tabs will be useful only to few heavy debuggers.
11. Ghextris - an ultra hard hacker tetris game :)
For absolute, hacker / (geeks), there is a tetris game called ghextris. The game is the hardest tetris game I ever played in my life. It requires more than regular IQ and a lot of practice if you want to become really good in this game.
To enjoy it:

Unfortunately there is no native port of ghextris for BSD (yet). Anyhow, it can be probably run using the Linux emulation or even compiled from source.
Well that's all I found for hexedit-ing, I'll be happy to hear if someone can give me some feedback on his favourite editor.
All those who lived the DOS OS computer era should certainly remember the DOS hex editors was very enjoyable. It was not rare case, where in this good old days, one could simply use the hex editor to "hack" the game and add extra player lives or modify some vital game parameter like put himself first in the top scores list. I even remember some DOS programs and games was possible to be cracked with a text editor ... Well it was times, now back to current situation as a Free Software user for the last 12 years it was interesting to see what is the DOS hexeditor like alternatives for FreeBSD and Linux and hence in this article I will present my findings:
A quick search in FreeBSD ports tree and Debian installable packages list, I've found a number of programs allowing one to edit in console and GUI binary files.
Here is a list of the hex editors I will in short review in this article:
- hexedit
- dhex
- chexedit
- hte
- hexer
- hexcurse
- ghex
- shed
- okteta
- bless
- lfhex
1. hexedit on Linux and BSD - basic hex editor
I've used hexedit already on Linux so I've used it some long time ago.
My previou experience in using hexedit is not too pinky, I found it difficult to use on Redhat and Debian Linux back in the day. hexedit is definitely not a choice of people who are not "initiated" with hex editting.
Anyways if you want to give it a try you can install it on FreeBSD with:
freebsd# cd /usr/ports/editors/hexedit
freebsd# make install clean
...
On Debian the hexedit, install package is named the same so installation is with apt:
debian:~# apt-get --yes install hexedit
2. Hex editting with chexedit
I've installed chexedit the usual way from ports:
freebsd# cd /usr/ports/editors/chexedit
freebsd# make install clean
...
chexedit is using the ncurses text console library, so the interface is very similar to midnight commander (mc) as you see from below's screenshot:
Editting the binary compiled in string was an easy task with chexedit as most of the commands are clearly visible, anyways changing a certain text string contained within the binary file with some other is not easy with chexedit as you need to know the corresponding binary binary value representing each text string character.
I'm not a low level programmer, so I don't know the binary values of each keyboard character and hence my competence came to the point where I can substitute the text string I wanted with some unreadable characters by simply filling all my text string with AA AA AA AA values...
chexedit on Debian is packaged under a deb ncurses-hexedit. Hence to install it on Deb run:
debian:~# apt-get --yes install ncurses-hexedit
...
Further on the binary to run chexedit on binary contained within ncurses-hexedit is:
debian:~# hexeeditor
3. Hex Editting on BSD and Linux with hte
Just after trying out chexedit, I've found about the existence of one even more sophisticated hexeditor console program available across both FreeBSD and Linux.
The program is called hte (sounds to me a bit like the Indian word for Elephant "Hatti" :))
hte is installable on Debian with cmd:
debian:~# apt-get install ht
On FreeBSD the port name is identical, so to install it I execed:
freebsd# cd /usr/ports/editors/hte
freebsd# make install clean
...
hte is started on Debian Linux (and presumably other Linux distros) with:
$ hte
On FreeBSD you need to run it with ht command:
freebsd# ht
You see how hte looks like in below screenshot:
ht has the look & feel like midnight commander and I found it easier to use than chexedit and hexeditor
4. hexer VI like interface for Linux
As I was looking through the available packages ready to install, I've tried hexer
debian:~# apt-get install --yes hexerhexer does follow the same standard commands like VIM, e.g. i for insert, a for append etc.
...
It was interesting to find out hexer was written by a Bulgarian fellow Petar Penchev :)
(Proud to be Bulgarian)
http://people.freebsd.org/~roam/ - Petar Penchev has his own page on FreeBSD.org
As a vim user I really liked the idea, the only thing I didn't liked is there is no easy way to just substitute a string within the binary with another string.
5. hexcurse another ncurses library based hex editor
On Deb install and run via:
debian:~# apt-get --yes install hexcurse
debian:~# hexcurse /usr/bin/mc
hexcurse is also available on FreeBSD to install it use cmd:
freebsd# cd /usr/ports/editors/hexcurse
freebsd# make install clean
....
To access the editor functions press CTRL+the first letter of the word in the bottom menu, CTRL+H, CTRL+S etc.
Something I disliked about it is the program search is always in hex, so I cannot look for a text string within the binaries with it.
6. ghex - Editting binary files in graphical environment
If you're running a graphical environment, take a look at ghex. ghex is a gnome (graphical hex) editor. Installing ghex on Debian is with:
debian:~# apt-get --yes install ghex
....
To run ghex from terminal type:
debian:~# ghex2
To install ghex on FreeBSD (and I assume other BSDs), install via port:
freebsd# cd /usr/ports/editors/ghex
freebsd# make install clean
Gnome hex editor have plenty of tools, useful for developers to debug binary files.
Some nice tools one can find are under the the menus:
Windows -> Character Table
This will show a complete list of each keyboard sent character in ASCII, Hex, Decimal, Octal and Binary
Another useful embedded tool in ghex is:
Windows -> Type Convertion Dialog
Note that if you want to use the Type Convertion Dialog tool to find the representing binary values of a text string you will have to type in the letters one by one and save the output within a text file and later you can go and use the same editor to edit the text string within the binary file you like.
I'm not a programmer but surely for programmers or people who want to learn some binary counting, this 2 ghex edmebbed tools are surely valuable.
To conclude even though there are plenty of softwares for hex editting in Linux and BSD, none of them is not so easy to use as the old DOS hexdedit tool, maybe it will be a nice idea if someone actually rewrites the DOS tool and they package it for various free operating systems, I'm sure many people will find it helpful to have a 1:1 equivalent to the DOS tool.
7. Shed pico like interfaced hex editor
For people, who use pico / nano as a default text editor in Linux shed will probably be the editor of choice as it follows the command shortcuts of pico On Deb based distros to install it run:
debian:~# apt-get install --yes shed
...
Shed has no BSD port as of time of writting. 8. Okteta a KDE GUI hex editor
For KDE users, I found a program called okteta. It is available for Deb based Linuxes as deb to install it:
debian:~# apt-get --yes install okteta
As of time of writting this article there is no okteta port for BSDs.
Okteta has plenty of functions and even has more of a functions than ghexedit. Something distinctive for it is it supports opening multiple files in tabs.
9. lfhex a large file text editor
lfhex is said to be a large (binary) file text editor, I have not tested it myself but just run it to see how it looks like. I don't have a need to edit large binary files too, but I guess there are people with such requirements too :)
To install lfhex on Debian:
debian:~# apt-get install --yes lfhex
lfhex has also a FreeBSD port installable via:
freebsd# cd /usr/ports/editors/lfhex
freebsd# make install clean
10. Bless a GUI tool for editting large hex (binary) files
Here is the description directly taken from the BSD port /usr/ports/editors/bless
Bless is a binary (hex) editor, a program that enables you to edit files as a sequence of bytes. It is written in C# and uses the Gtk# bindings for the GTK+ toolkit.
To install and use ot on deb based Linuxes:
debian:~# apt-get install --yes bless
....
On BSD installation is again from port:
freebsd# cd /usr/ports/editors/bless
freebsd# make install clean
....
Something that makes bless, maybe more desirable choice for GUI users than ghex is its availability of tabs. Opening multiple binaries in tabs will be useful only to few heavy debuggers.
11. Ghextris - an ultra hard hacker tetris game :)
For absolute, hacker / (geeks), there is a tetris game called ghextris. The game is the hardest tetris game I ever played in my life. It requires more than regular IQ and a lot of practice if you want to become really good in this game.
To enjoy it:
debian:~# apt-get --yes install ghextris
Unfortunately there is no native port of ghextris for BSD (yet). Anyhow, it can be probably run using the Linux emulation or even compiled from source.
Well that's all I found for hexedit-ing, I'll be happy to hear if someone can give me some feedback on his favourite editor.
Wed Apr 25 12:53:19 EEST 2012
How to change Debian GNU / Linux console (tty) language to Bulgarian or Russian Language
Debian has a package language-env. I haven't used my Linux console for a long time. So I couldn't exactly remember how I used to be making the Linux console to support cyrillic language (CP1251, bg_BG.UTF-8) etc.
I've figured out for the language-env existence in Debian Book on hosted on OpenFMI - Bulgarian Faculty of Mathematics and Informatics website.
The package info with apt-cache show displays like that:
What is really strange, is the package maintainer is not Bulgarian, Russian or Ukrainian but Japanese.
As you see the developer is weirdly not Bulgarian but Japanese Kenshi Muto. What is even more interesting is that it is another japanese that has actually written the script set-language-env contained within the package. Checking the script in the header one can see him, Tomohiro KUBOTA
Before I've found about the language-env existence, I knew I needed to have the respective locales installed on the system with:
So I run dpkg-reconfigure to check I have existing the locales for adding the Bulgarian language support.
Checking if the bulgarian locale is installed is also possible with /bin/ls:
The language-env contains a perl script called set-language-env which is doing the actual Debian Bulgarization / cyrillization. The set-language-env author is another Japanese and again not Slavonic person.
Actually set-language-env script is not doing the Bulgariazation but is a wrapper script that uses a number of "hacks" to make the console support cyrillic.
Further on to make the console support cyrillic, execute:
hipo@noah:~$ set-language-env
Setting up users' native language environment
by modifying their dot-files.
Type "set-language-env -h" for help.
1 : be (Bielaruskaja,Belarusian)
2 : bg (Bulgarian)
3 : ca (Catala,Catalan)
4 : da (Dansk,Danish)
5 : de (Deutsch,German)
6 : es (Espanol,Spanish)
7 : fr (Francais,French)
8 : ja (Nihongo,Japanese)
9 : ko (Hangul,Korean)
10 : lt (Lietuviu,Lithuanian)
11 : mk (Makedonski,Macedonian)
12 : pl (Polski,Polish)
13 : ru (Russkii,Russian)
14 : sr (Srpski,Serbian)
15 : th (Thai)
16 : tr (Turkce,Turkish)
17 : uk (Ukrajins'ka,Ukrainian)
Input number > 2
There are many questions in cyrillic list necessery to be answered to exactly define if you need cyrillic language support for GNOME, pine, mutt, console etcetera.
The script will create or append commands to a number of files on the system like ~/.bash_profile
The script uses the cyr command part of the Debian console-cyrillic package for the actual Bulgarian Linux localization.
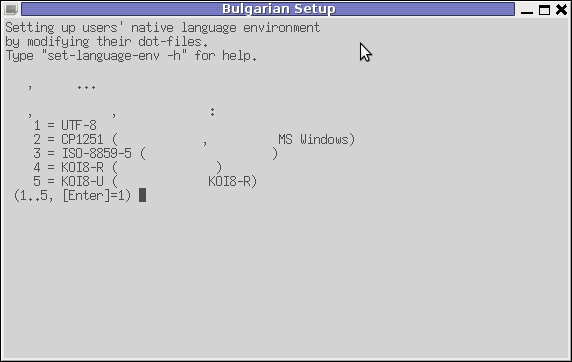
As said it was supposed to also do a localization in the past of many Graphical environment programs, as well as include Bulgarian support for GNOME desktop environment. Since GNOME nowdays is already almost completely translated through its native language files, its preferrable that localization to be done on Linux install time by selecting a country language instead of later doing it with set-language-env. If you failed to set the GNOME language during Linux install, then using set-language-env will still work. I've tested it and even though a lot of time passed since set-language-env was heavily used for bulgarization still the GUI env bulgarization works.
If set-language-env is run in gnome-terminal the result, the whole set of question dialogs will pop-up in new xterm and due to a bug, questions imposed will be unreadable as you can see in below screenshot:
If you want to remove the bulgarization, later at certain point, lets you don't want to have the cyrillic console or programs support use:
For anyone who wish to know more in depth, how set-language-env works check the README files in /usr/share/doc/language-env/ one readme written by the author of the Bulgarian localization part of the package Anton Zinoviev is /usr/share/doc/language-env/README.be-bg-mk-sr-uk
I've figured out for the language-env existence in Debian Book on hosted on OpenFMI - Bulgarian Faculty of Mathematics and Informatics website.
The package info with apt-cache show displays like that:
hipo@noah:~/Desktop$ apt-cache show language-env|grep -i -A 3 description

 Description: simple configuration tool for native language environment

  This tool adds basic settings for natural language environment such as

   LANG variable, font specifications, input methods, and so on into

    user's several dot-files such as .bashrc and .emacs.
What is really strange, is the package maintainer is not Bulgarian, Russian or Ukrainian but Japanese.
As you see the developer is weirdly not Bulgarian but Japanese Kenshi Muto. What is even more interesting is that it is another japanese that has actually written the script set-language-env contained within the package. Checking the script in the header one can see him, Tomohiro KUBOTA
Before I've found about the language-env existence, I knew I needed to have the respective locales installed on the system with:
# dpkg-reconfigure locales
So I run dpkg-reconfigure to check I have existing the locales for adding the Bulgarian language support.
Checking if the bulgarian locale is installed is also possible with /bin/ls:
# ls -al /usr/share/i18n/locales/*|grep -i bg

-rw-r--r-- 1 root root    8614 Feb 12 21:10 /usr/share/i18n/locales/bg_BG
The language-env contains a perl script called set-language-env which is doing the actual Debian Bulgarization / cyrillization. The set-language-env author is another Japanese and again not Slavonic person.
Actually set-language-env script is not doing the Bulgariazation but is a wrapper script that uses a number of "hacks" to make the console support cyrillic.
Further on to make the console support cyrillic, execute:
hipo@noah:~$ set-language-env
Setting up users' native language environment
by modifying their dot-files.
Type "set-language-env -h" for help.
1 : be (Bielaruskaja,Belarusian)
2 : bg (Bulgarian)
3 : ca (Catala,Catalan)
4 : da (Dansk,Danish)
5 : de (Deutsch,German)
6 : es (Espanol,Spanish)
7 : fr (Francais,French)
8 : ja (Nihongo,Japanese)
9 : ko (Hangul,Korean)
10 : lt (Lietuviu,Lithuanian)
11 : mk (Makedonski,Macedonian)
12 : pl (Polski,Polish)
13 : ru (Russkii,Russian)
14 : sr (Srpski,Serbian)
15 : th (Thai)
16 : tr (Turkce,Turkish)
17 : uk (Ukrajins'ka,Ukrainian)
Input number > 2
There are many questions in cyrillic list necessery to be answered to exactly define if you need cyrillic language support for GNOME, pine, mutt, console etcetera.
The script will create or append commands to a number of files on the system like ~/.bash_profile
The script uses the cyr command part of the Debian console-cyrillic package for the actual Bulgarian Linux localization.
As said it was supposed to also do a localization in the past of many Graphical environment programs, as well as include Bulgarian support for GNOME desktop environment. Since GNOME nowdays is already almost completely translated through its native language files, its preferrable that localization to be done on Linux install time by selecting a country language instead of later doing it with set-language-env. If you failed to set the GNOME language during Linux install, then using set-language-env will still work. I've tested it and even though a lot of time passed since set-language-env was heavily used for bulgarization still the GUI env bulgarization works.
If set-language-env is run in gnome-terminal the result, the whole set of question dialogs will pop-up in new xterm and due to a bug, questions imposed will be unreadable as you can see in below screenshot:
If you want to remove the bulgarization, later at certain point, lets you don't want to have the cyrillic console or programs support use:
# set-language-env -r

The script will create
For anyone who wish to know more in depth, how set-language-env works check the README files in /usr/share/doc/language-env/ one readme written by the author of the Bulgarian localization part of the package Anton Zinoviev is /usr/share/doc/language-env/README.be-bg-mk-sr-uk
Tue Apr 24 07:13:40 EEST 2012
How to delete your linkedin account
I've decided to delete my linkedin account as I don't see any good in constact connectiodness and being part of many "social" networks which if one thinks in deeply are not social but anti-social.
You just stay at home staring at a screen and it will be like this until the end of your days and even worser for the generations to come. Computer revolution or digital revolution is in reality huge devolutin (devil-lution)
To delete the linkedin account I used a short tutorial provided by This post

TO reach to your Profile settings, use upper right corner of your browser and follow the menus:
Once, trying to delete your account, linkedin will try to manipulate you to stay in Linkedin by pushing some of your contacts, pointing how you will get disconnected from him.
I'm amazed how impudent this guys can be, actually, its not just them. If you have tried or deleted your facebook account before time you will have faced, exactly the same thing. A profile (person picture) which was recently browsed by you will be shown to you and be said you will be unable to connect with him any more. Well who cares if it is God's will we will connect again :)
The problem with us modern people is we're so deluded that we have started relying more on technology and human knowledge than to God. For most people who are atheists relying more on technology than on God for their lives seems reasanable However for us Christians putting more trust in technology than in Gods providence for us is sinful and deadly.
I'm starting to get the conclusion, non-technological societies are more happier than technological ones. In that sense, we the Bulgarians are blessed, because technology is not so widely spread.
You just stay at home staring at a screen and it will be like this until the end of your days and even worser for the generations to come. Computer revolution or digital revolution is in reality huge devolutin (devil-lution)
To delete the linkedin account I used a short tutorial provided by This post
TO reach to your Profile settings, use upper right corner of your browser and follow the menus:
Settings -> Account -> Close your account
Once, trying to delete your account, linkedin will try to manipulate you to stay in Linkedin by pushing some of your contacts, pointing how you will get disconnected from him.
I'm amazed how impudent this guys can be, actually, its not just them. If you have tried or deleted your facebook account before time you will have faced, exactly the same thing. A profile (person picture) which was recently browsed by you will be shown to you and be said you will be unable to connect with him any more. Well who cares if it is God's will we will connect again :)
The problem with us modern people is we're so deluded that we have started relying more on technology and human knowledge than to God. For most people who are atheists relying more on technology than on God for their lives seems reasanable However for us Christians putting more trust in technology than in Gods providence for us is sinful and deadly.
I'm starting to get the conclusion, non-technological societies are more happier than technological ones. In that sense, we the Bulgarians are blessed, because technology is not so widely spread.
Mon Apr 23 20:04:04 EEST 2012
Barcodes are dangerous for human freedom! Technology not trustable!
This post will be short as I'm starting to think long posts are mostly non-sense. Have you people all wondered of barcoding?
All world stores around the world have now barcoding. Barcode numbers regulations are being orchestrated by certain bodies, we people have no control over. Barcoding makes us dependent on technology as only technology can be used to read and store barcodes. It is technology that issues the barcodes. We have come to a point, where we humans trust more technology than our physical fellows. Trusting technology more than the close people to us is very dangerous. What if technology is not working as we expect it to?
What if there are hidden ways to control technology that we're not aware of?
Technology concepts are getting more and more crazy and abstract.
Thinks about the virtualization for a while. Virtualuzation is being praised loudly these days and everyone is turnning to it thinking it is cheap and realiable? The facts I've seen and the little of experience I had with it were way less than convicable.
Who came with this stupid idea, oh yes I remember IBM came with this insane idea some about 40 years ago ... We had sanity for a while not massively adopting IBM's virtualization bulk ideas and now people got crazy again to use a number of virtualization technologies.
If you think for a while Virtualization is unreality (unexistence) of matter over another unreality. The programs that makes computers "runs" are not existent in practice, they only exist in some electricity form. Its just a sort of electric field if you think on it on a conceptual level ...
As we trust all our lives nowdays on technology, how do we know this technological stored information is not altered by other fields, how we can be sure it always acts as we think it does and should? Was it tested for at least 40 years before adoption as any new advancement should be.
Well Of course not! Everything new is just placed in our society without too much thinking. Someone gives the money for production, someone else buys it and installs it and its ready to go. Or at least that's how the consumers thinks and we have become all consumers. This is a big LIE we're constantly being convinced in!
It is not ready to work, it is not tested and we don't know what the consequence of it will be!
Technology and Genetically Modified Food are not so different in this that they both can produce unexpected results in our lives. And they're already producing the bad fruits as you should have surely seen.
You can see more and more people are getting sick, more people go to doctor more people have to live daily with medication to live a miserable dishealthy I wouldn't say live but "poor" existence ...
Next time they tell you new technology is good for you and will make your life better, Don't believe them! This is not necessery true.
Though todays technology can do you good, In my view the harm seriously exceeds the good.
Thu Apr 19 19:22:22 EEST 2012
A late Jesus is Risen / Hristos Voskrese paschal greeting and why Orthodox Christians don't celebrate with Roman Catholics and Jewish
It is the first week after Orthodox Christian Easter. This year 2012, the Orthodox Christians Easter date was on fifteen of April.
We've not just had a feast of an Eastern, but we actually celebrated the greatest day in all human history that happened 2012 years ago - The Glories Resurrection of our Lord Jesus Christ from the Death in the Third day!
Some Roman Catholic Christians, might be wondering, why the Orthodox Church is celebrating one week after Jewish Pascha, so in short I will explain in the reason. We orthodox christians do not celebrate with Roman Catholics Easter because Roman Catholics use the gregorian calendar to calculate and decided the day in which the Eastern celebrations should occur, where we the Orthodox Christians use still the old moon calendar (which the jews used too), when Jesus was crucified.
The gregorian calendar is very precise from a scientific point of view, however from a Church stand point it is completely wrong because, plainly taking the gregorian calendar math model doesn't take in consideration, that the jews are still celebrating their pascha following the old moon calendar.
The consequence is this year Roman Catholics, celebrated with Jewish. This from our Orthodox Christian point of view is incorrect, because Christ's Cross suffering is the pascha for us christians.
We Christians consider that the old God ordained jewish pascha was a prophecy feast, simply to remind jewish people before Christ's coming that Messiah (Christ) will come to say his people.
As Jewish rejected their true Messiah and Crucified him on the Cross, they have rejected to accept Christ as being the true pascha lamb slained for our sins.
Hence the Orthodox Christian Church teaches even to this day, that it is not righteous to celebrate Christ's Glorious Resurrection with Jewish Pascha.
Prohibition to celebrate Easter and Jewish Pascha on the same day is an Orthodox Church rule, since the early church days.
The Holy Fathers in their Church councils Council of Nicaea etc. has established as unchangable Church rule that, Jesus's Resurrection day feath, should never-ever coincide with the Jewish Pascha Celebrations.
The reasons the Church fathers ordered the Church Easter day to be always 1 week after Jewish Pascha is our saviour Jesus Christ ate pascha with his desciples as we can read in the 4 gospels. After Jesus ate pascha, he was caught mocked, tortured and crucified (killed on a cross shaped trees).
In the Orthodox Christian dome, we feasted the greatest day in all human history and not just a feast - We celebrated The Glories Resurrection of our Lord Jesus Christ in the Third day with the great Paschal greeting!
The Slavonic Paschal Greeting, translated words, we use across the Slavonic dome: ( Bulgaria / Russia / Ukraine, Serbia) is:
Christos voskrese! Voistinu voskrese!
We've not just had a feast of an Eastern, but we actually celebrated the greatest day in all human history that happened 2012 years ago - The Glories Resurrection of our Lord Jesus Christ from the Death in the Third day!
Some Roman Catholic Christians, might be wondering, why the Orthodox Church is celebrating one week after Jewish Pascha, so in short I will explain in the reason. We orthodox christians do not celebrate with Roman Catholics Easter because Roman Catholics use the gregorian calendar to calculate and decided the day in which the Eastern celebrations should occur, where we the Orthodox Christians use still the old moon calendar (which the jews used too), when Jesus was crucified.
The gregorian calendar is very precise from a scientific point of view, however from a Church stand point it is completely wrong because, plainly taking the gregorian calendar math model doesn't take in consideration, that the jews are still celebrating their pascha following the old moon calendar.
The consequence is this year Roman Catholics, celebrated with Jewish. This from our Orthodox Christian point of view is incorrect, because Christ's Cross suffering is the pascha for us christians.
We Christians consider that the old God ordained jewish pascha was a prophecy feast, simply to remind jewish people before Christ's coming that Messiah (Christ) will come to say his people.
As Jewish rejected their true Messiah and Crucified him on the Cross, they have rejected to accept Christ as being the true pascha lamb slained for our sins.
Hence the Orthodox Christian Church teaches even to this day, that it is not righteous to celebrate Christ's Glorious Resurrection with Jewish Pascha.
Prohibition to celebrate Easter and Jewish Pascha on the same day is an Orthodox Church rule, since the early church days.
The Holy Fathers in their Church councils Council of Nicaea etc. has established as unchangable Church rule that, Jesus's Resurrection day feath, should never-ever coincide with the Jewish Pascha Celebrations.
The reasons the Church fathers ordered the Church Easter day to be always 1 week after Jewish Pascha is our saviour Jesus Christ ate pascha with his desciples as we can read in the 4 gospels. After Jesus ate pascha, he was caught mocked, tortured and crucified (killed on a cross shaped trees).
In the Orthodox Christian dome, we feasted the greatest day in all human history and not just a feast - We celebrated The Glories Resurrection of our Lord Jesus Christ in the Third day with the great Paschal greeting!
Jesus is Risen!
Truly, He is Risen!
The Slavonic Paschal Greeting, translated words, we use across the Slavonic dome: ( Bulgaria / Russia / Ukraine, Serbia) is:
Christos voskrese! Voistinu voskrese!
One week after the Roman Catholics Christians celebrated Pascha, we - The Orthodox Christian dome feasted the greatest day in all human history - The Glories Resurrection of our Lord Jesus Christ in the Third day!
According to our Church Tradition, Christians should great each other with the Paschal greeting Hristos Voskrese during the whole "bright week" instead of the usual Hi / Hello phrase.
The current Bulgarian version of Христос Воскресе - Войстина Възкръсна! is Христос Възкръсна - Наистина Възкръсна
Thu Apr 19 14:13:06 EEST 2012
How to check MASTER / SLAVE MySQL nodes status - Check MySQL Replication Status
I'm doing replication for one server. Its not the first time I do configure replication between two MySQL database nodes, however since I haven't done it for a few years, my "know how" has mostly vanished so I had some troubles in setting it up. Once I followed some steps to configure replication I had to check if the two MASTER / Slave MySQL db nodes communicate properly. Hence I decided to drop a short post on that just in case if someone has to do the same or if I myself forget how I did it so I can check later on:
1. Check if MASTER MySQL server node is configured properly
The standard way to check a MySQL master node status info is with:
By putting \G some extra status info is provided:
2. Check if Slave MySQL node is configured properly
To check status of the slave the cmd is:
The command returns an output like:
As you can see the output is not too readable, as there are too many columns and data to be displayed and this doesn't fit neither a text console nor a graphical terminal emulator.
To get more readable (more verbose) status for the SQL SLAVE, its better to use command:
Here is a sample returned output:
If show master status or shwo slave status commands didn't reveal replication issue, one needs to stare at the mysql log for more info.
1. Check if MASTER MySQL server node is configured properly
The standard way to check a MySQL master node status info is with:
mysql> show master status;
+------------------+----------+---------------------------------------------------------+------------------+
| File | Position | Binlog_Do_DB | Binlog_Ignore_DB |
+------------------+----------+---------------------------------------------------------+------------------+
| mysql-bin.000007 | 106 | database1,database2,database3 | |
+------------------+----------+---------------------------------------------------------+------------------+
1 row in set (0.00 sec)
By putting \G some extra status info is provided:
mysql> show master status\G;
*************************** 1. row ***************************
File: mysql-bin.000007
Position: 106
Binlog_Do_DB: database1,database2,database3
Binlog_Ignore_DB:
1 row in set (0.00 sec)
ERROR:
No query specified
2. Check if Slave MySQL node is configured properly
To check status of the slave the cmd is:
mysql> show slave status;
The command returns an output like:
mysql> show slave status; +----------------------------------+-------------+-------------+-------------+---------------+------------------+---------------------+-------------------------+---------------+-----------------------+------------------+-------------------+-------------------------------------------------------+---------------------+--------------------+------------------------+-------------------------+-----------------------------+------------+------------+--------------+---------------------+-----------------+-----------------+----------------+---------------+--------------------+--------------------+--------------------+-----------------+-------------------+----------------+-----------------------+-------------------------------+---------------+---------------+----------------+----------------+ | Slave_IO_State | Master_Host | Master_User | Master_Port | Connect_Retry | Master_Log_File | Read_Master_Log_Pos | Relay_Log_File | Relay_Log_Pos | Relay_Master_Log_File | Slave_IO_Running | Slave_SQL_Running | Replicate_Do_DB | Replicate_Ignore_DB | Replicate_Do_Table | Replicate_Ignore_Table | Replicate_Wild_Do_Table | Replicate_Wild_Ignore_Table | Last_Errno | Last_Error | Skip_Counter | Exec_Master_Log_Pos | Relay_Log_Space | Until_Condition | Until_Log_File | Until_Log_Pos | Master_SSL_Allowed | Master_SSL_CA_File | Master_SSL_CA_Path | Master_SSL_Cert | Master_SSL_Cipher | Master_SSL_Key | Seconds_Behind_Master | Master_SSL_Verify_Server_Cert | Last_IO_Errno | Last_IO_Error | Last_SQL_Errno | Last_SQL_Error | +----------------------------------+-------------+-------------+-------------+---------------+------------------+---------------------+-------------------------+---------------+-----------------------+------------------+-------------------+-------------------------------------------------------+---------------------+--------------------+------------------------+-------------------------+-----------------------------+------------+------------+--------------+---------------------+-----------------+-----------------+----------------+---------------+--------------------+--------------------+--------------------+-----------------+-------------------+----------------+-----------------------+-------------------------------+---------------+---------------+----------------+----------------+ | Waiting for master to send event | HOST_NAME.COM | slave_user | 3306 | 10 | mysql-bin.000007 | 106 | mysqld-relay-bin.000002 | 251 | mysql-bin.000007 | Yes | Yes | database1,database2,database3 | | | | | | 0 | | 0 | 106 | 407 | None | | 0 | No | | | | | | 0 | No | 0 | | 0 | | +----------------------------------+-------------+-------------+-------------+---------------+------------------+---------------------+-------------------------+---------------+-----------------------+------------------+-------------------+-------------------------------------------------------+---------------------+--------------------+------------------------+-------------------------+-----------------------------+------------+------------+--------------+---------------------+-----------------+-----------------+----------------+---------------+--------------------+--------------------+--------------------+-----------------+-------------------+----------------+-----------------------+-------------------------------+---------------+---------------+----------------+----------------+
As you can see the output is not too readable, as there are too many columns and data to be displayed and this doesn't fit neither a text console nor a graphical terminal emulator.
To get more readable (more verbose) status for the SQL SLAVE, its better to use command:
mysql> show slave status\G;
Here is a sample returned output:
mysql> show slave status\G; *************************** 1. row *************************** Slave_IO_State: Waiting for master to send event Master_Host: HOST_NAME.COM Master_User: slave_user Master_Port: 3306 Connect_Retry: 10 Master_Log_File: mysql-bin.000007 Read_Master_Log_Pos: 106 Relay_Log_File: mysqld-relay-bin.000002 Relay_Log_Pos: 251 Relay_Master_Log_File: mysql-bin.000007 Slave_IO_Running: Yes Slave_SQL_Running: Yes Replicate_Do_DB: database1,database2,database3 Replicate_Ignore_DB: Replicate_Do_Table: Replicate_Ignore_Table: Replicate_Wild_Do_Table: Replicate_Wild_Ignore_Table: Last_Errno: 0 Last_Error: Skip_Counter: 0 Exec_Master_Log_Pos: 106 Relay_Log_Space: 407 Until_Condition: None Until_Log_File: Until_Log_Pos: 0 Master_SSL_Allowed: No Master_SSL_CA_File: Master_SSL_CA_Path: Master_SSL_Cert: Master_SSL_Cipher: Master_SSL_Key: Seconds_Behind_Master: 0 Master_SSL_Verify_Server_Cert: No Last_IO_Errno: 0 Last_IO_Error: Last_SQL_Errno: 0 Last_SQL_Error: 1 row in set (0.00 sec) ERROR: No query specified
If show master status or shwo slave status commands didn't reveal replication issue, one needs to stare at the mysql log for more info.
Wed Apr 18 12:12:37 EEST 2012
How to permanently enable Cookies in Lynx text browser - Disable accept cookies prompt in lynx console browser
The default behaviour of lynx - console text browser on Linuces, BSD and other free OSes is to always ask, for the accept cookies prompt once an internet web page is opened that requires browser cookies to be enabled.
I should admin, having this "secure by default" (always ask for new cookies) behaviour in lynx was a good practice from a security point of view.
Another reason, why this cookies prompt is enabled by default is back in the days, when lynx was actively developed by programmers the websites with cookies support was not that many and even cookies was mostly required for user/pass authentication (all those who still remember this days the websites that requires authentication was a way less than today) ...
With this said the current continuing security cautious behaviour in the browser, left from its old days is understandable.
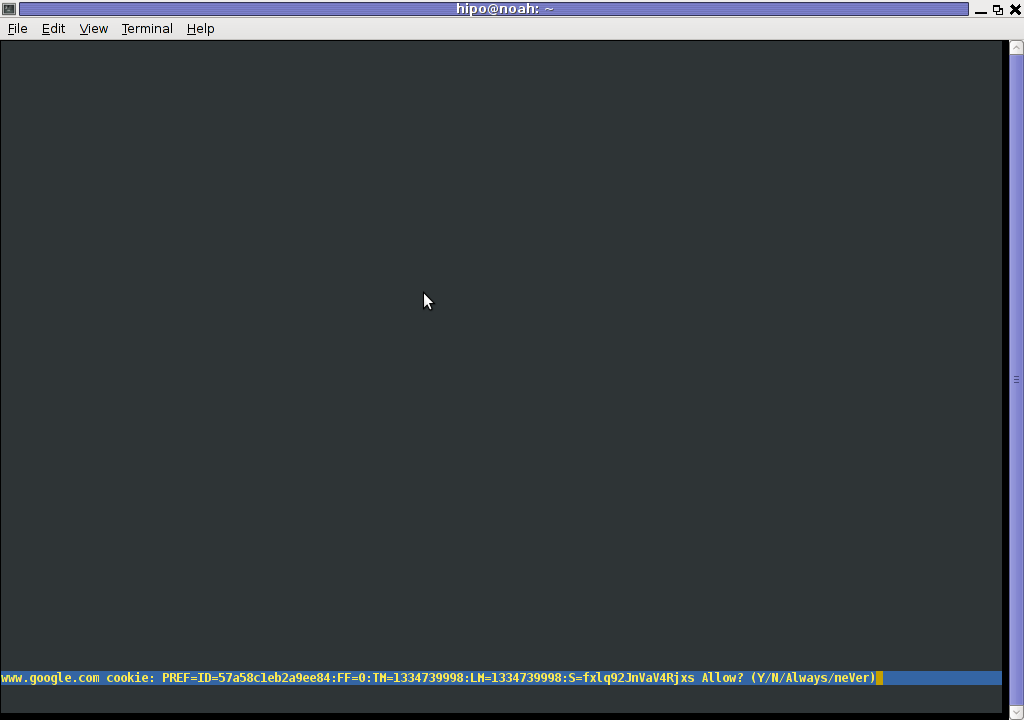
However I personally sometimes, need to use lynx more frequently and this behaviour of always opening a new website in text mode in console to prompts me for a cookie suddenly becomes a big waste of time if you use lynx to browser more than few sites. Hence I decided to change the default way lynx handles cookies and make them enabled by default instead.
Actually even in the past, when I was mainly using internet in console on every new server or home Linux install, I was again making the cookies to be permanently accepted.
Everyone who used lynx a few times already knows its "annoying" to all time accept cookie prompts ... This provoked me to write this short article to explain how enabling of constant cookie accepting in lynx is done
To enable the persistent cookies in lynx, one needs to edit lynx.cfg on different GNU / Linux and BSD* distributions lynx.cfg is located in different directory.
Most of the lynx.cfg usual locations are /etc/lynx/lynx.cfg or /etc/lynx.cfg as of time of writting this post in Debian Squeeze GNU / Linux the lynx.cfg is located in /etc/lynx-cur/lynx.cfg, whether for FreeBSD / NetBSD / OpenBSD users the file is located in /usr/local/etc/lynx.cfg
What I did to allow all cookies is open lynx.cfg in vim edit and change the following lines:
a)
with
b)
uncomment it to:
c) next, change
Onwards opening any website with lynx auto-accepts the cookies.
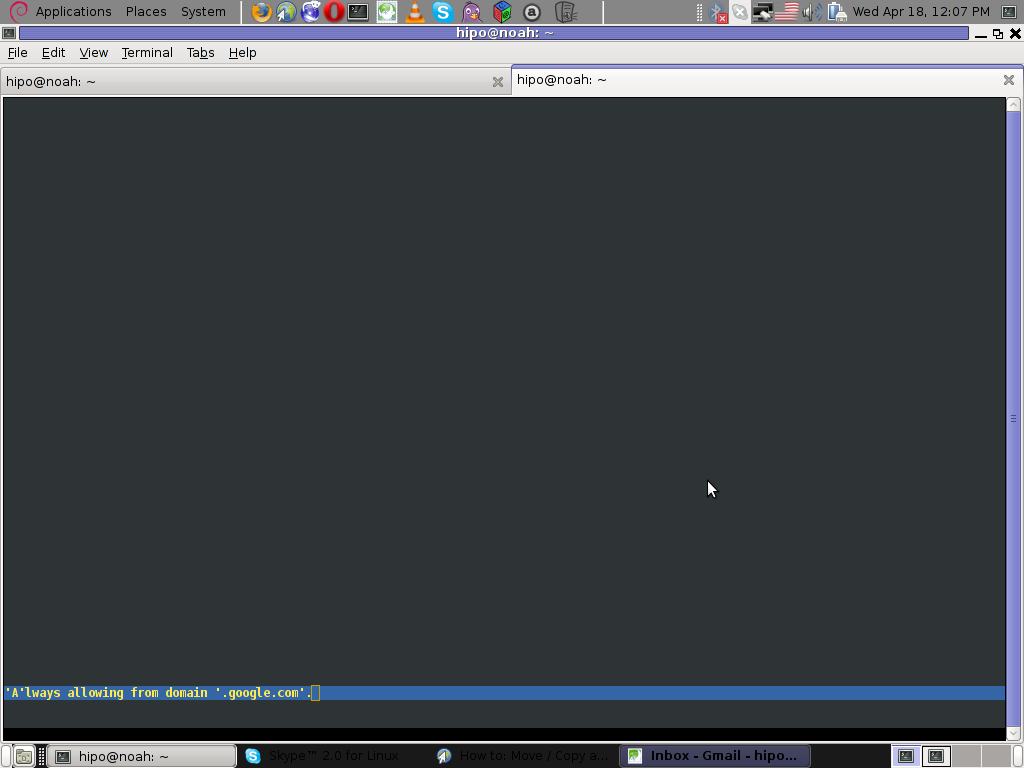
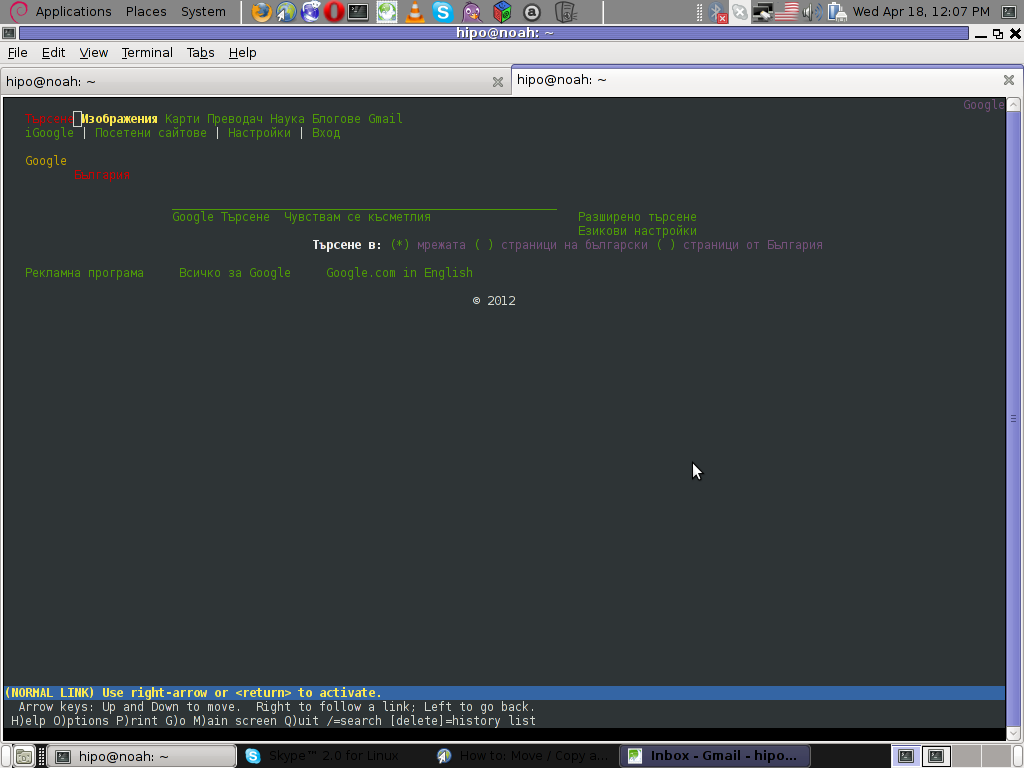
For people who care about there security (who still browse in console (surely not many anymore)), permanently allowing the cookies is not a good idea. But for those who are ready to drop off little security for convenience its ok.
I should admin, having this "secure by default" (always ask for new cookies) behaviour in lynx was a good practice from a security point of view.
Another reason, why this cookies prompt is enabled by default is back in the days, when lynx was actively developed by programmers the websites with cookies support was not that many and even cookies was mostly required for user/pass authentication (all those who still remember this days the websites that requires authentication was a way less than today) ...
With this said the current continuing security cautious behaviour in the browser, left from its old days is understandable.
However I personally sometimes, need to use lynx more frequently and this behaviour of always opening a new website in text mode in console to prompts me for a cookie suddenly becomes a big waste of time if you use lynx to browser more than few sites. Hence I decided to change the default way lynx handles cookies and make them enabled by default instead.
Actually even in the past, when I was mainly using internet in console on every new server or home Linux install, I was again making the cookies to be permanently accepted.
Everyone who used lynx a few times already knows its "annoying" to all time accept cookie prompts ... This provoked me to write this short article to explain how enabling of constant cookie accepting in lynx is done
To enable the persistent cookies in lynx, one needs to edit lynx.cfg on different GNU / Linux and BSD* distributions lynx.cfg is located in different directory.
Most of the lynx.cfg usual locations are /etc/lynx/lynx.cfg or /etc/lynx.cfg as of time of writting this post in Debian Squeeze GNU / Linux the lynx.cfg is located in /etc/lynx-cur/lynx.cfg, whether for FreeBSD / NetBSD / OpenBSD users the file is located in /usr/local/etc/lynx.cfg
What I did to allow all cookies is open lynx.cfg in vim edit and change the following lines:
a)
#FORCE_SSL_COOKIES_SECURE:FALSE
with
FORCE_SSL_COOKIES_SECURE:TRUE
b)
#SET_COOKIES:TRUE
uncomment it to:
SET_COOKIES:TRUE
c) next, change
ACCEPT_ALL_COOKIES:FALSE
ACCEPT_ALL_COOKIES:TRUE
Onwards opening any website with lynx auto-accepts the cookies.
For people who care about there security (who still browse in console (surely not many anymore)), permanently allowing the cookies is not a good idea. But for those who are ready to drop off little security for convenience its ok.
Fri Apr 13 18:02:22 EEST 2012
How to Add Virtual IP adddress on GNU / Linux - Set up multiple IP addresses on Linux boot with ifconfig
Periodically, I have to set-up new Linux servers with second, third in other words multiple IP addresses.
Anyone who needs to set up multiple IP addresses to be responding on one machine knows the common reason is a need is multiple domain names with SSL enabled hosted on the same physical server. Configuring different domain names to be resolved to different IPs is rare but for some case scenarios is a must. Some other use case is if running other popular Network services like, Apache VirtualHost,Qmail + (vpopmail POP3, FTP servers, proxies etc.
The universal way which allows to set multiple virtual IP addresses on GNU / Linux gives the admin an option as both ifconfig or ip commands can be used.
I personally always use ifconfig so I always use ifconfig to set new virtual IP addreses and interfaces.
1. Adding virtual ethernet interface and Virtual IP on Slackware and across all Linuxes with ifconfig
Adding a virtual ethernet interfaces with ifconfig command is done using the syntax:
To set a number of IP addresses to automatically be bringed up on server boot, simply place in /etc/rc.local before the exit 0 - last file line;
3. Adding new virtual IP addresses to server to /etc/rc.local from command line
To do add a set of virtual IP addresses to /etc/rc.local without using an interactive text editor (useful for scripting purposes) use:
4. Setting up Virtual IP addresses on Debian and Ubuntu G*/Linux
In Debian and other (deb) based Linux distributions (Ubuntu, Mint etc.), there is also another approach to "solve" the task through using the default networking config file:
/etc/network/interfaces
Hence if managing any deb one based Linux, its a good practice in terms of clarity to use the "debian way" to add virutal ip addresses.
On these distros to add new virtual ip address edit /etc/network/interfaces with your favourite text editor, for instance:
Place inside config like:
N.B. Be cautious or you will end up with your server being unreachable, make sure you put some crontab to periodically check and up the main eth0 assigned IP address to prevent server inaccessibility if you don't have a physical server access.
For more Virtual IPs just add more entries like the above ones ...
5. Setting up Virtual IP addresses on Redhat based distros (RHEL, CentOS, Fedora)
In Fedora, CentOS, RHEL each new virtual IP or virtual IP range has to go in a separate file like:
Each of the ifcfg-eth0:N files could be a straight copy of /etc/sysconfig/network-scripts/ifcfg-eth0
The default content of ifcfg-eth0:0 should be like:
Anyone who needs to set up multiple IP addresses to be responding on one machine knows the common reason is a need is multiple domain names with SSL enabled hosted on the same physical server. Configuring different domain names to be resolved to different IPs is rare but for some case scenarios is a must. Some other use case is if running other popular Network services like, Apache VirtualHost,Qmail + (vpopmail POP3, FTP servers, proxies etc.
The universal way which allows to set multiple virtual IP addresses on GNU / Linux gives the admin an option as both ifconfig or ip commands can be used.
I personally always use ifconfig so I always use ifconfig to set new virtual IP addreses and interfaces.
1. Adding virtual ethernet interface and Virtual IP on Slackware and across all Linuxes with ifconfig
Adding a virtual ethernet interfaces with ifconfig command is done using the syntax:
/sbin/ifconifg eth0:0 IP_ADDR0 netmask NETMASK_IP_ADDR up
/sbin/ifconfig eth0:1 IP_ADDR1 netmask NETMASK_IP_ADDR1 up
/sbin/ifconfig eth0:N IP_ADDR1 netmask NETMASK_IPADDRN up
...
Hence to add the 4 IP addresses:
- 1.2.3.4
- 1.2.3.5
- 1.2.3.7
- 1.2.5.8
use something like:
server:~# /sbin/ifconfig eth0:0 1.2.3.4 netmask 255.255.255.0 up

server:~# /sbin/ifconfig eth0:1 1.2.3.5 netmask 255.255.255.0 up

server:~# /sbin/ifconfig eth0:2 1.2.3.7 netmask 255.255.255.0 up

server:~# /sbin/ifconfig eth0:3 1.2.5.8 netmask 255.255.255.0 up

...

server:~# /sbin/ifconfig ethX:N x.x.x.x netmask 255.255.255.0 up
2. Setting Virtual IP addresses on interfaces on system boot timeTo set a number of IP addresses to automatically be bringed up on server boot, simply place in /etc/rc.local before the exit 0 - last file line;
export IP_ADDRESS1='1.2.3.4';

export IP_ADDRESS2='1.2.3.5';

export IP_ADDRESS3='1.2.3.8';

export IP_ADDRESS4='1.2.3.9';

/sbin/ifconfig eth0:0 $IP_ADDRESS1 netmask 255.255.255.0 up

/sbin/ifconfig eth0:1 $IP_ADDRESS2 netmask 255.255.255.0 up

/sbin/ifconfig eth0:2 $IP_ADDRESS3 netmask 255.255.255.0 up

/sbin/ifconfig eth0:3 $IP_ADDRESS3 netmask 255.255.255.0 up
3. Adding new virtual IP addresses to server to /etc/rc.local from command line
To do add a set of virtual IP addresses to /etc/rc.local without using an interactive text editor (useful for scripting purposes) use:
server:~# head -n $(($(echo $(wc -l /etc/rc.local |awk '{ print $1 }')) - 1)) /etc/rc.local >> /etc/rc.local.tmp
server:~# echo "export IP_ADDRESS1='1.2.3.4'" >> /etc/rc.local.tmp;
server:~# echo "export IP_ADDRESS2='1.2.3.5'" >> /etc/rc.local.tmp
server:~# echo "export IP_ADDRESS3='1.2.3.8'" >> /etc/rc.local.tmp
server:~# echo "export IP_ADDRESS4='1.2.3.9'" >> /etc/rc.local.tmp
server:~# echo "/sbin/ifconfig eth0:0 $IP_ADDRESS1 netmask 255.255.255.0 up" >>/etc/rc.local.tmp
server:~# echo "/sbin/ifconfig eth0:1 $IP_ADDRESS2 netmask 255.255.255.0 up" >> /etc/rc.local.tmp
server:~# echo "/sbin/ifconfig eth0:2 $IP_ADDRESS3 netmask 255.255.255.0 up" >> /etc/rc.local.tmp
server:~# echo "/sbin/ifconfig eth0:3 $IP_ADDRESS3 netmask 255.255.255.0 up" >> /etc/rc.local.tmp
server:~# echo "exit 0" >> /etc/rc.local.tmp
server:~# cp -rpf /etc/local /etc/local.bak; cp -rpf /etc/rc.local.tmp /etc/rc.local
4. Setting up Virtual IP addresses on Debian and Ubuntu G*/Linux
In Debian and other (deb) based Linux distributions (Ubuntu, Mint etc.), there is also another approach to "solve" the task through using the default networking config file:
/etc/network/interfaces
Hence if managing any deb one based Linux, its a good practice in terms of clarity to use the "debian way" to add virutal ip addresses.
On these distros to add new virtual ip address edit /etc/network/interfaces with your favourite text editor, for instance:
# vim /etc/network/interfaces
Place inside config like:
auto eth0:1

iface eth0:1 inet static

address 192.168.1.60

netmask 255.255.255.0

network x.x.x.x

broadcast x.x.x.x

gateway x.x.x.x
N.B. Be cautious or you will end up with your server being unreachable, make sure you put some crontab to periodically check and up the main eth0 assigned IP address to prevent server inaccessibility if you don't have a physical server access.
For more Virtual IPs just add more entries like the above ones ...
5. Setting up Virtual IP addresses on Redhat based distros (RHEL, CentOS, Fedora)
In Fedora, CentOS, RHEL each new virtual IP or virtual IP range has to go in a separate file like:
- /etc/sysconfig/network-scripts/ifcfg-eth0:0
- /etc/sysconfig/network-scripts/ifcfg-eth0:1
- /etc/sysconfig/network-scripts/ifcfg-eth0:2 ...
Each of the ifcfg-eth0:N files could be a straight copy of /etc/sysconfig/network-scripts/ifcfg-eth0
[root@centos:~]# cp /etc/sysconfig/network-scripts/ifcfg-eth0 /etc/sysconfig/network-scripts/ifcfg-eth0:0

[root@centos:~]# vim /etc/sysconfig/network-scripts/ifcfg-eth0:0
The default content of ifcfg-eth0:0 should be like:
NETMASK=255.255.255.0
DEVICE=eth0
ONBOOT=yes
TYPE=Ethernet
ETHTOOL_OPTS="duplex full speed 100 autoneg off wol g"
IPADDR=10.0.0.01
You will have to change the fields you see in red to be like:
DEVICE=eth0:0

IPADDR=10.0.0.02
Further on for all virtual IPs create files /etc/sysconfig/network-scripts/ifcfg-ethN and change DEVICE and IPADDR value.
Finally to load up the new Virtual IP interfaces to come online restart networking:
/sbin/service network restart

...
Check and re-check that the IP configs placed are correct, otherwise if you do it on a remote server you will loose connection to it as it could happen the primary server IP on eth0 fails to properly set.
Thu Apr 12 22:22:27 EEST 2012
How to copy / clone installed packages from one Debian server to another
1. Dump all installed server packages from Debian Linux server1
First it is necessery to dump a list of all installed packages on the server from which the intalled deb packages 'selection' will be replicated.
The format of the produced packages.txt file will have only two columns, in column1 there will be the package (name) installed and in column 2, the status of the package e.g.: install or deinstall
Note that you can only use the --get-selections as root superuser, trying to run it with non-privileged user I got:
2. Copy packages.txt file containing the installed deb packages from server1 to server2
There is many way to copy the packages.txt package description file, one can use ftp, sftp, scp, rsync ... lftp or even copy it via wget if placed in some Apache directory on server1.
A quick and convenient way to copy the file from Debian server1 to server2 is with scp as it can also be used easily for an automated script to do the packages.txt file copying (if for instance you have to implement package cloning on multiple Debian Linux servers).
As this is the first time I make connection to server2 from server1, I'm prompted to accept the host RSA unique fingerprint.
3. Install the copied selection from server1 on server2 with apt-get or dselect
The first apt-get update command assures the server will have the latest version of the packages currently installed, this will save you from running an outdated versions of the installed packages on debian-server2
Bear in mind that using apt-get sometimes, might create dependency issues. This is depending on the exact package names, being replicated in between the servers
Therefore it is better to use another approach with bash for loop to "replicate" installed packages between two servers, like so:
If you want to automate the questioning about aptitude operations pass on the -y
Be cautious if the -y is passed as sometimes some packages might be removed from the server to resolve dependency issues, if you need this packages you will have to again install them manually.
4. Mirroring package selection from server1 to server2 using one liner
A quick one liner, that does replicate a set of preselected packages from server1 to server2 is also possible with either a combination of apt, ssh, awk and dpkg or with ssh + dpkg + dselect :
a) One-liner code with apt-get unifying the installed packages between 2 or more servers
If it is necessery to install on more than just debian-server2, copy paste the above code to all servers you want to have identical installed packages as with debian-server1 or use a shor for loop to run the commands for each and every host of multiple servers group.
In some cases it might be better to use dselect instead as in some situations using apt-get might not correctly solve the package dependencies, if encountering problems with dependencies better run:
As you can see using this second dselect installed "package" mirroring is also way easier to read and understand than the prior "cryptic" method with apt-get, hence I personally think using dselect method is a better.
Well that's basically it. If you need to synchronize also configurations, either an rsync/scp shell script, should be used with all defined server1 config files or in case if a cloning of packages between identical server machines is necessery dd or some other tool like Norton Ghost could be used.
Hope this helps, someone.
First it is necessery to dump a list of all installed packages on the server from which the intalled deb packages 'selection' will be replicated.
debian-server1:~# dpkg --get-selections \* > packages.txt
The format of the produced packages.txt file will have only two columns, in column1 there will be the package (name) installed and in column 2, the status of the package e.g.: install or deinstall
Note that you can only use the --get-selections as root superuser, trying to run it with non-privileged user I got:
hipo@server1:~$ dpkg --set-selections > packages.txt

dpkg: operation requires read/write access to dpkg status area
2. Copy packages.txt file containing the installed deb packages from server1 to server2
There is many way to copy the packages.txt package description file, one can use ftp, sftp, scp, rsync ... lftp or even copy it via wget if placed in some Apache directory on server1.
A quick and convenient way to copy the file from Debian server1 to server2 is with scp as it can also be used easily for an automated script to do the packages.txt file copying (if for instance you have to implement package cloning on multiple Debian Linux servers).
 root@debian-server1:~# scp ./packages.txt hipo@server-hostname2:~/packages.txt

 The authenticity of host '83.170.97.153 (83.170.97.153)' can't be established.
 RSA key fingerprint is 38:da:2a:79:ad:38:5b:64:9e:8b:b4:81:09:cd:94:d4.
 Are you sure you want to continue connecting (yes/no)? yes
 Warning: Permanently added '83.170.97.153' (RSA) to the list of known hosts.
 hipo@83.170.97.153's password:

 packages.txt
As this is the first time I make connection to server2 from server1, I'm prompted to accept the host RSA unique fingerprint.
3. Install the copied selection from server1 on server2 with apt-get or dselect
debian-server2:/home/hipo# apt-get update

...

debian-server2:/home/hipo# apt-get upgrade

Reading package lists... Done

Building dependency tree

Reading state information... Done

debian-server2:/home/hipo# dpkg --set-selections < packages.txt

debian-server2:/home/hipo# apt-get -u dselect-upgrade --yes
The first apt-get update command assures the server will have the latest version of the packages currently installed, this will save you from running an outdated versions of the installed packages on debian-server2
Bear in mind that using apt-get sometimes, might create dependency issues. This is depending on the exact package names, being replicated in between the servers
Therefore it is better to use another approach with bash for loop to "replicate" installed packages between two servers, like so:
debian-server2:/home/hipo# for i in $(cat packages.txt |awk '{ print $1 }'); do aptitude install $i; done
If you want to automate the questioning about aptitude operations pass on the -y
debian-server2:/home/hipo# for i in $(cat packages.txt |awk '{ print $1 }'); do aptitude -y install $i; done
Be cautious if the -y is passed as sometimes some packages might be removed from the server to resolve dependency issues, if you need this packages you will have to again install them manually.
4. Mirroring package selection from server1 to server2 using one liner
A quick one liner, that does replicate a set of preselected packages from server1 to server2 is also possible with either a combination of apt, ssh, awk and dpkg or with ssh + dpkg + dselect :
a) One-liner code with apt-get unifying the installed packages between 2 or more servers
debian-server2:~# apt-get --yes install `ssh root@debian-server1 "dpkg -l | grep -E ^ii" | awk '{print $2}'`

...
If it is necessery to install on more than just debian-server2, copy paste the above code to all servers you want to have identical installed packages as with debian-server1 or use a shor for loop to run the commands for each and every host of multiple servers group.
In some cases it might be better to use dselect instead as in some situations using apt-get might not correctly solve the package dependencies, if encountering problems with dependencies better run:
debian-server2:/home/hipo# ssh root@debian-server1 'dpkg --get-selections' | dpkg --set-selections && dselect install
As you can see using this second dselect installed "package" mirroring is also way easier to read and understand than the prior "cryptic" method with apt-get, hence I personally think using dselect method is a better.
Well that's basically it. If you need to synchronize also configurations, either an rsync/scp shell script, should be used with all defined server1 config files or in case if a cloning of packages between identical server machines is necessery dd or some other tool like Norton Ghost could be used.
Hope this helps, someone.
Wed Apr 11 22:11:03 EEST 2012
Don't revoke GoDaddy SSL certificate. (Expired) Revoked SSL is impossible to revert
One of our company SSL (https) Certificates recently expired so I needed to renew the SSL certificate.
I was in a hurry doing plenty of other stuffs so it seemed logical for me to Revoke the Certificate. I thought revoking the certificate will simply cancel it and afterwards, in Godaddy's SSL (Manager Certificates) interface the Revoked - Cancelled certificate will re-appear in the menu, ready to be generated in the same way as earlier I initially generated the Godaddy's bought SSL certificate
Hence I proceeded and used Revoke button:
Well guess what my calculations, were wrong, Revoking, just cancel it. The just revoked domain certificate did not show up again in Godaddy's Cert Manager
To deal with the situation, I contacted Godaddy Support immediately with the following inquiry:
In 5 hours time I received the following tech support answer:
Apparently Godaddy, can work out a bit on their tech support answering time 5 hours for a simple reply is quite long.
Now taking in consideration, above reply from Godady, my only options are to either wait for 5 to 7 (business days) or buy a new credit for SSL certificate.
Buying a new credit will probably not happen as our company is experiencing some financial troubles because of the crisis. So I guess we will have to wait for this 7 days at worst. So again if you wonder to REVOKE or not an SSL certificate. Think again ...
Just a small note to make here, that Godaddy has a very straight forward way to just renew an expered certificate, which I succesfully later have done for 4 domains. Well, if only I knew earlier what REVOKE really does I wouldn't have ended in this mess ...
I was in a hurry doing plenty of other stuffs so it seemed logical for me to Revoke the Certificate. I thought revoking the certificate will simply cancel it and afterwards, in Godaddy's SSL (Manager Certificates) interface the Revoked - Cancelled certificate will re-appear in the menu, ready to be generated in the same way as earlier I initially generated the Godaddy's bought SSL certificate
Hence I proceeded and used Revoke button:
Well guess what my calculations, were wrong, Revoking, just cancel it. The just revoked domain certificate did not show up again in Godaddy's Cert Manager
To deal with the situation, I contacted Godaddy Support immediately with the following inquiry:
Other : Revoked SSL Certificate
Issue :
Hello we have revoked the SSL certificate for our domain our.domain-name.com.
Can we revert back the certificate as it was.Mbr /> If not how to generate a new key for our domain https://our.domain-name.com
Thanks in Advance. Kindest Regards "My-Company-name" Tech Support
In 5 hours time I received the following tech support answer:
Dear Tech Support,
Thank you for contacting Online Support. It is not possible to reinstate a canceled certificate. You will need to purchase a new certificate. I have requested that a refund be applied to your account. Once the credit appears in your account, please allow 5-7 business days to see the funds applied to the associated payment method. Thank you for your patience and understanding in this matter.
Please let us know if we can help you in any other way.
Sincerely,
Christian P.
Online Support Team
Customer Inquiry
Name : Cadia Tech Support
Domain Name : our.domain-name.com
ShopperID : xxxxxxxxx
Phone : xxxxxxxx
Shopper Validated : Yes
Browser : Mozilla/5.0 (Windows; U; Windows NT 6.1; en-US; rv:1.9.2.3) Gecko/20100401 Firefox/3.6.3
Apparently Godaddy, can work out a bit on their tech support answering time 5 hours for a simple reply is quite long.
Now taking in consideration, above reply from Godady, my only options are to either wait for 5 to 7 (business days) or buy a new credit for SSL certificate.
Buying a new credit will probably not happen as our company is experiencing some financial troubles because of the crisis. So I guess we will have to wait for this 7 days at worst. So again if you wonder to REVOKE or not an SSL certificate. Think again ...
Just a small note to make here, that Godaddy has a very straight forward way to just renew an expered certificate, which I succesfully later have done for 4 domains. Well, if only I knew earlier what REVOKE really does I wouldn't have ended in this mess ...
Tue Apr 10 13:15:24 EEST 2012
How to list Files in a directory and generate web URLS with PHP
I needed a short PHP script that reads all, my .html files in a directory and then generates html a hrefs links pointing to each of the html files stored in the directory.
Here is the short code I come up:
In my case the directories with html were planned to contain, less than 100 files a directory, so in order to show links to only the first 100 files in the directory, I used the $max_files=100 and a check if value is reached in the while loop. For anyone who want to build html you see in above while if $max_files is reached then the while loop exits.
Because by default the files returned contained the naming format file_name.html, whether I wanted to show only the file name without the .html extensions used str_replace(); to get rid of file extensions string.
Here is the short code I come up:
$directory_to_open="my-dir/";
$max_files=100;
$i=0;
if ($handle = opendir("$directory_to_open")) {
while (false !== ($file = readdir($handle)) && $i <= $max_files)
{
$i=$i+1;
if ($file != "." && $file != "..")
{
$thelist .= '| '.str_replace(".html","",$file).' |';
echo "$thelist"; }
}
closedir($handle);
}
In my case the directories with html were planned to contain, less than 100 files a directory, so in order to show links to only the first 100 files in the directory, I used the $max_files=100 and a check if value is reached in the while loop. For anyone who want to build html you see in above while if $max_files is reached then the while loop exits.
Because by default the files returned contained the naming format file_name.html, whether I wanted to show only the file name without the .html extensions used str_replace(); to get rid of file extensions string.
Mon Apr 9 14:06:56 EEST 2012
Tools for finding files containing a string (recursively) in Graphical Enviroments (GNOME, KDE and XFCE) on GNU linux and FreeBSD
1. Finding files containing a specific string with GNOME GUI tool gnome-search-tool
Default installation of GNOME version 2.x and 3.x is equipped with a tool called gnome-search-tool. The tool is used by default in the GNOME's file explorer program Nautilus. The quickest way to look for a certain text string across all the files located in a directory and show them is with nautilus's - find manager.

Nautilus find uses gnome-search-tool program for its file search. Below is a screenshot showing the gnome-search-tool embedded in nautilus:
The gnome-search-tool can be also invoked through Gnome Run Application with ALT+F2 or directly run from terminal e.g.:
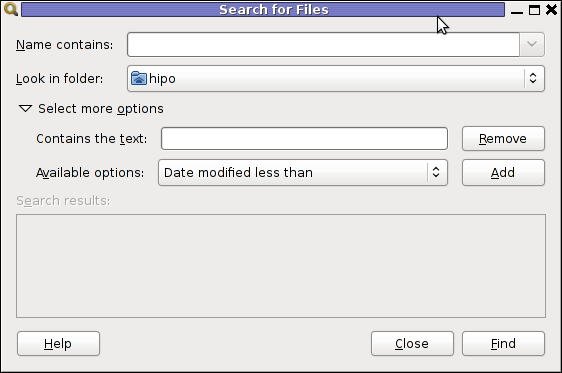
As you can see in below screenshot, gnome-search-tool has many available filter file search criterias.
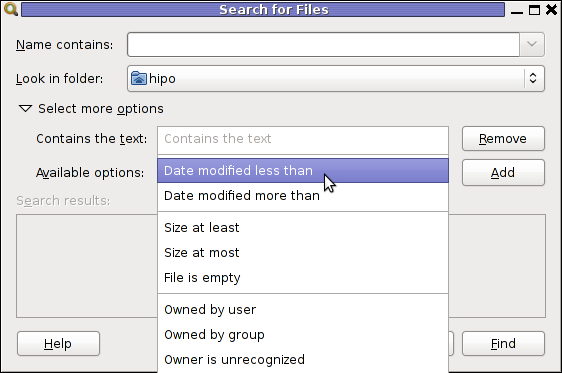
You see I wanted to look for my project passwords so typed in pass in Contains the text: field and pressed enter to simply look for this text in all my files in the look in folder RichtooRich

Actually gnome-search-tool offers plenty of more options than one might look for. With it one can easily make a combination of complex search critea (filters) and hence a very versatile Desktop file saerch tool. From testing it I can say it for sure more powerful program than MS Windows default file searching program called Find It - this is the program with the ( "dumb dog holing a magnifier" :)
One can use the Add or Remove to Add single or various combination of filter criterias. For the sake of testing it, I've added a number of file search filters as you see in the shot below:
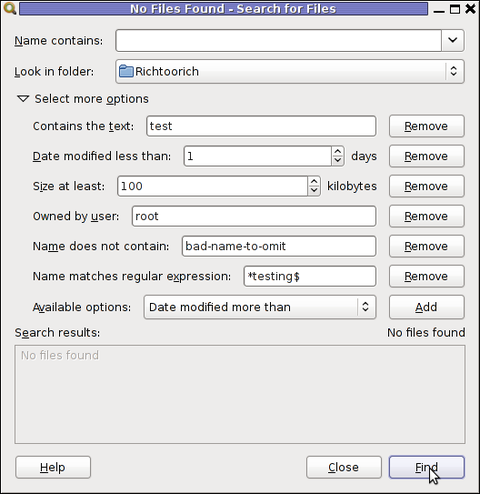
The search critias are not matched and therefore 0 files were found.
In case if you wonder how gnome-search-tool works? It is actually a GUI wrapper to Linux's Linux find command .
I wasn't complete sure if it uses find for the file search, so to check I run a one search and in in console ran:
You can see the filters set in gnome-search-tool are passed as command arguments to find.
2. Finding files containing a string recursively in KDE with kfind
For KDE users there is a handy little tool called Kfind. Kfind is less "search customizable" if it is compared to gnome-search-tool but it has advantage that its search options are way more "user friendly" / human readable :)
To use the tool to look in all files for explicit string fill in Look in: or browse to set the main directory where it will look for the string.
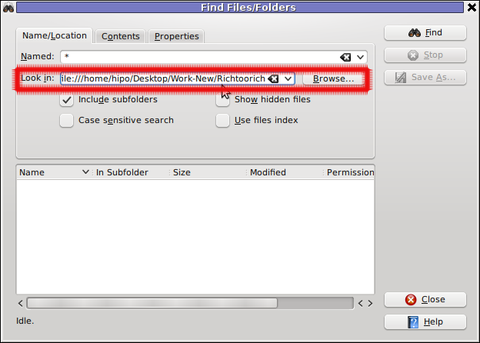 Then in the second Contents (tab) fill in the Containing Text: with the string to be looked for:
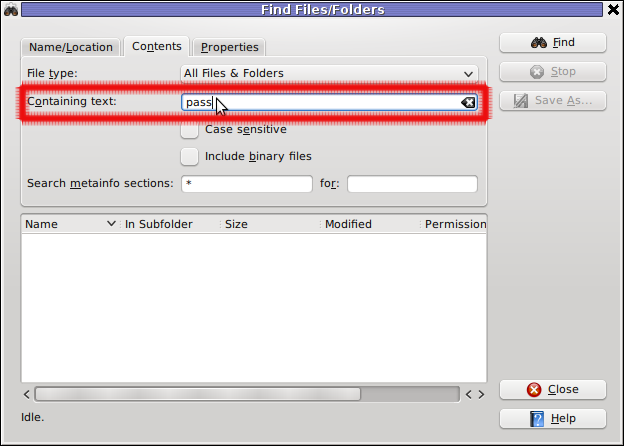
Finally in the Names/Location tab, there are two other helpful search options - Show Hidden Files and Case Sensitive Search
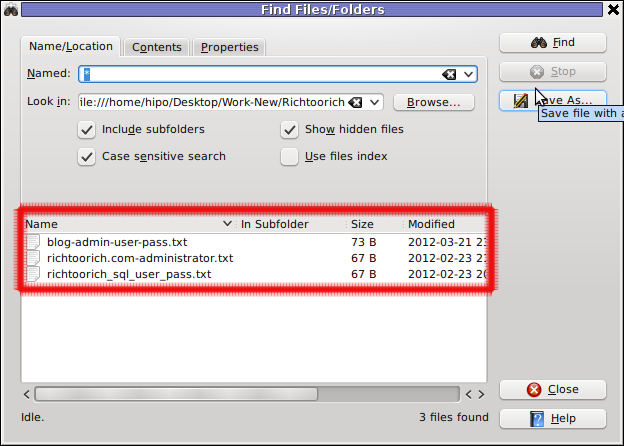
I'll be curious to hear if someone knows some other nice software easy and comprehensive to use for Linux / BSD. If you know a better file searcher for Linux than this kfind or gnome-search-tool please drop a comment.
Default installation of GNOME version 2.x and 3.x is equipped with a tool called gnome-search-tool. The tool is used by default in the GNOME's file explorer program Nautilus. The quickest way to look for a certain text string across all the files located in a directory and show them is with nautilus's - find manager.
Nautilus find uses gnome-search-tool program for its file search. Below is a screenshot showing the gnome-search-tool embedded in nautilus:
The gnome-search-tool can be also invoked through Gnome Run Application with ALT+F2 or directly run from terminal e.g.:
hipo@noah:~$ gnome-search-tool
As you can see in below screenshot, gnome-search-tool has many available filter file search criterias.
You see I wanted to look for my project passwords so typed in pass in Contains the text: field and pressed enter to simply look for this text in all my files in the look in folder RichtooRich
Actually gnome-search-tool offers plenty of more options than one might look for. With it one can easily make a combination of complex search critea (filters) and hence a very versatile Desktop file saerch tool. From testing it I can say it for sure more powerful program than MS Windows default file searching program called Find It - this is the program with the ( "dumb dog holing a magnifier" :)
One can use the Add or Remove to Add single or various combination of filter criterias. For the sake of testing it, I've added a number of file search filters as you see in the shot below:
The search critias are not matched and therefore 0 files were found.
In case if you wonder how gnome-search-tool works? It is actually a GUI wrapper to Linux's Linux find command .
I wasn't complete sure if it uses find for the file search, so to check I run a one search and in in console ran:
hipo@noah:~$ ps axuwf|grep -i find
hipo 18213 2.0 0.0 25568 1276 ? S 23:55 0:00 find /home/hipo/Richtoorich ( -iname * -o -iname .* ) ! -type p -exec grep -i -I -c test {} ; -mtime -1 ( -size 102400 -o -size +102400 ) -user root ! -iname *bad\-name\-to\-omit* -print
You can see the filters set in gnome-search-tool are passed as command arguments to find.
2. Finding files containing a string recursively in KDE with kfind
For KDE users there is a handy little tool called Kfind. Kfind is less "search customizable" if it is compared to gnome-search-tool but it has advantage that its search options are way more "user friendly" / human readable :)
To use the tool to look in all files for explicit string fill in Look in: or browse to set the main directory where it will look for the string.
Then in the second Contents (tab) fill in the Containing Text: with the string to be looked for:Finally in the Names/Location tab, there are two other helpful search options - Show Hidden Files and Case Sensitive Search
I'll be curious to hear if someone knows some other nice software easy and comprehensive to use for Linux / BSD. If you know a better file searcher for Linux than this kfind or gnome-search-tool please drop a comment.
Sat Apr 7 13:27:32 EEST 2012
PHP system(); hide command output - How to hide displayed output with exec();
I've recently wanted to use PHP's embedded system(""); - external command execute function in order to use ls + wc to calculate the number of files stored in a directory. I know many would argue, this is not a good practice and from a performance view point it is absolutely bad idea. However as I was lazy to code ti in PHP, I used the below line of code to do the task:
This example worked fine for me to calculate the number of files in my /dir, but unfortunately the execution output was also visialized in the browser. It seems this is some kind of default behaviour in both libphp and php cli. I didn't liked the behaviour so I checked online for a solution to prevent the system(); from printing its output.
What I found as a recommendations on many pages is instead of system(); to prevent command execution output one should use exec();.
Therefore I used instead of my above code:
By the way insetad of using exec();, it is also possible to just use ` (backtick) - in same way like in bash scripting's ``.
Hence the above code can be also written for short like this:
:)
<?

echo "Hello, ";

$line_count = system("ls -1 /dir/|wc -l");

echo "File count in /dir is $line_count \n";

?>
This example worked fine for me to calculate the number of files in my /dir, but unfortunately the execution output was also visialized in the browser. It seems this is some kind of default behaviour in both libphp and php cli. I didn't liked the behaviour so I checked online for a solution to prevent the system(); from printing its output.
What I found as a recommendations on many pages is instead of system(); to prevent command execution output one should use exec();.
Therefore I used instead of my above code:
<?

echo "Hello, ";

$line_count = exec("ls -1 /dir/|wc -l");

echo "File count in /dir is $line_count \n";

?>
By the way insetad of using exec();, it is also possible to just use ` (backtick) - in same way like in bash scripting's ``.
Hence the above code can be also written for short like this:
<?

echo "Hello, ";

$line_count = `ls -1 /dir/|wc -l`;

echo "File count in /dir is $line_count \n";

?>
:)
Fri Apr 6 13:48:10 EEST 2012
Fix Null error in Wordpress comment reply with wordpress-threaded-comments plugin enabled
I'm running Wordpress for already 3 years or so now. Since some very long time. The first wordpress install, I can hardly remember but it something like wordpress 2.5 or wordpress 2.4
Since quite a long time my wordpress blog is powered by a number of plugins, which I regularly update, whenever new plugins pops up ...
I haven't noticed most of the time problems during major Wordpress platform updates or the update of the installed extensions. However, today while I tried to reply back to one of my blog comments, I've been shocked that, I couldn't.
Pointing at the the Comment Reply box and typing inside was impossible and a null message was stayed filled in the form:

To catch what was causing this weird misbehaving with the reply comments functionality, I grepped through my /var/www/blog/wp-content/plugins/* for the movecfm(null,0,1,null):
I've taken the string movecfm(null,0,1,null) from the browser page source in in my Firefox by pressing - Ctrl+U).
Once I knew of the problem, I first tried commenting the occurances of the null fields in wp-thread-comment.php, but as there, were other troubles in commenting this and I was lazy to read the whole code, checked online if some other fellows experienced the same shitty null void javascript error and already someone pointed at a solution. In the few minutes search I was unable to find anyone who reported for this bug, but what I found is some user threads on wordpress.org mentioning since Wordpress 2.7+ the wordpress-threaded-comments is obsolete and the functionality provided by the plugin is already provided by default in newer WPinstalls.
Hence in order to enable the threaded comments Wordpress (embedded) reply functionality from within the wp-admin panel used:
You see there is also an option to define how many nested comments subcomments, can be placed per comment, the default was 5, but I thought 5 is a bit low so increased it to 10 comments reply possible per comment.
Finally, to prevent the default threaded comments to interfere with the Wordpress Threaded Comments plugin, disabled the plugin through menus:
This solved the weird javascript null "bug" caused by wordpress-threaded-comments once and for all.
Hopefully onwards, my blog readers will not have issues with threaded Reply Comments.
Since quite a long time my wordpress blog is powered by a number of plugins, which I regularly update, whenever new plugins pops up ...
I haven't noticed most of the time problems during major Wordpress platform updates or the update of the installed extensions. However, today while I tried to reply back to one of my blog comments, I've been shocked that, I couldn't.
Pointing at the the Comment Reply box and typing inside was impossible and a null message was stayed filled in the form:
To catch what was causing this weird misbehaving with the reply comments functionality, I grepped through my /var/www/blog/wp-content/plugins/* for the movecfm(null,0,1,null):
# cd /var/www/blog/wp-content/plugins

# grep -rli 'movecfm(null,0,1,null)' */*.php

wordpress-thread-comment/wp-thread-comment.php
I've taken the string movecfm(null,0,1,null) from the browser page source in in my Firefox by pressing - Ctrl+U).
Once I knew of the problem, I first tried commenting the occurances of the null fields in wp-thread-comment.php, but as there, were other troubles in commenting this and I was lazy to read the whole code, checked online if some other fellows experienced the same shitty null void javascript error and already someone pointed at a solution. In the few minutes search I was unable to find anyone who reported for this bug, but what I found is some user threads on wordpress.org mentioning since Wordpress 2.7+ the wordpress-threaded-comments is obsolete and the functionality provided by the plugin is already provided by default in newer WPinstalls.
Hence in order to enable the threaded comments Wordpress (embedded) reply functionality from within the wp-admin panel used:
Settings -> Discussions -> Enable Threaded (nested) comments (Tick)
You see there is also an option to define how many nested comments subcomments, can be placed per comment, the default was 5, but I thought 5 is a bit low so increased it to 10 comments reply possible per comment.
Finally, to prevent the default threaded comments to interfere with the Wordpress Threaded Comments plugin, disabled the plugin through menus:
Plugins -> Active -> Wordpress Thread Comments (Deactivate)
This solved the weird javascript null "bug" caused by wordpress-threaded-comments once and for all.
Hopefully onwards, my blog readers will not have issues with threaded Reply Comments.
Thu Apr 5 16:26:17 EEST 2012
How to run your Own / Personal Domain Web WHOIS service in a minute with SpeedyWHOIS
I've been planning to run my own domain WHOIS service, for quite sime time and I always postpone or forgot to do it.
If you wonder, why do I need the web whois service, the answer is it is way easier to use and remember for future reference, than wasting time n search for a whois service in google and then using some other's service to get a simple DOMAIN WHOIS info.
I postpopned and postponed running my own web whois, just until just yesterday, whether I have remembered about my idea to have my own whois up and running.
To achieve my goal I checked if there is free software or (open source) software that easily does this.
I know I can write one for me from scratch, but since it would have cost me some at least a week of programming and testing and I didn't wanted to go this way.
To check if someone had already made an easy to use whois service, I looked through in the "ultimate source for free software" sourceforge.net
Looking for the "whois web service" keywords, displayed few projects on top. But unfortunately many of the projects sources was not available anymore from http://sf.net and the project developers pages..
Thanksfully in a while, I found a project called SpeedyWhois, which PHP source was available for download.
Just in case if SpeedyWhois, disappears in the future (like it maybe) happened with, some of the other WHOIS web service projects, I've made , (like is the case with so many free software php scripts and apps) - the installation went quite smoothly.
To install it I took the following 3 steps:
1. Download the source (zip archive) with wget
# cd /var/www/whois-service;

/var/www/whois-service# wget -q http://pc-freak.net/files/speedywhois-0.1.4.zip
2. Unarchive it with unzip command
/var/www/whois-service# unzip speedywhois-0.1.4.zip

...


3. Edit Apache httpd.conf to create VirtualHost


This step is not mandatory, but I thought it is nice if I put the whois service under a subdomain, so add a VirtualHost to my httpd.conf


The Virtualhost Apache directives, I used are:


<VirtualHost *:80>

        ServerAdmin hipo_aT_pc-freak.net

        DocumentRoot /var/www/whois-service

        ServerName whois.pc-freak.net

        <Directory /var/www/whois-service>

        AllowOverride All

        Order Allow,Deny

        Allow from All

        </Directory>

</VirtualHost>


Onwards to take effect of new Webserver configs, I did Apache restart

# /usr/local/etc/rc.d/apache2 restart


Further on You can test whois a domain using my new installed SpeedyWHOIS -  Web WHOIS service  on  whois.pc-freak.net
.
Whenever I have some free time, maybe I will work on the code, to try to add support for logging of previous whois requests and posting links pointing to the previous whois done via the web WHOIS service on the main whois page.


One thing that I personally disliked in SpeedyWHOIS is, if there is no WHOIS information returned for a domain (e.g.) a:


# whois domainname.com


returns an empty information, the script doesn't warn with a message there is no WHOIS data available for this domain or something.


This is not so important as this kind of behaviour of 'error' handling can easily be changed with minimum changes in the php code.
If you wonder, why do I need the web whois service, the answer is it is way easier to use.


I don't have more time to research a bit further on the alternative open source web whois services, so I would be glad to hear from anyone who tested other web whois service that is free comes under a FOSS license.
In the mean time, I'm sure people with a small internet websites like mine who are looking to run their OWN (personal) whois service SpeedyWHOIS
does a great job.
Wed Apr 4 16:56:25 EEST 2012
How to delete user belonging to a group on FreeBSD - "the BSD (proper) way"
Some long time ago, I've created one user called newuser, on my home FreeBSD router and added him to be a member of wheel group. I've completely forgot about the users existing, just until yesterday when I saw the user still hanging around in my wheel group. For those unfamiliar with the wheel group on FreeBSD, wheel is the same like root group on Linux and some other *nices.
Before proceed with the reason fot this post to show the proper way of adding and removing user to a group on BSD, I will first explain a bit few things concerning BSD password files, where they are and why are they so many :)
On the first glimpse, people unfamiliar with BSD will be shocked / (confused) to find out there are 5 files, which has something to do to password authentication.
1. Some short explanation on /etc/passwd /etc/master.passwd, /etc/pwd.db, /etc/spwd.db, /etc/group and login.conf.db BSD auth and login files FreeBSD and rest of the BSD family has 5 files which deal with username and password authentication, group ids, default shell configs etc.:
The 5 ones are:
- /etc/passwd
- /etc/master.passwd
- /etc/group
- /etc/pwd.db
- /etc/spwd.db
/etc/passwd is readable by all the users on the system whether /etc/master.passwd is only readable by root and toor administrative users. In that numbers members to wheel group have access for reading to all of the five.
Just like on Linux /etc/passwd contains all kind of system existing users ... everything except the stored user passwords strings.
/etc/master.passwd is actually the BSD equivalent of Linux's /etc/shadow file. It stores md5 encrypted user passwords (by default) in a form of encrypted hashes. For tightened security one can, however choose to use a blowfish password hash encryption instead.
Since my newuser was a member to group, the user had read access to my /etc/master.passwd and hence this was a potential potential security hole on my system.
To close the whole I decided to remove newuser's membership to wheel group.
Before I say how I actually did it. I will sawy few more words on BSD systems authentication files structure.
The file /etc/master.passwd is actually the BSD equivalent of Linux's /etc/shadow.
Besides /etc/password and /etc/master.passwd, on BSD there are also two other separate binary database files storing authentication user credentials:
freebsd# ls -l /etc/pwd.db /etc/spwd.db

-rw-r--r--  1 root  wheel  90112 Mar 13 23:56 /etc/pwd.db

-rw-------  1 root  wheel  90112 Mar 13 23:56 /etc/spwd.db
In case if you're wondering what are this two *pwd.db files for:
/etc/pwd.db contains in database format /etc/passwd content
/etc/spwd.db contains in database format /etc/master.password
, spwd.db stands for (shadow) pwd.db.
Near the end of the man page for pwd_mkdb, pwd.db is described as "insecure password database file and spwd.db as secure password database file.
The exact database type can be displayed with file command which is alawys helpful in (determining a file types).
I use file almost daily to check the (MIME) type of most of the "weird" file type extensions I have on my system. If not yet familiar with file cmd, be sure to try it on few various file extensions and see how it works.
freebsd# file /etc/pwd.db

/etc/pwd.db: Berkeley DB 1.85 (Hash, version 2, native byte-order)

freebsd# file /etc/spwd.db

/etc/spwd.db: Berkeley DB 1.85 (Hash, version 2, native byte-order)
You see, files are stored in format of Berkley DB Hash version 2.
The two files got updated every time with command pwd_mkdb whether a change in /etc/master.passwd occurs through use of lets say pw or vipw.
Btw, one common way to initiate changes to /etc/master.passwd (lets say modify a user shell) is possible through vipw command.
vipw is a wrapper command that launch instance of vi editor over /etc/master.passwd, once changes are saved in the file, pwd_mkdb is run to regenerate the /etc/pwd.db and /etc/spwd.db. With this in mind vipw on BSD is the equivalent of manually editting /etc/shadow with vi /etc/shadow on G / Linux.
Whether talking about user credentials and /etc/pwd.db and /etc/spwd.db, its worthy to mention there is one more db file - /etc/login.conf.db. /etc/login.conf.db is red everytime a user logs in the system. It is is generated from the plain text /etc/login.conf. Just in case if wondering why this .db files are used on FreeBSD at all, the reason is efficiency.
Reading binary database (structured data) as we all know is way faster than plain text file look ups
The performance advantage of the BSD's use of .db stored credentials is not so-"visible" in normal BSD systems with less than lets say 100 users.
Anyways on systems with few thousands of users that login and logout frequently the speed difference will surely be clear.
Manual generation of /etc/pwd.db and /etc/spwd.db or /etc/login.conf.db is possible via pwd_mkdb and cap_mkdb commands.
After explaining shortly the basic auth files, I'll proceed with my specific case and will explain how I removed my newuser from membership in wheel group.
2. "BSD way" to remove or add existing user to member a group
The record for my user newuser in /etc/group, looked like so:
freebsd# grep -i newuser /etc/group
wheel:*:0:root,hipo,newuser
I was curious if /etc/group was possible to manually edit like on Linux with vi or mcedit. I thought this might be a problem since I thought the /etc/group info might be stored somewhere along in /etc/pwd.db or /etc/spwd.db. My hypothesis, however was wrong.
Straight use of vim /etc/group and deletion of the newuser record was enough to remove the user from wheel.
Anyways this is not a standard way and especially if it has to be scripted it is unnecessery hassel, hence below is the 'BSD way' via pw:
freebsd# pw groupmod wheel -d newuser
There is no output returned, therefore the command executed succesfully.
pw can be used for plenty of user management operations. Lets say I want to add back the newuser to be a member of wheel some time in the future, I could use:
freebsd# pw groupmod wheel -m newuser
To later check if newuser is succesfully removed from /etc/group:
freebsd# grep -i wheel /etc/group

wheel:*:0:root,hipo
Generally it is better, to stick to one way to do everything related to user and group management with pw and use it to show group permissions for wheel instead:
freebsd# pw group show wheel

wheel:*:0:root,hipo
Tue Apr 3 12:44:17 EEST 2012
How to enable Newsletter support to Wordpress based website or blog with Newsletter or E-mail Newsletter plugin
One of the companies, where I'm doing a part time job, as an IT Consultant, System Administrator and Web developer, a e-marketing specialist and business consultant (the list goes on ;)) ... planned to integrate a Newsletter support in their Wordpress based websites.
As this fits my "job description" ,I took the task and implemented a simple but functional Newsletter support to their 4 WP based sites. In this article I will in short describe, my experience with placing the Newsletter subscription.:
Earlier I've done something similar as, I've added a subscipriotion (form) box to Wordpress to use Google Feedburner RSS . What I needed this time, however was a bit different. The company required the newsletter to be a separate one and don't relay on Google Feedburner (RSS) to deal with the subscriptions .
It took me a while until I came with a working version of a Newsletter and I actually tested all in all 4 newsletter wordpress plugins before, I had a well working one. Here in short, In this article I will shortly take a look at the 4 WP newsletter plugins:
1. A wordpress plugin called simply Newsletter
As of time of writting this is the most popular wordpress plugin, when I looked through:
Wordpress Newsletter plugin can be obtained via http://wordpress.org/extend/plugins/newsletter/ It is Advanced and probably the most superior free newsletter for WP. The plugin supports email subscriber user confirmation (double opt-in), as well as can be accustomized to work with single opt-in.
For all those who don't know Double Opt-In is the technical term for a once requested user email (single opt-in), for subscription which is later confirmed by following an email box sent link pointing to confirmation URL.
Double Opt-In is almost a standard and "must" as otherwise, many spam bots will fill in randomly email addresses and your subscribers list will be mostly containing spammer email addresses.
1. Install Wordpress Newsletter Plugin To install Newsletter plugin;
a) download and put into wp-content/plugins/ and unzip
b) Enable in Plugins:
c) Configure Newsletter
A new menu will appear in the left WP control panel, like you see in below screenshot:
Newsletter plugin is very configurable but it takes a bit of longer time until it is confingured to work well. So be patient with it.
d) Make Newsletter field appear on a wordpress home page.
In order to enable just configure Newsletter plugin (text and subscription form) to appear on the wordpress pages, you need to add the plugin as a widget. To do so go to:
Drag and drop the Newsletter plugin widget to the widget right pane. Put it on the exact place you would like it to appear.
Once the widget is placed, you will see it appear to the respective location on WP pages, you should have something like:

If while you enable the plugin and put the Newsletter widget doesn't appear on Wordpress, this is probably due to some Cache left from some enabled WP caching pugin like W3 Total Cache
In any case if Newsletter form subscription, is not appearing on your pages, delete the cache/ directory:
I've experienced, this caching problems and it was quite a riddle, until I found out that the Newsletter plugin is not appearing on the WP pages because of the old cache. I've checked bacicly everything (error.log , apache php_error.log) etc.. Therein, there was no error or anything, so after a long 1 hour or so poundering I figured out this kind of caching done by W3 Cache.
My guess is, the same newsletter "not working" issue is probably observable also on WP installs with other caching plugins like WP Hyper Cache or WP Db Cache
2. ALO EasyMail Newsletter Wordpress plugin
I don't know, why but this plugin didn't work properly on the wordpress install, I've tested it. Its true the wordpress version where I give it a try was not running, the latest stable wordpress so I assume this might be the reason for the empty pages returned when I enabled the plugin.
According to wordpress's plugin - http://wordpress.org/extend/plugins/alo-easymail/, the plugin is marked as Works, however in my case it didn't.
3. Adding Wordpress Newsletter through Email newsletter
This plugin was a real piece of cake, compared to all of the rest, tested this one was the easiest one to install and configure on Wordpress.
Just like with Newsletter and ALO EasyMail Newsletter once the user is subscribed, from the admin there is possibility to sent crafted messages to all subscribers.
The plugin is a great, choice for anyone who is looking for quick install of Newsletter on Wordpress without extra "config" complications.
Below is a quote describing email newsletter, taken from the plugin author webpage;
Advantage of this plugin
- Enabling the plugin is done via admin menus:
Afterwards, the plugin requires a quick configuration from wp-admin:
You see in the screenshot, the config where to place the plugin is trivial.
To make Email Newsletter appear on the pages, you will have to add the Email Newsletter widget from:
The widget looks like the one in below screenshot:

Drag and drop the widget to the widgets pane. Onwards on the wordpress pages, should appear an email subsciption box:

Though Email Newsletter is great, it has one serious drawback, as it doesn't support Double Opt-In. Therefore people subscribing through it are not mailed with a request to confirm their email subscription request.
As a result, its very likely many spam-bots submit fake emails in the newsletter subscribe form and in 1 year time your newsletter email list might get full with tens of thousands unexistent emails. If you end up with this bad scenario, once newsletter emails are sent to (regular) exitent subscribers, many of the bulk emails in the list will never reach their senders, but will just fill-up the mail server queue and take up server resources for nothing for one week or so (depending on the email configuration keep undelivered mail setting).
Anyways, since the basis of this plugin works fine, I'm sure if the author modifies it to include a simple Captcha instead of double-opt functionality, the plugin can become top plugin.
As this fits my "job description" ,I took the task and implemented a simple but functional Newsletter support to their 4 WP based sites. In this article I will in short describe, my experience with placing the Newsletter subscription.:
Earlier I've done something similar as, I've added a subscipriotion (form) box to Wordpress to use Google Feedburner RSS . What I needed this time, however was a bit different. The company required the newsletter to be a separate one and don't relay on Google Feedburner (RSS) to deal with the subscriptions .
It took me a while until I came with a working version of a Newsletter and I actually tested all in all 4 newsletter wordpress plugins before, I had a well working one. Here in short, In this article I will shortly take a look at the 4 WP newsletter plugins:
1. A wordpress plugin called simply Newsletter
As of time of writting this is the most popular wordpress plugin, when I looked through:
- http://wordpress.org/extend/plugins/
Wordpress Newsletter plugin can be obtained via http://wordpress.org/extend/plugins/newsletter/ It is Advanced and probably the most superior free newsletter for WP. The plugin supports email subscriber user confirmation (double opt-in), as well as can be accustomized to work with single opt-in.
For all those who don't know Double Opt-In is the technical term for a once requested user email (single opt-in), for subscription which is later confirmed by following an email box sent link pointing to confirmation URL.
Double Opt-In is almost a standard and "must" as otherwise, many spam bots will fill in randomly email addresses and your subscribers list will be mostly containing spammer email addresses.
1. Install Wordpress Newsletter Plugin To install Newsletter plugin;
a) download and put into wp-content/plugins/ and unzip
server:~# cd /var/www/blog/wp-content/plugins

server:/var/www/blog/wp-content/plugins# wget -q http://downloads.wordpress.org/plugin/newsletter.zip

server:/var/www/blog/wp-content/plugins# unzip newsletter.zip
b) Enable in Plugins:
Plugins -> Newsletter (Activate)
c) Configure Newsletter
A new menu will appear in the left WP control panel, like you see in below screenshot:
Newsletter plugin is very configurable but it takes a bit of longer time until it is confingured to work well. So be patient with it.
d) Make Newsletter field appear on a wordpress home page.
In order to enable just configure Newsletter plugin (text and subscription form) to appear on the wordpress pages, you need to add the plugin as a widget. To do so go to:
Appearance -> Widgets
Drag and drop the Newsletter plugin widget to the widget right pane. Put it on the exact place you would like it to appear.
Once the widget is placed, you will see it appear to the respective location on WP pages, you should have something like:
If while you enable the plugin and put the Newsletter widget doesn't appear on Wordpress, this is probably due to some Cache left from some enabled WP caching pugin like W3 Total Cache
In any case if Newsletter form subscription, is not appearing on your pages, delete the cache/ directory:
# rm -rf /var/www/wordpress-site/wp-content/cache/
I've experienced, this caching problems and it was quite a riddle, until I found out that the Newsletter plugin is not appearing on the WP pages because of the old cache. I've checked bacicly everything (error.log , apache php_error.log) etc.. Therein, there was no error or anything, so after a long 1 hour or so poundering I figured out this kind of caching done by W3 Cache.
My guess is, the same newsletter "not working" issue is probably observable also on WP installs with other caching plugins like WP Hyper Cache or WP Db Cache
2. ALO EasyMail Newsletter Wordpress plugin
I don't know, why but this plugin didn't work properly on the wordpress install, I've tested it. Its true the wordpress version where I give it a try was not running, the latest stable wordpress so I assume this might be the reason for the empty pages returned when I enabled the plugin.
According to wordpress's plugin - http://wordpress.org/extend/plugins/alo-easymail/, the plugin is marked as Works, however in my case it didn't.
3. Adding Wordpress Newsletter through Email newsletter
This plugin was a real piece of cake, compared to all of the rest, tested this one was the easiest one to install and configure on Wordpress.
Just like with Newsletter and ALO EasyMail Newsletter once the user is subscribed, from the admin there is possibility to sent crafted messages to all subscribers.
The plugin is a great, choice for anyone who is looking for quick install of Newsletter on Wordpress without extra "config" complications.
Below is a quote describing email newsletter, taken from the plugin author webpage;
Advantage of this plugin
- Simple no coding required.
- Easy installation .
- Using this plug-in we can send email to all registered folks.
- Using this plug-in we can send email to all comment posted folks.
- Email subscribe box for front end
- Check box option available to select/unselect emails from the send mail list.
- Integrated the email newsletter plugin & simple contact form plugin
- Enabling the plugin is done via admin menus:
Plugins -> Inactive -> Email Newsletter (enable)
Afterwards, the plugin requires a quick configuration from wp-admin:
Email Newsletter -> Subscriber form setting
You see in the screenshot, the config where to place the plugin is trivial.
To make Email Newsletter appear on the pages, you will have to add the Email Newsletter widget from:
Appearance -> Widgets
The widget looks like the one in below screenshot:
Drag and drop the widget to the widgets pane. Onwards on the wordpress pages, should appear an email subsciption box:
Though Email Newsletter is great, it has one serious drawback, as it doesn't support Double Opt-In. Therefore people subscribing through it are not mailed with a request to confirm their email subscription request.
As a result, its very likely many spam-bots submit fake emails in the newsletter subscribe form and in 1 year time your newsletter email list might get full with tens of thousands unexistent emails. If you end up with this bad scenario, once newsletter emails are sent to (regular) exitent subscribers, many of the bulk emails in the list will never reach their senders, but will just fill-up the mail server queue and take up server resources for nothing for one week or so (depending on the email configuration keep undelivered mail setting).
Anyways, since the basis of this plugin works fine, I'm sure if the author modifies it to include a simple Captcha instead of double-opt functionality, the plugin can become top plugin.
Mon Apr 2 13:31:22 EEST 2012
Saint Abraham the Bulgarian co-memoration in Bulgarian Orthodox Church
Saint Abraham the Bulgarian is an Orthodox Christian saint venerated across most Slavonic Christian dome. His co-memoration in the Bulgarian Orthodox Church (BPC) is on 1st of April.
What is unique about this saint is that he used to be born and grown in the tradition of the Muslim (Islam) faith and by the great providence of God he converted to the true faith of Christianity.
St. Abraham of (Bulgaria), was born in Volga Bulgaria in a community of Muslim Volga Bulgars (old Bulgarians). Nowdays Volga Bulgaria is located in Tararstan Russia. The saint used to be an islamic merchant and His martyrdom for Christ happened in March 6 (according to old Church Calendar) in year 1229.
He used to live in a very complex situation, when the islamic influence of Arabs in his motherland was quite severe. St. Abraham of Bulgaria used to be a rich man for his time, he was a merchant.
Because of the trade he travelled a lot to the Byzantine Empire and the Orthodox Christian principalities. This give him an opportunity to get to know Christian faith little by little.
He was accustomed to a wordly life but still always accepted strangers and similar to the Old Testamental father of natiosn st. Abraham he's been very hospitable to poor people.
By Gods grace he become convinced Muslim faith does not a true faith to the true God and by God's grace he accepted Jesus Christ as a Lord and saviour being baptized and hence converting to the truthful Christian faith.
His Christian baptizmal was accepted from Russian traders, who lived nearby the place of Great Bulgar.
Being baptized in the Christian faith Saint Abraham of Bulgaria not only confessed Christian faith across his fellow people, but he also led very harsh (ascetic like) life, wearing secretly below his clothes a heavy chains during his worldly travels. The profit he made from trade often he shared with the poor. Once he went for a trade to the city of Great (Bulgar) Bulgar. There he was arrested because there was a rumor, he cursed (islamic believed prophect) Mohammed and the muslim faith.

Muslims catched him and started convincing him to reject Christ, accusing him at a blasphemy. Abraham was not scared of muslim threats of expel and even death. As Muslims failed to force him "by words" to convert back to Islam, they took him and put him in jail because of his denial of (their) Islamic faith.
In jail he was tortured but, they failed to convince him to deny Christ, seeing they have no way to convince him to accept Muslim faith once again, saint tormentors first cut his hands, then the legs and finally disgraced by his boldness and continues confession of Christ they beheaded him.
Soon afterwards the city of Bulgar was captured and burned down by the Mongols, many people in that time saw this is Gods punishment for the innocent shed blood of Abraham the Bulgar.
The local Christians took his body and buried him in the Christian cemetery of the ancient city of (Bolgar) / Bulgar.
On the place, where the saint was buried, a healing water spring emerged. The first man who received healing from this spring by Christ's gracewas a muslim.

Great healing miracles happened on the saint grave. Local Christians took their relatives and bring them to the saints grave for a miracle healing and a prayer intercession of the saint. A rumour about the saints great graceous grave quickly spread and some people told about the miracle healing grave f st. Abraham to prince Georgi / (George) Vsevolodich. One year later again on 6th March 1230, the body of the saint was carried in the city of Vladimir, where the prince and his family, the Vladimirsk Bishop, the clergy and the local people received the holy relics of st. Abraham (of Bulgaria). The holy relics was kept in the local church "Dormition of Mother Mary" on 6th of March in the year of 1230.
The co-memoration of st. Abraham the Bulgarian is being observed in the Bulgarian Orthodox Church, since very ancient times.
Nowdays both Christians and Muslim celebrate the saints feast.

Interesgingly, nowdays St. Abraham the Bulgarian is venerated as a saint by both Orthodox Christians and by Muslims. Many Muslims from Turkey and other muslim countries come each year for the saints feast day to pray and ask for healing or prayer intercession to God.
Even to this very day people receive by Jesus's grace through saint Abraham the Bulgarian a various incurable disease healings, on the same spring where the saint was buried and through the incorruptable saint body.
What is unique about this saint is that he used to be born and grown in the tradition of the Muslim (Islam) faith and by the great providence of God he converted to the true faith of Christianity.
St. Abraham of (Bulgaria), was born in Volga Bulgaria in a community of Muslim Volga Bulgars (old Bulgarians). Nowdays Volga Bulgaria is located in Tararstan Russia. The saint used to be an islamic merchant and His martyrdom for Christ happened in March 6 (according to old Church Calendar) in year 1229.
He used to live in a very complex situation, when the islamic influence of Arabs in his motherland was quite severe. St. Abraham of Bulgaria used to be a rich man for his time, he was a merchant.
Because of the trade he travelled a lot to the Byzantine Empire and the Orthodox Christian principalities. This give him an opportunity to get to know Christian faith little by little.
He was accustomed to a wordly life but still always accepted strangers and similar to the Old Testamental father of natiosn st. Abraham he's been very hospitable to poor people.
By Gods grace he become convinced Muslim faith does not a true faith to the true God and by God's grace he accepted Jesus Christ as a Lord and saviour being baptized and hence converting to the truthful Christian faith.
His Christian baptizmal was accepted from Russian traders, who lived nearby the place of Great Bulgar.
Being baptized in the Christian faith Saint Abraham of Bulgaria not only confessed Christian faith across his fellow people, but he also led very harsh (ascetic like) life, wearing secretly below his clothes a heavy chains during his worldly travels. The profit he made from trade often he shared with the poor. Once he went for a trade to the city of Great (Bulgar) Bulgar. There he was arrested because there was a rumor, he cursed (islamic believed prophect) Mohammed and the muslim faith.
Muslims catched him and started convincing him to reject Christ, accusing him at a blasphemy. Abraham was not scared of muslim threats of expel and even death. As Muslims failed to force him "by words" to convert back to Islam, they took him and put him in jail because of his denial of (their) Islamic faith.
In jail he was tortured but, they failed to convince him to deny Christ, seeing they have no way to convince him to accept Muslim faith once again, saint tormentors first cut his hands, then the legs and finally disgraced by his boldness and continues confession of Christ they beheaded him.
Soon afterwards the city of Bulgar was captured and burned down by the Mongols, many people in that time saw this is Gods punishment for the innocent shed blood of Abraham the Bulgar.
The local Christians took his body and buried him in the Christian cemetery of the ancient city of (Bolgar) / Bulgar.
On the place, where the saint was buried, a healing water spring emerged. The first man who received healing from this spring by Christ's gracewas a muslim.
Great healing miracles happened on the saint grave. Local Christians took their relatives and bring them to the saints grave for a miracle healing and a prayer intercession of the saint. A rumour about the saints great graceous grave quickly spread and some people told about the miracle healing grave f st. Abraham to prince Georgi / (George) Vsevolodich. One year later again on 6th March 1230, the body of the saint was carried in the city of Vladimir, where the prince and his family, the Vladimirsk Bishop, the clergy and the local people received the holy relics of st. Abraham (of Bulgaria). The holy relics was kept in the local church "Dormition of Mother Mary" on 6th of March in the year of 1230.
The co-memoration of st. Abraham the Bulgarian is being observed in the Bulgarian Orthodox Church, since very ancient times.
Nowdays both Christians and Muslim celebrate the saints feast.
Interesgingly, nowdays St. Abraham the Bulgarian is venerated as a saint by both Orthodox Christians and by Muslims. Many Muslims from Turkey and other muslim countries come each year for the saints feast day to pray and ask for healing or prayer intercession to God.
Even to this very day people receive by Jesus's grace through saint Abraham the Bulgarian a various incurable disease healings, on the same spring where the saint was buried and through the incorruptable saint body.
Sun Apr 1 21:07:09 EEST 2012
How to quickly check unread Gmail emails on GNU / Linux - one liner script
I've hit an interesting article explaining how to check unread gmail email messages in Linux terminal. The original article is here
Being able to read your latest gmail emails in terminal/console is great thing, especially for console geeks like me.
Here is the one liner script:
Being able to read your latest gmail emails in terminal/console is great thing, especially for console geeks like me.
Here is the one liner script:
curl -u GMAIL-USERNAME@gmail.com:SECRET-PASSWORD \

--silent "https://mail.google.com/mail/feed/atom" | tr -d '\n' \

| awk -F '' '{for (i=2; i<=NF; i++) {print $i}}' \

| sed -n "s/\(.*\)<\/title.*name>\(.*\)<\/name>.*/\2 – \1/p"<br />
</code><br /><br />
<code>
Linux Users Group M. – [7] discussions, [10] comments and [2] jobs on LinkedIn<br />
Twitter – Lynn Serafinn (@LynnSerafinn) has sent you a direct message on Twitter!<br />
Facebook – Sys, you have notifications pending<br />
Twitter – Email Marketing (@optinlists) is now following you on Twitter!<br />
Twitter – Lynn Serafinn (@LynnSerafinn) is now following you on Twitter!<br />
NutshellMail – 32 New Messages for Sat 3/31 12:00 PM<br />
Linux Users Group M. – [10] discussions, [5] comments and [8] jobs on LinkedIn<br />
eBay – Deals up to 60% OFF + A Sweepstakes!<br />
LinkedIn Today – Top news today: The Magic of Doing One Thing at a Time<br />
NutshellMail – 29 New Messages for Fri 3/30 12:00 PM<br />
Linux Users Group M. – [16] discussions, [8] comments and [8] jobs on LinkedIn<br />
Ervan Faizal Rizki . – Join my network on LinkedIn<br />
Twitter – LEXO (@LEXOmx) retweeted one of your Tweets!<br />
NutshellMail – 24 New Messages for Thu 3/29 12:00 PM<br />
Facebook – Your Weekly Facebook Page Update<br />
Linux Users Group M. – [11] discussions, [9] comments and [16] jobs on LinkedIn<br />
</code><br /><br />
As you see this one liner uses curl to fetch the information from <i>mail.google.com</i>'s atom feed and then uses <b>awk</b> and <b>sed</b> to parse the returned content and make it suitable for display.<br /><br />
If you want to use the script every now and then on a Linux server or your Linux desktop you can <a href="http://pc-freak.net/bshscr/quick_gmail_new_mail_check.sh"> download the above code in a script file -quick_gmail_new_mail_check.sh here </a><br /><br />
Here is a screenshot of script's returned output:<br /><br />
<img src="http://pc-freak.net/images/quick_gmail_new_mail_check-bash-script-screenshot.png" alt="Quick Gmail New Mail Check bash script screenshot" /><br /><br />
A good use of a modified version of the script is in conjunction with a 15 minutes cron job to launch for  new gmail mails and launch your favourite desktop mail client.<br />
This method is useful if you don't want a constant hanging <i>Thunderbird</i> or <i>Evolution</i>, <i>pop3 / imap client</i> on your system to just take up memory or dangle down the window list.<br />
I've done a little modification to the script to simply, launch a predefined email reader program, if gmail atom feed returns new unread mails are available,  <a href="http://pc-freak.net/bshscr/check_gmail_unread_mail.sh"> check or download my check_gmail_unread_mail.sh here </a><br />
Bear in mind, on occasions of errors with incorrect username or password, the script will not return any errors. The script is missing a properer error handling.
Therefore, before you use the script make sure:<br /><br />
<code>
gmail_username='YOUR-USERNAME';<br />
gmail_password='YOUR-PASSWORD';<br />
</code><br /><br />
are 100% correct.<br /><br />
To launch the script on 15 minutes cronjob, put it somewhere and place a cron in (non-root) user:<br /><br />
<code>
# crontab -u root -e<br />
...<br />
*/15 * * * * /path/to/check_gmail_unread_mail.sh<br />
</code><br /><br />
Once you read your new emails in lets say Thunderbird, close it and on the next delivered unread gmail mails, your mail client will pop up by itself again. Once the mail client is closed the script execution will be terminated.<br />
Consised that if you get too frequently gmail emails, using the script might be annoying as every 15 minutes your mail client will be re-opened.<br /><br />
If you use any of the shell scripts, make sure there are well secured (make it owned only by you). The gmail username and pass are in plain text, so someone can steal your password, very easily. For a one user Linux desktops systems as my case, security is not such a big concern, putting my user only readable script permissions (e.g. <b>chmod 0700</b>)is enough.
		</div>
	</div>

	<div class="posted">
		<br />Posted by <span class="item-creator">hip0</span>
| <a class="link" href="../../../archives/2012/04/01/how_to_quickly_check_unread_gmail_emails_on_gnu__linux_-_one_liner_script/index.html">Permanent link</a>

<!-- <br /><a href="../../../nbcom-1.1/cmt.php?article=archives/2012/04/01/how_to_quickly_check_unread_gmail_emails_on_gnu__linux_-_one_liner_script/index.html#comments">Comments</a> -->
	</div>
</div>
			<div class="menu">

				<a href="#top">/\</a>
			</div>
		</div>

	</div><!-- /content div -->
</div><!-- /container div -->

<script type="text/javascript">
var gaJsHost = (("https:" == document.location.protocol) ? "https://ssl." : "http://www.");
document.write(unescape("%3Cscript src='" + gaJsHost + "google-analytics.com/ga.js' type='text/javascript'%3E%3C/script%3E"));
</script>
<script type="text/javascript">
try {
var pageTracker = _gat._getTracker("UA-2102595-4");
pageTracker._trackPageview();
} catch(err) {}</script>

<script type="text/javascript">
var gaJsHost = (("https:" == document.location.protocol) ? "https://ssl." : "http://www.");
document.write(unescape("%3Cscript src='" + gaJsHost + "google-analytics.com/ga.js' type='text/javascript'%3E%3C/script%3E"));
</script>
<script type="text/javascript">
try {
var pageTracker = _gat._getTracker("UA-2102595-5");
pageTracker._trackPageview();
} catch(err) {}</script>

</body>
</html>