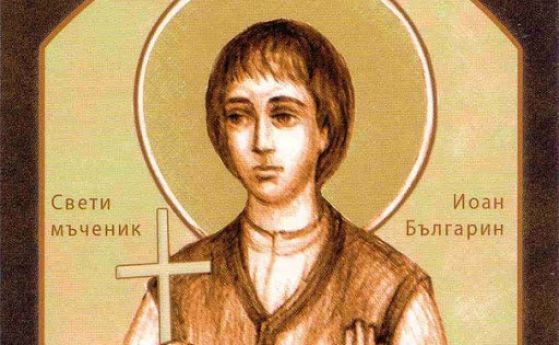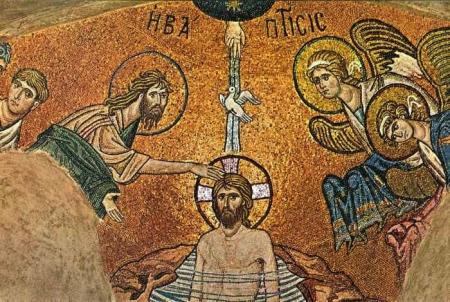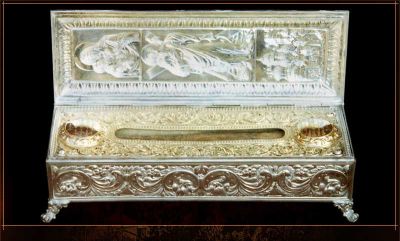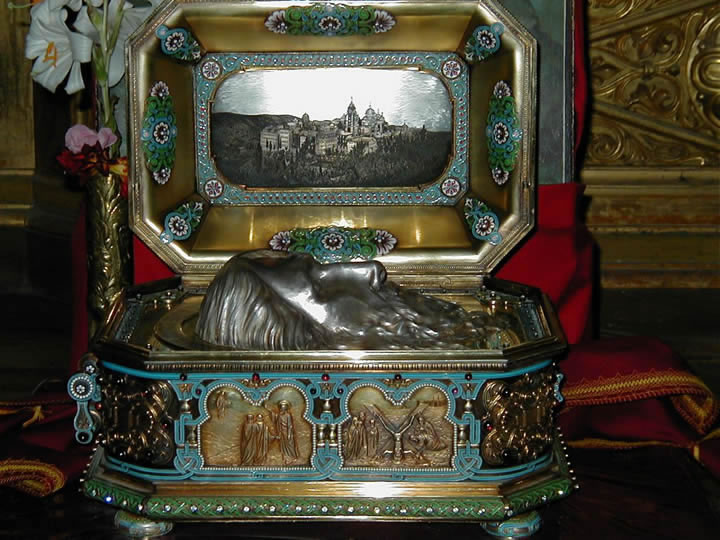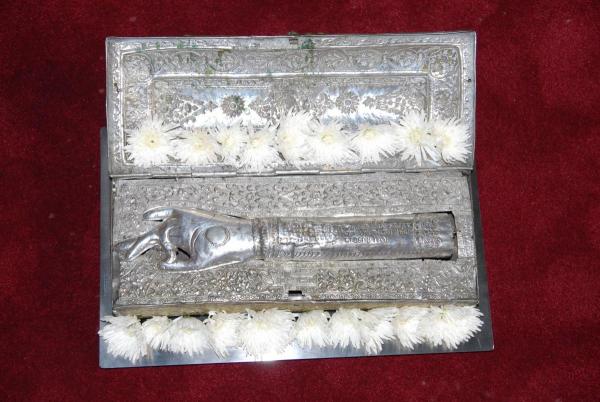
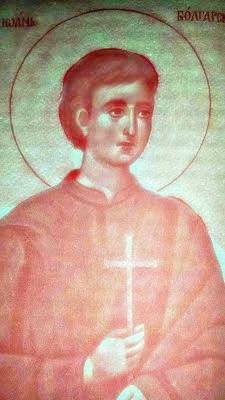
Saint new Martyr John the Bulgarian feast day on his martyrdom that was on 5 March 1784


March 5th, 2023

Saint_John-the-Bulgarian-new-martyr-5-march-year-1784


Life of St. Martyr John the Bulgarian – born circa year 1763 martyred 5 of March, 1784

Blessed John was a native of Bulgarian and as such he has been by inheritance an Orthodox Christian in the 18 century, where still Bulgaria was under the Ottoman Turks Slavery in which time being an Orthodox Christian was taugh as often Turks did they best to convert every Christian they can to the truthful in their opinion Islamic faith. Under the atmosphere of many great hardship for Christians.
By some chance he succumbed to the devil's wiles and denied Christ.

But after some time he realized his great transgression, feeling he fall badly from Grace and began to repent of his denial of the Christian faith.

In this state of mind, seeking to calm his conscience (internal voice of the soul who was talking in him that he did a huge wrong against the love of the Good Christ, he left his birthplace and came to Mount Athos, looking for help to heal his great soul wound.

Here John served, a spiritual elder for three years for the sake to receive a great help for his soul and receive forgiveness for his deniel of Christ. But because his conscience still troubled him, 
he was always depressed, sad, and silent and couldn't find peace with himself.

His very appearance indicated from far sight that he had suffered some great accident or badness in his life which doesn't give him any moment of peace and does not give him to living just like every ordinary person did.

As he could no longer bear the pangs of conscience of the internal man, John left Holy Mount Athos, came to Constantinople (Istanbul), dressed as a turk and in this guise entered the "Hagia Sophia (Wisdom of God)" mosque, which for many years has been the greatest symbol of Orthodox Christianity until the fall of Constantinople under Turks on May 29 1451.

There he began to cross himself with the Sign of the Cross, the Orthodox Christians does and to pray in a Christian way, which greatly smite the Agarians.

Enraged, they attacked him harshly and asked him why he was doing this? 


In a responce, he fearlessly confessed that he was a Christian, and that is why he Crossed himself as a Christian and worshiped Christ Only, who is the Son of God and true God!

Sveti_Ioan-Bylgarin-saint-John-the-Bulgarian-Ottoman-Empire-New-Martyr-for-Christ

The Hagarenes tried to divert him from his firm Creed of Faith (to save his earthly life) – as it was the common norm that "anyone who did such a shameful to muslims deed was worthy for dead", but when they tried hard to make him denounce his deed, pardon himself for his "unrighteous deed against the prophet Mohammed" and the Islamic faith but failed and were completely convinced that John was adamant and will not renounce his beliefs neither sorry for his embarassment, they immediately cut off his head outside in the courtyard of Hagia Sophia.

This happened on March 5, 1784. Thus, blessed John received a bright martyr's crown from Christ God at the age of 19 (and according to other biographical sources when he was just 18 years old).

Living Source © Lives of the Saints. Synodal Publishing House, Sofia, 1991
 

Living of St. John the Bulgarian (from the Greek Neon Martirologon)

Blessed John was a native from Bulgaria, young in age, about 18 years old, handsome in face, and literate.

On some occasion that befell him, he renounced – alas! from Christ.

But then, after a short time, he became aware of the evil he had done, repented and, leaving his birthplace, came to Holy Mount Athos monk republic and stayed in the great Lavra of St. Athanasius (founded in year 963 AD), where he ministered to a crippled spiritual elder and along dedicating his time to reading the holy books.

But because his conscience was gnawing o him because, the denial of Christ committed, he always walked dark, sorrowful and silent, so that by his sad appearance he showed everyone that he had experienced some great misfortune.

So, one day, under the pretext of going to his native place, he set out and went to Constantinople, where he put a Turkish distingushing muslim uniform that every muslim wear the red hat (fez) on his head and put on red shoes on his feet, and in this guise entered the mosque of Hagia Sophia (that was then a mosque but earlier the most glorious Christian temple who Saint Constantine has built and a symbol to the world for Christian). There he began to be crossing his shoulders with the sign of the cross and perform Christian worship.

When the Agareans saw him, they were indignant and fell upon him and sternly asked him why he was doing this?

And he, fearlessly confessed that he was a Christian and as a Christian he depicts the sign of Salvation his Life giving Cross and worships Jesus Christ, who is the Son of God and God.

The Agareans tried in various ways to convert him to islam, but found no way.

Finally, seeing the steadfastness of his conviction, they beheaded him outside the courtyard of the aforementioned mosque, and in this way, on March 5, 1784, the saint received the crown of martyrdom from Christ our God, Who deserves glory and power throughout the ages!

Amen!

Living Source: From "Neon Martirologon", a translation from the Greek epic. Parthenius

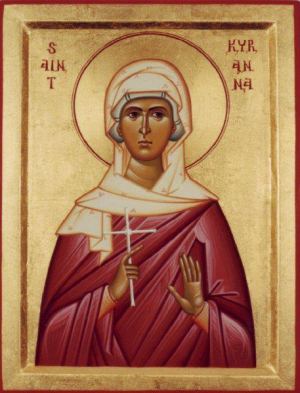
Saint Martyr Kirana of Solun (Thessaloniki) a Bulgarian macedonian saint martyred on 28 February 1751


February 28th, 2023

saint_Kyranna-of-Thessaloniki

Saint Martyr Kirana (Kerana) was born in the first half of the 18th century 1731 A.D. in the Thessaloniki village of (Ossa) Avisona, in the family of pious Christians in Ottoman Macedonia which at that times was highly inhabited with Bulgarians who held that name of the time, and even today many Bulgarian have this archaic name.

A slim and beautiful girl, she was taken by a janissary (stolen kids from Bulgarian or other non-turkish nations who were grown and included in the Ottoman empire’s governance or army) who was a subashiya (tax collector who collected 10% of all the non-turks income) in her village with the idea to make her one of his wifes. After Kirana rejected him, he abducted her with a gang of janissaries.

He took her to Thessalonica, where his friends testified falsely that the girl had promised to become his wife and accept their faith. Kirana proved to be a brave and steadfast Christian – she neither wanted to marry the rapist nor convert to Islam. Because of this, she was chained and thrown into prison. The commandant of the fortress, Ali Bey, allowed the janissaries to enter to Kirana’s prison and torture her as they wished. As we read from her left Biography:

"One beat her with a tree, – another – with a knife, a third – with kicks, a fourth – with fists, until they left her near dead…

And at night the locksmith of the prison hung her by the arms and grabbed any tree found and beat her mercilessly…".


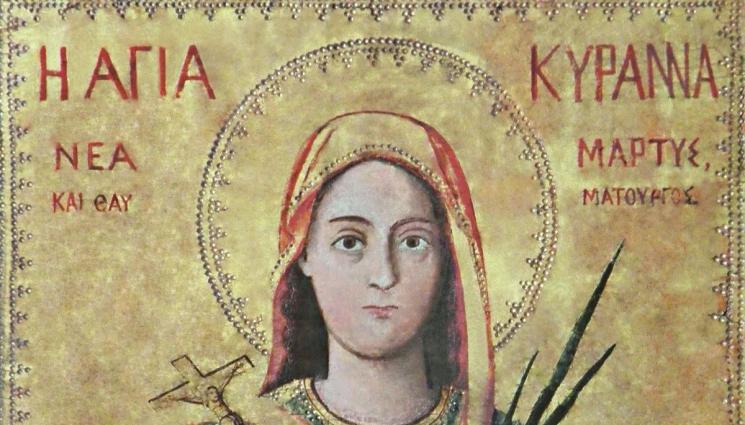
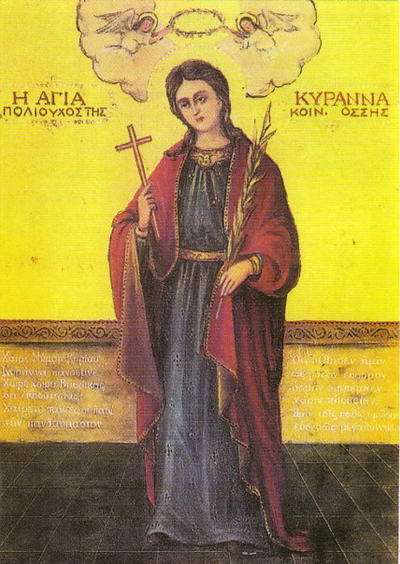
sveta_Kiriana-Solunska

Thus, for a week, Kirana was severely tortured. On the seventh day (February 28, 1751) she died. And then a miracle happened –

28-02-crkvensveta-Kiranna-Solunska-ikona

"… a great light shone in the prison, came down from above from the roof like lightning, which surrounded the body of the martyr, spilled over the whole prison and illuminated it as if the whole sun had entered inside. It was then the fourth or fifth hour of the night (t . f. 10-11 o'clock at night)." In the morning, the Turks allowed the Christians to take the body of the martyr. They buried her outside the city, in the Christian cemetery there. Her clothes were divided among the faithful as sacred. Later, an unknown scribe compiled her life in Greek. The Church honors the memory of the holy martyr Kirana and commemorates her on February 28.

Biography source: Plamen Pavlov, Hristo Temelski Saints and spiritual leaders from Macedonia with minor modifications

Switching from PasswordSafe to Keepass database, migrating .psafe3 to .kdbx format howto


February 23rd, 2023

passwordsafe-to-keepass-migration-logo

I have been using PasswordSafe for many years within my job location as system administrator on the Windows computers I do use as dumb hosts to administrate remotely via ssh servers, develop code in bash / perl or just store different SysAdmin management tools and interfaces passwords. The reason behind was simply that I come out from a Linux background as I've used for daily Sysadmin job for many years GNU / Linux and there I always prefer GNOME (gnome GTK interface) in favour of KDE's (QT Library), and whence I came to work for the "Evil" Windows oriented world of corporations  for the sake of Outlook use and Office 365 as well as Citrix accessibility i've become forced by the circumstances to use Windows. 
Hence for a PasswordManager for Windows back in the years, I preferred the simplicity of interface of PasswordSafe instead of Keepass which always reminded me of the nasty KDE.
PasswordSafe is really cool and a handy program and it works well, but recetnly when I had to store many many passwords and easily navigate through each of it I realized, by observing colleagues, that KeePass as of time of writting this article is much more Powerful and easy to use, as I can see all records of a searched passwords on a Single screen, instead of scrolling like crazy with PasswordSafe through the passowrds.

I didn’t really feel like cutting and pasting every field for all my passwords (plus I started experiencing some PasswordSafe copy / paste passwords issues – maybe not related to PasswordSafe itself so this was the turning point I decided to migrate to Keepass.

For that, started looking at the import export functions for each program. 

After a quick search, I found few articles online explaining on how the migration of PasswordSafe to KeePass can be easily handled as the versions of Keepass and Password safe are moving all the time, of course usually some of the guides to be found online are never competely upto date, so I had to slightly modify one of the articles and come up with this one 🙂 .
 

  •  My PasswordSafe program that keeps my account password records and notes is version is
    V 3.59 built on May 28 2022 and is running on my Windows 10 OS 64 bit release
  • The installed KeePass version to where I have migrated the Pwsafe password database Successfully is 2.48 64 Bit
     
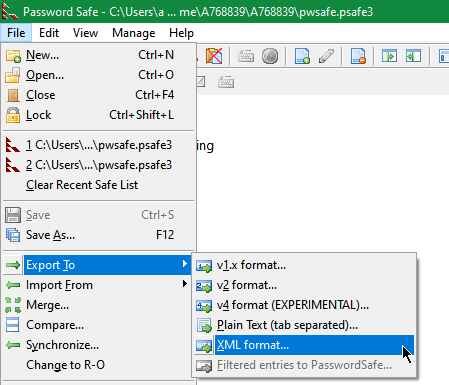
  1. Use the Password Safe function to export to XML file Format
    (File -> Export To -> XML Format )


    pwsafe.screenshot-export-password-psafe3
     

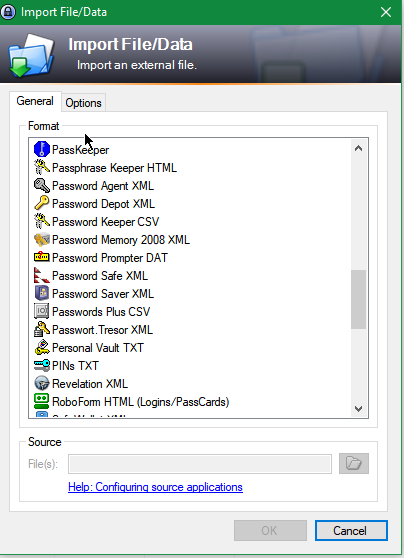
  2. Import the text file into KeePass
    (File->Import From-> Password Safe XML file)


    import-file-data-keepass-screenshot

This process worked quite fine. All of the passwords were imported .
Despite the importing (expected small glitches – please recheck that all was imported fine, before joy), the process is quicker than copy/pasting every field for each entry.

For those of you who are more worried about security than I am, you know this is a very insecure method to transfer passwords. For others, you may wish to export the (unencrypted) text file to a Veracrypt – that is a Truecypt fork (as nowadays obsolete unmaintaned and probably insecury) – a Free Open-Source On-The-Fly Disk Encryption Software to prepare  Veracrypt  partition and / or use Eraser on the text file once you’re finished with it or use another of the free Veracrypt open-source (free software) alternatives such DiskCryptor or even the proprietary Windows BitLocker / CipherShed / Axcrypt or some other encryption alternative software for Windows XP / 2000 / 7 10 that is out there.

NB! Please  don’t do this on a public computer or a PC that you don't administrate.
You never know who might find your passwords or might be sniffing on your OS, as today there are so many devices that perhaps are hacked and listening and collecting password datas  🙂

That's it now I enjoy my KeePass but I'm thankful to PasswordSafe developers, who have easified my password management Virtual life for years 🙂
Any hints on how you migrated PasswordSafe to Keepass are mostly welcome. Also will be nice to hear of hard-core PasswordSafe hints or plugins that can power-up the password storage, maybe I can get convinced back to return back to PasswordSafe 🙂
 

Linux extending life time for a damaged hard drive server tricks on a live server. Force fcsk on next reboot.Read-only file system error solutions


February 17th, 2023

linux-extending-life-time-for-a-damaged-hard-drive-server-tricks-can-not-read-superblock-linux-force-fsck-on-next-reboot

In our daily work as system administrators we have some very old Legacy systems running Clustered High Availability proxies using CRM (Cluster Resource Manager) and some legacy systems still using Heartbeat to manage the cluster instead of the newer and modern Corosync variant.

The HA cluster is only 2 nodes Linux machine and running the obscure already long time unsupported version of Redhat 5.11 (Ootpa) who was officially became stable distant year 1998 (yeath the years were good) and whose EOL (End of Life) has been reached long time ago and the OS is no longer supported, however for about 14 years the machines has been running perfectly fine until one of the Cluster nodes managed by ocf::heartbeat:IPAddr2 , that is  /etc/ha.d/resource.d/IPAddr2 shell script. Yeah for the newbies Heartbeat Application Cluster in Linux does work like that it uses a number of extendable pair of shell scripts written for different kind of Network / Web / Mail / SQL or whatever services HA management.

The first node configured however, started failing due to some errors like:
 

EXT3-fs error (device dm-1): ext3_journal_start_sb: Detected aborted journal
sd 0:2:0:0: rejecting I/O to offline device
Aborting journal on device sda1.
sd 0:2:0:0: rejecting I/O to offline device
printk: 159 messages suppressed.
Buffer I/O error on device sda1, logical block 526
lost page write due to I/O error on sda1
sd 0:2:0:0: rejecting I/O to offline device
ext3_abort called.
EXT3-fs error (device sda1): ext3_journal_start_sb: Detected aborted journal
Remounting filesystem read-only
sd 0:2:0:0: rejecting I/O to offline device
megaraid_sas: FW was restarted successfully, initiating next stage…
megaraid_sas: HBA recovery state machine, state 2 starting…
megasas: Waiting for FW to come to ready state
megasas: FW in FAULT state!!
FW state [-268435456] hasn't changed in 180 secs
megaraid_sas: out: controller is not in ready state
megasas: waiting_for_outstanding: after issue OCR. 
megasas: waiting_for_outstanding: before issue OCR. FW state = f0000000
megaraid_sas: pending commands remain even after reset handling. megasas[0]: Dumping Frame Phys Address of all pending cmds in FW
megasas[0]: Total OS Pending cmds : 0 megasas[0]: 64 bit SGLs were sent to FW
megasas[0]: Pending OS cmds in FW :

The result out of that was a frequently the filesystem of the machine got re-mounted as Read Only and of course that is
quite bad if you have a running processess of haproxy that should be able to be living their and take up some Web traffic
for high availability and you run all the traffic only on the 2nd pair of machine.

This of course was a clear sign for a failing disks or some hit bad blocks regions or as the messages indicates, some
problem with system hardware or Raid SAS Array.

The physical raid on the system, just like rest of the hardware is very old stuff as well.

[root@haproxy_lb_node1 ~]# lspci |grep -i RAI
01:00.0 RAID bus controller: LSI Logic / Symbios Logic MegaRAID SAS 2108 [Liberator] (rev 05)

The produced errors not only made the machine to auto-mount its root / filesystem in Read-Only mode but besides has most
likely made the machine to automatically reboot every few days or few times every day in a raw.

The second Load Balancer node2 did operated perfectly, and we thought that we might just keep the broken machine in that half running
and inconsistent state for few weeks until we have built the new machines with Pre-Installed new haproxy cluster with modern
RedHat Linux 8.6 distribution, but since we have to follow SLAs (Service Line Agreements) with Customers and the end services behind the
High Availability (HA) Haproxy cluster were at danger … 

We as sysadmins had the task to make our best to try to stabilize the unstable node with disk errors for the system to servive
and be able to normally serve traffic (if node2 that is in a separate Data center fails due to a hardware or electricity issues etc.)
.

Here is few steps we took, that has hopefully improved the situation.

1. Make backups of most important files of high importance

Always before doing anything with a broken system, prepare backup of the most important files, if that is a cluster that should be a backup of the cluster configurations (if you don't have already ones) backup of /etc/hosts / backup of any important services configs /etc/haproxy/haproxy.cfg /etc/postfix/postfix.cfg (like it was my case), preferrably backup of whole /etc/  any important files from /root/ or /home/users* directories backup of at leasts latest logs from /var/log etc.
 

2. Clear up all unnecessery services scripts from the server

Any additional Softwares / Services and integrity checking tools (daemons) / scripts and cron jobs, were immediately stopped and wheter unused removed.

E.g. we had moved through /etc/cron* to check what's there,

# ls -ld /etc/cron.*
drwx—— 2 root root 4096 Feb  7 18:13 /etc/cron.d
drwxr-xr-x 2 root root 4096 Feb  7 17:59 /etc/cron.daily
-rw-r–r– 1 root root    0 Jul 20  2010 /etc/cron.deny
drwxr-xr-x 2 root root 4096 Jan  9  2013 /etc/cron.hourly
drwxr-xr-x 2 root root 4096 Jan  9  2013 /etc/cron.monthly
drwxr-xr-x 2 root root 4096 Aug 26  2015 /etc/cron.weekly


And like well professional butchers removed everything unnecessery that could trigger any extra unnecessery disk read / writes to HDD.

E.g. just create

# mkdir -p /root/etc_old/{/etc/cron.d,\
/etc/cron.daily,/etc/cron.hourly,/etc/cron.monthly\
,/etc/cron.weekly}


And moved all unnecessery cron job scripts like:

1. nmon (old school network / memory / hard disk console tool for monitoring and tuning server parameters)
2. clamscan / freshclam crons
3. mlocate (the script that is taking care for periodic run of updatedb command to keep the locate command to easily search
for files inside the DB to put less read operations on disk in case if you need to find file (e.g. prevent yourself to everytime
run cmd like: find / . -iname '*whatever_you_look_for*'
4. cups cron jobs
5. logwatch cron
6. rkhunter stuff
7. logrotate (yes we stopped even logrotation trigger job as we found the server was crashing sometimes at the same time when
the lograte job to rotate logs inside /var/log/* was running perhaps leading to a hit of the I/O read error (bad blocks).


Also inspected the Administrator user root cron job for any unwated scripts and stopped two report bash scripts that were part of the PCI tightened Security procedures.
Therein found script responsible to periodically report the list of installed packages and if they have not changed, as well a script to periodically report via email the list of
/etc/{passwd,/etc/shadow} created users, used to historically keep an eye on the list of users and easily see if someone
has created new users on the machine. Those were enabled via /var/spool/cron/root cron jobs, in other cases, on other machines if it happens for you
it is a good idea to check out all the existing user cron jobs and stop anything that might be putting Read / Write extra heat pressure on machine attached the Hard drives.

# ls -al /var/spool/cron/
total 20
drwx——  2 root root 4096 Nov 13  2015 .
drwxr-xr-x 12 root root 4096 May 11  2011 ..
-rw——-  1 root root  133 Nov 13  2015 root


3. Clear up old log files and any files unnecessery

Under /var/log and /home /var/tmp /var/spool/tmp immediately try to clear up the old log files.
From my past experience this has many times made the FS file inodes that are storing on a unbroken part (good blocks) of the hard drive and
ready to be reused by newly written rsyslog / syslogd services spitted files.

!!! Note that during the removal of some files you might hit a files stored on a bad blocks that might lead to a unexpected system reboot.

But that's okay, don't worry most likely after a hard reset by a technician in the Datacenter the machine will boot again and you can enjoy
removing remaining still files to send them to the heaven for old files.


4. Trigger an automatic system file system check with fsck on next boot

The standard way to force a Linux to aumatically recheck its Root filesystem is to simply create the /forcefsck to root partition or any other secondary disk partition you would like to check.

# touch /forcefsck

# reboot


However at some occasions you might be unable to do it because, the / (root fs) has been remounted in ReadOnly mode, yackes …

Luckily old Linux distibutions like this RHEL 5.1, has a way to force a filesystem check after reboot fsck and identify any
unknown bad-blocks and hopefully succceed in isolating them, so you don't hit into the same auto-reboots if the hard drive or Software / Hardware RAID
is not in terrible state
, you can use an option built in in /sbin/shutdown command the '-F'

   -F     Force fsck on reboot.


Hence to make the machine reboot and trigger immediately fsck:

# shutdown -rF now


Just In case you wonder why to reboot before check the Filesystem. Well simply because you need to have them unmounted before you check.

In that specific case this produced so far a good result and the machine booted just fine and we crossed the fingers and prayed that the machine would work flawlessly in the coming few weeks, before we finalize the configuration of the substitute machines, where this old infrastructure will be migrated to a new built cluster with new Haproxy and Corosync / Pacemaker Cluster on a brand new RHEL.

NB! On newer machines this won't work however as shutdown command has been stripped off this option because no SystemV (SystemInit) or Upstart and not on SystemD newer services architecture.
 

5. Hints on checking the hard drives with fsck

If you happen to be able to have physical access to the remote Hardare machine via a TTY[1-9] Console, that's even better and is the standard way to do it but with this specific case we had no easy way to get access to the Physical server console.

It is even better to go there and via either via connected Monitor (Display) or KVM Switch (Those who hear KVM switch first time this is a great device in server rooms to connect multiple monitors to same Monitor Display), it is better to use a some of the multitude of options to choose from for USB Distro Linux recovery OS versions or a CDROM / DVD on older machines like this with the Redhat's recovery mode rolled on.
After mounting the partition simply check each of the disks
e.g. :

# fsck -y /dev/sdb
# fsck -y /dev/sdc

Or if you want to not waste time and look for each hard drive but directly check all the ones that are attached and known by Linux distro via /etc/fstab definition run:

# fsck -AR

If necessery and you have a mixture of filesystems for example EXT3 , EXT4 , REISERFS you can tell it to omit some filesystem, for example ext3, like that:

# fsck -AR -t noext3 -y


To skip fsck on mounted partitions with fsck:

# fsck -M /dev/sdb


One remark to make here on fsck is usually fsck to complete its job on various filesystem it uses other external component binaries usually stored in /sbin/fsck*

ls -al /sbin/fsck*
-rwxr-xr-x 1 root root  55576 20 яну 2022 /sbin/fsck*
-rwxr-xr-x 1 root root  43272 20 яну 2022 /sbin/fsck.cramfs*
lrwxrwxrwx 1 root root      9  4 юли 2020 /sbin/fsck.exfat -> exfatfsck*
lrwxrwxrwx 1 root root      6  7 юни 2021 /sbin/fsck.ext2 -> e2fsck*
lrwxrwxrwx 1 root root      6  7 юни 2021 /sbin/fsck.ext3 -> e2fsck*
lrwxrwxrwx 1 root root      6  7 юни 2021 /sbin/fsck.ext4 -> e2fsck*
-rwxr-xr-x 1 root root  84208  8 фев 2021 /sbin/fsck.fat*
-rwxr-xr-x 2 root root 393040 30 ное 2009 /sbin/fsck.jfs*
-rwxr-xr-x 1 root root 125184 20 яну 2022 /sbin/fsck.minix*
lrwxrwxrwx 1 root root      8  8 фев 2021 /sbin/fsck.msdos -> fsck.fat*
-rwxr-xr-x 1 root root    333 16 дек 2021 /sbin/fsck.nfs*
lrwxrwxrwx 1 root root      8  8 фев 2021 /sbin/fsck.vfat -> fsck.fat*


6. Using tune2fs to  adjust tunable filesystem parameters on ext2/ext3/ext4 filesystems (few examples)

a) To check whether really the filesystem was checked on boot time or check a random filesystem on the server for its last check up date with fsck:

#  tune2fs -l /dev/sda1 | grep checked
Last checked:             Wed Apr 17 11:04:44 2019

On some distributions like old Debian and Ubuntu, it is even possible to enable fsck to log its operations during check on reboot via changing the verbosity from NO to YES:

# sed -i "s/#VERBOSE=no/VERBOSE=yes/" /etc/default/rcS


If you're having the issues on old Debian Linuxes  and not on RHEL  it is possible to;

b) Enable all fsck repairs automatic on boot

by running via:
 

# sed -i "s/FSCKFIX=no/FSCKFIX=yes/" /etc/default/rcS


c) Forcing fcsk check on for server attached Hard Drive Partitions with tune2fs

# tune2fs -c 1 /dev/sdXY

Note that:
tune2fs can force a fsck on each reboot for EXT4, EXT3 and EXT2 filesystems only.

tune2fs can trigger a forced fsck on every reboot using the -c (max-mount-counts) option.
This option sets the number of mounts after which the filesystem will be checked, so setting it to 1 will run fsck each time the computer boots.
Setting it to -1 or 0 resets this (the number of times the filesystem is mounted will be disregarded by e2fsck and the kernel).


 For example you could:

d) Set fsck to run a filesystem check every 30 boots, by using -c 30 
 

# tune2fs -c 30 /dev/sdXY


e) Checking whether a Hard Drive has been really checked on the boot


#  tune2fs -l /dev/sda1 | grep checked
Last checked:             Wed Apr 17 11:04:44 2019


e) Check when was the last time the file system /dev/sdX was checked:
 

# tune2fs -l /dev/sdX | grep Last\ c
Last checked:             Thu Jan 12 20:28:34 2017


f) Check how many times our /dev/sdX filesystem was mounted

# tune2fs -l /dev/sdX | grep Mount
Mount count:              157

g) Check how many mounts are allowed to pass before filesystem check is forced
 

# tune2fs -l /dev/sdX | grep Max
Maximum mount count:      -1


7. Repairing disk / partitions via GRUB fsck.mode and fsck.repair kernel module options

It is also possible to force a fsck.repair on boot via GRUB, but that usually is not an option someone would like as the machine might fail too boot if it hards to repair hardly, however in difficult situations with failing disks temporary enabling it is good idea.

This can be done by including for grub initial config

GRUB_CMDLINE_LINUX_DEFAULT="quiet splash fsck.mode=force fsck.repair=yes"

fsck.mode=force – will force a fsck each time a system boot and keeping that value enabled for a long time inside GRUB is stupid for servers as

sometimes booting could be severely prolonged because of the checks especially with servers with many or slow old hard drives.

fsck.repair=yes – will make the fsck try to repair if it finds bad blocks when checking (be absolutely sure you know, what you're doing if passing this options)

The options can be also set via editing the GRUB boot screen, if you have physical access to the server and don't want to reload the grub loader and possibly make the machine unbootable on next boot.
 

8. Few more details on how /etc/fstab disk fsck check parameters values for Systemd Linux machines works

The "proper" way on systemd (if we can talk about proper way on Linux) to runs fsck for each filesystem that has a fsck is to pass number greater than 0 set in
/etc/fstab (last column in /etc/fstab), so make sure you edit your /etc/fstab if that's not the case.

The root partition should be set to 1 (first to be checked), while other partitions you want to be checked should be set to 2.

Example /etc/fstab:
 

# /etc/fstab: static file system information.

/dev/sda1  /      ext4  errors=remount-ro  0  1
/dev/sda5  /home  ext4  defaults           0  2

The values you can put here as a second number meaning is as follows:
0 – disabled, that is do not check filesystem
1 – partition with this PASS value has a higher priority and is checked first. This value is usually set to the root / partition
2 – partitions with this PASS value will be checked last

a) Check the produced log out of fsck

Unfortunately on the older versions of Linux distros with SystemV fsck log output might be not generated except on the physical console so if you have a kind of duplicator device physical tty on the display port of the server, you might capture some bad block reports or fixed errors messages, but if you don't you might just cross the fingers and hope that anything found FS irregularities was recovered.

On systemd Linux machines the fsck log should be produced either in /run/initramfs/fsck.log or some other location depending on the Linux distro and you should be able to see something from fsck inside /var/log/* logs:

# grep -rli fsck /var/log/*


Close it up

Having a system with failing disk is a really one of the worst sysadmin nightmares to get. The good news is that most of the cases we're prepared with some working backup or some work around stuff like the few steps explained to mitigate the amount of Read / Writes to hard disks on the failing machine HDDs. If the failing disk is a primary Linux filesystem all becomes even worse as every next reboot, you have no guarantee, whether the kernel / initrd or some of the other system components required to run the Core Linux system won't break up the normal boot. Thus one side changes on the hard drives is a risky business on ther other side, if you're in a situation where you have a mirror system or the failing system is just a Linux server installed without a Cluster pair, then this is not a big deal as you can guarantee at least one of the nodes still up, unning and serving. Still doing too much of operations with HDD is always a danger so the steps described, though in most cases leading to improvement on how the system behaves, the system should be considered totally unreliable and closely monitored not only by some monitoring stuff like Zabbix / Prometheus whatever but regularly check the systems state via normal SSH logins. It is important if you have some important datas or logs on the system that are not synchronized to a system node to copy them before doing any of the described operations. After all minimal is backuped, proceed to clear up everything that might be cleared up and still the machine to continue providing most of its functionalities, trigger fsck automatic HDD check on next reboot, reboot, check what is going on and monitor the machine from there on.

Hopefully the few described steps, has helped some sysadmin. There is plenty of things which I've described that might go wrong, even following the described steps, might not help if the machines Storage Drives / SAS / SSD has too much of a damage. But as said in most cases following this few steps would improve the machine state.

Wish you the best of luck!
 

iSH, the best free SSH / Telnet client for iOS iPhone, iPad equivallent of MobaXterm and fully functional Alpine Linux emulator


February 8th, 2023

ish-linux-terminal-emulator-for-iphone-ipad-ios-logo-screenshoticon

Since few months I've switched my old BLU r1 HD Phone (a great old low budget phone for its price) to a friend's iPhone 10 ( X ) who gifted it for me. Coming from Android world, everyone who has experience with it is a pain in the ass as some of the Apps, which are into Google's play store does not have the same equivalent into Apple's install Package manager tool AppStore. Some of the crucial tools which I was interested as a freshly new migrated user from Android to iPhone was to have a decent SSH / Telnet client and Terminal, with which I can easily connect to my Linux servers both home and work. 

As Android Phone user, to connect and manage my SSH sessions I used most often some of the most popular Connectbot / SSHDroid / JuiceSSH.
On Android I've usually installed all of these tools but most frequently used Connectbot, which quickly become my favourite SSH client for Android over time.

The reasons why I really loved Connectbot and used it on Android OS in short:

  • It is Completely free
  • Ad-free
  • Open-source (too bad not Free software but still step better)
  • Copy and paste text between Applications
  • Customizable interface (i.e. font size, keyboard layout, SSH auth agent, etc.)


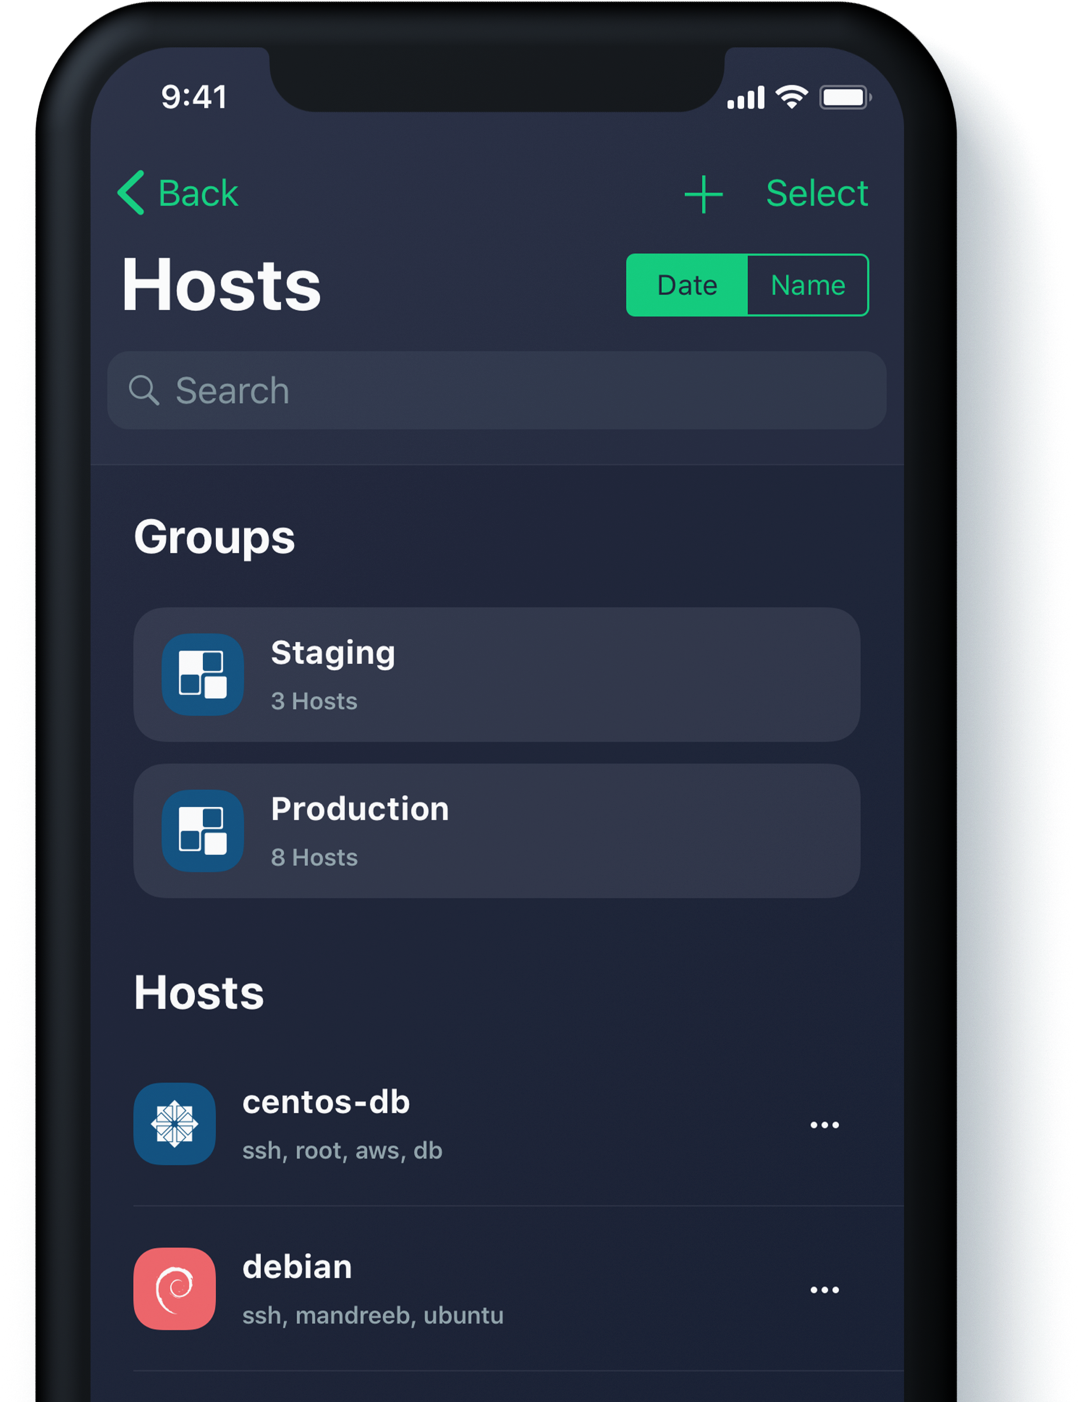
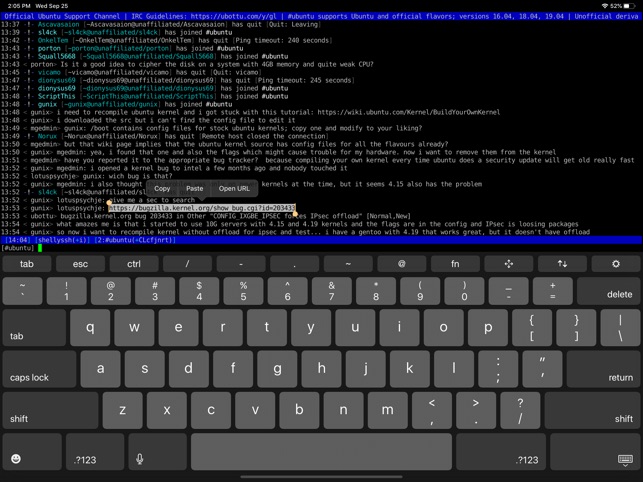
connectbot-android-ssh-remote-connect-client-screenshot

I've seen some people used and preferred Termius but never myself really liked this client, as it was including some Advertisements or for don't remember why reason.
Switching to iOS mobile operating system, of course was quite a shock especially the moment I found out the standard loved SSH Remote Client programs are used are not available or have only a paid version. Thus it took me quite a while of a research and googling until I found some decent stuff.

termius-ssh-telnet-client-ios-screenshot

Tried for a time with Termius as well but again, its Ads and lack of some functionality pissed me off, so I've moved on to Shelly.

shelly-iphone-ssh-telnet-client-ios-screenshot

Shelly is really not a bad tool but has limitation over the SSH sessions you can add and other limitations, which can only be unlocked with an "Upgrade", to its paid version, thus I decided after few weeks of attempts to make it my remote server management mobile tool for iPhone, I've dropped it off as well.

Then I found the Blink Shell App – Blink Shell is a professional, desktop grade terminal for iOS. As overall the tool is really great and is easy to use but again to have it used in its full power you need the paid version and until you pay for it every now and then you got interruption of your shell for some really annoying ads.
Thus even though I used it for a times this few tools with whom basicly you can do basic remote ssh / telnet session operations eventually,  started looking for a better SSH Client Free alternative for iPhone Users.

Then came a friend at home for a dinner my dear friend Milen (Static) and he show me iOS.
The moment I saw this tool I totally loved it, for its simplicity and its resemblance to a classical TTY Physical old Linux console I used back in the days and its ability to resemble easily any improved functionaltiy through simple screen (multiple session management) command tool or tmux.

Wait, what's iSH ? And why it is the Best SSH / Telnet client to manage your servers remotely on iOS Mobiles (iPhone and IPads) ? 

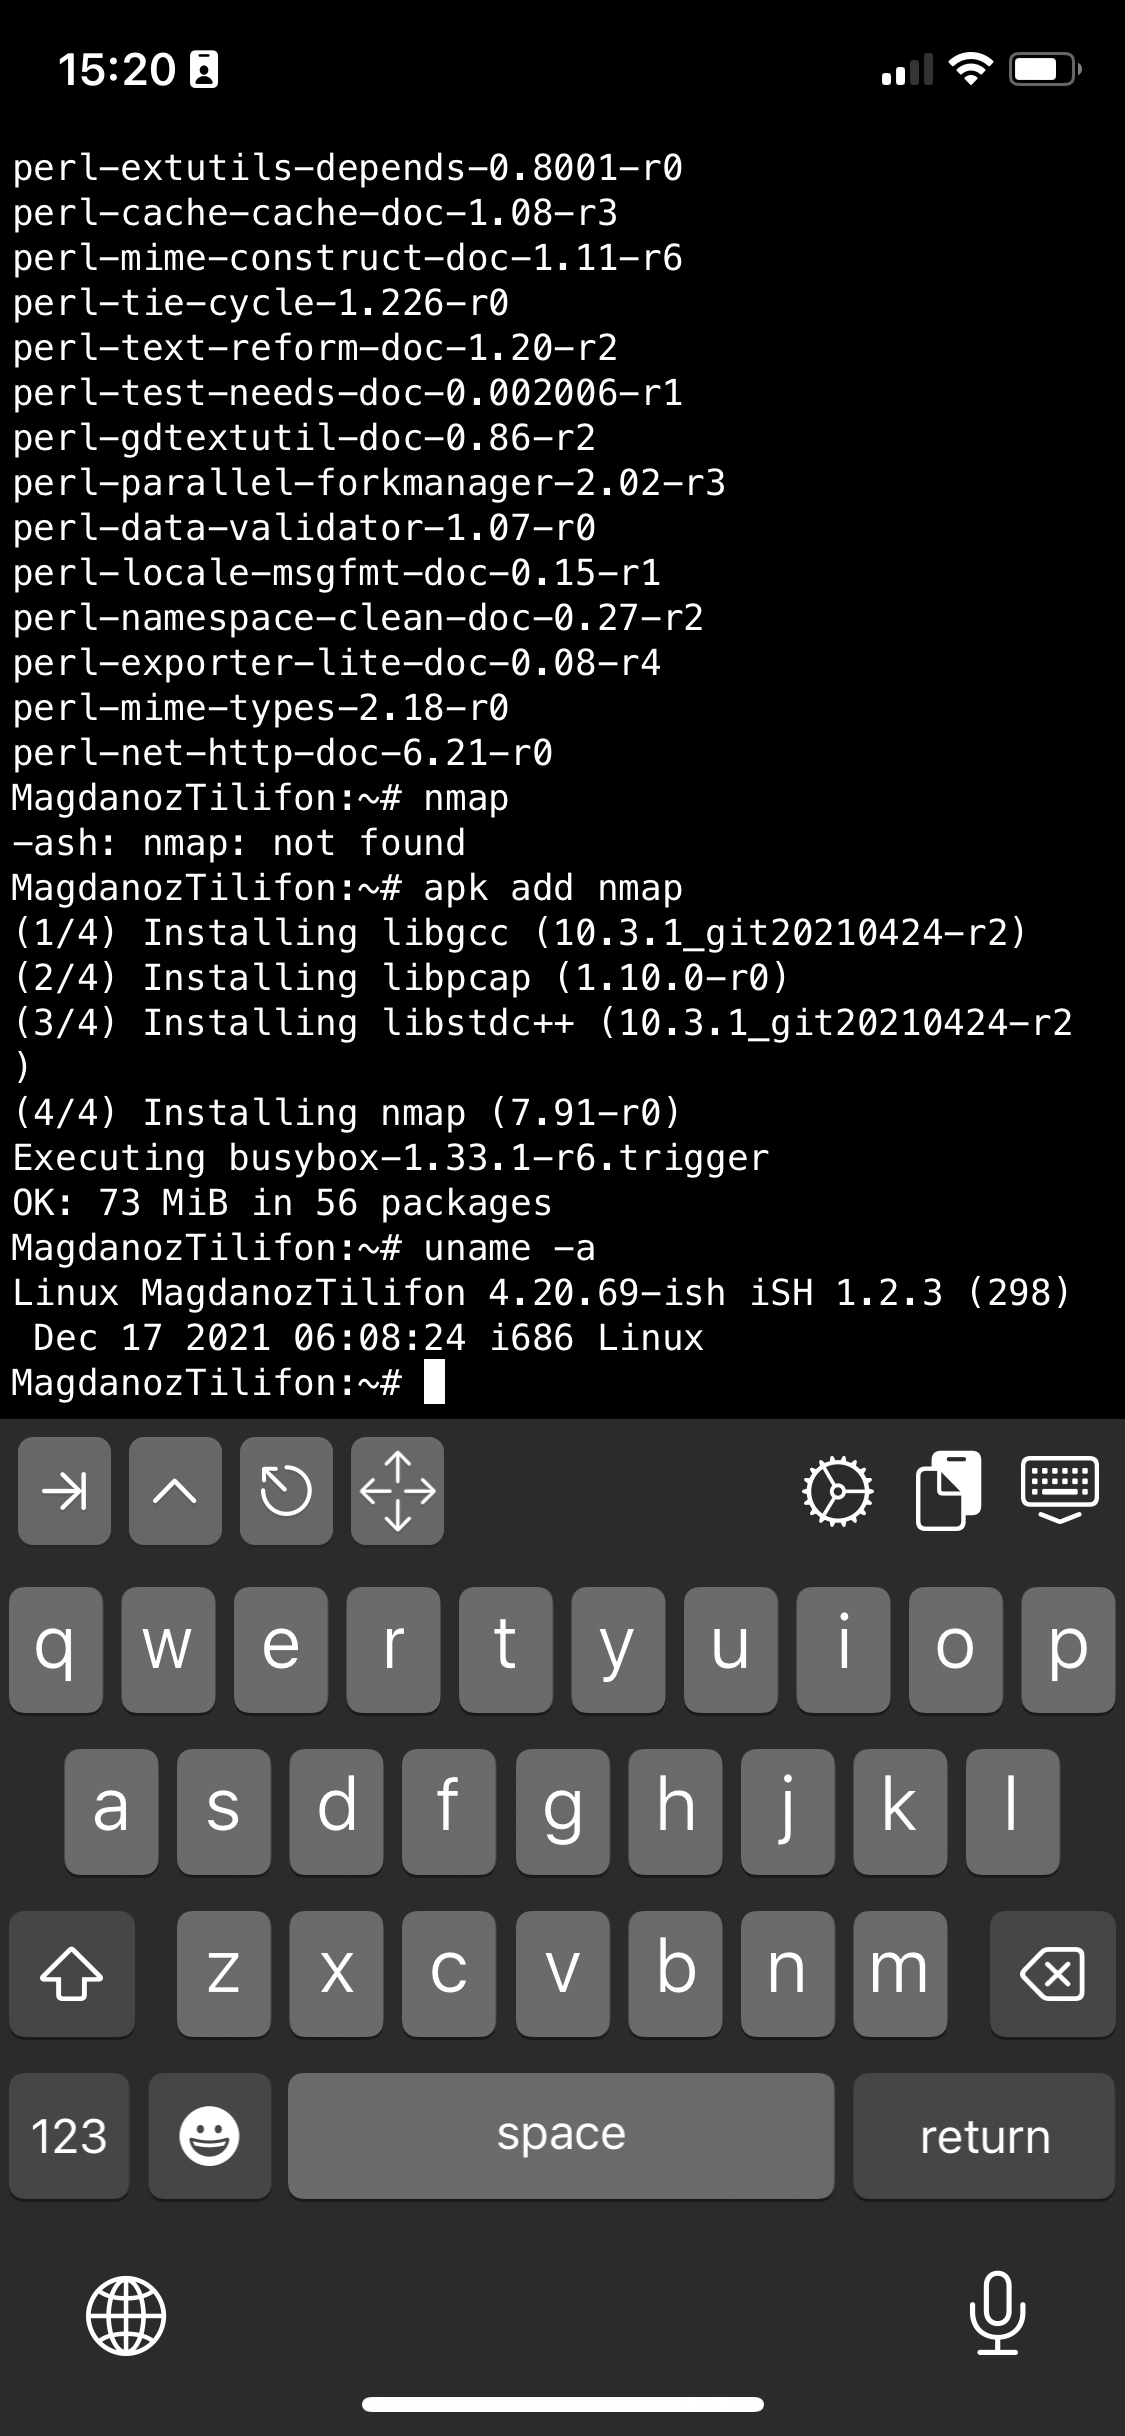
iSH is a project to get a Linux shell environment running locally on your iOS device, using a usermode x86 emulator.


In other wors iSH is Linux emulator with busybox and a package ports for many of the standard Linux tools you get by simple apt-get / yum or if I have to compare you get via the MobaXterm's advanced apt-cyg (Cygwin packages) tool capabilities.

Once iSH is installed it comes with pre-installed apk command line package management tool, with which you can install stuff like openssh-client / screen / tmux / mc (midnight commander) etc. apk, is an apt like command like tool which uses as a basis for installing its packages Alpine Linux repositories.
Alpine Linux is perhaps little known as it is not one of these main stream disributions, such as Fedora or Ubuntu, but for those more concerned about security  Alpine Linux is well known as it is a security-oriented, lightweight Linux distribution based on musl libc and busybox. What makes the Linux even more attractive and perhaps the reason why the iSH developers decided to use it as a basis for their iSH emulator is it being actively developed and its tightened security makes it a good compliment to the quite closed and security focused mobile platform iOS.

iSH is available straight from AppStore , so to use it install it and run it (it is really a great news that iOS does not require iphone to be jailbreak – ed, and it is an ordinary installable software straight from AppStore):
iSH, already comes with some of the standard programs you would expect in a Linux environment such as Vi, wget, zip / unzip, and tar.
However to fit it better for my use over ssh and improve its capabilities, as well as support and use multiple Virtual windows ssh, just like you do on a Linux xterm
run from ish shell: 

# apk add openssh-client
# apk add screen
# apk add vim
# apk add mc


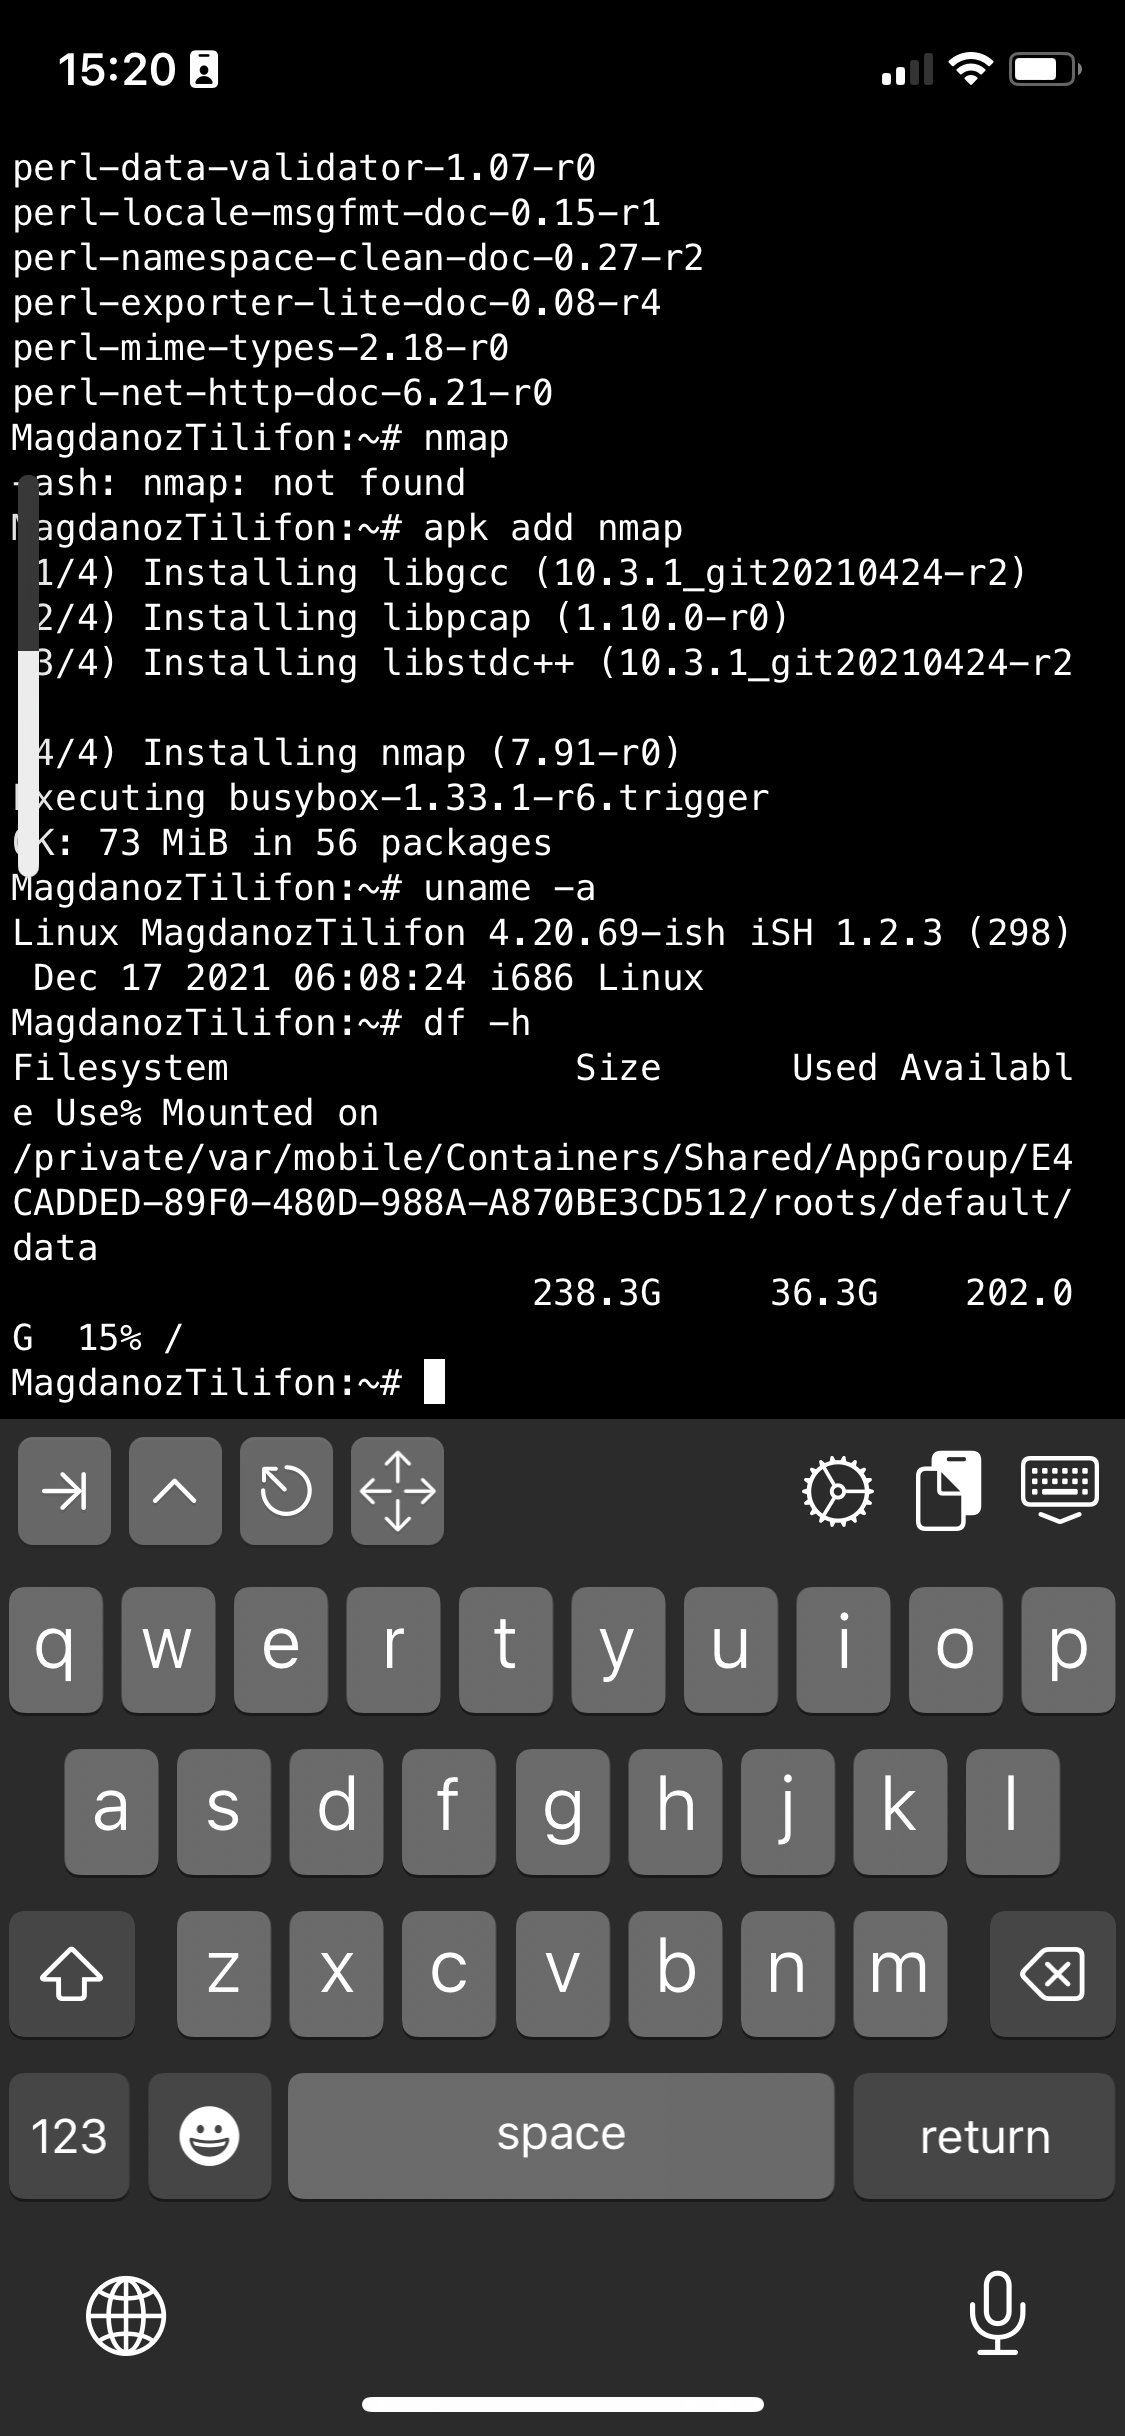
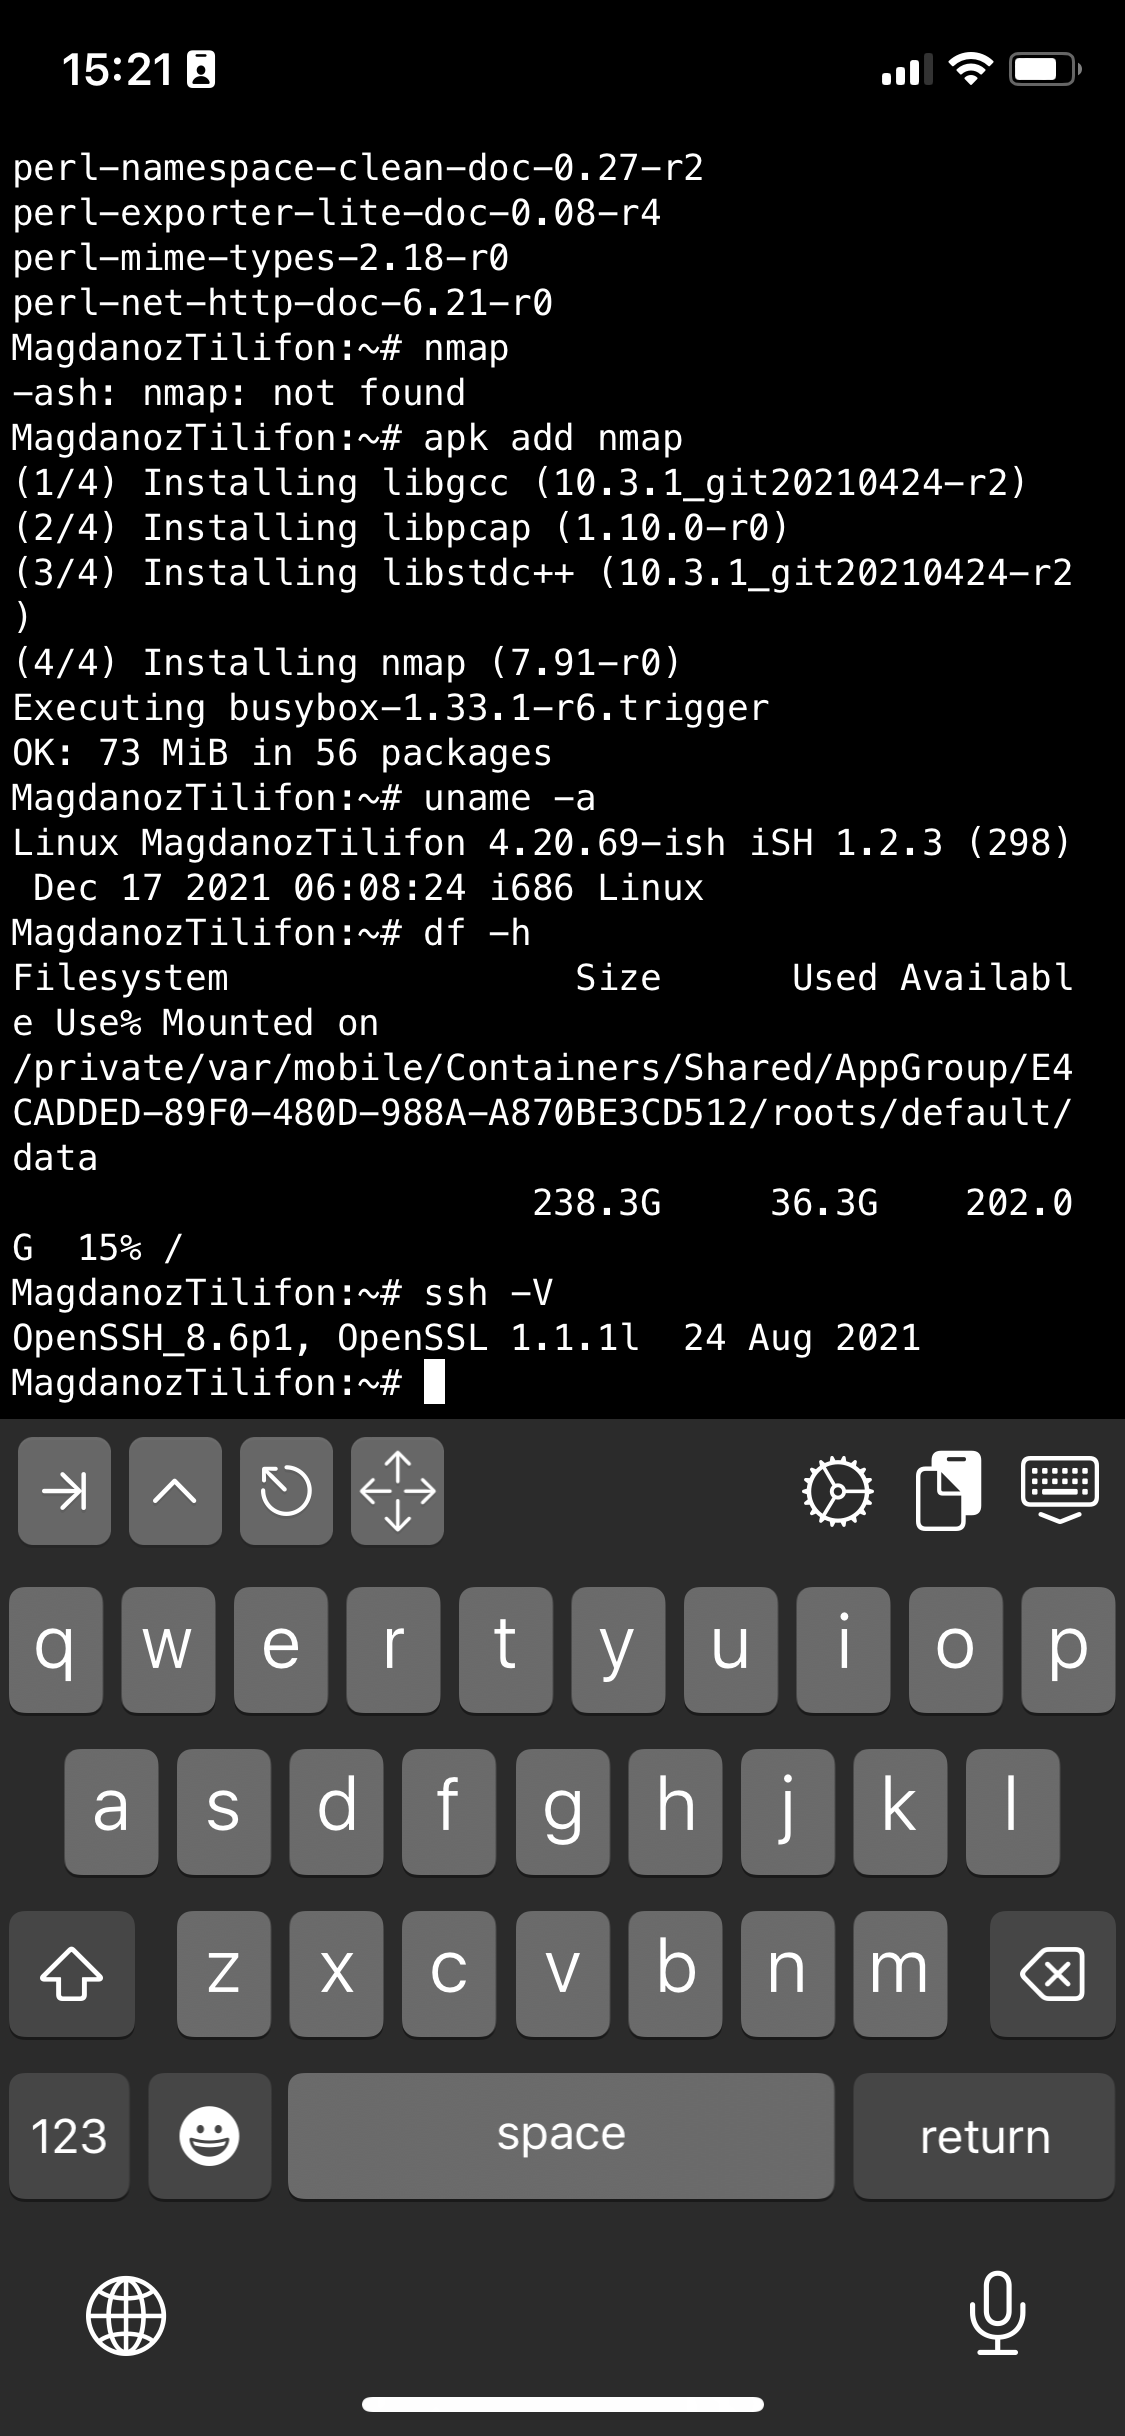
ish-screenshot-terminal3-linux-emulator-iphone-alpine

ish-screenshot-terminal2-linux-emulator-iphone-alpine

ish-screenshot-terminal1-linux-emulator-iphone-alpine-linux

I also like to have a Midnight Commander and VIM Text editor installed out of the box to be able to move around in Ncurses interface through my iPhone.

ish-iphone-keyboard-key-shortcuts

Note that, just like most GNU / Linux distributions, iOS shell will run a normal bash shell.
From there on to use iSH as my default SSH client and enable my just installed GNU screen some Windowing beauty for readability whence I use the screen with multiple ssh logins to different servers as well make the screen Virtual consoles to have ability for scroll back and scroll up of console text to work, I do set up the following .screenrc inside my /home/iPhoneuser

The .screenrc to setup on the iSH to easify your work with screen is as follows:
 

# An alternative hardstatus to display a bar at the bottom listing the
# windownames and highlighting the current windowname in blue. (This is only
# enabled if there is no hardstatus setting for your terminal)
hardstatus on
hardstatus alwayslastline
hardstatus string "%{.bW}%-w%{.rW}%n %t%{-}%+w %=%{..G} %H %{..Y} %m/%d %C%a "
# Enable scrolling fix the annoying screen scrolling problem
termcapinfo xterm* ti@:te@
# Scroll up
bindkey -d "^[[5S" eval copy "stuff 5\025"
bindkey -m "^[[5S" stuff 5\025

# Scroll down
bindkey -d "^[[5T" eval copy "stuff 5\004"
bindkey -m "^[[5T" stuff 5\004

# Scroll up more
bindkey -d "^[[25S" eval copy "stuff \025"
bindkey -m "^[[25S" stuff \025

# Scroll down more
bindkey -d "^[[25T" eval copy "stuff \004"
bindkey -m "^[[25T" stuff \004

You can download the same .screenrc file from here straight with wget from the console:

# wget https://www.pc-freak.net/files/.screenrc


Run GNU screen manager


 # screen

You will end up with a screen session, to open a new session for Virtual Terminal use virtual keyboard from ISH and Press

CTRL + A + C

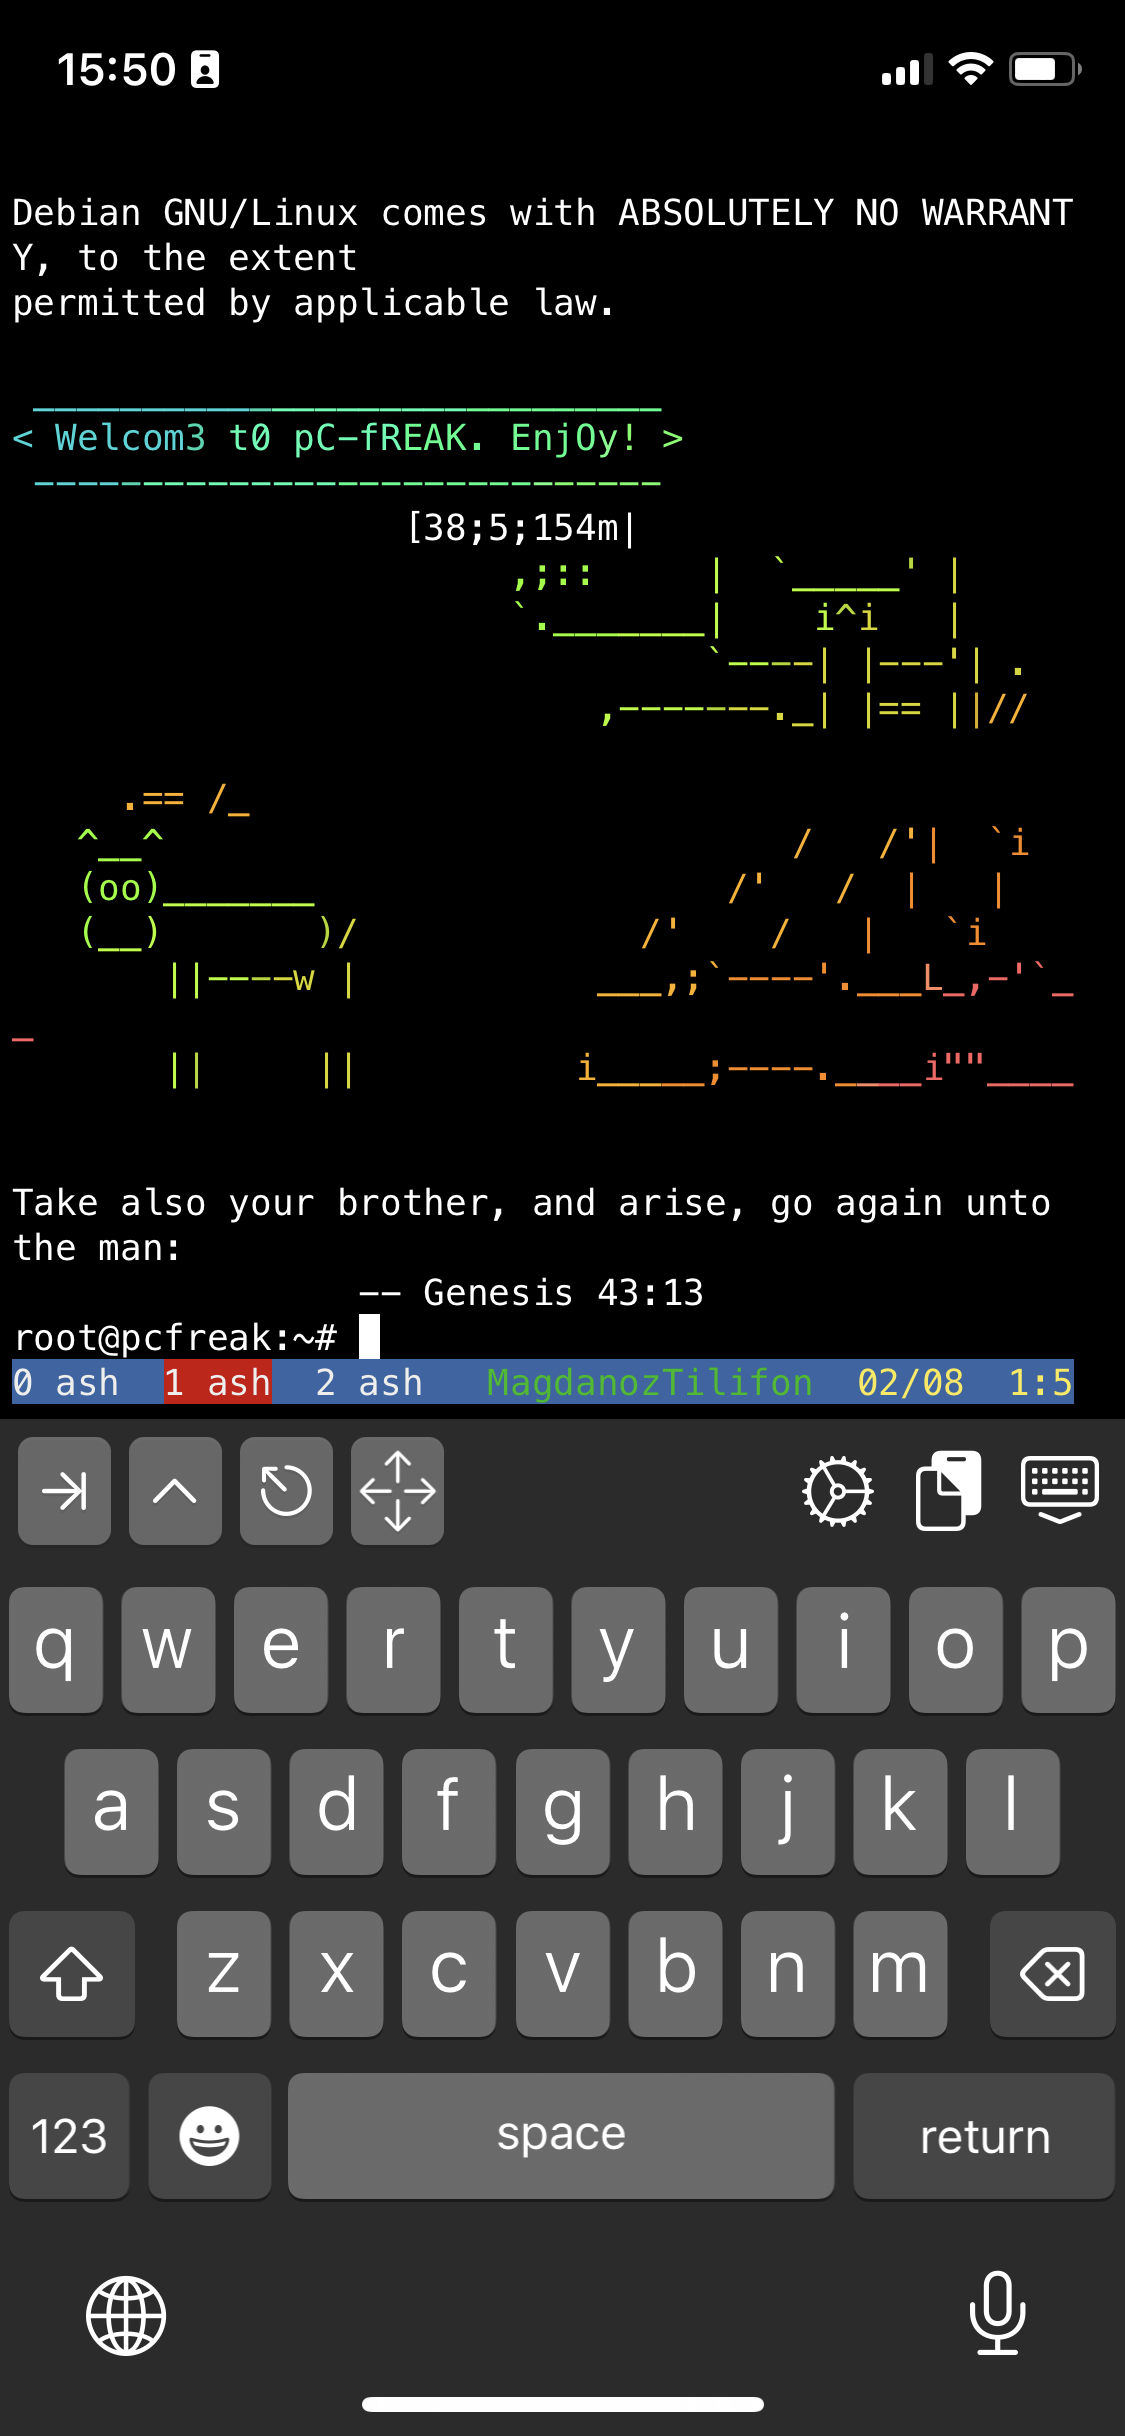
To open other Virtual Windows inside screen just press CTRL + A + C as many times as you need it, each session will appear ina small window on the down corner as you can see in screenshot

ish-terminal-with-screen-multiple-virtual-terminals-screenshot-iphone-ios

To move across the Screen unnamed 3 Virtual Windows 0 ash 1 ash and 2 ash use the Virtual keyboard

for next WIndow use key combination:
 

CTRL + A + N (where + is just to indicate you have to press them once after another and not actually press the + 🙂 )


For Previous Window use:

CTRL + A + P

Or use CTRL + A and type 

:number 3 (where number is the number of window)

The available iSH commands without adding any further packages which are part of the busybox install are as follows:

Available /bin/ directory commands:

arch  ash  base64  bbconfig  busybox  cat  chgrp  chmod  chown  conspy  cp  date  dd  df  dmesg  dnsdomainname  dumpkmap  echo  ed  egrep  false  fatattr  fdflush  fgrep  fsync  getopt  grep  gunzip  gzip  hostname  ionice  iostat  ipcalc  kbd_mode  kill  link  linux32  linux64  ln  login  ls  lzop  makemime  mkdir  mknod  mktemp  more  mount  mountpoint  mpstat  mv  netstat  nice  pidof  ping  ping6  pipe_progress  printenv  ps  pwd  reformime  rev  rm  rmdir  run-parts  sed  setpriv  setserial  sh  sleep  stty  su  sync  tar  touch  true  umount  uname  usleep  watch  zcat  


Available /usr/bin/ commands:    

awk  basename  beep  blkdiscard  bunzip2  bzcat  bzip2  cal  chvt  cksum  clear  cmp  comm  cpio  crontab  cryptpw  cut  dc  deallocvt  diff  dirname  dos2unix  du  dumpleases  eject  env  expand  expr  factor  fallocate  find  flock  fold  free  fuser  getconf  getent  groups  hd  head  hexdump  hostid  iconv  id  install  ipcrm  ipcs  killall  ldd  less  logger  lsof  lsusb  lzcat  lzma  lzopcat  md5sum  mesg  microcom  mkfifo  mkpasswd  nc  nl  nmeter  nohup  nproc  nsenter  nslookup  od  passwd  paste  patch  pgrep  pkill  pmap  printf  pscan  pstree  pwdx  readlink  realpath  renice  reset  resize  scanelf  seq  setkeycodes  setsid  sha1sum  sha256sum  sha3sum  sha512sum  showkey  shred  shuf  smemcap  sort  split  ssl_client  strings  sum  tac  tail  tee  test  time  timeout  top  tr  traceroute  traceroute6  truncate  tty  ttysize  udhcpc6  unexpand  uniq  unix2dos  unlink  unlzma  unlzop  unshare  unxz  unzip  uptime  uudecode  uuencode  vi  vlock  volname  wc  wget  which  whoami  whois  xargs  xxd  xzcat  yes  


If you're a maniac developer you can even use iSH, to do some programs development with vim with Python / Perl or PHP as these are available from the Alpine repositories and installable via a simple apk add packagename for security experts nmap and some security tools are also available but unfortunately not everything is still working as this project is in active development and iOS has some security limitations if OS is not ROOTED 🙂

Hence some of the packages you can install via apk manager will be failing actually.
There is a list of What works and what doesn't still on iSH on the project github wiki check it out here.

There is much more funny stuff you can do with it, and actually my quick research on how people use iSH on their phones lead me to some Videos talking about iOS and Ethical hacking etc, but I'll stop here as I dont have the time to dig deeper to it. 
If you know or have some good use of iSH or some other goody you are using as a hack please share in comments.

Enjoy ! 🙂
Improve MobaXterm Best Windows terminal client with some additional settings tune ups / Install extra Linux Cygwin tools on MobaXterm and various post install configuration goodies


January 20th, 2023

mobaxterm-logo_400x400-terminal-client-tune-up-howto-for-a-new-install

Earlier I've written a an article MobaXTerm: A good gnome-terminal like tabbed SSH client for Windows / Windows Putty Tabs Alternative in which I've introduced the best in my opinion SSH / Telnet / VNC / RDP / Xserver in one Terminal client emulator for Windows operating systems.

The client has been around for quite some time and it has been improving rapidly over the last 10 years, where it now more looks like a separate Operating System than a single terminal client. It's size is quite compact as well and my opinion and every self respectiving developer, system administrator, IT geek or a hacker would definitely
use the mobaxterm at home or at work place on a daily. I guess some of my readers, who have already migrated SuperPutty / SecureCRT or Putty / XMing or whatever kind of exotic Remote SSH Console terminal is used could validate this 🙂

Therefore as I've set up Mobaxterm on a multiple computers all around, I've found it useful to write a small article with some post-install hints (tune ups) one can do immediately once he has installed the Desktop or Portable Apps version of mobaxterm on desktop PC / notebook.
 

1. Set up your bashrc server / command aliases

Lets say you need to setup some rules for connectivity via a socks proxy to dig holes over a harsh company firewalls or add
custom options to every ssh client attempt to remote server, or simply alias some of your servers with custom connectivity options
and so on simply open vi / vim text editor from mobaxterm local terminal and place inside your rules, for example that could be anything like:


alias ssh='ssh -o stricthostkeychecking=no -o passwordauthentication=yes -o PreferredAuthentications=password  -v'
alias sftp='sftp -o stricthostkeychecking=no -o passwordauthentication=yes -o PreferredAuthentications=password'

alias work-server='ssh UserName@work-server -v -o passwordauthentication=yes -o PreferredAuthentications=password'

alias proxy='ssh -D 3128 UserName@proxyIP-host1 -o ConnectTimeout=80'
alias proxy1='ssh -D 3128 UserName@proxy-host2 -p 443 -o ConnectTimeout=60'
alias proxy3='ssh -D 3128 Username@proxy-host3 -p 443 -o ConnectTimeout=60'

Simply open the terminal and setup whatever you require
export ftp_proxy="http://proxy-host:8080"
export https_proxy="https://proxy-host:8080"
export http_proxy="http://proxy-host:8080"
export HTTP_PROXY="http://proxy-host:8080"
export HTTPS_PROXY="http://proxy-host:8080"


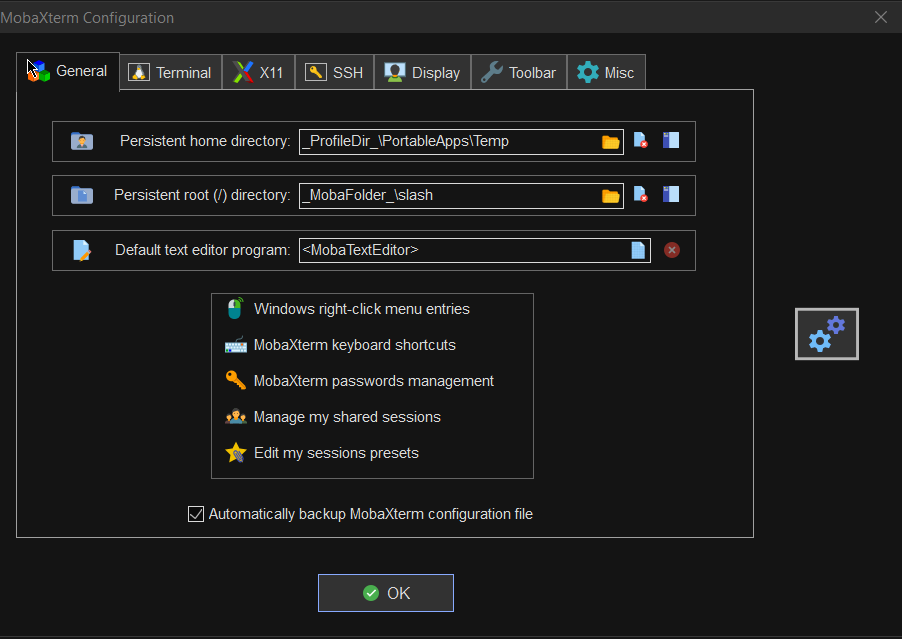
2. Set mobaxterm presistent directory / persistent root directory and default text editor

Make sure you have properly defined at least Persistent directory / Persistent directory if you want to keep the files under your /home/mobaxterm and root directory be able to save your data from local mobaxterm terminal work you have done.

To do so o to Configuration -> General

MobaXterm-persistent-home-directory
 

3. Change default settings for Opening / Closing Terminal tabs just like in gnome-terminal

MobaXterm is really awesome as the developer, followed pretty much the logic of some common GNU / Linux Terminal clients like Gnome-Terminal and KDE's default Konsole terminal.

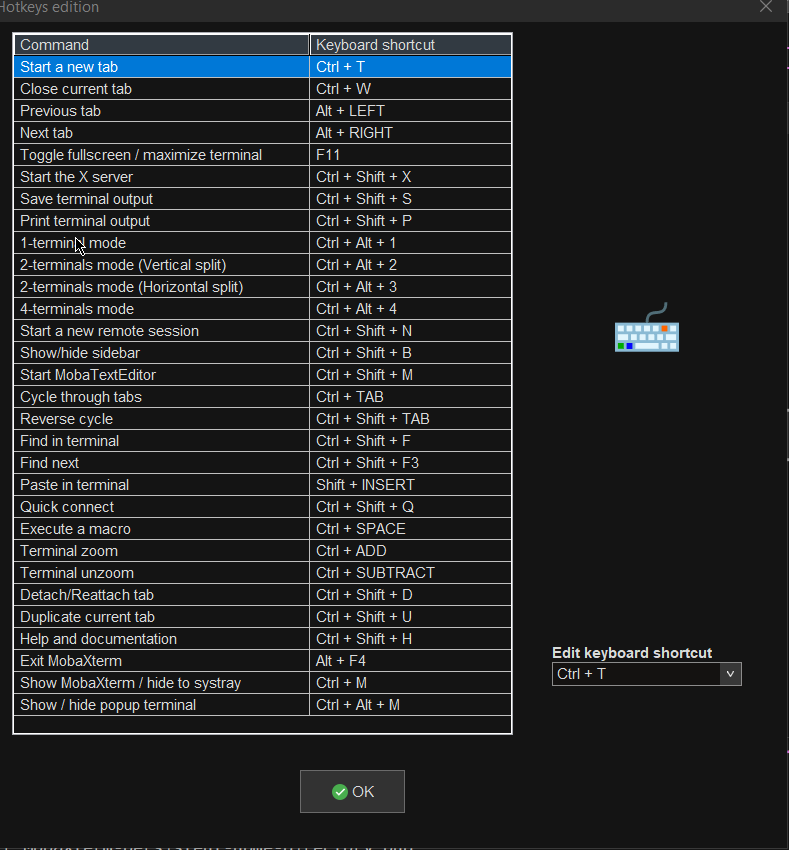
One of the first things to do once Mobaxterm is installed on the PC is to set up nice key binds as default onces might be heard to learn at the beginning or you might have already the habit to use the certain set of key combinations on your Linux desktop:

Common once are:

1. Open tab / Close tab common once I bind to are (CTRL + T / CTRL + W)
2. Previous tab move / Next tab move keys common one I use are (ALT + LEFT / ALT + RIGHT)
3. Find in terminal (CTRL + F)

rebind-mobaxterm-standard-keys
 

4. Make MobaXterm to automatically open a terminal to not Start local terminal every time

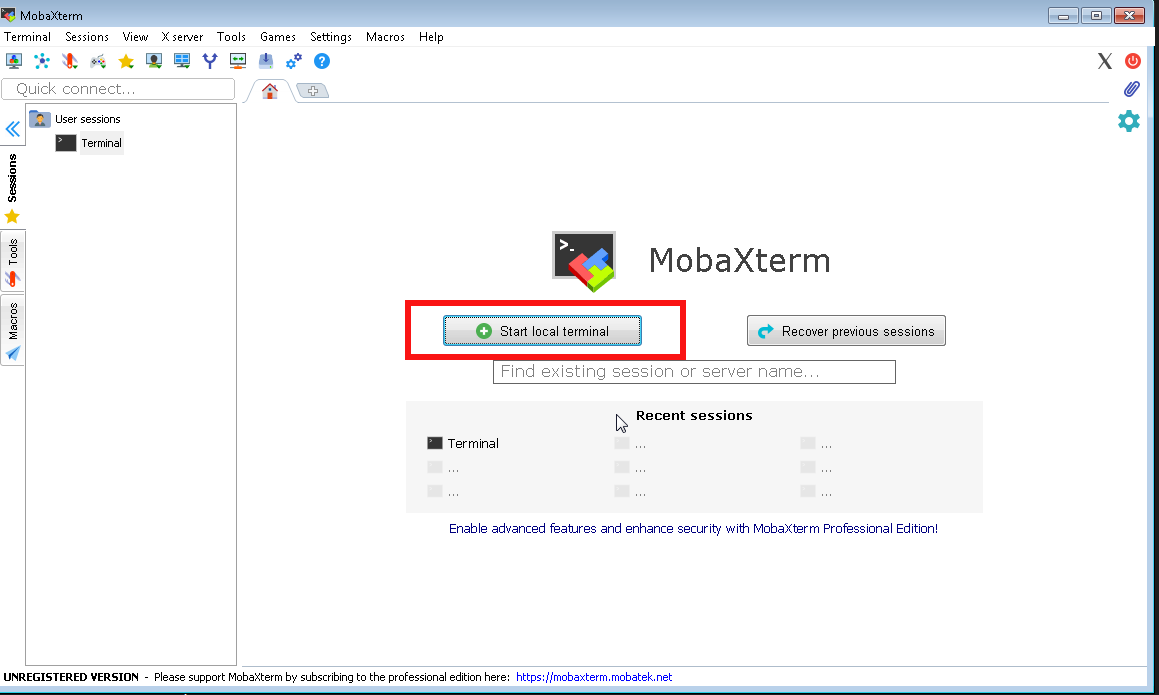
By default mobaxterm it is really annoying cause every time you run it after system reboot you have to select
Start local terminal
Once you run the terminal you get this prompt and you have to press on Start local terminal

mobaxterm-start-local-terminal


How to make Mobaxterm automatically open local Terminal Tab on every boot?
 

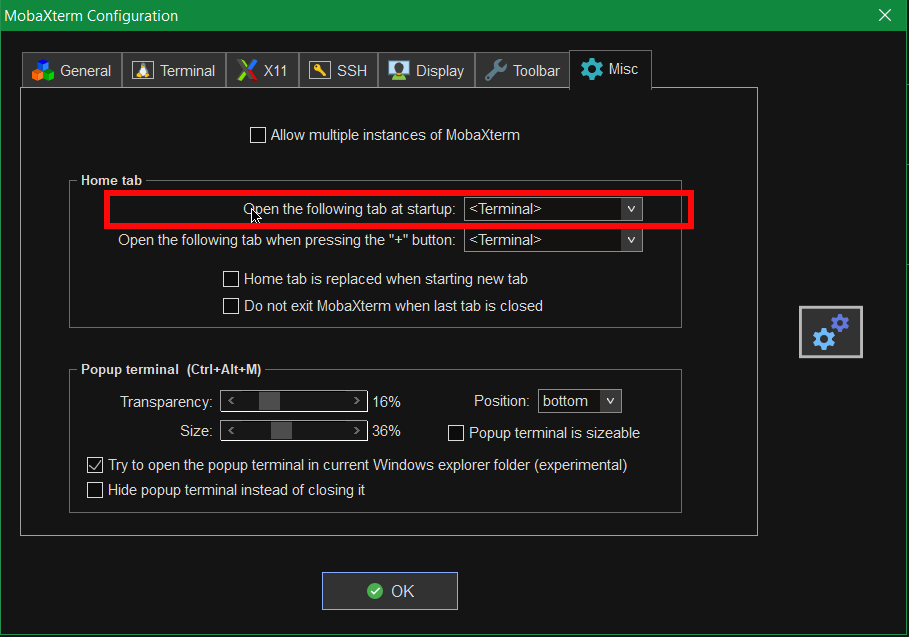
To fix this so every time a local terminal is spawn on MobaXterm you have get to:
 

Settings -> Configuration -> Misc


Open the Following tab at startup by default it will be

<Home (Pinned)>

Change it to:

<Terminal>

mobaxterm-open-the-followintab-tab-in-startup

That's it on next login your Local Terminal with /bin/bash.exe will auto load !
 

[hipo.WINDOWS-PC] ➤ env|grep -i SHELL
SHELL=/bin/bash.exe
PATH=/bin:/drives/c/Users/hipo/DOCUME~1
/MobaXterm/slash/bin:/drives/c/Windows:/drives/c/Windows/system32:/drives/c/Windows/system32:/drives/c/Windows:/drives/c/Windows/System32/Wbem:
/drives/c/Windows/System32/WindowsPowerShell/v1.0:/drives/c/Windows/sysnative
PSModulePath=C:\Windows\system32\WindowsPowerShell\v1.0\Modules\
CMDPATH=C:\Windows\system32;C:\Windows;C:\Windows\System32\Wbem;
C:\Windows\System32\WindowsPowerShell\v1.0\;C:\Windows\sysnative\;
C:\Users\hipo\DOCUME~1\MobaXterm\slash\bin
WINPATH=C:\Windows\system32;C:\Windows;C:\Windows\System32\Wbem;C:\Windows\System32\WindowsPowerShell\v1.0\;C:\Windows\sysnative\


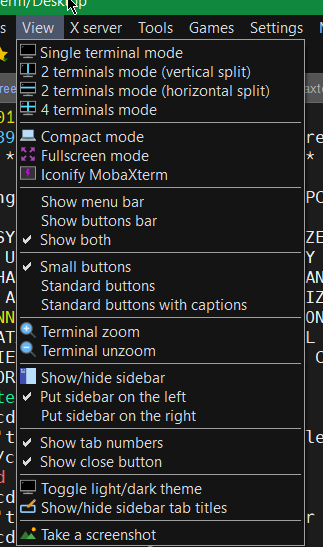
5. Make menu buttons to appear smaller


Go to menu and select
View -> (Small Buttons)

mobaxterm-select-small-buttons-screenshot

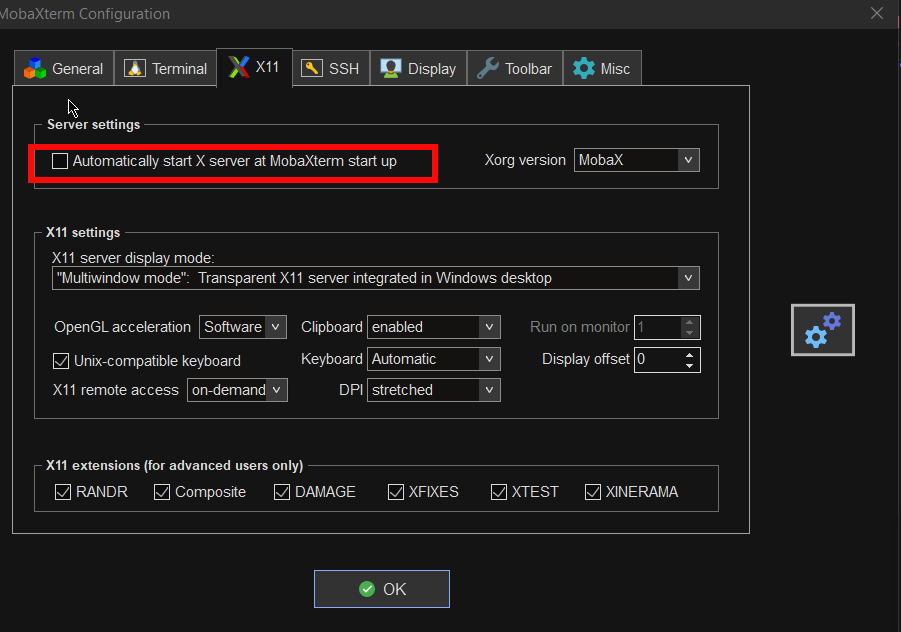
6. Disable auto start of XServer to prevent a port listener on the machine on TCP port

By default mobaxterm opens XServer listener, so you can immediately connect from a remote SSH servers missing Xserver and install software requiring an XServer, for example software such as Oracle Database or some MiddleWare WebLogig or IBM's Web Sphere. This is useful but if you want to have a good security only allow this server on a purpose. Otherwise the XServer will run in parallel with rest of your Moba and just load up your PC and eat up some RAM memory. To disable it go to:

mobaxterm-x11-automatically-start-X-server-disable-stop-at-startup

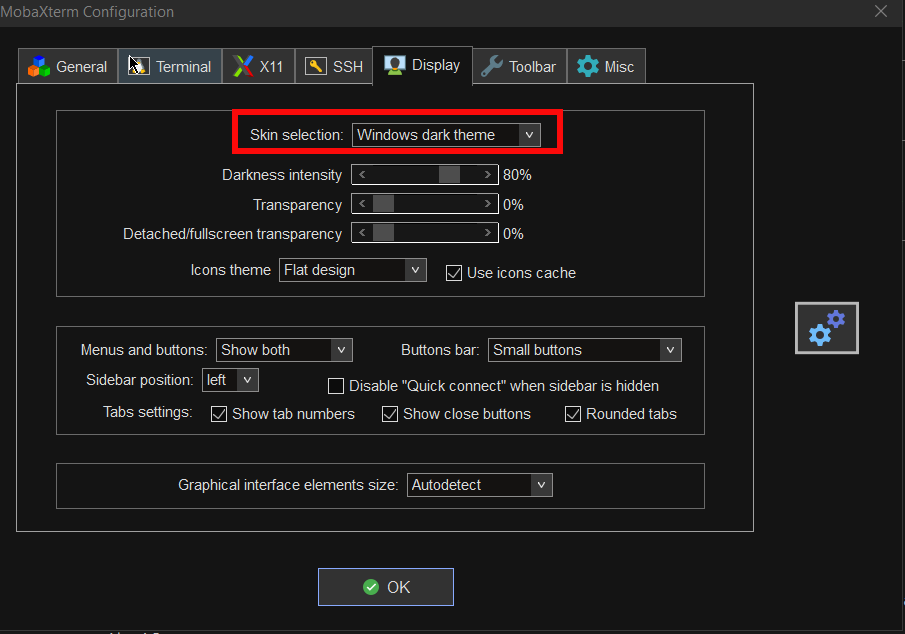
7. Change the mobaxterm Default theme to Dark

This is optional I like to set the Theme to Dark, also as a Theme for Windows as well as for MobaxTerm, the aim of that is simply to not put extra stress on my eye sight. Being on the PC around 8 to 10 hours and spending some 6 to 8 hours on console work is enough. If you want to do as well.

mobaxterm-change-default-theme-to-dark-theme

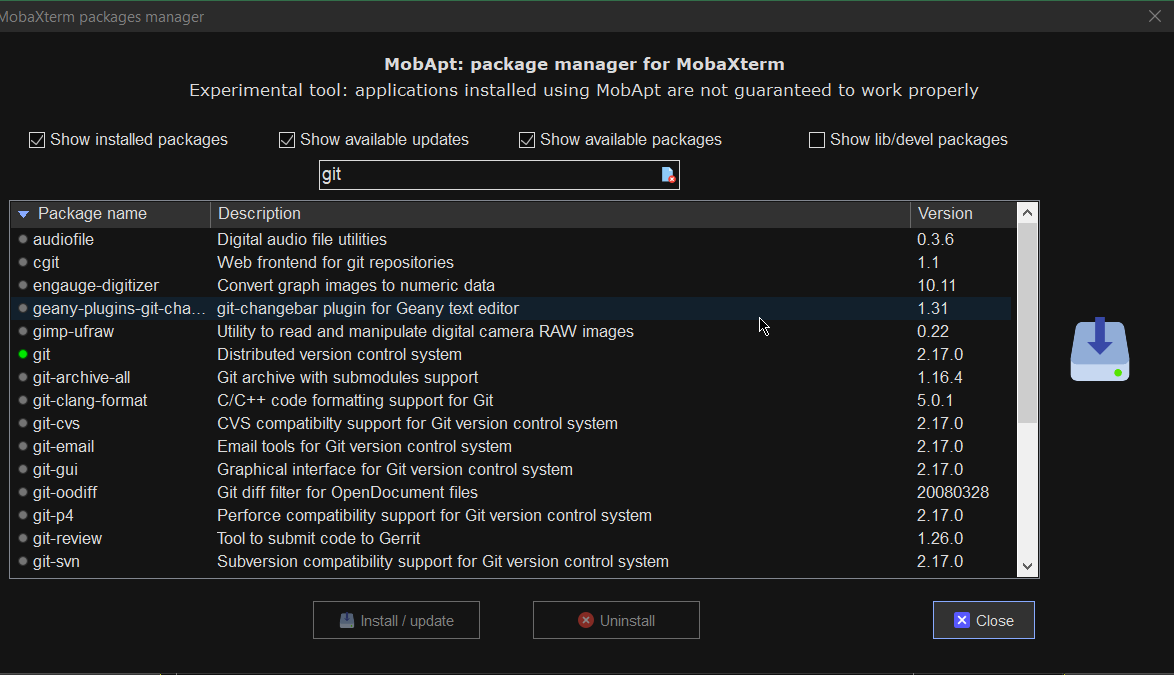
8. Install additional set of common Linux tools to mobaxterm to use on Windows
 

Tools such as:

1. Midnight Commander (mc)
2. Wget
3. Curl
4. Vim
5. Screen
6. Rsync
7. Perl
8. W3m
9. dosunix
10. unix2dos
11. gnupg
12. diffutils
13. mysql
14. mpg123
15. whois


If you want to have a set of packages pre-installed that are including above as well as the rest of mine, here is a dump of my installed mobapt manager packages:

For more simply use the experimental Mobaxterm  Graphical Package installer
 

[hipo.WINDOWS-PC] ➤  for i in $(cat Downloads/installed-packages-mobaxterm.txt ); do apt-cyg install $i; done
 

Found package GeoIP-database

Installing GeoIP-database
Downloading GeoIP-database-20180505-1.tar.xz…
Unpacking GeoIP-database-20180505-1.tar.xz…


Running postinstall scripts
Package GeoIP-database installed.

Rebasing new libraries

Found package adwaita-icon-theme

Installing adwaita-icon-theme
Downloading adwaita-icon-theme-3.26.1-1.tar.xz…


You will be prompted for a single Yes for the respository

MobApt Packages Manager

mobapt-pkg-manager-install-git-from-gui-mobaxterm-package-installer

Though it is said it is experimental, I have to say the MobApt Apt Manager works quite good, I never had any issues with it so far.

9. Mobaxterm.ini the settings storage file that can help you move your configurations

If you have to prepeare new MobaXterm on multiple PCs frequently perhaps it is best to just copy the Mobaxterm.ini file. 
Here is an example of my mobaxterm.ini for download.
 

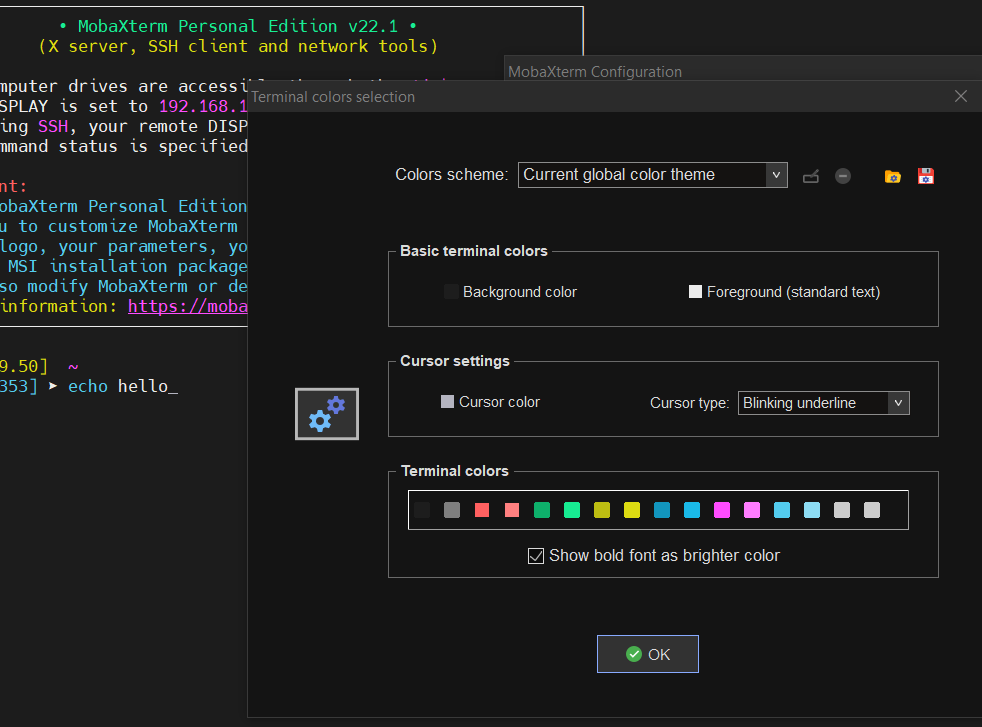
10. Change terminal colors and curor type and enable blinking (customizations)


Settings -> Configuration -> Terminal -> (Default Terminal Color Settings)


mobaxterm-change-terminal-colors-and-blinking-cursor-setting-screenshot

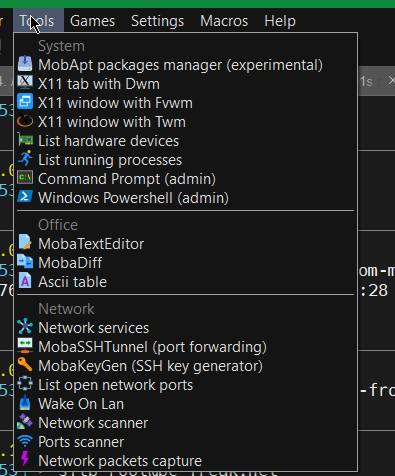
11. Use very useful moba Tools
 

mobaxterm-terminal-great-useful-tools-screenshot
For sysadmins Moba has plenty of other jems such as:

  • Network Port scanner such as Nmap with GUI

  • list open network ports (GUI interface to netmap)

  • SSH tunnel tool

  • Moba Diff

  • Wake on Lan

  • Network Packet capturer (such as tcpdump)

  • List running processes (such as taskmgr in simple form)

  • List machine hardware devices (such as Windows Device manager)

 
12. Remote monitoring of opened ssh session


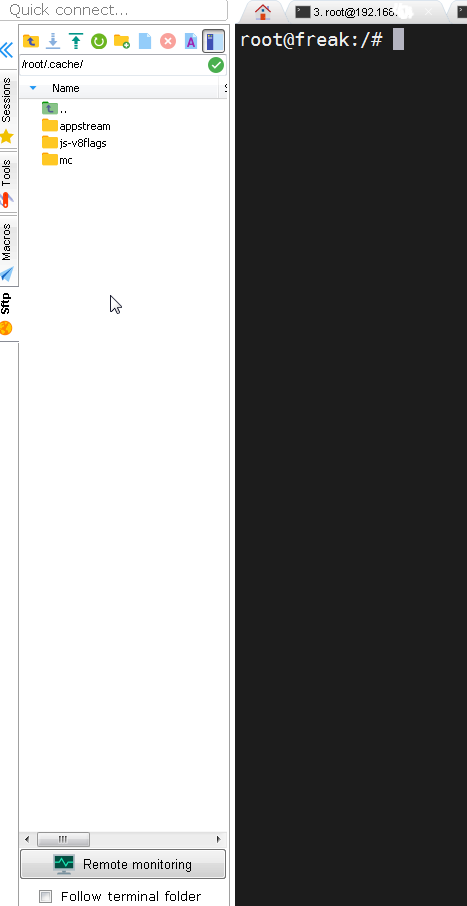
To enable remote monitoring for a Saved session simply use the "Remote monitoring" button on the down left corner of the terminal.

mobaxterm-remote-monitoring-of-remote-ssh-server-screenshot-button

Or to enable it for a new host, open:

1. "Saved sessions"
2. Click over "User sessions"
3. New Session -> (SSH)
4. Basic SSH Settings (Remote host) -> OK
5. Click over the new created session
6. Click on Remote monitoring for the opened session

remote-monitoring-from-mobaxterm-screenshot

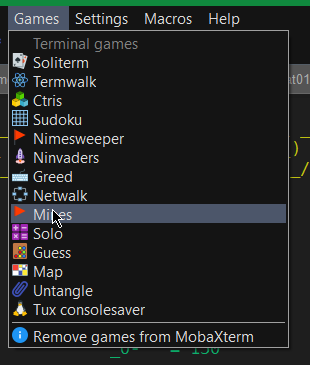
13. Play some mobaxterm console games

As you might have pissed off of configuring go on and enjoy some of the great console games, some of which are also present on a normal Linux new distribution installation. 🙂

mobaxterm-list-of-games-screenshot

List of Moba Games

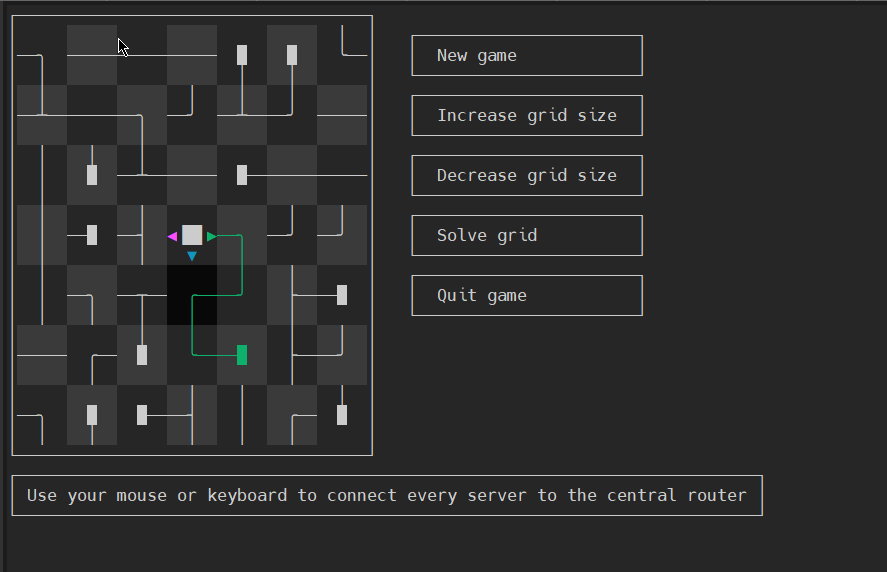
teamwalk-mobaxterm-console-connect-network-routers-game
TeamWalk (Use your mouse or keyboard to connect every server to the central router)

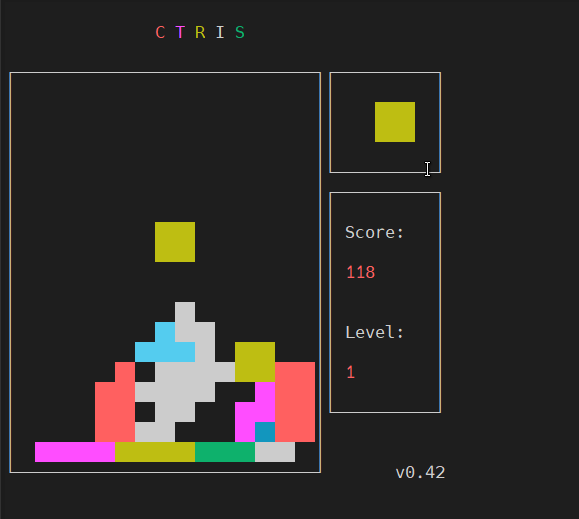
ctris-console-text-game-mobaxterm

Ctris Console tetris from Mobaxterm

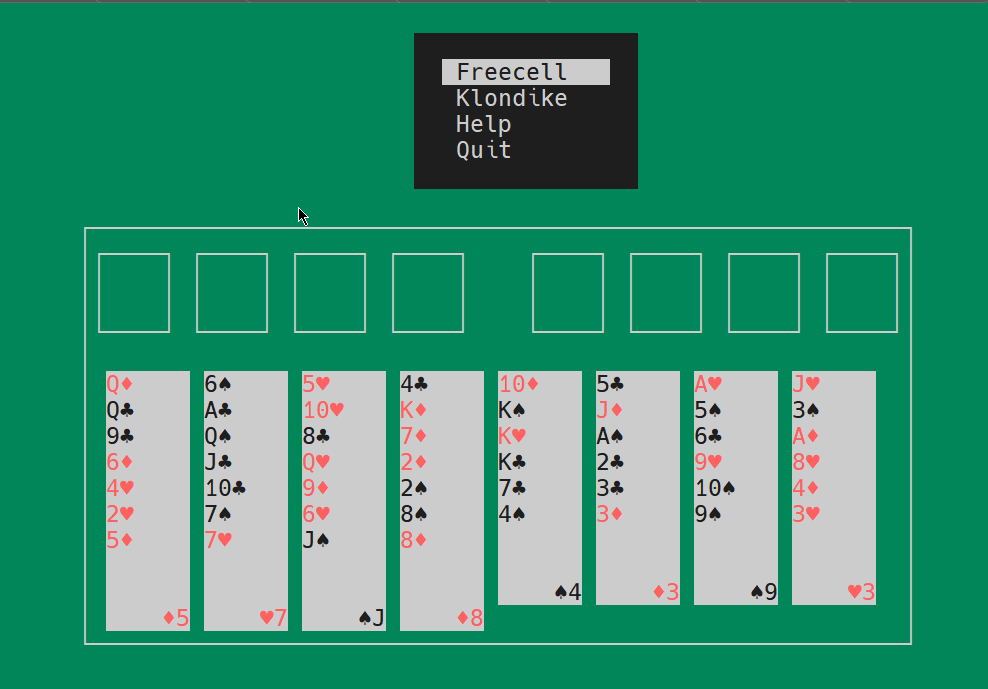
solitaire-text-console-game-played-on-mobaxterm-screenshot

Text console Solitaire from Moba
 

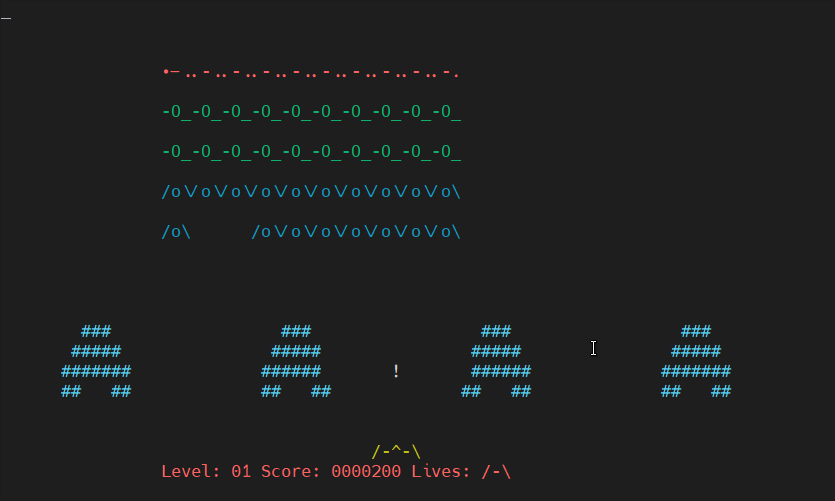
Ninvaders-console-game-mobaxterm

Here is NinVaders (Text Version of Space Invaders Arcade Classic)
 

Enjoy ! 🙂

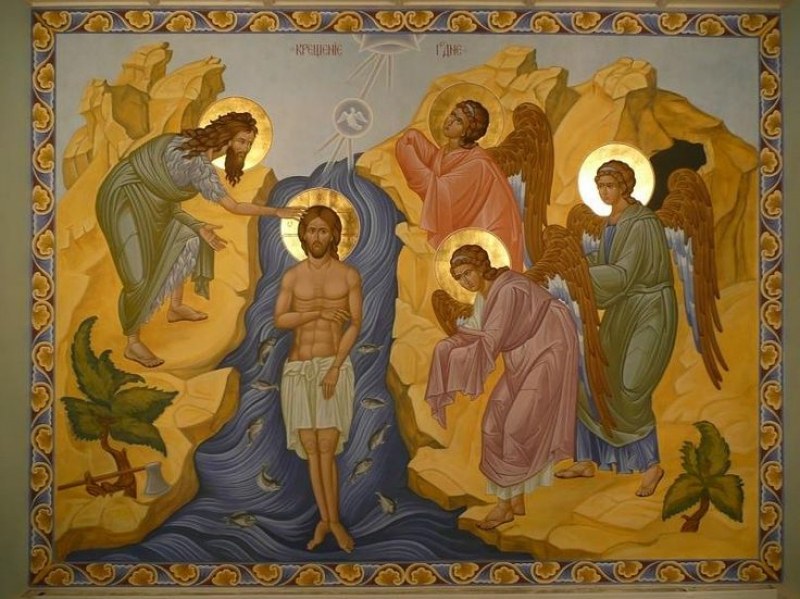
The Great Epiphany, appearance of God to Men and Manifestation of the Son of God by the Baptism in River Jordan. A short biography and history of the feast and its meaning


January 6th, 2023

Epiphany-Theophany-Bogojavlenie-icon-from-miniature-of-Tomichov_psaltir_16-century

Epiphany (Богоявление) icon minituature of Tomichev Psaltir (year circa 1380)

"And behold, the heavens were opened to Him, and He saw the Spirit of God descending like a dove and alighting on Him. And behold, a voice from heaven, which said: This is My beloved Son, in Whom I am well pleased." (Matt. 3:16-17)

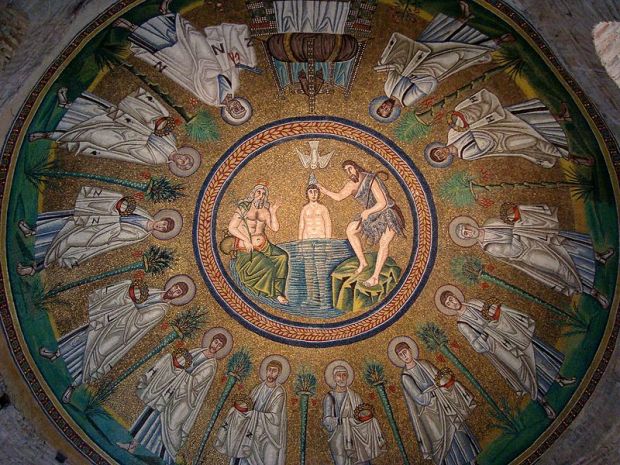
Bogoyavlenie-Epiphany-the-Baptism-of-Christ-by-John-the-Forerunner

The Baptism of Christ Ravenna Basillica – Mosaic V century

There is clear evidence of the celebration of this most ancient feast of the Lord as early as the 2nd century, but by the 4th century it was combined with the Nativity of Christ.
The common holiday for both events was called “Epiphany”, because at His baptism in the waters of the Jordan, Jesus Christ appeared to the world for public service and his hypostasis as Son of God has been manifested by the Descendent of the Holy Spirit in the form of a Pure Dove.
Through His birth He appeared to the world in the flesh. In ancient times the celebration of Epiphany (Theophany) and Nativity (Christmas) according to many liturgists has been celebrated on a single date by the whole Worldly Church both in East in West, North and South.

The term Theophany was less used though as Theophany is distinguished by the word Epiphany as (Theophany) has been a word used to also mark celebrated by Greek paganistic false believes, whether Epiphany has a meaning of the Christian meaning of God’s revealing himself for the world by the Baptism of the Lord Jesus Christ Son of God.

Later, the Church for different reasons the decided to celebrate the two events separately – on December 25 the Nativity of Christ, and on January 6 – the Epiphany.

01.06_Epiphany-Theophany-Krashtenie-1290-Panselinos-Protata

Theophany (One of the best considered iconographers Panselinos Protata circa year 1290)

There are too few details about the earthly life of the Lord Jesus Christ before His baptism, which we can find in the pages of the Gospel narratives as God decided to keep his aspect of his earthly presence in the flesh a secret to be only revealed in the Life in Heaven, where those chosen and sanctified by his All Filling Grace through the mysterious of the Church and all those will receive salvation will see and understand why this was hidden by us while being in the flesh .

The Saviour, Who truly strove

“And Jesus answering said unto him,Suffer it to be so now: for thus it becometh us to fulfil all righteousness. Then he suffered him” (Matt. 3:15),

waited until he had reached the age of 30, required by Jewish custom for every priest or teacher, and before going out to preach publicly, he accepted the baptism of His Forerunner saint John the Baptist whose feast day is on 7th of January just a day after the day of Epiphany.

Shortly before that, John the Baptist, the son of priest Zacharias and Elizabeth, had begun his penitential preaching at God's command

Epiphany-Baptism-of-Christ-Daphni-mosaic-XI-century

Baptismal of Christ Daphni XI century mosaic

These things were done in Bethabara beyond Jordan, where John was baptizing.” (John 1:28). John was the Angel predicted by the prophet Malachi, who was supposed to prepare the way of the Lord (Matt. 3:1).

The great Old Testament Prophet Isaiah also spoke about him:
"The voice of one crying in the wilderness says: prepare the way of the Lord, make the paths of our God in the wilderness" (Is. 40:3). His call: "Repent, for the kingdom of heaven is at hand!" (Matt. 3:2)

attracted the attention of even the Pharisees and Sadducees. (Matt. 3:7). People from all walks of life approached him with anxiety and trust. Priests and Levites from among the Pharisees were sent to him from Jerusalem to ask him:

"Why do you baptize, if you are not the Christ, nor Elijah, nor the Prophet?" (John 1:19, 25),

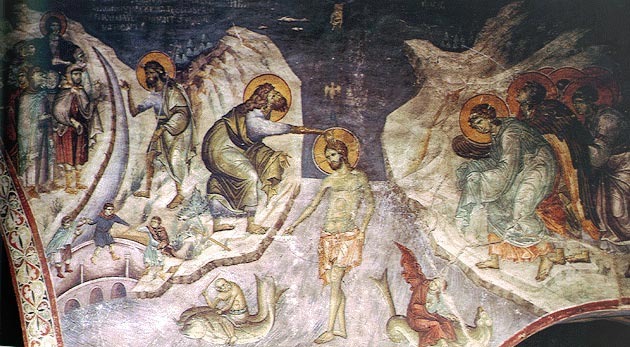
Kryshtenie-Gospodne-Theophany-praznuvame-krashtenie-Gospodne

and John answered them:
"I baptize with water, but one stands among you, whom you do not know. He is the one who is coming after me, who preceded me, and whom I am not worthy to unbind the thong of His shoe" (John 1:26-27).

And behold, this One came!

"from Galilee to the Jordan to John to be baptized by him. And John restrained him and said: I need to be baptized by You, and do You come to me? But Jesus answered him and said : Leave it now; for thus it behooves us to fulfill all righteousness. Then John admits Him" (Matt. 3:13-15).

Beautiful-orthodox-christian-icon-Theophany-Epipihany-Baptismal-of-Christ

"And when all the people were baptized, and when Jesus, after being baptized, was praying, the heavens were opened, and the Holy Spirit descended upon Him in bodily form, like a dove" (Luke 3:21).

"And behold, a voice from heaven, which said: This is my beloved Son, in whom I am well pleased" (Matt. 3:17).

At the baptism of Jesus Christ, this great secret was announced to the world, about which the Old Testament only hinted and about which ancient Egypt and India only spoke in fables – the secret of the Divine Trinity.

The Father appeared to our hearing, the Spirit appeared to human sight, and the Son – to our touch in His many years of communication with men.

The (Heavenly) Father gave His testimony about the Son, the Son was baptized, and the Holy Spirit like a dove flew over the water.

Through the testimony of John: "Behold the Lamb of God, who takes away the sin of the world" (John 1:29) and through the baptism of Jesus, Christ's mission was shown to the world and the way of our salvation was indicated.

Namely: by immersing in the waters of the Jordan, the Lord took upon Himself the sins of the human race and died under its burden, and coming out of the water shows His coming to life, His resurrection. And in us, through holy Baptism, the old sinful and cursed man must die and we come out of the holy (baptismal) font as revived, cleansed, renewed and reborn.

The Feast of the Epiphany is also called Enlightenment, because the Jordanian event enlightens us by showing us God manifested in the unfathomable mystery of the consubstantial and indivisible Trinity. Each of us through Holy Baptism is adopted by the Father of Light through the merit of the Son and through the power of the Holy Spirit. For this enlightenment, he also praised the Epiphany’s Kontaktion found in the Church service book of Menaion:

"You have appeared today to the universe, and Your light, Lord, has reflected upon us who wisely sing to You: you have come and appeared, Light unapproachable."

The feast of the Epiphany is connected with the great consecration of water, which should remind us that at the banks of the Jordan River, God has renewed through water and the Spirit our nature that has become stale from sin.

© Lives of the Saints. Synodal Publishing House, Sofia, 1991, edited by Parthenius, Bishop of Lefkada and Archimandrite Dr. Athanasius (Bonchev) with few minor inclusions and clearances by hip0 (Georgi D. Georgiev)


The short historical path of the Holy Relics of Saint Andrew the First-called of the Apostles of Christ


December 2nd, 2022

St_Andrew_the_Apostle_-_Bulgarian_icon-by-icon-Yoan-from-Gabrovo-iconographer

Why saint Andrew the Apostle is special for the Bulgarian Orthodox Church
and the Eastern Churches?


According to Church tradition saint Andrew the Apostle the First-called was the apostle from which wide areas of the Eastern lands was christianized, by his fervent preach of the Gospel and the good news of the Resurrection of Christ who suffered on the Cross for the salvation of mankind.
The Ecumenical Patriarchy of Constantinople and the Ancient Eastern Byzantium Church has received its apostleship in practice, exactly from st. Apostle Andrew.
During his apostleship mission saint Andrew has preached the Gospel and gave the faith for a first time in the Ist century according to Church tradition, as he passed by the Black sea borders, today part of which are in Bulgaria, he went through Romania, where he has spent some time living as a hermit in a cave and then up to Kiev and Scythia, where he made a prophecy that the Christian faith will put its Roots and that soon the pagan tribes of Kiev lands will accept the faith and put the Cross high over their lands.

When Bulgaria was later Christianized by saint Boris-Michael, and the Holy Bulgarian church was established on this lands thanks to the missionary works of Saint Kiril and Methodius, Saint Kliment of Ohrid, saint Gorazd, Naum, Sava, Angelarius and  whole pleade of saints and teachers, Bulgaria has received, also the gift of priesthood and apostleship (has received its own hierarchy of bishops governing the Bulgarian Orthodox Church), thus by spiritual line the Holy Spirit here in Bulgaria was received from Saint Andrew, later this enlightnements achievement, the Books in Church Slavonic, the services and most importantly the Cyrllic alphabet was transffered from Bulgaria and later Serbia to the endless steppes territories of capital Kiev that was a capital of the Rus at that time and in all Scythia today the territories of Russia. Thus all the Byzantine Eastern Churches and  Bulgaria

After the end of the persecution of Christians, in the 4th century AD, Saint Equal-to-the-Apostles Emperor Constantine the Great began to erect numerous Christian temples.

Among them was the temple of the Holy Apostles in the new capital of the empire – Constantinople. After the death of St. Constantine in 337, his son, Constantius, ascended the throne.
The new ruler, fulfilling the will of his father, decided to bring to the capital of the empire the holy relics of the Apostles Andrew, Luke, Timothy and lay them in the church of the Holy Apostles, where the Equal-to-the-Apostles Emperor himself was buried.

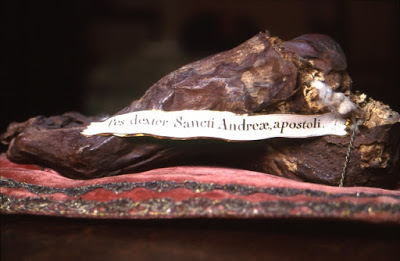
Originally, the holy relics of Saint Andrew the First-Called rested at the place of his martyrdom, in Patras, in the Peloponnese, Greece. According to Western tradition, a few days before the relics were transferred to Constantinople, Regulus, who was guarding them, removed the lid of the sarcophagus in which the relics of the Apostle rested, separated from them one shoulder, three fingers of the right hand, part of the knee and a tooth.

holy-right-hand-of-saint-Andrew-the-Apostle-first-called-Vatopedi

Holy right hand of saint Andrew the First-Called

With these relics Regulus left Patras and set out to preach the Gospel among the pagans inhabiting Scotland.
The inhabitants of the country welcomed the enlightener with great honor and together with their King accepted Holy Baptism.
In Scotland, the first Christian church was built in the name of Saint Andrew, in which parts of his holy relics were laid. Which played the role for Scotlands patron saint protector to become Saint Andrew the Apostle.

The deposition of the holy relics of Saint Apostle Andrew the First-Called in Constantinople took place on May 3, 357 in the presence of the Patriarch of Constantinople Macedonius I and Emperor Constantius.
In the 9th – 10th centuries, the Byzantine autocrats usually sent as a donation for the built monasteries and temples parts of the holy relics that rested in Constantinople, including the relics of the holy Apostles.

In the second half of the 9th century, following an urgent request and special intercession before the emperor, the honorable head of St. Apostle Andrew the First-Called was delivered to the St. Andrew's Church in the city of Patras, where it rested until the middle of the 15th century.

In 1460, to the walls of The army of the Ottoman Sultan Mohammed II was approaching the town of Patras. The Governor /Archon/ of the city of Patras, Thomas Paleologus (brother of the Byzantine Emperor Constantine XI, who died during the capture of Constantinople by the Turks in 1453, father of Princess Sofia, the future wife of the Grand Duke John III of Moscow), losing all hope of preserving independence of the city, took the precious and holy treasure of the city from St. Andrew's Church and arrived in Rome with it to collect funds and forces for the liberation of the Orthodox Christian East from the yoke of the infidels.

The holy head of St. Andrew the First-Called Apostle was in Rome until 1964, when, by the decision of Pope Paul VI, this shrine together with parts of the cross of St. Andrew was returned to the Greek Orthodox Church.

Now these relics are located in one of the largest cathedrals in the Balkans, Saint Andrew the First-Called in Patras, Greece, i.e. in this place where the first disciple of Christ preached and ended his martyr's earthly life.

saint-Andrew-first-called-of-the-apostles-X-shaped-cross-icon.jpg

X shaped cross of Saint Andrew according to medieval tradition

The honorable head of the Apostle rests on the throne in a silver coffin, and behind the throne – saint Andrew's cross-relic (according to middle-ages tradition to be X shaped cross in which are embedded parts of the real cross of Saint Andrew, on which he was crucified.

Head-of-Saint-Andrew-the-first-called-Apostle-reliquary

Mount Athos received the hand of St. Andrew as a gift in the Great Lavra of Athos, founded by Saint Athanasius (the Great) at the request of his friend and companion and patron of the Byzantine emperor Nikephoros Phocas (963-969).
Parts of the holy relics of holy Apostle are also kept in other monasteries on Mount Athos.

foot-of-saint-Andrew-the-first-call-Apostle-holy-relic

Foot Relic of Saint Andrew the Apostle

Likewise, part of the forehead bone is kept in the Saint Andrew's hermitage (scythe), in the scythe of saint Prohet Elijah is preserved the foot of the Apostle.
This walking stick was given in 1806 by Hieromonk Dionysius /in Kyzikon (Kyzicheska) Diocese/, who left the eparchy with these relics from the monastery of Saint Marina, cause the monastery was
looted and sacked by the Turks.

In the Russian monastery of Saint Panteleimon on Holy Mount Athos, the second foot of the First Called Disciple of Christ is preserved.

Part of the relics of Saint Andrew also rest in the nun's monastery dedicated to his name, which is located on the island of Catalonia in the village of Peratata.

Fragments of the honest relics of the Apostle are also found in the monastery of Saint Nicholas on the island of Euboea.

Material written from sources according to information from the Holy Kiev-Pechersk Lavra, on the occasion of the stay from June 27 to 29, 2003 during which the the foot of St. Andrew the First-Called, was given for veneration from the monastery of saint Panteleimon, Mount Athos.


Transferring a part of the relics of Saint Andrew to the church dedicated to Saint Andrew in Sofia, Bulgaria

 
Holy-relics-of-saint-Andrew-first-of-the-Apostles-in-church-of-saint-Andrew-Sofia-Bulgaria


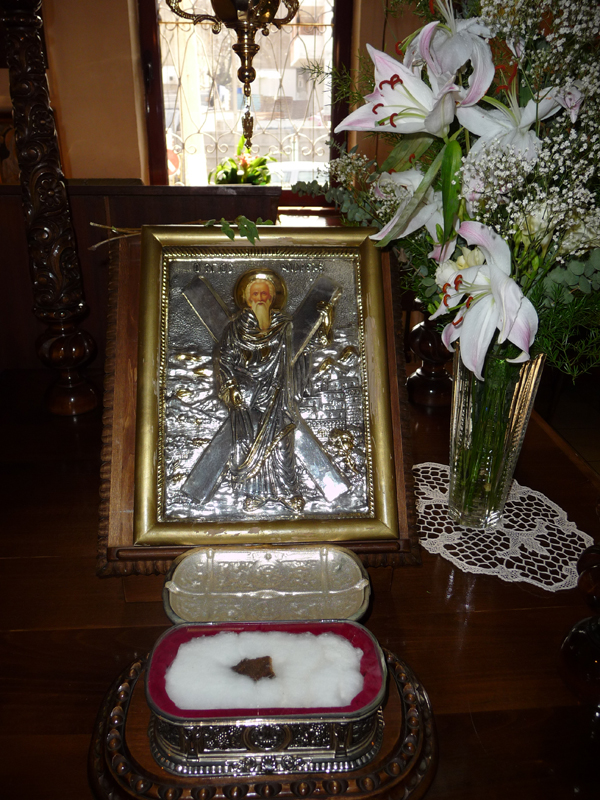
In 2001, the Metropolitan of Patras, Greece at that time Nicodemus, presented a piece of holy relics from the knee of Saint Andrew and a cross in which pieces of the cross on which St. Andrew the Apostle was crucified were placed.
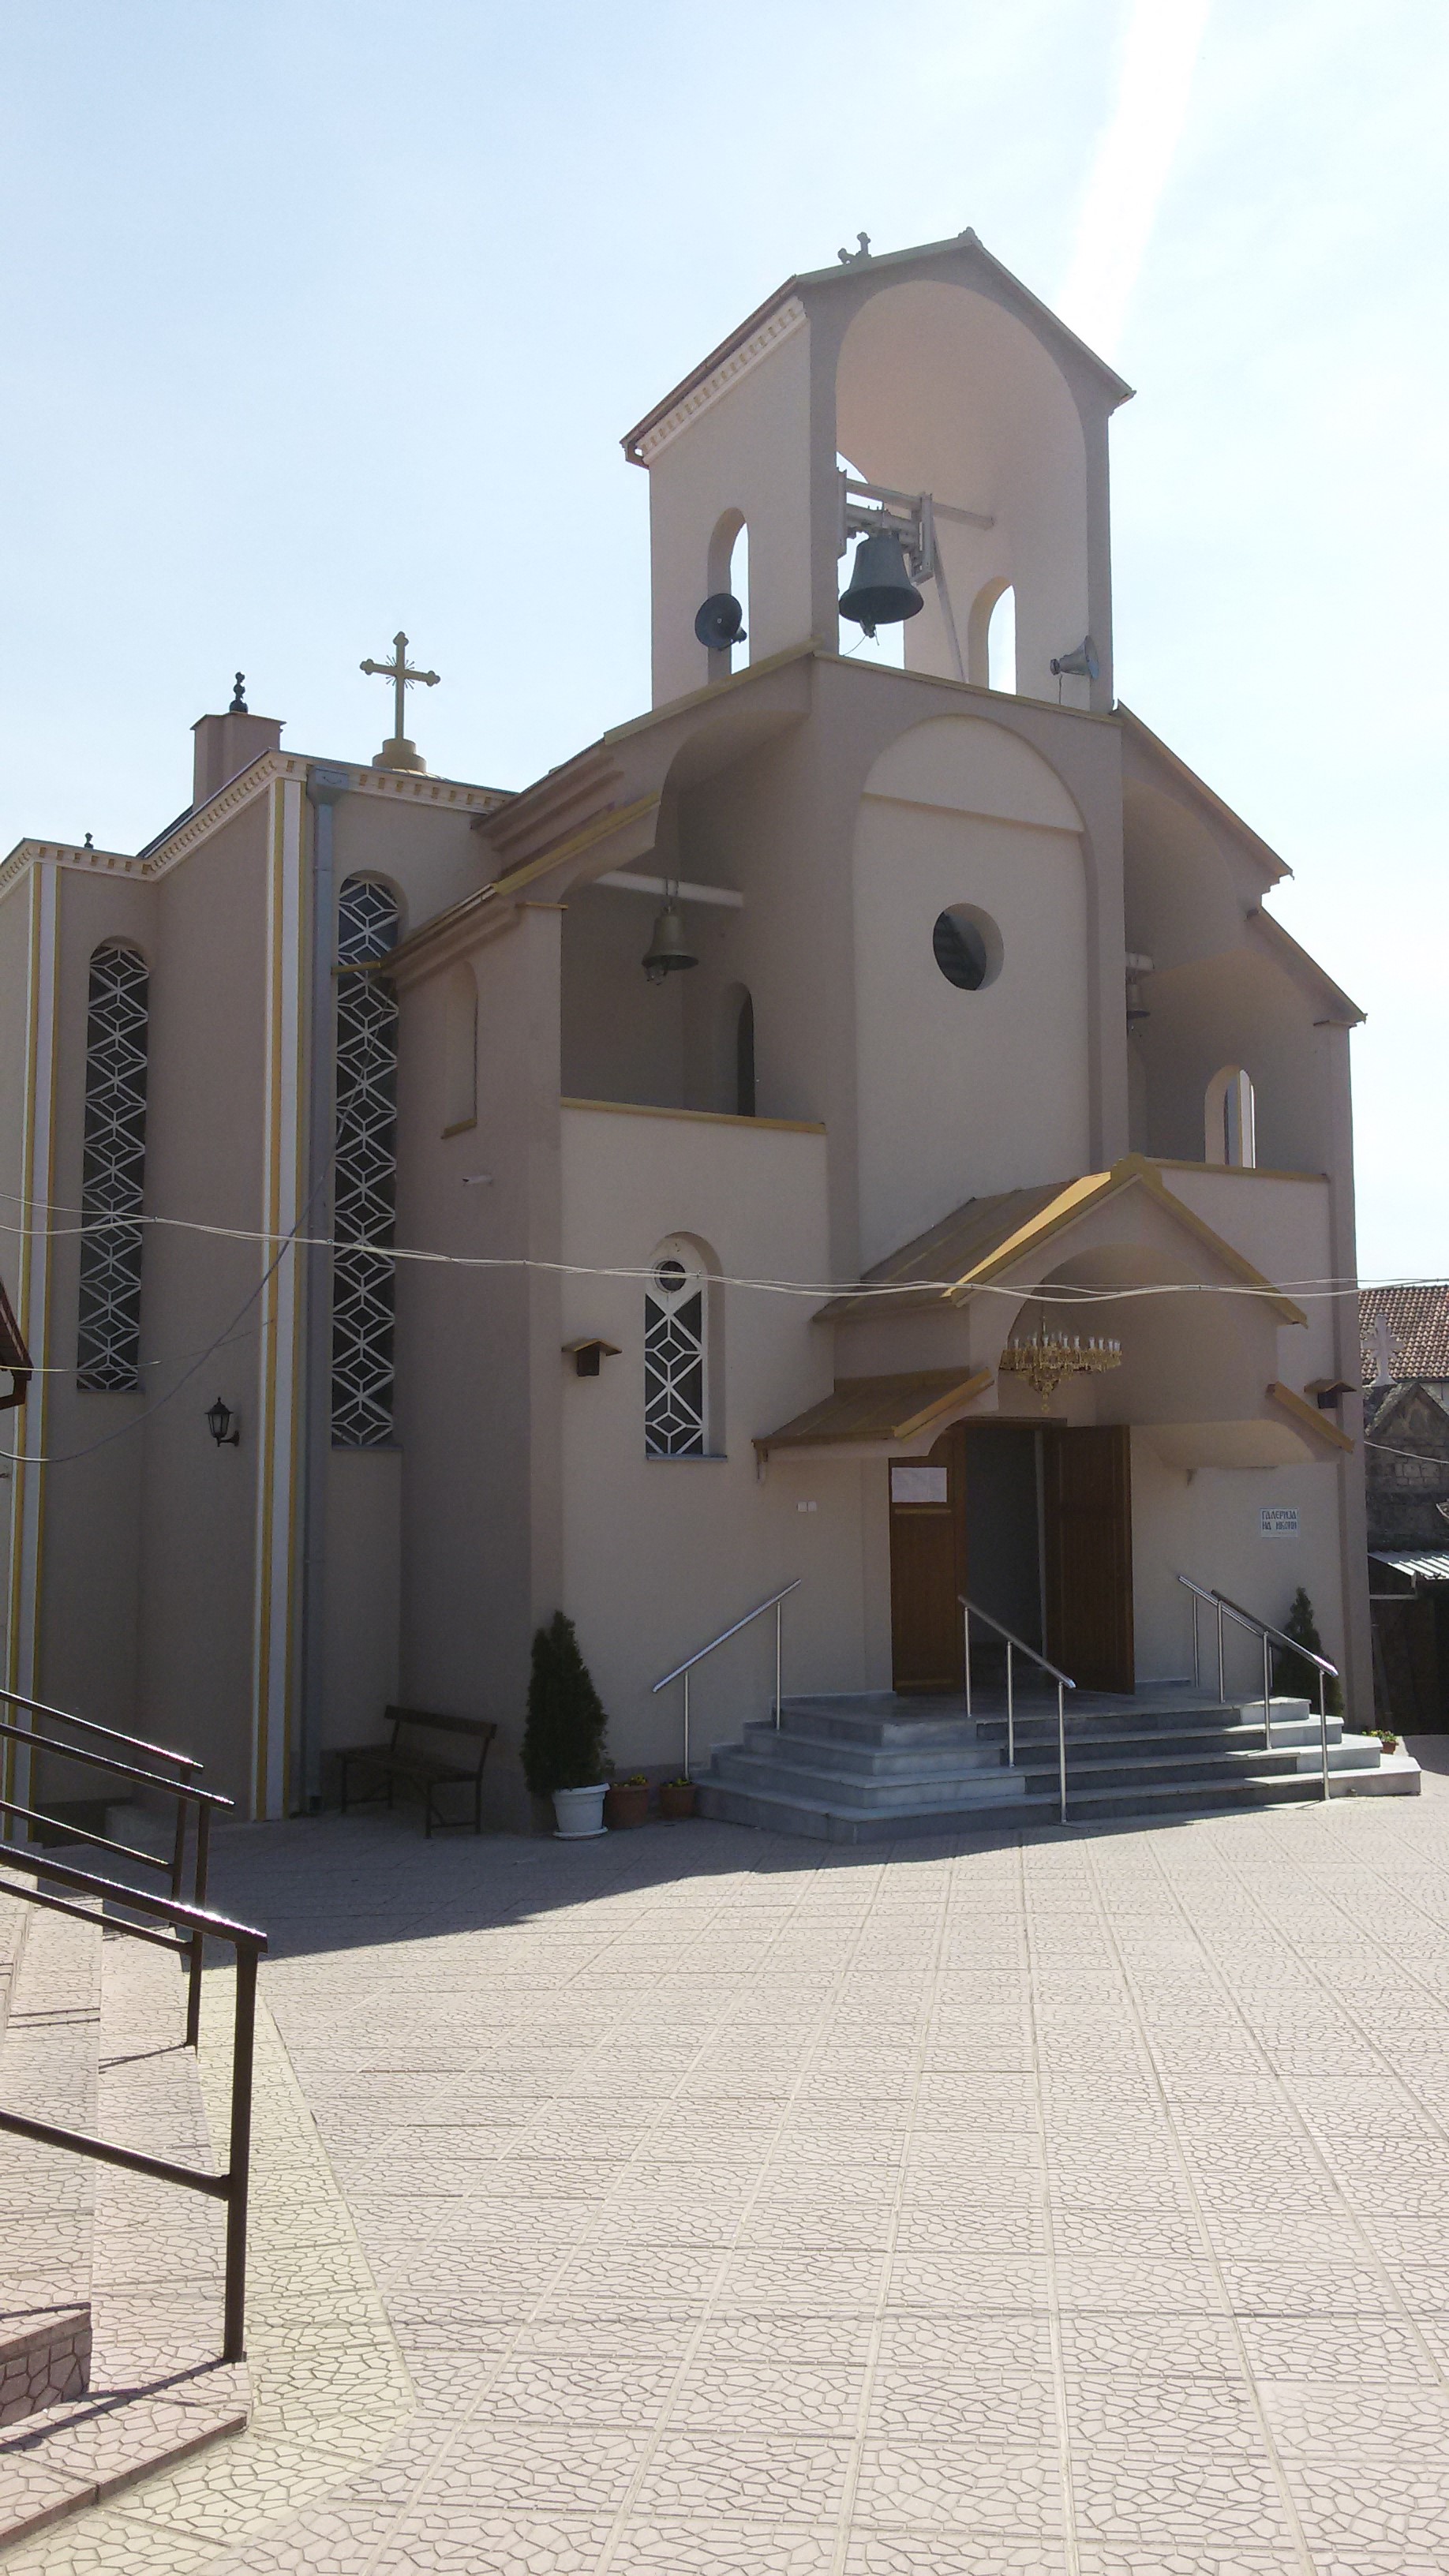
On November 29, 2001, on the occasion of the feast of St. Andrew the First-Called, the Reliquary was carried in a litany procession from the Bulgarian Church Synodal Palace to the capital church "Свети Андрей Първозвани / (Saint Andrew the First-called)".

A Holy Liturgy was served which was  attended by Their Eminences the Metropolitans: Metropolitan Kiril of Varna and Great Preslav, metropolitan Joseph of America and Australia, metr. Gelasius of New York, metr. Grigoriy of Velikoturno, metr. Neophyte of Dorostol and Cherven (currently Patriarch of Bulgaria) , metr. Gavriil (Gabriel) of Lovchan eparchy, His Eminence Bishop Nikolai of Znepol (then) and now metropolitan of Plovdiv, Patriarchal Vicar, Archimandrite Boris,  the secretary of Holy Synod, numerous priests, the graduates of the Sofia Theological Seminary "Saint Ivan Rilski" and many laymen.

When the litany reached its destination, the church "Stsaint Andrew the First-Called", the relics were welcomed, received and placed in the church for worship by Patriarch Maxim (Rest In Peace). Immediately after that, Great Vespers with five loaves of bread as the orthodox tradition is, was served by the Most Reverend (then) Bishop of Znepol, Nikolay, together with Archimandrite Boris and the temple clergy. The Most Holy Patriarch Maxim (already in his 90s) and some of the bishops attended the service in prayer. After the service, the relics remained exposed for worship in the House of God, which was also open at night. It should be noted that this was the only Orthodox church in Bulgaria dedicated to saint Ap. Andrei.

Also, the fact that for the first time the relics of St. Apostle Andrew are coming to our country is important. Part of the relics were transferred to the church on the island of Saint Anastasia near Burgas in the diocese of Sliven.
The reason for the transferral of relics to st. Anastasia is that according to tradition, the Apostle Andrew himself passed through this island in his apostleship mission.

Every year on November 30 – Saint. Andrew's Day, in the church the holiday is celebrated with a solemn Holy Liturgy, celebrated by His Holiness the Bulgarian Patriarch and Metropolitan of Sofia (today Neofitos), and in his absence, by a bishop, visiting clergy and the church clergy.

From materials from Church newspaper (official newspaper of the Bulgarian Orthodox Church)

Fix “There Has Been a Critical Error on Your Website” wordpress error


December 2nd, 2022

there-has-been-a-critical-error-on-your-website-wordpress-critical-error-fix

Say you have a shiny working WordPress based website withtout any monitoring set for years but suddenly, you open the site and you get the terrifying error:
 

There Has Been a Critical Error on Your Website

That is quite of a stress for sure. As in the first few minutes you don't understand how this has happened since, you did not touched the perfeclty working site for a very, very long time.
Then you start to debug into the apache / nginx access.log, error.log and mysql mysql.err etc. franticly trying to figure it out the normal ideas pop-up immediately into mind, whether you have a recent backup for the website's database. If you have pair of high availability webservers service or backup databases that serve the traffic via a separate standby instance of the service, you might try to switch off the official service and see whether the standby Webserver / SQL server instance would serve the website fine.
However, if this is not an option and you have no standby backup service as a recovery Plan B option already set. Your only option is to continue to debug what is wrong.
Then the next thing to do is to check whether you don't have a Web Caching or Proxy in front of your webservers that are preventing you to see a recent version of the website and give you some old cache or you don't have an ISP proxy that is giving you some unreal results. That is easily seenable from the Webserver logs. If this is neither the case the next thing is to:
 

Enable WordPress (wp-config.php) Debug mode

By default for Security reasons the WordPress PHP execution debug mode is switched off inside wp-config.php.
When there are odd pages with the WordPress based blog or site however this can easily be changed by modifying the WP_DEBUG true|false value.

To do so edit with a text editor such as vim / nano / mcedit  wp-config.php or if no SSH access to the remote machine, use SFTP / FTP transfer protocol copy the file to your desktop and inspect it and make sure the WP_DEBUG / WP_DEBUG_DISPLAY / WP_DEBUG_LOG has following values:

define( 'WP_DEBUG', true );

define( 'WP_DEBUG_DISPLAY', false );

define( 'WP_DEBUG_LOG', true );

Reloading the Browser window tab with There is a critical error on Your website, you should get some Errors or Warnings like:
 

Warning: Illegal string offset 'parent_slug' in /var/www/websitecom/wp-content/plugins/photo-gallery/booster/main.php on line 180

Warning: Illegal string offset 'slug' in /var/www/websitecom/wp-content/plugins/photo-gallery/booster/main.php on line 180


Then you can temporary disable the problematic problem in that case for example the photo-gallery and recheck the website, and then restore from backup snapshot the respective plugin files version from a moment, when the website was working.

If this doesn't solve it and more plugins are crashing and you can't find an easy way to work-around it you miss a backup, you might try to


Disable all WordPress active plugins

Disable your plugins from the dashboard, visit Plugins > Installed Plugins and tick the checkbox at the top of the list to select them all.
Then click Bulk Actions -> Deactivate, which should be enough to disable any conflicts and restore your site.

You can do essentially the same thing through SSH / FTP session.

Step 1: Log in to your site with SSH / FTP.
Step 2: Open the wp-content folder to find your plugins.
Step 3: Rename the plugins folder to plugins_old and verify that your site is working again via SSH run commands:

# cd  path_to/plugins; mv plugins plugins_old

or rename via FTP client
Step 4: Rename the folder back to “plugins”. The plugins should be disabled still, so you should be able to log in to your dashboard and activate them one by one. If
the plugins reactivate automatically, rename individual plugin folders with _old until your site is restored.

Raise the PHP Memory Limit

Sometimes, a low PHP limitation causes critical errors on WP based blogs and sites, if necessery raise up the memory limitation via:

define( 'WP_MEMORY_LIMIT', '128M' );

Change Max Upload File Size and Text Processing function limits

To increase the max upload file size, add this code to wp-config.php:

ini_set('upload_max_size' , '256M' );

ini_set('post_max_size','256M');

And to fix the breaking of large pages on your site, add this code:

ini_set('pcre.recursion_limit',20000000);
ini_set('pcre.backtrack_limit',10000000);

Clear up any caches

If you use some session caching of the website on the machine such as memcached / ncache / redis / varnish or an haproxy or any proxy in front of the webserver to do some kind of High availability could produce strange  unexpected Critical errors on Your Website, thus restarting such services or cleaning up any cache would be advisable if you have such.
 

What Causes "There Has Been a Critical Error on Your Website" error?


The reason could be practically anything as WP is a kind of multi-comonent free and a bit of bloatware. The general ones could be  from a missing database table / table fields to a messed up plugin after update a disappeared critical plugin or essential wordpress PHP file, but in my specific case the reason was simple the Plugins Auto-update, which I have had the stupidity to enable.

The WordPress Automatic Updates, though saving you effort and Protecting your website in most cases against recent bugs and Exploits and increasing the WP security level, often causes issues and from my personal experience it is not recommended so better avoid it. Again next time you implement any automation to your server make sure you put some kind of monitoring.

Even if you decide to enable it make sure you do it the right way and not like me, by enabling some Monitoring to the WordPress site via Zabbix / Nagios / Cacti / monit  etc to be sure you get notified immediately if the WordPress based site is down.

Holy fifteen Hierarchs Martyrs of Tiberipolis a saints of high veneration in Eastern Chrstiandom and Bulgaria in Medieval times


November 28th, 2022

Holy_15_Martyrs_of_Tiveriopolis_orthodox-christian-Icon

The martyrs of Tiberiopolis are the bishops Timothy of Tiberiopolis and Theodore of Nicaea, who participated in the First Ecumenical Council in 325 – both escaped from Nicaea, the priests Peter, John, Sergius, Theodore and Nicephorus, the deacons Basil and Thomas, the monks Hierotheus, Daniel, Chariton, Socrates , Comasius and Eusebius, were little known saints today in Christiandom but back in time these saints has been considered of a great importance and their intercession prayers were often seeken throughout the Eastern Church in Byzantium, Bulgaria and all the Chriatinized lands and perhaps even in the west. 

They were executed on November 28, 362 during the persecutions against Christians carried out by Emperor Julian the Apostate.Since Timothy died quickly due to his age, he was replaced by the layman Etimasius.

After their execution, the fifteen martyrs were buried by the local Christians in stone sarcophagi on which their names were inscribed.

Remains-of-original-Basilica-in-honour-of_15_Martyrs_of_Tiveriopolis

Remains of original Basilica with Tombs of the fifteen Holy martyrs

Later, the ancient Tiveriopolis (today Strumica situated in Macedonia), where the tombs were located, was destroyed by the Avars invasions, but the memory of the martyrs' graves remains in local legends for quite some time as there were many miracles happening on their tomb.

After the conversion of Bulgaria to Christianity in year 864, by Holy Prince (King) Boris, the Baptizer King immediately ordered the Comite (his servent governor) in Taradin, who ruled these lands, to search for the relics of the fifteen Holy Tiveriopol martyrs.

According to the original plan, the holy relics were supposed to be placed in the cathedral church on the Bregalnitsa river, which was being built at that time, but since the local population complained that their spiritual heritage and protection of the area was being taken away and there was a danger of revolts, a compromise was reached to take only the relics of three saints, Timothy, Komasius and Eusebius, and the others to remain in Strumica.

Sts_15_Martyrs_of_Tiveriopolis_Strumica-church

Contemporary Church dedicated to 15 Holy Hierarchs in country of Macedonia

The relics of the other saints were transferred to the new church at the time of King Simeon I (The Great).

According to the famous Medieval Theologian and Historian Theophylact of Ohrid from the beginning of the 12th century, a glorification was composed for the martyrs (which is a christian practice to glorify saints that continues to these day in the Church after new saints gets canonized), and the service was written and held in Bulgarian, which at that time was already having authentic cyrillic letters invented and translated by saint Kliment Ohridski and his pupils which just in western Bulgaria country to 3500. Some of those saint Kliment Ohridski (saint Clement of Ohrid) desciples priests as we know from the sources , composed the glorification church service in honor of the 15 Holy Hierarchs of Tiberipolis (The old Roman name for the area).

Sts_15_Martyrs_of_Tiveriopolis_icon

During the Ottoman invasion, the church of Bregalnica where relics held was destroyed and the holies were again lost.
Only saint Peter's hand remained in Strumica, but during the Balkan Wars in 1913 it was taken by the Greeks to Kukush ( Kilkis ) (Aegian Macedonia).

Sts_15_Martyrs_of_Tiveriopolis_Strumica-Kilkis-church

Contemporary Church in Aegian Greece dedicated to 15 Holy Hierarchs of Tiberiopolis

In Strumica, however the memory of the martyrs remains, whose memory is remember by the local Bulgarians at the place where, according to tradition, they were once killed.
A modern church temple was built on the same site, which is the successor of several older temples.

Below is the list with names and the position each of this holy man had, before their martyrdom:

Theodore Θεόδωρος bishop of Nicaea
Timothy Τιμόθεος of Tiberiopolis, bishop of Nicaea
Theodore Θεόδωρος priest Tiberiopolis
Nicephorus Νικηφόρος priest of Tiberiopolis
John Ioannis priest Tiberiopolis
Peter Πέτρος priest Tiberiopolis
Sergius Σέργιος priest of Tiberiopolis
Thomas Θωμάς deacon of Tiberiopolis
Vasilii Vasileios deacon of Tiberiopolis
Komasius Κομάσιος monk Nicaea
Eusebius Ευσέβιος monk Nicaea
Daniel Δανιήλ monk Tiberiopolis
Socrates Σωκράτης monk of Tiberiopolis
Chariton Χαρίτων monk Tiberiopolis
Hierotheus Ιερόθεος monk of Tiberiopolis
Etimasius Ετιμάσιος a layman of Tiberiopolis

The 15 Holy Martyrs, today are highly venerated in region of Macedonia (today country of Macedonia), as Macedonia has been historically part of Bulgarian Kingdom as well as in Greece who are considered patron saints of city of Kikis (central Macedonia today in Greece), where the local Church of Transfiguration was deciced to be reconsecacrated in favor of the 15 holy hierarchs of Tiberipolis as the hand of saint Peter from the 15 martyrs and an old icon was brough their by war emigrants escaping the Balkan wars, this hand is kept their even today.

Hand-of-saint_Peter-15-tiberioupolis-martyrs-in-Kilkis-church

Hand of Saint Peter from the 15 Tiberoupolis Martyrs holy relic